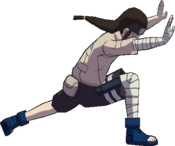
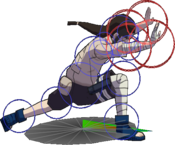
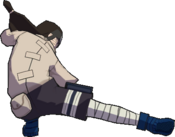
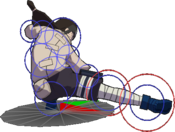
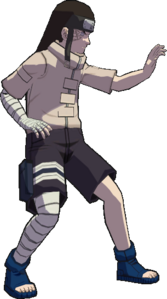
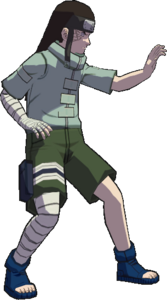
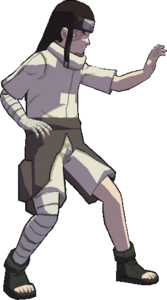
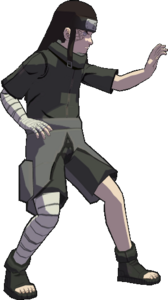
Summary
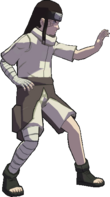
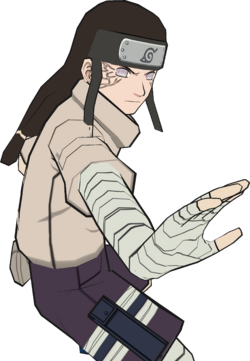
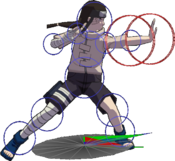
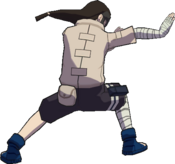
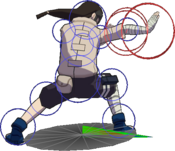
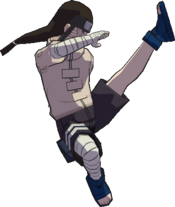
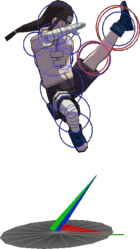
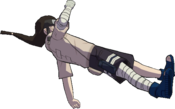
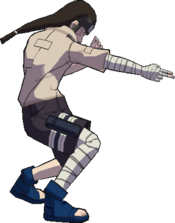
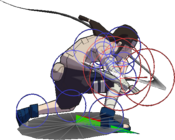
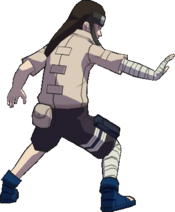
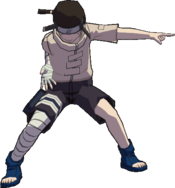
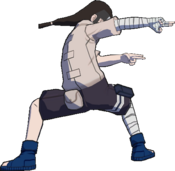
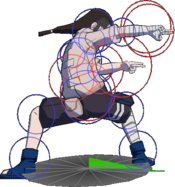
Neji is a character based around fundamentals, who happens to possess the ability to drain his opponent's chakra, in a similar vein to  Kisame. In combination with his Hyuuga Cancels, Neji can make great use of the tools he's been given, such as a complete 360° body counter that works on projectiles, an advancing poke that can drain chakra or be Hyuuga Canceled to act as a movement option, and above average pressure. These attributes, combined with his average damage and health relative to the cast, grants him very strong snowball potential.
Character Traits
- Long strings that can eat up guard bars and are possible even on whiff
- Numerous moves that drain chakra from the opponent; 6A, running A, BBB(A), BBBB(A), 2BB(A), 5X
- Hyuuga cancels allow for surprise pressure resets, RPS mix-up, and letting Neji run from backturn situations with 6A

- Neji can also bait KnJ without having to spend meter on
 with some Hyuuga cancels
Notes
 Hyuuga Cancels: Neji can feint some of his moves and cancel them into a neutral state by pressing
  during their startup.
| Neji
|

|
| Health:
|
210
|
| Guard Gauge:
|
1640
|
| Backdash Type:
|
Normal
|
String List
| String #
|
Inputs
|
Notes
|
 01 01
|
    
|
 Cancellable at Cancellable at  ( ( ) )- For all, can
  
- For
 04, can hold the final input to change the move's effect. 04, can hold the final input to change the move's effect.
- For
 05, can 05, can    
B string specifics:
- 5B(B) has a 1F gap, can only be avoided with a frame perfect sidestep.
- 5BB(B)
- 5BB(A) does Neji's 6A (dash stabs). Incredibly unsafe on block. If Neji tries to
 it for pressure, the opponent can reversal throw the recovery. 6A it for pressure, the opponent can reversal throw the recovery. 6A is also minus enough for the opponent to easily jump over his head and reset to neutral. is also minus enough for the opponent to easily jump over his head and reset to neutral.
- 5BBB(B) is a launching kick. Jump out gets hit, but can get sidestepped easily in the gap.
- 5BBB(A) is a 1F gap, can only be avoided with a frame perfect sidestep.
- 5BBB(4A) does standard kunai toss. The entire duration of this move is throwable, opponent can just reversal throw him.
- 5BBBB(B) ends the string with upkicks. Can be beaten out by the opponent with an immediate air shanks j.A.
|
 02 02
|
    
|
 03 03
|
   
|
 04 04
|
    
|
 05 05
|
  
|
 06 06
|
   
|
|
 07 07
|
        
|
 Cancellable at Cancellable at      ( ( ) )- For
 07-11, can 07-11, can       
- For
 10, can hold the final input to change the move's effect. 10, can hold the final input to change the move's effect.
- For
 11, can 11, can        
- For
 12, can 12, can      
6B string specifics:
Note: All these strings can be performed on whiff up through 6BBAB(B).
- 6B(B) is gapless.
- 6BB(A) can be stepped, jumped out of or armored into a punish with a fast 4B; slow 4Bs tend to get beaten by 6BBA(B). Opponent can also backdash this to avoid chip, but are very likely to be forced to block again by 6BBA(B) whiff string.
- 6BB(B) is punishable on block but unsteppable, can be used to beat opponents who want to step 6BB(A) however can be backdashed too.
- 6BBA(B) goes back to 5B. Can be hard punished with a 6 frame or faster high crush immediately after early sidestepping 6BB(A).
- 6BBA(A) does dash stabs again. Easy step after 6BB(A) but ONLY if you step to opposite side of the arm Neji is stabbing with. Backdashing 6BB(A) into step makes stepping this reliable regardless of step direction.
|
 08 08
|
        
|
 09 09
|
       
|
 10 10
|
        
|
 11 11
|
      
|
 12 12
|
    
|
 13 13
|
   
|
|
 14 14
|
   
|
 15 15
|
       
|
 Cancellable at Cancellable at     ( ( ) )- For
 15-19, can 15-19, can      
- For
 18, can hold the final input to change the move's effect. 18, can hold the final input to change the move's effect.
- For
 19, can 19, can       
- For
 20, can 20, can     
2B string specifics:
- 2B(B) is a gapless blockstring
- 2BB(A) can be air jumped out of, or dodged with air shanks to position the opponent for a punish
|
 16 16
|
       
|
 17 17
|
      
|
 18 18
|
       
|
 19 19
|
     
|
 20 20
|
   
|
 21 21
|
  
|
|
 22 22
|
      
|
 Cancellable at Cancellable at    ( ( ) )- For
 21-26, can 21-26, can     
- For
 25, can hold the final input to change the move's effect. 25, can hold the final input to change the move's effect.
- For
 26, can 26, can      
- For
 27, can 27, can    
|
 23 23
|
      
|
 24 24
|
     
|
 25 25
|
      
|
 26 26
|
    
|
 27 27
|
  
|
Weak Attacks
5B
|
|
| Damage
|
Hit Level
|
Startup
|
Active Frames
|
Recovery
|
Guard Damage
|
Blockstun
|
Advantage on Hit
|
Advantage on Block
|
| 12
|
High
|
14
|
2
|
31
|
-
|
-
|
-
|
-
|
- Primary Jab.
- Can go into
 ( ( ) on whiff, which can be ) on whiff, which can be  . .
|
|
Toggle Hitboxes Toggle Hitboxes
|
6B
|
|
| Damage
|
Hit Level
|
Startup
|
Active Frames
|
Recovery
|
Guard Damage
|
Blockstun
|
Advantage on Hit
|
Advantage on Block
|
| 15
|
Mid
|
17
|
4
|
32
|
-
|
-
|
-
|
-
|
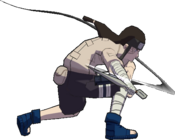
A two-handed shove. A forward-leaning move that leads into the majority of Neji's neutral/string pressure, which can be done on whiff. Notable examples include 6BB(B) and 6BBA(A), which can be  ; looping back to Neji's jabs with 6BBA(B); 6BBABBB(A) leading into a hitgrab that steals about 17-20% meter; and even a triple OTG in 6BB(A) to get meter back. ; looping back to Neji's jabs with 6BBA(B); 6BBABBB(A) leading into a hitgrab that steals about 17-20% meter; and even a triple OTG in 6BB(A) to get meter back.
|
|
Toggle Hitboxes Toggle Hitboxes
|
2B
|
|
| Damage
|
Hit Level
|
Startup
|
Active Frames
|
Recovery
|
Guard Damage
|
Blockstun
|
Advantage on Hit
|
Advantage on Block
|
| 12
|
Low
|
18
|
3
|
35
|
-
|
-
|
-
|
-
|
A short-ranged low kick. Much like 6B, this move leads into Neji's usual strings, even on whiff: 2BB(A) takes 1 full bar of meter and launches away; 2B(A) is one of the strongest oki options (along with 2A by itself) because it both beats out wake-up kick and leads into BNB; 2BA(A) can be  , takes meter and launches for a combo; and 2B(A) can double OTG. , takes meter and launches for a combo; and 2B(A) can double OTG.
Flag Data
| High Crush
|
frames 14~39
|
|
|
Toggle Hitboxes Toggle Hitboxes
|
4B
|
|
| Damage
|
Hit Level
|
Startup
|
Active Frames
|
Recovery
|
Guard Damage
|
Blockstun
|
Advantage on Hit
|
Advantage on Block
|
| 15
|
Mid
|
30
|
4
|
35
|
-
|
-
|
-
|
-
|
Turning palm attack with armor on startup. Decent 4B relative to the rest of the cast as it has good range and strings possible on connect (including a  point in 4BB(B)). point in 4BB(B)).
Flag Data
| Autoguard
|
frames 2~17
|
|
|
Toggle Hitboxes Toggle Hitboxes
|
8B
|
|
| Damage
|
Hit Level
|
Startup
|
Active Frames
|
Recovery
|
Guard Damage
|
Blockstun
|
Advantage on Hit
|
Advantage on Block
|
| 12
|
Mid
|
17
|
5
|
28
|
-
|
-
|
-
|
-
|
Leaping kick that can go over lows, however most of the time the hitboxes are too high to actually hit the opponent out of a low-to-the-ground attack. A good anti-air/callout tool, and can lead into meterless combos with a 5B/2B or 2A follow-up.
Flag Data
| Low Crush
|
frames 10~35
|
|
|
Toggle Hitboxes Toggle Hitboxes
|
Running B
|
|
| Damage
|
Hit Level
|
Startup
|
Active Frames
|
Recovery
|
Guard Damage
|
Blockstun
|
Advantage on Hit
|
Advantage on Block
|
| 18
|
Mid
|
21
|
5
|
39
|
-
|
-
|
-
|
-
|
A running vaulting kick. Has access to a follow-up (run B(B)) that doubles as an  point and launches far away. If the opponent doesn't shake out of the stagger, it leads into a 5B combo. point and launches far away. If the opponent doesn't shake out of the stagger, it leads into a 5B combo.
Flag Data
| Low Crush
|
frames 10~30
|
|
|
Toggle Hitboxes Toggle Hitboxes
|
j.B
|
|
| Damage
|
Hit Level
|
Startup
|
Active Frames
|
Recovery
|
Guard Damage
|
Blockstun
|
Advantage on Hit
|
Advantage on Block
|
| 15
|
Mid
|
25
|
Until L
|
-
|
-
|
-
|
-
|
-
|
An elbow dive whose hitboxes cover Neji pretty well from below. Can be confirmed into a combo meterless, as well as be  . Neji takes a step back after reaching the ground, giving it use as a tool to bait an opponent mashing from under him. . Neji takes a step back after reaching the ground, giving it use as a tool to bait an opponent mashing from under him.
|
|
Toggle Hitboxes Toggle Hitboxes
|
Strong Attacks
5A
Uncharged Uncharged Charged Charged
|
| Version
|
Damage
|
Hit Level
|
Startup
|
Active Frames
|
Recovery
|
Guard Damage
|
Blockstun
|
Advantage on Hit
|
Advantage on Block
|
| Uncharged
|
7×2
|
-
|
-
|
-
|
-
|
-
|
-
|
-
|
-
|
| Charged
|
7×4
|
-
|
-
|
-
|
-
|
-
|
-
|
-
|
-
|
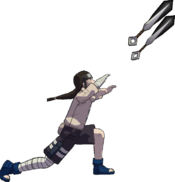
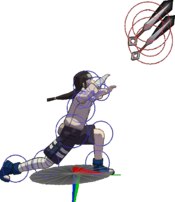
- Throws 2 kunai when uncharged, and 4 kunai when charged
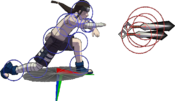
A standard projectile, though somewhat worse than most.
|
|
Toggle Hitboxes Toggle Hitboxes
|
6A
The moneymaker The moneymaker
|
| Damage
|
Hit Level
|
Startup
|
Active Frames
|
Recovery
|
Guard Damage
|
Blockstun
|
Advantage on Hit
|
Advantage on Block
|
| 7×3
|
Mid
|
21
|
2(5)2(5)2
|
34
|
-
|
-
|
Launch
|
-
|
- Drains ~25% (1 bar) chakra if all three stabs hit
- Launches on hit
- Can be
 during startup, 6A during startup, 6A  animation is 27F total animation is 27F total
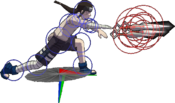
Neji does a low profile dash forward and pokes the opponent's chakra points 3 times, draining their chakra with each hit. His most valuable move that gives him great utility in movement and mix-up potential, and is probably one of the best combo tools in the game too.
  high crushes very quickly, so it can be used to get out of jab pressure at times and reward Neji with an instant launch combo starter. In a combo, it can also be looped into itself 3~4 times at the wall/corner (character-specific) for massive chakra drain. It's also possible to OTG hit with its first 1~2 hits for damage & drain on a missed tech (or off of high crushes very quickly, so it can be used to get out of jab pressure at times and reward Neji with an instant launch combo starter. In a combo, it can also be looped into itself 3~4 times at the wall/corner (character-specific) for massive chakra drain. It's also possible to OTG hit with its first 1~2 hits for damage & drain on a missed tech (or off of   on smaller stages/at the wall or corner). However, 6A adds a lot of hits to a combo without dealing as much damage as his other attacks and strings, so using it more than maybe once in a combo for chakra control is costing him damage and maybe even the ability to end with 5X. on smaller stages/at the wall or corner). However, 6A adds a lot of hits to a combo without dealing as much damage as his other attacks and strings, so using it more than maybe once in a combo for chakra control is costing him damage and maybe even the ability to end with 5X.
Hyuuga cancelling this move lets Neji use it as a very quick command dash for getting in on or running away from the opponent without running as much of a risk as the attack getting punished on whiff/block. For example,     can lead to a strike/throw/step punish on block, or can let Neji escape an attempted KnJ if he's in the middle of a combo. can lead to a strike/throw/step punish on block, or can let Neji escape an attempted KnJ if he's in the middle of a combo.
Note: Against  Zabuza, Neji can pass through his legs if this move is used close enough to him. Zabuza, Neji can pass through his legs if this move is used close enough to him.
Flag Data
| High Crush
|
frames 6~16
|
|
|
Toggle Hitboxes Toggle Hitboxes
|
2A
|
|
| Damage
|
Hit Level
|
Startup
|
Active Frames
|
Recovery
|
Guard Damage
|
Blockstun
|
Advantage on Hit
|
Advantage on Block
|
| 17
|
Low
|
20
|
4
|
33
|
-
|
-
|
-
|
-
|
A downwards kunai swipe that hits lows and any attempts at high crushing. Perfect on oki as it beats wake-up kick and leads into his string pressure.
Flag Data
| High Crush
|
frames 19~45
|
|
|
Toggle Hitboxes Toggle Hitboxes
|
4A
|
|
| Damage
|
Hit Level
|
Startup
|
Active Frames
|
Recovery
|
Guard Damage
|
Blockstun
|
Advantage on Hit
|
Advantage on Block
|
| -
|
-
|
11
|
18
|
11
|
-
|
-
|
-
|
-
|
- Can counter attacks AND projectiles, that hit from ANY angle
- Can hold
 to extend catch frames to extend catch frames
- Counterattack horizontal launches on hit
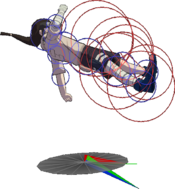
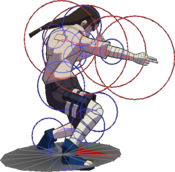
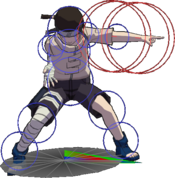
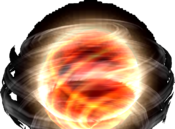
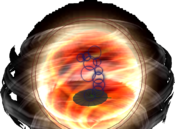
A 360° activating body counter that goes into an unblockable and unsubbable mini rotation counterattack on catch. Notable due to covering Neji all around as well as working against projectiles, though this last trait can be used against it. Counterattack has a long-lasting hitbox, which leads to hasty opponents getting hit all the same.
|
|
8A
|
|
| Damage
|
Hit Level
|
Startup
|
Active Frames
|
Recovery
|
Guard Damage
|
Blockstun
|
Advantage on Hit
|
Advantage on Block
|
| 7×2
|
-
|
-
|
-
|
-
|
-
|
-
|
-
|
-
|
A pair of kunai thrown upwards. One of the worse 8As in terms of anti-airing, both due to the low amount of projectiles and the fact that Neji moves forward upon use. Anti-air reactions need to be on point to snipe someone out of the air with these.
|
|
Toggle Hitboxes Toggle Hitboxes
|
Running A
|
|
| Damage
|
Hit Level
|
Startup
|
Active Frames
|
Recovery
|
Guard Damage
|
Blockstun
|
Advantage on Hit
|
Advantage on Block
|
| 16
|
Mid
|
20
|
5
|
36
|
-
|
-
|
-
|
-
|
|
|
|
Toggle Hitboxes Toggle Hitboxes
|
j.A
|
|
| Damage
|
Hit Level
|
Startup
|
Active Frames
|
Recovery
|
Guard Damage
|
Blockstun
|
Advantage on Hit
|
Advantage on Block
|
| 7×2
|
-
|
-
|
-
|
-
|
-
|
-
|
-
|
-
|
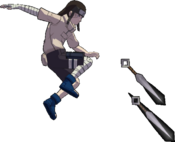
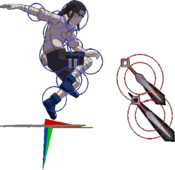
Standard aerial kunai. Throws 2 projectiles.
|
|
Toggle Hitboxes Toggle Hitboxes
|
Throws
5Y
|
|
| Damage
|
Hit Level
|
Startup
|
Active Frames
|
Recovery
|
Guard Damage
|
Blockstun
|
Advantage on Hit
|
Advantage on Block
|
| 20
|
-
|
1
|
1
|
48
|
-
|
-
|
-
|
-
|
Average GNT throw. Typical follow-up after throw is   for chakra drain before starting the rest of the combo. for chakra drain before starting the rest of the combo.
|
|
Special
5X
|
|
| Damage
|
Hit Level
|
Startup
|
Active Frames
|
Recovery
|
Guard Damage
|
Blockstun
|
Advantage on Hit
|
Advantage on Block
|
| 5+5, 64
|
Mid×2
|
22
|
3(4)3
|
23
|
-
|
-
|
-
|
-
|
- Costs 100% (4 bars) chakra
- Drains 75% (3 bars) chakra from the opponent on hit
- Both activator hits must connect for the cinematic to trigger
Cinematic super where Neji stabs the opponent twice to trigger it, and then barrages all 64 of their chakra points in quick succession. Aside from being a combo ender, 64 Palm also drains a staggering amount of meter from the opponent to put a hold on their resources for a bit. Can be combo’d into at a maximum of 8 hits before BBX (even at midscreen), but Neji may have to adjust combos to compensate for character sizes.
|
|
Toggle Hitboxes Toggle Hitboxes
|
2X
|
|
| Damage
|
Hit Level
|
Startup
|
Active Frames
|
Recovery
|
Guard Damage
|
Blockstun
|
Advantage on Hit
|
Advantage on Block
|
| 60
|
Mid
|
12
|
26
|
31
|
-
|
-
|
-
|
-
|
- Real-time super
- Costs 75% (3 bars) chakra
- Horizontal launch on hit
- Invincible on frames 11~26
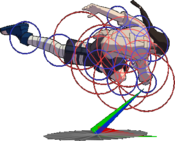
A body whirlwind that hits 360° degrees around Neji. It deals less damage than 5X, but its incredibly fast startup lets it combo from longer juggles and the hitbox makes it perfect for catching careless KnJs and finishing OTG damage strings. A perfectly timed air RKnJ can avoid it if it's used as the former, but Neji can also delay the super cancel while still letting it combo if no KnJ to make it difficult to do so.
|
|
Toggle Hitboxes Toggle Hitboxes
|
Strategy
Matchups
- Neji's 4A can trigger on 5A bugs and will destroy them when it does. He will also be invincible through the recovery after the Kaiten triggers if Shino tries to punish it with something like his 8A.
Colors
Changes from Vanilla
List may be outdated. Please feel free to update any incorrect info
- Grabbable Moves: 8A, j.A
- 5B: elbow hitbox appears on frame 2; slightly smaller
- 5B(B): hitbox appears and disappears one frame later
- 5BBB(A): is a custom capture state move
- 5BBBB(A): damage increased from 14 to 20
- 4B: remove stagger, made strong, more stun
- 2B(B): changed with 5BBB(B) with A follow up
- 8B: more lift on hit, hitbox appears later, no Y cancel
- RB: replaced with RA with B follow ups
- RB(B): can be done on whiff; transition is 5 frames slower
- 5A: charge time reduced from 11 frames to 8
- 6A: launches on the last hit, damage and lift on hit adjusted; first two hits juggle slightly better without a wall
- A4A: unblockable and unsubbable
- 2A(A): added as 6A
- RA: is a custom poke
- 5X: starts moving 3 frames sooner, activates if only hitting the second hit; first hit turns back turned opponents around; hitboxes and lift adjusted for more consistency
Resources
Guides and Info
Notable Players
- Disclaimer: This list is derived from community input and is in no way comprehensive or a form of ranking of any kind. Our community criteria can be found here.
Navigation
| General
|
|
| Characters
|
|
| Archived Information
|
|
![]() Kisame. In combination with his Hyuuga Cancels, Neji can make great use of the tools he's been given, such as a complete 360° body counter that works on projectiles, an advancing poke that can drain chakra or be Hyuuga Canceled to act as a movement option, and above average pressure. These attributes, combined with his average damage and health relative to the cast, grants him very strong snowball potential.
Kisame. In combination with his Hyuuga Cancels, Neji can make great use of the tools he's been given, such as a complete 360° body counter that works on projectiles, an advancing poke that can drain chakra or be Hyuuga Canceled to act as a movement option, and above average pressure. These attributes, combined with his average damage and health relative to the cast, grants him very strong snowball potential.

 with some Hyuuga cancels
 Hyuuga Cancels: Neji can feint some of his moves and cancel them into a neutral state by pressing
  during their startup.
 Shino
Shino
