Super Naruto: Clash of Ninja 4/Choji
Summary
Choji may seem like a grappler at first glance, however, he is actually a setplay character. He combines unblockable tech chase options with an unblockable neutral getup option to force the opponent to keep playing a 50/50 on oki. He is slow and has no chip damage and instead relies on trading his HP as a resource with armored moves to break through the opponent’s pressure.
Notes
Choji has no access to chip damage. Coupled with no ranged moves, he cannot normally pressure an opponent who wants to sit back and refuse to approach. Instead, he can use Chips ![]()
![]() which give him a stacking damage buff to encourage his opponent to approach.
which give him a stacking damage buff to encourage his opponent to approach.
Choji does not have good anti-sub. His only direct tool for punishing sub is ![]()
![]()
![]()
![]() which is a mid-string turn around version of his
which is a mid-string turn around version of his ![]() . This, however, can be Option Select subbed (meaning there exists a guaranteed timing that beats both
. This, however, can be Option Select subbed (meaning there exists a guaranteed timing that beats both ![]()
![]()
![]() and
and ![]()
![]()
![]()
![]() ) so it should only be used as a reaction to a poor sub timing from the opponent.
) so it should only be used as a reaction to a poor sub timing from the opponent.
Choji has a standard (15f) jab. This means you need to be cognizant of your opponent’s jab startup when attempting to enforce offense from your plus on block moves. Characters with faster jabs may end up clashing or beating you depending on the situation.
![]() is not a tool to beat all grounded options. It only loses to very specific launches, however, it can clash which immediately means you lose the interaction, and you can also be hit very late into the move (it is not armored all the way to hitbox).
is not a tool to beat all grounded options. It only loses to very specific launches, however, it can clash which immediately means you lose the interaction, and you can also be hit very late into the move (it is not armored all the way to hitbox).
When ![]()
![]() clashes with a move while grounded, Choji will grab them immediately after the clash. However, if Choji has left the ground when the clash occurs, it will function as normal and you will be punishable.
clashes with a move while grounded, Choji will grab them immediately after the clash. However, if Choji has left the ground when the clash occurs, it will function as normal and you will be punishable.
The three types of moves that beat Choji’s armor states are “Spinning Launch”, “Flying Launch”, and “Ground Bounce” (These are community names and not necessarily proper state names). Armored moves also lose to Supers and other capture states (like hit grabs).
“Expansion moves” (![]()
![]() ,
, ![]()
![]() ,
, ![]()
![]() ,
, ![]()
![]()
![]() ,
, ![]()
![]() ,
, ![]()
![]() ,
, ![]() and
and ![]()
![]() ) all expend chip stacks. There is no mechanism for keeping track of your chip stacks other than keeping count in your head.
) all expend chip stacks. There is no mechanism for keeping track of your chip stacks other than keeping count in your head.
Whenever you close out a round, always mash ![]()
![]() . If your opponent is good, they will press start and prevent you from gaining stacks by advancing to the next round quickly. However, certain round finishers leave enough time to get at least 1 chip stack even when they press start.
. If your opponent is good, they will press start and prevent you from gaining stacks by advancing to the next round quickly. However, certain round finishers leave enough time to get at least 1 chip stack even when they press start.
Chips
Choji's ![]()
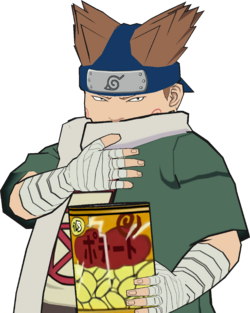
![]() has him eat chips from a bag. Each chip he eats will increase his damage by 6.25%, up to a maximum of 50% at 8 chips. Chip stacks will persist through rounds, however, expansion moves will remove chip stacks.
has him eat chips from a bag. Each chip he eats will increase his damage by 6.25%, up to a maximum of 50% at 8 chips. Chip stacks will persist through rounds, however, expansion moves will remove chip stacks.
String List
| String # | Inputs | Notes |
|---|---|---|
| ||
| ||
|
Weak Attacks
5B
Toggle Hitboxes Toggle Hitboxes
|
|---|
6B
Toggle Hitboxes Toggle Hitboxes
|
|---|
2B
Toggle Hitboxes Toggle Hitboxes
|
|---|
4B
Toggle Hitboxes Toggle Hitboxes
|
|---|
8B
Toggle Hitboxes Toggle Hitboxes
|
|---|
Running B
j.B
Strong Attacks
5A
Toggle Hitboxes Toggle Hitboxes
|
|---|
6A
2A
Toggle Hitboxes Toggle Hitboxes
|
|---|
4A
8A
Running A
j.A
Throws
5Y
2Y
j.Y
Special
5X
2X
4X
Strategy
Choji’s best round start option is to hold back. His backdash doesn’t create enough distance and can be punished pretty easily. His jabs are frame 15, and while they are mid, they don’t do much for him at round start (and a large portion of the cast out speeds him). Jump is a decent option as well since ![]()
![]() will beat jab attempts and falling
will beat jab attempts and falling ![]()
![]() is generally safe (when blocked) and on hit may lead to a combo or oki.
is generally safe (when blocked) and on hit may lead to a combo or oki.
Choji’s oki is a 50/50. If they tech roll, you can use your ![]() to tech chase them. If they neutral getup, you can jump over them forcing them to turn around in place, and then do a
to tech chase them. If they neutral getup, you can jump over them forcing them to turn around in place, and then do a ![]()
![]()
![]() , holding behind their character which will cause it to hit their back. If you notice your opponent is constantly doing neutral getup, enforce your oki with the unblockable
, holding behind their character which will cause it to hit their back. If you notice your opponent is constantly doing neutral getup, enforce your oki with the unblockable ![]()
![]() . If they refuse to neutral getup, chase them with
. If they refuse to neutral getup, chase them with ![]() .
.
![]()
![]() is a great tool to prevent people from just pressing buttons on you. It does have a huge windup though, so it can be baited and you will be hit near the end of the move. If your opponent doesn’t meaty properly on oki,
is a great tool to prevent people from just pressing buttons on you. It does have a huge windup though, so it can be baited and you will be hit near the end of the move. If your opponent doesn’t meaty properly on oki, ![]()
![]() can be a very powerful tool in persuading them to prioritize throw or other setups on oki, which may open up
can be a very powerful tool in persuading them to prioritize throw or other setups on oki, which may open up ![]() on wakeup as a decent option.
on wakeup as a decent option.
A very meaty ![]()
![]() is plus on block. Meaty
is plus on block. Meaty ![]()
![]() is safe on block and can open up opportunities for a whiff punish if your opponent is prone to mashing after they block. Get in the habit of pressing
is safe on block and can open up opportunities for a whiff punish if your opponent is prone to mashing after they block. Get in the habit of pressing ![]() after you input
after you input ![]()
![]() so that if it does hit you immediately
so that if it does hit you immediately ![]() . This will allow you to get follow ups if they miss the tech roll, or be in a good position to enforce oki.
. This will allow you to get follow ups if they miss the tech roll, or be in a good position to enforce oki.
Both of Choji’s throws are good. Slam throw does a good amount of damage and you can follow up with a ![]() string combo, or
string combo, or ![]()
![]() /
/![]()
![]() for grounded damage. Generic throw naturally combos into
for grounded damage. Generic throw naturally combos into ![]()
![]() and
and ![]() as well as giving you access to front sub shenanigans or keeping wall pressure post combo.
as well as giving you access to front sub shenanigans or keeping wall pressure post combo.
![]()
![]() is your dedicated high crush (and a low attack) however,
is your dedicated high crush (and a low attack) however, ![]() and
and ![]()
![]() are rather notorious for ducking jabs and other moves.
are rather notorious for ducking jabs and other moves.
![]()
![]() and
and ![]()
![]()
![]() are generally not great moves, however, they become very strong in the
are generally not great moves, however, they become very strong in the ![]() Sakon & Ukon matchup as he cannot armor it and in the
Sakon & Ukon matchup as he cannot armor it and in the ![]() Choji mirror as it beats
Choji mirror as it beats ![]() and
and ![]()
![]() .
. ![]()
![]()
![]() and
and ![]()
![]()
![]()
![]() while they don’t guarantee a follow up (sometimes at wall) you will get a better oki setup or can follow up with OTG hits.
while they don’t guarantee a follow up (sometimes at wall) you will get a better oki setup or can follow up with OTG hits.
![]()
![]()
![]() has great tracking. If your opponent likes to step once and try to take their turn back, this string will catch them during their jab startup and leads to a full combo.
has great tracking. If your opponent likes to step once and try to take their turn back, this string will catch them during their jab startup and leads to a full combo.
Most of Choji’s strings continue on whiff. Use this to bait your opponent into a premature approach option and continue the string to catch them off guard.
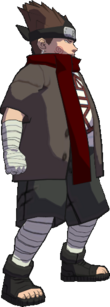
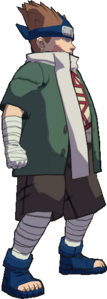
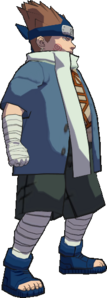
Colors
Changes from Vanilla
List may be outdated. Feel free to update where necessary
- Overall: When large (moves that increase Choji physical size for the duration of the move), Choji has guard frames and is grabbable
- Air Throw added, does a modified A8A animation
- Health: increased from 225 to 240
- Guard: increased from 1800 to 1920
- Run speed increased (from 4.5 units per 20 frames to 4.5 units per 17 frames)
- 2A: chips increase Choji's strength. He requires 8 chips to get to his maximum strength. When he is at maximum chips, he gets a 1.5X damage multiplier. 2A maxes out strength (1.5x) at 8 chips from 13. Builds 1/16th of a bar of meter. Each chip adds .5X damage multiplier
- He also loses chip gains for certain moves which are:
- 1 chip lost: GRKnJ
- 2 chips lost: 6A, Act4A, RA, JA
- 4 chips lost: 5X, 2X, 4X
- 2A maxes out strength (1.5x) at 6 chips from 13. Builds 1/16th of a bar of meter
- 5B: has slightly more stun on hit and block; transition to 5B(A) is one frame faster
- 5B(B): has slightly more lift, shoulder hitbox does not appear on the first frame, SFX comes out one frame later, 3 frames less disadvantage on block
- 5B(A): hitbox appears one frame sooner; transitions one frame faster
- 5BA(A): added as 2A
- Holding A allows you to keep eating chips
- 5BB(A) can be performed on whiff; 5BB(6A) reverses direction
- 5BB(B) and 8B: is an uppercut
- 5BBB(B) and 8B(B): is also an uppercut, but has spinning knockback and hits higher
- 6B: damage (+3) and stun increased; increased hitstun (links to 5B); turns on back hit
- 6B(B): is the strong uppercut (8B(B))
- 6B(A): can be done on whiff; transitions two frames slower; duration on the attack is increased by 2; if holding down on the first active frame the attack bounces instead of staggers; 8 frames less endlag
- 6BA(A) added as 5B(A); 6BAA(A) as 2A as well
- 4B: hits mid and is untechable; hitbox appears and disappears one frame later; hitboxes are slightly larger
- 8B to 8B(B): transition is slightly slower
- 8B(A): is 8A
- 2B faster; recovers faster; high crushes faster; no string follow-up
- wRB: faster; shorter lunge; ends sooner
- JB: Can be directionally influenced left and right each frame of the attack; bounces cloer to Choji
- 5A: has one more frame on the end for grab, super armor ends on frame 30 down from from 55, damage increased from 25 to 30, thrown trajectory changed, can tech roll and sub right before landing. Removed flicker cancel infinite.
- A5A: is hittable after Chouji throws the opponent
- Added ability to redirect ground command grab with 4
- 6A: links into the final hit better, ending hits twice, the first is a bounce and second hit is a hard knockdown; deflects projectiles and updates direction more often, startup sped up 4 frames, damage +1 for each hit
- 4A: counter window improved, can be activated from all sides
- A4A: is unblockable and unsubbable, slight adjustment to size, damage increased to 25 from 20
- 8A: Hitboxes adjusted to not grab behind as easily, super armor ends when Chouji leaves the ground, hitboxes appear 4 frames earlier, damage increased from 40 to 30 and opponent can sub after Chouji removes his hands from the opponent
- A8A: is hittable after Chouji gets off the opponent
- RA: size adjusted, hitbox duration better matches animation, pushes on block
- JA: does increased guard damage, falls faster, hard knockdown, pushes on block, size adjusted
- JA and wRA: deflect projectiles
- GRKnJ: size adjusted to match RA
- Added 2Y
- Added j.Y
- 5X: starts moving 4 frames sooner during super freeze
- 4X: is a real time super similar to Act4A with 10 frames of immunity to highs and mids on startup; requires and uses 75%; 14 frames blockstun; does not push on block
Resources
Gameplay footage
Notable Players
- Disclaimer: This list is derived from community input and is in no way comprehensive or a form of ranking of any kind. Our community criteria can be found here.
| Name | Usual Color | Region | Contact | Example Play |
|---|---|---|---|---|
| GreyAlice | 
|
United States |
Unavailable | Greyalice matches |
| Name | Usual Color | Region | Contact | Example Play |
|---|---|---|---|---|
| Athkore | 
|
Japan |
Unavailable | Athkore matches |


