Summary
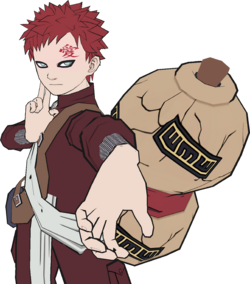
With high health and the sturdiest guard in the game, the Sand Village's jinchuriki is a defensive powerhouse. Gaara punishes poor KNJ's hard with tracking sand pillars which reset his long combo loops. Once his victim is weakened, he can easily finish them off with his Sand Burial super, or chip damage with his various sand attacks.
Character Traits
- Sturdiest guard bar in the game. Gaara can afford to block strings for a little bit longer than other characters.
- His main combo loops of 8ABAY and 2BA are very obnoxious to KnJ. 8ABA causes front sub resets at walls, and 2BA pillars have good tracking which can punish KnJ into a reset anywhere.
Notes
| Gaara
|
|
| Health:
|
220
|
| Guard Gauge:
|
2000
|
| Backdash Type:
|
Normal
|
String List
| String #
|
Inputs
|
Notes
|
 01 01
|

|
 Cancellable at () Cancellable at ()- For 03, can hold the final input to change the move's effect.
- For 04, the final move requires 75% meter to be used.
|
| 02
|

|
| 03
|
|
| 04
|
|
| 05
|
|
| 06
|
|
| 07
|

|
| 08
|
|
|
| 09
|
|
- Can hold the final input to change the move's effect.
|
| 10
|

|
|
| 11
|
|
- Can hold the final input to change the move's effect.
|
| 12
|

|
|
| 13
|
|
|
| 14
|
|
- The final move requires 75% meter to be used.
|
| 15
|
|
|
| 16
|
|
| 17
|
|
|
| 18
|
|
|
| 19
|

|
|
| 20
|
|
|
| 21
|

|
|
| 22
|
|
|
| 23
|
|
- The second input will not come out unless the first is successfully activated.
|
| 24
|
|
- The final move requires 75% meter to be used.
|
| 25
|
|
|
Weak Attacks
5B
|
|
| Damage
|
Hit Level
|
Startup
|
Active Frames
|
Recovery
|
Guard Damage
|
Blockstun
|
Advantage on Hit
|
Advantage on Block
|
| 14
|
High
|
14
|
2
|
30
|
-
|
-
|
-
|
-
|
- Primary Jab.
- Can go into() on whiff.
|
|
Toggle Hitboxes Toggle Hitboxes
|
6B
|
|
| Damage
|
Hit Level
|
Startup
|
Active Frames
|
Recovery
|
Guard Damage
|
Blockstun
|
Advantage on Hit
|
Advantage on Block
|
| 16
|
Mid
|
18
|
5
|
34
|
-
|
-
|
-
|
-
|
Lunging back hand. High crushes and hits mid making it useful for okizeme.
Flag Data
| High Crush
|
frames 7~17
|
|
|
Toggle Hitboxes Toggle Hitboxes
|
2B
|
|
| Damage
|
Hit Level
|
Startup
|
Active Frames
|
Recovery
|
Guard Damage
|
Blockstun
|
Advantage on Hit
|
Advantage on Block
|
| 16
|
Low
|
18
|
5
|
32
|
-
|
-
|
-
|
-
|
Low, sweeping kick. High crush. One of Gaara's most commonly used neutral pokes. Slower than his jab but leads to his main sand pillar combos. Be careful on block, as characters with air kunai attacks can punish A follow-ups.
Flag Data
| High Crush
|
frames 11~35
|
|
|
Toggle Hitboxes Toggle Hitboxes
|
4B
|
|
| Damage
|
Hit Level
|
Startup
|
Active Frames
|
Recovery
|
Guard Damage
|
Blockstun
|
Advantage on Hit
|
Advantage on Block
|
| 20
|
Mid
|
32
|
4
|
38
|
-
|
-
|
-
|
-
|
Guard frame attack. Slow relative to other character's 4B's but, lacking other defensive abilities aside from his sturdy guard, sometimes a necessary evil. On offense can link into a full combo but the string is punishable on block.
Flag Data
| Autoguard
|
frames 2~20
|
|
|
Toggle Hitboxes Toggle Hitboxes
|
8B
|
|
| Damage
|
Hit Level
|
Startup
|
Active Frames
|
Recovery
|
Guard Damage
|
Blockstun
|
Advantage on Hit
|
Advantage on Block
|
| 16
|
High
|
18
|
3
|
36
|
-
|
-
|
-
|
-
|
Jumping knee kick. Lifts the opponent on block or causes a spinning launch on hit. High crush during the startup. High damage combo filler. j.A is a decent blockstring.
Flag Data
| High Crush
|
frames 7~12
|
| Low Crush
|
frames 14~36
|
|
|
Toggle Hitboxes Toggle Hitboxes
|
Running B
|
|
| Damage
|
Hit Level
|
Startup
|
Active Frames
|
Recovery
|
Guard Damage
|
Blockstun
|
Advantage on Hit
|
Advantage on Block
|
| 17
|
High
|
19
|
5
|
39
|
-
|
-
|
-
|
-
|
Backflip kick. Not all too useful on block as the follow-up is punishable. Niche uses in combos.
|
|
Toggle Hitboxes Toggle Hitboxes
|
j.B
|
|
| Damage
|
Hit Level
|
Startup
|
Active Frames
|
Recovery
|
Guard Damage
|
Blockstun
|
Advantage on Hit
|
Advantage on Block
|
| 18
|
Mid
|
25
|
Until landing
|
-
|
-
|
-
|
-
|
-
|
Divekick which causes a spinning launch. Great combo filler due to its high damage and big launch. Its slow startup makes it risky and seldom-used in neutral.
|
|
Toggle Hitboxes Toggle Hitboxes
|
Strong Attacks
5A
Normal Normal Charged Charged
|
| Version
|
Damage
|
Hit Level
|
Startup
|
Active Frames
|
Recovery
|
Guard Damage
|
Blockstun
|
Advantage on Hit
|
Advantage on Block
|
| Uncharged
|
-
|
-
|
-
|
-
|
-
|
-
|
-
|
-
|
-
|
| Charged
|
-
|
-
|
-
|
-
|
-
|
-
|
-
|
-
|
-
|
Fires two slow moving sand projectiles. Full charge makes them space out and multi-hit, allowing Gaara to combo depending on the spacing. Not great in neutral as opponent can move around them easily, but great on block due to the multi-hit nature of the attack locking down the opponent.
|
|
Toggle Hitboxes Toggle Hitboxes
|
6A
|
|
| Damage
|
Hit Level
|
Startup
|
Active Frames
|
Recovery
|
Guard Damage
|
Blockstun
|
Advantage on Hit
|
Advantage on Block
|
| -
|
-
|
-
|
-
|
-
|
-
|
-
|
-
|
-
|
Gaara's round ender. Can finish off opponents by dealing tons of chip damage. A follow-up allows for extra damage and help keep Gaara safe after the attack. Near walls, Gaara can link 6A back into 5B (and then string to 5BBB(A)) for a combo loop that forces substitution.
|
|
Toggle Hitboxes Toggle Hitboxes
|
2A
|
|
| Damage
|
Hit Level
|
Startup
|
Active Frames
|
Recovery
|
Guard Damage
|
Blockstun
|
Advantage on Hit
|
Advantage on Block
|
| 16
|
-
|
-
|
-
|
-
|
-
|
-
|
-
|
-
|
Gaara causes an eruption of sand completely surrounding himself. On hit, sends the victim flying across the screen. Serves as a combo ender since it will catch KNJ's. Sometimes able to combo afterwards this is dependent on positioning with the wall. Unblockable when Gaara is backturned to the opponend and nd thus has utility in certain okizeme situations.
|
|
Toggle Hitboxes Toggle Hitboxes
|
4A
|
|
| Damage
|
Hit Level
|
Startup
|
Active Frames
|
Recovery
|
Guard Damage
|
Blockstun
|
Advantage on Hit
|
Advantage on Block
|
| -
|
-
|
-
|
-
|
-
|
-
|
-
|
-
|
-
|
Counter. Activated counter is Gaara's teleport sand dive. Works on projectiles.
|
|
Toggle Hitboxes Toggle Hitboxes
|
8A
|
|
| Damage
|
Hit Level
|
Startup
|
Active Frames
|
Recovery
|
Guard Damage
|
Blockstun
|
Advantage on Hit
|
Advantage on Block
|
| 14
|
-
|
23
|
-
|
-
|
-
|
-
|
-
|
-
|
Gaara makes a sand pillar erupt at his opponent's location, launching them in the air. Good anti-air since it reaches pretty high and Gaara can start his combo loop with 8ABAY, but sucks in neutral as the move's position tracking is quite a bit before it actually hits and the move can also be easily punished if it doesn't connect.
|
|
Toggle Hitboxes Toggle Hitboxes
|
Running A
|
|
| Damage
|
Hit Level
|
Startup
|
Active Frames
|
Recovery
|
Guard Damage
|
Blockstun
|
Advantage on Hit
|
Advantage on Block
|
| 18
|
Low
|
9
|
17
|
33
|
-
|
-
|
-
|
-
|
Sand car. Sweeps on hit but easily punishable on block. Generally serves as a combo ender for a little extra damage, like after a 5[A], or as a seldom used burst option to catch the opponent off guard.
|
|
Toggle Hitboxes Toggle Hitboxes
|
j.A
|
|
| Damage
|
Hit Level
|
Startup
|
Active Frames
|
Recovery
|
Guard Damage
|
Blockstun
|
Advantage on Hit
|
Advantage on Block
|
| -
|
-
|
-
|
-
|
-
|
-
|
-
|
-
|
-
|
Gaara launches sand projectiles at a downwards angle, similar to standard air kunai.
|
|
Toggle Hitboxes Toggle Hitboxes
|
Throws
5Y
|
|
| Damage
|
Hit Level
|
Startup
|
Active Frames
|
Recovery
|
Guard Damage
|
Blockstun
|
Advantage on Hit
|
Advantage on Block
|
| 20
|
-
|
1
|
1
|
48
|
-
|
-
|
-
|
-
|
|
|
|
2Y
|
|
| Damage
|
Hit Level
|
Startup
|
Active Frames
|
Recovery
|
Guard Damage
|
Blockstun
|
Advantage on Hit
|
Advantage on Block
|
| -
|
-
|
-
|
-
|
-
|
-
|
-
|
-
|
-
|
Side switch throw. Gaara launches the opponent behind himself with a sand pillar.
|
|
Special
5X
|
|
| Damage
|
Hit Level
|
Startup
|
Active Frames
|
Recovery
|
Guard Damage
|
Blockstun
|
Advantage on Hit
|
Advantage on Block
|
| -
|
-
|
-
|
-
|
-
|
-
|
-
|
-
|
-
|
Gaara sends out a wave of grasping sand-hands which slowly move forward, making it the longest active super in the game and good for catching rolling opponents or connecting after sand pillars. High damage and if it doesn't kill, Gaara can go for a chip-damage kill with 6AA. One of the better BM supers to hit after round end because the cutscene is long and brutal.
|
|
Toggle Hitboxes Toggle Hitboxes
|
2X
|
|
| Damage
|
Hit Level
|
Startup
|
Active Frames
|
Recovery
|
Guard Damage
|
Blockstun
|
Advantage on Hit
|
Advantage on Block
|
| -
|
-
|
-
|
-
|
-
|
-
|
-
|
-
|
-
|
Gaara protects himself in a sphere of sand and then Shukaku's arm shoots out towards the opponent. Gaara is fully invincible during the move. The attack is blockable. Not very useful unless you're catching your opponent pressing a very laggy move, due to its slow startup. The arm can be directed straight upwards by holding 8.
|
|
Toggle Hitboxes Toggle Hitboxes
|
Strategy
Gaara's main gameplan is to keep the opponent guessing, both on block and hit, with his sand pillars. Given that the sand attacks of track the enemy, it can be hard for the opponent to KNJ out. Gaara's combo loop lasts so long that a mistimed KNJ can easily link into a death combo, even without a hard call out from Gaara. Gaara should mix up the number of pillars he uses and their timing following a .
(sand dive) crosses up on block, though the defender can avoid this attack with a sidestep or movement.
The string threatens a teleport attack (sand dive) at the end, which can be performed on whiff.  string enders can help make the opponent scared to take back their turn.
It's okay if you don't outright kill your opponent after a combo or super, as Gaara is the king of chipping out opponents remaining health with moves like .
Gaara may struggle against characters with good block strings and fast buttons, leaving him doing nothing but blocking helplessly. Ensure to keep a good defensive wall, snuffing out approaches and always making sure you're in control of the match.
Colors
Changes from Vanilla
List may be outdated
- Guard: increased from 1760 to 2000
- 5B: elbow hitbox removed; hitbox made smaller; active frame 2, hitbox size increase
- 5B(B): hitbox disappears two frames earlier
- 5BB(B): turns back turned opponents around
- 5BBA(A): has three grabbable frames at the startup, doesn't teleport as high
- 5BBBB(A): hitbox appears two frames earlier; teleports a frame later when coming from B moves (ex: 6BB(A) instead of 8AB(A))
- 6B: turns back turned opponents around
- 6B(B): (taijutsu flip kick) blockstun increased, start up is 4 frames later, toe hitboxes slightly bigger; "lands" 2 frames later; recovers 10 frames faster on landing
- 4BB(B): increased duration, lower angle, hand knockdown
- 2B: lift increased
- 2BA(A) and 2BAA(A): adjusted hand to clasp on Gaara's arm properly
- 8B: ends significantly sooner, cannot do A or B follow ups after Gaara lands
- 5A: charge time decreased from 11f to 9f
- 6A: appears 12 frames sooner; can be grabbed for the whole duration
- 4A: counter window improved
- A4A: appears behind opponent into custom RA that is an unblockable sweep
- 2A: comes out faster, can be grabbed
- 8A: is immune to high attacks on frames 9-20, cannot be thrown 15-until the pillar appears, then can be grabbed after; hands curl around the arm properly
- 8A(B): (sand flip kick) "lands" two frames later; recovers 8 frames faster
- JA: projectile has more stun; air momentum only affects his upwards lift
- 5X: hitbox appears 5 frames sooner
- 2X: comes out faster, recovers quicker, requires and costs 75% meter, blocks everything while the orb is active, safe(r) on hit; grabbable until frame 30 on startup (13 frames after super freeze ends for the opponent) and as the sphere disappears; does 40 damage
- GRKnJ: is RA; teleports 1 frame faster
Notable Players
- Disclaimer: This list is derived from community input and is in no way comprehensive or a form of ranking of any kind. Our community criteria can be found here.
| Name
|
Usual Color
|
Region
|
Contact
|
Example Play
|
| Lemo
|
|

United States
|
Unavailable
|
Lemo Replaytheater
|
| Name
|
Usual Color
|
Region
|
Contact
|
Example Play
|
| Wahu
|

|
United States
|
Unavailable
|
Wahu Replaytheater
|
Navigation
| General
|
|
| Characters
|
|
| Archived Information
|
|


