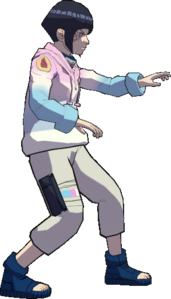
Super Naruto: Clash of Ninja 4/Hinata
Summary
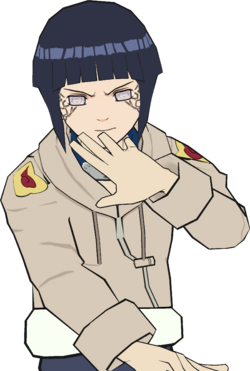
Hinata (referred to as "Shy" Hinata to differentiate from ![]() Awakened Hinata) is a close combat specialist who makes use of feints (Hyuuga cancels) and strong counters. Deadly super confirms allow her to capitalize on any opening and make her an explosive character offensively. In Super, Hinata has benefitted from quality-of-life changes, such as better combo routes after her 2A kunai swipe, better frame data on several important moves including her jab (one frame faster), 6B, and 6AA, a new 6BB super-cancel point and the ability to “fastfall” j.B.
Awakened Hinata) is a close combat specialist who makes use of feints (Hyuuga cancels) and strong counters. Deadly super confirms allow her to capitalize on any opening and make her an explosive character offensively. In Super, Hinata has benefitted from quality-of-life changes, such as better combo routes after her 2A kunai swipe, better frame data on several important moves including her jab (one frame faster), 6B, and 6AA, a new 6BB super-cancel point and the ability to “fastfall” j.B.
Notes
 Hyuuga Cancels: Hinata is able to feint some of her moves and cancel them into a neutral state by pressing
  during their startup.
String List
| String # | Inputs | Notes |
|---|---|---|
| ||
| ||
| ||
| ||
| ||
| ||
|
Weak Attacks
5B
Toggle Hitboxes Toggle Hitboxes
|
|---|
6B
Toggle Hitboxes Toggle Hitboxes
|
|---|
2B
Toggle Hitboxes Toggle Hitboxes
|
|---|
4B
Toggle Hitboxes Toggle Hitboxes
|
|---|
8B
Toggle Hitboxes Toggle Hitboxes
|
|---|
Running B
j.B
Strong Attacks
5A
Uncharged Charged
|
|
|---|---|
Toggle Hitboxes Toggle Hitboxes
|
6A
2A
Toggle Hitboxes Toggle Hitboxes
|
|---|
4A
8A
Running A
j.A
Throws
5Y
Specials
5X
2X
Strategy
Neutral
Because Hinata lacks obvious buttons to “cheat” neutral and threaten from long distances, she relies on basic movement and evasion, such as jumps or sidesteps to create openings and force a committal option from her opponent.
Once Hinata finds herself at close range with the opponent, her options include:


 (longer reaching) or

 (faster and catches sidesteps) can be Hyuuga-cancelled, leaving Hinata only momentarily vulnerable to whiff punishes.
- Jump back, and if the opponent attempts a move, punish with

 -an effective punish against characters that continue strings on whiff as they approach you.
 - Pre-emptive use of

 or
or 
 , if you anticipate them pressing buttons. Useful against characters that use fast high crushes frequently.


 , Hinata’s high crush into her lunging palm strike (
 ), to catch an incoming high or an opponent moving linearly. The string is safe on block due to pushing on block unless the opponent has their back to a wall. The
 input can be delayed or replaced with
 instead.
 can be Hyuuga-cancelled, leading to a mix-up between jab, grab, and
 .
. 
 can be used to catch responses to your run-in due to its seven active frames (compared to three for
 ).
).
 is good against back-turned opponents because it launches and closes distance quickly. If Hinata suspects that the attack will come out too late, she can Hyuuga-cancel and follow with 6B or 2B now that she is within range.
Defense
- While defending, Hinata utilizes sidesteps, jump out points and

 ,
, 
 or
or 
 to punish unsafe blockstrings.
 and
and 
 yield Hinata a full punish.
- Sidestep into

 (her go-to on back-turned opponents) or 5B are also options.
 - Some blockstrings that lift Shy allow her to punish with

 as well.
 - On her own wake-up, Shy can terrorize the opponent with

 and her fast
 . If the opponent becomes hesitant during her wake-up, Hinata may be able to grab or jab them herself instead.
Guard Pressure
- While attacking the enemy’s guard, Hinata should be aware that


 can be
 'd by nearly the entire cast or be jumped out of. Tall characters can jump out of

 .
. - In Super, Hinata has been given the


 and
and 


 string variations which come out faster than

 or
or 

 , which can catch both
 and jump outs after
 .
. - If the opponent lets Hinata go deeper into strings, she may need to apply delays to her strings to hit during the vulnerable frames of her opponent's

 .
. 


 can punish a jump out meant to avoid


 .
.- Hinata can apply Hyuuga cancels for guard pressure and mixes. The


 and
and 


 Hyuuga cancels lead to a rewarding strike/throw mix, though a trained eye may be able to react to the feint. For this reason, it may be unwise to overuse Hyuuga cancels against opponents who react well to them.
 - If the opponent does not jump after

 ,
, 


 is one of Shy's safer guard mix-ups because it pushes on block.
 - In some matchups,


 leads to one of the stronger guard mixes in the game.
- The
 string finisher slides Hinata forward under most aerial counterattacks, and can be Hyuuga-cancelled (giving her plus frames with the opponent landing, at which point she can mix their landing with a strike or throw or otherwise chase them as try to come down from the air).
 - Hinata can punish button presses in the air by finishing the string without a feint, or using the feint to slide under the incoming attack.
- Hinata should use this string cautiously against opponent's with fast aerial attacks such as Zabuza/Kisame

 or Ino, Tenten, Kidomaru and Temari
 .
.
- The
Punishes
- Once Hinata has her foe in a combo, Hyuuga cancels are helpful for keeping her safe from opposing substitutions.
- Hyuuga cancels help mask her substitution reads as well, which she may follow with traditional sub-punishes.
- Shy can
 -turn-
 vs. air KNJ, giving her a full combo.
 - Variations of


 can be used in spots where the opponent may KNJ allowing Hinata to escape or potentially punish the substitution with the correct timing.
Okizeme
- Hinata has a strong okizeme game, with the ability to beat wake-up kicks (WUK) through

 and continue her pressure with


 onwards.
List of Hyuuga-cancellable strings:


 - 27F animation


 - 27F animation


 - 27F animation


 - 27F animation


 - 27F animation


 - 27F animation


 - 27F animation
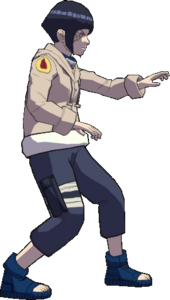
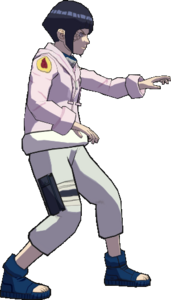
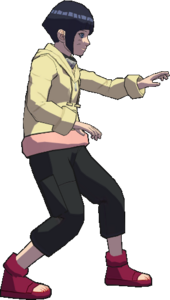
Colors
Changes from Vanilla
- Health: Increased from 185 to 210
- Guard: increased 1480 to 1520
- Combo list updated:
- 5BBA(A), 6A(A) added to the combo strings
- Grabbable moves: 8A, JB, JA, 2X
- 5B(B): hitbox appears and disappears one frame later
- 5BB(A): has stagger, has one more frame blockstun, turns better on hit
- 5BBBB(6B): Added- same as wRB animation and properties
- 6B: has one more frame blockstun, increased range, smaller hitbox
- 6B(B): has one more frame blockstun and can be super canceled; Hyuuga Cancel is four frames sooner
- 6BB(B): RB attack replaced with Vanilla 5BBB(B) with its B and A follow-ups
- 6BBB(6B): Added as Vanilla 6BB(B)
- 4B: no longer staggers or pushes block, significantly stronger on hit and block stun
- 2B: has slightly less lift on hit and high crushes from 14-40 to better match the visuals
- 2B(B): changed to be 5BB(B) with A follow up still intact
- 8B: Both hitboxes appear one frame later, slightly bigger hitboxes on the second hit; recovers slightly faster
- wRB: 2 more lift (applies to the attack's mid-string appearances as well)
- 5A: charge time decreased from 11f to 8f
- 4A: Starts up 4 frames sooner, ends 8 frames later
- A4A: can only be subbed on the first frame
- 6A: stagger added, turns better on hit, more lift, first three frames are intangible
- 2A(A): added as 6A(A)
- 5X: damage increased from 65 to 85, starts moving in super freeze three frames sooner; two more active hitbox frames
- 2X: requires 75% meter to use, window starts up 3 frames faster and ends when the animation starts to change like other counters; drains slightly more than 12.5% meter on a miss at the end of the move; activation gives opponent no chakra on hit. Costs 12.5% meter if the counter ends without being triggered.
- GRKnJ: Appears closer to the opponent
