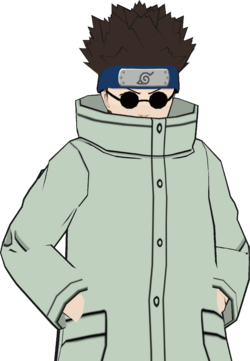
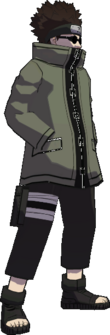
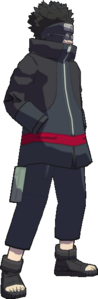
Summary
Not everyone can be a hero; the only Konoha boy left behind for the Sasuke retrieval mission gets his revenge in Super Clash of Ninja 4. Shino is known as a setup character who summons bugs to control space, enforce one of the stronger okizeme games in the cast and create tick throws and unblockables. Compared to Vanilla, Shino benefits from revamped combo routes, a unique air throw, and importantly a quicker charge A, allowing him to utilize the bigger, badder version of his bugs summon in more situations.
Notes
- Due to the commitment required to start his setplay, Shino must adjust how he uses his bugs depending on the opposing character, which means Shino players must have a general understanding of the other characters in the cast in order to fully utilize his kit.

 and
and 
 are notable as important tools to create openings for Shino to start his unique brand of pressure.
- Bugs can be destroyed by being hit, kunai and most projectiles. There are some projectiles that don't work for destroying bugs (some include
 Temari (charged),
  Itachi
  , and
, and  Tayuya Ogre-based moves).
| Shino
|
|
| Health:
|
210
|
| Guard Gauge:
|
1640
|
| Backdash Type:
|
Normal
|
String List
| String #
|
Inputs
|
Notes
|
 01 01
|
|
 Cancellable at () Cancellable at ()- For 02, can hold the final input to change the move's effect.
- For 04-08, switches sides with the fifth move.
|
| 02
|
|
| 03
|
|
| 04
|
|
| 05
|
|
| 06
|
|
| 07
|
|
| 08
|
|
| 09
|

|
|
| 10
|
|
- Switches sides with the third move.
|
| 11
|
|
| 12
|
|
| 13
|
|
| 14
|
|
| 15
|
|
|
| 16
|
|
- Switches sides with the third move.
|
| 17
|
|
| 18
|
|
| 19
|
|
| 20
|
|
| 21
|
|
|
| 22
|

|
|
| 23
|
|
|
| 24
|

|
|
| 25
|
|
|
| 26
|
|
- Can hold the final input to change the move's effect.
|
Weak Attacks
5B
|
|
| Damage
|
Hit Level
|
Startup
|
Active Frames
|
Recovery
|
Guard Damage
|
Blockstun
|
Advantage on Hit
|
Advantage on Block
|
| 12
|
High
|
14
|
3
|
25
|
180
|
19
|
7
|
-8
|
|
|
|
Toggle Hitboxes Toggle Hitboxes
|
6B
|
|
| Damage
|
Hit Level
|
Startup
|
Active Frames
|
Recovery
|
Guard Damage
|
Blockstun
|
Advantage on Hit
|
Advantage on Block
|
| 14
|
High
|
19
|
3
|
35
|
210
|
18
|
2
|
-19
|
|
|
|
Toggle Hitboxes Toggle Hitboxes
|
2B
|
|
| Damage
|
Hit Level
|
Startup
|
Active Frames
|
Recovery
|
Guard Damage
|
Blockstun
|
Advantage on Hit
|
Advantage on Block
|
| 11
|
Low
|
17
|
5
|
36
|
165
|
23
|
8
|
-17
|
Crouching Kick
Good for punishing highs, but on whiff it has a decent amount of end lag.
Flag Data
| High Crush
|
Frames 10~40
|
|
|
Toggle Hitboxes Toggle Hitboxes
|
4B
|
|
| Damage
|
Hit Level
|
Startup
|
Active Frames
|
Recovery
|
Guard Damage
|
Blockstun
|
Advantage on Hit
|
Advantage on Block
|
| 15
|
Mid
|
30
|
6
|
33
|
225
|
19
|
+11
|
-19
|
Shino's guard frame attack is a pretty unique one. It has relatively short guard frames for its start-up, but then transitions into high crush frames, and then low crush frames. 4B(B) is a launching kick that leas to combos on  , and 4B(A) is 6A. , and 4B(A) is 6A.
Flag Data
| High Crush
|
frames 12~19
|
| Low Crush
|
frames 20~33
|
| Autoguard
|
frames 2~12
|
|
|
Toggle Hitboxes Toggle Hitboxes
|
8B
|
|
| Damage
|
Hit Level
|
Startup
|
Active Frames
|
Recovery
|
Guard Damage
|
Blockstun
|
Advantage on Hit
|
Advantage on Block
|
| 18
|
Mid
|
28
|
2
|
26
|
255
|
23
|
44 (Before Get-up animations start), Neutral Get-up and Wake up Kick: 78, Rolling Get-up: 91
|
+3
|
|
|
|
Toggle Hitboxes Toggle Hitboxes
|
Running B
|
|
| Damage
|
Hit Level
|
Startup
|
Active Frames
|
Recovery
|
Guard Damage
|
Blockstun
|
Advantage on Hit
|
Advantage on Block
|
| 15
|
Mid
|
14
|
10
|
32
|
225
|
23
|
14
|
-18
|
|
|
|
Toggle Hitboxes Toggle Hitboxes
|
j.B
|
|
| Damage
|
Hit Level
|
Startup
|
Active Frames
|
Recovery
|
Guard Damage
|
Blockstun
|
Advantage on Hit
|
Advantage on Block
|
| 18
|
Mid
|
25
|
Until landing
|
29
|
270
|
23
|
Varies (Minimum advantage 23 before techroll animation)
|
-9
|
Divekick
Flag Data
| Low Crush
|
Frame 1 until you hit the ground
|
| Throw Immunity
|
No
|
|
|
Toggle Hitboxes Toggle Hitboxes
|
Strong Attacks
5A
|
|
| Version
|
Damage
|
Hit Level
|
Startup
|
Active Frames
|
Recovery
|
Guard Damage
|
Blockstun
|
Advantage on Hit
|
Advantage on Block
|
| Uncharged
|
5×3
|
-
|
7
|
230
|
4 (after first active hitbox)
|
0
|
7 near a wall/corner (final hit will always be 14), 14 midscreen
|
Varies depending on placement (5-14)
|
Positive (bugs act independent once summoned)
|
| Charged
|
5×6
|
-
|
15
|
420
|
2 (after first active hitbox)
|
0
|
7 near a wall/corner (final hit will always be 14), 14 midscreen
|
Varies depending on placement (5-14)
|
Positive (bugs act independent once summoned)
|
Summon Bugs
- Can be interrupted by an attack before bugs are summoned
- Can be destroyed by projectiles
- Will disappear if Shino is hit
Remember!!! ALL BUG MOVES ARE INTANGIBLE TO WEAK ATTACKS
- Uncharged:
- Uncharged Summons a small group of bugs that remains on the field that has 3 hits and travels a short distance before disappearing
- First active hitbox comes out on frame 65
- Charged:
- Charged Summons a large group of bugs that remains on the field longer and has 3 additional hits
- First active hitbox comes out on frame 77
Flag Data
| Chip Damage
|
For every bug hit: 1
|
| Chakra Drain
|
-250 per hit
|
|
|
Toggle Hitboxes Toggle Hitboxes
|
6A
|
|
| Damage
|
Hit Level
|
Startup
|
Active Frames
|
Recovery
|
Guard Damage
|
Blockstun
|
Advantage on Hit
|
Advantage on Block
|
| 7×5
|
-
|
20
|
28
|
20
|
0
|
Multi Hit (5) 1st Hit: 8, 2nd-4th Hit: 8 normally and 14 as the final hit (In Air: 13), 5th Hit: 14 (In Air: 13)
|
8
|
-9
|
|
|
|
Toggle Hitboxes Toggle Hitboxes
|
2A
|
|
| Damage
|
Hit Level
|
Startup
|
Active Frames
|
Recovery
|
Guard Damage
|
Blockstun
|
Advantage on Hit
|
Advantage on Block
|
| 10
|
-
|
28
|
50
|
43 (after first active hitbox)
|
0
|
14
|
47~140
|
-8
|
|
|
|
Toggle Hitboxes Toggle Hitboxes
|
4A
|
|
| Damage
|
Hit Level
|
Startup
|
Active Frames
|
Recovery
|
Guard Damage
|
Blockstun
|
Advantage on Hit
|
Advantage on Block
|
| 10
|
-
|
9
|
26
|
14
|
-
|
-
|
Varies (Depends on the opponent move that is used) minimum advantage is 10
|
-
|
Counter Move
- Unblockable bugs are summoned when counter is successful
- Teleports behind the opponent when counter is successful
- When hit by bugs, can be shaken out of to reduce stun
- Can be destroyed by projectiles
- Will disappear if Shino is hit
It can be used for catching people WuK (less risk with bugs present). With bugs present it can be used to bait out on bug pressure.
Flag Data
| Chakra Drain
|
-500
|
|
|
8A
|
|
| Damage
|
Hit Level
|
Startup
|
Active Frames
|
Recovery
|
Guard Damage
|
Blockstun
|
Advantage on Hit
|
Advantage on Block
|
| 7×3
|
-
|
20
|
80
|
49 (after first active hitbox)
|
0
|
Multi Hit (3) 1st Hit: 5, 2nd Hit: 5 normally and 14 as the final hit, 3rd Hit: 14
|
Varies based on height of characters and if they're in the air or not (minimum advantage: 13)
|
Varies (Can be positive or negative depending on how many hits the opponent blocks and how high/low the opponent is when getting hit by the move)
|
Tracking Projectile
- Anti-Air
- Unblockable on backturn
- Will not disappear if Shino is hit
- Can be destroyed by projectiles
Flag Data
| Chip Damage
|
For every bug hit: 1
|
| Chakra Drain
|
Multi Hit (3) -350 each
|
|
|
Running A
|
|
| Damage
|
Hit Level
|
Startup
|
Active Frames
|
Recovery
|
Guard Damage
|
Blockstun
|
Advantage on Hit
|
Advantage on Block
|
| 0
|
-
|
6 (The frame he teleports)
|
-
|
20
|
-
|
-
|
-
|
-
|
|
|
|
j.A
|
|
| Damage
|
Hit Level
|
Startup
|
Active Frames
|
Recovery
|
Guard Damage
|
Blockstun
|
Advantage on Hit
|
Advantage on Block
|
| 6×5
|
-
|
10
|
28
|
Varies (Normal jump: 9, Double Jump: 16 for example)
|
0
|
Multi Hit (5) 1st Hit: 8, 2nd-4th Hit: 8 normally and 14 as the final hit (In Air: 13), 5th Hit: 14 (In Air: 13)
|
Varies (Can be neutral or positive depending on the amount of hits and whether or not they're in the air)
|
Varies (Can be positive or negative depending on where the move is used and how high/low the move is being used)
|
Short-Range Down Angle Projectile
- Can not be destroyed by projectiles (including kunai)
Flag Data
| Low Crush
|
Frame 1 until you hit the ground
|
| Chip Damage
|
For every bug hit: 1
|
| Chakra Drain
|
Multi Hit (5) -300 each
|
|
|
Throws
5Y
|
|
| Damage
|
Hit Level
|
Startup
|
Active Frames
|
Recovery
|
Guard Damage
|
Blockstun
|
Advantage on Hit
|
Advantage on Block
|
| 20
|
-
|
1
|
1
|
47
|
-
|
-
|
-
|
-
|
|
|
|
2Y
|
|
| Damage
|
Hit Level
|
Startup
|
Active Frames
|
Recovery
|
Guard Damage
|
Blockstun
|
Advantage on Hit
|
Advantage on Block
|
| 10
|
-
|
1
|
1
|
47
|
-
|
-
|
13
|
-
|
Flag Data
| Chakra Drain
|
-1,925
|
|
|
j.Y
|
|
| Damage
|
Hit Level
|
Startup
|
Active Frames
|
Recovery
|
Guard Damage
|
Blockstun
|
Advantage on Hit
|
Advantage on Block
|
| 12
|
-
|
1
|
1
|
Until landing + 9L
|
-
|
-
|
Varies (Can be more positive depending on the height the move was used) Minimum advantage: 3 (before tech options)
|
-
|
Shino's air throw does slightly less damage than the standard, but uniquely sends some bugs to drain chakra from the opponent.
Flag Data
| Unsubbable
|
False
|
| Chakra Drain
|
-1,539
|
|
|
Special
5X
|
|
| Damage
|
Hit Level
|
Startup
|
Active Frames
|
Recovery
|
Guard Damage
|
Blockstun
|
Advantage on Hit
|
Advantage on Block
|
| 10, 65
|
-
|
22
|
3
|
46
|
-
|
-
|
17 (Before getup options)
|
-
|
- Standard Super
- Drains 54.6% Chakra
Flag Data
| Unsubbable
|
True
|
| Chakra Drain
|
-8,400
|
| Throw Immunity
|
Yes
|
|
|
Toggle Hitboxes Toggle Hitboxes
|
2X
|
|
| Damage
|
Hit Level
|
Startup
|
Active Frames
|
Recovery
|
Guard Damage
|
Blockstun
|
Advantage on Hit
|
Advantage on Block
|
| 82
|
-
|
26
|
26
|
86
|
0
|
Multi Hit (6): 1
|
Varies (negative if used OTG or all hits do not confirm, positive if during a combo or all hits confirm)
|
-87 minimum if all 6 hits confirm on block
|
- Alternative Super
- Drains 31.25% chakra
- Frame 11 is when invincibility frames occur; can be interrupted by an attack before invincibility
Flag Data
| Chip Damage
|
For every bug hit: 2
|
| Unsubbable
|
True
|
| Chakra Drain
|
Multi Hit (6) -800 each
|
| Throw Immunity
|
No
|
|
|
Strategy
Things to know about certain Weak Moves and Throws
- Avoid using () too much in neutral due to Shino having the worst jab string gap without some form of bugs. Be aware even with bugs (charged as well), certain 's can go through Shino's bugs (like
 Rock Lee and
  OTK Naruto) and some can even go through bugs and hit Shino during his (like
  Kimimaro and
  Awakened Hinata) so sometimes you must block or if you have a good reaction time use as a punish. Using gives Shino enough time to use (charged too), however you must immediately run in front of the bugs to protect it or else the opponent can just tech roll into (Kunai) to remove the bugs. Also it's better to use (uncharged) near walls/corners and (charged) in bigger stages/positions further from the wall to prevent Shino from being punished on tech roll.
 drains some chakra and gives him 3 plus frames (you act 3 frames before your opponent), normally this would be fine but due to Shino's () being very lackluster on block, Shino's options are very limited after the throw. It is recommended you only use this move when bugs are present (for pressure with or combos with charged).
- helps him counter foes who attempt to jump over his grounded bugs.
Advice about using Bugs
- In neutral, characters that lack a normal (kunai) Shino can risk more (charged) instead of (uncharged) from a distance on tech roll (preferably on large stages or when Shino is not near a wall) such as Rock Lee and
 Choji, but in most cases you must play safe and do (uncharged) on tech roll due to characters with quick teleport attacks and/or quick options or else you will be punished. Some include
  Ino and
  Kiba ,
  Might Guy and
  CS2 Sasuke .
- Shino can tick throw after the opponent is currently blocking bugs or setup an unblockable scenario with .
Colors
Changes from Vanilla
(Note: List may be outdated. Please update if you see any errors)
- Health: increased from 195 to 205
- Guard: increased from 1560 to 1640
- Air throw added
- Grabbable Moves: 5BB(A), 6A, JA
- 5B(B): hitbox appears and disappears one frame later
- 5BB(B): lifts on hit and block, ends sooner
- 6B(B): now staggers
- 6BB(B): has one less active hitbox frame and has slightly more lift on hit
- 6BBA(B): has two more frames duration on the hitbox; can be transitioned into quickly
- 6BBA(8B): added as 8B
- 4B: hitbox appears 1 frame sooner
- 4B(B): launches on hit, ends sooner
- 4B(A): changed to be 6A
- 2B: made strong
- 2B(B): has more lift and ends sooner; hitbox appears and disappears one frame later
- 8B: does 1 more damage; ends sooner; hitbox appears one frame later and disappears one frame earlier; hard knockdown
- RB: duration changed, ends sooner
- JB: given a better decent angle; more lift
- 5A; charges in 14 frames from 27
- 6A: releases bugs slightly sooner, hits 5 times instead of 3, more range
- 4A: better counter window
- A4A: recovers significantly faster, walking bugs are unblockable
- 2A: comes out faster
- 8A: comes out faster
- RA: replaced with a set distance teleport
- JA: has bugs come out one frame sooner and hits 5 times instead of 3
- 5Y: victim is immune to mids and highs during the startup
- 2Y: added; victim is immune to mids and highs until they are released
- 5X: hitbox appears one frame sooner; one less frame of super freeze
- 2X: bugs spawn faster, each hit does 1 more damage; slightly less lift
Resources
Shino Replaytheater
Notable Players
- Disclaimer: This list is derived from community input and is in no way comprehensive or a form of ranking of any kind. Our community criteria can be found here.
| Name
|
Usual Color
|
Region
|
Contact
|
Example Play
|
| Jerry
|
|

United States
|
Unavailable
|
Jerry matches
|
Navigation
| General
|
|
| Characters
|
|
| Archived Information
|
|


 )
)