User:Pythmere/VSAV/Q-Bee
Introduction
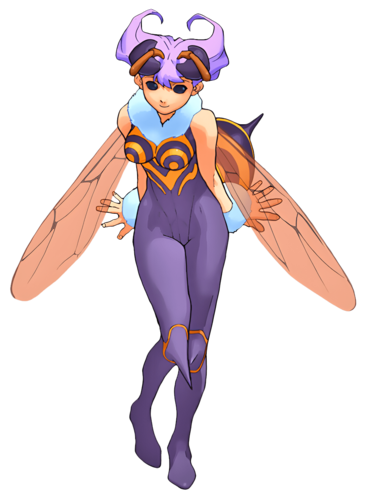
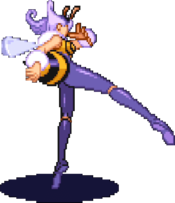
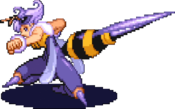
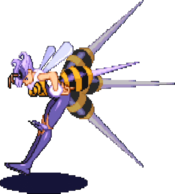
Q-Bee (キュービィ), the Soul Collector.
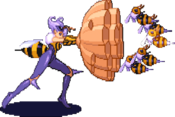
The Queen Bee of the Soul Bee species, a race that consumes souls to live. Q-Bee's race resided in the territory of the Dohma family, where they languished to near extinction during the period where Jedah was dead. Following Jedah's resurrection and his gathering of powerful souls in the Majigen, Q-Bee noticed the pooling of strong souls. She proceeded to ventured into the Majigen in order to gather souls she needed in order to alleviate the Soul Bees' hunger and restore their population.
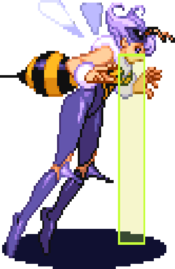
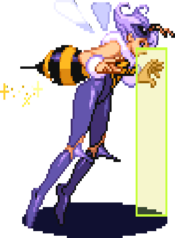
Q-Bee is a top-tier pixie who is considered third best. She has strong normals for pressure and owning neutral, excellent mobility, & an annoyingly small hurtbox while crouching. She does suffer from standard pixie issues like low damage, low health, & relying on universal mechanics for defense. If you enjoy rushing your opponent down with insanely fast IADs & poking with incredible normals than Q-bee is recommended for you.
Gameplay
Primary objective:
- Bully opponents with strong pokes in neutral
- Float at/over opponents & make opportunities with her homing air dash
- Once inside, use instant-air-dashes as oppressive high/low offense
- Loop high/low mix-ups on oki to keep the opponent in a vortex/blender
- Once the opponent has accrued considerable white life, confirm into ES C>R
- Use Q.J. as corner pressure to elevate your corner advantage
| Strengths | Weaknesses |
|---|---|
|
|
Movement
Walk: Fast walk speed, tall hitbox.
Dash: A ground-based dash. Good movement speed, though there is an uncancelable startup window and an uncancelable dash-cool if not canceled in time. Attacking during a dash will result in a dash attack. The dash will retain momentum on dash attacks, making it good for tick throw setups (typically d.LK or when applicable d.LP into O.M.). Due to the uncancellable startup and limited dash attacks (they all hit mid) it's not as commonly used as her airdash, but is still very useful in certain situations, such as chasing the opponent or running away from the opponent, and sometimes as a meaty off an anti-air reset when an airdash would result in an upwards airdash.
Jump: Wide forward jump arc, very narrow backward jump arc. Somewhat floaty, though average speed. Holding up allows you to float for a period of time. Neutral and forward jumps can float longer than a backwards jump. You can also get a short float after chicken guarding. There are some chains/situations where holding up-back to block instead of just back will cause Q-Bee's guard to drop.
Air Dash: Arguably the best in the game, though definitely one of her most defining features. Since it auto-targets it comes with it's own set of pros and cons. The great thing about auto-target is if the opponent is grounded QB will usually airdash downwards towards the ground, which lets you do some insanely fast high/low mixups. The downside being that if the opponent is airborne or reset then QB might accidentally airdash upwards into the sky, leaving her rather vulnerable and curbing her rushdown. Although newer players tend to spam the hell out of it just about any time and any where, it's better used when up close or a couple character lengths away. A good sense of space, timing, and footsies will very dramatically help a QB player land airdashes, since having a bad sense of these things will make you very prone to getting abused and whiffing all over the place. Keep in mind that airdashing is possible after airblocking, which is extremely useful after chicken blocking, as well as after floating.
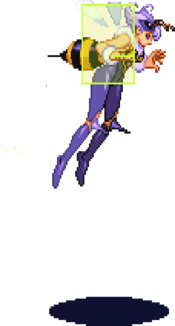
Float (hover) - hold up: Holding any upwards direction (7, 8, 9) results in QB floating briefly during the apex of her normal jump. She can float longer during a forward jump than neutral or back. The direction of the float input does not have to match the direction of the jump, so jumping forwards with 9 can float with 7, allowing you to jump forwards, airblock, and float as an option select. Pretty good maneuver for baiting anti-airs. The float does not change QB's normal jump properties at all, so it is possible to airblock during it, attack during and after it, and even airdash during or after a float. A typical use for it is to jump forwards and float over the opponent, then airdash towards them from behind. Be wary of slower/delayed enemy airchains on chicken block, as the transition from normal jump to float has a few vulnerable frames, and QBee has a unique airblock pushback trajectory that can be exploited for enemy ground-to-air unblockables.
Normal Moves
Standing Normals
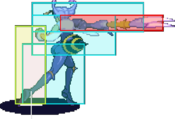
5LP
| Startup | Active | Recovery | Hit Adv. | Block Adv. | Renda Bonus |
|---|---|---|---|---|---|
| 6 | 3 | 8 | 8 | 7 | H: 11 G: 10 |
| Guard | Cancel | Invuln | Red Damage | White Damage | Gauge |
| mid | yes | - | 7 | 3 | H: 6 G: 3 W: 0 |
5MP
| Startup | Active | Recovery | Hit Adv. | Block Adv. | Renda Bonus |
|---|---|---|---|---|---|
| 7 | 3 | 16 | 5 | 4 | N/A |
| Guard | Cancel | Invuln | Red Damage | White Damage | Gauge |
| mid | no | - | 16 | 7 | H: 15 G: 9 W: 3 |
5HP
| Startup | Active | Recovery | Hit Adv. | Block Adv. | Renda Bonus |
|---|---|---|---|---|---|
| 13 | 29 | 21 | -3 | -4 | N/A |
| Guard | Cancel | Invuln | Red Damage | White Damage | Gauge |
| mid | no | - | 5x5 | 2x5 | H: 10+4x4 G: 8+2x4 W: 6 |
5LK
| Startup | Active | Recovery | Hit Adv. | Block Adv. | Renda Bonus |
|---|---|---|---|---|---|
| 5 | 4 | 8 | 4 | 3 | N/A |
| Guard | Cancel | Invuln | Red Damage | White Damage | Gauge |
| mid | yes | - | 7 | 3 | H: 6 G: 3 W: 0 |
5MK
| Startup | Active | Recovery | Hit Adv. | Block Adv. | Renda Bonus |
|---|---|---|---|---|---|
| 6 | 4 | 17 | 4 | 3 | N/A |
| Guard | Cancel | Invuln | Red Damage | White Damage | Gauge |
| mid | yes | - | 17 | 6 | H: 15 G: 9 W: 3 |
5HK
| Startup | Active | Recovery | Hit Adv. | Block Adv. | Renda Bonus |
|---|---|---|---|---|---|
| 9 | 2,2(4)3,2 | 23 | 0 | -1 | N/A |
| Guard | Cancel | Invuln | Red Damage | White Damage | Gauge |
| mid | no | - | 6x4 | 2x4 | H: 11+5+4+4 G: 8+2x3 W: 6 |
Crouching Normals
2LP
| Startup | Active | Recovery | Hit Adv. | Block Adv. | Renda Bonus |
|---|---|---|---|---|---|
| 6 | 3 | 9 | 4 | 3 | H: 7 G: 6 |
| Guard | Cancel | Invuln | Red Damage | White Damage | Gauge |
| low | yes | - | 7 | 3 | H: 6 G: 3 W: 0 |
2MP
| Startup | Active | Recovery | Hit Adv. | Block Adv. | Renda Bonus |
|---|---|---|---|---|---|
| 7 | 4 | 14 | 3 | 2 | N/A |
| Guard | Cancel | Invuln | Red Damage | White Damage | Gauge |
| low | yes | - | 16 | 6 | H: 15 G: 9 W: 3 |
2HP
| Startup | Active | Recovery | Hit Adv. | Block Adv. | Renda Bonus |
|---|---|---|---|---|---|
| 11 | 14 | 22 | 10 | 9 | N/A |
| Guard | Cancel | Invuln | Red Damage | White Damage | Gauge |
| mid | no | - | 7x3 | 3x3 | H: 12+6+6 G: 9+2x3 W: 6 |
2LK
| Startup | Active | Recovery | Hit Adv. | Block Adv. | Renda Bonus |
|---|---|---|---|---|---|
| 5 | 2 | 10 | 6 | 5 | N/A |
| Guard | Cancel | Invuln | Red Damage | White Damage | Gauge |
| low | yes | - | 6 | 2 | H: 6 G: 3 W: 0 |
2MK
| Startup | Active | Recovery | Hit Adv. | Block Adv. | Renda Bonus |
|---|---|---|---|---|---|
| 7 | 3 | 16 | 5 | 4 | N/A |
| Guard | Cancel | Invuln | Red Damage | White Damage | Gauge |
| mid | yes | - | 16 | 6 | H: 15 G: 9 W: 3 |
2HK
| Startup | Active | Recovery | Hit Adv. | Block Adv. | Renda Bonus |
|---|---|---|---|---|---|
| 8 | 13 | 22 | - | -7 | N/A |
| Guard | Cancel | Invuln | Red Damage | White Damage | Gauge |
| low | no | - | 20,16 | 9,7 | H: 24 G: 15 W: 6 |
Air Normals
J.LP
| Startup | Active | Recovery | Hit Adv. | Block Adv. | Renda Bonus |
|---|---|---|---|---|---|
| 5 | 3 | 5 | - | - | N/A |
| Guard | Cancel | Invuln | Red Damage | White Damage | Gauge |
| overhead | yes | - | 8 | 3 | H: 6 G: 3 W: 0 |
'
Decent speed and range for a jump jab. The hitbox is somewhat the same as j.LK so it's difficult to say which is better. Good for IADs or airchain starter.J.MP
| Startup | Active | Recovery | Hit Adv. | Block Adv. | Renda Bonus |
|---|---|---|---|---|---|
| 8 | 5 | 6 | - | - | N/A |
| Guard | Cancel | Invuln | Red Damage | White Damage | Gauge |
| overhead | yes | - | 16 | 7 | H: 15 G: 9 W: 3 |
J.HP
| Startup | Active | Recovery | Hit Adv. | Block Adv. | Renda Bonus |
|---|---|---|---|---|---|
| 24 | 13 | 18 | - | - | N/A |
| Guard | Cancel | Invuln | Red Damage | White Damage | Gauge |
| overhead | no | - | 6x4 | 3x4 | H: 10+4x3 G: 8+2x3 W: 6 |
J.LK
| Startup | Active | Recovery | Hit Adv. | Block Adv. | Renda Bonus |
|---|---|---|---|---|---|
| 5 | 4 | 8 | - | - | N/A |
| Guard | Cancel | Invuln | Red Damage | White Damage | Gauge |
| overhead | yes | - | 8 | 4 | H: 6 G: 3 W: 0 |
J.MK
| Startup | Active | Recovery | Hit Adv. | Block Adv. | Renda Bonus |
|---|---|---|---|---|---|
| 8 | 5 | 9 | - | - | N/A |
| Guard | Cancel | Invuln | Red Damage | White Damage | Gauge |
| overhead | yes | - | 17 | 6 | H: 15 G: 9 W: 3 |
J.HK
| Startup | Active | Recovery | Hit Adv. | Block Adv. | Renda Bonus |
|---|---|---|---|---|---|
| 10 | 4 | 11 | - | - | N/A |
| Guard | Cancel | Invuln | Red Damage | White Damage | Gauge |
| overhead | no | - | 22 | 8 | H: 24 G: 15 W: 6 |
Normal Throws
6MP or 6HP
| Startup | Active | Recovery | Hit Adv. | Block Adv. | Renda Bonus |
|---|---|---|---|---|---|
| 1 | - | 89 + landing 1 | - | - | N/A |
| Guard | Cancel | Invuln | Red Damage | White Damage | Gauge |
| throw | no | 1-88 whole body | 14+9 (14+4) | 5+3 (5+1) | H: 9 G: 0 W: 0 |
J.6P or J.4P
| Startup | Active | Recovery | Hit Adv. | Block Adv. | Renda Bonus |
|---|---|---|---|---|---|
| 1 | - | 83 + 1 + landing1 | - | - | N/A |
| Guard | Cancel | Invuln | Red Damage | White Damage | Gauge |
| throw | no | 1-83 whole body | 14+9 (14+4) | 5+3 (5+1) | H: 9 G: 0 W: 0 |
Special Moves
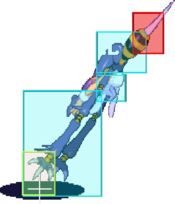
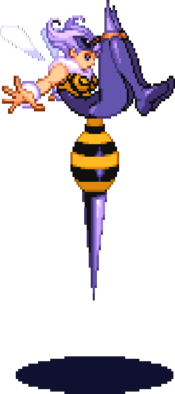
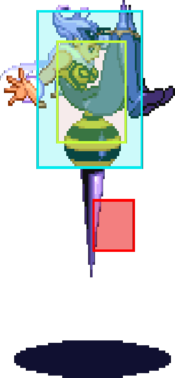
Delta A
214LK
| Startup | Active | Recovery | Hit Adv. | Block Adv. | Renda Bonus |
|---|---|---|---|---|---|
| 45 | 11 | landing 1 | - | - | N/A |
| Guard | Cancel | Invuln | Red Damage | White Damage | Gauge |
| overhead | no | - | 21 | 5 | H: 21 G: 16 W: 12 |
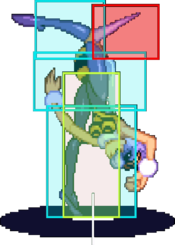
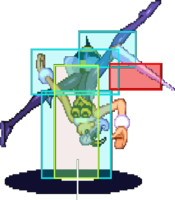
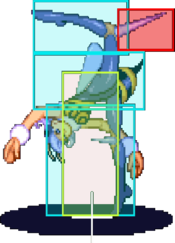
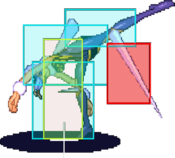
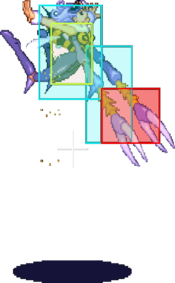
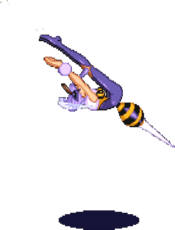
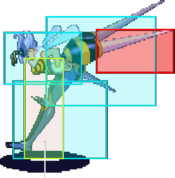
Dives almost vertically.
| Startup | Active | Recovery | Hit Adv. | Block Adv. | Renda Bonus |
|---|---|---|---|---|---|
| 45 | 13 | landing 1 | - | - | N/A |
| Guard | Cancel | Invuln | Red Damage | White Damage | Gauge |
| overhead | no | - | 23 | 6 | H: 21 G: 16 W: 12 |
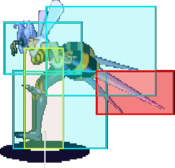
Midrange dive.
| Startup | Active | Recovery | Hit Adv. | Block Adv. | Renda Bonus |
|---|---|---|---|---|---|
| 45 | 22 | landing 1 | - | - | N/A |
| Guard | Cancel | Invuln | Red Damage | White Damage | Gauge |
| overhead | no | - | 25 | 7 | H: 21 G: 16 W: 12 |
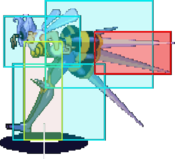
Very far dive.
| Startup | Active | Recovery | Hit Adv. | Block Adv. | Renda Bonus |
|---|---|---|---|---|---|
| 45 | 17 | landing 1 | - | - | N/A |
| Guard | Cancel | Invuln | Red Damage | White Damage | Gauge |
| overhead | no | - | 28 | 8 | H: 0 G: 0 W: 0 |
Slightly shorter range than HK version, but it will poison the opponent on hit. This move would probably be a lot more useful if it had a bit more range or it autotargeted the opponent, but since it has neither it's really not particularly useful. If you somehow manage to hit the opponent on the ground with the QJ bubble and you happen to be at the right range for this, then this would be the best followup since it poisons the opponent allowing for an additional ground-based followup (or even another QJ). But don't expect to be using this often, if at all.
| Startup | Active | Recovery | Hit Adv. | Block Adv. | Renda Bonus |
|---|---|---|---|---|---|
| 35 ~ 45 | 11 | landing 1 | - | - | N/A |
| Guard | Cancel | Invuln | Red Damage | White Damage | Gauge |
| overhead | no | - | 21 | 5 | H: 21 G: 16 W: 12 |
| Startup | Active | Recovery | Hit Adv. | Block Adv. | Renda Bonus |
|---|---|---|---|---|---|
| 35 ~ 45 | 13 | landing 1 | - | - | N/A |
| Guard | Cancel | Invuln | Red Damage | White Damage | Gauge |
| overhead | no | - | 23 | 6 | H: 21 G: 16 W: 12 |
| Startup | Active | Recovery | Hit Adv. | Block Adv. | Renda Bonus |
|---|---|---|---|---|---|
| 35 ~ 45 | 22 | landing 1 | - | - | N/A |
| Guard | Cancel | Invuln | Red Damage | White Damage | Gauge |
| overhead | no | - | 25 | 7 | H: 21 G: 16 W: 12 |
| Startup | Active | Recovery | Hit Adv. | Block Adv. | Renda Bonus |
|---|---|---|---|---|---|
| 35 ~ 45 | 17 | landing 1 | - | - | N/A |
| Guard | Cancel | Invuln | Red Damage | White Damage | Gauge |
| overhead | no | - | 28 | 8 | H: 0 G: 0 W: 0 |
S x P
K,K,K,K,LK
| Startup | Active | Recovery | Hit Adv. | Block Adv. | Renda Bonus |
|---|---|---|---|---|---|
| 12 | 4(4)4 | 10 | 11 | 10 | N/A |
| Guard | Cancel | Invuln | Red Damage | White Damage | Gauge |
| mid | no | - | 8xn | 3xn | H: 9+6xn G: 9+3xn W: 9 |
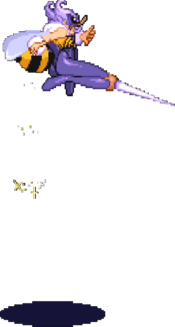
Slow stabs.
| Startup | Active | Recovery | Hit Adv. | Block Adv. | Renda Bonus |
|---|---|---|---|---|---|
| 13 | 3(3)3(3)1 | 10 | 14 | 13 | N/A |
| Guard | Cancel | Invuln | Red Damage | White Damage | Gauge |
| mid | no | - | 8xn | 3xn | H: 9+6xn G: 9+3xn W: 9 |
Mid stabs. Best frame advantage.
| Startup | Active | Recovery | Hit Adv. | Block Adv. | Renda Bonus |
|---|---|---|---|---|---|
| 15 | 2(3)2(3)2(1) | 10 | 12 | 11 | N/A |
| Guard | Cancel | Invuln | Red Damage | White Damage | Gauge |
| mid | no | - | 8xn | 3xn | H: 9+6xn G: 9+3xn W: 9 |
Fastest stabs.
| Startup | Active | Recovery | Hit Adv. | Block Adv. | Renda Bonus |
|---|---|---|---|---|---|
| 12 | 4(4)4 | variable + landing 1 | 11 | 10 | N/A |
| Guard | Cancel | Invuln | Red Damage | White Damage | Gauge |
| mid | no | - | 8xn | 3xn | H: 9+6xn G: 9+3xn W: 9 |
| Startup | Active | Recovery | Hit Adv. | Block Adv. | Renda Bonus |
|---|---|---|---|---|---|
| 13 | 3(3)3(3)1 | variable + landing 1 | 14 | 13 | N/A |
| Guard | Cancel | Invuln | Red Damage | White Damage | Gauge |
| mid | no | - | 8xn | 3xn | H: 9+6xn G: 9+3xn W: 9 |
| Startup | Active | Recovery | Hit Adv. | Block Adv. | Renda Bonus |
|---|---|---|---|---|---|
| 15 | 2(3)2(3)2(1) | variable + landing 1 | 12 | 11 | N/A |
| Guard | Cancel | Invuln | Red Damage | White Damage | Gauge |
| mid | no | - | 8xn | 3xn | H: 9+6xn G: 9+3xn W: 9 |
Catch And Release
236LP
Normal Version
ES Version
Normal
ES
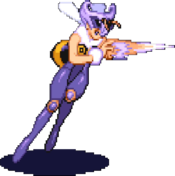
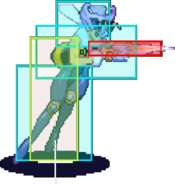
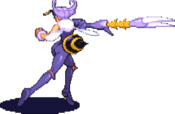
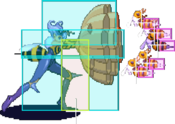
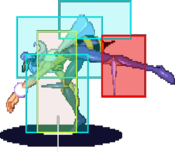
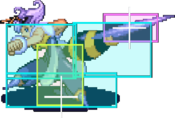
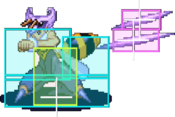
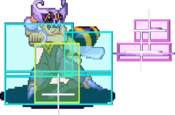
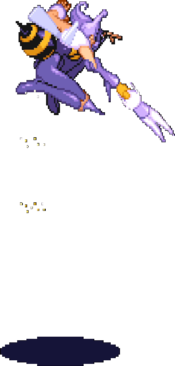
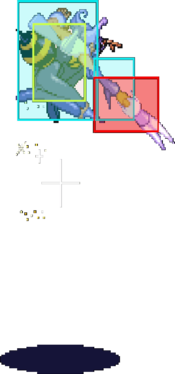
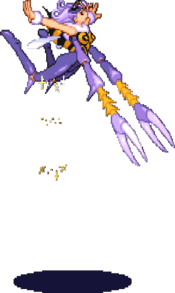
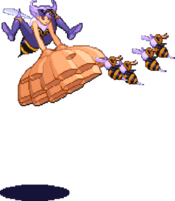
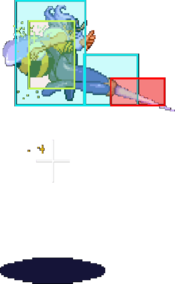
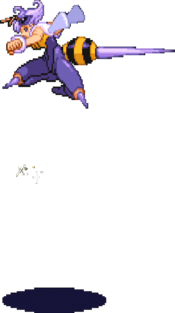
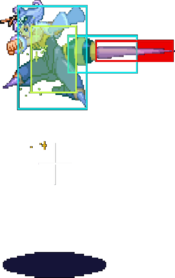
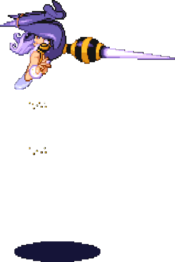
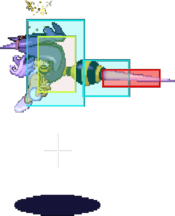
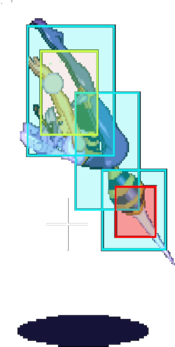
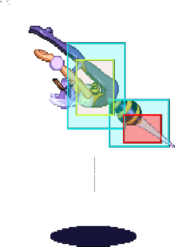
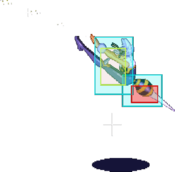
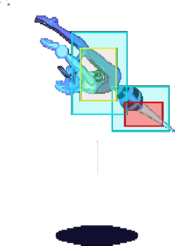
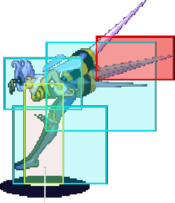
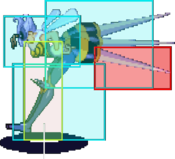
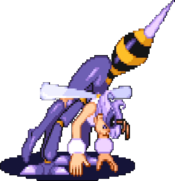
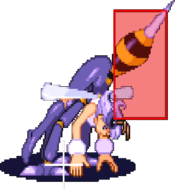
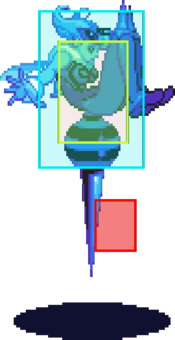
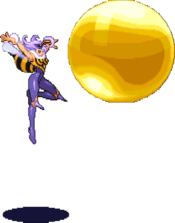
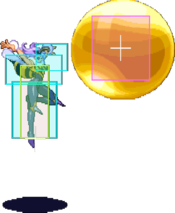
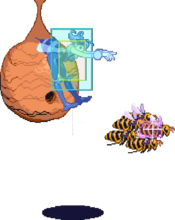
Pronounced "See arr". A blockable airborne rush. If this hits she will grab the opponent. This special has a rather generous amount of active frames and goes over some low attacks and even Felicia's ball roll, and will grab quite a lot of normal moves, beating their hitboxes clean. Despite having some recovery on block it's a fairly safe move, making it not entirely necessary to hitconfirm. Really, because of the outstanding hitbox and good recovery, it's not a bad poking move either, though not something you want to spam all the time since if it fails you lose initiative/pressure. There are scenarios where the ground version will hit, but fail to grab. The air/TK version is more consistent in this respect. Landing Suki: 1F No results Short range, slow speed. No results Mid range, mid speed. No results Far range, fast speed. Best for combos. No results Cocoon's the opponent. This is the best setup up a bubble okizeme since QB recovers extremely fast after the knockdown. Typically one would IAD j.P/j.K, 2LP/2LK xx 41236PP, then immediate lp 623PP on recovery and go for more IAD mixups or anti-air while the opponent is blocking the bubble. If the opponent is hit on the ground by the bubble the best follow up is another C->R. No results No results No results
No resultsGuard Cancel
623K
| Startup | Active | Recovery | Hit Adv. | Block Adv. | Renda Bonus |
|---|---|---|---|---|---|
| 10 | 2(4)14 | 18 | - | -14 | N/A |
| Guard | Cancel | Invuln | Red Damage | White Damage | Gauge |
| mid | no | 1-13 whole body | 12,12 | 4,4 | H: 24 G: 21+3 W: 18 |
The invulnerability window lasts longer than the startup, but due to it's angle it's only ever used when the situation calls for it.
| Startup | Active | Recovery | Hit Adv. | Block Adv. | Renda Bonus |
|---|---|---|---|---|---|
| 10 | 2(4)14 | 18 | - | -14 | N/A |
| Guard | Cancel | Invuln | Red Damage | White Damage | Gauge |
| mid | no | 1-13 whole body | 19,19 | 4,4 | H: 0 G: 0 W: 0 |
Command Throw
632[4]P
| Startup | Active | Recovery | Hit Adv. | Block Adv. | Renda Bonus |
|---|---|---|---|---|---|
| 2 | 4 | 24 | - | - | N/A |
| Guard | Cancel | Invuln | Red Damage | White Damage | Gauge |
| throw | no | 1-20 whole body (on whiff) | 28 | 8 | H: 21 G: 0 W: 12 |
QB's command grab is one of the best in the game. Good bubble setup. It's fully invulnerable, and it's 2F startup makes it so that it almost never whiffs. Either she grabs the opponent or she does MP/HP when she can't grab the opponent. Because of the poorness of HP it's a good idea to use MP instead, because a failed cmd grab resulting in a MP is preferable to an accidental HP.
| Startup | Active | Recovery | Hit Adv. | Block Adv. | Renda Bonus |
|---|---|---|---|---|---|
| 2 | 10 | 27 | - | - | N/A |
| Guard | Cancel | Invuln | Red Damage | White Damage | Gauge |
| throw | no | 1-26 whole body (on whiff) | 10+10+13 | 3+3+4 | H: 0 G: 0 W: 0 |
Pursuits
8P or 8K
| Startup | Active | Recovery | Hit Adv. | Block Adv. | Renda Bonus |
|---|---|---|---|---|---|
| 29 | 8 | landing 1 | - | - | N/A |
| Guard | Cancel | Invuln | Red Damage | White Damage | Gauge |
| mid | no | 1-4 feet | 6 | 6 | H: 24 G: 0 W: 6 |
8PP or 8KK
| Startup | Active | Recovery | Hit Adv. | Block Adv. | Renda Bonus |
|---|---|---|---|---|---|
| 29 | 8 | landing 1 | - | - | N/A |
| Guard | Cancel | Invuln | Red Damage | White Damage | Gauge |
| mid | no | 1-4 feet | 3x5 | 3x5 | H: 0 G: 0 W: 0 |
Ex Moves
623PP
| Startup | Active | Recovery | Hit Adv. | Block Adv. | Renda Bonus |
|---|---|---|---|---|---|
| 34 | 5 bounces, outside of screen | 69 | - | -1 | N/A |
| Guard | Cancel | Invuln | Red Damage | White Damage | Gauge |
| mid | no | - | 30 | 15 | H: 0 G: 0 W: 0 |
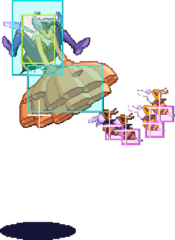
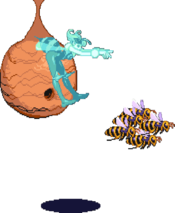
This move will be neutralized if QB is hit during it. It will coat the opponent in jelly (honey/wax) if they are hit on the ground, allowing a follow up. The opponent is considered partially airborne when coated, so any single hit attack will reset them (if it isn't a natural knockdown), if no attack is made they will be knocked down for no additional damage. Because of the one-hit rule, the best followups are her C->R, ES Delta A, or +B EX moves. If the opponent is hit while airborne they will not be coated and simply knocked down instead. This move makes for a great okizeme move, but only in certain situations. A normal C->R and normal throw are not good setups because the opponent can tech forward and punish her. However, her ES C->R and O.M. moves make great setups because she won't be punishable during the bubble startup. Typically once used the QB player will rush the opponent down and attempt to anti-air a chicken blocking opponent, or do IAD mixups against a ground blocking opponent. Stuns grounded opponent on hit (honey/wax), hit followup causes knockdown, airborne hit causes knockdown but does not add stun (no honey/wax on airborne hit), landing suki. ES-Delta A or ES-C>R will fully connect.: 1F
| Startup | Active | Recovery | Hit Adv. | Block Adv. | Renda Bonus |
|---|---|---|---|---|---|
| 34 | 5 bounces, outside of screen | 52 + variable + landing 1 | - | -1 | N/A |
| Guard | Cancel | Invuln | Red Damage | White Damage | Gauge |
| mid | no | - | 30 | 15 | H: 0 G: 0 W: 0 |
412[6]KK
| Startup | Active | Recovery | Hit Adv. | Block Adv. | Renda Bonus |
|---|---|---|---|---|---|
| 39 | out of screen | 82-119 | - | 12 | N/A |
| Guard | Cancel | Invuln | Red Damage | White Damage | Gauge |
| mid | no | - | 2+2x12+11 | (1+1)x4+7 | H: 0 G: 0 W: 0 |
This move is mostly for the sake of novelty, since the opponent will have a unique damage pose when hit with this. Although it does good damage and goes over lows, it's hitbox and startup speed are not particularly great. You'd have to be kind of psychic to land it randomly while midrange, and the only good setup for it is off a QJ that hits on the ground or ES Delta A, so it's almost never used except as a sandbag move or by accident. Landing Suki: 1f.
| Startup | Active | Recovery | Hit Adv. | Block Adv. | Renda Bonus |
|---|---|---|---|---|---|
| 28-39 | out of screen | 71-119 | - | - | N/A |
| Guard | Cancel | Invuln | Red Damage | White Damage | Gauge |
| mid | no | - | 2+2x12+11 | (1+1)x4+7 | H: 0 G: 0 W: 0 |
Dark Force
Flight: I^2 - Same strength P + K:
- (Any Version): Q-Bee flies into the air and is allowed normal flight for the duration. Very short deactivation recovery. while in flight mode, j.hk is special cancel enabled & can be special canceled from a chain.
Colors
Notable Players
Japanese Player Index: http://www21.atwiki.jp/vsplayer/pages/22.html
| Name (English) | Name (Japanese) | Color | Location | Contact | Notes |
|---|---|---|---|---|---|
| Sakamoto | さかもと | HP |
Kanto region | http://twitter.com/sakamoto7691 https://www.youtube.com/channel/UCAu1kW9THjP-lNh3VOc_vnA |
One of the primary T.O.'s of JP-VSAV #01 Q-Bee Tokyo Community Leader. |
| OraOra | おらQ | MP |
Kanto region | http://twitter.com/oraoraqbee | Used to be a GGPO regular under the name PPPPP. |
| Saito | 不能 -> 佐伯 -> サイトー |
KK |
Kanto region | https://note.mu/horibotan/n/n34eaf52098f4 https://twitter.com/hunou |
Rookie champion is now a pro Saito is a popular JP family name |
| SIN | SIN | HP |
Kansai Region | Old-School | |
| Panpiina | パンピーナ | LP |
Kyushu Region | ||
| Gyu-Bee | 牛-Bee | KK |
Kansai Region | ||
| Yankii | ヤンキー | KK |
Retired |
North America
| Name (English) | Name (Japanese) | Color | Location | Contact | Notes |
|---|---|---|---|---|---|
| Hilary | ヒラリー | PP |
Seattle, USA | https://twitter.com/Hilarylifts | One of the Seattle Crew. Absolute weight lifting boss, and a strong Q-Bee player. |
| Sketch | スケッチ | LP |
New York, USA | https://twitter.com/SketchJP | Long time player with outstanding results. Loved Japan, and decided to make a food tour business because of it |
| BushidoBrooklyn | 武士道ブルックリン | LP |
New York, USA | https://twitter.com/BushidoBrooklyn | Recent player that had notable success. He's a regular player at New York events. |
| Yawn | ヤーウン | MP |
Texas, USA | ??? | Fightcade player that has been very successful. Plays with Snuggleguns at their local arcade. |
| N-Bee | エン・ビー | KK |
New York, USA | ??? | Found recent notable success. They are a hacker and they made the super-robust training mode we use today. |
| Moebius | モービアス | LP |
Chicago, USA | https://twitter.com/moebiusqbee | Chicago bee. Too busy grinding on Fightcade to think about improving. |
South America
| Name (English) | Name (Japanese) | Color | Location | Contact | Notes |
|---|---|---|---|---|---|
| Sagamin | サガミン | KK |
Brazil | https://twitter.com/sagaminus | Retired. |
