User:Pythmere/VSAV/Victor
Introduction
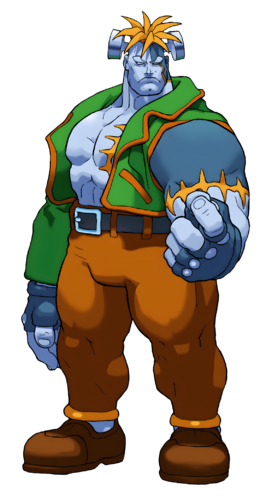
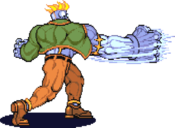
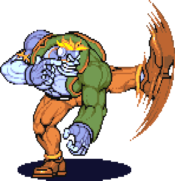
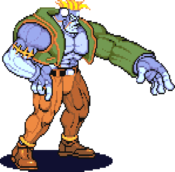
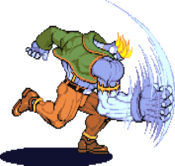
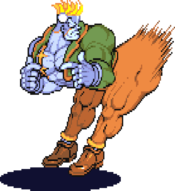
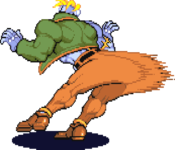
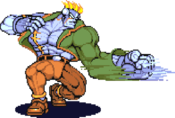
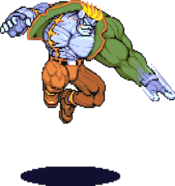
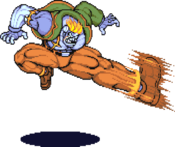
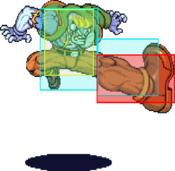
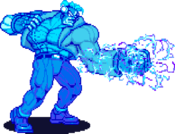
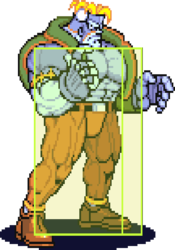
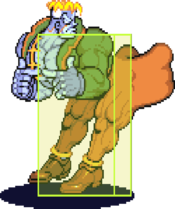
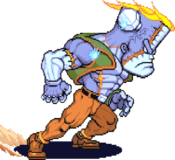
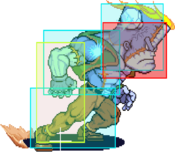
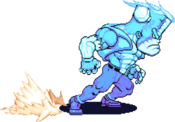
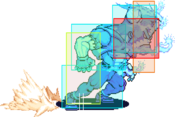
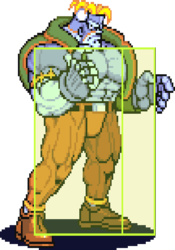
Victor von Gerdenheim (ビクトル), was the creation of a sick scientist Prof. Victor Von Gerdenheim, who lost his life shortly after giving him life. Without having an understanding of life and death, Victor interpreted his deceased creator's unresponsiveness for disapproval. Believing that if he proves himself to be strong that the Professor would accept him, Victor departed the castle to find challengers to test his strength. Upon defeating many Darkstalkers, Victor returned home, but the dead Professor still did not wake up. Instead, the prototype Emily welcomed Victor back. The two lived happily for many years until one night, Emily's ceased functioning. Victor came to believe that if he collected several souls, he would be able to revive Emily. He entered the Majigen to find said souls, but in the end, he sacrificed his body by using all his powers to revive Emily.
Gameplay
Primary Objectives:
- Abuse J.hp to approach
- Abuse command throws when the opponent is conditioned to block or Tech-Hit
- Utilize electric attacks in combos to gain damage & a reset
- Run a blender/vortex on the electric resets to stay on top of the opponent
- Confirm standing opponents to connect ES Lariat combos for big damage + corner advantage
| Strengths | Weaknesses |
|---|---|
|
|
Normal Moves
Standing Normals
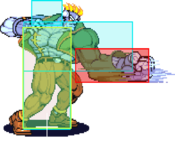
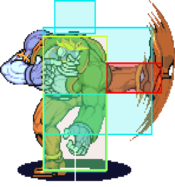
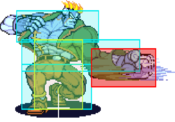
5LP
| Startup | Active | Recovery | Hit Adv. | Block Adv. | Renda Bonus |
|---|---|---|---|---|---|
| 5 | 2 | 15 | 4 | 3 | H: 7 G: 6 |
| Guard | Cancel | Invuln | Red Damage | White Damage | Gauge |
| mid | yes | - | 9 | 4 | H: 6 G: 3 W: 0 |
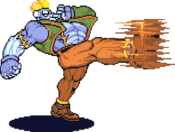
5MP
| Startup | Active | Recovery | Hit Adv. | Block Adv. | Renda Bonus |
|---|---|---|---|---|---|
| 9 | 3 | 21 | 0 | -1 | N/A |
| Guard | Cancel | Invuln | Red Damage | White Damage | Gauge |
| mid | no | - | 18 | 6 | H: 15 G: 9 W: 3 |
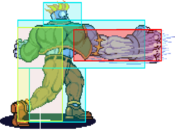
5HP
| Startup | Active | Recovery | Hit Adv. | Block Adv. | Renda Bonus |
|---|---|---|---|---|---|
| 13 | 3 | 27 | 10 | -3 | N/A |
| Guard | Cancel | Invuln | Red Damage | White Damage | Gauge |
| mid | no | - | 23 | 8 | H: 24 G: 15 W: 6 |
5LK
| Startup | Active | Recovery | Hit Adv. | Block Adv. | Renda Bonus |
|---|---|---|---|---|---|
| 6 | 3 | 8 | 8 | 7 | H: 11 G: 7 |
| Guard | Cancel | Invuln | Red Damage | White Damage | Gauge |
| mid | yes | - | 9 | 4 | H: 6 G: 3 W: 0 |
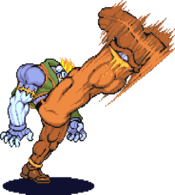
5MK
| Startup | Active | Recovery | Hit Adv. | Block Adv. | Renda Bonus |
|---|---|---|---|---|---|
| 9 | 3 | 21 | 0 | -1 | N/A |
| Guard | Cancel | Invuln | Red Damage | White Damage | Gauge |
| mid | no | - | 19 | 7 | H: 15 G: 9 W: 3 |
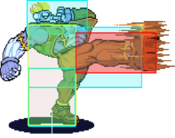
5HK
| Startup | Active | Recovery | Hit Adv. | Block Adv. | Renda Bonus |
|---|---|---|---|---|---|
| 13 | 6 | 32 | 2 | 11 | N/A |
| Guard | Cancel | Invuln | Red Damage | White Damage | Gauge |
| mid | no | - | 23 | 8 | H: 24 G: 15 W: 6 |
Close Normals
CL.5MP
| Startup | Active | Recovery | Hit Adv. | Block Adv. | Renda Bonus |
|---|---|---|---|---|---|
| 9 | 3 | 22 | -4 | -5 | N/A |
| Guard | Cancel | Invuln | Red Damage | White Damage | Gauge |
| mid | no | - | 20 | 7 | H: 15 G: 9 W: 3 |
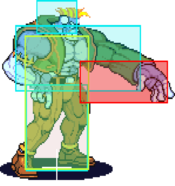
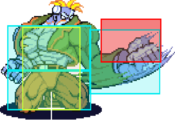
CL.5HP
| Startup | Active | Recovery | Hit Adv. | Block Adv. | Renda Bonus |
|---|---|---|---|---|---|
| 11 | 4 | 33 | 4 | -9 | N/A |
| Guard | Cancel | Invuln | Red Damage | White Damage | Gauge |
| mid | no | - | 25 | 9 | H: 24 G: 15 W: 6 |
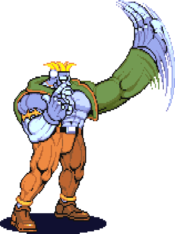
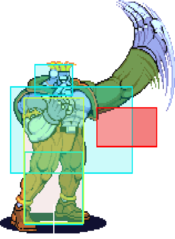
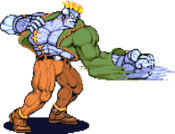
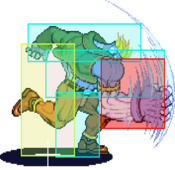
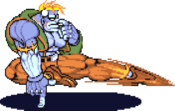
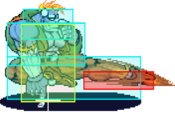
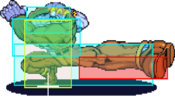
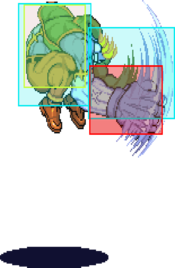
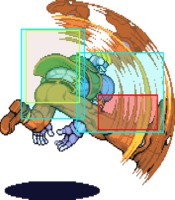
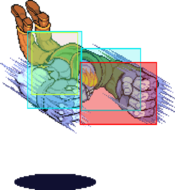
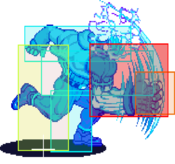
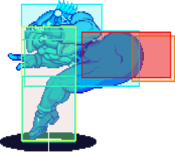
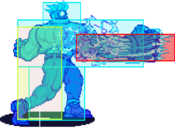
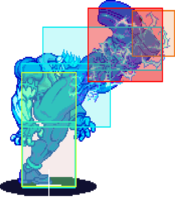
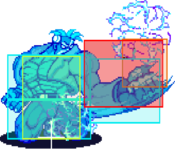
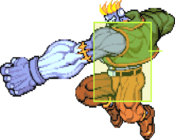
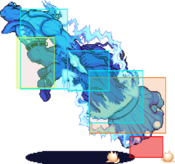
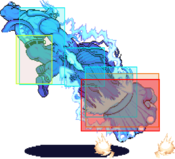
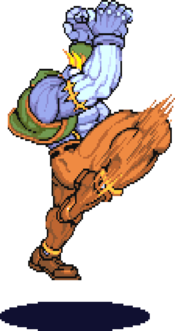
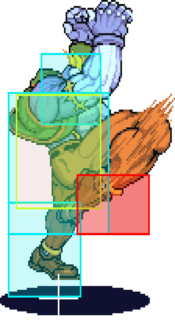
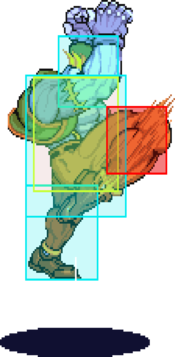
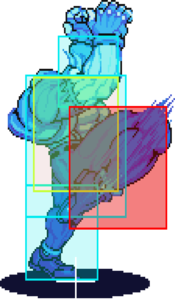
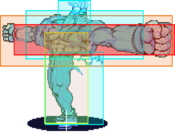
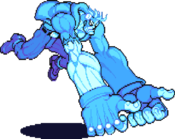
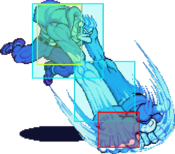
Victor brings his fist down on his opponent's head. Reset on hit.
At 64 pixels away from the opponent this turns into Far 5.HP.CL.5LK
| Startup | Active | Recovery | Hit Adv. | Block Adv. | Renda Bonus |
|---|---|---|---|---|---|
| 5 | 3 | 11 | 5 | 4 | H: 8 G: 7 |
| Guard | Cancel | Invuln | Red Damage | White Damage | Gauge |
| mid | yes | - | 10 | 5 | H: 6 G: 3 W: 0 |
Doesn't have the frame advantage of the far LK. Cancelable.
At 32 pixels away from the opponent this turns into Far 5.LK.CL.5MK
| Startup | Active | Recovery | Hit Adv. | Block Adv. | Renda Bonus |
|---|---|---|---|---|---|
| 11 | 3 | 24 | -3 | -4 | N/A |
| Guard | Cancel | Invuln | Red Damage | White Damage | Gauge |
| mid | no | - | 21 | 8 | H: 15 G: 9 W: 3 |
CL.5HK
| Startup | Active | Recovery | Hit Adv. | Block Adv. | Renda Bonus |
|---|---|---|---|---|---|
| 16 | 3 | 25 | 0 | -1 | N/A |
| Guard | Cancel | Invuln | Red Damage | White Damage | Gauge |
| mid | no | - | 26 | 9 | H: 24 G: 15 W: 6 |
Crouching Normals
2LP
| Startup | Active | Recovery | Hit Adv. | Block Adv. | Renda Bonus |
|---|---|---|---|---|---|
| 5 | 3 | 9 | 7 | 6 | H: 10 G: 9 |
| Guard | Cancel | Invuln | Red Damage | White Damage | Gauge |
| mid | yes | - | 9 | 4 | H: 6 G: 3 W: 0 |
2MP
| Startup | Active | Recovery | Hit Adv. | Block Adv. | Renda Bonus |
|---|---|---|---|---|---|
| 9 | 3 | 19 | 2 | 1 | N/A |
| Guard | Cancel | Invuln | Red Damage | White Damage | Gauge |
| mid | no | - | 18 | 6 | H: 15 G: 9 W: 3 |
2HP
| Startup | Active | Recovery | Hit Adv. | Block Adv. | Renda Bonus |
|---|---|---|---|---|---|
| 11 | 6 | 31 | 4 | -7 | N/A |
| Guard | Cancel | Invuln | Red Damage | White Damage | Gauge |
| mid | no | - | 23,22 | 8,8 | H: 24 G: 15 W: 6 |
2LK
| Startup | Active | Recovery | Hit Adv. | Block Adv. | Renda Bonus |
|---|---|---|---|---|---|
| 6 | 3 | 7 | 9 | 8 | H: 12 G: 11 |
| Guard | Cancel | Invuln | Red Damage | White Damage | Gauge |
| low | yes | - | 8 | 4 | H: 6 G: 3 W: 0 |
2MK
| Startup | Active | Recovery | Hit Adv. | Block Adv. | Renda Bonus |
|---|---|---|---|---|---|
| 10 | 2 | 18 | 3 | 2 | N/A |
| Guard | Cancel | Invuln | Red Damage | White Damage | Gauge |
| low | no | - | 17 | 6 | H: 15 G: 9 W: 3 |
2HK
| Startup | Active | Recovery | Hit Adv. | Block Adv. | Renda Bonus |
|---|---|---|---|---|---|
| 14 | 2 | 24 | - | -2 | N/A |
| Guard | Cancel | Invuln | Red Damage | White Damage | Gauge |
| low | no | - | 20 | 8 | H: 24 G: 15 W: 6 |
Air Normals
J.LP
| Startup | Active | Recovery | Hit Adv. | Block Adv. | Renda Bonus |
|---|---|---|---|---|---|
| 9 | 5 | 1 | - | - | N/A |
| Guard | Cancel | Invuln | Red Damage | White Damage | Gauge |
| high | no | - | 9 | 4 | H: 6 G: 3 W: 0 |
J.MP
| Startup | Active | Recovery | Hit Adv. | Block Adv. | Renda Bonus |
|---|---|---|---|---|---|
| 10 | 5 | 12 | - | - | N/A |
| Guard | Cancel | Invuln | Red Damage | White Damage | Gauge |
| high | no | - | 18 | 6 | H: 15 G: 9 W: 3 |
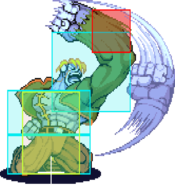
J.HP
| Startup | Active | Recovery | Hit Adv. | Block Adv. | Renda Bonus |
|---|---|---|---|---|---|
| 9 | 5 | 12 | - | - | N/A |
| Guard | Cancel | Invuln | Red Damage | White Damage | Gauge |
| high | no | - | 24 | 8 | H: 24 G: 15 W: 6 |
J.LK
| Startup | Active | Recovery | Hit Adv. | Block Adv. | Renda Bonus |
|---|---|---|---|---|---|
| 6 | 5 | 4 | - | - | N/A |
| Guard | Cancel | Invuln | Red Damage | White Damage | Gauge |
| high | no | - | 9 | 4 | H: 6 G: 3 W: 0 |
J.MK
| Startup | Active | Recovery | Hit Adv. | Block Adv. | Renda Bonus |
|---|---|---|---|---|---|
| 9 | 4 | 15 | - | - | N/A |
| Guard | Cancel | Invuln | Red Damage | White Damage | Gauge |
| high | no | - | 18 | 7 | H: 15 G: 9 W: 3 |
J.HK
| Startup | Active | Recovery | Hit Adv. | Block Adv. | Renda Bonus |
|---|---|---|---|---|---|
| 15 | 2 | 16 | - | - | N/A |
| Guard | Cancel | Invuln | Red Damage | White Damage | Gauge |
| high | no | - | 22 | 8 | H: 24 G: 15 W: 6 |
9J.HP
| Startup | Active | Recovery | Hit Adv. | Block Adv. | Renda Bonus |
|---|---|---|---|---|---|
| 12 | 6 | 22 | - | - | N/A |
| Guard | Cancel | Invuln | Red Damage | White Damage | Gauge |
| high | no | - | 20 | 7 | H: 24 G: 15 W: 6 |
Electric Normals
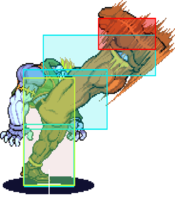
CL.5[MP]
| Startup | Active | Recovery | Hit Adv. | Block Adv. | Renda Bonus |
|---|---|---|---|---|---|
| 13 | 8 | 19 | 7 | -7 | N/A |
| Guard | Cancel | Invuln | Red Damage | White Damage | Gauge |
| mid | no | - | 17 | 6 | H: 15 G: 9 W: 3 |
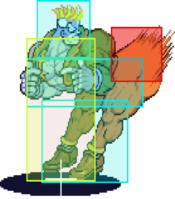
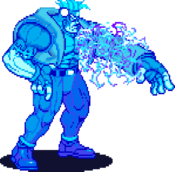
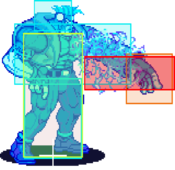
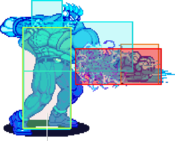
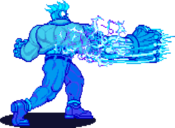
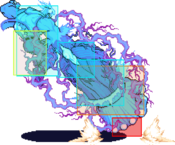
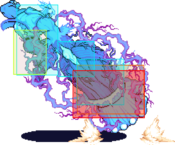
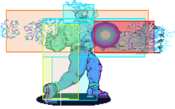
Since electric moves have no pushback, you can do a [2.LK > Close Electric 5.MP] and then link off of it as a combo extension. Great normal if you can consistently link off of this.
At 64 pixels away from the opponent this turns into Far Electric 5.MPCL.5[HP]
| Startup | Active | Recovery | Hit Adv. | Block Adv. | Renda Bonus |
|---|---|---|---|---|---|
| 15 | 8 | 33 | 43 | -9 | N/A |
| Guard | Cancel | Invuln | Red Damage | White Damage | Gauge |
| mid | no | - | 21 | 8 | H: 24 G: 15 W: 6 |
CL.5[MK]
| Startup | Active | Recovery | Hit Adv. | Block Adv. | Renda Bonus |
|---|---|---|---|---|---|
| 13 | 12 | 16 | 6 | -8 | N/A |
| Guard | Cancel | Invuln | Red Damage | White Damage | Gauge |
| mid | no | - | 17 | 6 | H: 15 G: 9 W: 3 |
CL.5[HK]
| Startup | Active | Recovery | Hit Adv. | Block Adv. | Renda Bonus |
|---|---|---|---|---|---|
| 21 | 3 | 29 | 47 | -5 | N/A |
| Guard | Cancel | Invuln | Red Damage | White Damage | Gauge |
| mid | no | - | 21 | 8 | H: 24 G: 15 W: 6 |
5[MP]
| Startup | Active | Recovery | Hit Adv. | Block Adv. | Renda Bonus |
|---|---|---|---|---|---|
| 8 | 5 | 31 | 3 | -11 | N/A |
| Guard | Cancel | Invuln | Red Damage | White Damage | Gauge |
| mid | no | - | 15 | 5 | H: 15 G: 9 W: 3 |
5[HP]
| Startup | Active | Recovery | Hit Adv. | Block Adv. | Renda Bonus |
|---|---|---|---|---|---|
| 16 | 10 | 35 | 41 | -11 | N/A |
| Guard | Cancel | Invuln | Red Damage | White Damage | Gauge |
| mid | no | - | 19 | 7 | H: 24 G: 15 W: 6 |
5[MK]
| Startup | Active | Recovery | Hit Adv. | Block Adv. | Renda Bonus |
|---|---|---|---|---|---|
| 10 | 3 | 33 | 1 | -13 | N/A |
| Guard | Cancel | Invuln | Red Damage | White Damage | Gauge |
| mid | no | - | 15 | 5 | H: 15 G: 9 W: 3 |
5[HK]
| Startup | Active | Recovery | Hit Adv. | Block Adv. | Renda Bonus |
|---|---|---|---|---|---|
| 18 | 10 | 36 | 35 | -17 | N/A |
| Guard | Cancel | Invuln | Red Damage | White Damage | Gauge |
| mid | no | - | 19 | 7 | H: 24 G: 15 W: 6 |
2[MP]
| Startup | Active | Recovery | Hit Adv. | Block Adv. | Renda Bonus |
|---|---|---|---|---|---|
| 8 | 5 | 29 | 5 | -9 | N/A |
| Guard | Cancel | Invuln | Red Damage | White Damage | Gauge |
| mid | no | - | 15 | 5 | H: 15 G: 9 W: 3 |
2[HP]
| Startup | Active | Recovery | Hit Adv. | Block Adv. | Renda Bonus |
|---|---|---|---|---|---|
| 17 | 13 | 27 | 46 | -5 | N/A |
| Guard | Cancel | Invuln | Red Damage | White Damage | Gauge |
| mid | no | - | 18 | 7 | H: 24 G: 15 W: 6 |
2[MK]
| Startup | Active | Recovery | Hit Adv. | Block Adv. | Renda Bonus |
|---|---|---|---|---|---|
| 9 | 3 | 26 | 8 | -6 | N/A |
| Guard | Cancel | Invuln | Red Damage | White Damage | Gauge |
| mid | no | - | 15 | 5 | H: 15 G: 9 W: 3 |
2[HK]
| Startup | Active | Recovery | Hit Adv. | Block Adv. | Renda Bonus |
|---|---|---|---|---|---|
| 14 | 4 | 36 | - | -16 | N/A |
| Guard | Cancel | Invuln | Red Damage | White Damage | Gauge |
| mid | no | - | 18 | 7 | H: 24 G: 15 W: 6 |
Normal Throws
6MP or 4MP
| Startup | Active | Recovery | Hit Adv. | Block Adv. | Renda Bonus |
|---|---|---|---|---|---|
| 1 | - | 254 | 25 | - | N/A |
| Guard | Cancel | Invuln | Red Damage | White Damage | Gauge |
| throw | no | 1-229 whole body | 4x(3~10) (2x(3~10)) | 4 (2) | H: 9 G: 0 W: 0 |
6HP or 4HP
| Startup | Active | Recovery | Hit Adv. | Block Adv. | Renda Bonus |
|---|---|---|---|---|---|
| 1 | - | 250 | - | - | N/A |
| Guard | Cancel | Invuln | Red Damage | White Damage | Gauge |
| throw | no | 1-225 whole body | 4x(3~10) (2x(3~10)) | 4 (2) | H: 9 G: 0 W: 0 |
6MP or 4MP~28P
| Startup | Active | Recovery | Hit Adv. | Block Adv. | Renda Bonus |
|---|---|---|---|---|---|
| 1 | - | 143-152 | - | - | N/A |
| Guard | Cancel | Invuln | Red Damage | White Damage | Gauge |
| throw | no | 1-101~110 whole body | 26 (26) | 8 (8) | H: 12 G: 0 W: 0 |
6K or 4K
| Startup | Active | Recovery | Hit Adv. | Block Adv. | Renda Bonus |
|---|---|---|---|---|---|
| 1 | - | 56 | - | - | N/A |
| Guard | Cancel | Invuln | Red Damage | White Damage | Gauge |
| throw | no | 1-42 whole body | 25 (6) | 8 (2) | H: 9 G: 0 W: 0 |
J.6P or J.4P
| Startup | Active | Recovery | Hit Adv. | Block Adv. | Renda Bonus |
|---|---|---|---|---|---|
| 1 | - | 37 + 18 + landing 1 | - | - | N/A |
| Guard | Cancel | Invuln | Red Damage | White Damage | Gauge |
| throw | no | 1-37 whole body | 23 | 8 | H: 9 G: 0 W: 0 |
Command Movement
2KKK
| Startup | Active | Recovery | Hit Adv. | Block Adv. | Renda Bonus |
|---|---|---|---|---|---|
| 0 | 11 | 33 | - | - | N/A |
| Guard | Cancel | Invuln | Red Damage | White Damage | Gauge |
| - | no | 1-11 feet | - | - | H: 0 G: 0 W: 0 |
Special Moves
Giga Forehead
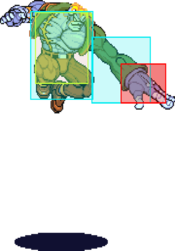
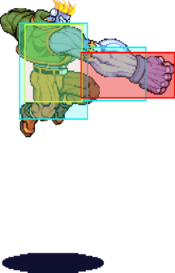
[4],6LP
| Startup | Active | Recovery | Hit Adv. | Block Adv. | Renda Bonus |
|---|---|---|---|---|---|
| 15 | 6 | 37 | - | -19 | N/A |
| Guard | Cancel | Invuln | Red Damage | White Damage | Gauge |
| mid | no | 1-12 upper body | 23 | 5 | H: 24 G: 21 W: 18 |
[4],6MP
| Startup | Active | Recovery | Hit Adv. | Block Adv. | Renda Bonus |
|---|---|---|---|---|---|
| 15 | 10 | 42 | - | -28 | N/A |
| Guard | Cancel | Invuln | Red Damage | White Damage | Gauge |
| mid | no | 1-12 upper body | 25 | 6 | H: 24 G: 21 W: 18 |
[4],6HP
| Startup | Active | Recovery | Hit Adv. | Block Adv. | Renda Bonus |
|---|---|---|---|---|---|
| 15 | 14 | 44 | - | -34 | N/A |
| Guard | Cancel | Invuln | Red Damage | White Damage | Gauge |
| mid | no | 1-12 upper body | 27 | 7 | H: 24 G: 21 W: 18 |
[4],6PP
| Startup | Active | Recovery | Hit Adv. | Block Adv. | Renda Bonus |
|---|---|---|---|---|---|
| 15 | 8,4,4 | 40 | - | -24 | N/A |
| Guard | Cancel | Invuln | Red Damage | White Damage | Gauge |
| mid | no | 1-12 upper body | 15x3 | 4x3 | H: 0 G: 0 W: 0 |
Giga Stake
[2],8LP
| Startup | Active | Recovery | Hit Adv. | Block Adv. | Renda Bonus |
|---|---|---|---|---|---|
| 32 | 1,5 | 45 | - | -26 | N/A |
| Guard | Cancel | Invuln | Red Damage | White Damage | Gauge |
| high | no | 1-5 | 26 | 6 | H: 32 G: 27 W: 22 |
[2],8MP
| Startup | Active | Recovery | Hit Adv. | Block Adv. | Renda Bonus |
|---|---|---|---|---|---|
| 35 | 1,5 | 45 | - | -26 | N/A |
| Guard | Cancel | Invuln | Red Damage | White Damage | Gauge |
| high | no | 1-5 | 28 | 7 | H: 32 G: 27 W: 22 |
[2],8HP
| Startup | Active | Recovery | Hit Adv. | Block Adv. | Renda Bonus |
|---|---|---|---|---|---|
| 37 | 1,5 | 45 | - | -26 | N/A |
| Guard | Cancel | Invuln | Red Damage | White Damage | Gauge |
| high | no | 1-5 | 30 | 8 | H: 32 G: 27 W: 22 |
[2],8PP
| Startup | Active | Recovery | Hit Adv. | Block Adv. | Renda Bonus |
|---|---|---|---|---|---|
| 39 | 1,1,1,2,1,2 | 45 | - | -23 | N/A |
| Guard | Cancel | Invuln | Red Damage | White Damage | Gauge |
| high | no | 1-5 | 16x3 | 5x3 | H: 0 G: 0 W: 0 |
Giga Burn
623LK
| Startup | Active | Recovery | Hit Adv. | Block Adv. | Renda Bonus |
|---|---|---|---|---|---|
| 10 | 8 | 20 | - | -4 | N/A |
| Guard | Cancel | Invuln | Red Damage | White Damage | Gauge |
| mid | no | - | 22,18 | 5,5 | H: 24 G: 21 W: 18 |
623MK
| Startup | Active | Recovery | Hit Adv. | Block Adv. | Renda Bonus |
|---|---|---|---|---|---|
| 10 | 8 | 20 | - | -4 | N/A |
| Guard | Cancel | Invuln | Red Damage | White Damage | Gauge |
| mid | no | - | 24,19 | 6,5 | H: 24 G: 21 W: 18 |
623HK
| Startup | Active | Recovery | Hit Adv. | Block Adv. | Renda Bonus |
|---|---|---|---|---|---|
| 10 | 8 | 24 | - | -8 | N/A |
| Guard | Cancel | Invuln | Red Damage | White Damage | Gauge |
| mid | no | - | 26,20 | 7,5 | H: 24 G: 21 W: 18 |
623KK
| Startup | Active | Recovery | Hit Adv. | Block Adv. | Renda Bonus |
|---|---|---|---|---|---|
| 13 | 3,3,3 | 20 | - | -2 | N/A |
| Guard | Cancel | Invuln | Red Damage | White Damage | Gauge |
| mid | no | - | 14x3 | 4x3 | H: 0 G: 0 W: 0 |
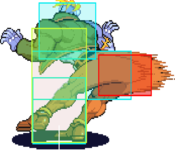
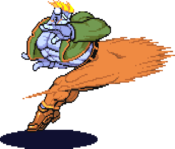
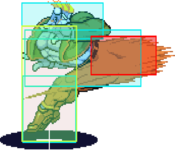
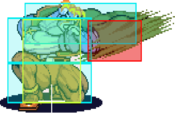
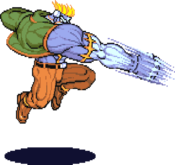
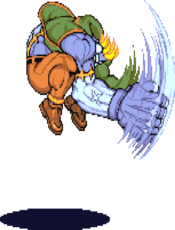
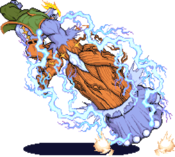
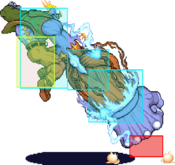
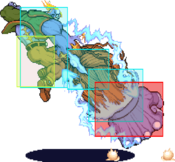
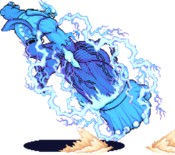
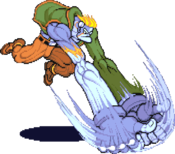
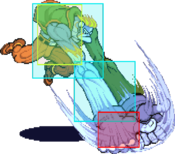
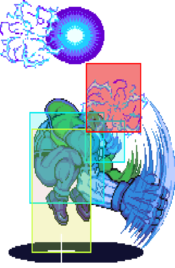
Fairly quick move compared to Victor's normals, has moderate recovery time if it misses. One of Victor's more useful special move. Anti-air and guard cancels are obvious uses, but since this move is fast you can use it to shorten gaps after a knockdown while building meter. At close range you can use it to beat out some pokes and jumping attempts. It's also a very useful move to start guessing game, for example getting it blocked in the corner open a tricky 50/50 game where you either go for a throw or beat the jump-out attempt with an electrified normal. Whiffing it on crouching opponent is also useful against players with slow reaction, you can throw them very easily when it recovers.
(ES Version): Deals three hits. You can combo a HP Gyro Crush after this, timing is strict though.Guard Cancels
623LK
| Startup | Active | Recovery | Hit Adv. | Block Adv. | Renda Bonus |
|---|---|---|---|---|---|
| 10 | 8 | 20 | - | -4 | N/A |
| Guard | Cancel | Invuln | Red Damage | White Damage | Gauge |
| mid | no | - | 10,8 | 2,2 | H: 24 G: 21 W: 18 |
623MK
| Startup | Active | Recovery | Hit Adv. | Block Adv. | Renda Bonus |
|---|---|---|---|---|---|
| 10 | 8 | 20 | - | -4 | N/A |
| Guard | Cancel | Invuln | Red Damage | White Damage | Gauge |
| mid | no | - | 12,9 | 3,2 | H: 24 G: 21 W: 18 |
623HK
| Startup | Active | Recovery | Hit Adv. | Block Adv. | Renda Bonus |
|---|---|---|---|---|---|
| 10 | 8 | 24 | - | -8 | N/A |
| Guard | Cancel | Invuln | Red Damage | White Damage | Gauge |
| mid | no | - | 12,9 | 3,2 | H: 24 G: 21 W: 18 |
623KK
| Startup | Active | Recovery | Hit Adv. | Block Adv. | Renda Bonus |
|---|---|---|---|---|---|
| 13 | 3,3,3 | 20 | - | -2 | N/A |
| Guard | Cancel | Invuln | Red Damage | White Damage | Gauge |
| mid | no | - | 7x3 | 2x3 | H: 0 G: 0 W: 0 |
Fairly quick move compared to Victor's normals, has moderate recovery time if it misses. One of Victor's more useful special move. Anti-air and guard cancels are obvious uses, but since this move is fast you can use it to shorten gaps after a knockdown while building meter. At close range you can use it to beat out some pokes and jumping attempts. It's also a very useful move to start guessing game, for example getting it blocked in the corner open a tricky 50/50 game where you either go for a throw or beat the jump-out attempt with an electrified normal. Whiffing it on crouching opponent is also useful against players with slow reaction, you can throw them very easily when it recovers.
(ES Version): Deals three hits. You can combo a HP Gyro Crush after this, timing is strict though.Gyro Crush
214LP
| Startup | Active | Recovery | Hit Adv. | Block Adv. | Renda Bonus |
|---|---|---|---|---|---|
| 9 | 4 | 24 | -3 | -4 | N/A |
| Guard | Cancel | Invuln | Red Damage | White Damage | Gauge |
| mid | no | - | 20 | 5 | H: 17 G: 14 W: 12 |
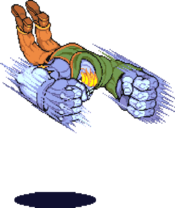
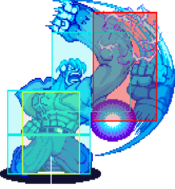
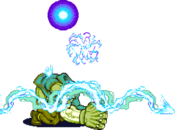
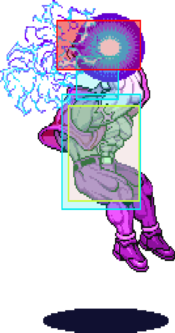
The Gyro Crush will cancel out projectiles it comes into contact with. Use L and R to control Victor's position during it. Be wary, low attacks will go under this and hit you.
(LP Version): You can throw this out randomly at almost no cost to you. It will stop some jump-ins and allow you to effectively walk through fireball spams.214MP
| Startup | Active | Recovery | Hit Adv. | Block Adv. | Renda Bonus |
|---|---|---|---|---|---|
| 9 | 4(4)4(4)4 | 24 | -3 | -4 | N/A |
| Guard | Cancel | Invuln | Red Damage | White Damage | Gauge |
| mid | no | - | 9x3 | 2x3 | H: 17+5x2 G: 14+2x2 W: 12 |
214HP
| Startup | Active | Recovery | Hit Adv. | Block Adv. | Renda Bonus |
|---|---|---|---|---|---|
| 9 | 4(4)4(4)4(4)4(4)4 | 24 | -11 | -12 | N/A |
| Guard | Cancel | Invuln | Red Damage | White Damage | Gauge |
| mid | no | - | 10x5 | 3x5 | H: 17+5x4 G: 14+2x4 W: 12 |
The Gyro Crush will cancel out projectiles it comes into contact with. Use L and R to control Victor's position during it. Be wary, low attacks will go under this and hit you.
(HP Version): On block you can maneuver yourself out of range of most punishes, deals a good amount of chip damage and can be used to finish people off.214PP
| Startup | Active | Recovery | Hit Adv. | Block Adv. | Renda Bonus |
|---|---|---|---|---|---|
| 10 | 4(4)4(4)4(8)4 | 20 | - | 3 | N/A |
| Guard | Cancel | Invuln | Red Damage | White Damage | Gauge |
| mid | no | - | 10x3+20 | 2x3+4 | H: 0 G: 0 W: 0 |
The Gyro Crush will cancel out projectiles it comes into contact with. Use L and R to control Victor's position during it. Be wary, low attacks will go under this and hit you.
(ES Version): You can follow up this move with a HP Gyro Crush or another ES Gyro Crush for more damage. Timing is strict.Pursuits
8P or 8K
| Startup | Active | Recovery | Hit Adv. | Block Adv. | Renda Bonus |
|---|---|---|---|---|---|
| 40 | 2 | 32 + landing 1 | - | - | N/A |
| Guard | Cancel | Invuln | Red Damage | White Damage | Gauge |
| mid | no | 1-4 feet | 9 | 9 | H: 24 G: - W: 6 |
8PP or 8KK
| Startup | Active | Recovery | Hit Adv. | Block Adv. | Renda Bonus |
|---|---|---|---|---|---|
| 40 | 2(11)2 | 44 + landing 1 | - | - | N/A |
| Guard | Cancel | Invuln | Red Damage | White Damage | Gauge |
| mid | no | 1-4 feet | 4+4+12 | 4+4+10 | H: 0 G: 0 W: 0 |
Command Throws
236LK
| Startup | Active | Recovery | Hit Adv. | Block Adv. | Renda Bonus |
|---|---|---|---|---|---|
| 1 | 1 | 45 | - | - | N/A |
| Guard | Cancel | Invuln | Red Damage | White Damage | Gauge |
| throw | no | - | 4x(3~13) | 2x(3~13) | H: 12 G: 0 W: 21 |
Ex Moves
[2],8KK
| Startup | Active | Recovery | Hit Adv. | Block Adv. | Renda Bonus |
|---|---|---|---|---|---|
| 27 | 16 | 51 | - | -31 | N/A |
| Guard | Cancel | Invuln | Red Damage | White Damage | Gauge |
| mid | no | 1-7 feet, 35-38 feet | 17 | 4 | H: 0 G: 0 W: 0 |
720+KK
| Startup | Active | Recovery | Hit Adv. | Block Adv. | Renda Bonus |
|---|---|---|---|---|---|
| 1 | 1 | 45 | - | - | N/A |
| Guard | Cancel | Invuln | Red Damage | White Damage | Gauge |
| throw | no | - | 7x6+12 | 2x7 | H: 0 G: 0 W: 0 |
Dark Force
Great Gerdenheim - Same strength P + K:
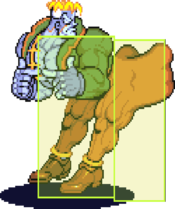
- Victor gains increased armor and speed.
- (L/M Version):
Victor loses his standing LP, MP, and HP moves which become untechable command grabs.
- (H Version):
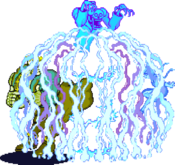
Victor's standing normals become their close range version and always come packed with electricity.
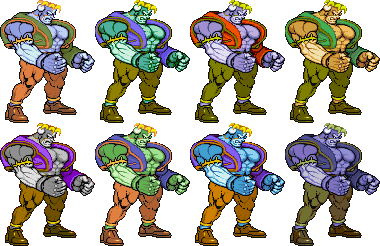
Colors
Notable Players
Japan
Japanese Player Index: http://www21.atwiki.jp/vsplayer/pages/26.html
| Name (English) | Name (Japanese) | Color | Location | Contact | Notes |
|---|---|---|---|---|---|
| Oboro | オボロ | KK |
Kansai | http://twitter.com/OBOROCK | Mega Offense |
| Kame | カメ (Sometimes 亀) | HK |
Kanto | http://twitter.com/kame_victor | Mega Defense |
| Oshikiri | 押切 | MP |
Kanto | Author of the manga "Hi Score Girl". | |
| Tate | タテ | PP |
North America
| Name (English) | Name (Japanese) | Color | Location | Contact | Notes |
|---|---|---|---|---|---|
| Amerikame | アメリカメ | HP |
Illinois, USA | https://twitter.com/AmeriKameFGC | Recent player that has found success. Has made many recent tutorials to assist newer players. |
