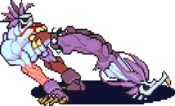
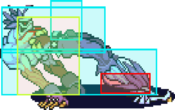
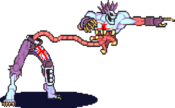
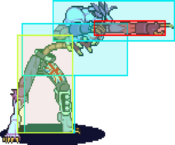
User:Pythmere/VSAV/Zabel
Introduction
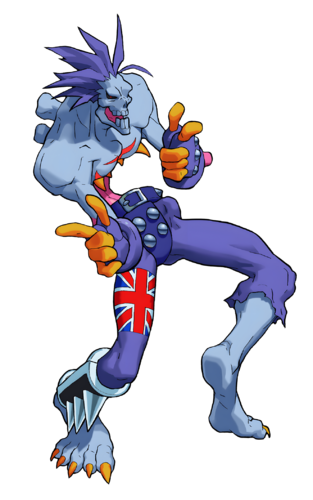
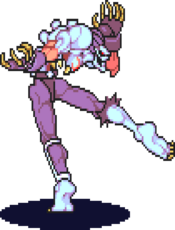
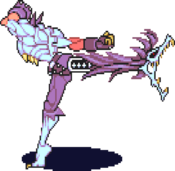
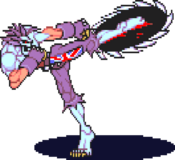
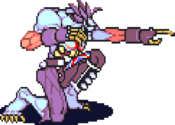
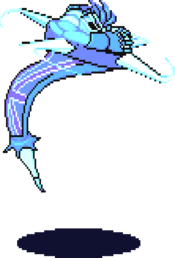
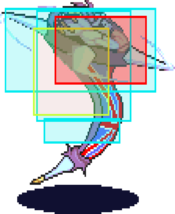
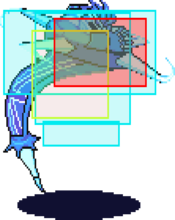
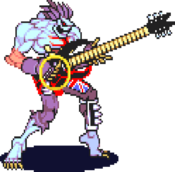
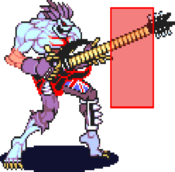
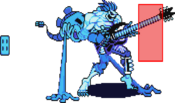
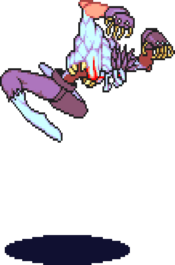
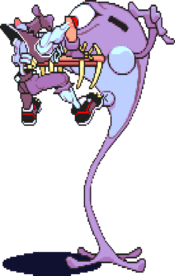
Zabel Zarock (ザベル), the Undead Rockstar
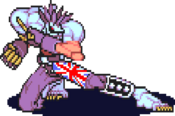
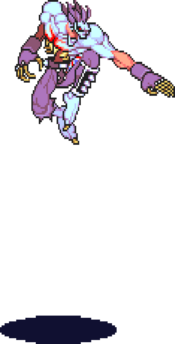
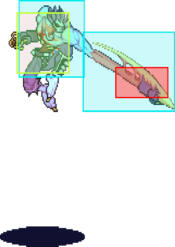
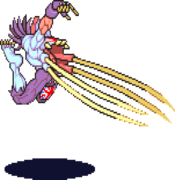
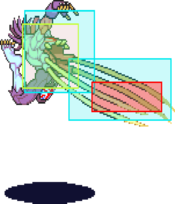
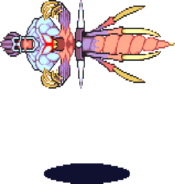
A charismatic young rock star who engaged in ritualistic sacrifice during one of his concerts, killing himself & 100 of his fans. Taking notice of this, Emperor Ozom restored Zabel as an undead. Zabel was told that if he sought more power, he would have to defeat Darkstalkers and he became Ozom's personal assassin. Although Zabel appeared agreeable, his true intentions were to destroy Ozom and take his place as the new emperor.
Zabel, or sometimes called Bell, is the undisputed best-in-class character in VSAV. Although he is extremely powerful & effective, he takes a lot of work as his execution requirements are quick & timely. Zabel is recommended for players who are willing to put in the grind to reap the advantages of this glass-cannon extraordinaire.
Gameplay
Primary objective:
- Dominate mid-range with his best-in-class normals like 9MP, 9HK, 6MP, etc.
- Confirm air-resets & select anti-airs into UB 9LK setups
- Chase ground rolls for insane offensive mixups
- On the inside, advance with IAD offense or dashing frame-traps
- Combo with Renda LK into super for amazing burst damage & knockdown
- Use Hell Gate to escape disadvantageous interactions
| Strengths | Weaknesses |
|---|---|
|
|
Movement
Walk: Zabel's walk speed is about average.
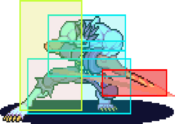
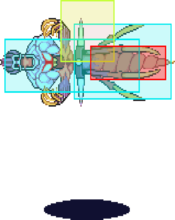
Crouch: Zabel can crouch forward and backward by holding 3 or 1. Crouching has higher speed than walking. Crawling seems to eliminate Zabel's landing recovery from jumps, which is moderately useful.
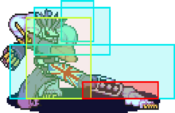
Dash: Zabel crouches forward at higher speed. While dashing pressing any attack button will make Zabel perform the crouching version of the attack with some added momentum. This attack loses its ability to cancel and chain though. The dash can also be canceled by pressing 4. When the dash ends Zabel will stand up for some frames before he can crouch back again.
Jump: Zabel's jump distance is rather short.
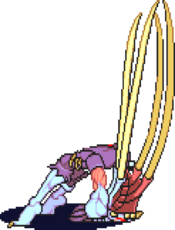
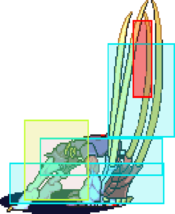
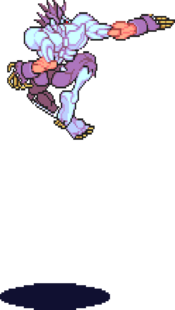
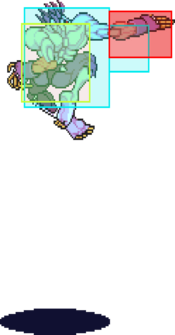
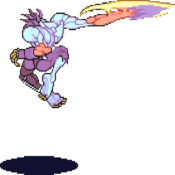
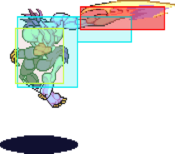
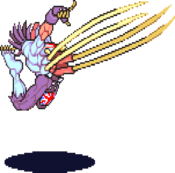
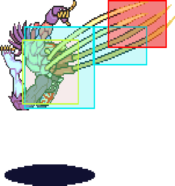
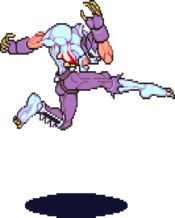
Air dash: Pressing 44 or 66 in the air will make Zabel air dash. Pressing 4 or any attack button during the air dash will make Zabel fall down while performing the attack. Zabel can't airblock or chain during the air dash. If Zabel air dashes backward then his air 2K moves will also moves him backwards. The motion for an instant air dash (IAD) is 956. If done quickly enough Zabel will dash very close to the ground. Then you can cancel the IAD into another normal to make an air attack (must be blocked high) very close to the ground. This is a huge part of Zabel's pressure/mixup game, it helps him cover grounds quickly and makes blocking his attack strings incredibly difficult. Last note, IADs are obviously anti-low but can also hover above some standing moves, even when the IAD is done as low as possible (Aulbath's far stand HK comes to mind).
Normal Moves
Standing Normals
5LP
| Startup | Active | Recovery | Hit Adv. | Block Adv. | Renda Bonus |
|---|---|---|---|---|---|
| 5 | 3 | 10 | 3 | 2 | H: 6 G: 5 |
| Guard | Cancel | Invuln | Red Damage | White Damage | Gauge |
| mid | yes | - | 8 | 4 | H: 6 G: 3 W: 0 |
A decent s.LP. It has a about 3 uses. One being to anti-air your opponents IADs and overheads, which is very dependent on positioning otherwise it will fail. Another use is to guard break opponents in the corner after forcing them to chicken block. The main benefit of using this normal to anti-air is that while they are being air reset, you have plenty of time to instant air-dash and attempt a j.LK unblockable or a j2.HP overhead for a mix-up.
The final use is to simply use it in pressure strings to attempt to catch jumpers. It will hit most crouching characters, while whiffing on crouching: Bulleta, Gallon, Lilith, Morrigan, and Q-Bee.5MP
| Startup | Active | Recovery | Hit Adv. | Block Adv. | Renda Bonus |
|---|---|---|---|---|---|
| 6 | 3 | 19 | -1 | -2 | N/A |
| Guard | Cancel | Invuln | Red Damage | White Damage | Gauge |
| mid | yes | - | 17 | 6 | H: 15 G: 9 W: 3 |
This s.MP isn't the most obvious normal to use at times, but it still has plenty of uses at advanced levels.
Its Zabel's most damaging special cancelable normal, though canceling it from max range into Evil Scream does not consistently combo.
Sometimes I use it to swipe someone out of the air, as no other normals of his reach quite that height in so few frames. Using it as an anti-air on someone intending to jump in at you and attack will typically fail, so its more useful when someone does something like a badly spaced jump over you.
This normal option selects from his command throw and normal throw attempts. If you mess up the throw timing or distance, it is much safer on block and whiff than s.HP.
Using it in pressure strings to catch jumpers works sometimes. You should be careful though as this move will whiff on crouching Gallon and Q-bee.5HP
| Startup | Active | Recovery | Hit Adv. | Block Adv. | Renda Bonus |
|---|---|---|---|---|---|
| 7 | 2(5)5 | 24 | -4 | -5 | N/A |
| Guard | Cancel | Invuln | Red Damage | White Damage | Gauge |
| mid | no | - | 10+13 | 3+4 | H: 15+9 G: 10+4 W: 6 |
硬直差の範囲(1段目) H:-11~-10 G:-12~-11 硬直差の範囲(2段目) H:-4~0 G:-5~-1
※2段目の攻撃判定は複数回発生するが1ヒットのみ5LK
| Startup | Active | Recovery | Hit Adv. | Block Adv. | Renda Bonus |
|---|---|---|---|---|---|
| 5 | 3 | 9 | 4 | 3 | H: 7 G: 6 |
| Guard | Cancel | Invuln | Red Damage | White Damage | Gauge |
| mid | yes | - | 7 | 3 | H: 6 G: 3 W: 0 |
This s.LK's only real use is to assist in combos to Death Voltage and Evil Scream.
It has a bit more range than a c.LK, so in situations where [c.LK > c.LK] will whiff, [c.LK > s.LK] may hit.
Naturally you'll end your block string on this move often when attempting to hit confirm into super. From a block position this move has very good frame advantage, especially with the renda bonus(+1 less than c.LK). Using this advantage to further your pressure is very important to Zabel's game-plan.5MK
| Startup | Active | Recovery | Hit Adv. | Block Adv. | Renda Bonus |
|---|---|---|---|---|---|
| 7 | 3 | 19 | -1 | -2 | N/A |
| Guard | Cancel | Invuln | Red Damage | White Damage | Gauge |
| mid | yes | - | 16 | 6 | H: 15 G: 9 W: 3 |
Not a lot of use from this s.MK, mostly used as a tool to special cancel from at a distance.
While it does not have the same range as s.MP, it more consistently combos at a distance into Evil Scream. I personally like using it after hitting [instant air-dash j.HK >> s.MK xx Evil Scream].5HK
| Startup | Active | Recovery | Hit Adv. | Block Adv. | Renda Bonus |
|---|---|---|---|---|---|
| 10 | 6,10 | 21 | -6 | -7 | N/A |
| Guard | Cancel | Invuln | Red Damage | White Damage | Gauge |
| mid | no | - | 9+9 | 3+3 | H: 15+9 G: 10+4 W: 6 |
硬直差の範囲(1段目) H:-12~-7 G:-13~-8
硬直差の範囲(2段目) H:-6~+3 G:-7~+2Crouching Normals
2LP
| Startup | Active | Recovery | Hit Adv. | Block Adv. | Renda Bonus |
|---|---|---|---|---|---|
| 5 | 3 | 7 | 6 | 5 | H: 9 G: 8 |
| Guard | Cancel | Invuln | Red Damage | White Damage | Gauge |
| mid | yes | - | 7 | 4 | H: 6 G: 3 W: 0 |
2MP
| Startup | Active | Recovery | Hit Adv. | Block Adv. | Renda Bonus |
|---|---|---|---|---|---|
| 6 | 3 | 18 | 0 | -1 | N/A |
| Guard | Cancel | Invuln | Red Damage | White Damage | Gauge |
| mid | yes | - | 16 | 6 | H: 15 G: 9 W: 3 |
2HP
| Startup | Active | Recovery | Hit Adv. | Block Adv. | Renda Bonus |
|---|---|---|---|---|---|
| 10 | 5 | 26 | -6 | -7 | N/A |
| Guard | Cancel | Invuln | Red Damage | White Damage | Gauge |
| mid | no | - | 21 | 8 | H: 24 G: 15 W: 6 |
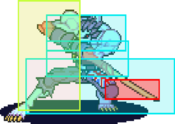
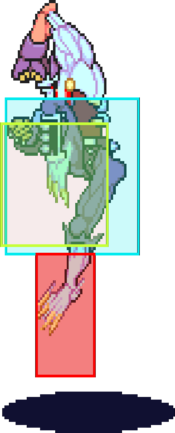
This c.HP's sole use is as an anti-air. You definitely should not think of it as his one stop answer to all anti-air situations, as it is very positionally dependent and it starts up somewhat slow at 10 frames. But, if you successful space and time this attack correctly, it will beat most jump in attacks clean.
Using this as an anti air will give you about +10~ frames on the recovering opponent. This could be more if you hit later into c.HP's active frames. This isn't enough time to set up a completely solid high-low mix-up, there may be a slight gap, but its still practical due to positioning and the advantage you have. Just throwing out 6.MP on their recovery should generally be a perfect meatie though, so use this occasionally to make them scared of moving.
The biggest downside to this move is if you accidentally miss your airdash and get a regular ground dash into c.HP. Dash c.HP on block is extremely unsafe and all you can do is hope your opponent is too slow in reacting with the punish.2LK
| Startup | Active | Recovery | Hit Adv. | Block Adv. | Renda Bonus |
|---|---|---|---|---|---|
| 5 | 3 | 8 | 5 | 4 | H: 8 G: 7 |
| Guard | Cancel | Invuln | Red Damage | White Damage | Gauge |
| low | yes | - | 6 | 3 | H: 6 G: 3 W: 0 |
2MK
| Startup | Active | Recovery | Hit Adv. | Block Adv. | Renda Bonus |
|---|---|---|---|---|---|
| 7 | 4 | 20 | -3 | -4 | N/A |
| Guard | Cancel | Invuln | Red Damage | White Damage | Gauge |
| low | yes | - | 15 | 6 | H: 15 G: 9 W: 3 |
硬直差の範囲 H:-3~0 G:-4~-1 This c.MK has a few uses, but you should not be using it much outside of chain combos and a normal to cancel into Evil Scream. This move actually moves Zabel forward across the ground a bit when he preforms it, making him just barely be able to combo into c.HK in a longer chain.
This will combo from max range into Evil Scream. Standing at about air-dash range on your opponents wakeup and doing this raw into Evil Scream can sometimes be an effective gimmick.
Don't use this move in a dash, you will be punished. Do not end your block strings with this move, the negative frames are simply too much. The fact he moves forward during this move means its easier to hit someone with the later frames of this, but that isn't very reliable in making it any safer.2HK
| Startup | Active | Recovery | Hit Adv. | Block Adv. | Renda Bonus |
|---|---|---|---|---|---|
| 8 | 10 | 21 | - | -7 | N/A |
| Guard | Cancel | Invuln | Red Damage | White Damage | Gauge |
| low | no | - | 18 | 8 | H: 24 G: 15 W: 6 |
Command Normals
6LP
| Startup | Active | Recovery | Hit Adv. | Block Adv. | Renda Bonus |
|---|---|---|---|---|---|
| 6 | 4 | 15 | -3 | -4 | H: 0 G: -1 |
| Guard | Cancel | Invuln | Red Damage | White Damage | Gauge |
| mid | yes | - | 6 | 3 | H: 6 G: 3 W: 0 |
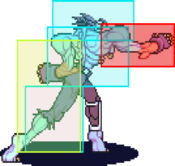
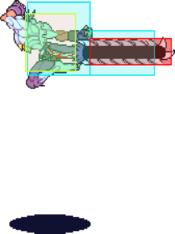
Long range poke, it's slightly faster than 6MP and has less recovery, but is more vulnerable to being crouched under by a majority of the cast, although against the few who can't it becomes much more reliable. Hurtbox extends a decent amount which can make it vulnerable to getting hit, though the low recovery makes the issue not too prevalent but is still something to keep in mind.
6LP can also link into a Death Voltage or Evil Scream at closer distances. Just like 6MP, it can catch jumpers as they leave the ground.
Overall, a very solid move.
- • This move will only hit crouching: Bishamon, Victor, Anakaris, Jedah
6MP
| Startup | Active | Recovery | Hit Adv. | Block Adv. | Renda Bonus |
|---|---|---|---|---|---|
| 7 | 5 | 20 | -4 | -5 | N/A |
| Guard | Cancel | Invuln | Red Damage | White Damage | Gauge |
| mid | no | - | 15 | 6 | H: 15 G: 9 W: 3 |
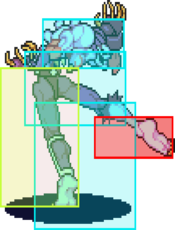
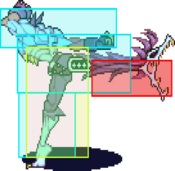
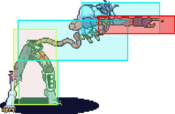
Zabel's premier long range poke. The hitbox is perfectly positioned to hit almost every croucher in the game besides Q-bee, and to catch people trying to jump out of pressure.
You'll find yourself using this a lot, but its important not to use it to much. You won't win any matches by just spamming this move constantly. Infact, it can be dangerous to use on whiff if your opponent times a jump over it into a punish. You use it just enough to make people scared to move too much while applying pressure.
Converting hits from this on grounded opponents into something is not very practical as Zabel is at -4 even on hit. But if you happen to swipe your opponent out of their jump start up you get some decent advantage and a better opportunity to mount an offensive.6HP
| Startup | Active | Recovery | Hit Adv. | Block Adv. | Renda Bonus |
|---|---|---|---|---|---|
| 8 | 2(6)2(2)4 | 25 | -4 | -5 | N/A |
| Guard | Cancel | Invuln | Red Damage | White Damage | Gauge |
| mid | no | - | 7+9+11 | 3+4+5 | H: 12+6+6 G: 9+3+3 W: 6 |
硬直差の範囲(1段目) H:-16~-15 G:-17~-16 硬直差の範囲(2段目) H:-8~-7 G:-9~-8
硬直差の範囲(3段目) H:-4~-1 G:-5~-26LK
| Startup | Active | Recovery | Hit Adv. | Block Adv. | Renda Bonus |
|---|---|---|---|---|---|
| 7 | 3 | 12 | 1 | 0 | H: 4 G: 3 |
| Guard | Cancel | Invuln | Red Damage | White Damage | Gauge |
| mid | no | - | 6 | 3 | H: 6 G: 3 W: 0 |
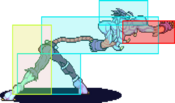
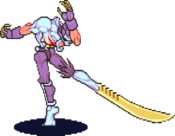
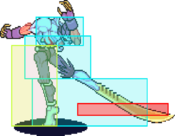
A decent long range poke. It has a few things going for it that Zabel's other distanced pokes do not have. For one it has a very fast recovery, unlike 6.MP which can be dangerous at times. Two, it can't be crouched under by most characters like s.LP. And third, it actually has decent frames on hit and block with +1 and even 0 respectively. The biggest downside is that it does rather pathetic damage on its own.
Hitting this move from max distance will still allow you to combo into s.MP.
Oddly enough, this move provides a renda bonus if you combo into it from a s.LK or c.LK. The 6.LK does not rapid cancelable into itself, so that is the only way to get the renda bonus.6MK
| Startup | Active | Recovery | Hit Adv. | Block Adv. | Renda Bonus |
|---|---|---|---|---|---|
| 9 | 6 | 21 | -6 | -7 | N/A |
| Guard | Cancel | Invuln | Red Damage | White Damage | Gauge |
| mid | no | - | 15 | 6 | H: 9 G: 6 W: 3 |
What would be a decent long range poke simply gets outclassed by 6.MP's ability to catch jumpers, longer range, and slightly better recovery.
Most of your use of this attack will come from chaining out of 6.MP for a bit more damage.
One thing this move does have over 6.MP though is its ability to hit every crouching character in the game, including Q-Bee. Using this in the Q-bee match-up instead of 6.MP can be effective.6HK
| Startup | Active | Recovery | Hit Adv. | Block Adv. | Renda Bonus |
|---|---|---|---|---|---|
| 15 | 16 | 23 | -2 | -15 | N/A |
| Guard | Cancel | Invuln | Red Damage | White Damage | Gauge |
| mid | no | - | 20 | 8 | H: 24 G: 15 W: 6 |
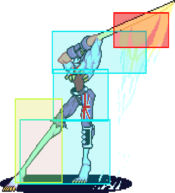
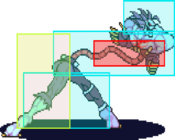
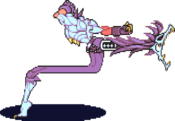
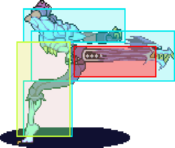
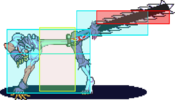
An extremely capable far anti-air normal attack. High damage and large active frames make this a preferred anti-air attack, though its uses as anti-air are still very situational like all of his other anti-air normals. Secondly, this attack can also be used as as a chain combo ender against standing opponents if you are looking for a max damage combo that uses no meter.
As an anti-air, if the opponent is jumping in I would avoid using this at a distance shorter than 3/4 to full screen depending on the match-up. The slow start-up and ability of an opponent to cleanly jump over this can make using it from too close very dangerous. For example, against a Lilith super-jumping in this move is very effective at a distance and will beat her cleanly.
The more common application of using this as an anti-air is to catch people doing up-back jumps when you have them cornered. Sniping a few up-back jumps with this in a row will do decent damage.
The frame advantage you can get using this as an anti air is extremely variable considering this move is active for a massive 16 frames. If you anti-air with the first frame of the move it will give you about +2/3~ frames on hit, and if you hit with the very last active frame of the move you can get a huge +17/18~ frames on hit. Recognizing when this move hits and properly exploiting it can give you a huge payoff.
This move will actually hit crouching Bishamon and Victor surprisingly enough.Air Normals
J.LP
| Startup | Active | Recovery | Hit Adv. | Block Adv. | Renda Bonus |
|---|---|---|---|---|---|
| 5 | 6 | 1 | - | - | N/A |
| Guard | Cancel | Invuln | Red Damage | White Damage | Gauge |
| overhead | yes | - | 9 | 4 | H: 6 G: 3 W: 0 |
A normal which pretty much only has the use of starting air chains on chicken blockers in certain situations. Depending on positioning you won't even use this very much to start an air chain.
There is a bit of potential for doing some gimmicks with this using the full guard, but its nothing that is at all practical. Read j.MP below for an explanation on full guard.J.MP
| Startup | Active | Recovery | Hit Adv. | Block Adv. | Renda Bonus |
|---|---|---|---|---|---|
| 5 | 6 | 6 | - | - | N/A |
| Guard | Cancel | Invuln | Red Damage | White Damage | Gauge |
| overhead | yes | - | 18 | 7 | H: 15 G: 9 W: 3 |
J.HP
| Startup | Active | Recovery | Hit Adv. | Block Adv. | Renda Bonus |
|---|---|---|---|---|---|
| 7 | 4 | 8 | - | - | N/A |
| Guard | Cancel | Invuln | Red Damage | White Damage | Gauge |
| overhead | no | - | 22 | 8 | H: 24 G: 15 W: 6 |
J.LK
| Startup | Active | Recovery | Hit Adv. | Block Adv. | Renda Bonus |
|---|---|---|---|---|---|
| 4 | 6 | 4 | - | - | N/A |
| Guard | Cancel | Invuln | Red Damage | White Damage | Gauge |
| overhead | yes | - | 8 | 4 | H: 6 G: 3 W: 0 |
J.MK
| Startup | Active | Recovery | Hit Adv. | Block Adv. | Renda Bonus |
|---|---|---|---|---|---|
| 5 | 6 | 4 | - | - | N/A |
| Guard | Cancel | Invuln | Red Damage | White Damage | Gauge |
| overhead | yes | - | 17 | 7 | H: 15 G: 9 W: 3 |
J.HK
| Startup | Active | Recovery | Hit Adv. | Block Adv. | Renda Bonus |
|---|---|---|---|---|---|
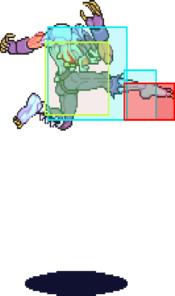
| 7 | 2(2)2(2)2 | 14 | - | - | N/A |
| Guard | Cancel | Invuln | Red Damage | White Damage | Gauge |
| overhead | no | - | 8x3 | 3x3 | H: 15+9+9 G: 10+4+4 W: 6 |
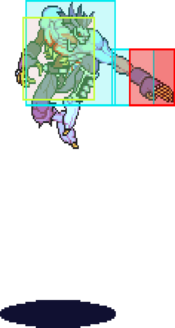
A decent normal to IAD with sometimes. It has both its strengths and faults.
You'll find yourself getting hit out of it a bit more frequently than you'd expect. And it won't take long for you to realize that some characters can pretty effectively just crouch under it to avoid it more often than not. The fact it clearly will hit multiple times, and the block-stop applied to the move make it a bit easy to guard cancel.
That said, it is a 3 hit normal that hits overhead, so on taller crouching characters it can be efficient in opening them up. If they crouch too soon.
Against fireball characters where you have to dash a little higher to get over their fireballs, this can be an effective punish to combo all the way to the ground when j2.HP does not have enough hit-stun to do. As a bonus it makes for a super easy hit confirm of s.MP or s.MK into Evil Scream for big damage.
Finally, if you catch an opponent in chicken guard with this, you have 2 different options based on positioning. Mid-screen, you can possibly get a s.LP or s.MP guard break after landing. In the corner, if it is timed right you can get a s.LP guard break reset, into an IAD > j.LK unblockable. It is very important to look out for both of these situations.
Something to note is that if you air-dash super low, more often than not you will only get 2 hits out of this normal instead of 3. This can throw off your combo timing quite a bit, but at the same time it can confuse your opponent. It can be difficult to confirm how many hits you will do, but try to use this to your advantage instead of disadvantage.Air Command Normals
J.2LP
| Startup | Active | Recovery | Hit Adv. | Block Adv. | Renda Bonus |
|---|---|---|---|---|---|
| 5 | 6 | 5 | - | - | N/A |
| Guard | Cancel | Invuln | Red Damage | White Damage | Gauge |
| overhead | yes | - | 7 | 3 | H: 6 G: 3 W: 0 |
| Startup | Active | Recovery | Hit Adv. | Block Adv. | Renda Bonus |
|---|---|---|---|---|---|
| 4 | 6 | 5 | - | - | N/A |
| Guard | Cancel | Invuln | Red Damage | White Damage | Gauge |
| overhead | yes | - | 7 | 3 | H: 6 G: 3 W: 0 |
J.2MP
| Startup | Active | Recovery | Hit Adv. | Block Adv. | Renda Bonus |
|---|---|---|---|---|---|
| 5 | 6 | 6 | - | - | N/A |
| Guard | Cancel | Invuln | Red Damage | White Damage | Gauge |
| overhead | yes | - | 16 | 7 | H: 15 G: 9 W: 3 |
| Startup | Active | Recovery | Hit Adv. | Block Adv. | Renda Bonus |
|---|---|---|---|---|---|
| 4 | 6 | 6 | - | - | N/A |
| Guard | Cancel | Invuln | Red Damage | White Damage | Gauge |
| overhead | yes | - | 16 | 7 | H: 15 G: 9 W: 3 |
J.2HP
| Startup | Active | Recovery | Hit Adv. | Block Adv. | Renda Bonus |
|---|---|---|---|---|---|
| 7 | 4 | 5 | - | - | N/A |
| Guard | Cancel | Invuln | Red Damage | White Damage | Gauge |
| overhead | no | - | 20 | 8 | H: 24 G: 15 W: 6 |
| Startup | Active | Recovery | Hit Adv. | Block Adv. | Renda Bonus |
|---|---|---|---|---|---|
| 6 | 4 | 5 | - | - | N/A |
| Guard | Cancel | Invuln | Red Damage | White Damage | Gauge |
| overhead | no | - | 20 | 8 | H: 24 G: 15 W: 6 |
J.2K
| Startup | Active | Recovery | Hit Adv. | Block Adv. | Renda Bonus |
|---|---|---|---|---|---|
| 9 | until landing | - | - | - | N/A |
| Guard | Cancel | Invuln | Red Damage | White Damage | Gauge |
| mid | no | - | 16 | 8 | H: 6 G: 3 W: 0 |
| Startup | Active | Recovery | Hit Adv. | Block Adv. | Renda Bonus |
|---|---|---|---|---|---|
| 9 | until landing | - | - | - | N/A |
| Guard | Cancel | Invuln | Red Damage | White Damage | Gauge |
| mid | no | - | 16 | 8 | H: 15 G: 9 W: 3 |
| Startup | Active | Recovery | Hit Adv. | Block Adv. | Renda Bonus |
|---|---|---|---|---|---|
| 9 | until landing | - | - | - | N/A |
| Guard | Cancel | Invuln | Red Damage | White Damage | Gauge |
| mid | no | - | 16 | 8 | H: 15 G: 9 W: 3 |
| Startup | Active | Recovery | Hit Adv. | Block Adv. | Renda Bonus |
|---|---|---|---|---|---|
| 5 | until landing | - | - | - | N/A |
| Guard | Cancel | Invuln | Red Damage | White Damage | Gauge |
| mid | no | - | 16 | 8 | H: 6 G: 3 W: 0 |
| Startup | Active | Recovery | Hit Adv. | Block Adv. | Renda Bonus |
|---|---|---|---|---|---|
| 5 | until landing | - | - | - | N/A |
| Guard | Cancel | Invuln | Red Damage | White Damage | Gauge |
| mid | no | - | 16 | 8 | H: 12 G: 6 W: 0 |
| Startup | Active | Recovery | Hit Adv. | Block Adv. | Renda Bonus |
|---|---|---|---|---|---|
| 5 | until landing | - | - | - | N/A |
| Guard | Cancel | Invuln | Red Damage | White Damage | Gauge |
| mid | yes | - | 16 | 0 | H: 15 G: 18 W: 9 |
This move can only be special canceled out of an air-dash with the hard kick drill.
When air dashing the move builds no meter on whiff with the MK and HK versions, but still gives meter on hit.Normal Throws
6MP or 6HP
| Startup | Active | Recovery | Hit Adv. | Block Adv. | Renda Bonus |
|---|---|---|---|---|---|
| 1 | - | 227 | 2 | - | N/A |
| Guard | Cancel | Invuln | Red Damage | White Damage | Gauge |
| throw | no | 1-192 whole body | 5x(3~10) (5x(3~10)) | 7 (3) | H: 0 G: 0 W: 0 |
A mash throw that can be throw-teched entirely and does a stand reset on hit. If you are attempting to throw behind yourself the s.HP throw option-select is pretty good, but the setup from the throw afterwards is terrible.
Even with the +2 frames from the throw, you don't have much of a potential follow up because of how far you are placed from the opponent, even in the corner.
The main plus of the punch throw is against opponents that have no clue you can counter mash to make it do less damage. If you get full mash damage, this throw actually does massive damage. At that point it is Zabel's 3rd strongest attack when it comes to red damage, and his most damaging attack in terms of white damage.
The huge damage from that is offset though on the measly damage this throw does if completely throw teched.6MK or 6HK
| Startup | Active | Recovery | Hit Adv. | Block Adv. | Renda Bonus |
|---|---|---|---|---|---|
| 1 | - | 53 | - | - | N/A |
| Guard | Cancel | Invuln | Red Damage | White Damage | Gauge |
| throw | no | 1-27 whole body | 28 (13) | 9 (4) | H: 0 G: 0 W: 0 |
A good throw. The option select from his normals isn't as good as it is for his punch throws, but the options he gets from the throw itself is much better than his punch throw.
If you have a reason for wanting to do a back throw, this is your preferred option as the command throw only throws in the direction you are facing.
In the corner, you have more than enough time to attempt a j.LK unblockable on knockdown. And on throw-tech Zabel gets +11 frames to attempt a mixup.J.6P or J.4P
| Startup | Active | Recovery | Hit Adv. | Block Adv. | Renda Bonus |
|---|---|---|---|---|---|
| 1 | - | 16 + 28 + landing 2 | - | - | N/A |
| Guard | Cancel | Invuln | Red Damage | White Damage | Gauge |
| throw | no | 1-16 whole body | 22 (10) | 7 (3) | H: 0 G: 0 W: 0 |
Zabel's air throw is hardly a core part of his air game. Positionally, based on the height of his jump and location of the air throw, he will have difficulties grabbing a few characters as well. If you are trying to punish somebody, an IAD into an air reset with a normal, so you will know just how they recover is probably better than the knockdown into a roll they'd get from the air throw.
Unteched, damage wise this throw is decent, it does a little more damage than his strongest air normal(j.HP). Even with the hard knockdown this gives, you still have enough time to set up your oki options as well.
Teched, damage isn't very good. Zabel will chuck them across the screen and they will air reset. You actually have some pretty decent frame advantage off of this, but a throw midscreen puts them too far away to really exploit this. If they air tech you in the corner, you can get a solid air-dash mix-up on their recovery if you IAD at the soonest possible moment. The frame advantage from this isn't quite as much as an IAD into a normal attack reset.Special Moves
Death Hurricane
214K
| Startup | Active | Recovery | Hit Adv. | Block Adv. | Renda Bonus |
|---|---|---|---|---|---|
| 7 | 19 | 8 + landing 8 | - | -11 | N/A |
| Guard | Cancel | Invuln | Red Damage | White Damage | Gauge |
| mid | no | - | 22 | 6 | H: 24 G: 21 W: 18 |
Short range
| Startup | Active | Recovery | Hit Adv. | Block Adv. | Renda Bonus |
|---|---|---|---|---|---|
| 7 | 29 | 11 + landing 8 | - | -24 | N/A |
| Guard | Cancel | Invuln | Red Damage | White Damage | Gauge |
| mid | no | - | 22 | 6 | H: 24 G: 21 W: 18 |
Medium range.
| Startup | Active | Recovery | Hit Adv. | Block Adv. | Renda Bonus |
|---|---|---|---|---|---|
| 7 | 39 | 17 + landing 8 | - | -40 | N/A |
| Guard | Cancel | Invuln | Red Damage | White Damage | Gauge |
| mid | no | - | 22 | 6 | H: 24 G: 21 W: 18 |
Long range.
| Startup | Active | Recovery | Hit Adv. | Block Adv. | Renda Bonus |
|---|---|---|---|---|---|
| 7 | {2(1)}x12,2 | 18 + landing 8 | - | -49 | N/A |
| Guard | Cancel | Invuln | Red Damage | White Damage | Gauge |
| mid | no | - | 13x3 | 5x3 | H: 0 G: 0 W: 0 |
Hits 3 times.
| Startup | Active | Recovery | Hit Adv. | Block Adv. | Renda Bonus |
|---|---|---|---|---|---|
| 6 | 20 | variable + landing 8 | - | - | N/A |
| Guard | Cancel | Invuln | Red Damage | White Damage | Gauge |
| mid | no | - | 22 | 6 | H: 24 G: 21 W: 18 |
| Startup | Active | Recovery | Hit Adv. | Block Adv. | Renda Bonus |
|---|---|---|---|---|---|
| 6 | 30 | variable + landing 8 | - | - | N/A |
| Guard | Cancel | Invuln | Red Damage | White Damage | Gauge |
| mid | no | - | 22 | 6 | H: 24 G: 21 W: 18 |
| Startup | Active | Recovery | Hit Adv. | Block Adv. | Renda Bonus |
|---|---|---|---|---|---|
| 6 | 40 | variable + landing 8 | - | - | N/A |
| Guard | Cancel | Invuln | Red Damage | White Damage | Gauge |
| mid | no | - | 22 | 6 | H: 24 G: 21 W: 18 |
| Startup | Active | Recovery | Hit Adv. | Block Adv. | Renda Bonus |
|---|---|---|---|---|---|
| 6 | 40 | variable + landing 8 | - | - | N/A |
| Guard | Cancel | Invuln | Red Damage | White Damage | Gauge |
| mid | no | - | 22 | 6 | H: 24 G: 21 W: 18 |
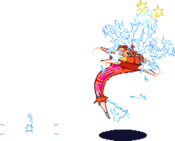
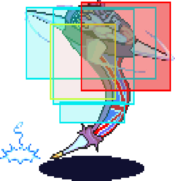
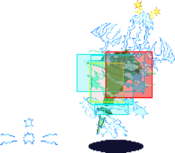
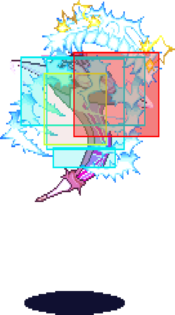
Skull Sting
2[8]LK
| Startup | Active | Recovery | Hit Adv. | Block Adv. | Renda Bonus |
|---|---|---|---|---|---|
| 31 | 4,4,4 | landing 9 | 12 | 11 | N/A |
| Guard | Cancel | Invuln | Red Damage | White Damage | Gauge |
| mid | no | 1 feet | 6xn | 1xn | H: 12+3xn G: 12+1xn W: 12 |
Short range
| Startup | Active | Recovery | Hit Adv. | Block Adv. | Renda Bonus |
|---|---|---|---|---|---|
| 33 | 4,4,4 | landing 9 | 12 | 11 | N/A |
| Guard | Cancel | Invuln | Red Damage | White Damage | Gauge |
| mid | no | 1 feet | 6xn | 1xn | H: 12+3xn G: 12+1xn W: 12 |
Medium range
| Startup | Active | Recovery | Hit Adv. | Block Adv. | Renda Bonus |
|---|---|---|---|---|---|
| 35 | 4,4,3 | landing 9 | 13 | 12 | N/A |
| Guard | Cancel | Invuln | Red Damage | White Damage | Gauge |
| mid | no | 1 feet | 6xn | 1xn | H: 12+3xn G: 12+1xn W: 12 |
Long range
| Startup | Active | Recovery | Hit Adv. | Block Adv. | Renda Bonus |
|---|---|---|---|---|---|
| 29 | 2,2,2(2)2,3,2,2 | landing 9 | 14 | 13 | N/A |
| Guard | Cancel | Invuln | Red Damage | White Damage | Gauge |
| mid | no | 1 feet | 5xn | 1xn | H: 0 G: 0 W: 0 |
Hits more
| Startup | Active | Recovery | Hit Adv. | Block Adv. | Renda Bonus |
|---|---|---|---|---|---|
| 31 | 4,4,5,2 | landing 9 | 14 | 13 | N/A |
| Guard | Cancel | Invuln | Red Damage | White Damage | Gauge |
| mid | no | - | 6xn | 1xn | H: 12+3xn G: 12+1xn W: 12 |
| Startup | Active | Recovery | Hit Adv. | Block Adv. | Renda Bonus |
|---|---|---|---|---|---|
| 33 | 4,4,5,2 | landing 9 | 14 | 13 | N/A |
| Guard | Cancel | Invuln | Red Damage | White Damage | Gauge |
| mid | no | - | 6xn | 1xn | H: 12+3xn G: 12+1xn W: 12 |
| Startup | Active | Recovery | Hit Adv. | Block Adv. | Renda Bonus |
|---|---|---|---|---|---|
| 35 | 4,4,5,1 | landing 9 | 15 | 14 | N/A |
| Guard | Cancel | Invuln | Red Damage | White Damage | Gauge |
| mid | no | - | 6xn | 1xn | H: 12+3xn G: 12+1xn W: 12 |
| Startup | Active | Recovery | Hit Adv. | Block Adv. | Renda Bonus |
|---|---|---|---|---|---|
| 29 | 2,2,2(2)2,3,2,2(1) | landing 9 | 13 | 12 | N/A |
| Guard | Cancel | Invuln | Red Damage | White Damage | Gauge |
| mid | no | - | 5xn | 1xn | H: 0 G: 0 W: 0 |
Hell Gate
412[6]K
| Startup | Active | Recovery | Hit Adv. | Block Adv. | Renda Bonus |
|---|---|---|---|---|---|
| - | - | 63 | - | - | N/A |
| Guard | Cancel | Invuln | Red Damage | White Damage | Gauge |
| teleport | no | 1-57 whole body | - | - | H: 0 G: 0 W: 12 |
Teleport. Invincible from the 1st frame. Strength determines where you'll reappear, no matter which side you're on. No ES
- (L Version) Left side.
- (M Version) Mid-screen.
- (H Version) Right side.
Death Phrase GC
623K
| Startup | Active | Recovery | Hit Adv. | Block Adv. | Renda Bonus |
|---|---|---|---|---|---|
| 9 | 4 | 45 | - | -34 | N/A |
| Guard | Cancel | Invuln | Red Damage | White Damage | Gauge |
| mid | no | 1-13 whole body | 12 | 5 | H: 9 G: 4 W: 0 |
Fast, knocks down
| Startup | Active | Recovery | Hit Adv. | Block Adv. | Renda Bonus |
|---|---|---|---|---|---|
| 9 | 4 | 45 | - | -34 | N/A |
| Guard | Cancel | Invuln | Red Damage | White Damage | Gauge |
| mid | no | 1-13 whole body | 13+9 | 5+4 | H: 0 G: 0 W: 0 |
Command Throw
632[4]P
| Startup | Active | Recovery | Hit Adv. | Block Adv. | Renda Bonus |
|---|---|---|---|---|---|
| 2 | 11 | 33 | - | - | N/A |
| Guard | Cancel | Invuln | Red Damage | White Damage | Gauge |
| throw | no | - | 6+6+16 | 2+2+4 | H: 12 G: 0 W: 12 |
Both option selects using s.MP and s.HP are good so use both, though I favor s.HP a bit more as it catches jumpers more often.
| Startup | Active | Recovery | Hit Adv. | Block Adv. | Renda Bonus |
|---|---|---|---|---|---|
| 2 | 11 | 33 | - | - | N/A |
| Guard | Cancel | Invuln | Red Damage | White Damage | Gauge |
| throw | no | - | 6x4+16 | 2x4+4 | H: 0 G: 0 W: 0 |
Going for an ES Skull Punish can be extremely dangerous. It overlaps with the Evil Scream input of 6~4, and you'll get it by accident the majority of the time by either being too far from the opponent or doing it too soon out of block stun. This is a problem for two reasons. First off you lose the ability to do an option select with a normal move. And second, evil scream is -14 on block so you really do not want to do it in someones face raw.
Because of those reasons you should generally be sticking with the regular version of Skull Punish rather than the ES version.Pursuits
8P or 8K
| Startup | Active | Recovery | Hit Adv. | Block Adv. | Renda Bonus |
|---|---|---|---|---|---|
| 36 | 6 | landing 1 | - | - | N/A |
| Guard | Cancel | Invuln | Red Damage | White Damage | Gauge |
| mid | no | 1-6 feet | 2x3 | 2x3 | H: 6x3 G: 0 W: 6 |
| Startup | Active | Recovery | Hit Adv. | Block Adv. | Renda Bonus |
|---|---|---|---|---|---|
| 36 | 6 | landing 1 | - | - | N/A |
| Guard | Cancel | Invuln | Red Damage | White Damage | Gauge |
| mid | no | 1-6 feet | 2x6 | 2x6 | H: 0 G: 0 W: 0 |
Ex Moves
6[4]PP
| Startup | Active | Recovery | Hit Adv. | Block Adv. | Renda Bonus |
|---|---|---|---|---|---|
| 16 | 8 | 22 | - | -14 | N/A |
| Guard | Cancel | Invuln | Red Damage | White Damage | Gauge |
| mid | no | - | 8+36 | 3+12 | H: 0 G: 0 W: 0 |
632[4]KK
| Startup | Active | Recovery | Hit Adv. | Block Adv. | Renda Bonus |
|---|---|---|---|---|---|
| 7 | 31 | 17 + landing 8 | - | -41 | N/A |
| Guard | Cancel | Invuln | Red Damage | White Damage | Gauge |
| mid | no | - | 43 | 15 | H: 0 G: 0 W: 0 |
| Startup | Active | Recovery | Hit Adv. | Block Adv. | Renda Bonus |
|---|---|---|---|---|---|
| 6 | 32 | variable + landing 8 | - | - | N/A |
| Guard | Cancel | Invuln | Red Damage | White Damage | Gauge |
| mid | no | - | 43 | 15 | H: 0 G: 0 W: 0 |
623PP
| Startup | Active | Recovery | Hit Adv. | Block Adv. | Renda Bonus |
|---|---|---|---|---|---|
| 52 | 1 | 36 | - | - | N/A |
| Guard | Cancel | Invuln | Red Damage | White Damage | Gauge |
| throw | NO | - | 41 | 10 | H: 0 G: 0 W: 0 |
== Dark Force ==
Final Transformation: Ultimate Undead - Same strength P + K
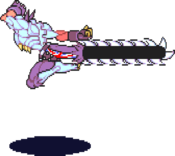
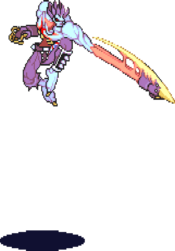
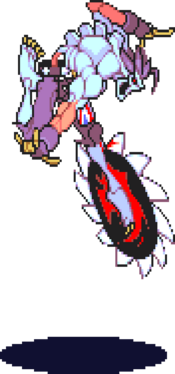
- (Any Version) Gold Chainsaw mode. Zabel gets a new set of attacks, while losing his special moves and throws, and his dash becomes a hop rather than his normal crawl. While in dark force mode Zabel's normals do white (recoverable) damage on block. DF-Zabel has a unique Guard-Cancel animation
Ultimate Revenge - 623K (DFGC):
- A Guard Cancel only available while in Dark Force mode. The hitbox on this one is worse than his regular Guard Cancel. Unblockable (is this true?). No ES.
- Dark Force Combos
Colors
Notable Players
Japan
Japanese Player Index: http://www21.atwiki.jp/vsplayer/pages/20.html
| Name (English) | Name (Japanese) | Color | Location | Contact | Notes |
|---|---|---|---|---|---|
| Komemaru | こめまる | MP |
Kanto Region | http://twitter.com/komemaru_z | #1 Zabel, from Tokyo |
| Sakai Hell Beat |
サカイ |
KK |
Kanto Region | #2 Zabel Switched to Demitri in 2017 | |
| T2ya Tetsuya |
— | LK |
Tokyo, Japan | http://twitter.com/t2ya55 | Legendary Zabel Retired T.O. for DCC-events |
| Nan | ナン | LK |
Kansai Region | http://twitter.com/hanakozou | Best Bell in West Japan |
| Tkm | — | HK |
Niigata, Japan | http://twitter.com/Tkmiyasama | |
| Dekamelon | でかめろん デカメロン |
MK |
Kanto, Japan | http://twitter.com/Dekameronb | |
| Yamakawa | やまかわ | MP |
Kansai Region | https://twitter.com/yamakawa_zabel | |
| Ogawa | オガワ | MP |
Kanto Region | ||
| Aojiru | 青汁 | MK |
Kanto Region | https://twitter.com/aojiru_zabel | |
| Kuronu Chrono |
黒野 | HK |
Kanto, Japan | Organizes the New Comer Tournaments at Mikado | |
| Bega Vega |
ベガ | HP |
Kanto, Japan | https://www.youtube.com/channel/UCuNnv95STflv3tDNZmeGAAA | |
| Irifune | 入船 | MP |
Kanto, Japan | ||
| CAA | — | MP |
Kansai Region | Retired. |
North America
| Name (English) | Name (Japanese) | Color | Location | Contact | Notes |
|---|---|---|---|---|---|
| VickiViper | ヴィキーヴァイパー | MP |
Virginia, USA | https://twitter.com/DarkForceVicki | Multi game specialist, and multi game champion. She is too damn fast, and singlehandedly holds brackets up because she signed up for everything. |
| Apollo | アパロー | KK |
New York, USA | https://twitter.com/Apollo19999 | Community Organizer with very good results. He's a baseball loving giant, and is an EX2 champion. |
| Conduit | 導管 | HP |
New York, USA | Conduit#7839 | Seasoned player with roots back in the original Fightcade. Will play offline one day. |
| Servo | サーボー | MK |
Ohio, USA | https://twitter.com/Servotronic | VMP Stream Master who had great results. She solves all of the technical problems that come with streaming from CRTs, which is too many. |
| Rotanibor | ロタニボル | MK |
California, USA | https://twitter.com/ROTANIBOR | Semi-Retired. Considered the Founder of the VSAV community in the US. |
South America
| Name (English) | Name (Japanese) | Color | Location | Contact | Notes |
|---|---|---|---|---|---|
| ZombieF | ゾンビ | PP |
Brazil | https://mobile.twitter.com/zombief_ | Extremely strong Zabel player that has gotten a lot of notoriety in the SA scene in 2022. |
