Samurai Shodown V Special/Kyoshiro Senryo: Difference between revisions
(→Combos) |
|||
| Line 318: | Line 318: | ||
*'''66C 2BC''' | *'''66C 2BC''' | ||
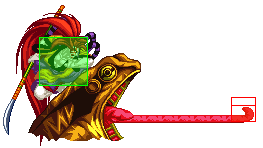
: | :The Kyoshiro's 66C slow down really quick and can be guarded and punished, so be carefull when you use it. | ||
*'''66C 2BC''' (Center) | *'''66C 2BC''' (Center) | ||
: | :If you're to close you have to do a small walk or dash (depend on distance) to hit with 2BC. | ||
*'''3C 2BC''' (Corner) | *'''3C 2BC''' (Corner) | ||
: | :In corner you can 2BC freely. | ||
*'''421A 2BC''' (Corner) | *'''421A 2BC''' (Corner) | ||
: | :It does few damages. Usually you'll prefer doing another 421S or whathever. | ||
*'''236CD 2BC''' (Corner) | *'''236CD 2BC''' (Corner) | ||
: | :Same. The damage added are not that good. You'll prefer doing 421S or whathever. | ||
*'''214C 8BC''' (Center) | *'''214C 8BC''' (Center) | ||
: | :If you practice enough the timing, you can do it regular. | ||
*'''214C 8BC''' (Corner) | *'''214C 8BC''' (Corner) | ||
: | :Carefull, if you're to close you may have difficulties to do it, and if you do you'll be hard punished. | ||
*'''214C xx ABC xx 8BC''' (Corner) | *'''214C xx ABC xx 8BC''' (Corner) | ||
: | :This one is a finish move, use it when you know you gonna win the match. It does a lot of damage so have fun. | ||
*'''236CD 8BC''' (Center) | *'''236CD 8BC''' (Center) | ||
: | :You can do 66 in the animation of the WFT and maintain 6 to dash as soon as possible. This combo works only against heavy characters as Kusaregedo, Gaira and Tam Tam. | ||
*'''236CD 8BC''' (Corner) | *'''236CD 8BC''' (Corner) | ||
: | :Be aware that the 8BC timing is not the same for the WFT than the Frog. In this case do the 8BC as soon as possible. | ||
*'''n.2A xx 623A''' | *'''n.2A xx 623A''' | ||
: | :Not the simpliest timing of the game, but this combo exist. | ||
=== Jump === | === Jump === | ||
*'''j.AB 214C 8BC/Whathever''' | *'''j.AB 214C 8BC/Whathever''' | ||
: | :You'll probably never use it, but this combo exist. Can be followed up by 8BC or okizeme move. | ||
*'''j.AB 214C 8BC/Whathever''' (Backhit) | *'''j.AB 214C 8BC/Whathever''' (Backhit) | ||
: | :Easier in backhit. Can be followed up by 8BC or okizeme move. | ||
=== Anti-air === | === Anti-air === | ||
*'''j.AB''' | *'''j.AB''' | ||
: | :Your j.AB is a good anti-air move because it's very fast. | ||
*'''2AB''' | *'''2AB''' | ||
: | :It's more tricky to use because you can be hitted by your opponent first (or having a double hit) but this move is a decent anti-air if you know how and when use it. | ||
*'''44 2S''' | *'''44 2S''' | ||
: | :The third anti-air of Kyoshiro, this one is even more tricky than 2AB (for the same reasons) but it's a very good anti-air. | ||
=== Gimmick === | === Gimmick === | ||
*'''66B xx 214C''' (Karacancel) | *'''66B xx 214C''' (Karacancel) | ||
: | :It may surprise your opponent. This one is more a gimmick or a yolo gambling than a real move. | ||
*'''66AB xx 214C''' (Karacancel) | *'''66AB xx 214C''' (Karacancel) | ||
: | :Same. It may surprise your opponent but don't count on it in long term. | ||
=== Shenanigan === | === Shenanigan === | ||
*'''66B xx 214C''' | *'''66B xx 214C''' | ||
: | :This one is more reliable. Still a gambling, if your opponent guard both 66B and 214C you'll get oblitered. | ||
*'''421A + 214C/Whathever''' | *'''421A + 214C/Whathever''' | ||
: | :After 421A you can do 214C, if your opponent want to punish he will get hit by the frog. You can mixup with 623S (anti-air) or 216D (deflect) or guard instead. | ||
*'''44 2S''' | *'''44 2S''' | ||
: | :Instant overhead. You're offering you to a free punish if it's guarded. You should not abuse of it. | ||
*'''2A 44 2S''' (Center) | *'''2A 44 2S''' (Center) | ||
: | :Use this one when you want to pressure and force low guard to bait the instant overhead. | ||
*'''2A 2A 44 2S''' (Corner) | *'''2A 2A 44 2S''' (Corner) | ||
: | :Same principe but with two 2A in corner. | ||
*'''5AB xx 216D xx 214C 8BC/Whathever''' | *'''5AB xx 216D xx 214C 8BC/Whathever''' | ||
: | :You can't do it against all character. 5AB xx 216D xx 214C is more safe than 5AB xx 214C but it's rage-cancellable with ABC. Can be followed up by 8BC or okizeme move. | ||
=== Pure luck, absolute yolo gambling loto, don't use it unless carpe diem is your way of life === | === Pure luck, absolute yolo gambling loto, don't use it unless carpe diem is your way of life === | ||
*'''236CD''' (Meaty/Crossup) | *'''236CD''' (Meaty/Crossup) | ||
: | :It may crossup your opponent in meaty if you have a godlike read (or insane luck). | ||
*'''4CD 214C''' (Throw cheese) | *'''4CD 214C''' (Throw cheese) | ||
: | :Cheesy play on careless opponent, may work once if you're lucky enough. +50 cool point if you manage to place it. May be mixed with WFT if your opponent jump to escape another throw cheese. | ||
=== Time slow === | === Time slow === | ||
*'''j.AB j.AB j.AB 2S''' | *'''j.AB j.AB j.AB 2S''' | ||
: | :Can be usefull to know this. Due to the amount of meditation needed to do this, you'll almost never do the three j.AB, so don't try to force the third j.AB and stop to the second or first. Anyway you will rarely use the time slow with Kyoshiro. | ||
*'''2B 214C or BCD''' | *'''2B 214C or BCD''' | ||
: | :If they don't block the 2B you can freely use the frog or issen. | ||
*'''n.5A 2C BCD''' | *'''n.5A 2C BCD''' | ||
: | :Standard strat to try to open the guard and get the issen. You can use the n.5A for tick throw purpose. Anyway as I said before, don't count too much on the time slow as Kyoshiro. | ||
*'''5B 214C''' | *'''5B 214C''' | ||
: | :If you're used to the cheese gimmickly strat with Kyoshiro, this one often works the first time, so feel free to use it (but only once per person!). You can do only the 214C too. | ||
=== Link === | |||
:[https://www.youtube.com/playlist?list=PLSDPJV9_8CvN__3Qn6oTkVl6D8-XxQoat Here is a playlist with some videos to show how to do the combos.] | |||
== Strategies == | == Strategies == | ||
Revision as of 10:04, 19 April 2021
Introduction
Failed to begin an actor line, for his frog listens to no one but him.
Strong defensive space control and the ability to mix up from arm's reach combined is what makes Kyoshiro tick. To this effect, he has a good suite of tools to choose from and a bunch of ways to use them, gimmicky or otherwise. He's played most safely in the war of attrition, as his mixups range from risky to spectacularly risky. But nobody blocks the frog anyways.
| Strengths | Weaknesses |
|---|---|
|
|
Data
- Damage taken: 105%
- Rage duration: 10 seconds
- Amount to rage: 15
- Walk speed: 544
- Backwalk speed: 480
- Dash speed: 1200
- Jump duration: 59 frames
- Width: 16
- Throw range: 12
- Throw recovery: 50 frames
Normals
Far Slashes
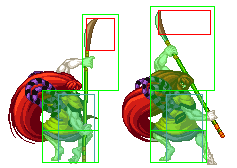
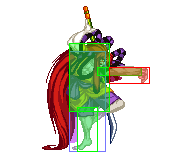
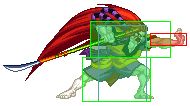
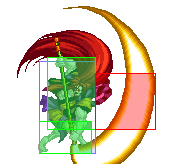
5A:
|
5B:
|
5AB:
|
2A:
|
2B:
|
2AB:
|
Near Slashes
n.5A:
|
n.5B:
|
n.5AB:
|
n.2A:
|
n.2B:
|
n.2AB:
|
Overheads
5BC:
|
| u.5BC: |
Kicks
5C:
|
6C:
|
2C:
|
3C:
|
Jumping
| j.A: |
j.B:
|
j.AB:
|
| j.C: |
Dashing
66A:
|
66B:
|
66AB:
|
66C:
|
Unarmed
| u.5S: |
| u.2S: |
| ju.S: |
u.66S:
|
Pursuits
| Small Pursuit - 2BC |
Big Pursuit - 8BC
|
System
| Deflect - 216D: |
| Weapon Pickup - 5A: |
Taunt Disarm - Start Start Start:
|
Specials
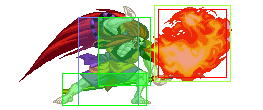
Ootsunami - 236S: (can be used unarmed)
|
Gama Jigoku - 214C: (can be used unarmed)
|
Kaiten Kyokubu - 623S:
|
Chikemuri Kuruwa - j.2S:
|
Choubi Jishi - 214S:
|
Kaen Kyokubu - 421S: (can be used unarmed)
|
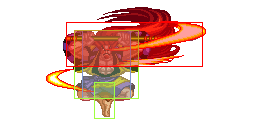
Aragotoshi Kyoshiro "Ketsuniku no Mai" - 236CD - WFT:
|
Combos
Normal
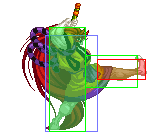
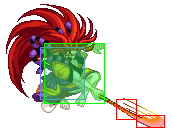
- 66C 2BC
- The Kyoshiro's 66C slow down really quick and can be guarded and punished, so be carefull when you use it.
- 66C 2BC (Center)
- If you're to close you have to do a small walk or dash (depend on distance) to hit with 2BC.
- 3C 2BC (Corner)
- In corner you can 2BC freely.
- 421A 2BC (Corner)
- It does few damages. Usually you'll prefer doing another 421S or whathever.
- 236CD 2BC (Corner)
- Same. The damage added are not that good. You'll prefer doing 421S or whathever.
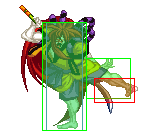
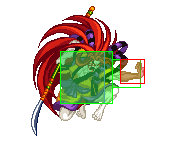
- 214C 8BC (Center)
- If you practice enough the timing, you can do it regular.
- 214C 8BC (Corner)
- Carefull, if you're to close you may have difficulties to do it, and if you do you'll be hard punished.
- 214C xx ABC xx 8BC (Corner)
- This one is a finish move, use it when you know you gonna win the match. It does a lot of damage so have fun.
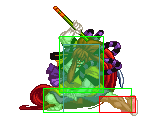
- 236CD 8BC (Center)
- You can do 66 in the animation of the WFT and maintain 6 to dash as soon as possible. This combo works only against heavy characters as Kusaregedo, Gaira and Tam Tam.
- 236CD 8BC (Corner)
- Be aware that the 8BC timing is not the same for the WFT than the Frog. In this case do the 8BC as soon as possible.
- n.2A xx 623A
- Not the simpliest timing of the game, but this combo exist.
Jump
- j.AB 214C 8BC/Whathever
- You'll probably never use it, but this combo exist. Can be followed up by 8BC or okizeme move.
- j.AB 214C 8BC/Whathever (Backhit)
- Easier in backhit. Can be followed up by 8BC or okizeme move.
Anti-air
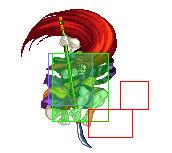
- j.AB
- Your j.AB is a good anti-air move because it's very fast.
- 2AB
- It's more tricky to use because you can be hitted by your opponent first (or having a double hit) but this move is a decent anti-air if you know how and when use it.
- 44 2S
- The third anti-air of Kyoshiro, this one is even more tricky than 2AB (for the same reasons) but it's a very good anti-air.
Gimmick
- 66B xx 214C (Karacancel)
- It may surprise your opponent. This one is more a gimmick or a yolo gambling than a real move.
- 66AB xx 214C (Karacancel)
- Same. It may surprise your opponent but don't count on it in long term.
Shenanigan
- 66B xx 214C
- This one is more reliable. Still a gambling, if your opponent guard both 66B and 214C you'll get oblitered.
- 421A + 214C/Whathever
- After 421A you can do 214C, if your opponent want to punish he will get hit by the frog. You can mixup with 623S (anti-air) or 216D (deflect) or guard instead.
- 44 2S
- Instant overhead. You're offering you to a free punish if it's guarded. You should not abuse of it.
- 2A 44 2S (Center)
- Use this one when you want to pressure and force low guard to bait the instant overhead.
- 2A 2A 44 2S (Corner)
- Same principe but with two 2A in corner.
- 5AB xx 216D xx 214C 8BC/Whathever
- You can't do it against all character. 5AB xx 216D xx 214C is more safe than 5AB xx 214C but it's rage-cancellable with ABC. Can be followed up by 8BC or okizeme move.
Pure luck, absolute yolo gambling loto, don't use it unless carpe diem is your way of life
- 236CD (Meaty/Crossup)
- It may crossup your opponent in meaty if you have a godlike read (or insane luck).
- 4CD 214C (Throw cheese)
- Cheesy play on careless opponent, may work once if you're lucky enough. +50 cool point if you manage to place it. May be mixed with WFT if your opponent jump to escape another throw cheese.
Time slow
- j.AB j.AB j.AB 2S
- Can be usefull to know this. Due to the amount of meditation needed to do this, you'll almost never do the three j.AB, so don't try to force the third j.AB and stop to the second or first. Anyway you will rarely use the time slow with Kyoshiro.
- 2B 214C or BCD
- If they don't block the 2B you can freely use the frog or issen.
- n.5A 2C BCD
- Standard strat to try to open the guard and get the issen. You can use the n.5A for tick throw purpose. Anyway as I said before, don't count too much on the time slow as Kyoshiro.
- 5B 214C
- If you're used to the cheese gimmickly strat with Kyoshiro, this one often works the first time, so feel free to use it (but only once per person!). You can do only the 214C too.
Link
Strategies
General
Kyoshiro is a very strong defensive character with good range and damages. With him, you want to force your opponent to stay far and made him make mistakes to control space and punish him. By the way, even if he's a zoning/defensive character, he's not weak at all at close combat courtesy of falling spin.
Zoning and poking
Due to his good range on his normals, Kyoshiro has a good set for zoning and poking purpose.
- 2A - Quick and usefull poke, it's fast and can be spammed because it's pretty safe. But be carefull because it can be deflected.
- 2B - Hit low from far range, it's an usefull poke if you use it wisely. The main problem of this normal it's that can be punished with a good read, jumping opponent or character with good range.
- 5B - This one can be jumped over and being deflected but has many use thanks to the recoil cancel.
- j.B - Really great air option. Against some match-up you can literally abuse of this and having the priority against all attack and never being punished. If blocked backdash, if they run toward you add 2S to the backdash.
- 5BC - One of the greatest overhead in the game, jump over many projectiles, great range and good damage. Thanks to the frog and 2B, people often turtle with low guard, giving you good opportunities to do it. Not safe if blocked and you'll be thrown in most of case.
- 236S - Don't use it if it's not from far screen or you'll be punished by an AB by almost every character in the game. Even for chip damage or for poking purpose you'll have better option in any case.
Anti-air
2AB, 5AB, j.AB, j.B, 44 2S, 623S, 236CD... Kyoshiro got so many options to anti-air someone. The main problem and difficulty of this amazing set that is difficult to know which option use on which situation. The three best options are j.AB, 2AB and 44 2S.
If someone jump and do an action, do the j.AB, didn't work? Go for the 2AB, didn't work? Go the the 44 2S. With these three option you can cover almost everything (if it's not everything).
Okizeme
Kyoshiro has a really good okizeme tools, 5BC, 3C, 421S, 44 2S, 66B... Not all of these options are safe but if you mix-up enough you'll be very annoying for your opponent every time you knockdown him because of the low, overhead and chip damage mix-up.
The 421S option is a good one to do some chip damages (and the A version is pretty safe and can be followed up by the frog) but if you do it immediatly after knockdowned your opponent, he will not wake-up and stay on the ground to avoid the chip damages.
Round finisher and chip damage
One of the Kyoshiro' strenghts is his ability to chip damages and ending rounds (with chip damages or not).
- 214AB - Gimmickly but you can use the fire dash after recoil cancelling a 5B/5AB. If your opponent don't jump you'll kill him with the chip damages.
- 421S - After a knockdown against a cornered opponent, this one is pretty usefull to end a round. Be carefull of the slide effect if your opponent roll.
- 2S - When your opponent got 1 or 2 "chip health point" you can jump and do the 2S. This won't work against every character (Enja or Kazuki can 2AB as anti-air).
- 236CD - This one has ridiculously strong chip damages. But because of it your opponent will be on guard and jump over if you do it blindly. Anyway if you manage to hit (on guard) your opponent will not be able to ABC for escape.
- 214C xx ABC xx 8BC (corner) - This one is more a match ender than a round ender but it does really hurt. The best thing about that is a that's lot easier than the normal 214C 8BC.
Cheese, gimmick and shenanigan
In addition of his range, his anti-airs options, his okizeme game and his chip damage, Kyoshiro can be a really cool gambling character with high risks but also high rewards.
That can be an empty throw into the frog, low punch into backdash spin, forward dash attack into frog... The clown got many stuff in his set to force some panic punish reaction to get frogged. But as I said, it's high rewards but also high risks, so don't use these strategies as they were normals strategies, the goal isn't to play yolo and to do random move!
These strats works on people when you usually play normaly. The empty throw will works only if you did before only normals throws on the same opponent, the change will make him fell for that nearly only in that case, and only once. So use them wisely.
Time Slow vs. Rage
Kyoshiro will almost never use the time slow, the sword gauge boost and the anti-air/chip damages capacity of the WFT are more consistents strengths than the time slow. Anyway if your opponent jump you can j.AB and finish with 2S/another j.AB.
Frame Data
| Move | Damage | Startup | Active | Total | Cancel | Weapon Clash |
Hit Adv. |
Backhit Adv. |
Block Adv. |
Guard | Notes |
| 5A | 6 | 7 | 3 | 26 | 1~4(4) / 10~15(6) | - | -9 | -9 | -12 | Mid | Weak attack, Deflectable(weak) |
| 5B | 11 | 13 | 3 | 33 | 1~7(7) | 11~12(2) / 16~18(3) | -2 | +6 | -18 | Mid | Medium attack, Deflectable(med) |
| 5AB | 5, 24 | 15 | 3 | 45 | 1~2(2) | 6~14(9) / 18~20(3) | +8 | +18 | -26 | Mid | Weak attack, Deflectable(heavy) |
| 2A | 6 | 8 | 3 | 21 | 1~7(7) | - | -3 | -3 | -12 | Mid | Weak attack, Deflectable(weak) |
| 2B | 11 | 12 | 2 | 36 | 1~4(4) | 10~12(3) | -6 | +2 | -18 | Low | Medium attack |
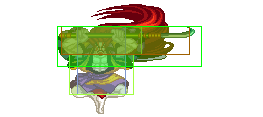
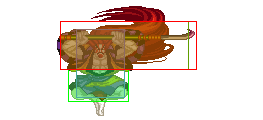
| 2AB | 27 | 13 | 9 | 47 | 1~2(2) / 36~39(4) | - | -3 | +13 | -26 | Mid | Heavy attack, Deflectable(heavy) |
| n.5A | 4 | 5 | 3 | 18 | 1~4(4) / 8~18(11) | - | -3 | -3 | -8 | Mid | Weak attack |
| n.5B | 7 | 11 | 5 | 34 | x | - | -5 | +3 | -18 | Mid | Medium attack |
| n.5AB | 29 | 14 | 3 | 58 | 1~3(3) | 12~13(2) | -7 | +3 | -26 | Mid | Heavy attack, Deflectable(heavy) |
| n.2A | 4 | 5 | 2 | 10 | 1~2(2) / 5~10(6) | - | +5 | +5 | +0 | Mid | Weak attack |
| n.2B | 7 | 10 | 2 | 29 | x | - | -1 | +7 | -14 | Mid | Medium attack |
| n.2AB | 27 | 13 | 9 | 47 | 1~2(2) / 36~39(4) | - | -3 | +13 | -26 | Mid | Heavy attack, Deflectable(heavy) |
| 5C | 6 | 9 | 10 | 33 | 1~5(5) | - | -6 | +2 | -19 | Mid | Medium attack |
| 6C | 6 | 8 | 10 | 35 | 1~3(3) | - | -17 | -17 | -22 | Low | Weak attack |
| 2C | 2 | 5 | 4 | 21 | 1~4(4) | - | -6 | -6 | -11 | Low | Weak attack |
| 3C | 6 | 14 | 5 | 36 | 1~4(4) | - | KD | KD | -17 | Low | Knockdown attack |
| u.3C | 6 | 16 | 4 | 36 | 1~4(4) | - | KD | KD | -17 | Low | Knockdown attack |
| j.A | 4 | 6 | 23 | 32 | 1~3(3) | - | -- | -- | -- | High | Weak attack |
| j.B | 9 | 12 | 8 | 43 | x | - | -- | -- | -- | High | Medium attack, Deflectable(med) |
| j.AB | 25 | 10 | 3 | 40 | x | - | -- | -- | -- | High | Heavy attack, Deflectable(heavy) |
| j.C | 5 | 8 | 6 | 17 | x | - | -- | -- | -- | High | Medium attack |
| ju.C | 5 | 8 | 6 | 17 | x | - | -- | -- | -- | High | Medium attack |
| 5BC | 16 | 20 | 5 | x | 1~2(2) | - | KD | KD | -13 | High | Medium attack Knockdown attack |
| u.5BC | 6 | 20 | 8 | x | 1~3(3) | - | KD | KD | -23 | High | Medium attack Knockdown attack |
| 66A | 4 | 14 | 5 | 37 | x | - | -5 | +3 | -18 | Mid | Medium attack |
| 66B | 11 | 20 | 2 | 48 | 9~10(2) / 34~35(2) | - | KD | KD | -23 | High | Medium attack Knockdown attack |
| 66AB | 15 | 15 | 3 | 44 | 1~14(14) | - | KD | KD | -24 | Mid | Knockdown attack |
| 66C | 4 | 3 | 6 | 32 | x | - | KD | KD | -24 | Low | Knockdown attack |
| u.5S | 4 | 11 | 5 | 34 | 1~3(3) | - | -5 | +3 | -18 | Mid | Medium attack |
| u.2S | 3 | 7 | 2 | 24 | 1~2(2) | - | -7 | -7 | -12 | Mid | Weak attack |
| ju.S | 5 | 6 | 21 | 30 | x | - | -- | -- | -- | High | Weak attack |
| u.66S | 4 | 10 | 7 | 30 | 1~9(9) | - | KD | KD | -15 | Mid | Knockdown attack |
| u.66C | 4 | 3 | 6 | 32 | x | - | KD | KD | -24 | Low | Knockdown attack |
| 2BC | 5 | 18 | 2 | 42 | x | - | -- | -- | -- | Mid | |
| u.2BC | 4 | 3 | 3 | 11 | x | - | -- | -- | -- | Mid | |
| 8BC | 13 | 39 | 3 | 113 | x | - | -- | -- | -- | Mid | |
| u.8BC | 8 | 39 | 1 | 74 | x | - | -- | -- | -- | Mid | |
| Ootsunami - 236A | 9 | 17 | x | 60 | x | - | -6 | KD | -31 | Mid | Medium attack 7-9f throw invincible |
| Ootsunami - 236B | 9 | 19 | x | 68 | x | - | -12 | KD | -37 | Mid | Medium attack |
| Ootsunami - 236AB | 9 | 22 | x | 71 | x | - | -12 | KD | -37 | Mid | Medium attack |
| Chikemuri Kuruwa - j.2S | 22 | 1 | x | x | x | - | KD | KD | -67 | Mid | Knockdown attack |
| Gama Jigoku - 214C | 22 | 17 | 5 | 117 | x | - | KD | KD | -73 | Low | Knockdown attack fixed damage |
| Kaen Kyokubu - 421A | 17 | 35 | 35 | 87 | x | - | KD | KD | -9 | Mid | Knockdown attack |
| Kaen Kyokubu - 421B | 17 | 36 | 52 | 109 | x | - | KD | KD | -13 | Mid | Knockdown attack |
| Kaen Kyokubu - 421AB | 17 | 38 | 84 | 153 | x | - | KD | KD | -21 | Mid | Knockdown attack |
| Kaiten Kyokubu - 623A | 18 | 9 | 18 | 62 | x | - | KD | KD | -47 | Mid | Knockdown attack 1-8f knees-head invincible 9-26f throw invincible |
| Kaiten Kyokubu - 623B | 18 | 9 | 24 | 71 | x | - | KD | KD | -56 | Mid | Knockdown attack 1-8f knees-head invincible 9-32f throw invincible |
| Kaiten Kyokubu - 623AB | 18 | 9 | 26 | 128 | x | - | KD | KD | -113 | Mid | Knockdown attack 1-8f knees-head invincible 9-34f throw invincible |
| Choubi Jishi - 214A | 17 | 17 | 12 | 88 | x | - | KD | KD | -56 | Mid | Knockdown attack 1-7f upper body invincible 14-16f fully invincible 4 hits on guard |
| Choubi Jishi - 214B | 18 | 20 | 19 | 100 | x | - | KD | KD | -57 | Mid | Knockdown attack 1-10f upper body invincible 7 hits on guard |
| Choubi Jishi - Ranshin - 214AB | 23 | 31 | 28 | 143 | x | - | KD | KD | -83 | Mid | Knockdown attack 1-20f fully invincible 7 hits on guard |
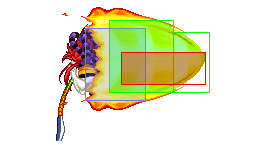
| Ketsuniku no Mai - 236CD | 30 | 20 | 35 | 95 | x | - | KD | KD | -29 | Mid | Knockdown attack. 20-54f throw invincible 14 hits on guard |
