User:Pythmere/VSAV/Q-Bee: Difference between revisions
No edit summary |
No edit summary |
||
| Line 252: | Line 252: | ||
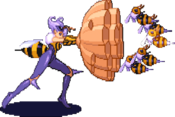
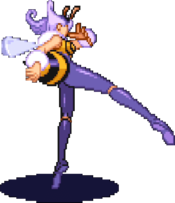
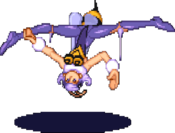
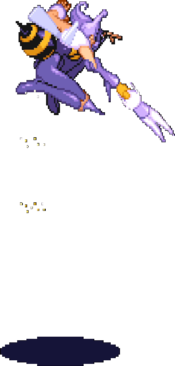
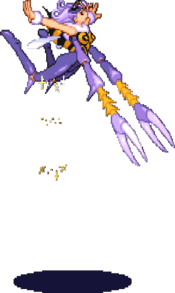
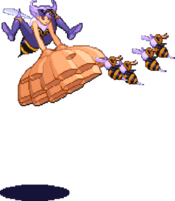
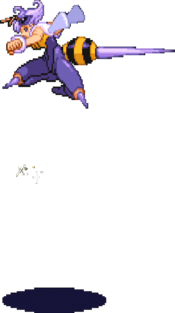
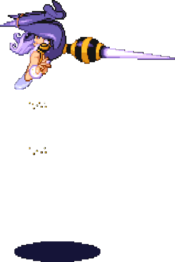
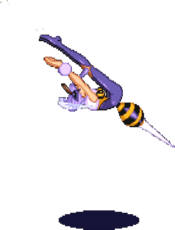
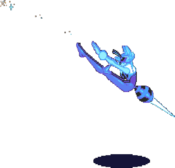
{{MoveDataCargoImage|QB_236PP|caption=ES Version}} | {{MoveDataCargoImage|QB_236PP|caption=ES Version}} | ||
| hitboxes = | | hitboxes = | ||
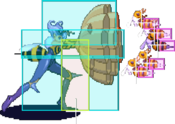
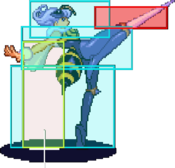
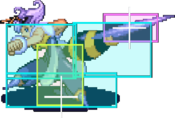
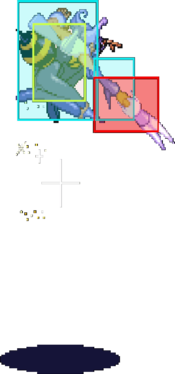
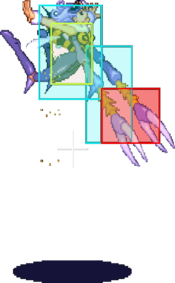
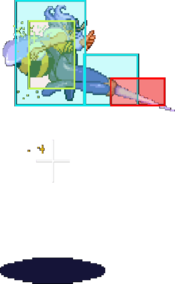
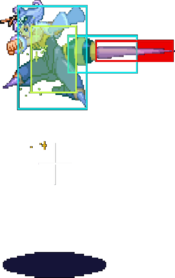
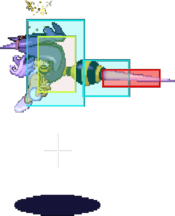
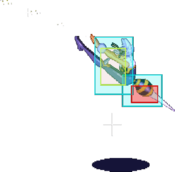
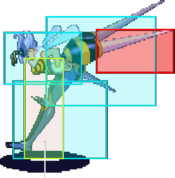
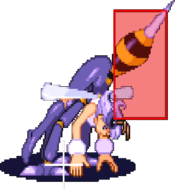
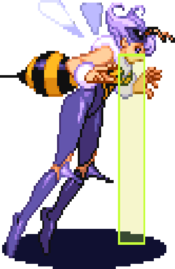
{{MoveDataCargoImage|QB_236LP|caption=|hitbox=yes}} | {{MoveDataCargoImage|QB_236LP|caption=Normal|hitbox=yes}} | ||
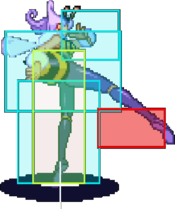
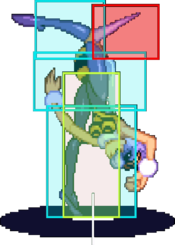
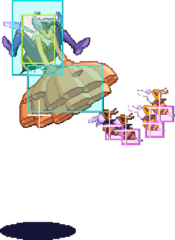
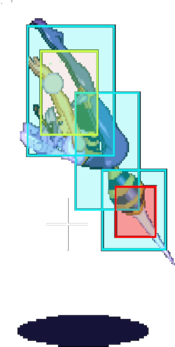
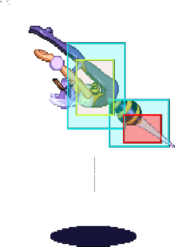
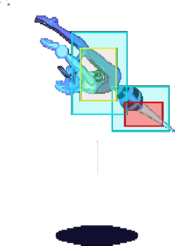
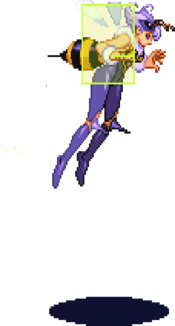
{{MoveDataCargoImage|QB_236PP|caption=ES|hitbox=yes}} | |||
| info = | | info = | ||
| Line 269: | Line 270: | ||
{{AttackDataCargo-VSAV/Query|QB_J_236MP}} | {{AttackDataCargo-VSAV/Query|QB_J_236MP}} | ||
{{AttackDataCargo-VSAV/Query|QB_J_236HP}} | {{AttackDataCargo-VSAV/Query|QB_J_236HP}} | ||
{{AttackDataCargo-VSAV/Query|QB_J_236PP}} | {{AttackDataCargo-VSAV/Query|QB_J_236PP}} | ||
}} | }} | ||
Revision as of 23:45, 23 March 2023
standing normal
5LP
| Startup | Active | Recovery | Hit Adv. | Block Adv. | Renda Bonus |
|---|---|---|---|---|---|
| 6 | 3 | 8 | 8 | 7 | H: 11 G: 10 |
| Guard | Cancel | Invuln | Red Damage | White Damage | Gauge |
| mid | yes | - | 7 | 3 | H: 6 G: 3 W: 0 |
5MP
| Startup | Active | Recovery | Hit Adv. | Block Adv. | Renda Bonus |
|---|---|---|---|---|---|
| 7 | 3 | 16 | 5 | 4 | N/A |
| Guard | Cancel | Invuln | Red Damage | White Damage | Gauge |
| mid | no | - | 16 | 7 | H: 15 G: 9 W: 3 |
5HP
| Startup | Active | Recovery | Hit Adv. | Block Adv. | Renda Bonus |
|---|---|---|---|---|---|
| 13 | 29 | 21 | -3 | -4 | N/A |
| Guard | Cancel | Invuln | Red Damage | White Damage | Gauge |
| mid | no | - | 5x5 | 2x5 | H: 10+4x4 G: 8+2x4 W: 6 |
5LK
| Startup | Active | Recovery | Hit Adv. | Block Adv. | Renda Bonus |
|---|---|---|---|---|---|
| 5 | 4 | 8 | 4 | 3 | N/A |
| Guard | Cancel | Invuln | Red Damage | White Damage | Gauge |
| mid | yes | - | 7 | 3 | H: 6 G: 3 W: 0 |
5MK
| Startup | Active | Recovery | Hit Adv. | Block Adv. | Renda Bonus |
|---|---|---|---|---|---|
| 6 | 4 | 17 | 4 | 3 | N/A |
| Guard | Cancel | Invuln | Red Damage | White Damage | Gauge |
| mid | yes | - | 17 | 6 | H: 15 G: 9 W: 3 |
5HK
| Startup | Active | Recovery | Hit Adv. | Block Adv. | Renda Bonus |
|---|---|---|---|---|---|
| 9 | 2,2(4)3,2 | 23 | 0 | -1 | N/A |
| Guard | Cancel | Invuln | Red Damage | White Damage | Gauge |
| mid | no | - | 6x4 | 2x4 | H: 11+5+4+4 G: 8+2x3 W: 6 |
crouching normal
2LP
| Startup | Active | Recovery | Hit Adv. | Block Adv. | Renda Bonus |
|---|---|---|---|---|---|
| 6 | 3 | 9 | 4 | 3 | H: 7 G: 6 |
| Guard | Cancel | Invuln | Red Damage | White Damage | Gauge |
| low | yes | - | 7 | 3 | H: 6 G: 3 W: 0 |
2MP
| Startup | Active | Recovery | Hit Adv. | Block Adv. | Renda Bonus |
|---|---|---|---|---|---|
| 7 | 4 | 14 | 3 | 2 | N/A |
| Guard | Cancel | Invuln | Red Damage | White Damage | Gauge |
| low | yes | - | 16 | 6 | H: 15 G: 9 W: 3 |
2HP
| Startup | Active | Recovery | Hit Adv. | Block Adv. | Renda Bonus |
|---|---|---|---|---|---|
| 11 | 14 | 22 | 10 | 9 | N/A |
| Guard | Cancel | Invuln | Red Damage | White Damage | Gauge |
| mid | no | - | 7x3 | 3x3 | H: 12+6+6 G: 9+2x3 W: 6 |
2LK
| Startup | Active | Recovery | Hit Adv. | Block Adv. | Renda Bonus |
|---|---|---|---|---|---|
| 5 | 2 | 10 | 6 | 5 | N/A |
| Guard | Cancel | Invuln | Red Damage | White Damage | Gauge |
| low | yes | - | 6 | 2 | H: 6 G: 3 W: 0 |
2MK
| Startup | Active | Recovery | Hit Adv. | Block Adv. | Renda Bonus |
|---|---|---|---|---|---|
| 7 | 3 | 16 | 5 | 4 | N/A |
| Guard | Cancel | Invuln | Red Damage | White Damage | Gauge |
| mid | yes | - | 16 | 6 | H: 15 G: 9 W: 3 |
2HK
| Startup | Active | Recovery | Hit Adv. | Block Adv. | Renda Bonus |
|---|---|---|---|---|---|
| 8 | 13 | 22 | - | -7 | N/A |
| Guard | Cancel | Invuln | Red Damage | White Damage | Gauge |
| low | no | - | 20,16 | 9,7 | H: 24 G: 15 W: 6 |
jumping normal
J.LP
| Startup | Active | Recovery | Hit Adv. | Block Adv. | Renda Bonus |
|---|---|---|---|---|---|
| 5 | 3 | 5 | - | - | N/A |
| Guard | Cancel | Invuln | Red Damage | White Damage | Gauge |
| overhead | yes | - | 8 | 3 | H: 6 G: 3 W: 0 |
'
Decent speed and range for a jump jab. The hitbox is somewhat the same as j.LK so it's difficult to say which is better. Good for IADs or airchain starter.J.MP
| Startup | Active | Recovery | Hit Adv. | Block Adv. | Renda Bonus |
|---|---|---|---|---|---|
| 8 | 5 | 6 | - | - | N/A |
| Guard | Cancel | Invuln | Red Damage | White Damage | Gauge |
| overhead | yes | - | 16 | 7 | H: 15 G: 9 W: 3 |
J.HP
| Startup | Active | Recovery | Hit Adv. | Block Adv. | Renda Bonus |
|---|---|---|---|---|---|
| 24 | 13 | 18 | - | - | N/A |
| Guard | Cancel | Invuln | Red Damage | White Damage | Gauge |
| overhead | no | - | 6x4 | 3x4 | H: 10+4x3 G: 8+2x3 W: 6 |
J.LK
| Startup | Active | Recovery | Hit Adv. | Block Adv. | Renda Bonus |
|---|---|---|---|---|---|
| 5 | 4 | 8 | - | - | N/A |
| Guard | Cancel | Invuln | Red Damage | White Damage | Gauge |
| overhead | yes | - | 8 | 4 | H: 6 G: 3 W: 0 |
J.MK
| Startup | Active | Recovery | Hit Adv. | Block Adv. | Renda Bonus |
|---|---|---|---|---|---|
| 8 | 5 | 9 | - | - | N/A |
| Guard | Cancel | Invuln | Red Damage | White Damage | Gauge |
| overhead | yes | - | 17 | 6 | H: 15 G: 9 W: 3 |
J.HK
| Startup | Active | Recovery | Hit Adv. | Block Adv. | Renda Bonus |
|---|---|---|---|---|---|
| 10 | 4 | 11 | - | - | N/A |
| Guard | Cancel | Invuln | Red Damage | White Damage | Gauge |
| overhead | no | - | 22 | 8 | H: 24 G: 15 W: 6 |
hit command grab
236LP
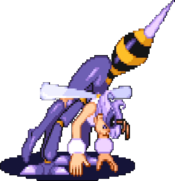
Normal Version
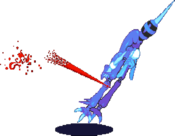
ES Version
Normal
ES
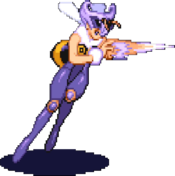
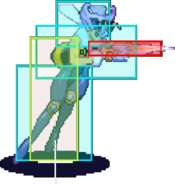
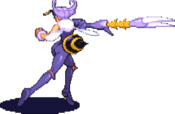
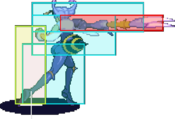
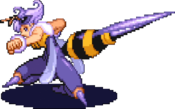
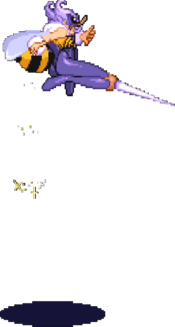
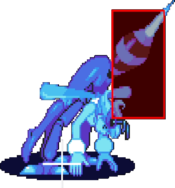
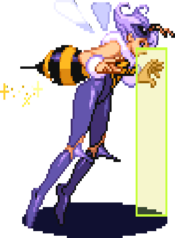
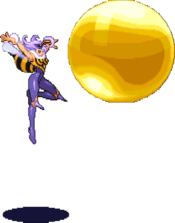
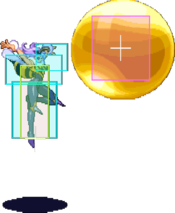
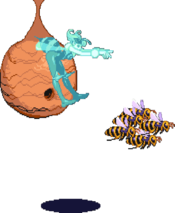
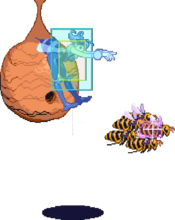
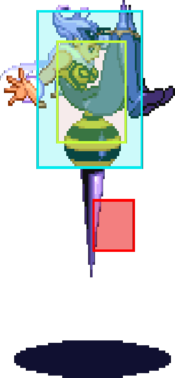
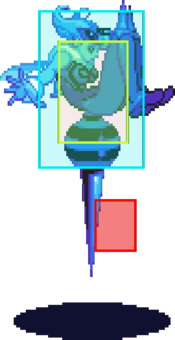
Pronounced "See arr". A blockable airborne rush. If this hits she will grab the opponent. This special has a rather generous amount of active frames and goes over some low attacks and even Felicia's ball roll, and will grab quite a lot of normal moves, beating their hitboxes clean. Despite having some recovery on block it's a fairly safe move, making it not entirely necessary to hitconfirm. Really, because of the outstanding hitbox and good recovery, it's not a bad poking move either, though not something you want to spam all the time since if it fails you lose initiative/pressure. There are scenarios where the ground version will hit, but fail to grab. The air/TK version is more consistent in this respect. Landing Suki: 1F No results Short range, slow speed. No results Mid range, mid speed. No results Far range, fast speed. Best for combos. No results Cocoon's the opponent. This is the best setup up a bubble okizeme since QB recovers extremely fast after the knockdown. Typically one would IAD j.P/j.K, 2LP/2LK xx 41236PP, then immediate lp 623PP on recovery and go for more IAD mixups or anti-air while the opponent is blocking the bubble. If the opponent is hit on the ground by the bubble the best follow up is another C->R. No results No results No results
No resultsspecial
214LK
| Startup | Active | Recovery | Hit Adv. | Block Adv. | Renda Bonus |
|---|---|---|---|---|---|
| 45 | 11 | landing 1 | - | - | N/A |
| Guard | Cancel | Invuln | Red Damage | White Damage | Gauge |
| overhead | no | - | 21 | 5 | H: 21 G: 16 W: 12 |
214MK
| Startup | Active | Recovery | Hit Adv. | Block Adv. | Renda Bonus |
|---|---|---|---|---|---|
| 45 | 13 | landing 1 | - | - | N/A |
| Guard | Cancel | Invuln | Red Damage | White Damage | Gauge |
| overhead | no | - | 23 | 6 | H: 21 G: 16 W: 12 |
214HK
| Startup | Active | Recovery | Hit Adv. | Block Adv. | Renda Bonus |
|---|---|---|---|---|---|
| 45 | 22 | landing 1 | - | - | N/A |
| Guard | Cancel | Invuln | Red Damage | White Damage | Gauge |
| overhead | no | - | 25 | 7 | H: 21 G: 16 W: 12 |
es special
214KK
| Startup | Active | Recovery | Hit Adv. | Block Adv. | Renda Bonus |
|---|---|---|---|---|---|
| 45 | 17 | landing 1 | - | - | N/A |
| Guard | Cancel | Invuln | Red Damage | White Damage | Gauge |
| overhead | no | - | 28 | 8 | H: 0 G: 0 W: 0 |
special
J.214LK
| Startup | Active | Recovery | Hit Adv. | Block Adv. | Renda Bonus |
|---|---|---|---|---|---|
| 35 ~ 45 | 11 | landing 1 | - | - | N/A |
| Guard | Cancel | Invuln | Red Damage | White Damage | Gauge |
| overhead | no | - | 21 | 5 | H: 21 G: 16 W: 12 |
J.214MK
| Startup | Active | Recovery | Hit Adv. | Block Adv. | Renda Bonus |
|---|---|---|---|---|---|
| 35 ~ 45 | 13 | landing 1 | - | - | N/A |
| Guard | Cancel | Invuln | Red Damage | White Damage | Gauge |
| overhead | no | - | 23 | 6 | H: 21 G: 16 W: 12 |
J.214HK
| Startup | Active | Recovery | Hit Adv. | Block Adv. | Renda Bonus |
|---|---|---|---|---|---|
| 35 ~ 45 | 22 | landing 1 | - | - | N/A |
| Guard | Cancel | Invuln | Red Damage | White Damage | Gauge |
| overhead | no | - | 25 | 7 | H: 21 G: 16 W: 12 |
es special
J.214KK
| Startup | Active | Recovery | Hit Adv. | Block Adv. | Renda Bonus |
|---|---|---|---|---|---|
| 35 ~ 45 | 17 | landing 1 | - | - | N/A |
| Guard | Cancel | Invuln | Red Damage | White Damage | Gauge |
| overhead | no | - | 28 | 8 | H: 0 G: 0 W: 0 |
special
K,K,K,K,LK
| Startup | Active | Recovery | Hit Adv. | Block Adv. | Renda Bonus |
|---|---|---|---|---|---|
| 12 | 4(4)4 | 10 | 11 | 10 | N/A |
| Guard | Cancel | Invuln | Red Damage | White Damage | Gauge |
| mid | no | - | 8xn | 3xn | H: 9+6xn G: 9+3xn W: 9 |
K,K,K,K,MK
| Startup | Active | Recovery | Hit Adv. | Block Adv. | Renda Bonus |
|---|---|---|---|---|---|
| 13 | 3(3)3(3)1 | 10 | 14 | 13 | N/A |
| Guard | Cancel | Invuln | Red Damage | White Damage | Gauge |
| mid | no | - | 8xn | 3xn | H: 9+6xn G: 9+3xn W: 9 |
es special
K,K,K,K,HK
| Startup | Active | Recovery | Hit Adv. | Block Adv. | Renda Bonus |
|---|---|---|---|---|---|
| 15 | 2(3)2(3)2(1) | 10 | 12 | 11 | N/A |
| Guard | Cancel | Invuln | Red Damage | White Damage | Gauge |
| mid | no | - | 8xn | 3xn | H: 9+6xn G: 9+3xn W: 9 |
special
J.K,K,K,K,LK
| Startup | Active | Recovery | Hit Adv. | Block Adv. | Renda Bonus |
|---|---|---|---|---|---|
| 12 | 4(4)4 | variable + landing 1 | 11 | 10 | N/A |
| Guard | Cancel | Invuln | Red Damage | White Damage | Gauge |
| mid | no | - | 8xn | 3xn | H: 9+6xn G: 9+3xn W: 9 |
J.K,K,K,K,MK
| Startup | Active | Recovery | Hit Adv. | Block Adv. | Renda Bonus |
|---|---|---|---|---|---|
| 13 | 3(3)3(3)1 | variable + landing 1 | 14 | 13 | N/A |
| Guard | Cancel | Invuln | Red Damage | White Damage | Gauge |
| mid | no | - | 8xn | 3xn | H: 9+6xn G: 9+3xn W: 9 |
es special
J.K,K,K,K,HK
| Startup | Active | Recovery | Hit Adv. | Block Adv. | Renda Bonus |
|---|---|---|---|---|---|
| 15 | 2(3)2(3)2(1) | variable + landing 1 | 12 | 11 | N/A |
| Guard | Cancel | Invuln | Red Damage | White Damage | Gauge |
| mid | no | - | 8xn | 3xn | H: 9+6xn G: 9+3xn W: 9 |
special GC
623K
| Startup | Active | Recovery | Hit Adv. | Block Adv. | Renda Bonus |
|---|---|---|---|---|---|
| 10 | 2(4)14 | 18 | - | -14 | N/A |
| Guard | Cancel | Invuln | Red Damage | White Damage | Gauge |
| mid | no | 1-13 whole body | 12,12 | 4,4 | H: 24 G: 21+3 W: 18 |
es special GC
623KK
| Startup | Active | Recovery | Hit Adv. | Block Adv. | Renda Bonus |
|---|---|---|---|---|---|
| 10 | 2(4)14 | 18 | - | -14 | N/A |
| Guard | Cancel | Invuln | Red Damage | White Damage | Gauge |
| mid | no | 1-13 whole body | 19,19 | 4,4 | H: 0 G: 0 W: 0 |
command throw
632[4]P
| Startup | Active | Recovery | Hit Adv. | Block Adv. | Renda Bonus |
|---|---|---|---|---|---|
| 2 | 4 | 24 | - | - | N/A |
| Guard | Cancel | Invuln | Red Damage | White Damage | Gauge |
| throw | no | 1-20 whole body (on whiff) | 28 | 8 | H: 21 G: 0 W: 12 |
es command throw
632[4]PP
| Startup | Active | Recovery | Hit Adv. | Block Adv. | Renda Bonus |
|---|---|---|---|---|---|
| 2 | 10 | 27 | - | - | N/A |
| Guard | Cancel | Invuln | Red Damage | White Damage | Gauge |
| throw | no | 1-26 whole body (on whiff) | 10+10+13 | 3+3+4 | H: 0 G: 0 W: 0 |
ex projectile
623PP
| Startup | Active | Recovery | Hit Adv. | Block Adv. | Renda Bonus |
|---|---|---|---|---|---|
| 34 | 5 bounces, outside of screen | 69 | - | -1 | N/A |
| Guard | Cancel | Invuln | Red Damage | White Damage | Gauge |
| mid | no | - | 30 | 15 | H: 0 G: 0 W: 0 |
J.623PP
| Startup | Active | Recovery | Hit Adv. | Block Adv. | Renda Bonus |
|---|---|---|---|---|---|
| 34 | 5 bounces, outside of screen | 52 + variable + landing 1 | - | -1 | N/A |
| Guard | Cancel | Invuln | Red Damage | White Damage | Gauge |
| mid | no | - | 30 | 15 | H: 0 G: 0 W: 0 |
412[6]KK
| Startup | Active | Recovery | Hit Adv. | Block Adv. | Renda Bonus |
|---|---|---|---|---|---|
| 39 | out of screen | 82-119 | - | 12 | N/A |
| Guard | Cancel | Invuln | Red Damage | White Damage | Gauge |
| mid | no | - | 2+2x12+11 | (1+1)x4+7 | H: 0 G: 0 W: 0 |
J.412[6]KK
| Startup | Active | Recovery | Hit Adv. | Block Adv. | Renda Bonus |
|---|---|---|---|---|---|
| 28-39 | out of screen | 71-119 | - | - | N/A |
| Guard | Cancel | Invuln | Red Damage | White Damage | Gauge |
| mid | no | - | 2+2x12+11 | (1+1)x4+7 | H: 0 G: 0 W: 0 |
pursuit
8P or 8K
| Startup | Active | Recovery | Hit Adv. | Block Adv. | Renda Bonus |
|---|---|---|---|---|---|
| 29 | 8 | landing 1 | - | - | N/A |
| Guard | Cancel | Invuln | Red Damage | White Damage | Gauge |
| mid | no | 1-4 feet | 6 | 6 | H: 24 G: 0 W: 6 |
es pursuit
8PP or 8KK
| Startup | Active | Recovery | Hit Adv. | Block Adv. | Renda Bonus |
|---|---|---|---|---|---|
| 29 | 8 | landing 1 | - | - | N/A |
| Guard | Cancel | Invuln | Red Damage | White Damage | Gauge |
| mid | no | 1-4 feet | 3x5 | 3x5 | H: 0 G: 0 W: 0 |
ground throw
6MP or 6HP
| Startup | Active | Recovery | Hit Adv. | Block Adv. | Renda Bonus |
|---|---|---|---|---|---|
| 1 | - | 89 + landing 1 | - | - | N/A |
| Guard | Cancel | Invuln | Red Damage | White Damage | Gauge |
| throw | no | 1-88 whole body | 14+9 (14+4) | 5+3 (5+1) | H: 9 G: 0 W: 0 |
air throw
J.6P or J.4P
| Startup | Active | Recovery | Hit Adv. | Block Adv. | Renda Bonus |
|---|---|---|---|---|---|
| 1 | - | 83 + 1 + landing1 | - | - | N/A |
| Guard | Cancel | Invuln | Red Damage | White Damage | Gauge |
| throw | no | 1-83 whole body | 14+9 (14+4) | 5+3 (5+1) | H: 9 G: 0 W: 0 |
