Super Naruto: Clash of Ninja 4/Kimimaro: Difference between revisions
Jump to navigation
Jump to search
Scatteraxis (talk | contribs) (Created page with "{{Infobox-SCON4 |name = Kimimaru |image = SCON4 Kimimaru Portrait.png |size = 300 |health = 210 |guard = 1680 |backdash = Normal |install = |installdmgmod = }} {{TOC limit|2}} == Summary == == Notes == == String List == ==Weak Attacks== ===<big>5B</big>=== {{MoveData |image = SCON4_Kimimaru_5B.png |hitbox = SCON4_Kimimaru_5B_hitbox.png |caption = |name = {{NotationIcon-SCON4|B}} |input = |data = {{AttackData-SCON4 |damage = - |hitlevel = - |startup = - |a...") |
Scatteraxis (talk | contribs) No edit summary |
||
| Line 1: | Line 1: | ||
{{Infobox-SCON4 | {{Infobox-SCON4 | ||
|name = | |name = Kimimaro | ||
|image = SCON4 | |image = SCON4 Kimimaro Portrait.png | ||
|size = 300 | |size = 300 | ||
|health = 210 | |health = 210 | ||
|guard = 1680 | |guard = 1680 | ||
|install = | |install = | ||
|installdmgmod = | |installdmgmod = | ||
| Line 13: | Line 12: | ||
== Summary == | == Summary == | ||
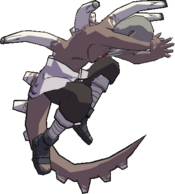
"I'm a big scary dinosaur" - ''Translation of Kimimaro's round win quote.'' | |||
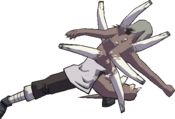
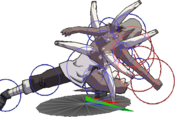
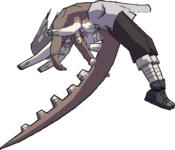
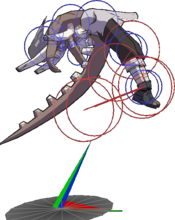
Largely unchanged from his Vanilla counterpart, Kimimaro does not have access to much in the way of unique mechanics or tricks. Rather, he is a physical combatant who hits hard with slicing bone attacks and giant dinosaur tail. The leader of the sound five has made many a ninja, genin and jounin alike, cry foul of his sheer efficiency grounding their health bar to zero. | |||
== Notes == | == Notes == | ||
| Line 22: | Line 23: | ||
===<big>5B</big>=== | ===<big>5B</big>=== | ||
{{MoveData | {{MoveData | ||
|image = | |image = SCON4_Kimimaro_5B.png | ||
|hitbox = | |hitbox = SCON4_Kimimaro_5B_hitbox.png | ||
|caption = | |caption = | ||
|name = {{NotationIcon-SCON4|B}} | |name = {{NotationIcon-SCON4|B}} | ||
| Line 47: | Line 48: | ||
===<big>6B</big>=== | ===<big>6B</big>=== | ||
{{MoveData | {{MoveData | ||
|image = | |image = SCON4_Kimimaro_6B.png | ||
|hitbox = | |hitbox = SCON4_Kimimaro_6B_hitbox.png | ||
|caption = | |caption = | ||
|name = {{NotationIcon-SCON4|6}}{{NotationIcon-SCON4|B}} | |name = {{NotationIcon-SCON4|6}}{{NotationIcon-SCON4|B}} | ||
| Line 71: | Line 72: | ||
===<big>2B</big>=== | ===<big>2B</big>=== | ||
{{MoveData | {{MoveData | ||
|image = | |image = SCON4_Kimimaro_2B.png | ||
|hitbox = | |hitbox = SCON4_Kimimaro_2B_hitbox.png | ||
|caption = | |caption = | ||
|name = {{NotationIcon-SCON4|2}}{{NotationIcon-SCON4|B}} | |name = {{NotationIcon-SCON4|2}}{{NotationIcon-SCON4|B}} | ||
| Line 95: | Line 96: | ||
===<big>4B</big>=== | ===<big>4B</big>=== | ||
{{MoveData | {{MoveData | ||
|image = | |image = SCON4_Kimimaro_4B.png | ||
|hitbox = | |hitbox = SCON4_Kimimaro_4B_hitbox.png | ||
|caption = | |caption = | ||
|name = {{NotationIcon-SCON4|4}}{{NotationIcon-SCON4|B}} | |name = {{NotationIcon-SCON4|4}}{{NotationIcon-SCON4|B}} | ||
| Line 119: | Line 120: | ||
===<big>8B</big>=== | ===<big>8B</big>=== | ||
{{MoveData | {{MoveData | ||
|image = | |image = SCON4_Kimimaro_8B.png | ||
|hitbox = | |hitbox = SCON4_Kimimaro_8B_hitbox.png | ||
|caption = | |caption = | ||
|name = {{NotationIcon-SCON4|8}}{{NotationIcon-SCON4|B}} | |name = {{NotationIcon-SCON4|8}}{{NotationIcon-SCON4|B}} | ||
| Line 143: | Line 144: | ||
===<big>Running B</big>=== | ===<big>Running B</big>=== | ||
{{MoveData | {{MoveData | ||
|image = | |image = SCON4_Kimimaro_runB.png | ||
|hitbox = | |hitbox = SCON4_Kimimaro_runB_hitbox.png | ||
|caption = | |caption = | ||
|name = {{NotationIcon-SCON4|run}}{{NotationIcon-SCON4|B}} | |name = {{NotationIcon-SCON4|run}}{{NotationIcon-SCON4|B}} | ||
| Line 167: | Line 168: | ||
===<big>j.B</big>=== | ===<big>j.B</big>=== | ||
{{MoveData | {{MoveData | ||
|image = | |image = SCON4_Kimimaro_jB.png | ||
|hitbox = | |hitbox = SCON4_Kimimaro_jB_hitbox.png | ||
|caption = | |caption = | ||
|name = {{NotationIcon-SCON4|air}}{{NotationIcon-SCON4|B}} | |name = {{NotationIcon-SCON4|air}}{{NotationIcon-SCON4|B}} | ||
| Line 192: | Line 193: | ||
===<big>5A</big>=== | ===<big>5A</big>=== | ||
{{MoveData | {{MoveData | ||
|image = | |image = SCON4_Kimimaro_5A.png | ||
|hitbox = | |hitbox = SCON4_Kimimaro_5A_hitbox.png | ||
|name = {{NotationIcon-SCON4|A}} | |name = {{NotationIcon-SCON4|A}} | ||
|input = | |input = | ||
| Line 215: | Line 216: | ||
===<big>6A</big>=== | ===<big>6A</big>=== | ||
{{MoveData | {{MoveData | ||
|image = | |image = SCON4_Kimimaro_6A.png | ||
|hitbox = | |hitbox = SCON4_Kimimaro_6A_hitbox.png | ||
|caption = | |caption = | ||
|name = {{NotationIcon-SCON4|6}}{{NotationIcon-SCON4|A}} | |name = {{NotationIcon-SCON4|6}}{{NotationIcon-SCON4|A}} | ||
| Line 239: | Line 240: | ||
===<big>2A</big>=== | ===<big>2A</big>=== | ||
{{MoveData | {{MoveData | ||
|image = | |image = SCON4_Kimimaro_2A.png | ||
|hitbox = | |hitbox = SCON4_Kimimaro_2A_hitbox.png | ||
|caption = | |caption = | ||
|name = {{NotationIcon-SCON4|2}}{{NotationIcon-SCON4|A}} | |name = {{NotationIcon-SCON4|2}}{{NotationIcon-SCON4|A}} | ||
| Line 263: | Line 264: | ||
===<big>4A</big>=== | ===<big>4A</big>=== | ||
{{MoveData | {{MoveData | ||
|image = | |image = SCON4_Kimimaro_4A.png | ||
|hitbox = | |hitbox = SCON4_Kimimaro_4A_hitbox.png | ||
|caption = | |caption = | ||
|name = {{NotationIcon-SCON4|4}}{{NotationIcon-SCON4|A}} | |name = {{NotationIcon-SCON4|4}}{{NotationIcon-SCON4|A}} | ||
| Line 287: | Line 288: | ||
===<big>8A</big>=== | ===<big>8A</big>=== | ||
{{MoveData | {{MoveData | ||
|image = | |image = SCON4_Kimimaro_8A.png | ||
|hitbox = | |hitbox = SCON4_Kimimaro_8A_hitbox.png | ||
|caption = | |caption = | ||
|name = {{NotationIcon-SCON4|8}}{{NotationIcon-SCON4|A}} | |name = {{NotationIcon-SCON4|8}}{{NotationIcon-SCON4|A}} | ||
| Line 311: | Line 312: | ||
===<big>Running A</big>=== | ===<big>Running A</big>=== | ||
{{MoveData | {{MoveData | ||
|image = | |image = SCON4_Kimimaro_runA.png | ||
|hitbox = | |hitbox = SCON4_Kimimaro_runA_hitbox.png | ||
|caption = | |caption = | ||
|name = {{NotationIcon-SCON4|run}}{{NotationIcon-SCON4|A}} | |name = {{NotationIcon-SCON4|run}}{{NotationIcon-SCON4|A}} | ||
| Line 335: | Line 336: | ||
===<big>j.A</big>=== | ===<big>j.A</big>=== | ||
{{MoveData | {{MoveData | ||
|image = | |image = SCON4_Kimimaro_jA.png | ||
|hitbox = | |hitbox = SCON4_Kimimaro_jA_hitbox.png | ||
|caption = | |caption = | ||
|name = {{NotationIcon-SCON4|air}}{{NotationIcon-SCON4|A}} | |name = {{NotationIcon-SCON4|air}}{{NotationIcon-SCON4|A}} | ||
| Line 360: | Line 361: | ||
===<big>5Y</big>=== | ===<big>5Y</big>=== | ||
{{MoveData | {{MoveData | ||
|image = | |image = SCON4_Kimimaro_5Y.png | ||
|caption = | |caption = | ||
|name = {{NotationIcon-SCON4|Y}} | |name = {{NotationIcon-SCON4|Y}} | ||
| Line 384: | Line 385: | ||
===<big>5X</big>=== | ===<big>5X</big>=== | ||
{{MoveData | {{MoveData | ||
|image = | |image = SCON4_Kimimaro_5X.png | ||
|hitbox = | |hitbox = SCON4_Kimimaro_5X_hitbox.png | ||
|caption = | |caption = | ||
|name = {{NotationIcon-SCON4|X}} | |name = {{NotationIcon-SCON4|X}} | ||
| Line 408: | Line 409: | ||
===<big>2X</big>=== | ===<big>2X</big>=== | ||
{{MoveData | {{MoveData | ||
|image = | |image = SCON4_Kimimaro_2X.png | ||
|hitbox = | |hitbox = SCON4_Kimimaro_2X_hitbox.png | ||
|caption = | |caption = | ||
|name = {{NotationIcon-SCON4|2}}{{NotationIcon-SCON4|X}} | |name = {{NotationIcon-SCON4|2}}{{NotationIcon-SCON4|X}} | ||
| Line 435: | Line 436: | ||
== Navigation == | == Navigation == | ||
{{Navbox-SCON4}} | {{Navbox-SCON4}} | ||
[[Category: | [[Category:Kimimaro (SCON4)]] | ||
[[Category:Super Naruto: Clash of Ninja 4]] | [[Category:Super Naruto: Clash of Ninja 4]] | ||
Revision as of 15:58, 5 July 2023
| Kimimaro
| |
|---|---|

| |
| Health: | 210 |
| Guard Gauge: | 1680 |
Summary
"I'm a big scary dinosaur" - Translation of Kimimaro's round win quote.
Largely unchanged from his Vanilla counterpart, Kimimaro does not have access to much in the way of unique mechanics or tricks. Rather, he is a physical combatant who hits hard with slicing bone attacks and giant dinosaur tail. The leader of the sound five has made many a ninja, genin and jounin alike, cry foul of his sheer efficiency grounding their health bar to zero.
Notes
String List
Weak Attacks
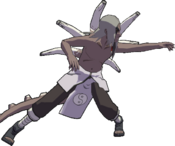
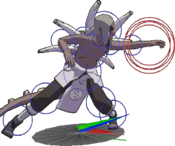
5B
Toggle Hitboxes Toggle Hitboxes
|
|---|
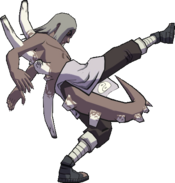
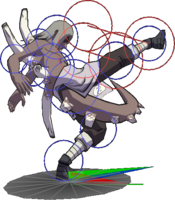
6B
Toggle Hitboxes Toggle Hitboxes
|
|---|
2B
Toggle Hitboxes Toggle Hitboxes
|
|---|
4B
Toggle Hitboxes Toggle Hitboxes
|
|---|
8B
Toggle Hitboxes Toggle Hitboxes
|
|---|
Running B
Toggle Hitboxes Toggle Hitboxes
|
|---|
j.B
Toggle Hitboxes Toggle Hitboxes
|
|---|
Strong Attacks
5A
Toggle Hitboxes Toggle Hitboxes
|
|---|
6A
Toggle Hitboxes Toggle Hitboxes
|
|---|
2A
Toggle Hitboxes Toggle Hitboxes
|
|---|
4A
Toggle Hitboxes Toggle Hitboxes
|
|---|
8A
Toggle Hitboxes Toggle Hitboxes
|
|---|
Running A
Toggle Hitboxes Toggle Hitboxes
|
|---|
j.A
Toggle Hitboxes Toggle Hitboxes
|
|---|
Throws
5Y
Special
5X
Toggle Hitboxes Toggle Hitboxes
|
|---|
2X
Toggle Hitboxes Toggle Hitboxes
|
|---|
