Super Naruto: Clash of Ninja 4/Kimimaro: Difference between revisions
Jump to navigation
Jump to search
Scatteraxis (talk | contribs) |
No edit summary |
||
| Line 5: | Line 5: | ||
|health = 210 | |health = 210 | ||
|guard = 1680 | |guard = 1680 | ||
|backdash = Normal | |||
|install = | |install = | ||
|installdmgmod = | |installdmgmod = | ||
| Line 12: | Line 13: | ||
== Summary == | == Summary == | ||
Largely unchanged from his Vanilla counterpart, Kimimaro does not have access to much in the way of unique mechanics or tricks. Rather, he is a physical combatant who hits hard with slicing bone attacks and giant dinosaur tail. The leader of the Sound Five has made many a ninja, genin and jounin alike, cry foul of his sheer efficiency grounding their health bar to zero. | |||
Largely unchanged from his Vanilla counterpart, Kimimaro does not have access to much in the way of unique mechanics or tricks. Rather, he is a physical combatant who hits hard with slicing bone attacks and giant dinosaur tail. The leader of the | |||
== Notes == | == Notes == | ||
== String List == | == String List == | ||
{|class="wikitable mw-collapsible mw-collapsed" style="margin:1em auto 1em auto" | |||
|- | |||
!align="center"|String # | |||
!align="center"|Inputs | |||
!align="center"|Notes | |||
|- | |||
|align="center"|{{NotationIcon-SCON4|String}} '''01''' | |||
|{{NotationIcon-SCON4|B}}{{NotationIcon-SCON4|B}}{{NotationIcon-SCON4|B}}{{NotationIcon-SCON4|B}}{{NotationIcon-SCON4|B}} | |||
|rowspan="5"|{{NotationIcon-SCON4|X}}Cancellable at {{NotationIcon-SCON4|B}}({{NotationIcon-SCON4|B}}) | |||
|- | |||
|align="center"|{{NotationIcon-SCON4|String}} '''02''' | |||
|{{NotationIcon-SCON4|B}}{{NotationIcon-SCON4|B}}{{NotationIcon-SCON4|B}}{{NotationIcon-SCON4|B}}{{NotationIcon-SCON4|A}} | |||
|- | |||
|align="center"|{{NotationIcon-SCON4|String}} '''03''' | |||
|{{NotationIcon-SCON4|B}}{{NotationIcon-SCON4|B}}{{NotationIcon-SCON4|B}}{{NotationIcon-SCON4|A}}{{NotationIcon-SCON4|A}} | |||
|- | |||
|align="center"|{{NotationIcon-SCON4|String}} '''04''' | |||
|{{NotationIcon-SCON4|B}}{{NotationIcon-SCON4|B}}{{NotationIcon-SCON4|A}}{{NotationIcon-SCON4|B}}{{NotationIcon-SCON4|A}} | |||
|- | |||
|align="center"|{{NotationIcon-SCON4|String}} '''05''' | |||
|{{NotationIcon-SCON4|B}}{{NotationIcon-SCON4|B}}{{NotationIcon-SCON4|A}}{{NotationIcon-SCON4|A}}{{NotationIcon-SCON4|A}} | |||
|- | |||
|align="center"|{{NotationIcon-SCON4|String}} '''06''' | |||
|{{NotationIcon-SCON4|6}}{{NotationIcon-SCON4|B}}{{NotationIcon-SCON4|B}}{{NotationIcon-SCON4|B}} | |||
| | |||
|- | |||
|align="center"|{{NotationIcon-SCON4|String}} '''07''' | |||
|{{NotationIcon-SCON4|6}}{{NotationIcon-SCON4|B}}{{NotationIcon-SCON4|B}}{{NotationIcon-SCON4|A}}{{NotationIcon-SCON4|B}}{{NotationIcon-SCON4|A}} | |||
| | |||
|- | |||
|align="center"|{{NotationIcon-SCON4|String}} '''08''' | |||
|{{NotationIcon-SCON4|6}}{{NotationIcon-SCON4|B}}{{NotationIcon-SCON4|B}}{{NotationIcon-SCON4|A}}{{NotationIcon-SCON4|A}}{{NotationIcon-SCON4|A}} | |||
| | |||
|- | |||
|align="center"|{{NotationIcon-SCON4|String}} '''09''' | |||
|{{NotationIcon-SCON4|6}}{{NotationIcon-SCON4|B}}{{NotationIcon-SCON4|A}}{{NotationIcon-SCON4|B}}{{NotationIcon-SCON4|B}}{{NotationIcon-SCON4|B}} | |||
| | |||
|- | |||
|align="center"|{{NotationIcon-SCON4|String}} '''10''' | |||
|{{NotationIcon-SCON4|6}}{{NotationIcon-SCON4|B}}{{NotationIcon-SCON4|A}}{{NotationIcon-SCON4|B}}{{NotationIcon-SCON4|B}}{{NotationIcon-SCON4|A}} | |||
| | |||
|- | |||
|align="center"|{{NotationIcon-SCON4|String}} '''11''' | |||
|{{NotationIcon-SCON4|6}}{{NotationIcon-SCON4|B}}{{NotationIcon-SCON4|A}}{{NotationIcon-SCON4|B}}{{NotationIcon-SCON4|A}}{{NotationIcon-SCON4|A}} | |||
| | |||
|- | |||
|align="center"|{{NotationIcon-SCON4|String}} '''12''' | |||
|{{NotationIcon-SCON4|6}}{{NotationIcon-SCON4|B}}{{NotationIcon-SCON4|A}}{{NotationIcon-SCON4|A}}{{NotationIcon-SCON4|A}} | |||
| | |||
|- | |||
|align="center"|{{NotationIcon-SCON4|String}} '''13''' | |||
|{{NotationIcon-SCON4|2}}{{NotationIcon-SCON4|B}}{{NotationIcon-SCON4|B}}{{NotationIcon-SCON4|B}} | |||
| | |||
|- | |||
|align="center"|{{NotationIcon-SCON4|String}} '''14''' | |||
|{{NotationIcon-SCON4|2}}{{NotationIcon-SCON4|B}}{{NotationIcon-SCON4|A}}{{NotationIcon-SCON4|B}} | |||
| | |||
|- | |||
|align="center"|{{NotationIcon-SCON4|String}} '''15''' | |||
|{{NotationIcon-SCON4|2}}{{NotationIcon-SCON4|B}}{{NotationIcon-SCON4|A}}{{NotationIcon-SCON4|A}}{{NotationIcon-SCON4|B}} | |||
| | |||
|- | |||
|align="center"|{{NotationIcon-SCON4|String}} '''16''' | |||
|{{NotationIcon-SCON4|2}}{{NotationIcon-SCON4|B}}{{NotationIcon-SCON4|A}}{{NotationIcon-SCON4|A}}{{NotationIcon-SCON4|A}} | |||
| | |||
|- | |||
|align="center"|{{NotationIcon-SCON4|String}} '''17''' | |||
|{{NotationIcon-SCON4|8}}{{NotationIcon-SCON4|B}}{{NotationIcon-SCON4|A}} | |||
| | |||
|- | |||
|align="center"|{{NotationIcon-SCON4|String}} '''18''' | |||
|{{NotationIcon-SCON4|run}}{{NotationIcon-SCON4|B}}{{NotationIcon-SCON4|B}} | |||
| | |||
|- | |||
|align="center"|{{NotationIcon-SCON4|String}} '''19''' | |||
|{{NotationIcon-SCON4|run}}{{NotationIcon-SCON4|B}}{{NotationIcon-SCON4|A}} | |||
| | |||
|- | |||
|align="center"|{{NotationIcon-SCON4|String}} '''20''' | |||
|{{NotationIcon-SCON4|6}}{{NotationIcon-SCON4|A}}{{NotationIcon-SCON4|A}}{{NotationIcon-SCON4|A}}{{NotationIcon-SCON4|A}} | |||
| | |||
|- | |||
|align="center"|{{NotationIcon-SCON4|String}} '''21''' | |||
|{{NotationIcon-SCON4|6}}{{NotationIcon-SCON4|A}}{{NotationIcon-SCON4|A}}{{NotationIcon-SCON4|B}}{{NotationIcon-SCON4|A}} | |||
| | |||
|- | |||
|align="center"|{{NotationIcon-SCON4|String}} '''22''' | |||
|{{NotationIcon-SCON4|6}}{{NotationIcon-SCON4|A}}{{NotationIcon-SCON4|B}}{{NotationIcon-SCON4|B}}{{NotationIcon-SCON4|B}} | |||
| | |||
|- | |||
|align="center"|{{NotationIcon-SCON4|String}} '''23''' | |||
|{{NotationIcon-SCON4|6}}{{NotationIcon-SCON4|A}}{{NotationIcon-SCON4|B}}{{NotationIcon-SCON4|B}}{{NotationIcon-SCON4|A}} | |||
| | |||
|- | |||
|align="center"|{{NotationIcon-SCON4|String}} '''24''' | |||
|{{NotationIcon-SCON4|6}}{{NotationIcon-SCON4|A}}{{NotationIcon-SCON4|B}}{{NotationIcon-SCON4|A}}{{NotationIcon-SCON4|A}} | |||
| | |||
|- | |||
|align="center"|{{NotationIcon-SCON4|String}} '''25''' | |||
|{{NotationIcon-SCON4|2}}{{NotationIcon-SCON4|A}}{{NotationIcon-SCON4|B}}{{NotationIcon-SCON4|B}}{{NotationIcon-SCON4|B}} | |||
| | |||
|- | |||
|align="center"|{{NotationIcon-SCON4|String}} '''26''' | |||
|{{NotationIcon-SCON4|2}}{{NotationIcon-SCON4|A}}{{NotationIcon-SCON4|B}}{{NotationIcon-SCON4|B}}{{NotationIcon-SCON4|A}} | |||
| | |||
|- | |||
|align="center"|{{NotationIcon-SCON4|String}} '''27''' | |||
|{{NotationIcon-SCON4|2}}{{NotationIcon-SCON4|A}}{{NotationIcon-SCON4|B}}{{NotationIcon-SCON4|A}}{{NotationIcon-SCON4|A}} | |||
| | |||
|- | |||
|align="center"|{{NotationIcon-SCON4|String}} '''28''' | |||
|{{NotationIcon-SCON4|2}}{{NotationIcon-SCON4|A}}{{NotationIcon-SCON4|A}}{{NotationIcon-SCON4|A}} | |||
| | |||
|- | |||
|align="center"|{{NotationIcon-SCON4|String}} '''29''' | |||
|{{NotationIcon-SCON4|8}}{{NotationIcon-SCON4|A}}{{NotationIcon-SCON4|B}} | |||
| | |||
|- | |||
|align="center"|{{NotationIcon-SCON4|String}} '''30''' | |||
|{{NotationIcon-SCON4|8}}{{NotationIcon-SCON4|A}}{{NotationIcon-SCON4|A}}{{NotationIcon-SCON4|B}} | |||
| | |||
|- | |||
|align="center"|{{NotationIcon-SCON4|String}} '''31''' | |||
|{{NotationIcon-SCON4|8}}{{NotationIcon-SCON4|A}}{{NotationIcon-SCON4|A}}{{NotationIcon-SCON4|A}} | |||
| | |||
|} | |||
==Weak Attacks== | ==Weak Attacks== | ||
Revision as of 21:03, 10 July 2023
| Kimimaro
| |
|---|---|

| |
| Health: | 210 |
| Guard Gauge: | 1680 |
| Backdash Type: | Normal |
Summary
Largely unchanged from his Vanilla counterpart, Kimimaro does not have access to much in the way of unique mechanics or tricks. Rather, he is a physical combatant who hits hard with slicing bone attacks and giant dinosaur tail. The leader of the Sound Five has made many a ninja, genin and jounin alike, cry foul of his sheer efficiency grounding their health bar to zero.
Notes
String List
| String # | Inputs | Notes |
|---|---|---|
Weak Attacks
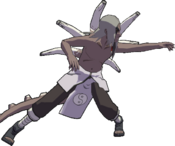
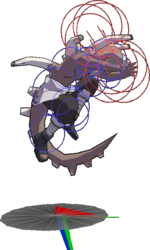
5B
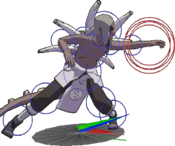
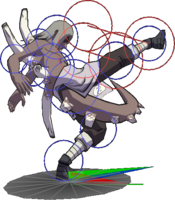
Toggle Hitboxes Toggle Hitboxes
|
|---|
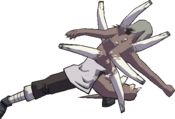
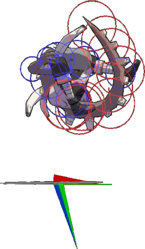
6B
Toggle Hitboxes Toggle Hitboxes
|
|---|
2B
Toggle Hitboxes Toggle Hitboxes
|
|---|
4B
Toggle Hitboxes Toggle Hitboxes
|
|---|
8B
Toggle Hitboxes Toggle Hitboxes
|
|---|
Running B
Toggle Hitboxes Toggle Hitboxes
|
|---|
j.B
Toggle Hitboxes Toggle Hitboxes
|
|---|
Strong Attacks
5A
Toggle Hitboxes Toggle Hitboxes
|
|---|
6A
Toggle Hitboxes Toggle Hitboxes
|
|---|
2A
Toggle Hitboxes Toggle Hitboxes
|
|---|
4A
Toggle Hitboxes Toggle Hitboxes
|
|---|
8A
Toggle Hitboxes Toggle Hitboxes
|
|---|
Running A
Toggle Hitboxes Toggle Hitboxes
|
|---|
j.A
Toggle Hitboxes Toggle Hitboxes
|
|---|
Throws
5Y
j.Y
Special
5X
Toggle Hitboxes Toggle Hitboxes
|
|---|
2X
Toggle Hitboxes Toggle Hitboxes
|
|---|
