Super Naruto: Clash of Ninja 4/Zabuza: Difference between revisions
Jump to navigation
Jump to search

(→5Y) |
No edit summary |
||
| Line 582: | Line 582: | ||
|data = | |data = | ||
{{AttackData-SCON4 | {{AttackData-SCON4 | ||
|damage = 20 | |damage = 20 | ||
|hitlevel = - | |hitlevel = - | ||
|startup = 1 | |startup = 1 | ||
| Line 593: | Line 593: | ||
|throwinvul = - | |throwinvul = - | ||
|description = | |description = | ||
* | *'''Standard Throw''' | ||
}} | }} | ||
}} | }} | ||
| Line 605: | Line 605: | ||
|data = | |data = | ||
{{AttackData-SCON4 | {{AttackData-SCON4 | ||
|damage = | |damage = 40 | ||
|hitlevel = - | |hitlevel = - | ||
|startup = 1 | |startup = 1 | ||
|active = | |active = 1 | ||
|recovery = | |recovery = 48 | ||
|guarddmg = - | |guarddmg = - | ||
|blockstun = - | |blockstun = - | ||
| Line 616: | Line 616: | ||
|throwinvul = - | |throwinvul = - | ||
|description = | |description = | ||
* | *Switches sides | ||
Slams the opponent into the ground for high damage. Can follow up with 5B. | |||
}} | |||
}} | |||
===<big>j.Y</big>=== | |||
{{MoveData | |||
|image = SCON4_Zabuza_jY.png | |||
|caption = | |||
|name = {{NotationIcon-SCON4|air}}{{NotationIcon-SCON4|Y}} | |||
|input = | |||
|data = | |||
{{AttackData-SCON4 | |||
|damage = 20 | |||
|hitlevel = - | |||
|startup = 1 | |||
|active = 1 | |||
|recovery = Until Landing + 9 | |||
|guarddmg = - | |||
|blockstun = - | |||
|advhit = - | |||
|advblock = - | |||
|throwinvul = - | |||
|description = | |||
*'''Standard Air Throw''' | |||
}} | }} | ||
}} | }} | ||
| Line 629: | Line 653: | ||
|data = | |data = | ||
{{AttackData-SCON4 | {{AttackData-SCON4 | ||
|damage = | |damage = 83 | ||
|hitlevel = | |hitlevel = Middle | ||
|startup = 19 | |startup = 19 | ||
|active = 4 | |active = 4 | ||
| Line 655: | Line 679: | ||
|data = | |data = | ||
{{AttackData-SCON4 | {{AttackData-SCON4 | ||
|damage = | |damage = 77 (12*2, 13*3, 30) | ||
|hitlevel = | |hitlevel = Middle | ||
|startup = 25 | |startup = 25 | ||
|active = 66 | |active = 66 | ||
| Line 667: | Line 691: | ||
|description = | |description = | ||
* Requires 75% (3 bars) chakra, but will consume all chakra Zabuza has when executed. | * Requires 75% (3 bars) chakra, but will consume all chakra Zabuza has when executed. | ||
Rapid spinning slashes that hit 360 degrees around Zabuza. Deals less damage than 5X, | Rapid spinning slashes that hit 360 degrees around Zabuza. Deals less damage than 5X, but in exchange, it can be used as an anti-KnJ super if the opponent's going to try to escape his combos. Foolproof on air RKnJ and LKnJs, but can still lose to grounded RKnJs that high crush (such as {{NotationIcon-SCON4|Kankuro}}'s). | ||
}} | }} | ||
}} | }} | ||
| Line 679: | Line 703: | ||
|data = | |data = | ||
{{AttackData-SCON4 | {{AttackData-SCON4 | ||
|damage = | |damage = 45 | ||
|hitlevel = - | |hitlevel = - | ||
|startup = 14 | |startup = 14 | ||
| Line 690: | Line 714: | ||
|throwinvul = - | |throwinvul = - | ||
|description = | |description = | ||
* Costs 75% (3 bars) chakra | * Costs 75% (3 bars) chakra | ||
Zabuza grabs the opponent out of whatever they were doing and and decks them in the face. This super is a hitgrab with relatively low damage and low range, but its use is that its crush frames make it a reversal to most moves, specifically invulnerable to mids and highs. | Zabuza grabs the opponent out of whatever they were doing and and decks them in the face. This super is a hitgrab with relatively low damage and low range, but its use is that its crush frames make it a reversal to most moves, specifically invulnerable to mids and highs. | ||
Revision as of 10:02, 26 August 2023
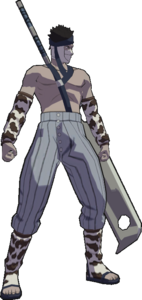
| Zabuza
| |
|---|---|

| |
| Health: | 230 |
| Guard Gauge: | 1840 |
| Backdash Type: | Normal |
Summary
"The Demon of the Hidden Mist" was generally overshadowed in Vanilla GNT4 by his fellow swordsman, ![]() Kisame. Both were characterized by their big hitboxes, big damage, and slow attacks, though Zabuza lacked his counterpart's crucial chakra drain. In Super, Zabuza is one of the more dramatically re-worked characters. Compared to Kisame, Zabuza benefits from better movement options, such as 4A and running A teleports, superior strings on block, his 8A anti-KNJ, and a 4X reversal. A moveset befitting a master of stealth and murder.
Kisame. Both were characterized by their big hitboxes, big damage, and slow attacks, though Zabuza lacked his counterpart's crucial chakra drain. In Super, Zabuza is one of the more dramatically re-worked characters. Compared to Kisame, Zabuza benefits from better movement options, such as 4A and running A teleports, superior strings on block, his 8A anti-KNJ, and a 4X reversal. A moveset befitting a master of stealth and murder.
Notes
String List
| String # | Inputs | Notes |
|---|---|---|
| ||
| ||
| ||
| ||
| ||
Weak Attacks
5B
 |
|---|
6B
 |
|---|
2B
 |
|---|
4B
 |
|---|
8B
 |
|---|
Running B
 |
|---|
j.B
 |
|---|
Strong Attacks
5A
6A
2A
4A
8A
Running A
j.A
j.6A
Throws
5Y
2Y
j.Y
Specials
5X
2X
4X
Strategy
- j.A can be considered the signature swordsmen attack for both Zabuza and Kisame. Its big, vertical hitbox controls space and is useful for both approaches and defensive retreats. When it connects with the oppponent's guard as Zabuza descends, it frequently results in frame advantage because the attack animation is automatically cancelled once Zabuza lands on the ground. Zabuza can use this frame advantage to perform a strike/throw mix, made more potent due to Zabuza's high damage 2Y slam throw.
- On hit, j.A staggers, also resulting in a strike/throw mix, though Zabuza can combo with an attack if he desires.
- The phantom sword glitch gives Zabuza access to an unblockable aerial attack if the user has good timing.
- Defensively, j.A is one of the strongest counters in the game to opposing strings which lift Zabuza into the air.
- Zabuza can jump back and j.A to punish opponents attempting to take back their turn following a Zabuza blockstring.
- For okizeme, if the opponent uses neutral get up or wake-up-kick (WUK), Zabuza can jump over the opponent and then double jump back to the front side and j.A, crossing up their guard or punishing WUK.
- Both swordsmen have a faster backwalk than most other characters. This allows them to walk backwards out of some strings where other characters cannot.
- Zabuza's combo game has some advantages by walls, corners or on small stages, gaining access to combos which utilize 5B6B, 2BB, 2AA, and 8A.
- 2X can be used during guard pressure to threaten a guard break.
Colors
Default ( )
)

Color 2 ( )
)

Color 3 ( )
)
