|
|
| Line 284: |
Line 284: |
| |data = | | |data = |
| {{AttackData-SCON4 | | {{AttackData-SCON4 |
| |damage = - | | |damage = 20 |
| |startup = 19 | | |startup = 19 |
| |hitlevel = - | | |hitlevel = high |
| |active = 4 | | |active = 4 |
| |recovery = 41 | | |recovery = 41 |
Revision as of 16:46, 4 October 2023
Summary
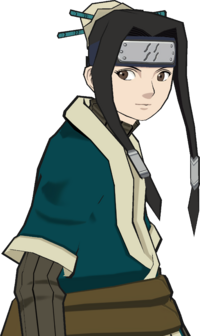
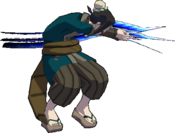
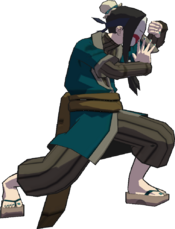
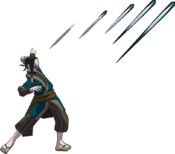
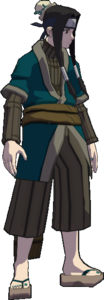
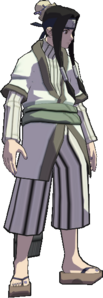
Haku is considered by many as one of the most technically challenging characters SCON has to offer, due to to his subpar HP and high skill ceiling. Haku's playstyle revolves around the use of his trademark needle projectiles, used to threaten tick throws, create frame traps, or for his needle loop infinite. Haku also possesses strong normals, such as 8B and 2A, allowing for both defensive and offensive game plans to shine. Utilizing the many applications of needles in tandem with Haku's great normals is essential to mastering the character.
| Haku
|

|
| Health:
|
200
|
| Guard Gauge:
|
1600
|
| Backdash Type:
|
Normal
|
String List
| String #
|
Inputs
|
Notes
|
 01 01
|
    
|
 Cancellable at Cancellable at  ( ( ) )- For
 07-08, switches sides with the fourth move. 07-08, switches sides with the fourth move.
- For
 12-13, switches sides with the third move. 12-13, switches sides with the third move.
|
 02 02
|
     
|
 03 03
|
     
|
 04 04
|
     
|
 05 05
|
     
|
 06 06
|
    
|
 07 07
|
     
|
 08 08
|
     
|
 09 09
|
    
|
 10 10
|
    
|
 11 11
|
   
|
 12 12
|
    
|
 13 13
|
    
|
 14 14
|
  
|
- Can hold the second input to change the move's effect.
|
 15 15
|
   
|
|
 16 16
|
    
|
|
 17 17
|
    
|
|
 18 18
|
    
|
|
 19 19
|
    
|
|
 20 20
|
   
|
|
 21 21
|
    
|
|
 22 22
|
    
|
- Switches sides with the second move.
|
 23 23
|
  
|
 24 24
|
  
|
|
 25 25
|
    
|
|
 26 26
|
     
|
|
 27 27
|
     
|
|
 28 28
|
     
|
|
 29 29
|
     
|
|
 30 30
|
    
|
|
 31 31
|
     
|
|
 32 32
|
     
|
- Switches sides with the third move.
|
 33 33
|
    
|
 34 34
|
     
|
|
 35 35
|
     
|
|
 36 36
|
 
|
- Can hold the first input to change the move's effect.
|
 37 37
|
   
|
|
 38 38
|
   
|
|
 39 39
|
  
|
|
 40 40
|
   
|
|
 41 41
|
    
|
|
 42 42
|
    
|
|
 43 43
|
  
|
|
Weak Attacks
5B
|
|
| Damage
|
Hit Level
|
Startup
|
Active Frames
|
Recovery
|
Guard Damage
|
Blockstun
|
Advantage on Hit
|
Advantage on Block
|
| 12
|
High
|
15
|
2
|
28
|
-
|
-
|
-
|
-11
|
- Can go into
 ( ( ) on whiff. ) on whiff.
Average high jab.
|
|
6B
|
|
| Damage
|
Hit Level
|
Startup
|
Active Frames
|
Recovery
|
Guard Damage
|
Blockstun
|
Advantage on Hit
|
Advantage on Block
|
| 12
|
-
|
21
|
3
|
32
|
-
|
-
|
-
|
-16
|
Flag Data
| High Crush
|
7~20
|
|
|
2B
|
|
| Damage
|
Hit Level
|
Startup
|
Active Frames
|
Recovery
|
Guard Damage
|
Blockstun
|
Advantage on Hit
|
Advantage on Block
|
| 12
|
-
|
23
|
6
|
26
|
-
|
-
|
-
|
-12
|
Flag Data
| High Crush
|
7~41
|
|
|
4B
|
|
| Damage
|
Hit Level
|
Startup
|
Active Frames
|
Recovery
|
Guard Damage
|
Blockstun
|
Advantage on Hit
|
Advantage on Block
|
| 20
|
high
|
19
|
4
|
41
|
-
|
-
|
-
|
-20
|
Flag Data
| Low Crush
|
frames 13~43
|
| Autoguard
|
frames 2~10
|
|
|
8B
|
|
| Damage
|
Hit Level
|
Startup
|
Active Frames
|
Recovery
|
Guard Damage
|
Blockstun
|
Advantage on Hit
|
Advantage on Block
|
| -
|
Middle
|
16
|
3(4)6
|
16
|
-
|
-
|
-
|
-6
|
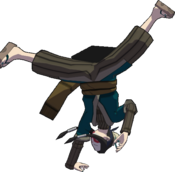
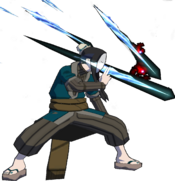
Cartwheel kick. One of Haku's best normals as it can't be crushed by most moves, has great frame data all around for safety on whiff/block, the second hit lets it win clash situations and actually does a good job at hitting opponents out of close air space too.
String options:  for ???, for ???,  for 2A (possible on hit/block/whiff) for 2A (possible on hit/block/whiff)
|
|
Running B
|
|
| Damage
|
Hit Level
|
Startup
|
Active Frames
|
Recovery
|
Guard Damage
|
Blockstun
|
Advantage on Hit
|
Advantage on Block
|
| -
|
-
|
20
|
5
|
33
|
-
|
-
|
-
|
-19
|
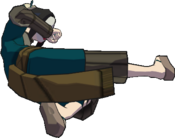
Weird looking flip kick that's blessed with immediate low crush.
Flag Data
| Low Crush
|
frames 1~35
|
|
|
j.B
|
|
| Damage
|
Hit Level
|
Startup
|
Active Frames
|
Recovery
|
Guard Damage
|
Blockstun
|
Advantage on Hit
|
Advantage on Block
|
| -
|
-
|
17
|
4
|
13+9L
|
-
|
-
|
-
|
-
|
|
|
|
Strong Attacks
5A
|
|
| Damage
|
Hit Level
|
Startup
|
Active Frames
|
Recovery
|
Guard Damage
|
Blockstun
|
Advantage on Hit
|
Advantage on Block
|
| -
|
-
|
-
|
-
|
-
|
-
|
-
|
-
|
-
|
|
|
|
6A
|
|
| Damage
|
Hit Level
|
Startup
|
Active Frames
|
Recovery
|
Guard Damage
|
Blockstun
|
Advantage on Hit
|
Advantage on Block
|
| -
|
Mid
|
17
|
4(9)4
|
33
|
-
|
-
|
-
|
-30
|
|
|
|
2A
|
|
| Damage
|
Hit Level
|
Startup
|
Active Frames
|
Recovery
|
Guard Damage
|
Blockstun
|
Advantage on Hit
|
Advantage on Block
|
| -
|
-
|
14
|
3
|
32
|
-
|
-
|
-
|
-17
|
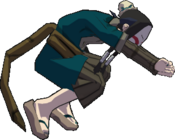
Haku takes a quick step forward into a kunai sweep at the opponent's feet. Great for low profiling in neutral due to the surprise movement and fast high crush.
Flag Data
| High Crush
|
frames 8~35
|
| Chip Damage
|
yes
|
|
|
4A
|
|
| Damage
|
Hit Level
|
Startup
|
Active Frames
|
Recovery
|
Guard Damage
|
Blockstun
|
Advantage on Hit
|
Advantage on Block
|
| -
|
-
|
11
|
25
|
-
|
-
|
-
|
-
|
Unblockable
|
Taijutsu counter. On catch, Haku teleports and comes down on the opponent's head with a kunai attack.
|
|
8A
|
|
| Damage
|
Hit Level
|
Startup
|
Active Frames
|
Recovery
|
Guard Damage
|
Blockstun
|
Advantage on Hit
|
Advantage on Block
|
| -
|
-
|
-
|
-
|
-
|
-
|
-
|
-
|
-
|
|
|
|
Running A
|
|
| Damage
|
Hit Level
|
Startup
|
Active Frames
|
Recovery
|
Guard Damage
|
Blockstun
|
Advantage on Hit
|
Advantage on Block
|
| -
|
-
|
17, 18
|
-
|
-
|
-
|
-
|
-
|
-
|
Running needles. Advantageous on block
|
|
j.A
|
|
| Damage
|
Hit Level
|
Startup
|
Active Frames
|
Recovery
|
Guard Damage
|
Blockstun
|
Advantage on Hit
|
Advantage on Block
|
| -
|
-
|
8, 12, 15, 18, 21
|
Until hit
|
Until landing
|
-
|
-
|
-
|
-
|
- Needle release can be delayed by holding
 , at the cost of chakra , at the cost of chakra
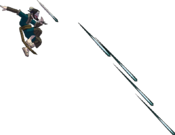
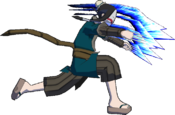
Haku throws a stream of 5 ice needles that can also be suspended in place for use later if he holds the input. Air ice needles are the one tool in his kit that makes Haku as strong as he is, and are easily one of the best moves in the game period.
Haku's air shanks are better than most because of the number he throws and how spaced out the toss is. They cover the space in front of him for longer than regular kunai tosses, to where an instant   gives him enough time to either combo if they hit or pressure on block. gives him enough time to either combo if they hit or pressure on block.
Whenever Haku holds the  button, his needles float in the air where he placed them instead of flying at the opponent immediately where they will also constantly adjust their trajectory to track the opponent's position until they are released. The needles are uninteractable while held and aside from manual release, they will also be let go if he runs out of chakra, is hit by an attack or is forced to block an attack. As for manually releasing, it can also be done while Haku is in the middle of most other actions (i.e. using button, his needles float in the air where he placed them instead of flying at the opponent immediately where they will also constantly adjust their trajectory to track the opponent's position until they are released. The needles are uninteractable while held and aside from manual release, they will also be let go if he runs out of chakra, is hit by an attack or is forced to block an attack. As for manually releasing, it can also be done while Haku is in the middle of most other actions (i.e. using  attacks, sidestepping, and during throw & throw whiff animations). Held needles are godlike in neutral or close quarters situations to either unblockable back hit the opponent, no-risk punishes to them attempting offense, enabling "needle loops" that force baitable KnJs, and bolster Haku's offense by giving him plus frames and thus constant strike/throw on demand. attacks, sidestepping, and during throw & throw whiff animations). Held needles are godlike in neutral or close quarters situations to either unblockable back hit the opponent, no-risk punishes to them attempting offense, enabling "needle loops" that force baitable KnJs, and bolster Haku's offense by giving him plus frames and thus constant strike/throw on demand.
|
|
Throws
5Y
|
|
| Damage
|
Hit Level
|
Startup
|
Active Frames
|
Recovery
|
Guard Damage
|
Blockstun
|
Advantage on Hit
|
Advantage on Block
|
| 20
|
-
|
1
|
1
|
48
|
-
|
-
|
-
|
-
|
GNT throw. Haku can just set up needles here instead of going for a combo if he's afraid of the opponent's KnJ.
|
|
Special
5X
|
|
| Damage
|
Hit Level
|
Startup
|
Active Frames
|
Recovery
|
Guard Damage
|
Blockstun
|
Advantage on Hit
|
Advantage on Block
|
| -
|
-
|
22
|
3
|
30
|
-
|
-
|
-
|
-
|
Average cinematic super. Haku can universally do 5 hits of a combo prior to a BBX super confirm, any higher than that and the juggle starts to drop on certain characters.
|
|
2X
|
|
| Damage
|
Hit Level
|
Startup
|
Active Frames
|
Recovery
|
Guard Damage
|
Blockstun
|
Advantage on Hit
|
Advantage on Block
|
| -
|
-
|
18
|
2
|
57
|
-
|
-
|
-
|
-
|
Haku teleports to the opponent wherever they are on the stage and hits them with an unblockable stomp, before summoning more needles to stab them. Functions as both a reversal super and neutral tool against certain characters. However, it must be used wisely in both instances because the invincibility on startup is short and the super flash telegraphs to the opponent that they should step your super.
|
|
Strategy
Colors
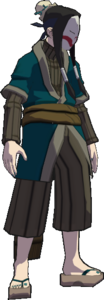
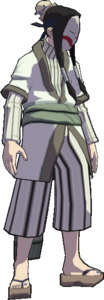
Note: When Haku gets hit while using a masked color, his mask will fall off when he loses about half of his health, remaining maskless for the rest of the match. This has no gameplay implications at all.
Changes from Vanilla
(Needs further updates. Please let wiki editors know details)
- 5B: made high
- 5BB(A) (flip): Replaced with 6A and its follow-ups.
- 2B: hitbox appears one frame sooner; hit direction changed slightly to assist follow ups
- 2B(B): launch height and type adjusted for more consistency on characters it used to drop on
- 2B(A) (flip): replaced with 6A(A)
- 5BB(8A) and 6B(8A) added: Performs flip; properly low crushes
- 2BA(A) (flip slash): is unblockable
- JB(A): Added as JA
- 6A: hits twice; damage is distributed between the two hits
- 4A: window improved
- A4A: appears above 14 frames faster, activation is unblockable and unsubbable; hitboxes are bigger and better placed; moves quicker
- 8A: needles have slightly more lift on hit
- RA(8): Vanilla 2B(A) (flip) with follow ups; RA still does running needles
- JA: spawns 5 needles instead of 10, holding each needle drains 6 chakra per frame instead of 3 (was pairs before)
- 5X: hitbox appears 4 frames earlier
- 2X: Stomp hitbox changed to be a shockwave hitbox instead of on his shin; needles knock down
- GRKnJ: Made a mid instead of a high
Resources
Navigation
| General
|
|
| Characters
|
|
| Archived Information
|
|
 Kabuto,
  CS2 Sasuke,
  Zabuza) and Kandle vs Skeet (vs
  Kabuto)