|
|
| Line 276: |
Line 276: |
| |blockstun = - | | |blockstun = - |
| |advhit = Flying Launch | | |advhit = Flying Launch |
| |advblock = -2,2 | | |advblock = -2,1 |
| |throwinvul = - | | |throwinvul = - |
| |description = | | |description = |
Revision as of 11:06, 19 November 2023
Summary
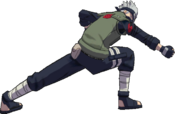
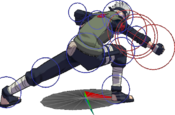
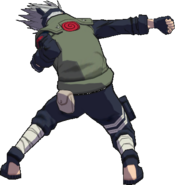
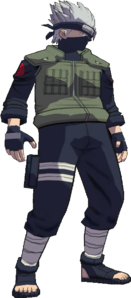
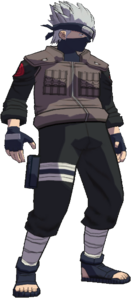
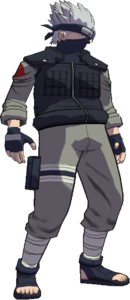
Having two forms, numerous super-cancel points and directional inputs, the "Copycat Ninja" Kakashi can be one of the more intricate characters in the game to play. While his base form is somewhat slow and limited, Sharingan grants access to several exceptional buttons, one of the most damaging supers in the game, and Sharingan cancels. Kakashi's high damage output, varied options, and HP can truly make him feel like a Jounin in a game full of Genin.
Notes
Kakashi has numerous unique super cancel points in his strings described in the string list section, much more than most other characters. A list of them can be found in the Strategy section.
Sharingan 
Kakashi is able to activate his Sharingan  , altering his moveset considerably at the cost of slowly draining his health out while active.
- Sharingan Cancel: When in
 mode, you cancel perform a Sharingan Cancel by pressing
 after certain moves, which will cancel all recovery frames and return you to base form.
| Kakashi
|

|
| Health:
|
230
|
| Guard Gauge:
|
1840
|
| Backdash Type:
|
Normal
|
| Install (Sharingan)
|
| Install Damage Modifier:
|
1x
|
| Install Backdash Type:
|
Long
|
String List
| String #
|
Inputs
|
Notes
|
 01 01
|
   
|
|
 02 02
|
    
|
 03 03
|
    
|
 04 04
|
   
|
 05 05
|
   
|
 06 06
|
    
|
 Cancellable at Cancellable at   ( ( ) )
|
 07 07
|
     
|
 08 08
|
     
|
 09 09
|
   
|
 Cancellable at Cancellable at   ( ( ) )
|
 10 10
|
    
|
 11 11
|
    
|
 12 12
|
  
|
 13 13
|
    
|
 Cancellable at Cancellable at   ( ( ) )
|
 14 14
|
     
|
 15 15
|
     
|
 16 16
|
    
|
 17 17
|
    
|
 18 18
|
    
|
 Cancellable at Cancellable at   ( ( ) )
|
 19 19
|
     
|
 20 20
|
     
|
| String #
|
Inputs
|
Notes
|
 01 01
|
    
|
 Cancellable at Cancellable at  ( ( ) )
|
 02 02
|
     
|
 03 03
|
     
|
 04 04
|
   
|
 05 05
|
   
|
 06 06
|
    
|
 Cancellable at Cancellable at   ( ( ) )
|
 07 07
|
     
|
 08 08
|
     
|
 09 09
|
    
|
 Cancellable at Cancellable at   ( ( ) )
|
 10 10
|
    
|
 11 11
|
    
|
 12 12
|
  
|
 13 13
|
     
|
 Cancellable at Cancellable at   ( ( ) )
|
 14 14
|
      
|
 15 15
|
      
|
 16 16
|
    
|
 17 17
|
    
|
 18 18
|
    
|
 Cancellable at Cancellable at   ( ( ) )
|
 19 19
|
     
|
 20 20
|
     
|
Weak Attacks
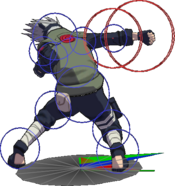
5B
|
|
| Version
|
Damage
|
Hit Level
|
Startup
|
Active Frames
|
Recovery
|
Guard Damage
|
Blockstun
|
Advantage on Hit
|
Advantage on Block
|
| Normal
|
14
|
High
|
14
|
3
|
23
|
208
|
20
|
+7 (+12)
|
-5
|
| Sharingan
|
13
|
High
|
14
|
3
|
23
|
193
|
20
|
+7 (+12)
|
-3
|
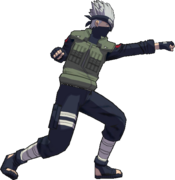
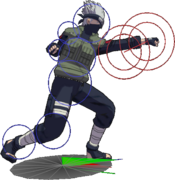
- Primary Jab.
- Can go into
 ( ( ) on whiff. ) on whiff.
Flag Data
| High Crush
|
No
|
| Mid Crush
|
No
|
| Low Crush
|
No
|
| Chip Damage
|
No
|
| Unsubbable
|
False
|
| Chakra Drain
|
No
|
| Throw Immunity
|
Yes
|
|
|
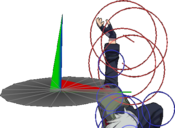
Toggle Hitboxes Toggle Hitboxes
|
6B
|
|
| Damage
|
Hit Level
|
Startup
|
Active Frames
|
Recovery
|
Guard Damage
|
Blockstun
|
Advantage on Hit
|
Advantage on Block
|
| 28
|
mid
|
23
|
5
|
27
|
-
|
-
|
Flying Launch
|
-8
|
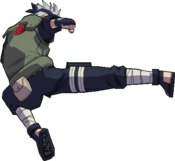
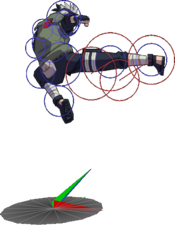
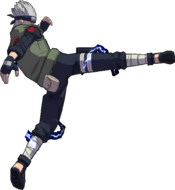
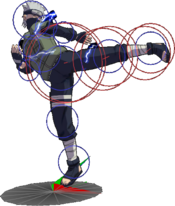
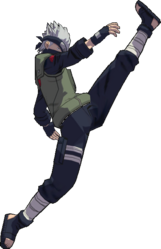
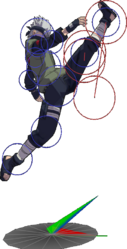
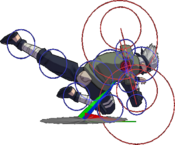
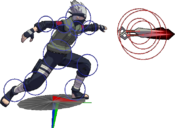
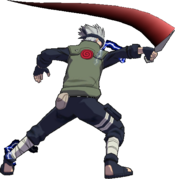
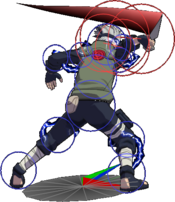
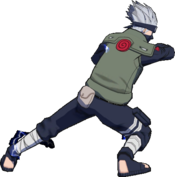
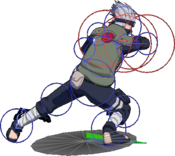
Big kick which launches into flying screen, combos into 2A if Y-Cancelled (Y-Cancel). Low crush and beats wake-up-kick (WUK). Good whiff punish.
|
|
Toggle Hitboxes Toggle Hitboxes
|
Sharingan 6B
|
|
| Damage
|
Hit Level
|
Startup
|
Active Frames
|
Recovery
|
Guard Damage
|
Blockstun
|
Advantage on Hit
|
Advantage on Block
|
| 13,22
|
High,High
|
19,43
|
3,3
|
20,20
|
-
|
-
|
Flying Launch
|
-2,1
|
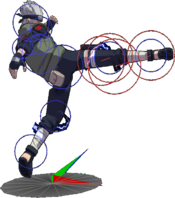
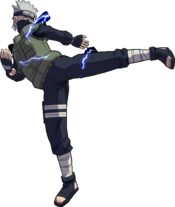
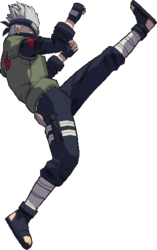
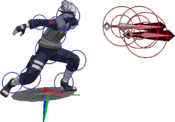
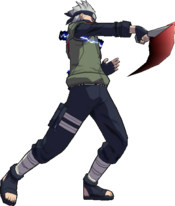
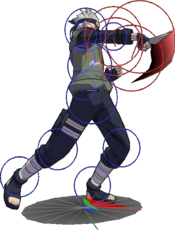
Similar to 6B but does a double kick instead that is advantageous on block. Great for okizeme when timed to hit meaty as it'll punish steps and high profile WUK.
|
|
Toggle Hitboxes Toggle Hitboxes
|
2B
|
|
| Damage
|
Hit Level
|
Startup
|
Active Frames
|
Recovery
|
Guard Damage
|
Blockstun
|
Advantage on Hit
|
Advantage on Block
|
| 15
|
low
|
25
|
5
|
32
|
-
|
-
|
KD
|
-17
|
|
|
|
Toggle Hitboxes Toggle Hitboxes
|
Sharingan 2B
|
|
| Damage
|
Hit Level
|
Startup
|
Active Frames
|
Recovery
|
Guard Damage
|
Blockstun
|
Advantage on Hit
|
Advantage on Block
|
| 18
|
low
|
22
|
3
|
30
|
-
|
-
|
KD
|
-13
|
|
|
|
Toggle Hitboxes Toggle Hitboxes
|
4B
|
|
| Damage
|
Hit Level
|
Startup
|
Active Frames
|
Recovery
|
Guard Damage
|
Blockstun
|
Advantage on Hit
|
Advantage on Block
|
| 19
|
mid
|
30
|
4
|
37
|
-
|
-
|
-2,+10(Staggers)
|
-25
|
Guard frame attack. Deceptively large amount of guard frames for a medium speed 4B. Can convert to longer combos with 4BB(Y).
|
|
Toggle Hitboxes Toggle Hitboxes
|
8B
|
|
| Damage
|
Hit Level
|
Startup
|
Active Frames
|
Recovery
|
Guard Damage
|
Blockstun
|
Advantage on Hit
|
Advantage on Block
|
| 15
|
mid
|
16
|
11
|
28
|
-
|
-
|
launch
|
-23
|
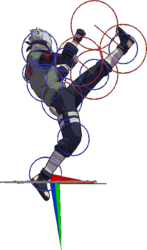
Upwards kick which launches and links with 5B. Can be a decent anti-air call out.
|
|
Toggle Hitboxes Toggle Hitboxes
|
Running B
|
|
| Damage
|
Hit Level
|
Startup
|
Active Frames
|
Recovery
|
Guard Damage
|
Blockstun
|
Advantage on Hit
|
Advantage on Block
|
| 20
|
low
|
11
|
8
|
32
|
-
|
-
|
launch
|
-
|
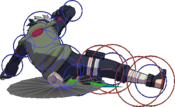
Running slide, high crushes and sweeps. Can be super/Sharingan cancelled or used as an OTG hit followed by a Sharingan activation. If the enemy subs during the run B, the Sharingan cancel will give Kakashi plus frames giving Kakashi a 50/50 strike/throw mix.
|
|
Toggle Hitboxes Toggle Hitboxes
|
j.B
|
|
| Damage
|
Hit Level
|
Startup
|
Active Frames
|
Recovery
|
Guard Damage
|
Blockstun
|
Advantage on Hit
|
Advantage on Block
|
| -
|
-
|
-
|
-
|
-
|
-
|
-
|
-
|
-
|
Divekick - strong combo filler.
|
|
Toggle Hitboxes Toggle Hitboxes
|
j.6B
|
|
| Damage
|
Hit Level
|
Startup
|
Active Frames
|
Recovery
|
Guard Damage
|
Blockstun
|
Advantage on Hit
|
Advantage on Block
|
| -
|
-
|
-
|
-
|
-
|
-
|
-
|
-
|
-
|
An axe kick which bounces the victim and pushes on block. Can be used to cross up the opponent on oki by jumping past the opponent and then double jumping back to the original position. Strong when landed, but can be punished with a sidestep.
|
|
Toggle Hitboxes Toggle Hitboxes
|
Strong Attacks
5A
|
|
| Version
|
Damage
|
Hit Level
|
Startup
|
Active Frames
|
Recovery
|
Guard Damage
|
Blockstun
|
Advantage on Hit
|
Advantage on Block
|
| Normal
|
-
|
-
|
-
|
-
|
-
|
-
|
-
|
-
|
-
|
| Full Charge
|
-
|
-
|
-
|
-
|
-
|
-
|
-
|
-
|
-
|
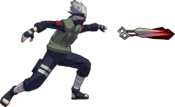
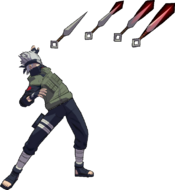
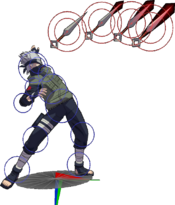
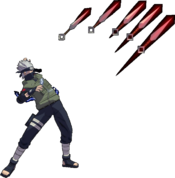
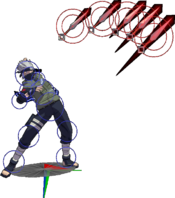
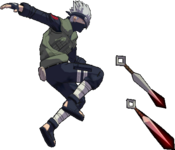
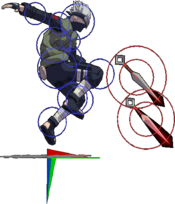
Standard projectile throw with a shuriken. Fires an additional shuriken at full charge.
|
|
Toggle Hitboxes Toggle Hitboxes
|
6A
|
|
| Damage
|
Hit Level
|
Startup
|
Active Frames
|
Recovery
|
Guard Damage
|
Blockstun
|
Advantage on Hit
|
Advantage on Block
|
| -
|
-
|
-
|
-
|
-
|
-
|
-
|
-
|
-
|
Mid, staggers and continues into Kakashi's 5BB string. Good for catching run step or high crush attempts.
|
|
Toggle Hitboxes Toggle Hitboxes
|
Sharingan 6A
|
|
| Damage
|
Hit Level
|
Startup
|
Active Frames
|
Recovery
|
Guard Damage
|
Blockstun
|
Advantage on Hit
|
Advantage on Block
|
| -
|
-
|
-
|
-
|
-
|
-
|
-
|
-
|
-
|
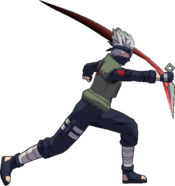
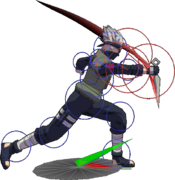
Double kunai slash, launches. Compared to base form, is quicker, deals more damage, and is also a highly effective as a super confirm due to its meter build and launch height.
|
|
Toggle Hitboxes Toggle Hitboxes
|
2A
|
|
| Damage
|
Hit Level
|
Startup
|
Active Frames
|
Recovery
|
Guard Damage
|
Blockstun
|
Advantage on Hit
|
Advantage on Block
|
| -
|
-
|
-
|
-
|
-
|
-
|
-
|
-
|
-
|
Goes underground and grabs the opponent by the feet. Can be delayed by holding [A] at the cost of chakra. Can punish laggy projectile moves or combo off of 6BY. Delaying 2A can be used to catch a victim who attempts to KnJ.
|
|
Toggle Hitboxes Toggle Hitboxes
|
4A
|
|
| Damage
|
Hit Level
|
Startup
|
Active Frames
|
Recovery
|
Guard Damage
|
Blockstun
|
Advantage on Hit
|
Advantage on Block
|
| -
|
-
|
-
|
-
|
-
|
-
|
-
|
-
|
-
|
Counter, can be held at the cost of chakra (up to two bars). Hard knockdown.
|
|
Toggle Hitboxes Toggle Hitboxes
|
Sharingan 4A
|
|
| Damage
|
Hit Level
|
Startup
|
Active Frames
|
Recovery
|
Guard Damage
|
Blockstun
|
Advantage on Hit
|
Advantage on Block
|
| 0
|
-
|
-
|
-
|
-
|
-
|
-
|
-
|
-
|
Frame 3 counter which teleports Kakashi behind the opponent. Works on supers, and for a small number of characters, Kakashi will copy the super and use it back on the opponent.
|
|
8A
Normal Normal Sharingan Sharingan
|
| Version
|
Damage
|
Hit Level
|
Startup
|
Active Frames
|
Recovery
|
Guard Damage
|
Blockstun
|
Advantage on Hit
|
Advantage on Block
|
| Normal
|
-
|
-
|
-
|
-
|
-
|
-
|
-
|
-
|
-
|
| Sharingan
|
-
|
-
|
-
|
-
|
-
|
-
|
-
|
-
|
-
|
Standard up projectile throw. Fires an extra projectile while in Sharingan.
|
|
Toggle Hitboxes Toggle Hitboxes
|
Running A
|
|
| Damage
|
Hit Level
|
Startup
|
Active Frames
|
Recovery
|
Guard Damage
|
Blockstun
|
Advantage on Hit
|
Advantage on Block
|
| -
|
-
|
-
|
-
|
-
|
-
|
-
|
-
|
-
|
Running shuriken throw. Staggers and has string follow-ups.
|
|
Toggle Hitboxes Toggle Hitboxes
|
j.A
|
|
| Damage
|
Hit Level
|
Startup
|
Active Frames
|
Recovery
|
Guard Damage
|
Blockstun
|
Advantage on Hit
|
Advantage on Block
|
| -
|
-
|
-
|
-
|
-
|
-
|
-
|
-
|
-
|
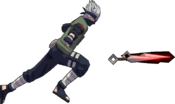
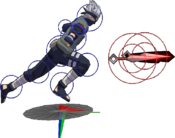
Air shuriken (standard air shanks).
|
|
Toggle Hitboxes Toggle Hitboxes
|
Throws
5Y
|
|
| Damage
|
Hit Level
|
Startup
|
Active Frames
|
Recovery
|
Guard Damage
|
Blockstun
|
Advantage on Hit
|
Advantage on Block
|
| 20
|
-
|
1
|
1
|
48
|
-
|
-
|
-
|
-
|
|
|
|
j.Y
|
|
| Damage
|
Hit Level
|
Startup
|
Active Frames
|
Recovery
|
Guard Damage
|
Blockstun
|
Advantage on Hit
|
Advantage on Block
|
| -
|
-
|
-
|
-
|
-
|
-
|
-
|
-
|
-
|
|
|
|
j.2Y
|
|
| Damage
|
Hit Level
|
Startup
|
Active Frames
|
Recovery
|
Guard Damage
|
Blockstun
|
Advantage on Hit
|
Advantage on Block
|
| -
|
-
|
-
|
-
|
-
|
-
|
-
|
-
|
-
|
- Costs 25% (1 bar) chakra.
Kakashi pulls the victim into the Kamui dimension, dealing damage and activating Sharingan. Can punish a missed tech roll with j.B or j.A.
|
|
Special
5X
|
|
| Version
|
Damage
|
Hit Level
|
Startup
|
Active Frames
|
Recovery
|
Guard Damage
|
Blockstun
|
Advantage on Hit
|
Advantage on Block
|
| Normal
|
-
|
-
|
-
|
-
|
-
|
-
|
-
|
-
|
-
|
| Full Charge
|
-
|
-
|
-
|
-
|
-
|
-
|
-
|
-
|
-
|
- Normal 5X
- Costs 100% (4 bars) chakra.
- Can be charged to increase damage.
- Sharingan 5X
- Costs 75% (3 bars) chakra.
- Can be charged to increase damage.
- Disables Sharingan on hit.
|
|
Toggle Hitboxes Toggle Hitboxes
|
4X
|
|
| Damage
|
Hit Level
|
Startup
|
Active Frames
|
Recovery
|
Guard Damage
|
Blockstun
|
Advantage on Hit
|
Advantage on Block
|
| -
|
-
|
-
|
-
|
-
|
-
|
-
|
-
|
-
|
- Costs 25% (1 bar) chakra.
Activates Sharingan, altering Kakashi's abilities.
|
|
Sharingan 2X
|
|
| Damage
|
Hit Level
|
Startup
|
Active Frames
|
Recovery
|
Guard Damage
|
Blockstun
|
Advantage on Hit
|
Advantage on Block
|
| -
|
-
|
-
|
-
|
-
|
-
|
-
|
-
|
-
|
- Costs 100% (4 bars) chakra.
- Disables Sharingan on hit.
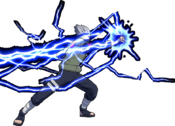
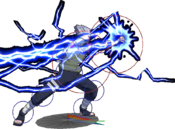
One of the highest damaging supers in the game.
|
|
Toggle Hitboxes Toggle Hitboxes
|
Strategy
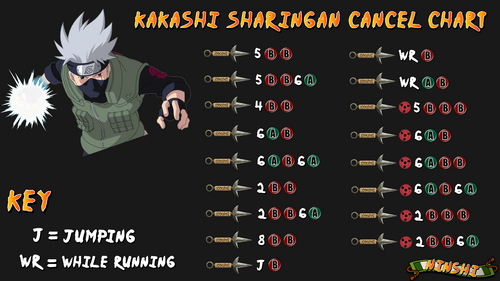
Kakashi should enter Sharingan mode whenever he has a chance, most often after scoring a knockdown, since it gives him access to several of his best moves as well as Sharingan cancels. While attacking the opponent's guard in Sharingan mode, every super-cancel point becomes a mix-up as Kakashi can either continue his string or disable Sharingan, allowing him to either start a new block string or attempt a throw.
The combination of Sharingan-cancel based block string mix-ups and heavy guard damage means that Kakashi can often threaten guard breaks. 

 and
and 


 (both base and
  ) in particular are strong and low commitment.

 is plus for Kakashi and results in a 50/50 scenario. Following with a
 , which hits mid, beats most options. If the opponent jumps back after

 , Kakashi can check with an air throw. If the opponent holds block, Kakashi can throw.

 and
and 
 give Kakashi two of the best approach options in the game and allow him to close distance fast, which he will need to do against projectile zoners. Both have a continuation string with
  (the same punch as
 ), allowing Kakashi to activate or deactivate Sharingan after his running attacks or combo into a super.

A diagram of Kakashi's Sharingan cancels.
Combos
| Combo
|
Notes
|
    
|
Basic combo off of jab
|
     
|
 version of combo above version of combo above
|
       
|
Basic, short combo into  
|
Colors
Changes from Vanilla
List may be outdated. Feel free to update
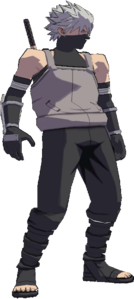
- Alternate costume changed to be ANBU Kakashi
- J2Y: Air Throw is custom; non sharingan version puts Kakashi in sharingan mode and does not build meter, requires and costs 25% meter; in sharigan it does more damage and builds meter
- Sharingan health drain removed
- Grabbable moves: 8A, JA, RA, 5A, 2A landing
- 5B: hitbox appears one frame sooner, slightly smaller hand hitbox; elbow hitbox removed; hand hitbox larger on frame 2; Sharingan mode has 2 more frames of block stun
- 5B(B): has increased stun, hitbox appears and disappears one frame later
- SBB(B): has super cancel and staggers; hitbox appears one frame sooner with one more frame of block stun; B follow up transition timing made slightly longer
- 5BBA: Changed to 6A with roundhouse follow up 5BBA(B)
- 5BB(6A): is a custom kunai slash forward that lifts on hit and block, super cancelable; sharingan version does not lift on block
- 5BBB(B): does 5 more damage and is a hard knockdown
- S5BBB(B): comes out one frame slower
- 5BBB(A): hitbox added to knee and size adjusted, doesn't lift on block, more lift on hit
- 6B: hitbox appears one frame earlier, more lift to match S6B's second hit
- S6B: first hit has slightly more blockstun; second hit pushes on block with a slightly bigger knee hitbox and the hitbox disappears one frame earlier
- 4B: floats higher
- 8B: hitbox appears two frames later
- RB: add super cancel
- JB: add super cancel, better descent angle
- 6A: has more lift
- S6A: first hit has more lift on hit, 2 more frames on duration
- 4A: uses animation from stance cancel
- S4A: has 9 additional frames added to the activator to better match the animation
- A4A: moves into launch hit faster, unblockable
- S4A: changed Mizuki 5X properly copied
- Act2A: is hittable at the peak of the jump; adds hits to the combo meter: +1 damage
- 5X; duration improved from 1 frame to 7, fully charged from 1 to 8; damage adjusted to the cinematic portion of the attack
- S5X: is 5X; on transition to capture state leaves sharingan mode; requires 75%and costs all remaining meter
- S2X: is GNT4 S5X, activator duration increased by 2 frames; damage reduced; on transition to capture state leaves sharingan mode
- 4X: requires and costs 25%
- GRKnJ: travels two frames slower; appears further back
Resources
Guides and Info
Navigation
| General
|
|
|
|
| Characters
|
|
|
|
| Archived Information
|
|
- ↑ Unfortunately the companion video, focusing more on Ahare's Kakashi is missing

![]() , altering his moveset considerably at the cost of slowly draining his health out while active.
, altering his moveset considerably at the cost of slowly draining his health out while active.
 mode, you cancel perform a Sharingan Cancel by pressing
 after certain moves, which will cancel all recovery frames and return you to base form.
![]()
![]()
![]() and
and ![]()
![]()
![]()
![]() (both base and
(both base and ![]() ) in particular are strong and low commitment.
) in particular are strong and low commitment. ![]()
![]()
![]() is plus for Kakashi and results in a 50/50 scenario. Following with a
is plus for Kakashi and results in a 50/50 scenario. Following with a ![]()
![]() , which hits mid, beats most options. If the opponent jumps back after
, which hits mid, beats most options. If the opponent jumps back after ![]()
![]()
![]() , Kakashi can check with an air throw. If the opponent holds block, Kakashi can throw.
, Kakashi can check with an air throw. If the opponent holds block, Kakashi can throw.
![]()
![]() and
and ![]()
![]() give Kakashi two of the best approach options in the game and allow him to close distance fast, which he will need to do against projectile zoners. Both have a continuation string with
give Kakashi two of the best approach options in the game and allow him to close distance fast, which he will need to do against projectile zoners. Both have a continuation string with ![]() (the same punch as
(the same punch as ![]()
![]() ), allowing Kakashi to activate or deactivate Sharingan after his running attacks or combo into a super.
), allowing Kakashi to activate or deactivate Sharingan after his running attacks or combo into a super.
