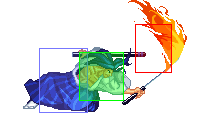
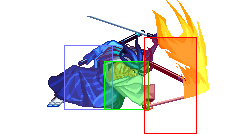
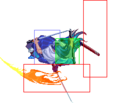
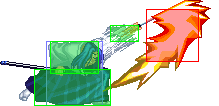
Samurai Shodown V Special/Ukyo Tachibana: Difference between revisions
(additions/changes to a couple normals) |
(Undo revision 322246 by StupeLikesRushdowns (talk) Keep humor, memes, and jokes to a minimum. In particular, avoid making extensive edits just to add jokes.) Tag: Undo |
||
| (261 intermediate revisions by 6 users not shown) | |||
| Line 1: | Line 1: | ||
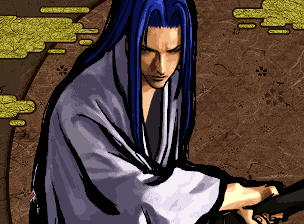
[[Image:SS5PortraitUkyo.png|frame|right|橘 右京, Tachibana Ukyo]] | [[Image:SS5PortraitUkyo.png|frame|right|橘 右京, Tachibana Ukyo]] | ||
[[Image:SS5ColorsUkyo.png|frame|right|Colors]] | [[Image:SS5ColorsUkyo.png|frame|right|Colors]] | ||
{{TOClimit|3}} | |||
== Introduction == | == Introduction == | ||
Blue-haired Iaido master and poster boy for tuberculosis awareness. | Blue-haired Iaido master and poster boy for [https://twitter.com/FM_Synth/status/1100633759475322882 tuberculosis awareness]. | ||
Ukyo is one of the best characters in the game. Pretty much any gameplan can be accommodated for with his toolkit -- if he can do it, he does it incredibly well. Mixups, runaway, turtling, anti-airing, punishing, you name it. He takes extra damage, meaning he can suffer for a mistake, but he will run circles around most opponents if given the opportunity. | |||
{| | |||
|-style="text-align:left;" | |||
! Strengths !! Weaknesses | |||
|- style="vertical-align:top;text-align:left" | |||
| style="width: 50%;"| | |||
* Stellar normals with long range, good damage, and quick startup. | |||
* Strong mixups and okizeme. | |||
* Great movement for both approaching to punish and running away to turtle. | |||
* Amazing anti-airs and air-to-airs. | |||
* Can punish just about everything. | |||
* A hit with the ladies. | |||
| style="width: 50%;"| | |||
* Super floaty jump. | |||
* Bad defense value. | |||
* Hugely punishable mixups and the looming possibility of messing up TK Tsubame Gaeshi makes self-destruction Ukyo's biggest weakness. | |||
|- | |||
|} | |||
== Data == | == Data == | ||
| Line 14: | Line 31: | ||
*Damage taken: 120% | *Damage taken: 120% | ||
*Rage duration: 20 seconds | *Rage duration: 20 seconds | ||
*Amount to rage: 45 | *<span style="color: purple; cursor:help" title="Number of hits from Haohmaru n.5A it takes to reach full rage">Amount to rage:</span> 45 | ||
*Walk speed: 544 | *Walk speed: 544 | ||
*Backwalk speed: 384 | *Backwalk speed: 384 | ||
| Line 20: | Line 37: | ||
*Jump duration: 59 frames | *Jump duration: 59 frames | ||
*Width: 16 | *Width: 16 | ||
*Throw range: 12 | *<span style="color: purple; cursor:help" title="Min. Range 8; Max Range 28">Throw range:</span> 12 | ||
*Throw recovery: 50 frames | |||
*<span style="color: purple; cursor:help" title="In latest aggregate tier list (see FAQ)">Tier placing:</span> S | |||
== | ==Normal Moves== | ||
===Far Slashes=== | |||
======<font style="visibility:hidden" size="0">5A</font>====== | |||
{{MoveData | |||
|image=SamSho5sp_Ukyo_5A.png | |||
|resizeImage=no | |||
|caption= | |||
|name=5A | |||
|data= | |||
{{AttackData-SSVSP | |||
|damage=6 | |||
|guard=Mid | |||
|cancel=1~2 (2)/9~14 (6) | |||
|invul= | |||
|property=Recoil Cancel | |||
|property2=Deflectable (Light) | |||
|property3=Weapon Clash 8 (1) | |||
|level=Weak Attack | |||
<!------------> | |||
|startup=9 | |||
|active=2 | |||
|recovery=15 | |||
|hitAdv=-6 | |||
|backhitAdv=-6 | |||
|blockAdv=-12 | |||
|description=5B with properties more suited to mashing (quicker recovery, better safety on block, earlier cancel window). This comes with a niche benefit that cancelling this into 214C will not drain your sword gauge if you don't hit with it. Useful for that alone, but 5B tends to be better if you aren't expecting them to block. | |||
}} | |||
}} | |||
=== | ======<font style="visibility:hidden" size="0">5B</font>====== | ||
{{MoveData | |||
|image=SamSho5sp_Ukyo_5A.png | |||
|resizeImage=no | |||
|caption= | |||
|name=5B | |||
|data= | |||
{{AttackData-SSVSP | |||
|damage=12 | |||
|guard=Mid | |||
|cancel=11~15 (5) | |||
|invul= | |||
|property=Recoil Cancel | |||
|property2=Deflectable (Medium) | |||
|property3=Weapon Clash 7 (1) | |||
|level=Medium Attack | |||
<!------------> | |||
|startup=8 | |||
|active=2 | |||
|recovery=25 | |||
|hitAdv=-8 | |||
|backhitAdv=0 | |||
|blockAdv=-18 | |||
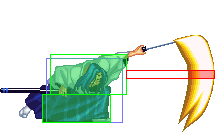
|description=Ukyo's main poke. Quick horizontal swipe with 8-frame start up, and great range. This will preempt all sorts of footsie buttons thanks to its ridiculous speed, but overusing it can leave you open vs jumpers and long range whiff punishes. | |||
There are a few wrinkles to this move -- cancelling into 214C (fake apple toss) will shorten the recovery on hit and whiff, almost matching 5A recovery. Cancelling into 236S or 214S on hit will usually not combo, but will catch them trying to do something that isn't just blocking. | |||
}} | |||
}} | |||
======<font style="visibility:hidden" size="0">5AB</font>====== | |||
| | {{MoveData | ||
|image=SamSho5sp_Ukyo_5AB_1.png | |||
|image2=SamSho5sp_Ukyo_5AB_2.png | |||
|resizeImage=no | |||
|caption= | |||
|name=5AB | |||
|data= | |||
{{AttackData-SSVSP | |||
|damage=31 | |||
|guard=Mid | |||
|cancel= | |||
|invul= | |||
|property=Deflectable (Heavy) | |||
|property2=Weapon Clash 10-12 (3) | |||
|level=Heavy Attack | |||
<!------------> | |||
|startup=13 | |||
|active=2 | |||
|recovery=38 | |||
|hitAdv=-2 | |||
|backhitAdv=+8 | |||
|blockAdv=-34 | |||
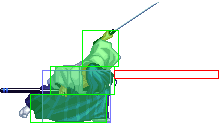
|description=One of Ukyo's main punishers. Has a zippy-quick 13-frame startup, has huge range, and does pretty hefty damage. However, it has no recoil animation, and there is an extended hurtbox before the attack becomes active, so it's incredibly risky to throw this out as anything other than a guaranteed punish. | |||
}} | |||
}} | |||
|- | ======<font style="visibility:hidden" size="0">2A</font>====== | ||
| | {{MoveData | ||
|image=SamSho5sp_Ukyo_2A.png | |||
|resizeImage=no | |||
|caption= | |||
|name=2A | |||
|data= | |||
{{AttackData-SSVSP | |||
|damage=5 | |||
|guard=Mid | |||
|cancel=1 (1)/7~11 (5) | |||
|invul= | |||
|property=Recoil Cancel | |||
|property2=Deflectable (Light) | |||
|level=Weak Attack | |||
<!------------> | |||
|startup=5 | |||
|active=2 | |||
|recovery=14 | |||
|hitAdv=-5 | |||
|backhitAdv=-5 | |||
|blockAdv=-6 | |||
|description=Basically a faster 5A while crouching, which naturally means it's another mainstay poke. Great at interrupting and keeping foes away despite its relatively short range and being pretty easily high profiled. | |||
}} | |||
}} | |||
|- | ======<font style="visibility:hidden" size="0">2B</font>====== | ||
| | {{MoveData | ||
|image=SamSho5sp_Ukyo_2B_1.png | |||
|image2=SamSho5sp_Ukyo_2B_2.png | |||
|resizeImage=no | |||
|caption= | |||
|name=2B | |||
|data= | |||
{{AttackData-SSVSP | |||
|damage=11 | |||
|guard=Mid | |||
|cancel=1~4 (4) | |||
|invul= | |||
|property=Recoil Cancel | |||
|property2=Deflectable (Medium) | |||
|level=Medium Attack | |||
<!------------> | |||
|startup=8 | |||
|active=3 | |||
|recovery=30 | |||
|hitAdv=-9 | |||
|backhitAdv=-1 | |||
|blockAdv=-18 | |||
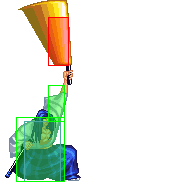
|description=Sitting anti-air that starts above Ukyo's head before hitting in front of him. Both hitboxes are extremely disjointed and will beat pretty much anything in that range clean. Requiring your foe be away from you means you can't reliably hit people with the part above his head. You have better anti-airs in a lot of situations due to the risk of this being a crouching anti-air, but this is still great at catching jumps when nothing else can reach. | |||
}} | |||
}} | |||
|- | ======<font style="visibility:hidden" size="0">2AB</font>====== | ||
| | {{MoveData | ||
|image=SamSho5sp_Ukyo_2AB.png | |||
|resizeImage=no | |||
|caption= | |||
|name=2AB | |||
|data= | |||
{{AttackData-SSVSP | |||
|damage=29 | |||
|guard=Mid | |||
|cancel=1~6 (6) | |||
|invul= | |||
|property=Deflectable (Heavy) | |||
|level=Heavy Attack | |||
<!------------> | |||
|startup=12 | |||
|active=1 | |||
|recovery=37 | |||
|hitAdv=0 | |||
|backhitAdv=+10 | |||
|blockAdv=-32 | |||
|description=Ukyo rolls to the ground and slashes at the opponent's knees. Another main punisher, is 1 frame faster than 5AB, but does 2 points less damage. Like 5AB, it's very punishable on block -- even moreso since Ukyo moves towards his opponent while using it. The short hurtbox also lets it occasionally sneak under stuff. Strong reactionary tool for various situations. Also enables combos if it hits them from behind. | |||
}} | |||
}} | |||
===Near Slashes=== | |||
======<font style="visibility:hidden" size="0">n.5A</font>====== | |||
{{MoveData | |||
|image=SamSho5sp_Ukyo_n5A.png | |||
|resizeImage=no | |||
|caption= | |||
|name=n.5A | |||
|data= | |||
{{AttackData-SSVSP | |||
|damage=5 | |||
|guard=Mid | |||
|cancel=1~13 (13) | |||
|invul= | |||
|property=Deflectable (Light) | |||
|level=Weak Attack | |||
<!------------> | |||
|startup=5 | |||
|active=3 | |||
|recovery=9 | |||
|hitAdv=-1 | |||
|backhitAdv=-1 | |||
|blockAdv=-6 | |||
|description=A no-recoil hilt bash with quick recovery. This is good to tag people out of the air from behind or disrupt their offense. Way better at hitting hops than your other mash buttons as well. The cancel window doesn't allow combos but can frame trap people. | |||
}} | |||
}} | |||
|- | ======<font style="visibility:hidden" size="0">n.5B</font>====== | ||
| | {{MoveData | ||
|image=SamSho5sp_Ukyo_n5B.png | |||
|resizeImage=no | |||
|caption= | |||
|name=n.5B | |||
|data= | |||
{{AttackData-SSVSP | |||
|damage=8 | |||
|guard=Mid | |||
|cancel=8~11 (4) | |||
|invul= | |||
|property=Recoil Cancel | |||
|property2=Deflectable (Medium) | |||
|property3=Weapon Clash 6~7 (2) | |||
|level=Medium Attack | |||
<!------------> | |||
|startup=8 | |||
|active=1 | |||
|recovery=32 | |||
|hitAdv=-14 | |||
|backhitAdv=-6 | |||
|blockAdv=-18 | |||
|description=Fairly quick slash that can combo into all of his specials including WFT. Doesn't reach upwards quite as much as the animation would suggest. | |||
}} | |||
}} | |||
|} | ======<font style="visibility:hidden" size="0">n.5AB</font>====== | ||
{{MoveData | |||
|image=SamSho5sp_Ukyo_n5AB_1.png | |||
|image2=SamSho5sp_Ukyo_n5AB_2.png | |||
|resizeImage=no | |||
|caption= | |||
|name=n.5AB | |||
|data= | |||
{{AttackData-SSVSP | |||
|damage=5, 23 | |||
|guard=Mid | |||
|cancel=1~7 (7) | |||
|invul= | |||
|property=Recoil Cancel | |||
|property2=Deflectable (Heavy) | |||
|property3=Weapon Clash 9~11 (3)/14 (1)/19 (1) | |||
|level=Heavy Attack | |||
<!------------> | |||
|startup=12 | |||
|active=2 | |||
|recovery=42 | |||
|hitAdv=-6 | |||
|backhitAdv=+4 | |||
|blockAdv=-26 | |||
|description=Basically a two-hitting version of 5AB, though it's only used for lazy punishes since you usually can do better. If the first hit connects on an airborne opponent, the second hit won't combo and you'll be wide open. | |||
}} | |||
}} | |||
=== | ======<font style="visibility:hidden" size="0">n.2A</font>====== | ||
{{MoveData | |||
|image=SamSho5sp_Ukyo_n2A.png | |||
|resizeImage=no | |||
|caption= | |||
|name=n.2A | |||
|data= | |||
{{AttackData-SSVSP | |||
|damage=4 | |||
|guard=Mid | |||
|cancel=1~2 (2)/5~12 (8) | |||
|invul= | |||
|property=Deflectable (Light) | |||
|level=Weak Attack | |||
<!------------> | |||
|startup=5 | |||
|active=5 | |||
|recovery=7 | |||
|hitAdv=-1 | |||
|backhitAdv=-1 | |||
|blockAdv=-6 | |||
|description=Another scramble tool that's mostly just n.5A but closer to the ground. | |||
}} | |||
}} | |||
======<font style="visibility:hidden" size="0">n.2B</font>====== | |||
| | {{MoveData | ||
|image=SamSho5sp_Ukyo_n2B.png | |||
|resizeImage=no | |||
|caption= | |||
|name=n.2B | |||
|data= | |||
{{AttackData-SSVSP | |||
|damage=6 | |||
|guard=Mid | |||
|cancel=6~15 (10) | |||
|invul= | |||
|property=Deflectable (Medium) | |||
|level=Medium Attack | |||
<!------------> | |||
|startup=6 | |||
|active=6 | |||
|recovery=12 | |||
|hitAdv=+1 | |||
|backhitAdv=+9 | |||
|blockAdv=-12 | |||
|description=Your usual hilt bop but it has enough hitstun to combo into things. It's worth knowing about because it's his fastest combo slash but misjudging this and having a 2B come out can be dangerous. | |||
}} | |||
}} | |||
| | ======<font style="visibility:hidden" size="0">n.2AB</font>====== | ||
| | {{MoveData | ||
|image=SamSho5sp_Ukyo_n2AB_1.png | |||
|image2=SamSho5sp_Ukyo_n2AB_2.png | |||
|resizeImage=no | |||
|caption= | |||
|name=n.2AB | |||
|data= | |||
{{AttackData-SSVSP | |||
|damage=5, 25 | |||
|guard=Mid | |||
|cancel=1~5 (5) | |||
|invul= | |||
|property=Recoil Cancel | |||
|level=Heavy Attack | |||
<!------------> | |||
|startup=14 | |||
|active=3 | |||
|recovery=44 | |||
|hitAdv=-2 | |||
|backhitAdv=+8 | |||
|blockAdv=-21 | |||
|description=Crouching multi-hit horizontal swipe above Ukyo's head that is not an anti-air. Does more damage than n.5AB but starts up 2 frames slower. It's basically interchangeable with n.5AB as a punish tool, but it's also prone to coming out if you misspace a 2AB backhit attempt. | |||
}} | |||
}} | |||
===Overheads=== | |||
======<font style="visibility:hidden" size="0">5BC</font>====== | |||
{{MoveData | |||
|image=SamSho5sp_Ukyo_5BC.png | |||
|resizeImage=no | |||
|caption= | |||
|name=5BC | |||
|data= | |||
{{AttackData-SSVSP | |||
|damage=16 | |||
|guard=High | |||
|cancel= | |||
|invul= | |||
|property= | |||
|level= | |||
<!------------> | |||
|startup=20 | |||
|active=2 | |||
|recovery=24 | |||
|hitAdv=KD | |||
|backhitAdv=KD | |||
|blockAdv=-19 | |||
|description=Weird hopping overhead that goes backwards. The hitbox goes backwards through the animation like with Mina so it can possibly hit people hopping behind you. Deceptively good as a defensive tool due to this and the high tech jump. | |||
}} | |||
}} | |||
|- | ======<font style="visibility:hidden" size="0">u.5BC</font>====== | ||
| | {{MoveData | ||
|image=SamSho5sp_Ukyo_u5BC.png | |||
|resizeImage=no | |||
|caption= | |||
|name=u.5BC | |||
|data= | |||
{{AttackData-SSVSP | |||
|damage=6 | |||
|guard=High | |||
|invul= | |||
|property= | |||
|level= | |||
<!------------> | |||
|startup=31 | |||
|active=9 | |||
|recovery=6 | |||
|hitAdv=KD | |||
|backhitAdv=KD | |||
|blockAdv=-19 | |||
|description=Another weird overhead, now with Ukyo sticking his foot out. Doesn't go backwards and knocks the opponent quite a ways, but it's extremely slow and kind of weak. If you absolutely need that long tech jump rather than a standard hop, I guess. | |||
}} | |||
}} | |||
===Kicks=== | |||
======<font style="visibility:hidden" size="0">5C</font>====== | |||
{{MoveData | |||
|image=SamSho5sp_Ukyo_5C.png | |||
|resizeImage=no | |||
|caption= | |||
|name=5C | |||
|data= | |||
{{AttackData-SSVSP | |||
|damage=5 | |||
|guard=Mid | |||
|cancel=1~4 (4) | |||
|invul= | |||
|property= | |||
|level=Medium Attack | |||
<!------------> | |||
|startup=8 | |||
|active=4 | |||
|recovery=24 | |||
|hitAdv=-9 | |||
|backhitAdv=-1 | |||
|blockAdv=-22 | |||
|description=Kind of a lame poking kick. There isn't much good to be said about it. | |||
}} | |||
}} | |||
|- | ======<font style="visibility:hidden" size="0">6C</font>====== | ||
| | {{MoveData | ||
|image=SamSho5sp_Ukyo_6C.png | |||
|resizeImage=no | |||
|caption= | |||
|name=6C | |||
|data= | |||
{{AttackData-SSVSP | |||
|damage=7 | |||
|guard=Low | |||
|cancel=1~2 (2) | |||
|invul= | |||
|property= | |||
|level= | |||
<!------------> | |||
|startup=5 | |||
|active=11 | |||
|recovery=19 | |||
|hitAdv=KD | |||
|backhitAdv=KD | |||
|blockAdv=-24 | |||
|description=Sliding knock down kick that lets you add a light pursuit afterwards. A good use of this is to use this when your opponent is running at you. Ukyo's hurtbox shrinks down noticeably during this like in 2AB. Very strong option when disarmed. | |||
}} | |||
}} | |||
|} | ======<font style="visibility:hidden" size="0">2C</font>====== | ||
{{MoveData | |||
|image=SamSho5sp_Ukyo_2C.png | |||
|resizeImage=no | |||
|caption= | |||
|name=2C | |||
|data= | |||
{{AttackData-SSVSP | |||
|damage=2 | |||
|guard=Low | |||
|cancel= | |||
|invul=6-9f throw invincible | |||
|property= | |||
|level=Weak Attack | |||
<!------------> | |||
|startup=6 | |||
|active=4 | |||
|recovery=2 | |||
|hitAdv=+5 | |||
|backhitAdv=+5 | |||
|blockAdv=0 | |||
|description=The best low kick in the game. Unlike every other low kick, this one is actually plus on hit and even on block. This is his main way of mixing up at close range. It recovers fast enough to let you do all sorts of on hit or block. | |||
}} | |||
}} | |||
=== | ======<font style="visibility:hidden" size="0">3C</font>====== | ||
{{MoveData | |||
|image=SamSho5sp_Ukyo_3C.png | |||
|resizeImage=no | |||
|caption= | |||
|name=3C | |||
|data= | |||
{{AttackData-SSVSP | |||
|damage=6 | |||
|guard=Mid | |||
|cancel= | |||
|invul=5-14f throw invincible | |||
|property= | |||
|level= | |||
<!------------> | |||
|startup=5 | |||
|active=10 | |||
|recovery=14 | |||
|hitAdv=KD | |||
|backhitAdv=KD | |||
|blockAdv=-18 | |||
|description=Ukyo leans down and sticks his foot out for his opponent to run into. Active for a long time, great hitbox, but punishable if blocked too early. It is a goofy option to meaty through bad reversal attempts and throws thanks to its active frames featuring throw invuln. Also beats out pokes/approaches/bad jumpins easily. Useful move depending on the MU. | |||
}} | |||
}} | |||
===Jumping=== | |||
| | ======<font style="visibility:hidden" size="0">j.A</font>====== | ||
{{MoveData | |||
|image=SamSho5sp_Ukyo_jA.png | |||
|resizeImage=no | |||
|caption= | |||
|name=j.A | |||
|data= | |||
{{AttackData-SSVSP | |||
|damage=5 | |||
|guard=High | |||
|cancel=1~3 (3) | |||
|invul= | |||
|property=Deep Deflectable (Light) | |||
|level=Weak Attack | |||
<!------------> | |||
|startup=7 | |||
|active=16 | |||
|recovery=7 | |||
|hitAdv= | |||
|backhitAdv= | |||
|blockAdv= | |||
|description=Jumping hilt bop. Completely outclassed in most situations. | |||
}} | |||
}} | |||
|- | ======<font style="visibility:hidden" size="0">j.B</font>====== | ||
| | {{MoveData | ||
|image=SamSho5sp_Ukyo_jB.png | |||
|resizeImage=no | |||
|caption= | |||
|name=j.B | |||
|data= | |||
{{AttackData-SSVSP | |||
|damage= | |||
|guard= | |||
|cancel=1~2 (2) | |||
|invul= | |||
|property=Deep Deflectable (Medium) | |||
|level=Medium Attack | |||
<!------------> | |||
|startup=5 | |||
|active=4 | |||
|recovery=21 | |||
|hitAdv= | |||
|backhitAdv= | |||
|blockAdv= | |||
|description=Downwards slice that hits below Ukyo in front and behind. Its primary use is to hit people trying to cross under your floaty jump. But during Time Slow, its ability to instant overhead combined with 2C as a low gives Ukyo a seriously threatening mixup that cashes out into Issen. | |||
}} | |||
}} | |||
|} | ======<font style="visibility:hidden" size="0">j.8AB</font>====== | ||
{{MoveData | |||
|image=SamSho5sp_Ukyo_j8AB.png | |||
|resizeImage=no | |||
|caption= | |||
|name=j.8AB | |||
|data= | |||
{{AttackData-SSVSP | |||
|damage=26 | |||
|guard=High | |||
|cancel=1~5 (5) | |||
|invul= | |||
|property=Deep Deflectable (Heavy) | |||
|level=Heavy Attack | |||
<!------------> | |||
|startup=10 | |||
|active=3 | |||
|recovery=21 | |||
|hitAdv= | |||
|backhitAdv= | |||
|blockAdv= | |||
|description=A somewhat specialized air-to-air thanks to only being usable from a neutral jump. Can snipe opponents that otherwise lack a strong horizontal jumping attack. Easy to deep hit with on the way down. | |||
}} | |||
}} | |||
=== | ======<font style="visibility:hidden" size="0">j.7/9AB</font>====== | ||
{{MoveData | |||
|image=SamSho5sp_Ukyo_jAB_1.png | |||
|image2=SamSho5sp_Ukyo_jAB_2.png | |||
|resizeImage=no | |||
|caption= | |||
|name=j.AB | |||
|data= | |||
{{AttackData-SSVSP | |||
|damage=25 | |||
|guard=High | |||
|cancel=1~5 (5) | |||
|invul= | |||
|property=Deep Deflectable (Heavy) | |||
|level=Heavy Attack | |||
<!------------> | |||
|startup=12 | |||
|active=5 | |||
|recovery=11 | |||
|hitAdv= | |||
|backhitAdv= | |||
|blockAdv= | |||
|description=Strong air-to-air button that covers horizontally in front if you don't want to commit to a Tsubame. Exercise caution, depending on opposing jump arcs and how early you hit them with this, you might be punished on hit. Also exceedingly difficult to anti-air in spite of Ukyo's awful jump. | |||
}} | |||
}} | |||
======<font style="visibility:hidden" size="0">j.C</font>====== | |||
| | {{MoveData | ||
|image=SamSho5sp_Ukyo_jC.png | |||
|resizeImage=no | |||
|caption= | |||
|name=j.C | |||
|data= | |||
{{AttackData-SSVSP | |||
|damage=3, 3 | |||
|guard=High | |||
|cancel= | |||
|invul= | |||
|property= | |||
|level=Heavy Attack | |||
<!------------> | |||
|startup=5 | |||
|active=5 | |||
|recovery=21 | |||
|hitAdv= | |||
|backhitAdv= | |||
|blockAdv= | |||
|description=Hits twice, and covers slightly below in front of him. The first hit usually combos into the second hit, and the second hit counts as a heavy attack. This means that if the second hit is deep or hits a croucher, you can easily confirm into 5AB for very good damage. Being a two-hitting high also naturally means that Ukyo can mix up off of this. If his opponent just lets him jump in for free, at least | |||
}} | |||
}} | |||
|- | ===Dashing=== | ||
| | ======<font style="visibility:hidden" size="0">66A</font>====== | ||
{{MoveData | |||
|image=SamSho5sp_Ukyo_66A.png | |||
|resizeImage=no | |||
|caption= | |||
|name=66A | |||
|data= | |||
{{AttackData-SSVSP | |||
|damage=5 | |||
|guard=Mid | |||
|cancel=1~3 (3) | |||
|invul= | |||
|property=Recoil Cancel | |||
|property2=Deflectable (Heavy) | |||
|level=Medium Attack | |||
<!------------> | |||
|startup=11 | |||
|active=8 | |||
|recovery=15 | |||
|hitAdv=-4 | |||
|backhitAdv=+4 | |||
|blockAdv=-26 | |||
|description=Running hilt bop. It's awful on block and has low reward on hit as lots of running lights tend to be but the attack itself has long reach and great priority near the tip. | |||
}} | |||
}} | |||
|- | ======<font style="visibility:hidden" size="0">66B</font>====== | ||
| | {{MoveData | ||
|image=SamSho5sp_Ukyo_66B.png | |||
|resizeImage=no | |||
|caption= | |||
|name=66B | |||
|data= | |||
{{AttackData-SSVSP | |||
|damage=12 | |||
|guard=Mid | |||
|cancel= | |||
|invul= | |||
|property= | |||
|level=Medium Attack | |||
<!------------> | |||
|startup=22 | |||
|active=1 | |||
|recovery=44 | |||
|hitAdv=KD | |||
|backhitAdv=KD | |||
|blockAdv=-39 | |||
|description=Ukyo dashes behind his opponent and slashes them. The recovery on this is awful, but it's fast and tough to see and Ukyo's upper body is intangible so he can go through some anti-dash attacks and hit them (note that he can still be thrown). You can rack up a lot of free damage just using this in tricky ways on the opponent's wakeup like faking a crossup during their rolls. | |||
It will always whiff if your opponent is in the corner and can possibly whiff if you do it too close because of how far he runs. If you space this wrong and don't go behind them he'll slice the wrong direction and you will get punished. And even though it looks like he turns around during the attack he hasn't, so any punish after this being blocked will count as a backhit. | |||
}} | |||
}} | |||
|- | ======<font style="visibility:hidden" size="0">66AB</font>====== | ||
| | {{MoveData | ||
|image=SamSho5sp_Ukyo_66AB.png | |||
|resizeImage=no | |||
|caption= | |||
|name=66AB | |||
|data= | |||
{{AttackData-SSVSP | |||
|damage=15 | |||
|guard=Mid | |||
|cancel= | |||
|invul=1-13f throw invincible | |||
|property= | |||
|level= | |||
<!------------> | |||
|startup=4 | |||
|active=2 | |||
|recovery=28 | |||
|hitAdv=KD | |||
|backhitAdv=KD | |||
|blockAdv=-29 | |||
|description=Running 2AB. Yet another awesome punisher, for those times when your other moves won't reach, and when chasing backdashes or stuffing approaches. It hits on frame 4(!), reaches really far, and deals good damage. Being similar to 2AB means it low profiles a lot of attacks, and as such it's a great anti-air from the front or from behind if spaced right. | |||
}} | |||
}} | |||
|} | ======<font style="visibility:hidden" size="0">66C</font>====== | ||
{{MoveData | |||
|image=SamSho5sp_Ukyo_66C.png | |||
|resizeImage=no | |||
|caption= | |||
|name=66C | |||
|data= | |||
{{AttackData-SSVSP | |||
|damage=4 | |||
|guard=Low | |||
|cancel= | |||
|invul=1-17f throw invincible | |||
|property= | |||
|level= | |||
<!------------> | |||
|startup=6 | |||
|active=12 | |||
|recovery=15 | |||
|hitAdv=KD | |||
|backhitAdv=KD | |||
|blockAdv=-21 | |||
|description=Basically running 6C. Can surprise opponents from a good distance away and combo into 2BC. | |||
}} | |||
}} | |||
=== | ===Unarmed=== | ||
======<font style="visibility:hidden" size="0">u.5S</font>====== | |||
{{MoveData | |||
|image=SamSho5sp_Ukyo_u5S.png | |||
|resizeImage=no | |||
|caption= | |||
|name=u.5S | |||
|data= | |||
{{AttackData-SSVSP | |||
|damage=4 | |||
|guard=Mid | |||
|cancel=1 (1) | |||
|invul= | |||
|property= | |||
|level= | |||
<!------------> | |||
|startup=5 | |||
|active=1 | |||
|recovery=13 | |||
|hitAdv=-3 | |||
|backhitAdv=-3 | |||
|blockAdv=-8 | |||
|description=Dinky little slap at an upwards angle. | |||
}} | |||
}} | |||
======<font style="visibility:hidden" size="0">u.2S</font>====== | |||
| | {{MoveData | ||
|image=SamSho5sp_Ukyo_u2S.png | |||
|resizeImage=no | |||
|caption= | |||
|name=u.2S | |||
|data= | |||
{{AttackData-SSVSP | |||
|damage=4 | |||
|guard=Mid | |||
|cancel= | |||
|invul= | |||
|property= | |||
|level= | |||
<!------------> | |||
|startup=6 | |||
|active=1 | |||
|recovery=14 | |||
|hitAdv=-4 | |||
|backhitAdv=-4 | |||
|blockAdv=-9 | |||
|description=Crouching version of the above. Might as well just press 2C. | |||
}} | |||
}} | |||
|- | ======<font style="visibility:hidden" size="0">ju.S</font>====== | ||
| | {{MoveData | ||
|image=SamSho5sp_Ukyo_juS.png | |||
|resizeImage=no | |||
|caption= | |||
|name=ju.S | |||
|data= | |||
{{AttackData-SSVSP | |||
|damage=4 | |||
|guard=High | |||
|cancel= | |||
|invul= | |||
|property= | |||
|level= | |||
<!------------> | |||
|startup=9 | |||
|active=8 | |||
|recovery=8 | |||
|hitAdv= | |||
|backhitAdv= | |||
|blockAdv= | |||
|description=Jumping slap. Don't jump. | |||
}} | |||
}} | |||
======<font style="visibility:hidden" size="0">u.66S</font>====== | |||
{{MoveData | |||
|image=SamSho5sp_Ukyo_u66S.png | |||
|resizeImage=no | |||
|caption= | |||
|name=u.66S | |||
|data= | |||
{{AttackData-SSVSP | |||
|damage=4 | |||
|guard=Mid | |||
|cancel=1~2 (2) | |||
|invul= | |||
|property= | |||
|level= | |||
<!------------> | |||
|startup=6 | |||
|active=1 | |||
|recovery=16 | |||
|hitAdv=KD | |||
|backhitAdv=KD | |||
|blockAdv=-13 | |||
|description=Dash slap that knocks down. The angle and the long range knockdown is why you'd want to use this. | |||
}} | |||
}} | |||
|- | ===Pursuit=== | ||
| | ======<font style="visibility:hidden" size="0">2BC</font>====== | ||
{{MoveData | |||
|image=SamSho5sp_Ukyo_2BC.png | |||
|resizeImage=no | |||
|caption= | |||
|name= Pursuit | |||
|input=2BC | |||
|data= | |||
{{AttackData-SSVSP | |||
|damage=6 | |||
|guard= | |||
|cancel= | |||
|invul= | |||
|property= | |||
|level= | |||
<!------------> | |||
|startup=21 | |||
|active=7 | |||
|recovery=42 | |||
|hitAdv= | |||
|backhitAdv= | |||
|blockAdv= | |||
|description=Fairly slow pursuit with middling damage. This is a good tool for Ukyo because he can use it after most of his knockdowns and it keeps him within range to run his oki. Funny enough this is actually faster and deals more damage with no weapon. | |||
}} | |||
}} | |||
======<font style="visibility:hidden" size="0">8BC</font>====== | |||
{{MoveData | |||
|image=SamSho5sp_Ukyo_2BC.png | |||
|resizeImage=no | |||
|caption= | |||
|name= Heavy Pursuit | |||
|input= 8BC | |||
|data= | |||
{{AttackData-SSVSP | |||
|damage=13 | |||
|guard= | |||
|cancel= | |||
|invul= | |||
|property= | |||
|level= | |||
<!------------> | |||
|startup=40 | |||
|active=38 | |||
|recovery=24 | |||
|hitAdv= | |||
|backhitAdv= | |||
|blockAdv= | |||
|description=This is only guaranteed after a 236A hits the opponent in the corner. | |||
}} | |||
}} | |||
|} | ==System== | ||
======<font style="visibility:hidden" size="0">Deflect</font>====== | |||
{{MoveData | |||
|image=SamSho5sp_Ukyo_Deflect.png | |||
|resizeImage=no | |||
|caption= | |||
|name= Deflect | |||
|input= 216D | |||
|data= | |||
{{AttackData-SSVSP | |||
|damage= | |||
|guard= | |||
|cancel= | |||
|invul= | |||
|property= | |||
|level= | |||
<!------------> | |||
|startup= | |||
|active= | |||
|recovery= | |||
|hitAdv= | |||
|backhitAdv= | |||
|blockAdv= | |||
|description=Big big big deflect. Use it as you would use other deflects. | |||
}} | |||
}} | |||
=== | ======<font style="visibility:hidden" size="0">Taunt Disarm</font>====== | ||
{{MoveData | |||
|image=SamSho5sp_Ukyo_3xstart.png | |||
|resizeImage=no | |||
|caption= | |||
|name= Taunt Disarm | |||
|input= Start x 3 | |||
|data= | |||
{{AttackData-SSVSP | |||
|damage= | |||
|guard= | |||
|cancel= | |||
|invul= | |||
|property= | |||
|level= | |||
<!------------> | |||
|startup= | |||
|active= | |||
|recovery= | |||
|hitAdv= | |||
|backhitAdv= | |||
|blockAdv= | |||
|description=Just kinda sticks his sword in the ground. | |||
}} | |||
}} | |||
======<font style="visibility:hidden" size="0">Weapon Pickup</font>====== | |||
| | {{MoveData | ||
|image=SamSho5sp_Ukyo_wpn_pickup.png | |||
|resizeImage=no | |||
|caption= | |||
|name= Weapon Pickup | |||
|input= 5A near weapon | |||
|data= | |||
{{AttackData-SSVSP | |||
|damage= | |||
|guard= | |||
|cancel= | |||
|invul= | |||
|property= | |||
|level= | |||
<!------------> | |||
|startup= | |||
|active= | |||
|recovery= | |||
|hitAdv= | |||
|backhitAdv= | |||
|blockAdv= | |||
|description=Surprisingly fast weapon pickup. | |||
}} | |||
}} | |||
==Special Moves== | |||
===Specials=== | |||
======<font style="visibility:hidden" size="0">j.1236S</font>====== | |||
{{MoveData | |||
|- | |image=SamSho5sp_Ukyo_j1236A_1.png | ||
| | |image2=SamSho5sp_Ukyo_j1236AB_1.png | ||
|resizeImage=no | |||
|caption=A/B Tsubame | |||
|caption2=AB Tsubame | |||
|name=Tsubame Gaeshi | |||
|input=j.1236S | |||
|data= | |||
{{AttackData-SSVSP | |||
|version=A | |||
|damage=18 | |||
|guard=High | |||
|invul= | |||
|property= | |||
|level= | |||
<!------------> | |||
|startup=3 | |||
|active=6 | |||
|recovery=16 on landing | |||
|hitAdv=KD | |||
|backhitAdv=KD | |||
|blockAdv=-41 | |||
}} | |||
{{AttackData-SSVSP | |||
|version=B | |||
|damage=21 | |||
|guard=High | |||
|invul= | |||
|property= | |||
|level= | |||
<!------------> | |||
|startup=3 | |||
|active=6 | |||
|recovery=23 on landing | |||
|hitAdv=KD | |||
|backhitAdv=KD | |||
|blockAdv=-48 | |||
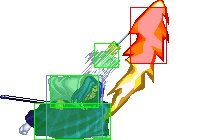
|description=One of Ukyo's most important moves in general. All versions hit overhead, have very great hitboxes that more or less cannot be contested, and have fast startup. Ukyo bounces backwards when it's blocked, with heavier versions not bouncing as far and having more recovery in exchange for increased damage. Generally speaking, these are all very unsafe on block. Some characters might have a tougher time meaningfully punishing light Tsubame if it's spaced out well, however, so its risk assessment can be matchup-dependent. | |||
Doing a Tsubame from the ground (tiger knee'ing/TK) is input as 12369S, and you want to learn how to do this if you want to play Ukyo well. Can also be TK'd with neutral/back jumps or done from a backdash for specialized purposes. It can be low profiled, especially by smaller characters such as Rera, and having it whiff can be a death sentence. Pick your opportunities very carefully when using it. Or don't. | |||
A/B both have a blazing fast 3-frame startup and are fast enough to combo off of 2C when TK'd. B Tsubame's longer landing recovery can put you in a bad situation even on hit, depending on the matchup (think Gaira or similar cases), so the light version's increased safety might make or break the match for you. These are a very strong option to buffer after blocking an attack for a lightning fast punish. You also get a lot of mileage reacting to bad jumps and hitting them with a TK'd Tsubame. | |||
|- | <gallery class="mw-collapsible mw-collapsed" data-expandtext="show hitboxes" data-collapsetext="hide hitboxes"> | ||
| | SamSho5sp_Ukyo_j1236A_1.png|Frame 3 | ||
SamSho5sp_Ukyo_j1236A_2.png|Frame 4 | |||
SamSho5sp_Ukyo_j1236A_3.png|Frames 5-6 | |||
SamSho5sp_Ukyo_j1236A_4.png|Frames 7-8 | |||
</gallery> | |||
}} | |||
{{AttackData-SSVSP | |||
|version=AB | |||
|damage=2x6, 24 | |||
|guard=High | |||
|invul= | |||
|property= | |||
|level= | |||
<!------------> | |||
|startup=10 | |||
|active=7 | |||
|recovery=45 on landing | |||
|hitAdv=KD | |||
|backhitAdv=KD | |||
|blockAdv=-75 | |||
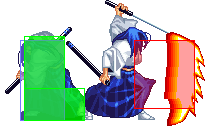
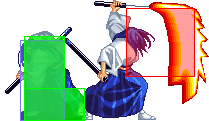
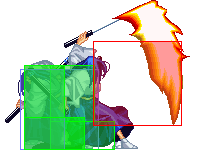
|description=AB Tsubame is slower (10f startup) but hits numerous times and has an even larger hitbox than the others, allowing him to cross up with it (not that you'd want to). This sounds cool until you realize that in most situations a simple j.AB or A/B Tsubame will work much better because the smaller hits reduce his sword gauge and neuter the damage as a result. It also leaves him even more open to punishment if blocked or whiffed, as he hardly bounces at all and starts coughing after he lands. | |||
The best characteristic this move has is that it gives a proper launch if it connects during time slow, so he can combo afterwards. Its ridiculous hitbox comes in handy here to beat would-be attempts to stuff time slow juggle shenanigans. | |||
=== | <gallery class="mw-collapsible mw-collapsed" data-expandtext="show hitboxes" data-collapsetext="hide hitboxes"> | ||
SamSho5sp_Ukyo_j1236AB_1.png|Frames 10-11 | |||
SamSho5sp_Ukyo_j1236AB_2.png|Frames 12-13 | |||
SamSho5sp_Ukyo_j1236AB_3.png|Frames 14-15 | |||
SamSho5sp_Ukyo_j1236AB_4.png|Frame 16 | |||
</gallery> | |||
}} | |||
}} | |||
======<font style="visibility:hidden" size="0">214S</font>====== | |||
| | {{MoveData | ||
|image=SamSho5sp_Ukyo_214A_1.png | |||
|image2=SamSho5sp_Ukyo_214A_2.png | |||
|image3=SamSho5sp_Ukyo_214A_3.png | |||
|image4=SamSho5sp_Ukyo_214AB_1.png | |||
|resizeImage=no | |||
|caption= | |||
|name=Hiken Sasameyuki | |||
|input=214S | |||
|data= | |||
{{AttackData-SSVSP | |||
|version=A | |||
|damage=5x5 | |||
|guard=Mid | |||
|invul= | |||
|property= | |||
|level= | |||
<!------------> | |||
|startup=19 | |||
|active=2 | |||
|recovery=22 | |||
|hitAdv=-4 | |||
|backhitAdv=-4 | |||
|blockAdv=-17 | |||
}} | |||
{{AttackData-SSVSP | |||
|version=B | |||
|damage=6x8 | |||
|guard=Mid | |||
|invul= | |||
|property= | |||
|level= | |||
<!------------> | |||
|startup=18 | |||
|active=2 | |||
|recovery=22 | |||
|hitAdv=-5 | |||
|backhitAdv=-5 | |||
|blockAdv=-17 | |||
}} | |||
{{AttackData-SSVSP | |||
|version=AB | |||
|damage=7x11 | |||
|guard=Mid | |||
|invul=1-12f throw invuln | |||
|property= | |||
|level= | |||
<!------------> | |||
|startup=22 | |||
|active=2 | |||
|recovery=30 | |||
|hitAdv=-12 | |||
|backhitAdv=-12 | |||
|blockAdv=-25 | |||
|description=Ukyo tosses up an apple before slicing repeatedly in front of him. Has good range, but is only really useful as a chip tool. Surprisingly annoying for lots of characters to punish, but still risky if it pushes them out and you whiff. AB version has throw invuln on startup in case you want to look cool on a throw read. Overall a neat somewhat gimmicky way to chip them out and occasionally push them out, but the apple throw can be a giveaway. That's what throwing all those fake apples is for, wink wink. | |||
During time slow if your opponent is almost dead, you can use this to chip or combo because the time slow significantly delays its pushback. The AB version will eat up pretty much your entire time slow though. | |||
<gallery class="mw-collapsible mw-collapsed" data-expandtext="show 214A hitboxes" data-collapsetext="hide 214A hitboxes"> | |||
SamSho5sp_Ukyo_214A_1.png|Frames 19-20, 39-40 | |||
SamSho5sp_Ukyo_214A_2.png|Frames 24-25, 34-35 | |||
SamSho5sp_Ukyo_214A_3.png|Frames 29-30 | |||
</gallery> | |||
<gallery class="mw-collapsible mw-collapsed" data-expandtext="show 214B hitboxes" data-collapsetext="hide 214B hitboxes"> | |||
SamSho5sp_Ukyo_214A_2.png|Frames 18-19, 38-39 | |||
SamSho5sp_Ukyo_214B_1.png|Frames 23-24, 33-34, 43-44, 53-54 | |||
SamSho5sp_Ukyo_214B_2.png|Frames 28-29, 48-49 | |||
</gallery> | |||
|} | <gallery class="mw-collapsible mw-collapsed" data-expandtext="show 214AB hitboxes" data-collapsetext="hide 214AB hitboxes"> | ||
SamSho5sp_Ukyo_214AB_1.png|Frames 22-23, 52-53, | |||
SamSho5sp_Ukyo_214B_1.png|Frames 27-28, 47-48, 57-58 | |||
SamSho5sp_Ukyo_214AB_2.png|Frames 32-33, 42-43, 62-63, 72-73 | |||
SamSho5sp_Ukyo_214AB_3.png|Frames 37-38, 67-68 | |||
</gallery> | |||
}} | |||
}} | |||
== | ======<font style="visibility:hidden" size="0">214C</font>====== | ||
{{MoveData | |||
|image=SamSho5sp_Ukyo_214C.png | |||
|resizeImage=no | |||
|caption= | |||
|name='Hi'ken Sasameyuki | |||
|input=214C | |||
|data= | |||
{{AttackData-SSVSP | |||
|damage= | |||
|guard= | |||
|invul= | |||
|property= | |||
|level= | |||
<!------------> | |||
|startup= | |||
|active= | |||
|recovery=17 | |||
|hitAdv= | |||
|backhitAdv= | |||
|blockAdv= | |||
|description=The absent sword, for all your apple throwing purposes. Very fun to cancel into for style points, or to shorten the recovery on your 5B presses. You can buffer all sorts of fun stuff behind this, and even visually confirm what your opponent is doing before committing to anything beyond the toss itself. All Ukyo players are required by law to do this at least five times per match. | |||
}} | |||
}} | |||
======<font style="visibility:hidden" size="0">236S</font>====== | |||
| | {{MoveData | ||
|image=SamSho5sp_Ukyo_236A.png | |||
|image2=SamSho5sp_Ukyo_236B_1.png | |||
|image3=SamSho5sp_Ukyo_236B_2.png | |||
|image4=SamSho5sp_Ukyo_236AB.png | |||
|resizeImage=no | |||
|caption=Step 1 | |||
|caption3=Step 2 | |||
|caption4=Step 3 | |||
|name=Zanzou Fumikomi Giri | |||
|input=236S | |||
|data= | |||
{{AttackData-SSVSP | |||
|version=A | |||
|damage=16 | |||
|guard=Mid | |||
|invul= | |||
|property= | |||
|level= | |||
<!------------> | |||
|startup=15 | |||
|active=2 | |||
|recovery=32 | |||
|hitAdv=KD | |||
|backhitAdv=KD | |||
|blockAdv=-27 | |||
}} | |||
{{AttackData-SSVSP | |||
|version=B | |||
|damage=5, 18 | |||
|guard= | |||
|invul= | |||
|property= | |||
|level= | |||
<!------------> | |||
|startup=15 | |||
|active= | |||
|recovery=41 | |||
|hitAdv=KD | |||
|backhitAdv=KD | |||
|blockAdv=-36 | |||
}} | |||
{{AttackData-SSVSP | |||
|version=AB | |||
|damage=5, 5, 10 | |||
|guard=Mid | |||
|invul= | |||
|property= | |||
|level= | |||
<!------------> | |||
|startup=15 | |||
|active=2 | |||
|recovery=39 | |||
|hitAdv=KD | |||
|backhitAdv=KD | |||
|blockAdv=-34 | |||
|description=Combo attack that has Ukyo send afterimages to slice you. All versions are very unsafe and can be punished once you get used to the different audio cues for each one. Heavier versions go farther and add another slash to the sequence. Can be used as a gimmicky whiff punish to go through stationary hitboxes, from a back roll or a long distance chip/counterpoke tool. But it's most reliable for combo punishes where you want the knockdown, or a recoil cancel if you're feeling lucky. | |||
Oh, fun fact, the heavy version can whiff on the last hit sometimes. | |||
}} | |||
}} | |||
|- | ===Weapon Flipping Technique=== | ||
| | {{MoveData | ||
|image=SamSho5sp_Ukyo_236CD.png | |||
|resizeImage=no | |||
|caption= | |||
|name=Tsubame Rokuren | |||
|input=236CD | |||
|data= | |||
{{AttackData-SSVSP | |||
|damage=30 | |||
|guard=High | |||
|invul= | |||
|property=14-47f above ground | |||
|level= | |||
<!------------> | |||
|startup=19 | |||
|active=29 | |||
|recovery=22 on landing | |||
|hitAdv=KD | |||
|backhitAdv=KD | |||
|blockAdv=-59 | |||
|description=It's your average combo super with the caveat that it's comically easy to punish. Ukyo even bounces behind the opponent when this is blocked, giving them ample time to unload a huge backhit punish. Raging isn't the best option Ukyo has for meter management, considering the strength of his meditation and time slow. But it deals standard WFT damage and can be reliably comboed into. It is also a high like the standard Tsubame, though it probably won't open up an attentive opponent. | |||
}} | |||
}} | |||
== Combos == | |||
== | === Normal === | ||
*'''(n.5B or n.2B) ...''' | |||
:*'''... xx 236B/236AB 2BC''' | |||
: | :Standard corner carry. 236B does slightly more damage but carries a shorter distance. Frequently drops if you're hitting them from behind. Pursuit is corner only. | ||
:*'''... xx 236A 8BC''' | |||
:More consistent on backhits. 8BC is a tighter link than 2BC in the above combo and is also corner only. | |||
:*'''... xx 214A''' | |||
:Reset to neutral. Can leave you open even on hit sometimes. | |||
:*'''... xx 236CD''' | |||
:If you absolutely must use WFT this is the only situation that it'll work in. | |||
*'''2C tk.1236A/B''' | |||
:2C is low, Tsubame Gaeshi is high. The motion for the IoH should be done right around when Ukyo recovers from the kick in order to time the link correctly. | |||
: | :There is a caveat with this combo, being that whether or not it works can depend on your spacing. If your opponent's hurtbox shrinks low enough during hitstun, it can result in the combo not working at all, or only working when you aren't at direct point blank range. For the most part, the latter category probably won't affect you very much. It also doesn't work on some characters when crouching. | ||
:Invalid on: Rimururu, Basara. | |||
:Valid when spaced on: Nakoruru, Shizumaru, Genuro, Kazuki, Sogetsu, Enja, Suija, Yoshitora, Yunfei, Mina. | |||
:Valid vs. crouching on: Kyoshiro, Basara, Gaira, Amakusa, Jubei, Zankuro, Kusaregedo, Gaoh. | |||
*'''(66AB/66C/6C/3C) 2BC''' | |||
:You'll likely use these normals quite a lot, so get used to converting them to a pursuit wherever you can. | |||
: | |||
=== Backhit only === | |||
*'''2AB tk.1236A/B''' | |||
:Situational? Yeah. Fast and hurts a ton? Yeah. At least the link is pretty lenient. Tsubame will whiff if you do this from too far. | |||
*'''2AB 5B xx 236B''' | |||
:Tougher and harder-hitting 2AB combo. The link is a lot tighter, but this does close to half a lifebar. Stick to the above version for more consistency. | |||
*'''2AB 66AB''' | |||
:The farthest reaching 2AB combo. Another annoying link despite the run buffer, so if you feel you must use this, practice it. | |||
*''' | *'''5B xx 236A/236B''' | ||
:Sometimes the followup will whiff or not combo but in general the increased hitstun from behind lets 5B combo into knockdowns. | |||
: | |||
*'''236A | *'''n.5B xx 214C 5B xx 236A/236B''' | ||
:Swag combo. | |||
*''' | *'''n.5B xx 214C tk.1236A/B''' | ||
: | :Tsubame link courtesy of apple. | ||
*''' | *'''n.5B/n.2B xx 214CD''' | ||
:Not that you'll be in the situation to land this very much, but hey. | |||
=== | === Time slow === | ||
*'''j.AB j.AB j.AB ...''' | |||
:Used to hearing about this one yet? Your jump is pretty floaty though, so you might do better waiting for them to fall into Issen range. | |||
*'''(j.9B or 2C)''' | *'''(j.9B or 2C) BCD''' | ||
:50/50 with instant overhead j.B and 2C. Both lead to Issen. 2C is harder to explode on reaction but hoping they won't is risky. You can string together multiple 2C reps if you expect they'll block high for the ioh. Jump in with j.C before this mixup for an extra layer for them to block. | |||
:50/50 with instant overhead j.B and 2C. Both lead to Issen. 2C is harder to explode on reaction but hoping they won't is risky. | |||
*'''j.1236AB BCD''' | *'''j.1236AB BCD''' | ||
:This one hurts a lot. Primarily used if you bait a big enough whiff while popping time slow. Use Tsubame before landing (don't tiger knee it), wait a little while for them to fall just around head height before using Issen. Lots of meditation and a full sword gauge for the Tsubame Gaeshi will lead to this easily shaving off ~75% of a lifebar. | :This one hurts a lot and cannot be exploded. Primarily used if you bait a big enough whiff while popping time slow. Use Tsubame before landing (don't tiger knee it), wait a little while for them to fall just around head height before using Issen. Lots of meditation and a full sword gauge for the Tsubame Gaeshi will lead to this easily shaving off ~75% of a lifebar. | ||
== Strategies == | == Strategies == | ||
=== General === | |||
Ukyo is | Ukyo is ideally played as an irritating hit and run character that can choose to mix up when he lands a knockdown. To this end he will harass with quick long range normals, dance in and out of the opponent's range, and smack them for overextending. This makes him potent for both offensive and defensive play, thanks particularly to his incredibly good grounded movement. His forward run has numerous attacks he can mix up and whiff punish with to boot. | ||
If he has the life lead, there's nothing stopping him from just running away and sitting on it. If the opponent has few options to effectively open you up, you can effectively wall them out with normals and punish them for overextending. This becomes very useful when the timer is running out. | |||
' | But there are a few very pertinent things to be concerned about with Ukyo. He takes a lot of damage thanks to his defense value. Despite his great reach, if a character can outrange him with a quick long range attack, such as Haohmaru 5AB, he needs to be on point with his choices so he doesn't get blown up. Similarly he cannot get too trigger-happy with his buttons against a foe that represents deflects, because all of his best ranged pokes can be deflected and you will get hurt for it. | ||
Almost any mixup Ukyo does is going to be heavily punishable, so if the opponent can block the basic 2C/Tsubame sequence or if they guess your 66B right, you are going to get hurt. Ukyo requires a great balance of careful play and effective risk-taking in order to play well, but the rewards for a correct guess can be huge as almost any knockdown he gets will feed into his pressure or let him run away. | |||
=== 2C Mixups/Pressure === | |||
Making the opponent block or get hit by a 2C opens them up to all sorts of possible mixups if you want to commit, including as okizeme. He can obviously do 2C tk.1236A/B for the classic setup, 2C 66B to cross up, 2C 6C to low knockdown, 2C 66CD to throw, etc. He can pretty safely keep pressing 2C to change up the timing, so getting out can be pretty tough if Ukyo's confident in his mixup. | |||
However, don't abuse these options if your opponent is good at fuzzy guarding or has a decent invulnerable move. Getting blocked means you're going to eat a juicy punish, so as they show they can block correctly, your mixup becomes less braindead and requires you put more thought into which of his various options you use. Also note that Tsubame Gaeshi will go right over a 2D, and a poorly executed TK will result in it whiffing over some crouching opponents. Be confident in your execution when doing this mixup or else. | |||
=== Poking === | |||
:* '''5B''' - The big button itself. If you don't know what best to use, you can choose this with relative impunity. Just be sure the opponent doesn't have a read on you. | |||
:* '''2B''' - Not as catch-all as his other normals, but you can keep them from jumping by representing this. Know your range so this actually comes out. | |||
:* '''2A''' - The quicker shorter range version of 5B. If they're too close for comfort, use this. It also has great priority as a counterpoke. | |||
:* '''2C''' - His best mash option up close. On hit or block you can mix up pretty effectively. Or just push them out of reach so you can go back to using slashes. | |||
:* '''3C''' - A super active option you can stick out to snipe outstretched hurtboxes. Doesn't lead to the best oki but you can make room if this hits. | |||
:* '''6C''' - Very quick decent range low option that leads to a pursuit and oki opportunities. A great option to catch desperate approaches. | |||
:* '''236A''' - Unsafe counterpoke gimmick, but hard to react to and punish if used sparingly. Best used at around 5B distance; even better as a recoil cancel. Do not abuse this. | |||
:* '''214S''' - Not too bad to wall them out with, actually. Does little damage but attempts to punish are tough to time correctly. Use sparingly if at all. | |||
=== Punishing === | |||
:* '''n.5B/n.2B xx 236S''' - Your fastest slash option that also does decent corner carry. See combos for version differences on 236S | |||
:* '''6C''' - A low damage twitch punish if you act too late for anything else. Easily sets up further pressure. | |||
:* '''5AB''' - 13f of pain. Great reach, startup, damage. Expect to die if this is blocked. Only use it for larger punishes. | |||
:* '''n.5AB/n.2AB''' - Hugely unsafe but not as much as 5AB. Your lazy punish options. | |||
:* '''2AB''' - Alternative to 5AB. Similar damage/startup but slightly weaker. Still worth representing. | |||
:* '''66AB''' - Buffer this during blockstun to reliably get it out faster. Great range, can punish from absurd distances even with minimum distance traveled. | |||
:* '''66CD''' - With a run speed like that, why not? | |||
:* '''tk.1236A/B''' - If you fancy yourself as having fast reflexes, buffer this during blockstun (maybe even hitstun). His absolute fastest punish but also one of the riskiest. Very big gamble. | |||
=== Time Slow vs. Rage === | |||
Ukyo's meditation is very strong. He gets a lot of bang for his buck meditating and his time slow is supremely threatening thanks to dangerous mixups that cash out for immense damage with Issen. His damage is already pretty strong without rage as well, so it's not like he really wants to rage. Find spots during slow moments to meditate, usually when the foe is too far to do anything but throw fireballs and try to chip you a bit. | |||
With that in mind if you're in a very scramble-heavy match and you find yourself raging because you didn't have time to meditate don't fret. Ukyo rages for a long time (20 seconds) and his best punishes/mixups all do some seriously beefy damage with extended sword gauge. His mediocre WFT is tacit encouragement to play out the rage and capitalize hard on his increased damage. Just play your usual Ukyo game and make them hurt a lot for making a mistake. | |||
== Matchups == | == Matchups == | ||
* '''vs. Basara''' | |||
:This is strange, but this matchup is actually ''not'' easy. Basara has alot of ways to open you up and even turtling attempts can just fail because of how tricky that guy is. Also don't even try to jump, if it's not tiger knee Tsubame and do it only when you're 100% sure it hits - it's just you have slow and floaty jump and Basara excels at dealing with that kind of jump arc. Be careful with his fakeouts, since his clone can do alot of stuff and if you hit the wrong target, pray for best. This matchup is surely the one, which comes with difficulty, and still good advantages - if you more or less got used to his tricks, then the most important thing in this MU is not respecting Basara. When he does mistake - do the 5AB for really big damage, since his defence is bad; if he tries to pull out the puff - try to 66AB > 2BC him so you will be able to reset the match to neutral state. By the way, his DP is not that good, you can just roll before it comes so opponent will whiff the move and its good opportunity to feed him another punish. To deal with opponent's tricky mobility, you can roll cancel into 214, since Basara struggles to punish it. Don't forget that, as mentioned above, Basara ''cannot'' be comboed by 2C into Tsubame Gaeshi while he is standing, so be careful! | |||
* '''vs. Enja''' | |||
:Every single Enja player loves to jump in with his j.AB. 3C and 6C beat this every time. You can actually completely stuff his approaches with these two kicks as well as the usual 2A/5B/2B suite. Most of his mixups leave him wide open; even a max range Rekka is easily punished with 2AB. If he flubs the third Rekka and you land behind him, you have enough time to land a backhit jumpin combo punish. A blocked 421S is easily AB'd on block pretty much every time. Just try not to rely on 2C abare too much if they know how to use their 5C or they like going for the overhead. | |||
* '''vs. Gaira''' | |||
:Gaira wants to rob you. He wants to try and grab you then run his 421x mixup before you get the chance to run away. So run away and make his poor mobility work against him. Any blocked ground pound even from fullscreen is a free 66AB punish. Any jump is easily sniped with 2B or Tsubame Gaeshi. Whiffed Katsu or 5AB is a free AB punish. He is forced to deflect or do something stupid to try and gain ground if just bulldogging you doesn't work. If this sounds like the matchup is in your favor, that's because it very much is -- assuming you don't get grabbed. | |||
* '''vs. Gaoh''' | |||
:His best options are all woefully punishable. The biggest worry you have is that his normals (especially 5AB) can actually contest your long reach if placed well, but they're dealt with by blocking and forcing him to go in. His 5AB is easily punished, and his recoil options are all beaten by simply waiting for him to do them and then punishing. His biggest boon in this matchup is sheer damage if he lands a clean hit as well as his 623C hitgrab being faster than almost all of your mash moves. | |||
* '''vs. Genjuro''' | |||
:This one is almost perfect even matchup, but Ukyo player can have hard time if he can't capitalize at Genjuro's weaknesses. Also opponent has answer for every jump-in attempt - his DP, though if you do empty jump to bait DP and you have cobra reaction - beat it with Tsubame (not 100% reliable). Be wary of his dash-ins and approaches at all: Genjuro can pretty much mix you up or grab, if you're not giving it proper caution, but he still can get punished by your pokes, and if his approach attempt was really bad, feed him hard slash or WFT. And being knockdowned by this guy means that you can get a taste of his cards oki, so this is one more thing you should care about. | |||
* '''vs. Haohmaru''' | |||
:Haohmaru can be pain in the ass for unprepared Ukyo player, because of his 5AB and, if you don't know this matchup either, his tornados and DP can be a problem too. Also in that case, if your opponent is smart, most of pressure attempts will be just outranged. The most important thing about why this is 6:4 in Ukyo's favour is that you can just prevent opponent from using 5AB by not making the situations when he can surely ''hit'' you. This matchup is pretty similar to Yoshitora in that a well-timed 2C meaty can whiff and recover in time for you to block and punish if he does 623S on his wakeup. 623AB is really fast so it might blow you up for a poorly timed one but has no invincibility. Also be careful with your 236S, Haohmaru can just beat it with his own 236 or 623. | |||
* '''vs. Jubei''' | |||
:In some aspects, Jubei as character is basically you but worse. Still, he has some important differences, which you can't ignore, at least his counters - this guy can even deny 2C > tk.Tsubame, if he's good enough. Also this matchup is pretty unique, because Jubei forces you to not just turtle all the match in the corner with his chip damage, so you ''really must'' to play around with him and use your brain to not get killed. A reversal 623 will beat your 2C though. | |||
* '''vs. Kazuki''' | |||
:You will have pretty big disadvantage in this matchup, if you just not careful and like to pressure opponent 25/8. Kazuki has alot of dangerous and sort of confusing gimmicks, and they are actually good vs unprepared Ukyo player, also his movement can make some problem too, since in case your opponent is strong, he will use all potential from that movement to prevent getting outranged by your normals and feed you some damage. On the other hand, you can be ready for all this things and in that case matchup turns around heavily in your favour, because Kazuki has no range, his gimmicks are mega-unsafe without precise spacing and gameplan relies alot on sword gauge which drains really fast, if he rushes all the time. The key to win in this MU is just to be patient to take the right moment and smack him, so he'll have no time to recover from it and reset to his gimmicky style. | |||
* '''vs. Kusaregedo''' | |||
:It goes without saying that you do not want to get grabbed. With that said, you can AB him if you block 5A, 5B, or 5AB at most ranges. Gedo extends hurtboxes with a lot of attacks, so you can actually out-footsie him unless he takes a risk or skips neutral and roll grabs you. The roll grab is annoying, but your own run grab will beat it clean during the forward movement. You can also use your 5BC to beat the roll grab. Ideally you don't want to be in range for him to do this at all. Smart backdashes can keep him honest, and him missing the grab is another AB punish if you're not too far. Be warned that his huge size and good mashing normals can make throwing him a pain. The rest is preventing him from running any sort of RPS robbery on you, not getting grabbed, and punishing him hard for messing up. Also him being so big means he's very easy to Tsubame. Do with that last bit what you will. | |||
* '''vs. Rasetsumaru''' | |||
:The first tenet of fighting Rasetsumaru is to not give him any easy punish opportunities, because the one thing he's best at is making punishes hurt. This means to be careful with your mixups. His DP freely lets him crush highs (even Tsubame Gaeshi), and of course his WFT will completely cleave through whatever you do. If you can play around those moves, this matchup becomes ten times easier. The only ways he can outrange you are with 5AB (which is slow and 66AB punishable on block pretty much every time) and tornadoes (which are chip damage at best unless you run facefirst into them) -- and otherwise your normals completely beat his in footsie range. Shoulder is also a free Tsubame punish if it's blocked even at max range, and anywhere closer is at least a free run grab. Just let him hang himself and you'll do fine. | |||
* '''vs. Shizumaru''' | |||
:It's easily your worst matchup, because of how much of your options Shizu can deny with his tools. Bad jump attempt - DP, dumb ground behavior - charge, and believe me, if he lands on you 80s charged Kyourakuzan - it will hurt alot, since the damage is already big and you have low defense value - its ''VERY HUGE''. His floating is just don't allows you to do anything about it, but you can still try to get him with Tsubame, or tk. Tsubame, if he's not too high; also when he does tk.float, don't respect him either, he's close to you - almost anything that's not slow af can work, Shizu floats slightly further - 5AB him. In overall, this guy denies any of your pressure attempts, so be very careful and keep him away. | |||
* '''vs. Yoshitora''' | |||
:This guy can seem pretty dangerous at first: cool mobility, 100x better jump arc than yours (especially with j.AB), strong pressure and mixups etc, but when you understand, how hard is it for him to approach you without eating damage from your pokes (and even 5AB, if it was really bad attempt) or getting his jump-ins denied by Tsubame, then it turns around to your favour. So although this matchup can be unique sometimes, to confirm this 7:3, you should be as always careful with your pressure and precise at outranging/keep-away. By the way, his AB uppercut takes a while to get out but is invincible until the first active frame. If your 2C is early enough you can actually recover before his uppercut's first active frame, then block and punish. | |||
* '''vs. Zankuro''' | |||
:Don't get AB'd. Do not be predictable if you're in range to get hit, and try not to get your Tsubame Gaeshi blocked, because you're begging to lose 50% if that happens. You ''could'' happily punish every 5AB or 2AB you block, but the problem is 66AB gets caught by his catch counter. As a result, you can't autopilot the 66AB punish like you can against almost every other long range heavy slash. If you're close enough, Tsubame can work as a guaranteed punish. His shoulder charge also crushes 2C spam and makes throws whiff, so he has a pretty okay time forcing you off of him until you start baiting it out. His jumps are pretty simple to anti-air, so every time Zankuro jumps is a risk taken that you should hit him for. The rest is just knowing how Ukyo works and how best to punish things that are very punishable. | |||
== Frame Data == | == Frame Data == | ||
| Line 336: | Line 1,415: | ||
| 5B || 12 || 8 || 2 || 34 || 11~15(5) || 7(1) || -8 || +0 || -18 || Mid || Medium attack, Deflectable(med) | | 5B || 12 || 8 || 2 || 34 || 11~15(5) || 7(1) || -8 || +0 || -18 || Mid || Medium attack, Deflectable(med) | ||
|- | |- | ||
| 5AB || 31 || 13 || 2 || 52 || x || - || -2 || +8 || -34 || Mid || Heavy attack, Deflectable(heavy) | | 5AB || 31 || 13 || 2 || 52 || x || 10-12 (3) || -2 || +8 || -34 || Mid || Heavy attack, Deflectable(heavy) | ||
|- | |- | ||
| 2A || 5 || 5 || 2 || 20 || 1(1) / 7~11(5) || - || -5 || -5 || -6 || Mid || Weak attack, Deflectable(weak) | | 2A || 5 || 5 || 2 || 20 || 1(1) / 7~11(5) || - || -5 || -5 || -6 || Mid || Weak attack, Deflectable(weak) | ||
| Line 360: | Line 1,439: | ||
| 6C || 7 || 5 || 11 || 34 || 1~2(2) || - || KD || KD || -24 || Low || Knockdown attack | | 6C || 7 || 5 || 11 || 34 || 1~2(2) || - || KD || KD || -24 || Low || Knockdown attack | ||
|- | |- | ||
| 2C || 2 || 6 || 4 || 11 || x || - || +5 || +5 || +0 || Low || Weak attack | | 2C || 2 || 6 || 4 || 11 || x || - || +5 || +5 || +0 || Low || Weak attack<br>6-9f throw invincible | ||
|- | |- | ||
| 3C || 6 || 5 || 10 || 28 || x || - || KD || KD || - | | 3C || 6 || 5 || 10 || 28 || x || - || KD || KD || -18 || Mid || Knockdown attack<br>5-14f throw invincible | ||
|- | |- | ||
| j.A || 5 || 7 || 16 || 30 || 1~3(3) || - || -- || -- || -- || High || Weak attack, Deflectable(weak) | | j.A || 5 || 7 || 16 || 30 || 1~3(3) || - || -- || -- || -- || High || Weak attack, Deflectable(weak) | ||
Latest revision as of 12:22, 17 May 2024
Introduction
Blue-haired Iaido master and poster boy for tuberculosis awareness.
Ukyo is one of the best characters in the game. Pretty much any gameplan can be accommodated for with his toolkit -- if he can do it, he does it incredibly well. Mixups, runaway, turtling, anti-airing, punishing, you name it. He takes extra damage, meaning he can suffer for a mistake, but he will run circles around most opponents if given the opportunity.
| Strengths | Weaknesses |
|---|---|
|
|
Data
- Damage taken: 120%
- Rage duration: 20 seconds
- Amount to rage: 45
- Walk speed: 544
- Backwalk speed: 384
- Dash speed: 1792
- Jump duration: 59 frames
- Width: 16
- Throw range: 12
- Throw recovery: 50 frames
- Tier placing: S
Normal Moves
Far Slashes
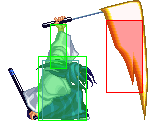
5A
5A
|
|---|
5B
5B
|
|---|
5AB
5AB
|
|---|
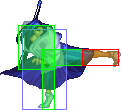
2A
2A
|
|---|
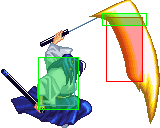
2B
2B
|
|---|
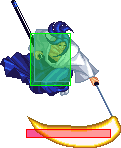
2AB
2AB
|
|---|
Near Slashes
n.5A
n.5A
|
|---|
n.5B
n.5B
|
|---|
n.5AB
n.5AB
|
|---|
n.2A
n.2A
|
|---|
n.2B
n.2B
|
|---|
n.2AB
n.2AB
|
|---|
Overheads
5BC
5BC
|
|---|
u.5BC
u.5BC
|
|---|
Kicks
5C
5C
|
|---|
6C
6C
|
|---|
2C
2C
|
|---|
3C
3C
|
|---|
Jumping
j.A
j.A
|
|---|
j.B
j.B
|
|---|
j.8AB
j.8AB
|
|---|
j.7/9AB
j.AB
|
|---|
j.C
j.C
|
|---|
Dashing
66A
66A
|
|---|
66B
66B
|
|---|
66AB
66AB
|
|---|
66C
66C
|
|---|
Unarmed
u.5S
u.5S
|
|---|
u.2S
u.2S
|
|---|
ju.S
ju.S
|
|---|
u.66S
u.66S
|
|---|
Pursuit
2BC
Pursuit
2BC |
|---|
8BC
Heavy Pursuit
8BC |
|---|
System
Deflect
Deflect
216D |
|---|
Taunt Disarm
Taunt Disarm
Start x 3 |
|---|
Weapon Pickup
Weapon Pickup
5A near weapon |
|---|
Special Moves
Specials
j.1236S
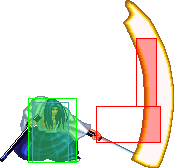
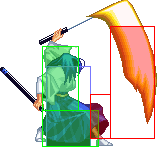
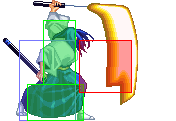
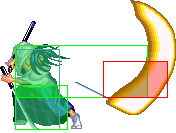
Tsubame Gaeshi j.1236S A/B Tsubame A/B Tsubame AB Tsubame AB Tsubame
|
|---|
214S
Hiken Sasameyuki
214S |
|---|
214C
'Hi'ken Sasameyuki
214C |
|---|
236S
Zanzou Fumikomi Giri 236S Step 1 Step 1 Step 2 Step 2 Step 3 Step 3
|
|---|
Weapon Flipping Technique
Tsubame Rokuren
236CD |
|---|
Combos
Normal
- (n.5B or n.2B) ...
- ... xx 236B/236AB 2BC
- Standard corner carry. 236B does slightly more damage but carries a shorter distance. Frequently drops if you're hitting them from behind. Pursuit is corner only.
- ... xx 236A 8BC
- More consistent on backhits. 8BC is a tighter link than 2BC in the above combo and is also corner only.
- ... xx 214A
- Reset to neutral. Can leave you open even on hit sometimes.
- ... xx 236CD
- If you absolutely must use WFT this is the only situation that it'll work in.
- 2C tk.1236A/B
- 2C is low, Tsubame Gaeshi is high. The motion for the IoH should be done right around when Ukyo recovers from the kick in order to time the link correctly.
- There is a caveat with this combo, being that whether or not it works can depend on your spacing. If your opponent's hurtbox shrinks low enough during hitstun, it can result in the combo not working at all, or only working when you aren't at direct point blank range. For the most part, the latter category probably won't affect you very much. It also doesn't work on some characters when crouching.
- Invalid on: Rimururu, Basara.
- Valid when spaced on: Nakoruru, Shizumaru, Genuro, Kazuki, Sogetsu, Enja, Suija, Yoshitora, Yunfei, Mina.
- Valid vs. crouching on: Kyoshiro, Basara, Gaira, Amakusa, Jubei, Zankuro, Kusaregedo, Gaoh.
- (66AB/66C/6C/3C) 2BC
- You'll likely use these normals quite a lot, so get used to converting them to a pursuit wherever you can.
Backhit only
- 2AB tk.1236A/B
- Situational? Yeah. Fast and hurts a ton? Yeah. At least the link is pretty lenient. Tsubame will whiff if you do this from too far.
- 2AB 5B xx 236B
- Tougher and harder-hitting 2AB combo. The link is a lot tighter, but this does close to half a lifebar. Stick to the above version for more consistency.
- 2AB 66AB
- The farthest reaching 2AB combo. Another annoying link despite the run buffer, so if you feel you must use this, practice it.
- 5B xx 236A/236B
- Sometimes the followup will whiff or not combo but in general the increased hitstun from behind lets 5B combo into knockdowns.
- n.5B xx 214C 5B xx 236A/236B
- Swag combo.
- n.5B xx 214C tk.1236A/B
- Tsubame link courtesy of apple.
- n.5B/n.2B xx 214CD
- Not that you'll be in the situation to land this very much, but hey.
Time slow
- j.AB j.AB j.AB ...
- Used to hearing about this one yet? Your jump is pretty floaty though, so you might do better waiting for them to fall into Issen range.
- (j.9B or 2C) BCD
- 50/50 with instant overhead j.B and 2C. Both lead to Issen. 2C is harder to explode on reaction but hoping they won't is risky. You can string together multiple 2C reps if you expect they'll block high for the ioh. Jump in with j.C before this mixup for an extra layer for them to block.
- j.1236AB BCD
- This one hurts a lot and cannot be exploded. Primarily used if you bait a big enough whiff while popping time slow. Use Tsubame before landing (don't tiger knee it), wait a little while for them to fall just around head height before using Issen. Lots of meditation and a full sword gauge for the Tsubame Gaeshi will lead to this easily shaving off ~75% of a lifebar.
Strategies
General
Ukyo is ideally played as an irritating hit and run character that can choose to mix up when he lands a knockdown. To this end he will harass with quick long range normals, dance in and out of the opponent's range, and smack them for overextending. This makes him potent for both offensive and defensive play, thanks particularly to his incredibly good grounded movement. His forward run has numerous attacks he can mix up and whiff punish with to boot.
If he has the life lead, there's nothing stopping him from just running away and sitting on it. If the opponent has few options to effectively open you up, you can effectively wall them out with normals and punish them for overextending. This becomes very useful when the timer is running out.
But there are a few very pertinent things to be concerned about with Ukyo. He takes a lot of damage thanks to his defense value. Despite his great reach, if a character can outrange him with a quick long range attack, such as Haohmaru 5AB, he needs to be on point with his choices so he doesn't get blown up. Similarly he cannot get too trigger-happy with his buttons against a foe that represents deflects, because all of his best ranged pokes can be deflected and you will get hurt for it.
Almost any mixup Ukyo does is going to be heavily punishable, so if the opponent can block the basic 2C/Tsubame sequence or if they guess your 66B right, you are going to get hurt. Ukyo requires a great balance of careful play and effective risk-taking in order to play well, but the rewards for a correct guess can be huge as almost any knockdown he gets will feed into his pressure or let him run away.
2C Mixups/Pressure
Making the opponent block or get hit by a 2C opens them up to all sorts of possible mixups if you want to commit, including as okizeme. He can obviously do 2C tk.1236A/B for the classic setup, 2C 66B to cross up, 2C 6C to low knockdown, 2C 66CD to throw, etc. He can pretty safely keep pressing 2C to change up the timing, so getting out can be pretty tough if Ukyo's confident in his mixup.
However, don't abuse these options if your opponent is good at fuzzy guarding or has a decent invulnerable move. Getting blocked means you're going to eat a juicy punish, so as they show they can block correctly, your mixup becomes less braindead and requires you put more thought into which of his various options you use. Also note that Tsubame Gaeshi will go right over a 2D, and a poorly executed TK will result in it whiffing over some crouching opponents. Be confident in your execution when doing this mixup or else.
Poking
- 5B - The big button itself. If you don't know what best to use, you can choose this with relative impunity. Just be sure the opponent doesn't have a read on you.
- 2B - Not as catch-all as his other normals, but you can keep them from jumping by representing this. Know your range so this actually comes out.
- 2A - The quicker shorter range version of 5B. If they're too close for comfort, use this. It also has great priority as a counterpoke.
- 2C - His best mash option up close. On hit or block you can mix up pretty effectively. Or just push them out of reach so you can go back to using slashes.
- 3C - A super active option you can stick out to snipe outstretched hurtboxes. Doesn't lead to the best oki but you can make room if this hits.
- 6C - Very quick decent range low option that leads to a pursuit and oki opportunities. A great option to catch desperate approaches.
- 236A - Unsafe counterpoke gimmick, but hard to react to and punish if used sparingly. Best used at around 5B distance; even better as a recoil cancel. Do not abuse this.
- 214S - Not too bad to wall them out with, actually. Does little damage but attempts to punish are tough to time correctly. Use sparingly if at all.
Punishing
- n.5B/n.2B xx 236S - Your fastest slash option that also does decent corner carry. See combos for version differences on 236S
- 6C - A low damage twitch punish if you act too late for anything else. Easily sets up further pressure.
- 5AB - 13f of pain. Great reach, startup, damage. Expect to die if this is blocked. Only use it for larger punishes.
- n.5AB/n.2AB - Hugely unsafe but not as much as 5AB. Your lazy punish options.
- 2AB - Alternative to 5AB. Similar damage/startup but slightly weaker. Still worth representing.
- 66AB - Buffer this during blockstun to reliably get it out faster. Great range, can punish from absurd distances even with minimum distance traveled.
- 66CD - With a run speed like that, why not?
- tk.1236A/B - If you fancy yourself as having fast reflexes, buffer this during blockstun (maybe even hitstun). His absolute fastest punish but also one of the riskiest. Very big gamble.
Time Slow vs. Rage
Ukyo's meditation is very strong. He gets a lot of bang for his buck meditating and his time slow is supremely threatening thanks to dangerous mixups that cash out for immense damage with Issen. His damage is already pretty strong without rage as well, so it's not like he really wants to rage. Find spots during slow moments to meditate, usually when the foe is too far to do anything but throw fireballs and try to chip you a bit.
With that in mind if you're in a very scramble-heavy match and you find yourself raging because you didn't have time to meditate don't fret. Ukyo rages for a long time (20 seconds) and his best punishes/mixups all do some seriously beefy damage with extended sword gauge. His mediocre WFT is tacit encouragement to play out the rage and capitalize hard on his increased damage. Just play your usual Ukyo game and make them hurt a lot for making a mistake.
Matchups
- vs. Basara
- This is strange, but this matchup is actually not easy. Basara has alot of ways to open you up and even turtling attempts can just fail because of how tricky that guy is. Also don't even try to jump, if it's not tiger knee Tsubame and do it only when you're 100% sure it hits - it's just you have slow and floaty jump and Basara excels at dealing with that kind of jump arc. Be careful with his fakeouts, since his clone can do alot of stuff and if you hit the wrong target, pray for best. This matchup is surely the one, which comes with difficulty, and still good advantages - if you more or less got used to his tricks, then the most important thing in this MU is not respecting Basara. When he does mistake - do the 5AB for really big damage, since his defence is bad; if he tries to pull out the puff - try to 66AB > 2BC him so you will be able to reset the match to neutral state. By the way, his DP is not that good, you can just roll before it comes so opponent will whiff the move and its good opportunity to feed him another punish. To deal with opponent's tricky mobility, you can roll cancel into 214, since Basara struggles to punish it. Don't forget that, as mentioned above, Basara cannot be comboed by 2C into Tsubame Gaeshi while he is standing, so be careful!
- vs. Enja
- Every single Enja player loves to jump in with his j.AB. 3C and 6C beat this every time. You can actually completely stuff his approaches with these two kicks as well as the usual 2A/5B/2B suite. Most of his mixups leave him wide open; even a max range Rekka is easily punished with 2AB. If he flubs the third Rekka and you land behind him, you have enough time to land a backhit jumpin combo punish. A blocked 421S is easily AB'd on block pretty much every time. Just try not to rely on 2C abare too much if they know how to use their 5C or they like going for the overhead.
- vs. Gaira
- Gaira wants to rob you. He wants to try and grab you then run his 421x mixup before you get the chance to run away. So run away and make his poor mobility work against him. Any blocked ground pound even from fullscreen is a free 66AB punish. Any jump is easily sniped with 2B or Tsubame Gaeshi. Whiffed Katsu or 5AB is a free AB punish. He is forced to deflect or do something stupid to try and gain ground if just bulldogging you doesn't work. If this sounds like the matchup is in your favor, that's because it very much is -- assuming you don't get grabbed.
- vs. Gaoh
- His best options are all woefully punishable. The biggest worry you have is that his normals (especially 5AB) can actually contest your long reach if placed well, but they're dealt with by blocking and forcing him to go in. His 5AB is easily punished, and his recoil options are all beaten by simply waiting for him to do them and then punishing. His biggest boon in this matchup is sheer damage if he lands a clean hit as well as his 623C hitgrab being faster than almost all of your mash moves.
- vs. Genjuro
- This one is almost perfect even matchup, but Ukyo player can have hard time if he can't capitalize at Genjuro's weaknesses. Also opponent has answer for every jump-in attempt - his DP, though if you do empty jump to bait DP and you have cobra reaction - beat it with Tsubame (not 100% reliable). Be wary of his dash-ins and approaches at all: Genjuro can pretty much mix you up or grab, if you're not giving it proper caution, but he still can get punished by your pokes, and if his approach attempt was really bad, feed him hard slash or WFT. And being knockdowned by this guy means that you can get a taste of his cards oki, so this is one more thing you should care about.
- vs. Haohmaru
- Haohmaru can be pain in the ass for unprepared Ukyo player, because of his 5AB and, if you don't know this matchup either, his tornados and DP can be a problem too. Also in that case, if your opponent is smart, most of pressure attempts will be just outranged. The most important thing about why this is 6:4 in Ukyo's favour is that you can just prevent opponent from using 5AB by not making the situations when he can surely hit you. This matchup is pretty similar to Yoshitora in that a well-timed 2C meaty can whiff and recover in time for you to block and punish if he does 623S on his wakeup. 623AB is really fast so it might blow you up for a poorly timed one but has no invincibility. Also be careful with your 236S, Haohmaru can just beat it with his own 236 or 623.
- vs. Jubei
- In some aspects, Jubei as character is basically you but worse. Still, he has some important differences, which you can't ignore, at least his counters - this guy can even deny 2C > tk.Tsubame, if he's good enough. Also this matchup is pretty unique, because Jubei forces you to not just turtle all the match in the corner with his chip damage, so you really must to play around with him and use your brain to not get killed. A reversal 623 will beat your 2C though.
- vs. Kazuki
- You will have pretty big disadvantage in this matchup, if you just not careful and like to pressure opponent 25/8. Kazuki has alot of dangerous and sort of confusing gimmicks, and they are actually good vs unprepared Ukyo player, also his movement can make some problem too, since in case your opponent is strong, he will use all potential from that movement to prevent getting outranged by your normals and feed you some damage. On the other hand, you can be ready for all this things and in that case matchup turns around heavily in your favour, because Kazuki has no range, his gimmicks are mega-unsafe without precise spacing and gameplan relies alot on sword gauge which drains really fast, if he rushes all the time. The key to win in this MU is just to be patient to take the right moment and smack him, so he'll have no time to recover from it and reset to his gimmicky style.
- vs. Kusaregedo
- It goes without saying that you do not want to get grabbed. With that said, you can AB him if you block 5A, 5B, or 5AB at most ranges. Gedo extends hurtboxes with a lot of attacks, so you can actually out-footsie him unless he takes a risk or skips neutral and roll grabs you. The roll grab is annoying, but your own run grab will beat it clean during the forward movement. You can also use your 5BC to beat the roll grab. Ideally you don't want to be in range for him to do this at all. Smart backdashes can keep him honest, and him missing the grab is another AB punish if you're not too far. Be warned that his huge size and good mashing normals can make throwing him a pain. The rest is preventing him from running any sort of RPS robbery on you, not getting grabbed, and punishing him hard for messing up. Also him being so big means he's very easy to Tsubame. Do with that last bit what you will.
- vs. Rasetsumaru
- The first tenet of fighting Rasetsumaru is to not give him any easy punish opportunities, because the one thing he's best at is making punishes hurt. This means to be careful with your mixups. His DP freely lets him crush highs (even Tsubame Gaeshi), and of course his WFT will completely cleave through whatever you do. If you can play around those moves, this matchup becomes ten times easier. The only ways he can outrange you are with 5AB (which is slow and 66AB punishable on block pretty much every time) and tornadoes (which are chip damage at best unless you run facefirst into them) -- and otherwise your normals completely beat his in footsie range. Shoulder is also a free Tsubame punish if it's blocked even at max range, and anywhere closer is at least a free run grab. Just let him hang himself and you'll do fine.
- vs. Shizumaru
- It's easily your worst matchup, because of how much of your options Shizu can deny with his tools. Bad jump attempt - DP, dumb ground behavior - charge, and believe me, if he lands on you 80s charged Kyourakuzan - it will hurt alot, since the damage is already big and you have low defense value - its VERY HUGE. His floating is just don't allows you to do anything about it, but you can still try to get him with Tsubame, or tk. Tsubame, if he's not too high; also when he does tk.float, don't respect him either, he's close to you - almost anything that's not slow af can work, Shizu floats slightly further - 5AB him. In overall, this guy denies any of your pressure attempts, so be very careful and keep him away.
- vs. Yoshitora
- This guy can seem pretty dangerous at first: cool mobility, 100x better jump arc than yours (especially with j.AB), strong pressure and mixups etc, but when you understand, how hard is it for him to approach you without eating damage from your pokes (and even 5AB, if it was really bad attempt) or getting his jump-ins denied by Tsubame, then it turns around to your favour. So although this matchup can be unique sometimes, to confirm this 7:3, you should be as always careful with your pressure and precise at outranging/keep-away. By the way, his AB uppercut takes a while to get out but is invincible until the first active frame. If your 2C is early enough you can actually recover before his uppercut's first active frame, then block and punish.
- vs. Zankuro
- Don't get AB'd. Do not be predictable if you're in range to get hit, and try not to get your Tsubame Gaeshi blocked, because you're begging to lose 50% if that happens. You could happily punish every 5AB or 2AB you block, but the problem is 66AB gets caught by his catch counter. As a result, you can't autopilot the 66AB punish like you can against almost every other long range heavy slash. If you're close enough, Tsubame can work as a guaranteed punish. His shoulder charge also crushes 2C spam and makes throws whiff, so he has a pretty okay time forcing you off of him until you start baiting it out. His jumps are pretty simple to anti-air, so every time Zankuro jumps is a risk taken that you should hit him for. The rest is just knowing how Ukyo works and how best to punish things that are very punishable.
Frame Data
| Move | Damage | Startup | Active | Total | Cancel | Weapon Clash |
Hit Adv. |
Backhit Adv. |
Block Adv. |
Guard | Notes |
| 5A | 6 | 9 | 2 | 25 | 1~2(2) / 9~14(6) | 8(1) | -6 | -6 | -12 | Mid | Weak attack, Deflectable(weak) |
| 5B | 12 | 8 | 2 | 34 | 11~15(5) | 7(1) | -8 | +0 | -18 | Mid | Medium attack, Deflectable(med) |
| 5AB | 31 | 13 | 2 | 52 | x | 10-12 (3) | -2 | +8 | -34 | Mid | Heavy attack, Deflectable(heavy) |
| 2A | 5 | 5 | 2 | 20 | 1(1) / 7~11(5) | - | -5 | -5 | -6 | Mid | Weak attack, Deflectable(weak) |
| 2B | 11 | 8 | 3 | 40 | 1~4(4) | - | -9 | -1 | -18 | Mid | Medium attack, Deflectable(med) |
| 2AB | 29 | 12 | 1 | 49 | 1~6(6) | - | +0 | +10 | -32 | Mid | Heavy attack, Deflectable(heavy) |
| n.5A | 5 | 5 | 3 | 16 | 1~4(4) / 5~13(9) | - | -1 | -1 | -6 | Mid | Weak attack, Deflectable(weak) |
| n.5B | 8 | 8 | 1 | 40 | 8~11(4) | 6~7(2) | -14 | -6 | -18 | Mid | Medium attack, Deflectable(med) |
| n.5AB | 5, 23 | 12 | 2 | 63 | 1~7(7) | 9~11(3) / 14(1) / 19(1) | -6 | +4 | -26 | Mid | Weak attack, Deflectable(heavy) |
| n.2A | 4 | 5 | 5 | 16 | 1~2(2) / 5~12(8) | - | -1 | -1 | -6 | Mid | Weak attack, Deflectable(weak) |
| n.2B | 6 | 6 | 6 | 23 | 6~15(10) | - | +1 | +9 | -12 | Mid | Medium attack, Deflectable(med) |
| n.2AB | 5, 25 | 14 | 3 | 62 | 1~5(5) | - | -2 | +8 | -21 | Mid | Weak attack, Deflectable(heavy) |
| 5C | 5 | 8 | 4 | 35 | 1~4(4) | - | -9 | -1 | -22 | Mid | Medium attack |
| 6C | 7 | 5 | 11 | 34 | 1~2(2) | - | KD | KD | -24 | Low | Knockdown attack |
| 2C | 2 | 6 | 4 | 11 | x | - | +5 | +5 | +0 | Low | Weak attack 6-9f throw invincible |
| 3C | 6 | 5 | 10 | 28 | x | - | KD | KD | -18 | Mid | Knockdown attack 5-14f throw invincible |
| j.A | 5 | 7 | 16 | 30 | 1~3(3) | - | -- | -- | -- | High | Weak attack, Deflectable(weak) |
| j.B | 9 | 5 | 4 | 29 | 1~2(2) | - | -- | -- | -- | High | Medium attack, Deflectable(med) |
| j8.AB | 26 | 10 | 3 | 33 | 1~5(5) | - | -- | -- | -- | High | Heavy attack, Deflectable(heavy) |
| j7/9.AB | 25 | 12 | 5 | 27 | 1~5(5) | - | -- | -- | -- | High | Heavy attack, Deflectable(heavy) |
| j.C | 3, 3 | 5 | 5 | 30 | x | - | -- | -- | -- | High | Heavy attack |
| ju.C | 3, 3 | 5 | 5 | 30 | x | - | -- | -- | -- | High | Heavy attack |
| 5BC | 16 | 20 | 2 | 45 | x | - | KD | KD | -19 | High | Medium attack Knockdown attack |
| u.5BC | 6 | 31 | 9 | 44 | x | - | KD | KD | -19 | High | Medium attack Knockdown attack |
| 66A | 5 | 11 | 8 | 33 | 1~3(3) | - | -4 | +4 | -26 | Mid | Medium attack, Deflectable(heavy) |
| 66B | 12 | 22 | 1 | 66 | x | - | KD | KD | -39 | Mid | Knockdown attack |
| 66AB | 15 | 4 | 2 | 38 | 1~2(2) | - | KD | KD | -29 | Mid | Knockdown attack 1-13f throw invincible |
| 66C | 4 | 6 | 12 | 32 | 1~3(3) | - | KD | KD | -21 | Low | Knockdown attack 1-17f throw invincible |
| u.5S | 4 | 5 | 1 | 18 | 1(1) | - | -3 | -3 | -8 | Mid | Weak attack |
| u.2S | 4 | 6 | 1 | 20 | x | - | -4 | -4 | -9 | Mid | Weak attack |
| ju.S | 4 | 9 | 8 | 25 | x | - | -- | -- | -- | High | Medium attack |
| u.66S | 4 | 6 | 1 | 24 | 1~2(2) | - | KD | KD | -13 | Mid | Knockdown attack 1-14f throw invincible |
| u.66C | 4 | 6 | 12 | 32 | 1~3(3) | - | KD | KD | -21 | Low | Knockdown attack 1-17f throw invincible |
| 2BC | 6 | 21 | 7 | 68 | x | - | -- | -- | -- | Mid | |
| u.2BC | 8 | 7 | 24 | 35 | x | - | -- | -- | -- | Mid | |
| 8BC | 13 | 40 | 38 | 101 | x | - | -- | -- | -- | Mid | |
| u.8BC | 8 | 25 | 18 | 79 | x | - | -- | -- | -- | Mid | |
| Tsubame Gaeshi - j.1236A | 18 | 3 | 6 | x | x | - | KD | KD | -41 | High | Medium attack Knockdown attack 16f landing recovery |
| Tsubame Gaeshi - j.1236B | 21 | 3 | 6 | x | x | - | KD | KD | -48 | High | Medium attack Knockdown attack 23f landing recovery |
| Tsubame Gaeshi - j.1236AB | 2x6, 24 | 10 | 7 | x | x | - | ?? | ?? | -75 | High | Medium attack Knockdown attack 45f landing recovery |
| 'Hi'ken Sasameyuki - 214C | x | x | x | 17 | x | - | -- | -- | -- | Mid | |
| Hiken Sasameyuki - 214A | 5x5 | 19 | 2 | 61 | x | - | -4 | -4 | -17 | Mid | Medium attack |
| Hiken Sasameyuki - 214B | 6x8 | 18 | 2 | 76 | x | - | -5 | -5 | -17 | Mid | Medium attack |
| Hiken Sasameyuki - 214AB | 7x11 | 22 | 2 | 102 | x | - | -12 | -12 | -25 | Mid | Medium attack 1-12f throw invincible |
| Zanzou Fumikomi Giri - 236A | 16 | 15 | 2 | x | x | - | KD | KD | -27 | Mid | Knockdown attack |
| Zanzou Fumikomi Giri - 236B | 5, 18 | 15 | 2 | x | x | - | KD | KD | -36 | Mid | Medium attack Knockdown attack |
| Zanzou Fumikomi Giri - 236AB | 5, 5, 10 | 15 | 2 | x | x | - | KD | KD | -34 | Mid | Heavy attack Knockdown attack |
| Tsubame Rokuren - 236CD | 30 | 19 | 29 | 69 | x | - | KD | KD | -59 | High | Medium attack 14-47f above ground 22f landing recovery |
