Super Naruto: Clash of Ninja 4/Kimimaro: Difference between revisions
Jump to navigation
Jump to search

Scatteraxis (talk | contribs) (→4B) |
Scatteraxis (talk | contribs) |
||
| Line 580: | Line 580: | ||
== Strategy == | == Strategy == | ||
While he lacks any true tick throws or teleport cross-ups, Kimi deals lots of guard damage and has a number of viable options and whiff strings which keep opponents guessing. | |||
* {{NotationIcon-SCON4|b}}, {{NotationIcon-SCON4|b}}{{NotationIcon-SCON4|b}}, {{NotationIcon-SCON4|6}}{{NotationIcon-SCON4|b}}{{NotationIcon-SCON4|b}}, {{NotationIcon-SCON4|6}}{{NotationIcon-SCON4|a}}, and {{NotationIcon-SCON4|2}}{{NotationIcon-SCON4|b}} (depending on opponent) are safe strings | |||
* {{NotationIcon-SCON4|B}}{{NotationIcon-SCON4|B}}{{NotationIcon-SCON4|B}}, {{NotationIcon-SCON4|B}}{{NotationIcon-SCON4|B}}{{NotationIcon-SCON4|A}}, {{NotationIcon-SCON4|B}}{{NotationIcon-SCON4|B}}{{NotationIcon-SCON4|A}}{{NotationIcon-SCON4|A}} on whiff | |||
* {{NotationIcon-SCON4|Air}}{{NotationIcon-SCON4|B}} as a low committal poke | |||
* Some characters without standard air shanks struggle to punish Kimi's {{NotationIcon-SCON4|B}}{{NotationIcon-SCON4|B}}{{NotationIcon-SCON4|B}} or {{NotationIcon-SCON4|B}}{{NotationIcon-SCON4|B}}{{NotationIcon-SCON4|B}}{{NotationIcon-SCON4|B}} | |||
* {{NotationIcon-SCON4|4}}{{NotationIcon-SCON4|B}} is a high damage launcher with guard frames | |||
** Large hitbox | |||
** Five active frames | |||
** High crushes at the startup, ducking down which may also low profile incoming attacks | |||
** Jumps during the attack with low crush frames | |||
** Functions as an effective anti-air option | |||
** Highly rewarding to land due to its damage and link to {{NotationIcon-SCON4|B}} while building chakra | |||
{{NotationIcon-SCON4|8}}{{NotationIcon-SCON4|B}}{{NotationIcon-SCON4|A}} can be done on whiff and high and low crushes at several points.<br /> | |||
* Kimimaro has several strong punishes for missed ground techs | |||
** {{NotationIcon-SCON4|2}}{{NotationIcon-SCON4|B}} hits twice OTG, as does {{NotationIcon-SCON4|B}}{{NotationIcon-SCON4|B}} | |||
** {{NotationIcon-SCON4|B}}{{NotationIcon-SCON4|B}}{{NotationIcon-SCON4|2}}{{NotationIcon-SCON4|X}} combos OTG, making Kimi capable of closing rounds suddenly after a missed tech | |||
** {{NotationIcon-SCON4|Air}}{{NotationIcon-SCON4|B}} is quick enough to hit OTG from the air when the opportunity arises | |||
* At the wall, a blocked {{NotationIcon-SCON4|Air}}{{NotationIcon-SCON4|B}} can lead to a guaranteed {{NotationIcon-SCON4|X}} due to the extended blockstun from pushing on block. | |||
==Colors== | ==Colors== | ||
Revision as of 20:12, 5 November 2023
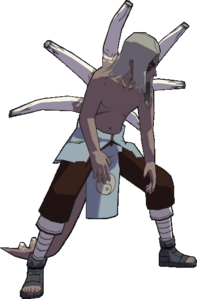
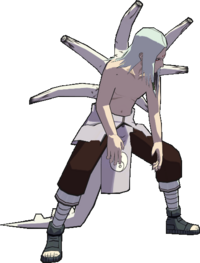
| Kimimaro
| |
|---|---|

| |
| Health: | 210 |
| Guard Gauge: | 1680 |
| Backdash Type: | Normal |
Summary
Largely unchanged from his Vanilla counterpart, Kimimaro does not have access to much in the way of unique mechanics or tricks. Rather, he is a physical combatant who hits hard with slicing bone attacks and giant dinosaur tail. The leader of the Sound Five has made many a ninja, genin and jounin alike, cry foul of his sheer efficiency grounding their health bar to zero.
Notes
String List
| String # | Inputs | Notes |
|---|---|---|
Weak Attacks
5B
  |
|
|---|---|
Toggle Hitboxes Toggle Hitboxes
|
6B
  |
|
|---|---|
Toggle Hitboxes Toggle Hitboxes
|
2B
  |
|
|---|---|
Toggle Hitboxes Toggle Hitboxes
|
4B
Toggle Hitboxes Toggle Hitboxes
|
|---|
8B
  |
|
|---|---|
Toggle Hitboxes Toggle Hitboxes
|
Running B
  |
|
|---|---|
Toggle Hitboxes Toggle Hitboxes
|
j.B
  |
|
|---|---|
Toggle Hitboxes Toggle Hitboxes
|
Strong Attacks
5A
Toggle Hitboxes Toggle Hitboxes
|
|---|
6A
Toggle Hitboxes Toggle Hitboxes
|
|---|
2A
Toggle Hitboxes Toggle Hitboxes
|
|---|
4A
Toggle Hitboxes Toggle Hitboxes
|
|---|
8A
Toggle Hitboxes Toggle Hitboxes
|
|---|
Running A
Toggle Hitboxes Toggle Hitboxes
|
|---|
j.A
Toggle Hitboxes Toggle Hitboxes
|
|---|
Throws
5Y
j.Y
Special
5X
Toggle Hitboxes Toggle Hitboxes
|
|---|
2X
Toggle Hitboxes Toggle Hitboxes
|
|---|
Strategy
While he lacks any true tick throws or teleport cross-ups, Kimi deals lots of guard damage and has a number of viable options and whiff strings which keep opponents guessing.
 , ,
, ,  ,
,  , and
, and  (depending on opponent) are safe strings
- , , on whiff
 as a low committal poke
- Some characters without standard air shanks struggle to punish Kimi's or
 is a high damage launcher with guard frames
- Large hitbox
- Five active frames
- High crushes at the startup, ducking down which may also low profile incoming attacks
- Jumps during the attack with low crush frames
- Functions as an effective anti-air option
- Highly rewarding to land due to its damage and link to while building chakra
![]()
![]()
![]() can be done on whiff and high and low crushes at several points.
can be done on whiff and high and low crushes at several points.
- Kimimaro has several strong punishes for missed ground techs
- hits twice OTG, as does
 combos OTG, making Kimi capable of closing rounds suddenly after a missed tech
- is quick enough to hit OTG from the air when the opportunity arises
- At the wall, a blocked can lead to a guaranteed due to the extended blockstun from pushing on block.
Colors
Default ()

Color 2 ( )
)

Color 3 ()
