Super Naruto: Clash of Ninja 4/Sakura
Jump to navigation
Jump to search

| Sakura
| |
|---|---|

| |
| Health: | 210 |
| Guard Gauge: | 1640 |
| Backdash Type: | Quick |
Summary
Sakura didn't exactly do much during part 1 of the anime. So what did we wind up with in Eighting's Clash of Ninja? Hard-hitting, "Inner Sakura" style normals and a plethora of shuriken projectiles. In Super, she receives a revamped combo game that can put the fear into the eyes of any opponent, and a more well-rounded kit with some very strong tools, defensively and offensively.
Notes
String List
| String # | Inputs | Notes |
|---|---|---|
| ||
| ||
| ||
| ||
| ||
| ||
Weak Attacks
5B
Toggle Hitboxes Toggle Hitboxes
|
|---|
6B
Toggle Hitboxes Toggle Hitboxes
|
|---|
2B
Toggle Hitboxes Toggle Hitboxes
|
|---|
4B
Toggle Hitboxes Toggle Hitboxes
|
|---|
8B
Toggle Hitboxes Toggle Hitboxes
|
|---|
Running B
Toggle Hitboxes Toggle Hitboxes
|
|---|
j.B
Toggle Hitboxes Toggle Hitboxes
|
|---|
Strong Attacks
5A
Toggle Hitboxes Toggle Hitboxes
|
|---|
6A
Toggle Hitboxes Toggle Hitboxes
|
|---|
2A
Toggle Hitboxes Toggle Hitboxes
|
|---|
4A
Toggle Hitboxes Toggle Hitboxes
|
|---|
8A
Toggle Hitboxes Toggle Hitboxes
|
|---|
Running A
Toggle Hitboxes Toggle Hitboxes
|
|---|
j.A
Toggle Hitboxes Toggle Hitboxes
|
|---|
Throws
5Y
2Y
Special
5X
Toggle Hitboxes Toggle Hitboxes
|
|---|
2X
Toggle Hitboxes Toggle Hitboxes
|
|---|
Strategy
Strengths
Sakura has a flexible toolkit allowing her to be approached as the player best see fit.
- Myriad ninja tools allow her to play the projectile zoner game- Template:ATemplate:ATemplate:A, Template:AirTemplate:ATemplate:ATemplate:A, Template:8Template:A, and Template:A-2C force opponents without a good long-range option to approach Sakura.
- If the opponent commits at the wrong time, Sakura can intercept their run-in with Template:B, Template:6Template:B, Template:2Template:B, and Template:AirTemplate:B.
- She can perform Template:BTemplate:ATemplate:ATemplate:A and Template:BTemplate:BTemplate:A on whiff adding another layer of zoning mix-ups.
- A well timed Template:4Template:A can leave Sakura in an advantageous position behind a whiffing opponent.
- Template:2Template:B is perhaps her greatest "cheat" button- being a fast high crush which can convert into a combo with Template:2Template:BTemplate:BTemplate:B without expending chakra.
- Her Template:4Template:B is the second fastest guard frame attack in the game and can get her out of many a sticky situation.
- Beware because both 4B and 4BB are jab punishable.
- With only 7 frames of auto-guard, 4B should be pressed right before the incoming attack connects with Sakura.
- Sakura's Template:Y throw is one of the most reliable in the game because it leaves the victim standing in front of her.
- Convert into a combo with Template:B, Template:2Template:B, Template:8Template:B, Template:6Template:B, or Template:6Template:A.
- Some of these options have strict timings.
- Between her projectiles, Template:BTemplate:BTemplate:A, Template:BTemplate:ATemplate:ATemplate:A, Template:6Template:ATemplate:4Template:A and Template:2Template:ATemplate:ATemplate:A, Sakura inflicts lots of chip damage and can close out rounds without needing an actual neutral win.
Weaknesses
- Sakura does not have an obvious answer to an opponent's jump back aside from basic counterplay such as sidesteps.
- Template:8Template:A will cover all vertical space but is slow and potentially leaves Sakura vulnerable. She may be able to combo off of a hit.
- Template:4Template:A will teleport Sakura behind the opponent
- Her backturn options are not particularly reliable, causing her to rely on throw which, when predictable, can be broken.
- Template:2Template:B is the quickest and most rewarding option, but it can be sidestepped or jumped.
- Template:6Template:B or Template:8Template:B staggers the opponent leading to a strike/throw mix between Template:2Template:B and Template:Y.
- Template:A-2C: Backturn situations may give Sakura ample time to charge her homing shuriken.
- Her combos are finnicky at the wall as she may pop her opponent over her head and behind her.
- Template:2Template:ATemplate:YC -> Template:4 can be used to catch a combo victim directly above her and reset spacing for the combo.
Combos
Credits[1]
Extra Combo Notes
- Template:6Template:ATemplate:ATemplate:YCancel is her highest damage 2-hit loop and can be done 3 times in a row from a 0 combo count.
- Template:2Template:ATemplate:B is her best 2-hit loop for meterless damage. Can lead into no-y-cancel Template:BTemplate:BTemplate:X or even into her supers directly, depending on combo structure.
- Template:8Template:BTemplate:B functions similarly to Template:2Template:ATemplate:B. The former does a bit more damage but needs to Template:YC-cancel in situations where the latter does not.
- Template:8Template:B is a meterless super confirm to Template:BTemplate:BTemplate:X or Template:BTemplate:BTemplate:2Template:X
Changes from Vanilla
- HP increased from 185 to 210
- Guard increased from 1480 to 1640
- Shuriken throws are grabbable
- Template:2Template:ATemplate:B and Template:8Template:BTemplate:B cause spinning launches instead of flying screen.
- Template:B string has been adjusted. She now has an adding lunging punch as BBB(B) with both an A and B follow-up, and no longer has the air shuriken at the end of the string
- 5B(B): shoulder hitbox slightly smaller, hitbox appears and disappears one frame later
- 5BB(B): "lands" two frames sooner; ends 9 frames sooner
- Template:2Template:B launches instead of sweeps
- Template:4Template:B cannot be continued on whiff
- Template:6Template:B uppercut replaced with vanilla Template:RunTemplate:B (lunging punch)
- Template:8Template:B ends sooner
- Template:RunTemplate:BTemplate:BTemplate:B and Template:2Template:BTemplate:BTemplate:B: Final kick has more lift
- Template:RunTemplate:B is now an untechable bounce and a high for the first two frames; techable and mid after the first two frames; hitbox disappears two frames sooner
- Template:4Template:A counter replaced with a back teleport
- Template:RunTemplate:A teleport replaced with running shuriken
- Template:6Template:A short teleport replaced with vanilla activated counter kunai slash with string follow-ups: Template:6Template:ATemplate:A, Template:6Template:ATemplate:ATemplate:A and Template:6Template:ATemplate:4Template:A
- Template:8Template:A throws an array of shuriken covering all vertical space instead of a packed group
- Template:A-double charge now staggers
- Template:2Template:A strings cannot be continued on whiff
- Added 2A(B)
- 2AA(A) replaced with Vanilla wrA
- Template:X one more frame duration on hitbox
- Template:2Template:X has better super freeze, hitbox appears one frame sooner and disappears two frames later
- GRKnJ: bounce changed to be closer; travels one frame faster
- Template:Y replaced with an animation from Bloody Roar: Extreme and now does damage
- Template:2Template:Y added as a hard knockdown throw which does more damage (also from Bloody Roar: Extreme)
Resources
Guides and Info
Gameplay footage
Colors
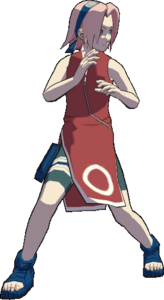
Default ( )
)

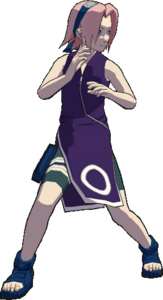
Color 2 ( )
)

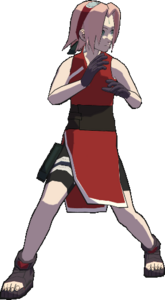
Shippuden-esque ( )
)

Sarada Uchiha ( )
)

- ↑ Special thank you to Jakyi for contributing to the combo list.