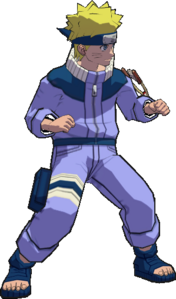
Super Naruto: Clash of Ninja 4/Naruto

From Mizuumi Wiki
Jump to navigation Jump to search

Summary

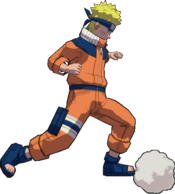
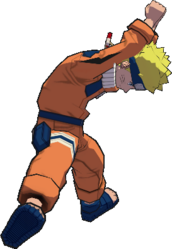
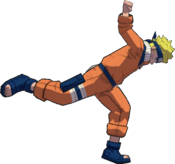
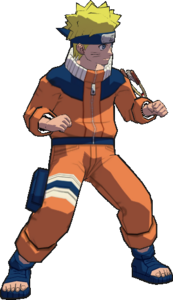
Naruto takes his place in Super as a well-rounded character with the ability to transform into his feral Nine-Tails Zero-tailed Kyuubi (ZTK) form. Naruto's air throw, decent sweep, good running attacks, a long range button and a 14-frame jab leave him ready to face the entire cast without having big exploitable weaknesses of his own. 6A gives him impressive okizeme, contributing to a scary offense, and Naruto also has a few new toys to play with- such as ZTK's Nine-Tails2A chakra burst.

Notes

String List

CONR3 STRING.png
Nine-Tails
String # Inputs Notes
CONR3 STRING.png 01 B ButtonB ButtonB ButtonB ButtonB ButtonB Button
  • X ButtonCancellable at B Button(B Button)
CONR3 STRING.png 02 B ButtonB ButtonB ButtonUpB ButtonB ButtonB Button
CONR3 STRING.png 03 B ButtonB ButtonB ButtonB ButtonB ButtonA Button
CONR3 STRING.png 04 B ButtonB ButtonB ButtonUpB ButtonB ButtonA Button
CONR3 STRING.png 05 B ButtonB ButtonB ButtonB ButtonA Button
CONR3 STRING.png 06 B ButtonB ButtonUpB Button
CONR3 STRING.png 07 B ButtonA ButtonA ButtonA ButtonA Button
CONR3 STRING.png 08 B ButtonA ButtonA ButtonB ButtonB ButtonB ButtonB ButtonB Button
  • X ButtonCancellable at B ButtonA ButtonA Button(B Button)
CONR3 STRING.png 09 B ButtonA ButtonA ButtonB ButtonB ButtonUpB ButtonB ButtonB Button
CONR3 STRING.png 10 B ButtonA ButtonA ButtonB ButtonB ButtonB ButtonA Button
CONR3 STRING.png 11 B ButtonA ButtonA ButtonB ButtonUpB Button
CONR3 STRING.png 12 B ButtonA ButtonA ButtonB ButtonB ButtonB ButtonB ButtonA Button
CONR3 STRING.png 13 B ButtonA ButtonA ButtonB ButtonB ButtonUpB ButtonB ButtonA Button
CONR3 STRING.png 14 B ButtonA ButtonB ButtonB Button
CONR3 STRING.png 15 B ButtonA ButtonB ButtonA ButtonA Button
CONR3 STRING.png 16 B ButtonA ButtonB ButtonA ButtonUpA Button
CONR3 STRING.png 17 ForwardB ButtonB Button
CONR3 STRING.png 18 ForwardB ButtonA ButtonA Button
CONR3 STRING.png 19 ForwardB ButtonA ButtonUpA Button
CONR3 STRING.png 20 DownB ButtonA ButtonA ButtonA Button
CONR3 STRING.png 21 DownB ButtonA ButtonB ButtonB ButtonB ButtonB ButtonB Button
  • X ButtonCancellable at DownB ButtonA Button(B Button)
CONR3 STRING.png 22 DownB ButtonA ButtonB ButtonB ButtonUpB ButtonB ButtonB Button
CONR3 STRING.png 23 DownB ButtonA ButtonB ButtonB ButtonB ButtonB ButtonA Button
CONR3 STRING.png 24 DownB ButtonA ButtonB ButtonB ButtonUpB ButtonB ButtonA Button
CONR3 STRING.png 25 DownB ButtonA ButtonB ButtonUpB Button
CONR3 STRING.png 26 ForwardA ButtonA Button
CONR3 STRING.png 27 ForwardA ButtonUpA Button
CONR3 STRING.png 28 RunA ButtonA ButtonA ButtonA Button
CONR3 STRING.png 29 RunA ButtonA ButtonB ButtonB ButtonB ButtonB ButtonB Button
  • X ButtonCancellable at RunA ButtonA Button(B Button)
CONR3 STRING.png 30 RunA ButtonA ButtonB ButtonB ButtonUpB ButtonB ButtonB Button
CONR3 STRING.png 31 RunA ButtonA ButtonB ButtonB ButtonB ButtonB ButtonA Button
CONR3 STRING.png 32 RunA ButtonA ButtonB ButtonB ButtonUpB ButtonB ButtonA Button
CONR3 STRING.png 33 RunA ButtonA ButtonB ButtonB ButtonB ButtonA Button
CONR3 STRING.png 34 RunA ButtonA ButtonB ButtonUpB Button
CONR3 STRING.png 35 RunA ButtonB ButtonB Button
CONR3 STRING.png 36 RunA ButtonB ButtonA ButtonA Button
CONR3 STRING.png 37 RunA ButtonB ButtonA ButtonUpA Button
String # Inputs Notes
CONR3 STRING.png 01 B ButtonB ButtonB ButtonB ButtonB ButtonB Button
  • X ButtonCancellable at B Button(B Button)
CONR3 STRING.png 02 B ButtonB ButtonB ButtonB ButtonA Button
CONR3 STRING.png 03 B ButtonB ButtonB ButtonA Button
CONR3 STRING.png 04 B ButtonA ButtonA ButtonA ButtonA Button
  • X ButtonCancellable at B ButtonA Button(A Button)
CONR3 STRING.png 05 B ButtonA ButtonB ButtonB Button
CONR3 STRING.png 06 B ButtonA ButtonB ButtonA Button
CONR3 STRING.png 07 B ButtonA ButtonA ButtonB ButtonB ButtonB ButtonB Button
  • X ButtonCancellable at B ButtonA Button(A Button)
CONR3 STRING.png 08 B ButtonA ButtonA ButtonB ButtonB ButtonA Button
CONR3 STRING.png 09 B ButtonA ButtonA ButtonB ButtonA Button
CONR3 STRING.png 10 A ButtonA ButtonB ButtonB ButtonB ButtonB Button
  • X ButtonCancellable at A Button(A Button)
CONR3 STRING.png 11 A ButtonA ButtonB ButtonB ButtonA Button
CONR3 STRING.png 12 A ButtonA ButtonB ButtonA Button
CONR3 STRING.png 13 A ButtonA ButtonA ButtonA Button
CONR3 STRING.png 14 A ButtonB ButtonB Button
CONR3 STRING.png 15 A ButtonB ButtonA Button
CONR3 STRING.png 16 ForwardB ButtonB ButtonB ButtonB ButtonB ButtonB Button
  • X ButtonCancellable at ForwardB Button(B Button)
CONR3 STRING.png 17 ForwardB ButtonB ButtonB ButtonB ButtonA Button
CONR3 STRING.png 18 ForwardB ButtonB ButtonB ButtonA Button
CONR3 STRING.png 19 ForwardB ButtonA ButtonA Button
CONR3 STRING.png 20 DownB ButtonB ButtonB ButtonB ButtonB ButtonB Button
  • X ButtonCancellable at DownB Button(B Button)
CONR3 STRING.png 21 DownB ButtonB ButtonB ButtonB ButtonA Button
CONR3 STRING.png 22 DownB ButtonB ButtonB ButtonA Button
CONR3 STRING.png 23 DownB ButtonA ButtonA Button
CONR3 STRING.png 24 UpB ButtonB ButtonB ButtonB Button
CONR3 STRING.png 25 UpB ButtonB ButtonA Button
CONR3 STRING.png 26 UpB ButtonA Button
CONR3 STRING.png 27 ForwardA ButtonB ButtonB ButtonB ButtonB Button
  • X ButtonCancellable at ForwardA Button
CONR3 STRING.png 28 ForwardA ButtonB ButtonB ButtonA Button
CONR3 STRING.png 29 ForwardA ButtonB ButtonA Button
CONR3 STRING.png 30 ForwardA ButtonA ButtonA Button
CONR3 STRING.png 31 UpA ButtonA Button

Weak Attacks

5B

B Button
SCON4 Naruto 5B.png
Damage Hit Level Startup Active Frames Recovery Guard Damage Blockstun Advantage on Hit Advantage on Block
- - - - - - - - -
  • Primary Jab.
  • Can go into B Button(B Button) on whiff.
Toggle Hitboxes
Toggle Hitboxes

6B

ForwardB Button
SCON4 Naruto 6B.png
Damage Hit Level Startup Active Frames Recovery Guard Damage Blockstun Advantage on Hit Advantage on Block
- - - - - - - - -
  • Description
Toggle Hitboxes
Toggle Hitboxes

ZTK 6B

Nine-TailsForwardB Button
Damage Hit Level Startup Active Frames Recovery Guard Damage Blockstun Advantage on Hit Advantage on Block
- - - - - - - - -
  • Description
Toggle Hitboxes
Toggle Hitboxes

2B

DownB Button
Damage Hit Level Startup Active Frames Recovery Guard Damage Blockstun Advantage on Hit Advantage on Block
- - - - - - - - -
  • Description
Toggle Hitboxes
Toggle Hitboxes

4B

BackB Button
SCON4 Naruto 4B.png
Damage Hit Level Startup Active Frames Recovery Guard Damage Blockstun Advantage on Hit Advantage on Block
- - - - - - - - -
  • Description
Toggle Hitboxes
Toggle Hitboxes

ZTK 4B

Nine-TailsBackB Button
Damage Hit Level Startup Active Frames Recovery Guard Damage Blockstun Advantage on Hit Advantage on Block
- - - - - - - - -
  • Description
Toggle Hitboxes
Toggle Hitboxes

8B

UpB Button
Damage Hit Level Startup Active Frames Recovery Guard Damage Blockstun Advantage on Hit Advantage on Block
- - - - - - - - -
  • Description
Toggle Hitboxes
Toggle Hitboxes

Running B

RunB Button
Damage Hit Level Startup Active Frames Recovery Guard Damage Blockstun Advantage on Hit Advantage on Block
- - - - - - - - -
  • Description
Toggle Hitboxes
Toggle Hitboxes

j.B

Air AttackB Button
Damage Hit Level Startup Active Frames Recovery Guard Damage Blockstun Advantage on Hit Advantage on Block
- - - - - - - - -
  • Description
Toggle Hitboxes
Toggle Hitboxes

Strong Attacks

5A

A Button
Version Damage Hit Level Startup Active Frames Recovery Guard Damage Blockstun Advantage on Hit Advantage on Block
Normal - - - - - - - - -
Partial Charge - - - - - - - - -
Full Charge - - - - - - - - -
  • Description
Toggle Hitboxes
Toggle Hitboxes

ZTK 5A

Nine-TailsA Button
Damage Hit Level Startup Active Frames Recovery Guard Damage Blockstun Advantage on Hit Advantage on Block
- - - - - - - - -
  • Description
Toggle Hitboxes
Toggle Hitboxes

6A

ForwardA Button
Damage Hit Level Startup Active Frames Recovery Guard Damage Blockstun Advantage on Hit Advantage on Block
- - - - - - - - -
  • Description
Toggle Hitboxes
Toggle Hitboxes

ZTK 6A

Nine-TailsForwardA Button
Damage Hit Level Startup Active Frames Recovery Guard Damage Blockstun Advantage on Hit Advantage on Block
- - - - - - - - -
  • Description
Toggle Hitboxes
Toggle Hitboxes

2A

DownA Button
Damage Hit Level Startup Active Frames Recovery Guard Damage Blockstun Advantage on Hit Advantage on Block
- - - - - - - - -
  • Description
Toggle Hitboxes
Toggle Hitboxes

ZTK 2A

Nine-TailsDownA Button
Damage Hit Level Startup Active Frames Recovery Guard Damage Blockstun Advantage on Hit Advantage on Block
- - - - - - - - -
  • Description
Toggle Hitboxes
Toggle Hitboxes

4A

BackA Button
Damage Hit Level Startup Active Frames Recovery Guard Damage Blockstun Advantage on Hit Advantage on Block
- - - - - - - - -
  • Description
Toggle Hitboxes
Toggle Hitboxes

ZTK 4A

Nine-TailsBackA Button
Damage Hit Level Startup Active Frames Recovery Guard Damage Blockstun Advantage on Hit Advantage on Block
- - - - - - - - -
  • Description
Toggle Hitboxes
Toggle Hitboxes

8A

UpA Button
Damage Hit Level Startup Active Frames Recovery Guard Damage Blockstun Advantage on Hit Advantage on Block
- - - - - - - - -
  • Description
Toggle Hitboxes
Toggle Hitboxes

ZTK 8A

Nine-TailsUpA Button
Damage Hit Level Startup Active Frames Recovery Guard Damage Blockstun Advantage on Hit Advantage on Block
- - - - - - - - -
  • Description
Toggle Hitboxes
Toggle Hitboxes

Running A

RunA Button
Damage Hit Level Startup Active Frames Recovery Guard Damage Blockstun Advantage on Hit Advantage on Block
- - - - - - - - -
  • Description
Toggle Hitboxes
Toggle Hitboxes

ZTK Running A

Nine-TailsRunA Button
Damage Hit Level Startup Active Frames Recovery Guard Damage Blockstun Advantage on Hit Advantage on Block
- - - - - - - - -
  • Description
Toggle Hitboxes
Toggle Hitboxes

j.A

Air AttackA Button
Damage Hit Level Startup Active Frames Recovery Guard Damage Blockstun Advantage on Hit Advantage on Block
- - - - - - - - -
  • Description
Toggle Hitboxes
Toggle Hitboxes

ZTK j.A

Nine-TailsAir AttackA Button
Damage Hit Level Startup Active Frames Recovery Guard Damage Blockstun Advantage on Hit Advantage on Block
- - - - - - - - -
  • Description
Toggle Hitboxes
Toggle Hitboxes

Throws

5Y

Y Button
Damage Hit Level Startup Active Frames Recovery Guard Damage Blockstun Advantage on Hit Advantage on Block
20 - 1 1 48 - - - -
  • Description

j.Y

Air AttackY Button
Damage Hit Level Startup Active Frames Recovery Guard Damage Blockstun Advantage on Hit Advantage on Block
- - - - - - - - -
  • Description

Special

5X

X Button
Damage Hit Level Startup Active Frames Recovery Guard Damage Blockstun Advantage on Hit Advantage on Block
- - - - - - - - -
  • Description
Toggle Hitboxes
Toggle Hitboxes

2X

DownX Button
Damage Hit Level Startup Active Frames Recovery Guard Damage Blockstun Advantage on Hit Advantage on Block
- - - 14 - - - - -
  • Description
Toggle Hitboxes
Toggle Hitboxes

4X & Nine-Tails4X

BackX Button
Version Damage Hit Level Startup Active Frames Recovery Guard Damage Blockstun Advantage on Hit Advantage on Block
4X - - - - - - - - -
Nine-Tails4X - - - - - - - - -
  • Costs 50% (2 bars) chakra
  • Transformation blast launches on hit

Naruto transforms into ZTK form, changing the way most of his attacks work including his X Button super. He is invincible and releases a chakra blast as he transforms, allowing it to function as a reversal.


  • Costs 50% (2 bars) chakra

Naruto returns to his base form. The transformation back has no hitbox.

Toggle Hitboxes
Toggle Hitboxes

ZTK 5X

Nine-TailsX Button
Damage Hit Level Startup Active Frames Recovery Guard Damage Blockstun Advantage on Hit Advantage on Block
- - - - - - - - -
  • Description
Toggle Hitboxes
Toggle Hitboxes

Strategy

Naruto has a simpler toolset than some of the cast, but has a toolset more geared towards offense and threatening okizeme, as ForwardA Button and DownA Button both set up air-throw attempts. RunB Button and RunA Button both allow him to approach reliably from a run, and ForwardB Button gives him a high range option from idle.
Naruto's defense is not extraordinary- BackB Button is sped up from vanilla but still not amazing and 2B is an average high crush with low range. His Air AttackB Button being faster than normal divekicks makes it more reliable as an anti-string option, and just overall a stand-out move.
Naruto has a few directional string options in his base form:

  • B ButtonB ButtonUpB Button
  • B ButtonB ButtonB ButtonUpB Button
  • ForwardA ButtonUpA Button

Barreling into action: RunB Button has a large hitbox covering Naruto's body and active for 14 frames

  • Frame advantage varies based on spacing but it's always safe on block
  • Can connect with B Button at the wall
  • Good for chasing down opponents in backturn situations
  • High crushes

Base Form

  • ForwardA Button is one of Naruto's most important moves, hitting mid and lifting on block
    • Quick recovery and string follow-up provide a guard mix-up between ForwardA Button > Air AttackY Button and ForwardA ButtonUpA Button
    • Acts as a high damage, single button, Y-Cancel-cancellable launcher for combo filler
    • ForwardA ButtonA Button string for punishing KnJs
  • B ButtonB ButtonB ButtonB Button: Good string for guard pressure and is hard to beat with a 4B, though it is escapable with normal air kunai after the 5BBB lift
  • B ButtonB ButtonB ButtonB ButtonA Button: Useful mix-up after 5BBBB to punish air kunai attempts
  • B ButtonB ButtonB ButtonUpB Button: Faster than 5BBBB, making it harder to punish and sometimes impossible depending on the opponent's Air AttackA Button
    • Does more damage than 5BBBB
  • UpB Button/B ButtonB ButtonUpB Button/B ButtonB ButtonB ButtonUpB Button is a spin launcher; useful for breaking Choji or Jirobo's hyper armor
  • String options above apply to B ButtonA ButtonA ButtonB Button follow-ups, though B ButtonA Button can be 4B'd
    • B ButtonA ButtonA Button can be done on whiff
  • B ButtonA ButtonA ButtonA ButtonA Button/DownB ButtonA ButtonA ButtonA Button: Plus on block, which provides a tick throw mix up by the wall
    • The final punch can be 4B'd, but BAAA's low recovery can be used to punish a pre-emptive 4B
  • DownA Button: Can be useful for okizeme since Naruto will be fully actionable by the time the clone appears resulting in plus frames
    • Can punish KnJ's and meterlessly start combos
    • Connect with jab at short range or RunB Button and RunA Button at long range

ZTK Form

  • Nine-TailsA Button: Hits mid, trumping high crush attempts.
    • Same attack as B ButtonA Button
  • Nine-TailsB ButtonA ButtonA ButtonA ButtonA Button: ZTK Naruto's main string for pressure from jab, ends in 8AA which provides great frame advantage.
  • Nine-TailsB ButtonA ButtonB ButtonA Button: Similar to 5BAAAA but ends in 8BA. Great mix-up as it has onee hit less before the lift.
  • Nine-TailsForwardB ButtonA ButtonA Button / Nine-TailsDownB ButtonA ButtonA Button: Having only a single hit before 8AA makes these strings hard to punish with 4B, making them consistent options for okizeme.
    • The 8AA lift portion of the string is punishable with normal air kunai.
  • Nine-TailsDownA Button can function as a KnJ or backturned punish or be incorporated into swaggy combos

Colors

Default ()
Color 2 ()

Changes from Vanilla

List may be outdated, feel free to update

Base form:

  • Grabbable Moves: JA, 8A,
  • 5B: elbow hitbox appears on frame 2
  • 5B(B): hand hitbox does not appear until frame 2
  • 5BBB(B): can be replaced with the clone active version with 8B
  • 5BBBB(B): does slightly more damage, pushes further away, and doesn't teleport as far
  • 5BAA(A): starts up and ends one frame later; staggers
  • 6B: has an untechable bounce after the first active frame; first frame is a high; properly low and high crushes
  • 4B: bounces closer on hit
  • 8B: hitbox appears one frame later, more lift
  • 6A(A), 6A(8A): added as 2A and 8A
  • 2A: has a new animation
  • RA: has more lift on hit
  • 5X6: activates into 5X and uses 6B attack; has a different super freeze animation; low and high crushes
  • 2X: has less super freeze and more duration
  • 4X: requires 50% meter; has more lift on hit. Invincibility removed.

ZTK:

  • Grabbable Moves: 2A
  • 5BBBB(B): bounces closer on hit
  • 5BA(B): has more lift on hit, hitbox appears three frames later, made normal lift instead of spinning
  • 5BAA(A): replaced with 8A
  • 5BAAA(A): replaced with 8A(A)
  • 6B: low crushes
  • 8B: lifts on block
  • 8B(B): has more lift on hit
  • 8B(A): added as 8A(A)
  • 5A: given more float
  • 5A(A): given more float and super cancel
  • 6A: given more float and super cancel
  • 4A: activation window improved
  • A4A: goes into RA
  • 2A: does activated 4A, adjustments to size; duration; and hitbox
  • 8A: has slightly more vertical range on the bottom
  • 8A(A): does slightly more damage and doesn't bounce
  • RA: ends 4 frames sooner; has three grabbable frames at the beginning
  • 5X: third to last hit staggers; second to last hit doesn't jump as far forward, fixed animation glitch (added one hit); first hit lift adjusted to not sometimes reset the combo
  • 5X6: uses 6B attack into Z5X; has a different super freeze animation
  • 4X: Can now revert to base form at the cost of 50% chakra
Resources

Guides and Info

Gameplay footage

Navigation

General
Controls
HUD
FAQ
System
Esoterica
Technical Data
Stages
Strategy
Characters
Anko
Choji
Gaara
Haku
Hinata
Awakened Hinata
Ino
Iruka
Itachi
Jiraiya
Jirobo
Kabuto
Kakashi
Kankuro
Kiba
Kidomaru
Kimimaro
Kisame
Might Guy
Mizuki
Naruto
OTK Naruto
Neji
Orochimaru
Rock Lee
Sakura
Sasuke
CS2 Sasuke
Shikamaru
Sakon & Ukon
Shino
Tayuya
Temari
Tenten
Third Hokage
Tsunade
Zabuza
Archived Information
Glossary
Training Modes
Netplay
Changelog
Resources