User:Ceruleancast/Dee
Introduction
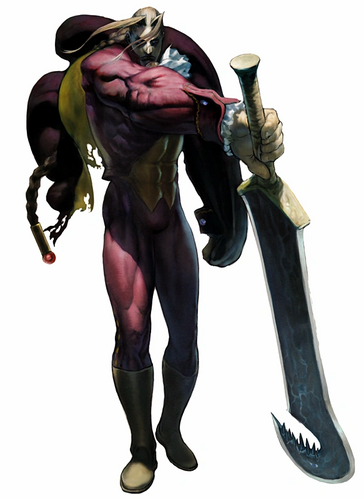
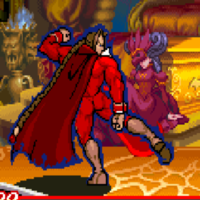
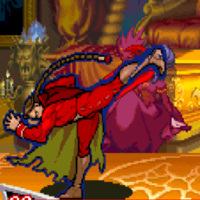
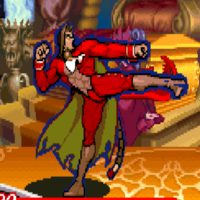
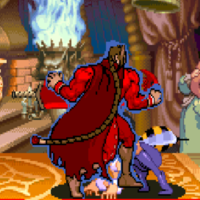
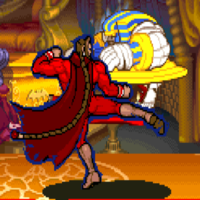
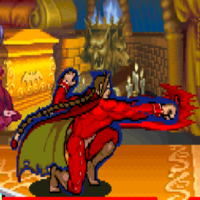
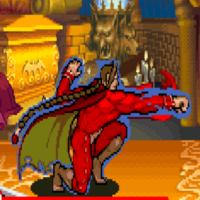
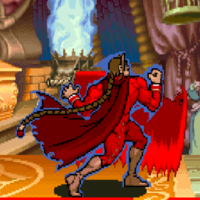
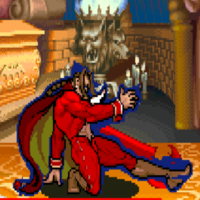
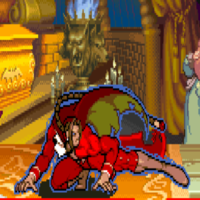
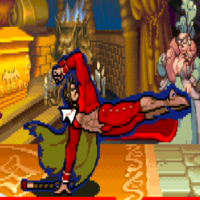
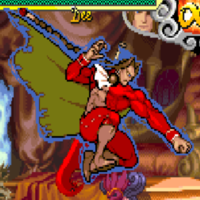
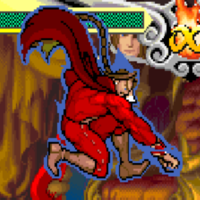
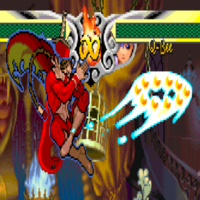
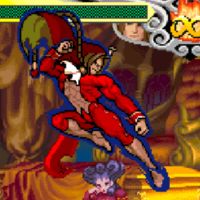
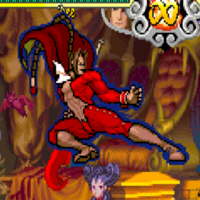
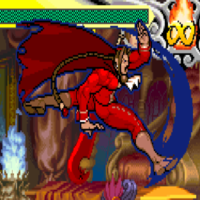
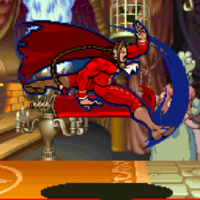
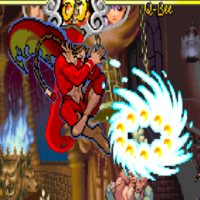
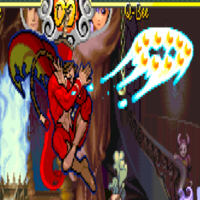
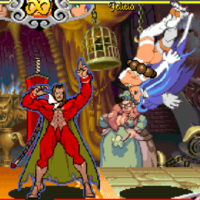
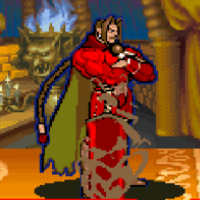
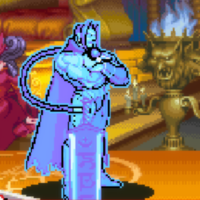
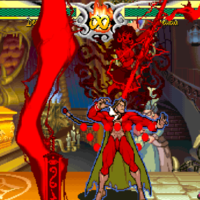
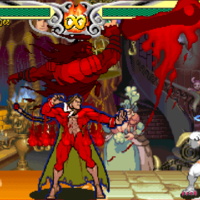
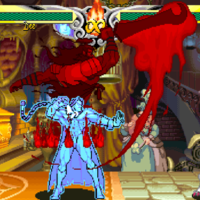
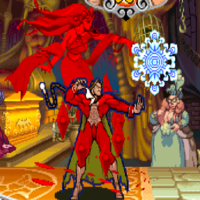
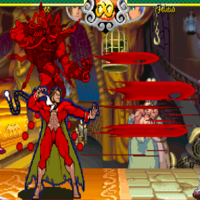
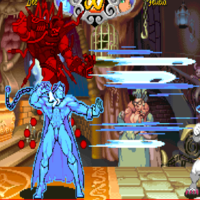
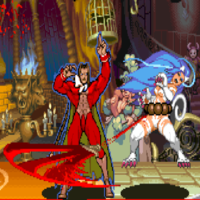
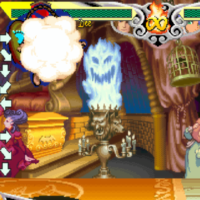
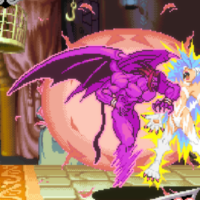
Dee (ディー), the Corrupted Dhampir.
In his ending in Night Warriors: Darkstalkers' Revenge, Donovan finally loses his humanity as he sacrifices himself somewhat in order to protect Anita as well as awaken her emotion again. Although Donovan is victorious, he succumbed to the dark part of his soul too much in order to do so. This tragic turn of events causes Anita to cry, and is symbolic in showing that Anita is finally whole again. Years later, a grown Anita wonders what became of Donovan, and she hopes he's okay. Sadly however, we find Donovan sitting on a throne, beside many bodies. He is fighting a never ending struggle with himself as he yearns for inner peace.
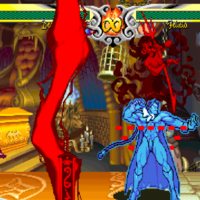
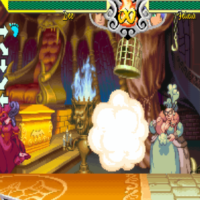
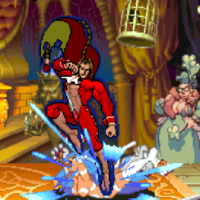
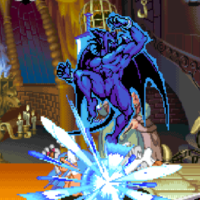
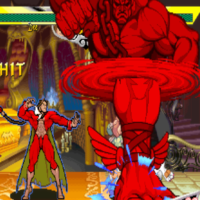
Dee is the Donovan-Demitri amalgamation exclusively playable in the Vsav, Vsav 2 and Vhunt 2 Arranged Editions of the PS2 Vampire: Darkstalkers Collection. As a result, he is not playable in the tournament standard game, but this page serves as a resource for those interested in him regardless. This will be focusing on his Vsav Arranged Edition version.
Dee's gameplan is more similar to Donovan's than Demitri's overall, focusing on utilizing his dash to start links and space your moves, but with the added twist of a majority of his normals being taken from Demitri's superior ones over Donovan's, giving him even greater options such as a massive sweep out of dash, several anti airs and poking tools as well as additional amazing set of aerials. But keeping several things from Donovan, notably his jump punches being put into Jhp & its commmand normals, his Killshread Summon and air UB Irift Sword. As well as having some unique moves to him, most notably Hell Dive which makes for an exceptional teleport. Also regardless if you have the sword planted or not, Dee's normals do not get worse unlike Donovan's, which is a great benefit. Dee is recommended for players who always wanted a more viable Donovan or want to stand out by being different from others.
Gameplay
Primary objectives:
- Use your dash to position yourself for jump-ins, spacing your anti air & poking tools and landing link starters
- Abuse your exceptional set of aerials to start high damaging chains, pressure, crossups, instant overheads, chicken guards and more
- Get massive stage control with Killshread Plant & Summon and your numerous long ranged tools and normals
- Use Hell Dive to make your approach unpredictable, escape bad spots and gain meter effectively
| Strengths | Weaknesses |
|---|---|
|
|
Movement
Walk: Demitri's walk. An average walk.
Dash: Donovan's dash. Pretty similar to Anakaris' dash in both the distance it travels and that you can do both standing and crouching normals out of it as well as specials, though you won't be forced to stand for any frames after finishing your crouching normal unlike Anakaris, making it more reliable for low profiling while dashing. Dashing is a pretty important part of Dee's game, paired with Demitri's superior normals, you get more out of it than Donovan such as superior anti airs and most infamously, Demitri's large sweep. You can even do these retreating. Dee also has link confirms off his dash, though they're quite tight, this can work especially well with dashing 5LK and 2LK as they're lows.
Jump: Demitri's jump. although the jump itself is fairly average, the options you have from it are great. Solid set of aerials such as; Jmk the most reliable crossup in the game, instant overheads through Jlk thanks to its low reaching hitbox, and it has other perks too such as being active for a good while and being great to start or add into your air chain combos, Jhp is decent for spacing (though the hurtbox is bigger than the visual would have you believe) and you have access to an air usable teleport which you can special cancel on hit or block. But Dee has one big boon when jumping, just like Donovan he lacks an air throw. This has to be played around against well.
Normal Moves
Standing Normals
5LP
| Startup | Active | Recovery | Hit Adv. | Block Adv. | Renda Bonus |
|---|---|---|---|---|---|
| - | - | - | - | - | likely |
| Guard | Cancel | Invuln | Red Damage | White Damage | Gauge |
| mid | yes | - | - | - | - |
5MP
| Startup | Active | Recovery | Hit Adv. | Block Adv. | Renda Bonus |
|---|---|---|---|---|---|
| - | - | - | - | - | - |
| Guard | Cancel | Invuln | Red Damage | White Damage | Gauge |
| mid | no | - | - | - | - |
5HP
| Startup | Active | Recovery | Hit Adv. | Block Adv. | Renda Bonus |
|---|---|---|---|---|---|
| - | - | - | - | - | - |
| Guard | Cancel | Invuln | Red Damage | White Damage | Gauge |
| mid | no | - | - | - | - |
5LK
| Startup | Active | Recovery | Hit Adv. | Block Adv. | Renda Bonus |
|---|---|---|---|---|---|
| - | - | - | - | - | likely |
| Guard | Cancel | Invuln | Red Damage | White Damage | Gauge |
| low | yes | - | - | - | - |
5MK
| Startup | Active | Recovery | Hit Adv. | Block Adv. | Renda Bonus |
|---|---|---|---|---|---|
| - | - | - | - | - | - |
| Guard | Cancel | Invuln | Red Damage | White Damage | Gauge |
| mid | no | - | - | - | - |
5HK
| Startup | Active | Recovery | Hit Adv. | Block Adv. | Renda Bonus |
|---|---|---|---|---|---|
| - | - | - | - | - | - |
| Guard | Cancel | Invuln | Red Damage | White Damage | Gauge |
| mid | no | - | - | - | - |
Close Normals
CL.5MP
| Startup | Active | Recovery | Hit Adv. | Block Adv. | Renda Bonus |
|---|---|---|---|---|---|
| - | - | - | - | - | - |
| Guard | Cancel | Invuln | Red Damage | White Damage | Gauge |
| mid | yes | - | - | - | - |
CL.5MK
| Startup | Active | Recovery | Hit Adv. | Block Adv. | Renda Bonus |
|---|---|---|---|---|---|
| - | - | - | - | - | - |
| Guard | Cancel | Invuln | Red Damage | White Damage | Gauge |
| mid | yes | - | - | - | - |
Crouching Normals
2LP
| Startup | Active | Recovery | Hit Adv. | Block Adv. | Renda Bonus |
|---|---|---|---|---|---|
| - | - | - | - | - | likely |
| Guard | Cancel | Invuln | Red Damage | White Damage | Gauge |
| mid | yes | - | - | - | - |
2MP
| Startup | Active | Recovery | Hit Adv. | Block Adv. | Renda Bonus |
|---|---|---|---|---|---|
| - | - | - | - | - | - |
| Guard | Cancel | Invuln | Red Damage | White Damage | Gauge |
| mid | yes | - | - | - | - |
2HP
| Startup | Active | Recovery | Hit Adv. | Block Adv. | Renda Bonus |
|---|---|---|---|---|---|
| - | - | - | - | - | - |
| Guard | Cancel | Invuln | Red Damage | White Damage | Gauge |
| mid | no | - | - | - | - |
2LK
| Startup | Active | Recovery | Hit Adv. | Block Adv. | Renda Bonus |
|---|---|---|---|---|---|
| - | - | - | - | - | likely |
| Guard | Cancel | Invuln | Red Damage | White Damage | Gauge |
| low | yes | - | - | - | - |
2MK
| Startup | Active | Recovery | Hit Adv. | Block Adv. | Renda Bonus |
|---|---|---|---|---|---|
| - | - | - | - | - | - |
| Guard | Cancel | Invuln | Red Damage | White Damage | Gauge |
| low | yes | - | - | - | - |
2HK
| Startup | Active | Recovery | Hit Adv. | Block Adv. | Renda Bonus |
|---|---|---|---|---|---|
| - | - | - | - | - | - |
| Guard | Cancel | Invuln | Red Damage | White Damage | Gauge |
| mid | no | - | - | - | - |
Jumping Normals
J.LP
| Startup | Active | Recovery | Hit Adv. | Block Adv. | Renda Bonus |
|---|---|---|---|---|---|
| - | - | - | - | - | - |
| Guard | Cancel | Invuln | Red Damage | White Damage | Gauge |
| overhead | yes | - | - | - | - |
J.MP
| Startup | Active | Recovery | Hit Adv. | Block Adv. | Renda Bonus |
|---|---|---|---|---|---|
| - | - | - | - | - | - |
| Guard | Cancel | Invuln | Red Damage | White Damage | Gauge |
| overhead | yes | - | - | - | - |
J.HP
| Startup | Active | Recovery | Hit Adv. | Block Adv. | Renda Bonus |
|---|---|---|---|---|---|
| - | - | - | - | - | - |
| Guard | Cancel | Invuln | Red Damage | White Damage | Gauge |
| overhead | no | - | - | - | - |
J.LK
| Startup | Active | Recovery | Hit Adv. | Block Adv. | Renda Bonus |
|---|---|---|---|---|---|
| - | - | - | - | - | - |
| Guard | Cancel | Invuln | Red Damage | White Damage | Gauge |
| overhead | yes | - | - | - | - |
J.MK
| Startup | Active | Recovery | Hit Adv. | Block Adv. | Renda Bonus |
|---|---|---|---|---|---|
| - | - | - | - | - | - |
| Guard | Cancel | Invuln | Red Damage | White Damage | Gauge |
| overhead | yes | - | - | - | - |
J.HK
| Startup | Active | Recovery | Hit Adv. | Block Adv. | Renda Bonus |
|---|---|---|---|---|---|
| - | - | - | - | - | - |
| Guard | Cancel | Invuln | Red Damage | White Damage | Gauge |
| overhead | no | - | - | - | - |
Command Normals
6HK
| Startup | Active | Recovery | Hit Adv. | Block Adv. | Renda Bonus |
|---|---|---|---|---|---|
| - | - | - | - | - | - |
| Guard | Cancel | Invuln | Red Damage | White Damage | Gauge |
| mid | no | - | - | - | - |
Command Air Normals
J.2HP
| Startup | Active | Recovery | Hit Adv. | Block Adv. | Renda Bonus |
|---|---|---|---|---|---|
| - | - | - | - | - | - |
| Guard | Cancel | Invuln | Red Damage | White Damage | Gauge |
| overhead | yes | - | - | - | - |
J.8HP
| Startup | Active | Recovery | Hit Adv. | Block Adv. | Renda Bonus |
|---|---|---|---|---|---|
| - | - | - | - | - | - |
| Guard | Cancel | Invuln | Red Damage | White Damage | Gauge |
| overhead | no | - | - | - | - |
Normal Throws
6MP or 6HP
| Startup | Active | Recovery | Hit Adv. | Block Adv. | Renda Bonus |
|---|---|---|---|---|---|
| 1 | - | - | - | - | N/A |
| Guard | Cancel | Invuln | Red Damage | White Damage | Gauge |
| throw | no | - | - | - | - |
Special Moves
Killshread Plant (Killshread equipped)
214K
| Startup | Active | Recovery | Hit Adv. | Block Adv. | Renda Bonus |
|---|---|---|---|---|---|
| - | - | - | - | - | N/A |
| Guard | Cancel | Invuln | Red Damage | White Damage | Gauge |
| - | no | - | - | - | - |
| Startup | Active | Recovery | Hit Adv. | Block Adv. | Renda Bonus |
|---|---|---|---|---|---|
| - | - | - | - | - | N/A |
| Guard | Cancel | Invuln | Red Damage | White Damage | Gauge |
| - | no | - | - | - | - |
| Startup | Active | Recovery | Hit Adv. | Block Adv. | Renda Bonus |
|---|---|---|---|---|---|
| - | - | - | - | - | N/A |
| Guard | Cancel | Invuln | Red Damage | White Damage | Gauge |
| - | no | - | - | - | - |
| Startup | Active | Recovery | Hit Adv. | Block Adv. | Renda Bonus |
|---|---|---|---|---|---|
| - | - | - | - | - | N/A |
| Guard | Cancel | Invuln | Red Damage | White Damage | Gauge |
| - | no | - | - | - | - |
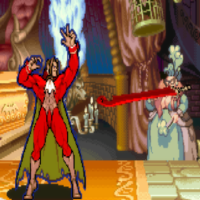
- A bit different from Donovan's version. When Donovan plants the Killshread, it teleports to a different part of the screen based on what button is pressed, and the button he presses to summon it determines the distance. When Dee plants the Killshread, he plants it at his feet and that's where it stays, the button strength he uses to call it back is also irrelevant and the distance it travels is determined by the button strength he used to plant it.
- (LK Version): Takes the least amount of times to plant.
- (MK Version): Middle of the road in the amount of time it takes to plant.
- (HK Version): Takes the longest amount of time to plant.
- (ES Version): Seems to roughly take as long as the HK version to plant?
Killshread Summon (Killshread planted) (Air OK)
214K
| Startup | Active | Recovery | Hit Adv. | Block Adv. | Renda Bonus |
|---|---|---|---|---|---|
| - | - | - | - | - | N/A |
| Guard | Cancel | Invuln | Red Damage | White Damage | Gauge |
| mid | no | - | - | - | - |
| Startup | Active | Recovery | Hit Adv. | Block Adv. | Renda Bonus |
|---|---|---|---|---|---|
| - | - | - | - | - | N/A |
| Guard | Cancel | Invuln | Red Damage | White Damage | Gauge |
| mid | no | - | - | - | - |
| Startup | Active | Recovery | Hit Adv. | Block Adv. | Renda Bonus |
|---|---|---|---|---|---|
| - | - | - | - | - | N/A |
| Guard | Cancel | Invuln | Red Damage | White Damage | Gauge |
| mid | no | - | - | - | - |
| Startup | Active | Recovery | Hit Adv. | Block Adv. | Renda Bonus |
|---|---|---|---|---|---|
| - | - | - | - | - | N/A |
| Guard | Cancel | Invuln | Red Damage | White Damage | Gauge |
| mid | no | - | - | - | - |
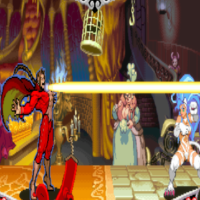
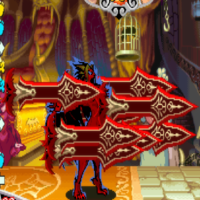
- Killshread dislodges itself from the ground and goes flying across the screen. The button pressed when inputting this move is irrelevant and the version of the move is decided from the button pressed when you planted it.
- (LK Version from Killshread Plant): Killshread flies a small amount of distance forward, and then returns to Dee. Hits once and does 1 hit of damage.
- (MK Version from Killshread Plant): Killshread flies a medium amount of distance forward, and then returns to Dee. hits once and does 2 hits of damage
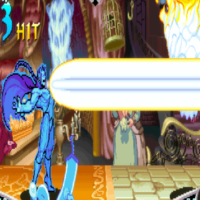
- (HK Version from Killshread Plant): Killshread flies across the whole screen, and then returns to Dee. Hits once and does 3 hits of damage.
- (ES Version from Killshread Plant): Killshread flies even further than the HK version, and then returns to Dee. Hits 3 times going out and 3 times coming back for a total of 6 hits.
Killshread Lightning (Killshread planted)
214PP
| Startup | Active | Recovery | Hit Adv. | Block Adv. | Renda Bonus |
|---|---|---|---|---|---|
| - | - | - | - | - | N/A |
| Guard | Cancel | Invuln | Red Damage | White Damage | Gauge |
| mid | no | - | - | - | - |
| Startup | Active | Recovery | Hit Adv. | Block Adv. | Renda Bonus |
|---|---|---|---|---|---|
| - | - | - | - | - | N/A |
| Guard | Cancel | Invuln | Red Damage | White Damage | Gauge |
| mid | no | - | - | - | - |
| Startup | Active | Recovery | Hit Adv. | Block Adv. | Renda Bonus |
|---|---|---|---|---|---|
| - | - | - | - | - | N/A |
| Guard | Cancel | Invuln | Red Damage | White Damage | Gauge |
| mid | no | - | - | - | - |
| Startup | Active | Recovery | Hit Adv. | Block Adv. | Renda Bonus |
|---|---|---|---|---|---|
| - | - | - | - | - | N/A |
| Guard | Cancel | Invuln | Red Damage | White Damage | Gauge |
| mid | no | - | - | - | - |
-
- (LP Version): Fastest to startup and does 1 hit.
- (MP Version): Second fastest to startup and does 2 hits.
- (HP Version): Slowest to startup and does 3 hits.
- (ES Version): Might be as slow or slower than the HP version, it does 4 hits.
Ifrit Arrow (Killshread planted)
4123P
| Startup | Active | Recovery | Hit Adv. | Block Adv. | Renda Bonus |
|---|---|---|---|---|---|
| - | - | - | - | - | N/A |
| Guard | Cancel | Invuln | Red Damage | White Damage | Gauge |
| mid | no | - | - | - | - |
| Startup | Active | Recovery | Hit Adv. | Block Adv. | Renda Bonus |
|---|---|---|---|---|---|
| - | - | - | - | - | N/A |
| Guard | Cancel | Invuln | Red Damage | White Damage | Gauge |
| mid | no | - | - | - | - |
| Startup | Active | Recovery | Hit Adv. | Block Adv. | Renda Bonus |
|---|---|---|---|---|---|
| - | - | - | - | - | N/A |
| Guard | Cancel | Invuln | Red Damage | White Damage | Gauge |
| mid | no | - | - | - | - |
| Startup | Active | Recovery | Hit Adv. | Block Adv. | Renda Bonus |
|---|---|---|---|---|---|
| - | - | - | - | - | N/A |
| Guard | Cancel | Invuln | Red Damage | White Damage | Gauge |
| mid | no | - | - | - | - |
-
- (LP Version): Least active frames, but recovers fast.
- (MP Version): Middle of the road.
- (HP Version): A lot of active frames, but recovers very slowly.
- (ES Version): Hits 3 times.
Ifrit Sword (Killshread equipped)
623P
| Startup | Active | Recovery | Hit Adv. | Block Adv. | Renda Bonus |
|---|---|---|---|---|---|
| - | - | - | - | - | N/A |
| Guard | Cancel | Invuln | Red Damage | White Damage | Gauge |
| mid | no | - | - | - | - |
| Startup | Active | Recovery | Hit Adv. | Block Adv. | Renda Bonus |
|---|---|---|---|---|---|
| - | - | - | - | - | N/A |
| Guard | Cancel | Invuln | Red Damage | White Damage | Gauge |
| mid | no | - | - | - | - |
- All versions of this attack are the same besides the ES version, which does more hits. All versions are air unblockable.
- (Normal Version): Hits 1 time.
- (ES Version): Hits 6 times for decent damage, though it will likely hit less when used as an anti-air.
Ifrit Sword GC (Killshread equipped)
623P
| Startup | Active | Recovery | Hit Adv. | Block Adv. | Renda Bonus |
|---|---|---|---|---|---|
| - | - | - | - | - | N/A |
| Guard | Cancel | Invuln | Red Damage | White Damage | Gauge |
| mid | no | - | - | - | - |
| Startup | Active | Recovery | Hit Adv. | Block Adv. | Renda Bonus |
|---|---|---|---|---|---|
| - | - | - | - | - | N/A |
| Guard | Cancel | Invuln | Red Damage | White Damage | Gauge |
| mid | no | - | - | - | - |
- Dee's Guard Cancel. All versions of this attack are the same besides the ES version, which does more hits. All versions are air unblockable.
- (Normal Version): Hits 1 time.
- (ES Version): Hits 6 times for decent damage, though it will likely hit less when used as an anti-air.
Blizzard Sword (Killshread equipped)
4123P
| Startup | Active | Recovery | Hit Adv. | Block Adv. | Renda Bonus |
|---|---|---|---|---|---|
| - | - | - | - | - | N/A |
| Guard | Cancel | Invuln | Red Damage | White Damage | Gauge |
| mid | no | - | - | - | - |
| Startup | Active | Recovery | Hit Adv. | Block Adv. | Renda Bonus |
|---|---|---|---|---|---|
| - | - | - | - | - | N/A |
| Guard | Cancel | Invuln | Red Damage | White Damage | Gauge |
| mid | no | - | - | - | - |
| Startup | Active | Recovery | Hit Adv. | Block Adv. | Renda Bonus |
|---|---|---|---|---|---|
| - | - | - | - | - | N/A |
| Guard | Cancel | Invuln | Red Damage | White Damage | Gauge |
| mid | no | - | - | - | - |
| Startup | Active | Recovery | Hit Adv. | Block Adv. | Renda Bonus |
|---|---|---|---|---|---|
| - | - | - | - | - | N/A |
| Guard | Cancel | Invuln | Red Damage | White Damage | Gauge |
| mid | no | - | - | - | - |
-
- (LP Version): Travels at the highest arc.
- (MP Version): Middle of the road in terms of arc.
- (HP Version): Travels at the lowest arc.
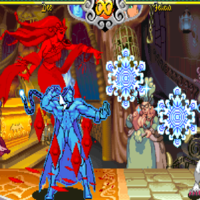
- (ES Version): Travels roughly around the same arc as the LP and MP version but launches 3 snowflakes instead of 1.
Lightning Sword (Killshread equipped)
421P
| Startup | Active | Recovery | Hit Adv. | Block Adv. | Renda Bonus |
|---|---|---|---|---|---|
| - | - | - | - | - | N/A |
| Guard | Cancel | Invuln | Red Damage | White Damage | Gauge |
| mid | no | - | - | - | - |
| Startup | Active | Recovery | Hit Adv. | Block Adv. | Renda Bonus |
|---|---|---|---|---|---|
| - | - | - | - | - | N/A |
| Guard | Cancel | Invuln | Red Damage | White Damage | Gauge |
| mid | no | - | - | - | - |
| Startup | Active | Recovery | Hit Adv. | Block Adv. | Renda Bonus |
|---|---|---|---|---|---|
| - | - | - | - | - | N/A |
| Guard | Cancel | Invuln | Red Damage | White Damage | Gauge |
| mid | no | - | - | - | - |
| Startup | Active | Recovery | Hit Adv. | Block Adv. | Renda Bonus |
|---|---|---|---|---|---|
| - | - | - | - | - | N/A |
| Guard | Cancel | Invuln | Red Damage | White Damage | Gauge |
| mid | no | - | - | - | - |
- Mashable for more damage. Not a very useful attack because even when mashing the damage just isn't very big and leaves your opponent standing.
- (LP Version): Active for the shortest period and does the least amount of hits.
- (MP Version): Active for longer than the LP version and does more hits.
- (HP Version): Active for longer than the MP version and does more hits.
- (ES Version): Active for the longest and does the most amount of hits.
Sword Grapple (Killshread equipped)
632[4] MP or HP
| Startup | Active | Recovery | Hit Adv. | Block Adv. | Renda Bonus |
|---|---|---|---|---|---|
| roughly around 3 frames? | - | - | - | - | N/A |
| Guard | Cancel | Invuln | Red Damage | White Damage | Gauge |
| throw | no | there seems to be some? | - | - | - |
- Dee's command throw. Pretty fast command throw with some invulnerability, you can potentially combo into Press of Foot from it though the effectiveness varies per character. Dee lacks a hitbox that catches high up close by while standing so you might want to add in LP or LK into your input as they have less lag than your other options. This move has no ES version.
Hell Dive (Air OK)
4123K
| Startup | Active | Recovery | Hit Adv. | Block Adv. | Renda Bonus |
|---|---|---|---|---|---|
| - | - | - | - | - | N/A |
| Guard | Cancel | Invuln | Red Damage | White Damage | Gauge |
| - | no | - | - | - | - |
- A teleport that places Dee in the air where he is able to perform actions after it. Can be spammed pretty fast and builds decent meter, especially when kara-canceling into it. If the teleport crosses up the opponent, Dee will autocorrect directions to face them.
- (LK Version): Teleports to the left side of the screen.
- (MK Version): Teleports to the middle of the screen.
- (HK Version): Teleports to the right side of the screen.
Pursuit
8P or 8K
| Startup | Active | Recovery | Hit Adv. | Block Adv. | Renda Bonus |
|---|---|---|---|---|---|
| - | - | - | - | - | N/A |
| Guard | Cancel | Invuln | Red Damage | White Damage | Gauge |
| mid | no | - | - | - | - |
| Startup | Active | Recovery | Hit Adv. | Block Adv. | Renda Bonus |
|---|---|---|---|---|---|
| - | - | - | - | - | N/A |
| Guard | Cancel | Invuln | Red Damage | White Damage | Gauge |
| mid | no | - | - | - | - |
Ex Moves
22K
| Startup | Active | Recovery | Hit Adv. | Block Adv. | Renda Bonus |
|---|---|---|---|---|---|
| - | - | - | - | - | N/A |
| Guard | Cancel | Invuln | Red Damage | White Damage | Gauge |
| overhead | no | Some at the start | - | - | - |
- Costs one meter. It's possible to OTG with this move for big damage, however if the opponent predicts this it's slow enough to roll out of the way from, or for characters with fast neutral wakeups - not roll at all. However the auto target version does help with catching rolls at least. You can combo into this from your command throw, though as previously mentioned some rolls could give issues confirming the combo.
• This move activates the DI/LI damage reduction bug.
- (LK Version): The giant foot lands right in front of Dee.
- (MK Version): The giant foot lands a mid screens distance away from Dee.
- (HK Version): The giant foot lands a full screens distance away from Dee.
- (KK Version): The giant foot appears where the opponents position was when the move was started. You need two bars of meter to be able to use this version, though it only consumes one bar.
MP,LP,Backwards,LK,MK
| Startup | Active | Recovery | Hit Adv. | Block Adv. | Renda Bonus |
|---|---|---|---|---|---|
| - | - | - | - | - | N/A |
| Guard | Cancel | Invuln | Red Damage | White Damage | Gauge |
| mid | no | - | - | - | - |
- Dee flies to the back of the screen then launches himself forward with an active hitbox. You can angle the direction of your flight.
LP,MP,Towards,LK,MK
| Startup | Active | Recovery | Hit Adv. | Block Adv. | Renda Bonus |
|---|---|---|---|---|---|
| - | - | - | - | - | N/A |
| Guard | Cancel | Invuln | Red Damage | White Damage | Gauge |
| mid | no | - | - | - | - |
- Costs 2 bars and you need to have the sword planted.
Dark Force
Slayshread
Same strength P + K |
|---|
Vampire Savior Arrange Damage Table
All damage values obtained from Demitri on Vampire Savior Arranged.
Normals
| Normal | Red | White | Cancel |
| s.LP | 5 | 8 | Special/Rapid |
| near.MP | 10 | 15 | Special |
| far.MP | 9 | 14 | |
| s.HP | 12 | 18 | |
| s.LK | 5 | 8 | Special/Rapid |
| near.MK | 11 | 16 | Special |
| far.MK | 11 | 17 | |
| s.HK | 13 | 20 | |
| c.LP | 4 | 8 | Special/Rapid |
| c.MP | 8 | 14 | Special |
| c.HP | 13 | 19 | |
| c.LK | 4 | 8 | Special/Rapid |
| c.MK | 8 | 14 | Special |
| c.HK | 9 | 16 | |
| 6.HK | 12 | 18 | |
| j.LP | 5 | 9 | Special |
| j.MP | 10 | 15 | Special |
| j5.HP | 13 | 19 | Special? |
| j8.HP | 13 | 19 | Special? |
| j2.HP | 13 | 19 | Special |
| j.LK | 5 | 9 | Special |
| j.MK | 9 | 14 | Special |
| j.HK | 12 | 19 |
Special and EX Moves
| Move | Red | White | Notes |
| Pursuit | 0 | 5 | 1 hits |
| Pursuit (ES) | 0 | 16 | 10 hits |
| Ground Throw | 5 | 10 | |
| Sword Grapple | 20 | 28 | |
| Ifrit Sword | 9 | 15 | |
| Ifrit Sword (ES) | 20 | 38 | 4 hit=14r/27w; 5 hit=17r/33w |
| Lightning Sword (LP) | 8 | 14 | |
| Lightning Sword (MP) | 10 | 18 | |
| Lightning Sword (HP) | 12 | 22 | |
| Lightning Sword (ES) | 14 | 26 | |
| Blizzard Sword | 8 | 13 | |
| Blizzard Sword (ES) | 11 | 19 | 1 hit=4r/7w; 2 hit=8r/14w |
| Killshread Summon | 11 | 17 | 1 hit=4r/6w; 2 hit=8r/12w |
| Killshread Lightning (LP) | 5 | 6 | |
| Killshread Lightning (MP) | 9 | 11 | |
| Killshread Lightning (HP) | 13 | 16 | |
| Killshread Lightning (ES) | 17 | 21 | |
| Killshread Arrow | 10 | 15 | |
| Killshread Arrow (ES) | 15 | 24 | |
| Press of Death | 29 | 45 | as pursuit=15r/23w |
| Change Immortal | 28 | 37 | |
| Kill Blade | 22 | 54 |
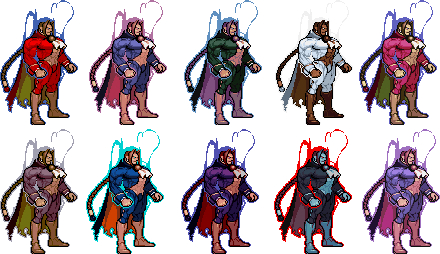
Colors
Notable Players
Europe
| Name (English) | Name (Japanese) | Color | Location | Contact | Notes |
|---|---|---|---|---|---|
| Cerulean | セルリアン | ALL |
Denmark | https://twitter.com/Ceruleancast | Strongest Dee in the multiverse |
