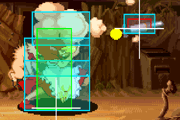
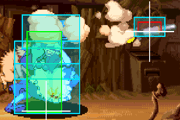
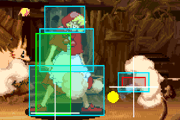
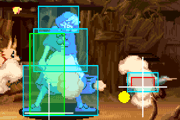
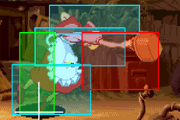
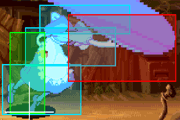
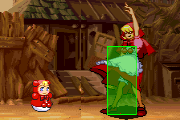
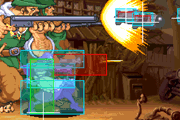
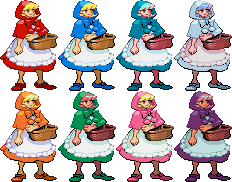
Vampire Savior/Bulleta/Archive
Introduction
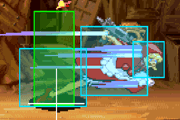
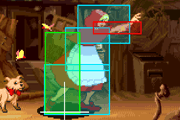
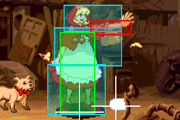
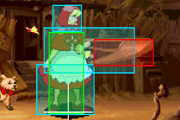
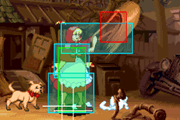
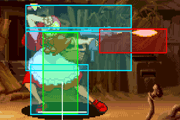
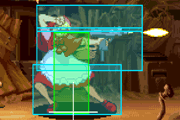
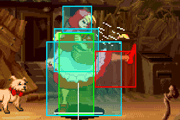
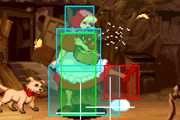
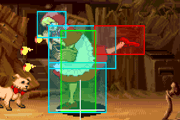
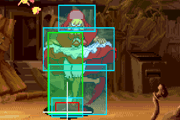
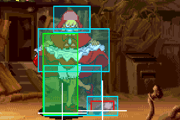
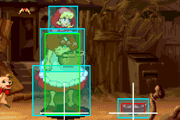
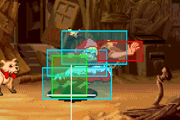
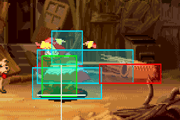
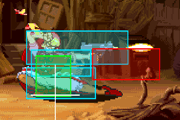
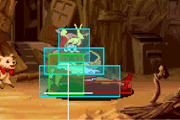
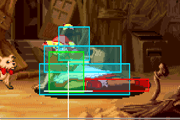
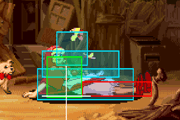
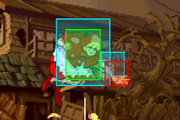
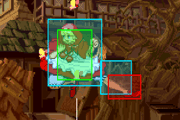
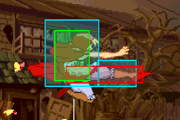
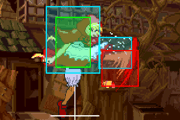
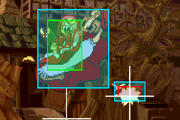
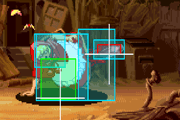
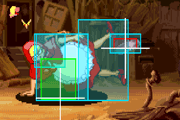
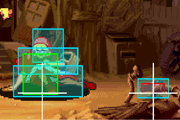
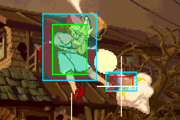
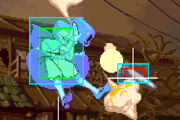
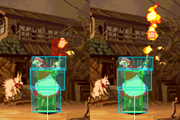
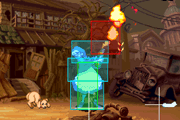
Bulleta (バレッタ), also known as Baby Bonnie Hood, the Dark Hunter.
A thrill seeker who enjoys the hunt, to the point where she does it for the sport of the hunt rather than the pursuit of money. Because of this, she is mainly described as an antithesis to Donovan. She hunts solely for sport, while Donovan hunts to find meaning in his existence. As a profit-seeking Dark Hunter, she pretends to act like a defenseless girl as a way to trick her prey in order for them to get closer to her. Many of her hunting skills include stabbing her opponents with weapons such as knives, and using guns for shooting down her prey.
Bulleta is infamous for her execution ceiling. She has fantastic movement & projectile durability. This synergy makes her zoning & neutral game very effective. She is one of the few characters who gets wins with Time Overs. If you are willing to commit to an execution grind & play patiently, Bulleta is the right choice for you.
Gameplay
Primary objectives:
- Gain air-resets to setup her amazing jump-in offense. Chicken block to 9MP is strong
- Use missiles as uncontested anti-airs
- Leverage your movement to be evasive and play patiently
- Abuse instant overheads to overwhelm the opponent
- Convert combos when the opponent is standing into huge damage & corner positioning
- Utilize dashing offensive options to open-up the opponent
| Strengths | Weaknesses |
|---|---|
|
|
}}
Movement
Walk: The only reason you should ever be walking as Bulleta is perhaps when you are moving backwards or need to walk a very short distance to follow up Tricky Basket with a throw. Walk as little as possible!
Dash: This is how you should be moving on the ground. Watching any Bulleta player, you'll notice how often dashing is required. The startup of the dash covers a large distance very quickly, allowing it to be 'cancelled' with any normal. If you only need to move a short distance, simply tap LP or press back out of your dash. Learn the properties of the dash, and get familiar with your movement with it alone or cancelled by a normal/back, and understand when you are open off the dash to do things like normal throw.
Double Jump: Bulleta is the only character in the game with a double jump! This gives her very good standing in any aerial situation, and also allows you to avoid many things on the ground. Use double jump where applicable to get in your opponent or dodge, but the most important thing about Bulleta's jump is to know when to chicken guard and when to air chain. This concept tends to come very naturally as you play and train.
Normal Moves
Standing
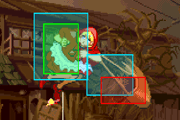
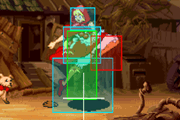
f.5LP
Good jab with a gratuitous amount of stun, renda or otherwise. Great for stuffing IAD or jump in shenanigans. Has essentially no whiff animation so you can use it with your dash to wavedash for some spacing without having to cancel it manually. Decent anti-air on its own, but what Bulleta gets off of the reset is outrageous. Bishamon and Victor can't crouch under it, so abuse it on them. |
Problematic normal. Pretty much the same as the far version, but with weaker frame-data. |
f.5MP
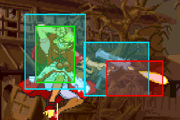
Amazing hitbox. Great frames. Dash in with it, hit-confirm into bnb of choice. Punish whiffed normals, stuff start-up of normals. Safe from guard cancels with good spacing. Basically, you're going to love this button. |
Another problematic normal. The best range to use this, sadly, the game doesn't let you use it. You can use it to catch jump-outs or for convoluted dash-under anti-air. Whiffing at point blank is suicide. Avoid using it on accident. |
Fires 7 bullets with a small range. She gets pushed back as the hits connect, so the number of connected hits will be less depending on how far you are, with 7 only being possible with a 66HP. This move is mostly useless, however. |
Germy shin-kick. Best time to use it is when you think you don't have the 12 frames to keep someone still with dash MP. |
No real use. Just do 2LP. |
Hits mid. While useless in neutral or combos this move's primary purpose is to be used from a dash to check an opponent upbacking. |
Very tricky projectile move. Stops your forward momentum completely and drops a mine. Toss at the end of a block-confirm to bait tech-hit (Zurashi). They'll still have to sit there and wait for the mine, or just flat out get hit from not expecting it. The advantage of this is option is that you can be out of the opponent's throw-range, so it's a much less risky Zurashi. Absolutely dirty on oki. Predict their tech and place a mine at their feet for a noncommittal oki option that is safe against wake up upback and throw. If you do it meaty enough it will be safe against wake GCs as well. Once the mine is placed if they block correctly you can start doing standard Bulleta nonsense. Should the opponent fail to pushblock the mine it can be used as a tick throw setup for her command grab. |
Crouching
2LP
A hit-confirm normal. Hits mid, but has better frame advantage than 2LK. Link into it from 2LK and figure out what you want to do from there. |
Basically the low version of 5MP with the added bonus of being able to link into itself. This move is advantageous enough on block to continue pressure when not at max range. |
Fires 5 bullets at the same standard range of her standing HP, still pushing her back. Awful move. Avoid it. |
Typical low short. Mostly used in her unblockable setup. Try your best to get into the habit of linking 2LP afterward. Its a nice, slow hit-confirm and leads into everything she has, pretty much. |
Unremarkable kick. Toss it into your chains for 1-2-3-4's. |
Decent sweep. Mainly a finisher for your chains. |
Jumping
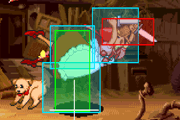
j.LP
You mainly come down with this on the shorter and skinnier characters like Felicia and Q-Bee. Follow up with j.MP for shenanigans. |
Phenomenal instant-overhead. Works on everyone except Q-bee on the way up. Decent air-to-air. Use your double-jumps to get above someone and slap them around. |
Fantastic air-to-air. Just smack people who are sitting on j.9 all day. |
The best version of her Uzi. Deceptive range and no crippling recovery. Toss it out after j.mp to help with hit-confirms. If they block an air chain near the corner, use this to keep them in block-stun while you land and guard-break them. |
Good for creating a wall that eats corner jump-outs. |
Better range than j.LP but whiffs on the obnoxiously short characters. Can be used as an IOH against tall crouchers. |
An amazing cross-up. Fast and compact, this move can also be used as air-to-air. |
If you read their tech and set up for an unblockable with j.HK c.LK, those who understand how to fight Bulleta may eventually just start blocking it correctly. Cycle back and come down with this kick to just hit them with an overhead attack. |
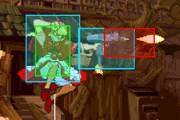
Disjointed projectile attack that causes a fire knockdown on hit and enables a pseudo-unblockable landing-low. Pretty solid hit-box so it can challenge & win most conventional anti-airs. This is great for setting up proximity block approaches very high up in the air. Please check the BUGs section to better understand her land-canceling nuance & pseudo-unblockable details. |
Command Normal Moves
Surprise & Hop – 4MK / 6MK:
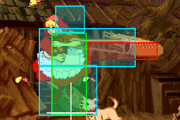
Bazooka knee. The classic use for this is to hold charge while you use it to get some forward movement in. Out of place in a game like this, however. Can be anti-air in some cases. |
Absolutely awful overhead attack. You get it on accident when trying to do dash MP |
Sobasket. Another out-of-place displacement command normal that she's stuck with. Use it to annoy the hell out of an Anakaris player or tick into ES command throw. |
3HK
Use it in your strings to bait tech hit. A little faster than her standing mine. You can also chain into it from a longer range than 2HK. |
Tell Me Why – 2LK+MK+HK:
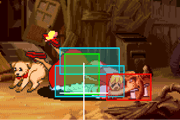
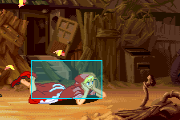
Bulleta crawls on the ground. A wholly defensive move, though not too hot. Throw immune, so you can bait the ones with a big whiff animation. |
Throws
- P Throw
Bulleta hops up on the enemy's shoulders and slits their throat. Though the pursuit will only connect if the other player doesn't press anything on knockdown, it still provides a closed gap to continue pressure. You should always do this through MP instead of HP, since you don't want to risk getting stuck with her uzi gun, would the throw whiff.
- Air Throw
Just an aerial version of her normal throw.
Pursuit
Bulleta leaps a considerable distance and shoots downward onto her opponent, getting pushed back upwards. Whiff or not, this pursuit is essential to Bulleta's gameplay. It homes in to wherever the opponent is knocked down while still being very fast. ES Pursuit is definitely more satisfying to see, but should generally be saved for the guaranteed pursuits that come after her command throw.
Specials
Smile & Missile (High) - [4]6P:
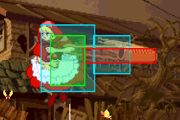
This is what you are always charging for. It builds your meter, stops rushdown, and keeps you safe. Like any fireball, you want to use certain versions in certain situations, but Bulleta's missiles tend to be more lenient. One good thing to learn is to feel safe behind your missiles for the most part. Bulleta can dash 'with' her missiles due to the huge dash range, and it provides a good wall to close the gap. This doesn't apply to ES, despite it going farther, because multiple hits are easier to tech or guard cancel. Bulleta cannot use a missile while another is on the screen, unless in Dark Force.
|
Smile & Missile (Low) - [4]6K:
Really, there's nothing special to say about this version of the missile. It has all the same properties of the P missiles, and the K missiles should only be used in a situation where the P missile would miss. Just think Sagat's tiger shots. For some, it is also much more comfortable to land low ES missiles off two c.LK's over high ES missile. Bulleta cannot use a missile while another is on the screen, unless in Dark Force. |
Hop & Missile - [2]8P:
Bulleta hops high into the air and fires a downward missile. Sadly, this move is mostly on 'never use' status with higher level players. It has very situational use and has a very obvious recovery time.
|
Cheer & Fire - 623P:
Boom champagne! This isn't your normal DP, it hits like one, but has no invincibility and requires pretty specific timing to hit someone out of the air. Stay away from this move unless your opponent is very predictable. The LP, MP, and HP versions are all the same. Molotov actually checks for projectiles on-screen, Bulleta cannot use molotov while another is on the screen.
|
Shyness & Strike - 214P:
This special is a big tool in Bulleta's arsenal, as it knocks down on hits and does a healthy amount of damage in one hit. While it has limited use as a pressure tool, you will want to save this for comboing into (don't underestimate the range). If you hold down the button before letting go, she will keep spinning the basket and it will get bigger and bigger. Obviously, this is incredibly easy to see and react to. The LP, MP, and HP versions are all the same, so use whichever is most comfortable in your combo input. You get a guaranteed pursuit after this move. |
Jealousy & Fake - 623K (GC Only):
Bulleta teleports behind the opponent, leaving a cloud of smoke and a doll in her original place. Unfortunately, although this move has 29F invulnerability, Bulleta is vulnerable for the last 10F of the animation before she can move, making this not an especially useful GC. Although it can get her out of the corner, it's best used against very laggy moves with a lot of active frames or simply not used at all. |
Sentimental Typhoon - 63214P:
It's as if they gave guile a command throw. Get a feel for the throw protection and make good use of it whenever you find yourself point blank. You can tick off of pretty much all of her standard dash normals. If you expect people to be 1hit teching your meaties, just dash up and use the ES version to spin them around a bit. Off instant j.mp j.mk, if you've already convinced them to sit still for this mix-up you can skip the whole high-low nonsense and land point blank for a throw. Half the strength of this move is the psychological effect. Because this move exists, there will be instances where you'll end up killing your opponent on jump-out punishes alone. Of course it'll come back full circle and you'll be allowed to just do a couple lights into dash forward command throw. Abuse it. |
EX Moves
Cool Hunting - 41236PP:
Hunters will pop up behind Bulleta and start firing along with Bulleta. This will fire a medium-long range stream of bullets along the bottom of the screen, and fullscreen missiles along the top of the screen. Fairly unsafe on miss, but characters like Victor can be free uses of it sometimes. In a smart sense, you won't see much of this super. Its best to people who use normals or air dash from a far, high up position; if they get hit by one missile, they will be forced to stay blocking in the air. In situations like Jedah air dashing in at a distance, it is pretty smart and safe to use Cool Hunting. |
Beautiful Memory - 41236KK:
With very short startup, Bulleta will move forward swinging knives. If whiffed, she will stop and be vulnerable for a short amount of time. If block, she will bounce off and likely eat a heavy normal punish. If it connects, it will keep them in the super and do full damage. Most players refuse to use their meter on this super. If you really have the game in your control, you can predict when people are going to throw something out trying to stop your rushdown and use this, as it has a fair amount of priority. That said, there is no specific way to use this super. Work it into your gameplay if you so desire, or save the meter for ES missiles. Beautiful Memory actually checks for projectiles on-screen, Bulleta cannot use Beautiful memory while a projectile is on the screen. |
Apple For You - 63214KK:
A command throw in which she puts an apple out in front of her, and the other character will pick it up if she is close enough and doesn't get hit out of it. Unlike her command throw, there is a specific whiff animation for this (a whiffed command throw would come out as basket) in which she puts out the apple then puts it back and is vulnerable for a short amount of time. This is harder to land than ES command throw, but is used in the same exact situations that ES command throw would be applied. Dashing in with this doesn't seem to be a viable option, and it is more done after something like an empty jump after a lot of blocked pressure. |
Dark Force
The Killing Time - Same strength P + K
- All versions are the same. All of Bulleta's punches will be replaced with an instant missile that corresponds to the strength pushed, but you will keep all your kicks. That means you can dash into missiles, do multiple missiles at once, etc. Jumping and pressing will do the [2]8 Missile, pressing any P will be a high Missile, and crouching with any P will be a low Missile. Since you keep your kicks, this can be used regularly to move in with 66LK and pressure with lots of missiles, but it sees more use as a panic/runaway tool to get the initial Dark Force invincibility on startup and then dash away repeatedly while firing missiles.
Frame Data
Normals
| Move | Startup | Hit
Advantage |
Block
Advantage |
Meter
Whiff/Block/Hit |
Guard | Cancel | Notes |
| n.LP | 4 | +6 | +5 | 0/ 3/ 6 | Mid | Yes/Rapid | Renda+: H:+9 B:+8 |
| n.MP | 9 | +6 | +5 | 3/ 9/15 | Mid | Yes | |
| n.HP | 9 | -16 | -17 | 6/7+1x6/9+3x6 | Mid | × | 密着から5ヒット時 |
| n.LK | 5 | +2 | +1 | 0/ 3/ 6 | Mid | Yes/Rapid | Renda+: H:+9 B:+8 |
| n.MK | 8 | +4 | +3 | 3/ 9/15 | Mid | Yes | |
| n.HK | 17 | Down | -5 | 6/15/24 | Mid | × | |
| LP | 4 | +10 | +9 | 0/ 3/ 6 | Mid | Yes/Rapid | Renda+: H:+9 B:+8 |
| MP | 6 | +6 | +5 | 3/ 9/15 | Mid | Yes | |
| HP | 9 | - | - | 6/7+1x6/9+3x6 | Mid | × | |
| LK | 6 | +4 | +3 | 0/ 3/ 6 | Mid | Yes/Rapid | Renda+: H:+9 B:+8 |
| MK | 8 | +4 | +3 | 3/ 9/15 | Mid | Yes | |
| HK | 17 | Down | - | 6/15/24 | Mid | × |
| Move | Startup | Hit
Advantage |
Block
Advantage |
Meter
Whiff/Block/Hit |
Guard | Cancel | Notes |
| c.LP | 4 | +6 | +5 | 0/ 3/ 6 | Mid | Yes/Rapid | Renda+: H:+9 G:+8 |
| c.MP | 6 | +7 | +6 | 3/ 9/15 | Low | Yes | |
| c.HP | 9 | -16 | -17 | 6/7+1x6/9+3x6 | Mid | × | 密着から5ヒット時 |
| c.LK | 4 | +6 | +5 | 0/ 3/ 6 | Mid | Yes/Rapid | Renda+: H:+8 G:+7 |
| c.MK | 6 | +5 | +4 | 3/ 9/15 | Low | Yes | |
| c.HK | 7 | Down | -3 | 6/15/24 | Low | × | |
| 3HK | 15 | Down | -9 | 6/15/24 | Mid | × | |
| 6MP | 12 | +4 | +3 | 3/ 9/15 | Mid | × | |
| 6MK | 5 | -3 | -4 | 3/ 9/15 | Mid | × | |
| 66MP | 21 | -1 | -2 | 3/ 9/15 | High | × |
| Move | Startup | Meter
Whiff/Block/Hit |
Guard | Cancel | Notes |
| 8.LP | 5 | 0/ 3/ 6 | High | × | |
| 8.MP | 7 | 3/ 9/15 | High | × | |
| 8.HP | 13 | 6/10+4/15+9 | High | × | |
| 8.LK | 5 | 0/ 3/ 6 | High | × | |
| 8.MK | 7 | 3/ 9/15 | High | × | |
| 8.HK | 11 | 6/15/24 | Mid | × | Down |
| j.LP | 5 | 0/ 3/ 6 | High | × | |
| j.MP | 5 | 3/ 9/15 | High | × | |
| j.HP | 13 | 6/10+4/15+9 | High | × | |
| j.LK | 5 | 0/ 3/ 6 | High | × | |
| j.MK | 7 | 3/ 9/15 | High | × | |
| j.HK | 11 | 6/15/24 | Mid | × | Down |
Specials
| Move | Startup | Hit
Advantage |
Block
Advantage |
Meter
Whiff/Block/Hit |
Guard | Notes |
| 4-6LP | 10 | Down | -1 | 15/18/21 | Mid | Downs Airborne Opponents |
| 4-6MP | 10 | Down | -1 | 15/18/21 | Mid | |
| 4-6HP | 10 | Down | -1 | 15/18/21 | Mid | |
| 4-6PP | 10 | Down | -2 | 0/0/0 | Mid | |
| 4-6LK | 10 | Down | -1 | 15/18/21 | Mid | Downs Airborne Opponents |
| 4-6MK | 10 | Down | -1 | 15/18/21 | Mid | |
| 4-6HK | 10 | Down | -1 | 15/18/21 | Mid | |
| 4-6KK | 10 | Down | -2 | 0/0/0 | Mid | |
| 2-8LP | 27 | Down | x | 15/18/21 | Mid | Landing Suki: 5F |
| 2-8MP | 27 | Down | x | 15/18/21 | Mid | |
| 2-8HP | 27 | Down | x | 15/18/21 | Mid | |
| 2-8PP | 27 | Down | x | 0/0/0 | Mid | |
| 623LP | 13 | Down | -9 | 18/21/24 | Mid | |
| 623MP | 15 | Down | -13 | 18/21/24 | Mid | |
| 623HP | 17 | Down | -18 | 18/21/24 | Mid | |
| 623PP | 11 | Down | x | 0/ 0/ 0 | Mid | |
| 214LP | 16〜 | Down | -9 | 18/21/24 | Mid | 発生値は可変 |
| 214MP | 64〜 | Down | -9 | 18/21/24 | Mid | 2段階目55F以上押す |
| 214HP | 112〜 | Down | -14 | 18/21/24 | Mid | 3段階目103F以上押す |
| 214PP | 27 | Down | -14 | 0/ 0/ 0 | Mid | |
| 623LK | x | x | x | x | x | Inv: 29F |
| 623MK | x | x | x | x | x | |
| 623HK | x | x | x | x | x | |
| 623KK | x | x | x | x | x | |
| 624MP | 2 | Down | - | 12/21 | Throw | |
| 624HP | 2 | Down | - | 12/21 | Throw | |
| 624PP | 2 | Down | - | 0/ 0 | Throw |
EX Moves
| Move | Gauge | Startup | Hit
Advantage |
Block
Advantage |
Guard | Notes |
| 426PP | 1 | 25 | Down | x | Mid | |
| 426KK | 1 | 17 | Down | -29 | Mid | 空中ヒット時追撃無し (*1) |
| 624KK | 1 | 18 | Down | x | Throw |
- Notes:
- 1: Invulnerable 16F. Landing Suki 1F
Colors
Notable Players
Japan
Japanese Player Index: http://www21.atwiki.jp/vsplayer/pages/23.html
| Name (English) | Name (Japanese) | Color | Location | Contact | Notes |
|---|---|---|---|---|---|
| Kosho | コショー | KK |
Kanto region | Bulleta GOD. | |
| Sako | — | LK |
Kansai region | http://twitter.com/sakonoko http://twitter.com/akikiwww |
OG Bulleta GOD Execution is the best in the world Retired |
| SuperMotiMoti | スーパーモチモチ | PP |
Kansai region | http://twitter.com/supermotimoti | Awesome ground/footsies game |
| Touhou | 徒歩 | LP |
Kanto region | http://twitter.com/tohololovitch | He is also an established IaMP player. |
| Akashi | — | LK |
Kanto region | http://twitter.com/game_overwork | http://orangech.tumblr.com Recently Married DD-Sas. Congrats! |
North America
| Name (English) | Name (Japanese) | Color | Location | Contact | Notes |
|---|---|---|---|---|---|
| Kain | ケイン | HK |
California, USA | https://twitter.com/KainZC7 | Long time player that is considered an execution monster. He started as a Lei-Lei player and has a pocket Bishamon. Has a long history with Hokuto No Ken too. |
| Fee Bee | フィービー | PP |
Kentucky, USA | https://twitter.com/feebeetweety | Recent player that has found success. She also organizes the Beginner's tournaments. |
| Goose | グース | Pacific Northwest, USA | https://twitter.com/chooseagoose | VMPNW's resident Bulleta. | |
| Baco | ベイコ | MK |
NorCal, USA | https://twitter.com/beikho | Originally from east coast, now resides in CA. |
| EmptyShiki | エンプティーシキ | LP |
Chicago, USA | https://twitter.com/Emptyshiki | Long time player. Has a ridiculous amount of CPS2 boards. |
