Vampire Savior/Morrigan/Archive
Introduction
Morrigan Aensland (モリガン), the Succubus
The adopted daughter of Belial Aensland, the ruler of Makai. Morrigan was born as a special succubus, who's power dwarfed those of the other Darkstalkers. Belial foresaw that Morrigan's great power would be disastrous for the kingdom if she could not control it, and so he sealed it away for her to one day master once she became older. Holding a great faith in his daughter, Belial placed the future of Makai in her hands and made Morrigan heir to the kingdom. Originally hedonistic and irresponsible, Morrigan would develop a new outlook on life, after reuniting with the final missing part of her soul, Lilith.
Morrigan's playstyle is often compared to that of a shoto-character (Ryu & Ken do parallel Demitri & Morrigan) from Capcom's Street Fighter series, possessing fireball and dragon punch type moves. Morrigan is widely considered one of the weaker characters in the game. If you want to put on a jet pack, setup high/low offense and throw DPs, then Morrigan is the right character for you.
Gameplay
Primary objectives:
- Be patient at neutral
- Gain meter with kara cancels
- Setup for anti-airs
- Utilize her effective walk speed
- Setup projectile knockdowns, which turn into okizeme opportunities
- Okizeme options
- Dash in for a high/low or left/right offense
- Beat Ireppa & blocking with option select HP-throw x option select Darkness Illusion (input is throw then a delayed DI) or option select Vector Drain x ST.HP
- Confirm hits into big damage with Darkness Illusion
- Utilize Morrigan's effective cheap kill setups to finish the opponent
| Strengths | Weaknesses |
|---|---|
|
|
}}
Normal Moves
Standing
| 5LP
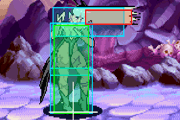
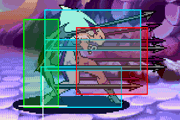
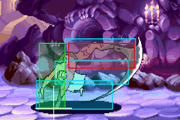
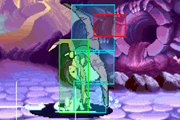
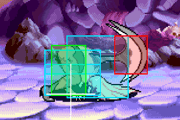
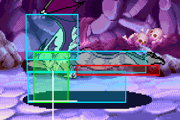
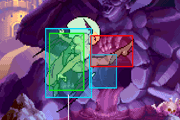
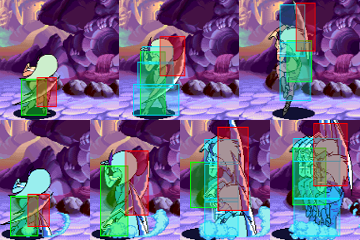
[ Startup: 5 | Hit:+6 | Block:+5 | Renda: H:+9 B:+8 ] Hair poke. The hitbox is somewhat high which makes it whiff most crouching characters. Advantageous on hit/block and gains a renda bonus. Primarily used for keeping people from dashing/hopping in, or for guard breaking. | |
| close 5LP
[ Startup: 5 | Hit:+6 | Block:+5 | Renda: H:+9 B:+8 ] Light Chop. Despite it's appearance it's basically identical in frame and function to the far version. | |
| 5MP
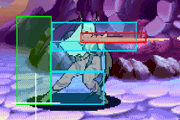
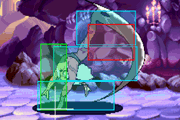
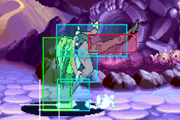
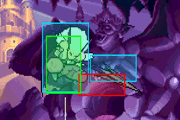
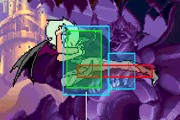
[ Startup: 6 | Hit:+3 | Block:+2 ] Side Chop. Good long hitbox, cancelable, and good frame advantage on hit/block make this rather ideal for general midrange poking. Your basic go-to move when at a distance. JP Wiki says it is H:+4/G:+3, double check values. | |
| close 5MP
[ Startup: 8 | Hit:-3 | Block:-4 ] Drill. Nearly worthless, try to avoid using this. The hitbox is deceptively high and small so it will whiff crouching characters and it does not make for a good anti-air either. The frame disadvantage on this move is terrible as well. It's one saving grace is that it's canceable and chainable, so be prepared to cancel it if you ever use it. | |
| 5HP
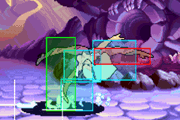
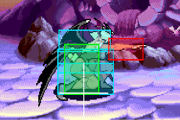
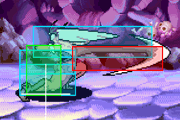
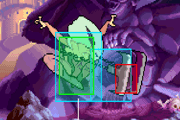
[ Startup: 9 | Hit:-1 | Block:-2 ] Needles. Pretty good hitbox, but not very good frame advantage. This is sometimes used due to the long active duration, which allows one to buffer DI easily during it. One could use it as a meaty due to it's long active hitframes, but in general it's only very sparsely used. | |
| close 5HP
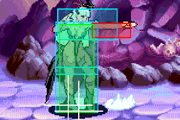
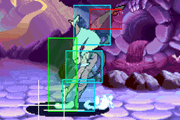
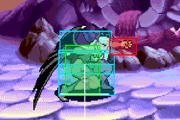
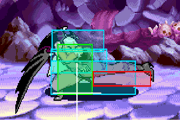
[ Startup: 9 | Hit:+3 | Block:+2 ] Upper Spikes. This is the preferred move to use when attempting to input a throw, since accidentally getting this is way better than accidentally getting n.5MP. Although it's not special cancelable it has decent frame advantage and a rather bizarre/interesting hitbox that avoids a lot more attacks that it appears like it should avoid. Even should the opponent block it you can still chain into 2HK. In general it's a great meaty for anti-jumping, which is why it's so good as a throw/anti-jump option select, best used against habitual chicken blockers. | |
| 5LK
[ Startup: 6 | Hit:+6 | Block:+5 | Renda: H:+9 B:+8 ] Shin kick. Has a lower hitbox than 5LP which makes it more commonly used against grounded opponents. This move is unfortunately deceptive because it does not gain a renda bonus, while the close version does, yet both moves look identical. | |
| 5MK
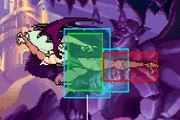
[ Startup: 6 | Hit:+5 | Block:+4 ] Boot. Good hitbox. Slightly better advantage than MP. However it is not cancelable. Due to the total worthlessness of close MP it's sometimes a good idea to use MK in order to avoid accidentally getting close MP. | |
| 5HK
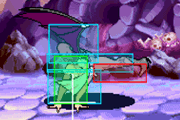
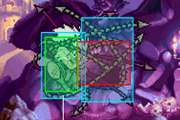
[ Startup: 11 | Hit:-3 | Block:-4 ] Scythe. Despite it's slow startup and appearance this move is pretty decent as an anti-air or general poking tool. Unfortunately it's not cancelable/chainable and it is somewhat disadvantageous on hit/block, so use with caution. | |
| close 5HK
[ Startup: 8 | Hit:-5 | Block:-6 ] Spinner. Because this move is multi-hit, it makes for a good DI-confirm when the opponent is standing, since you have plenty of time to both buffer the input and confirm the hit. Unfortunately, like the far version, it's both uncancellable and disadvantageous on hit/block. This move will only connect for (2) hits against most crouching opponents, so it's not the go-to DI-confirm tool we all hope for. |
Crouching
| 2LP
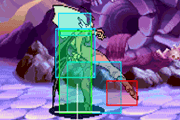
[ Startup: 5 | Hit:+7 | Block:+6 | Renda: H:+10 B:+9 ] Two-hit jab. Hits mid, so it's high blockable. It's one way to confirm into DI, as chaining or linking crouching jabs into themselves begins the DI input naturally. | |
| 2MP
[ Startup: 6 | Hit:+3 | Block:+2 ] Wing Blades. Hits mid so it's high blockable. Kind of a relatively crappy move. Her 2MK has better range, has faster startup, hits low, and much better advantage. Fortunately it's not disadvantageous and it's cancelable, but generally speaking her other moves are superior. | |
| 2HP
[ Startup: 9 | Hit:+1 | Block: 0 ] Wing Whip. An essential move for comboing DI. Typically chained into and then cmd-super canceled into DI. It's neutral on hit/block making it pretty decent even if not cmd-super-canceled. It's only mildly useful as a poke though, typically players only use it during chains. | |
| 2LK
[ Startup: 5 | Hit:+6 | Block:+5 | Renda: H:+9 B:+8 ] Low Short. Hits low, cancelable, good frame advantage. A typical low short. Not as advantageous as 2LP, but still pretty good and also gains a renda bonus. This will be your basic mixup too to hit low, varied with dashing highs and empty dash throws. | |
| 2MK
[ Startup: 6 | Hit:+5 | Block:+4 ] Low Forward. Hits low, cancelable, decent frame advantage. It's a nice poke and a general purpose move. The main advantage is that it's only one frame slower startup than her light attacks, which means it's a ridiculously fast move for a decent range low-hitting medium-strength attack. | |
| 2HK
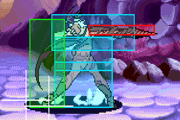
[ Startup: 8 | Hit: Knockdown | Block:-5 ] Sweep. Hits low, sweeps. This move is slightly disadvantageous on block, but "slightly" means "sorta safe". It's a good move to end with during chains, even on block. The main advantage this move has is it's exceptional range and startup speed. |
Jumping
| j.LP
[ Startup: 5 ] Needle. Typical jumping jab. Her fastest startup for a jumping attack. Sometimes used together with j.LK to confirm into DI. | |
| j.MP
[ Startup: 6 ] Blades. Decent j.MP. The hitbox extends downwards somewhat which is good for startup a jumpin airchain, such as j.MP j.MK. | |
| j.HP
[ Startup: 8 ] Spike shield. This move has a pretty good hitbox, making it a general purpose air-to-air or air-to-ground move. | |
| j.LK
[ Startup: 5 ] Knee. Typical jumping short. Useful in air battles or after chicken blocking. Also useful to stuff some anti-airs. | |
| j.MK
[ Startup: 6 ] Leg Thrust. Has crossup potential. Also useful in air-to-air battles since it extends quite a ways forwards. Pretty good after airblocking as well since the startup is quite fast and the reach is good. | |
| j.HK
[ Startup: 7 ] Air boot. Good range. Generally it works a lot like j.MK except less crossup potential and more forwards-hitting potential. |
Command Normal Moves
P Throw: Hip throw. Pretty good when option selected with HP. OK damage, typical for a throw. Avoid using MP. Takes full damage when the opponent tech's.
K Throw: Rocket punch. Also decent option select with MK and HK. Damage is about the same. Throws the opponent much further when mid-screen than punch throw. If the opponent tech's in the corner they can punish Morrigan.
Air Throw: Izuna Drop. Quite good as an air-throw. Good damage and range. Reliable with her jump arc.Takes full damage when the opponent tech's.
Pursuit: Drill stomp. Not a particularly useful pursuit for actually hitting with, since you sacrifice your okizeme potential when it hits. It's better to whiff with, or simply not do at all.
Movement
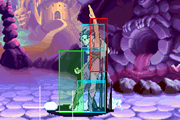
Walk: Fast walk speed, tall stance.
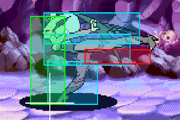
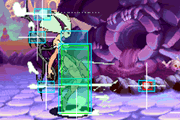
Dash: A ground-to-air dash, aka "flight" dash. Both her forward and backward dashes take her into the air where she can perform jumping attacks. A major tool for high/low rushdown. Another advantage to this kind of dash, apart from very fast overheads, is that it can dodge low attacks and if you're hit out of the air you will be reset rather than getting full-comboed. If you cross the opponent up during this dash you will auto-correct your direction to face the opponent, which also makes it extremely useful for left/right mixups as well as high/low. Morrigan's dash is also somewhat controllable, as you are able to input an upwards direction to modify her trajectory to a more vertical angle. The use of changing trajectory to the vertical dash is mostly for timing and positioning purposes on okizeme. Should you knock the opponent down the upward dash can keep you in place horizontally for a moment after a forward or backwards dash, that can allow you to land a meaty attack, and because it auto-corrects like her normal dash you can potentially cover multiple ground tech directions.
Upward Dash: Similar in nature to her ground dash. However this is done by inputting down then up (2 8). She also has a forwards or backwards version, like her ground dash. Her backwards version must be done by inputting 7, while her forwards one can be done by pressing either 8 or 9, after pressing any downwards direction. During this version you can press a horizontal motion to change her trajectory, if doing the forwards one you can press forward to change to that trajectory, if moving backwards you must press backwards. The use of this is somewhat limited, though it can take you higher on the screen than a normal jump which can be useful for positioning air Soul Fists or escaping pressure momentarily.
Jump: Average jump arc. Decent for airthrowing.
Specials
| Soul Fist - 236P (air):
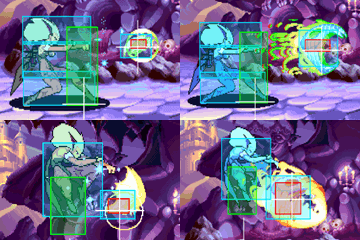
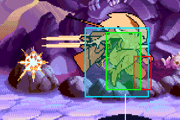
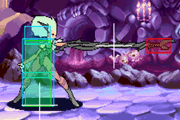
Standard fireball. On the ground the strength determines the speed and distance it fires, and nothing else. In the air the soul fist fires downwards and alters Morrigan's jump trajectory. Pretty good zoning tool and safe on block. Actually, all normal versions on the ground are -1/-2 at point blank, the further away from the opponent you are (the more distance the fireball travels) the more advantageous it becomes.
| |
| Shadow Blade - 623P (GC):
Dragon Punch, uppercut. Unlike many of the uppercuts in the game, Morrigan's actually has a noteworthy amount of invincibility. The normal versions have 5 frame startup and 7 frame invulnerability. The downside is that it's air blockable, so it's not a particularly good anti-air. And the 5F startup, while small, is baitable. Although it's tempting to use her pursuit after a successful DP, it's not recommended to do so as you lose your okizeme opportunity (unless the pursuit would kill the opponent). The other downside is that it has a 4 frame landing recovery, making it ground combo punishable, unlike Demitri's.
| |
| Vertical Dash - 28
A command dash that moves her more vertically than horizontally. Any downwards direction into any upwards direction causes this command dash to occur, if 7 is input then she will glide slightly backwards, if 8 or 9 is input she will glide slightly forwards. During either version you can press forwards or backwards (depending on which direction you're gliding) to switch to her normal dash. During her normal dash you can also transition into the vertical dash by pressing upwards, which is useful for okizeme. | |
| Vector Drain - 624P (close):
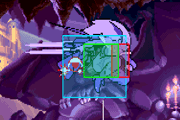
Command grab. One of the better and more useful command throws in the game. The startup is 5 frames which is about as fast as a jab, however it also has 4 frames of startup invulnerability. Combined with close HP negative edge kara-throw input option select, this throw is extremely threatening. The basic option select is to input the throw using HP and slide to MP then tap 2HK, if the opponent is on the ground and in a throwable state she will perform the throw, but if they jump or they are not throwable you will do a close HP instead, if the opponent is hit or blocks the close HP you chain to c.HK. Plus, the damage is good.
|
EX Moves
| Valkyrie Turn - 624K ~K (air):
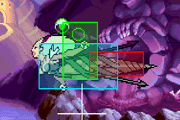
Drill. Morrigan will zoom off the screen, then return at a height that corresponds with the button pressed. She will float down to the ground until a kick is pressed, once pressed she will perform a drill attack that does quite a few rapid hits and causes moderate damage. This move has really slow startup so it's not a combo-type move, it's mostly a gimmick that is used very sparingly, either as a run-away or time-stall tactic. On the bright side it's advantageous on hit/block and difficult to GC. | |
| Darkness Illusion - LP LP 6 LK HP (air):
Raging succubus "DI". The main combo-super because it's a command super and therefor breaks cancel rules. Extremely fast startup, combos off just about anything, even good as a reversal in some situations. Excellent punisher as well. However, learning to combo this off a chained c.HP is a staple of Morrigan gameplay. If you're not consistently landing DIs in combos you're playing her wrong. | |
| Finishing Shower - MP LP 4 LK MK:
Bullet barrage. The startup on this move is incredibly poor, making it not a combo-type move. It is best used at full screen or proceeding knockdown to recover white life, stall the clock or get a Cheap Deathblow. You my influence the bullets by holding UP or DOWN. There are specific moves that it can punish such as low projectiles that leave the opponent recovering for a long period of time. Some notable ones are Jedah's Finale Rosso, Bishamon's Enma Seki, LeiLei's Gong and Bulleta's Cool Hunting at max range. However, Morrigan still has to make a good read to directly beat these moves using this super.
| |
| Cryptic Needle - 6 HP MP LP 6:
Bizarre rocket punch. There isn't much to be said about this super, other than it looks and sounds weird. It whiffs small crouching characters, but it does shoot full screen. And, if it hits, it does a fair amount of damage. There aren't many situations you would use this in lieu of a DI, though it's useful to remember she has it for those rare moments when it can actually hit. Certainly, it is worth the damage if you manage to land it as it does the same raw damage as DI, except that DI also adds a bit of recoverable damage in addition to the raw damage. NOTE: This move is air blockable. |
Dark Force
Illusion Attack: Astral Vision - Same strength P + K
- (Any Version) Morrigan creates a double which mirrors her moves. The position of the double is relative to the opponent's position, or rather, relative to your distance from the opponent. Risky due to it's punishable deactivation recovery. Can be used as a combo tool or an escape tool.
- While in Dark Force, soul fist forces a juggle state. All Soul fists can actually combo in situations which otherwise would not - for example, anti-air with J.mk xx Soul Fist
- While in Dark Force all of Morrigan's attacks (including Throws) have a damage output of 1/2 except Soul Fist & Finishing Shower
Frame Data
Normals
| Move | Startup | Hit
Advantage |
Block
Advantage |
Meter
Whiff/Block/Hit |
Guard | Cancel | Notes |
| n.LP | 5 | +6 | +5 | 0/ 3/ 6 | Mid | Yes/Rapid | Renda+: H:+9 G:+8 |
| n.MP | 6 | -3 | -4 | 3/ 9/15 | Mid | Yes | |
| n.HP | 9 | +3 | +2 | 6/15/24 | Mid | × | |
| n.LK | 6 | +6 | +5 | 0/ 3/ 6 | Mid | Yes/Rapid | Renda+: H:+9 G:+8 |
| n.MK | 6 | +5 | +4 | 3/ 9/15 | Mid | × | |
| n.HK | 8 | -5 | -6 | 6/ 8+2x3/11+5x3 | Mid | × | |
| LP | 5 | +6 | +5 | 0/ 3/ 6 | Mid | Yes/Rapid | Renda+: H:+9 G:+8 |
| MP | 8 | +4 | +3 | 3/ 9/15 | Mid | Yes | |
| HP | 9 | -1 | -2 | 6/15/24 | Mid | × | |
| LK | 6 | +6 | +5 | 0/ 3/ 6 | Mid | Yes/Rapid | Renda+: H:+9 G:+8 |
| MK | 6 | +5 | +4 | 3/ 9/15 | Mid | × | |
| HK | 11 | -3 | -4 | 6/15/24 | Mid | × |
| Move | Startup | Hit
Advantage |
Block
Advantage |
Meter
Whiff/Block/Hit |
Guard | Cancel | Notes |
| c.LP | 5 | +7 | +6 | 0/ 3+3/ 6+6 | Mid | Yes/Rapid | Renda+: H:+10 G:+9 |
| c.MP | 6 | +3 | +2 | 3/ 9/15 | Mid | Yes | |
| c.HP | 9 | +1 | 0 | 6/15/24 | Mid | × | |
| c.LK | 5 | +6 | +5 | 0/ 3/ 6 | Low | Yes/Rapid | Renda+: H:+9 G:+8 |
| c.MK | 6 | +5 | +4 | 3/ 9/15 | Low | Yes | |
| c.HK | 8 | Down | -5 | 6/15/24 | Mid | × |
| Move | Startup | Meter
Whiff/Block/Hit |
Guard | Cancel | Notes |
| j.LP | 5 | 0/ 3/ 6 | High | Yes | |
| j.MP | 6 | 3/ 9/15 | High | Yes | |
| j.HP | 8 | 6/15/24 | High | × | |
| j.LK | 5 | 0/ 3/ 6 | High | Yes | |
| j.MK | 6 | 3/ 9/15 | High | Yes | |
| j.HK | 7 | 6/15/24 | High | × |
Specials
| Move | Startup | Hit
Advantage |
Block
Advantage |
Meter
Whiff/Block/Hit |
Guard | Notes |
| 236LP | 18 | -1 | -2 | 12/16/21 | Mid | Knocks down airborne |
| 236MP | 18 | -1 | -2 | 12/16/21 | Mid | |
| 236HP | 18 | -1 | -2 | 12/16/21 | Mid | |
| 236PP | 20 | Down | +22 | 0/ 0/ 0 | Mid | |
| j.236LP | 19 | x | x | 12/16/21 | Mid | Knocks down airborne |
| j.236MP | 20 | x | x | 12/16/21 | Mid | |
| j.236HP | 21 | x | x | 12/16/21 | Mid | |
| j.236PP | 18 | Down | x | 0/ 0/ 0 | Mid | |
| 623LP | 5 | Down | -17 | 22/26/31 | Mid | 7F Inv startup |
| 623MP | 5 | Down | -20 | 22/26/31 | Mid | 7F Inv startup |
| 623HP | 5 | Down | -33 | 22/26/31 | Mid | 7F Inv startup |
| 623PP | 5 | Down | x | 0/ 0/ 0 | Mid | 10F Inv startup |
| 624MP | 5 | Down | x | 12/21 | Throw | 4F Inv startup |
| 624HP | 5 | Down | x | 12/21 | Throw | 4F Inv startup |
| 624PP | 5 | Down | x | 0/ 0 | Throw | 4F Inv startup |
EX Moves
| Move | Gauge | Startup | Hit
Advantage |
Block
Advantage |
Guard | Notes |
| 624K~K | 1 | Variable | +10 | +9 | Mid | (*1) |
| LP LP 6 LK HP | 1 | 4 | Down | -23 | Mid | 1F landing Suki |
| MP LP 4 LK MK | 1 | 47 | x | x | Mid | |
| 6 HP MP LP 6 | 1 | 31 | Down | -11 | Mid |
- Notes:
- 1: 1F landing suki. Invulnerable until Morrigan returns to the screen.
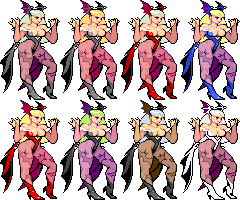
Colors
Notable Players
Japan
Japanese Player Index: http://www21.atwiki.jp/vsplayer/pages/19.html
| Name (English) | Name (Japanese) | Color | Location | Contact | Notes |
|---|---|---|---|---|---|
| Nishiken | 西建 | KK |
Kanto region | https://twitter.com/OcTxgD0uurC4pq4 | Soul Fist - Soul Fist |
| ARK | LP |
Kanto region | http://twitter.com/arkmorrigan https://www.youtube.com/user/arkmorrigan http://arkmorrigan.topaz.ne.jp |
||
| Morikami | モリカミ | HP |
Kanto Region | ||
| Madam | マダム | HP |
West Japan - A-Cho | ||
| Yajima T.T | やじまT.T | PP |
Kansai region | https://twitter.com/TT31316623 | |
| Sumi | すめ | HP |
Kansai Region | https://twitter.com/sume_mori https://www.youtube.com/channel/UC_2gKMLxs9GApmsviA3UL7w |
|
| Sasazuka | 笹塚 | MK |
Tokyo | http://twitter.com/Sasazuka00 | Execution GOD, also plays Lei-Lei |
| Takepon | たけぽん | PP |
Retired |
North America
| Name (English) | Name (Japanese) | Color | Location | Contact | Notes |
|---|---|---|---|---|---|
| VMP_KyleW | カイルW | PP |
Seattle | https://twitter.com/VMP_KyleW | Creator of the Vampire Savior: Aesthetic Edition hack. |
South America
| Name (English) | Name (Japanese) | Color | Location | Contact | Notes |
|---|---|---|---|---|---|
| The Seeker | シーカー | HP |
Brazil | https://twitter.com/ISW_TheSeeker | Commentates on NekoPunchi's streams, also known for his strong Lilith. |
