Vampire Savior/Bulleta: Difference between revisions
| (330 intermediate revisions by 15 users not shown) | |||
| Line 1: | Line 1: | ||
{{VSAV Character Intro|char=Bulleta|content= | |||
== Introduction == | == Introduction == | ||
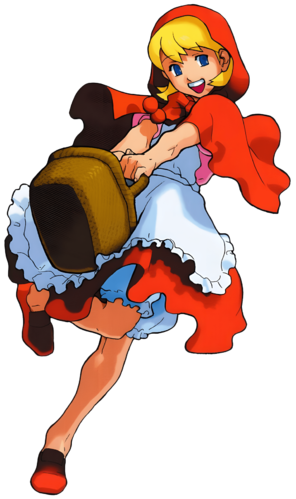
Bulleta (バレッタ) | '''Bulleta (バレッタ)''', also known as Baby Bonnie Hood, the Dark Hunter. | ||
A thrill seeker who enjoys the hunt, to the point where she does it for the sport of the hunt rather than the pursuit of money. Because of this, she is mainly described as an antithesis to Donovan. She hunts solely for sport, while Donovan hunts to find meaning in his existence. As a profit-seeking Dark Hunter, she pretends to act like a defenseless girl as a way to trick her prey in order for them to get closer to her. Many of her hunting skills include stabbing her opponents with weapons such as knives, and using guns for shooting down her prey. | |||
'''Bulleta''' is infamous for her execution ceiling. She has fantastic movement & projectile durability. This synergy makes her zoning & neutral game very effective. She is one of the few characters who gets wins with Time Overs. If you are willing to commit to an execution grind & play patiently, Bulleta is the right choice for you. | |||
== Gameplay == | |||
{{Content Box|content= | |||
| | '''Primary objectives:''' | ||
* Gain air-resets to setup her amazing jump-in offense. Chicken block to 9MP is strong | |||
* Use missiles as uncontested anti-airs | |||
* Leverage your movement to be evasive and play patiently | |||
* Abuse instant overheads to overwhelm the opponent | |||
* Convert combos when the opponent is standing into huge damage & corner positioning | |||
* Utilize dashing offensive options to open-up the opponent | |||
{{ProConTable | |||
| | |pros= | ||
* High mobility of ground dashing & double jumps allow lots of footsies & run away tactics | |||
= | * Low risk options that increase chances for Time Over victories | ||
* Extended combo damage on standing opponents | |||
* Amazing high/low/UB offense during air-to-ground & ground-to-ground interactions | |||
* Punch missile remains when hit, making it a very strong anti-air tool | |||
* EX Huntsman can uniquely punish certain full screen options, this is a rare tool in VSAV | |||
* High mobility enables effective ground-chasing during oki, adding to her overall offensive capability | |||
|cons= | |||
* Invincibility is gated behind meter | |||
* Most reliable anti-air is a charge move: has to be stocked ahead of time | |||
| | * Guard Cancel is very situational and does no damage | ||
* Link combos & offensive confirms create a high execution ceiling | |||
* Damage against air-state opponents is very low, making punishes for Demon Cradle & many other attacks a skewed risk/reward | |||
* Single hit damage is low, making combo-damage necessary - this is compounded by unfavorable ground-to-air interactions listed above | |||
* Lacks significant burst damage. Huge damage is gated behind standing opponents & a massive execution barrier | |||
}} | |||
}} | |||
}} | |||
{{TOClimit|2}} | |||
| | {{#vardefine:cargoTable|VSAV_MoveData}} | ||
[[/Data]] | |||
== Movement == | == Movement == | ||
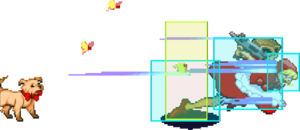
[[image: | [[image:vsav-bu-dash-hitbox.png|thumb|right|Bulleta's Forward Dash]] | ||
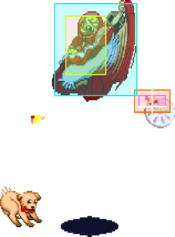
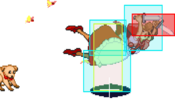
'''Walk:''' | '''Walk:''' Bulleta has an average walk speed. Dashing is usually better than walking, but dashing shifts your hurtbox down and away. Walking has a tall hurtbox that doesn't extend too far in front of you. Bulleta can use her walk as a spacing tool when the opponent is trying to tag her dashing hurtbox. | ||
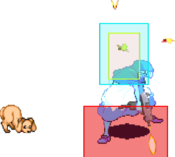
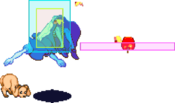
'''Dash:''' This is how you should be moving on the ground. Watching any Bulleta player, you'll notice how often dashing is required. The startup of the dash covers a large distance very quickly, allowing it to be 'cancelled' with any normal. If you only need to move a short distance, simply tap LP or press back out of your dash | '''Dash:''' This is how you should usually be moving on the ground. Watching any Bulleta player, you'll notice how often dashing is required. The startup of the dash covers a large distance very quickly, allowing it to be 'cancelled' with any normal or crouch or back input. If you only need to move a short distance, simply tap LP or press back out of your dash. | ||
'''Jump:''' Bulleta is the only character in the game with a double jump! This gives her very good | '''Double Jump:''' Bulleta is the only character in the game with a double jump! This gives her very good air positioning & run away, and also allows you to avoid many things on the ground. Use double jump where applicable to get in your opponent or stay evasive, but the most important thing about Bulleta's jump is to know when to chicken guard and when to air chain. | ||
== | === Normal Moves === | ||
==== Standing Normals ==== | |||
=====<font style="visibility:hidden; float:right">5LP</font>===== | |||
{{MoveDataCargo | |||
| title = 5 LP | |||
| input = 5LP | |||
| images = | |||
{{MoveDataCargoImage|BU_5LP|caption=}} | |||
| hitboxes = | |||
{{MoveDataCargoImage|BU_5LP|caption=|hitbox=yes}} | |||
| info = | |||
Crucial normal. Whiffs on all crouchers except Victor & Bishamon. Amazing frame advantage on hit or block, unlocking extended ground combos on standing opponents. This is also the go-to grounded UB normal. You can use dashing LP to stop Ireppa as a low committal solution, because it recovers so quickly. | |||
{{AttackDataCargo-VSAV/Query|BU_5LP}} | |||
}} | |||
=====<font style="visibility:hidden; float:right">5MP</font>===== | |||
{{MoveDataCargo | |||
| title = 5 MP | |||
| input = 5MP | |||
| images = | |||
{{MoveDataCargoImage|BU_5MP|caption=}} | |||
| hitboxes = | |||
{{MoveDataCargoImage|BU_5MP|caption=|hitbox=yes}} | |||
| info = | |||
Crucial normal that hits all crouchers. Used as a pressure extender, combo starter, and conditions your opponent to hold down+back for you to land a command throw. Has two input overlaps you must avoid: the proximity normal 5MP and the dash normal 66MP. To get this at close range, it must be input as 66~5MP, since Bulleta cannot use proximity normals while dashing. On a close 66~5MP hit, there is a small window to link into 5LP, 2LP, or 2LK & continue a combo. | |||
{{AttackDataCargo-VSAV/Query|BU_5MP}} | |||
}} | |||
| | =====<font style="visibility:hidden; float:right">5HP</font>===== | ||
| | {{MoveDataCargo | ||
| | | title = 5 HP | ||
| input = 5HP | |||
| images = | |||
{{MoveDataCargoImage|BU_5HP|caption=}} | |||
| hitboxes = | |||
{{MoveDataCargoImage|BU_5HP|caption=|hitbox=yes}} | |||
| info = | |||
Terrible move that you will get on accident while trying to pushblock. Throw with 6MP so you don't leak this normal, and avoid starting your pushblock on this button if possible. Has a niche use to create pushblock traps when cancelled into 5HK or 3HK. | |||
{{AttackDataCargo-VSAV/Query|BU_5HP}} | |||
}} | |||
=====<font style="visibility:hidden; float:right">5LK</font>===== | |||
| | {{MoveDataCargo | ||
| | | title = 5 LK | ||
| | | input = 5LK | ||
| images = | |||
{{MoveDataCargoImage|BU_5LK|caption=}} | |||
| hitboxes = | |||
{{MoveDataCargoImage|BU_5LK|caption=|hitbox=yes}} | |||
| info = | |||
Niche move. It hits crouchers and has a large window to renda cancel to 2LK, leaving you +9 for a 2MP 214P ender. It's a reasonable choice for the first button in a pushblock sequence. Useful to set up a tick throw from a dash. | |||
{{AttackDataCargo-VSAV/Query|BU_5LK}} | |||
}} | |||
Bulleta | =====<font style="visibility:hidden; float:right">5MK</font>===== | ||
{{MoveDataCargo | |||
| title = 5 MK | |||
| input = 5MK | |||
| images = | |||
{{MoveDataCargoImage|BU_5MK|caption=}} | |||
| hitboxes = | |||
{{MoveDataCargoImage|BU_5MK|caption=|hitbox=yes}} | |||
| info = | |||
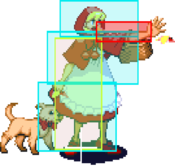
Situational anti-air, but still easily Bulleta's best grounded antiair outside of pushblock. Use your dash to space yourself appropriately for the antiair to work. Can be used aggressively out of a dash to catch jumps, like dash MP but it hits a little higher. Be ready to capitalize on the air reset afterwards. | |||
{{AttackDataCargo-VSAV/Query|BU_5MK}} | |||
}} | |||
=====<font style="visibility:hidden; float:right">5HK</font>===== | |||
{{MoveDataCargo | |||
| title = 5 HK | |||
| input = 5HK | |||
| | | images = | ||
| | {{MoveDataCargoImage|BU_5HK|caption=}} | ||
| | | hitboxes = | ||
{{MoveDataCargoImage|BU_5HK|caption=|hitbox=yes}} | |||
| info = | |||
You can chain into this to punish buttons & GC attempts. It has some uses on Oki as it stays active guaranteeing a meaty attack. Travels at a much closer distance than 3HK. | |||
{{AttackDataCargo-VSAV/Query|BU_5HK}} | |||
}} | |||
==== Close Normals ==== | |||
=====<font style="visibility:hidden; float:right">CL.5LP</font>===== | |||
| | {{MoveDataCargo | ||
| | | title = Close 5LP | ||
| | | input = cl.5LP | ||
| images = | |||
{{MoveDataCargoImage|BU_CL_5LP|caption=}} | |||
| hitboxes = | |||
{{MoveDataCargoImage|BU_CL_5LP|caption=|hitbox=yes}} | |||
| info = | |||
Used in grounded UBs & occasionally as a low commitment option for stuffing Ireppa. Bishamon & Victor can't crouch under it, so abuse it on them. | |||
{{AttackDataCargo-VSAV/Query|BU_CL_5LP}} | |||
}} | |||
This | =====<font style="visibility:hidden; float:right">CL.5MP</font>===== | ||
{{MoveDataCargo | |||
| title = Close 5MP | |||
| input = cl.5MP | |||
| images = | |||
{{MoveDataCargoImage|BU_CL_5MP|caption=}} | |||
| hitboxes = | |||
{{MoveDataCargoImage|BU_CL_5MP|caption=|hitbox=yes}} | |||
| info = | |||
Much slower than far 5MP with bad hitbox & hurtbox. Can't be used at the spacing where it would be a useful anti-air. This is one of Bulleta's garbage normals; avoid it by dashing before you press MP. | |||
{{AttackDataCargo-VSAV/Query|BU_CL_5MP}} | |||
}} | |||
| | =====<font style="visibility:hidden; float:right">CL.5LK</font>===== | ||
| | {{MoveDataCargo | ||
| | | title = Close LK | ||
| input = Cl.5LK | |||
| images = | |||
{{MoveDataCargoImage|BU_CL_5LK|caption=}} | |||
| hitboxes = | |||
{{MoveDataCargoImage|BU_CL_5LK|caption=|hitbox=yes}} | |||
| info = | |||
Not a great move & it rarely occurs in competitive play. I see it when someone leaks a tech-Hit attempt, but 2LK is better in this scenario. | |||
{{AttackDataCargo-VSAV/Query|BU_CL_5LK}} | |||
}} | |||
==== Crouching Normals ==== | |||
| | =====<font style="visibility:hidden; float:right">2LP</font>===== | ||
| | {{MoveDataCargo | ||
| | | title = 2 LP | ||
| input = 2LP | |||
| images = | |||
{{MoveDataCargoImage|BU_2LP|caption=}} | |||
| hitboxes = | |||
{{MoveDataCargoImage|BU_2LP|caption=|hitbox=yes}} | |||
| info = | |||
Crucial move, tied for fastest poke and used often in combos. Use this instead of 5LP when close, you can combo into renda 2LP or link 2MP 214P. Against standing, you can combo into renda 5LP into dash extensions. It's important to understand that Bulleta 2LP 5LP gives renda bonus on 5LP, leaving it +13f. | |||
{{AttackDataCargo-VSAV/Query|BU_2LP}} | |||
}} | |||
=====<font style="visibility:hidden; float:right">2MP</font>===== | |||
|} | {{MoveDataCargo | ||
| title = 2 MP | |||
| input = 2MP | |||
| images = | |||
{{MoveDataCargoImage|BU_2MP|caption=}} | |||
| hitboxes = | |||
{{MoveDataCargoImage|BU_2MP|caption=|hitbox=yes}} | |||
| info = | |||
Crucial normal, great low hitting poke and combo tool. This button is one of Bulleta's best disjointed hitboxes. It is also a go-to conditioning tool to catch pushblock or mashers. 2MP to 214P is the easiest way to combo a knockdown, and her most common combo ender. Bulleta will often link into this from 66~5LP, renda 2LK, renda 2LP, or any jump-in. | |||
{{AttackDataCargo-VSAV/Query|BU_2MP}} | |||
}} | |||
== | =====<font style="visibility:hidden; float:right">2HP</font>===== | ||
{{MoveDataCargo | |||
| title = 2 HP | |||
| input = 2HP | |||
| images = | |||
{{MoveDataCargoImage|BU_2HP|caption=}} | |||
| hitboxes = | |||
{{MoveDataCargoImage|BU_2HP|caption=|hitbox=yes}} | |||
| info = | |||
Terrible move that you will get on accident while trying to pushblock. Has a niche use to create pushblock traps when cancelled into 5HK or 3HK. | |||
{{AttackDataCargo-VSAV/Query|BU_2HP}} | |||
}} | |||
=====<font style="visibility:hidden; float:right">2LK</font>===== | |||
| | {{MoveDataCargo | ||
| | | title = 2 LK | ||
| input = 2LK | |||
| images = | |||
{{MoveDataCargoImage|BU_2LK|caption=}} | |||
| hitboxes = | |||
{{MoveDataCargoImage|BU_2LK|caption=|hitbox=yes}} | |||
{{AttackDataCargo-VSAV/Query|BU_2LK}} | |||
| info = | |||
Crucial normal. Tied with 2LP and 5LP for Bulleta's fastest button, hitting on frame 5. Can be renda cancelled into itself (2LK 2LK, quickly) or linked into itself (2LK 2LK, slowly), but the link into itself is not a useful combo tool. It has multiple combo options, but the easiest conversion is renda 2LK into 2MP 214P. A more optimal conversion is linking into 2LP, which gives you time to confirm a standing-only 5LP combo. If they're crouching, you can instead finish by renda 2LP into 2MP 214P. | |||
Used as an unblockable low after your opponent stand-blocks a deep J.HK. Good button to begin your crouching pushblock input with. | |||
{{AttackDataCargo-VSAV/Query|BU_2LK}} | |||
}} | |||
=====<font style="visibility:hidden; float:right">2MK</font>===== | |||
| | {{MoveDataCargo | ||
| | | title = 2 MK | ||
| | | input = 2MK | ||
| images = | |||
{{MoveDataCargoImage|BU_2MK|caption=}} | |||
| hitboxes = | |||
{{MoveDataCargoImage|BU_2MK|caption=|hitbox=yes}} | |||
| info = | |||
Use this as an extra chain attack against wide opponents like Gallon, Lei-Lei & Q-Bee, which might look like: (deep jump-in) 2MP 2MK 2HK. Much less range than 2MP, but much less hurtbox extension. | |||
{{AttackDataCargo-VSAV/Query|BU_2MK}} | |||
}} | |||
=====<font style="visibility:hidden; float:right">2HK</font>===== | |||
{{MoveDataCargo | |||
| title = 2 HK | |||
| input = 2HK | |||
| images = | |||
{{MoveDataCargoImage|BU_2HK|caption=}} | |||
| hitboxes = | |||
{{MoveDataCargoImage|BU_2HK|caption=|hitbox=yes}} | |||
| info = | |||
Short range knockdown, used after a corner walk-through as a chain ender to maintain highly advantageous Okizeme, as compared to her go-to knockdown of 214P. | |||
{{AttackDataCargo-VSAV/Query|BU_2HK}} | |||
}} | |||
==== Air Normals ==== | |||
== | =====<font style="visibility:hidden; float:right">J.LP</font>===== | ||
{{MoveDataCargo | |||
| title = J LP | |||
| input = J.LP | |||
| images = | |||
{{MoveDataCargoImage|BU_J_LP|caption=}} | |||
| hitboxes = | |||
{{MoveDataCargoImage|BU_J_LP|caption=|hitbox=yes}} | |||
| info = | |||
Used as a Zuurashi jump-in to enable extended ground combos on hit. Used to counter-play Demitri's Midnight Pleasure with an ascending 9J.LP chain. Can enable some ambiguous which-way offense if you are directly above them as they wake-up. This is also used for starting re-jump combos on specific characters like Q-Bee. | |||
{{AttackDataCargo-VSAV/Query|BU_J_LP}} | |||
}} | |||
=====<font style="visibility:hidden; float:right">8J.MP</font>===== | |||
{{MoveDataCargo | |||
| title = 8J MP | |||
| input = 8J.MP | |||
| images = | |||
{{MoveDataCargoImage|BU_8J_MP|caption=}} | |||
| hitboxes = | |||
{{MoveDataCargoImage|BU_8J_MP|caption=|hitbox=yes}} | |||
| info = | |||
Used to hold the corner without over-committing to an anti-air. Just 8-Jump with ascending 8J.MP and react accordingly to the hit, block or whiff scenario. | |||
{{AttackDataCargo-VSAV/Query|BU_8J_MP}} | |||
}} | |||
: | =====<font style="visibility:hidden; float:right">9J.MP</font>===== | ||
{{MoveDataCargo | |||
| title = 9J MP | |||
| input = 9J.MP | |||
| images = | |||
{{MoveDataCargoImage|BU_J_MP|caption=}} | |||
| hitboxes = | |||
{{MoveDataCargoImage|BU_J_MP|caption=|hitbox=yes}} | |||
| info = | |||
Crucial normal, a phenomenal instant-overhead that works on every character except QB. Against the rest of the short crouchers (MO, LI, BU), the IOH requires that jMP be performed on the first frame possible after jump, which is inconsistent due to frameskip. Amazing jump-in tool that enables 50/50s with a J.MK or a J.HK UB 2LK route. This move is so fast with great disjoint + reach that it is her go-to solution after a chicken block. | |||
{{AttackDataCargo-VSAV/Query|BU_J_MP}} | |||
}} | |||
== | =====<font style="visibility:hidden; float:right">8J.HP</font>===== | ||
{{MoveDataCargo | |||
| title = 8J HP | |||
| input = 8J.HP | |||
| images = | |||
{{MoveDataCargoImage|BU_8J_HP|caption=}} | |||
| hitboxes = | |||
{{MoveDataCargoImage|BU_8J_HP|caption=|hitbox=yes}} | |||
| info = | |||
Not an amazing tool, but seldomly used in the same scenario that 8 Jump J.MP is detailed above. Bulleta likes to descend with this in a specific time that allows 8J.HK to become active the moment Bulleta lands. | |||
{{AttackDataCargo-VSAV/Query|BU_8J_HP}} | |||
}} | |||
: | =====<font style="visibility:hidden; float:right">9J.HP</font>===== | ||
{{MoveDataCargo | |||
| title = 9J HP | |||
| input = 9J.HP | |||
| images = | |||
{{MoveDataCargoImage|BU_J_HP|caption=}} | |||
| hitboxes = | |||
{{MoveDataCargoImage|BU_J_HP|caption=|hitbox=yes}} | |||
| info = | |||
Crucial normal. The only good version of HP, used frequently in Bulleta's air chains. It is also reliable as an air chain that drags the opponent down to setup a grounded UB. Aim to descend with 9J.HP at max range then once you land you can go low or IOH or dash in for more advantage. Has almost no hitstop, so you need to get used to inputting your ground followup very quickly. Extremely advantageous on deep hit (+15 at best), which can be used to set up character-specific re-jump combos. | |||
{{AttackDataCargo-VSAV/Query|BU_J_HP}} | |||
}} | |||
== | =====<font style="visibility:hidden; float:right">J.LK</font>===== | ||
{{MoveDataCargo | |||
| title = J LK | |||
| input = J.LK | |||
| images = | |||
{{MoveDataCargoImage|BU_J_LK|caption=}} | |||
| hitboxes = | |||
{{MoveDataCargoImage|BU_J_LK|caption=|hitbox=yes}} | |||
| info = | |||
Used as an alternate IOH solution against Tall crouchers, used as a combo starter in select counter plays enabling extended ground dash combos (Lilith's Soul Flash is an example) | |||
{{AttackDataCargo-VSAV/Query|BU_J_LK}} | |||
}} | |||
=====<font style="visibility:hidden; float:right">8J.MK</font>===== | |||
:> = | {{MoveDataCargo | ||
| title = 8J MK | |||
| input = 8J.MK | |||
| images = | |||
{{MoveDataCargoImage|BU_8J_MK|caption=}} | |||
| hitboxes = | |||
{{MoveDataCargoImage|BU_8J_MK|caption=|hitbox=yes}} | |||
| info = | |||
Used in a specific corner 8 jump combo that works as a throw bait & can maintain advantage on block. This move is also better for landing on a grounded (crouching) opponent in front of you than 8J.MP due to its lower hit box | |||
{{AttackDataCargo-VSAV/Query|BU_8J_MK}} | |||
}} | |||
=== | =====<font style="visibility:hidden; float:right">9J.MK</font>===== | ||
{{MoveDataCargo | |||
| title = 9J MK | |||
| input = 9J.MK | |||
| images = | |||
{{MoveDataCargoImage|BU_J_MK|caption=}} | |||
| hitboxes = | |||
{{MoveDataCargoImage|BU_J_MK|caption=|hitbox=yes}} | |||
| info = | |||
Crucial normal, excellent cross-up okizeme tool & occasional air chain filler. Cancel into this after IOH 9J.MP to improve recovery. If a grounded opponent blocks this, you can't chain into 9J.HP afterward on most characters (possible on Demitri). | |||
{{AttackDataCargo-VSAV/Query|BU_J_MK}} | |||
}} | |||
=====<font style="visibility:hidden; float:right">9J.HK</font>===== | |||
{{MoveDataCargo | |||
| title = 9J HK | |||
| input = 9J.HK | |||
| images = | |||
{{MoveDataCargoImage|BU_J_HK|caption=}} | |||
| hitboxes = | |||
{{MoveDataCargoImage|BU_J_HK|caption=|hitbox=yes}} | |||
| info = | |||
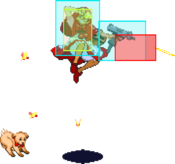
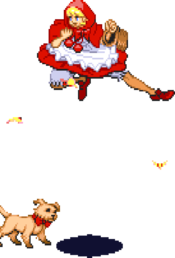
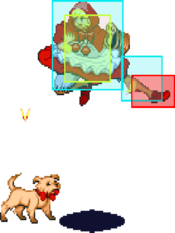
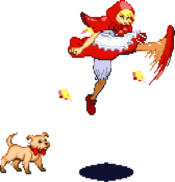
Crucial normal, a disjointed projectile attack that causes a fire knockdown on hit and enables a pseudo-unblockable landing-low. Pretty solid hit-box so it can challenge & win most conventional anti-airs. This is great for setting up proximity block approaches very high up in the air. Please check the BUGs section to better understand her land-canceling nuance & pseudo-unblockable details. | |||
{{AttackDataCargo-VSAV/Query|BU_J_HK}} | |||
}} | |||
==== Command Normals ==== | |||
=====<font style="visibility:hidden; float:right">Tricky Basket </font>===== | |||
{{MoveDataCargo | |||
| title = Tricky Basket | |||
| input = 6MP / 4MP | |||
| images = | |||
{{MoveDataCargoImage|BU_6MP|caption=}} | |||
| hitboxes = | |||
{{MoveDataCargoImage|BU_6MP|caption=|hitbox=yes}} | |||
| info = | |||
Use it to bully Anakaris (2LP 6MP 2LP 6MP...) or tick into an ES command throw. You can also use it to corpse hop during fire knockdowns. 4MP can be used to retreat while maintaining charge. | |||
{{AttackDataCargo-VSAV/Query|BU_6MP}} | |||
}} | |||
=== | =====<font style="visibility:hidden; float:right">Surprise & Hop</font>===== | ||
{{MoveDataCargo | |||
| title = Surprise & Hop | |||
| input = 6MK / 4MK | |||
| images = | |||
{{MoveDataCargoImage|BU_6MK|caption=}} | |||
| hitboxes = | |||
{{MoveDataCargoImage|BU_6MK|caption=|hitbox=yes}} | |||
| info = | |||
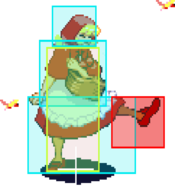
4MK is a fast, active advancing normal that maintains charge. It also has short range and can be throw punishable on hit, making it a tricky move to apply. Airborne on frame 3, which can be used to dodge throws. Can be made safe or slightly plus if used at a good spacing. 6MK is the same normal, but you don't get charge. | |||
{{AttackDataCargo-VSAV/Query|BU_6MK}} | |||
}} | |||
=====<font style="visibility:hidden; float:right">3HK</font>===== | |||
{{MoveDataCargo | |||
| title = 3 HK | |||
| input = 3HK | |||
| images = | |||
{{MoveDataCargoImage|BU_3HK|caption=}} | |||
| hitboxes = | |||
{{MoveDataCargoImage|BU_3HK|caption=|hitbox=yes}} | |||
| info = | |||
Frame-Trap with this to bait tech hits or movement as the mine is not displaced by the push back. Prioritize this in the corner as it combos from 2MP & allows an extended fire knockdown. It deals good damage & unlocks unique Okizeme routes in the corner. | |||
{{AttackDataCargo-VSAV/Query|BU_3HK}} | |||
}} | |||
:: | =====<font style="visibility:hidden; float:right">Tell Me Why</font>===== | ||
{{MoveDataCargo | |||
| title = Tell Me Why | |||
| input = 2 LK MK HK | |||
| images = | |||
{{MoveDataCargoImage|BU_2LK-MK-HK|caption=}} | |||
| hitboxes = | |||
{{MoveDataCargoImage|BU_2LK-MK-HK|caption=|hitbox=yes}} | |||
| info = | |||
Gimmicky & not effective defensive tool that's only notable feature is to have no throw enabled box, so you can make a hard call out on things like Midnight Bliss | |||
{{AttackDataCargo-VSAV/Query|BU_2LK-MK-HK}} | |||
}} | |||
==== Dashing Normals ==== | |||
=====<font style="visibility:hidden; float:right">Stumble & Blade</font>===== | |||
{{MoveDataCargo | |||
| title = Stumble & Blade | |||
| input = 6[6] MP / 4[4]MP | |||
| images = | |||
{{MoveDataCargoImage|BU_66_5MP|caption=}} | |||
| hitboxes = | |||
{{MoveDataCargoImage|BU_66_5MP|1|caption=|hitbox=yes}} | |||
{{MoveDataCargoImage|BU_66_5MP|2|caption=|hitbox=yes}} | |||
| info = | |||
Overhead attack that can be used to finish out a bat. Learn to avoid leaking this move, it's easy to get it by accident while trying to get 66~5MP. | |||
{{AttackDataCargo-VSAV/Query|BU_66_5MP}} | |||
}} | |||
==== Normal Throws ==== | |||
=====<font style="visibility:hidden; float:right">6MP or 6HP</font>===== | |||
:: | {{MoveDataCargo | ||
| title = P THROW | |||
| input = 6MP or 6HP | |||
| images = | |||
{{MoveDataCargoImage|BU_6MP_or_6HP|caption=}} | |||
| hitboxes = | |||
{{MoveDataCargoImage|BU_6MP_or_6HP|caption=|hitbox=yes}} | |||
| info = | |||
Prioritize throwing with MP instead of HP, since you don't want to risk getting stuck with her uzi gun, would the throw whiff. Bulleta recovers backwards after this throw. | |||
{{AttackDataCargo-VSAV/Query|BU_6MP_or_6HP}} | |||
}} | |||
=====<font style="visibility:hidden; float:right">J.6P or J.4P</font>===== | |||
{{MoveDataCargo | |||
| title = AIR THROW | |||
| input = J.6P or J.4P | |||
| images = | |||
{{MoveDataCargoImage|BU_J_6P_or_J_4P|caption=}} | |||
| hitboxes = | |||
{{MoveDataCargoImage|BU_J_6P_or_J_4P|caption=|hitbox=yes}} | |||
| info = | |||
Due to Bulleta's strength of Chicken Blocking into 9J.MP + high mobility, you should be landing this often in matches. Bulleta recovers backwards after this throw. | |||
{{AttackDataCargo-VSAV/Query|BU_J_6P_or_J_4P}} | |||
}} | |||
=== Special Moves === | |||
=== | ==== High Smile & Missile ==== | ||
=====<font style="visibility:hidden; float:right">[4],6P</font>===== | |||
{{MoveDataCargo | |||
| title = HIGH SMILE & MISSILE | |||
| input = [4],6P | |||
| images = | |||
{{MoveDataCargoImage|BU_[4]_6P|caption=Normal}} | |||
{{MoveDataCargoImage|BU_[4]_6PP|caption=Es}} | |||
| hitboxes = | |||
{{MoveDataCargoImage|BU_[4]_6P|caption=Normal|hitbox=yes}} | |||
{{MoveDataCargoImage|BU_[4]_6PP|caption=Es|hitbox=yes}} | |||
| info = | |||
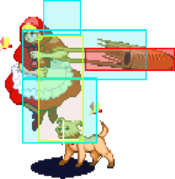
Crucial move. It builds your meter, stops rushdown, and keeps you safe. Like any fireball, you want to use certain versions in certain situations. Missiles stay active when Bulleta is hit so trades are always in her favor. Bulleta can dash 'with' her missiles due to the huge dash range, and it provides a good wall to close the gap. This doesn't apply to ES, despite it going farther, because multiple hits are easier to tech or guard cancel. Bulleta cannot use a missile while another is on the screen, unless in Dark Force or Lei-Lei reflected it. | |||
{{AttackDataCargo-VSAV/Query|BU_[4]_6P}} | |||
:'''(LP Version):''' This missile is best used to stop steep angled or IAD pressure. Think Q-Bee rushdown or Talbain jump-ins. It can also be worked into your close range pressure game. | |||
:'''(MP Version):''' Nothing to note | |||
:'''(HP Version):''' Use this on block as a frame-trap that punishes the opponents jumps or buttons. | |||
{{AttackDataCargo-VSAV/Query|BU_[4]_6PP}} | |||
'''(ES Version):''' Multiple hits with the only downfall being that its easily teched/guard cancelled, and it can also be comboed into off two low light normals (easier timing in the corner). Decent damage safe poke that is worth the meter. | |||
}} | |||
==== Low Smile & Missle ==== | |||
=====<font style="visibility:hidden; float:right">[4],6K</font>===== | |||
{{MoveDataCargo | |||
| title = LOW SMILE & MISSILE | |||
| input = [4],6K | |||
| images = | |||
{{MoveDataCargoImage|BU_[4]_6K|caption=Normal}} | |||
{{MoveDataCargoImage|BU_[4]_6KK|caption=Es}} | |||
| hitboxes = | |||
{{MoveDataCargoImage|BU_[4]_6K|caption=Normal|hitbox=yes}} | |||
{{MoveDataCargoImage|BU_[4]_6KK|caption=Es|hitbox=yes}} | |||
| info = | |||
Crucial move. This covers ground approaches & encourage your opponent to jump in. | |||
{{AttackDataCargo-VSAV/Query|BU_[4]_6K}} | |||
Vary your strengths to vary your timings & stay unpredictable | |||
{{AttackDataCargo-VSAV/Query|BU_[4]_6KK}} | |||
Good combo damage & also maintains offense on block, so often Bulleta's will route into it on hit or block. Decent damage safe poke that is worth the meter. | |||
}} | |||
==== Hop & Missile ==== | |||
=== | =====<font style="visibility:hidden; float:right">[2]8P</font>===== | ||
'' | {{MoveDataCargo | ||
| title = HOP & MISSILE | |||
| input = [2]8P | |||
| images = | |||
{{MoveDataCargoImage|BU_[2]8P|caption=Normal}} | |||
{{MoveDataCargoImage|BU_[2]8PP|caption=Es}} | |||
| hitboxes = | |||
{{MoveDataCargoImage|BU_[2]8P|caption=Normal|hitbox=yes}} | |||
{{MoveDataCargoImage|BU_[2]8PP|caption=Es|hitbox=yes}} | |||
| info = | |||
Terrible move with no use in competitive play | |||
{{AttackDataCargo-VSAV/Query|BU_[2]8P}} | |||
* '''(LP Version):''' Smallest angle shot. | |||
* '''(MP Version):''' Medium angle shot. | |||
* '''(HP Version):''' Larger angle shot. | |||
{{AttackDataCargo-VSAV/Query|BU_[2]8PP}} | |||
* '''(ES Version):''' Travels full screen and may be used to punish or counter play specific things, like an ES Ice Tower. | |||
}} | |||
==== Cheer & Fire ==== | |||
=====<font style="visibility:hidden; float:right">623P</font>===== | |||
{{MoveDataCargo | |||
| title = CHEER & FIRE | |||
| input = 623P | |||
| images = | |||
{{MoveDataCargoImage|BU_623LP|caption=Normal}} | |||
{{MoveDataCargoImage|BU_623PP|caption=Es}} | |||
| hitboxes = | |||
{{MoveDataCargoImage|BU_623LP|1|caption=|hitbox=yes}} | |||
: | {{MoveDataCargoImage|BU_623LP|2|caption=Normal|hitbox=yes}} | ||
{{MoveDataCargoImage|BU_623PP|caption=Es|hitbox=yes}} | |||
| info = | |||
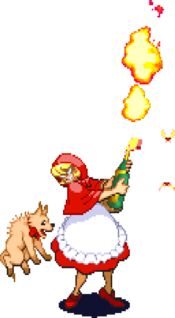
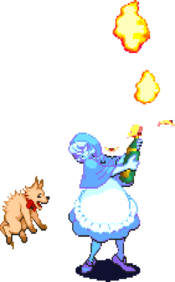
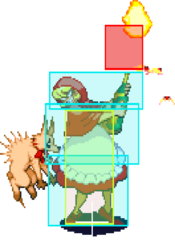
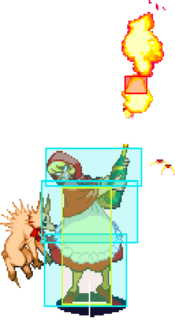
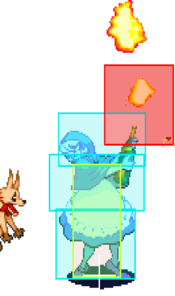
Bulleta cannot use molotov while another projectile is on the screen. Use this to cover the skies against characters like Jedah, Q-Bee & Morrigan | |||
{{AttackDataCargo-VSAV/Query|BU_623LP}} | |||
This version is good to kara-cancel into for meter building | |||
{{AttackDataCargo-VSAV/Query|BU_623MP}} | |||
Terrible move with no use in competitive play | |||
{{AttackDataCargo-VSAV/Query|BU_623HP}} | |||
Terrible move with no use in competitive play | |||
{{AttackDataCargo-VSAV/Query|BU_623PP}} | |||
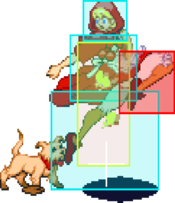
'''(ES Version):''' The move stays out much longer and moves up and down. Use this in the same scenarios as the LP version, where you can spend meter to increase the damage. Lastly, there is great Cheap Kill potential with this move if the opponent air block it. | |||
}} | |||
==== Shyness & Strike ==== | |||
=====<font style="visibility:hidden; float:right">214P</font>===== | |||
{{MoveDataCargo | |||
| title = SHYNESS & STRIKE | |||
| input = 214P | |||
| images = | |||
{{MoveDataCargoImage|BU_214LP|caption=Normal}} | |||
{{MoveDataCargoImage|BU_214PP|caption=Es}} | |||
| hitboxes = | |||
{{MoveDataCargoImage|BU_214LP|caption=Normal|hitbox=yes}} | |||
{{MoveDataCargoImage|BU_214PP|caption=Es|hitbox=yes}} | |||
| info = | |||
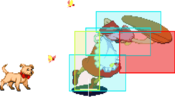
It is an effective combo ender tool because it knocks down. If you hold the punch button she will keep spinning the basket and it will charge up. The LP, MP and HP versions are all the same, so use whichever is most comfortable in your combo input. You get a guaranteed pursuit after this move. This move is air-state unblockable. | |||
{{AttackDataCargo-VSAV/Query|BU_214LP}} | |||
Combo ender tool | |||
{{AttackDataCargo-VSAV/Query|BU_214MP}} | |||
Combo ender tool | |||
{{AttackDataCargo-VSAV/Query|BU_214HP}} | |||
Combo ender tool | |||
{{AttackDataCargo-VSAV/Query|BU_214PP}} | |||
Terrible move not used in competitive play. | |||
}} | |||
=== | ==== Guard Cancel ==== | ||
=====<font style="visibility:hidden; float:right">623K</font>===== | |||
{{MoveDataCargo | |||
| title = JEALOUSY & FAKE | |||
| input = 623K | |||
| images = | |||
{{MoveDataCargoImage|BU_623K|caption=}} | |||
| hitboxes = | |||
{{MoveDataCargoImage|BU_623K|caption=|hitbox=yes}} | |||
| info = | |||
This move has 29F invulnerability but Bulleta is vulnerable for the last 10F of recovery. Due to the side switch nature of this move, it can be used to escape the corner or enable a punish on select full screen moves like Finishing Shower. | |||
{{AttackDataCargo-VSAV/Query|BU_623K}} | |||
}} | |||
==== Command Throws ==== | |||
=== | =====<font style="visibility:hidden; float:right">632[4]P</font>===== | ||
' | {{MoveDataCargo | ||
| title = SENTIMENTAL TYPHOON | |||
| input = 632[4] MP or HP | |||
| images = | |||
{{MoveDataCargoImage|BU_632[4]P|caption=Normal}} | |||
{{MoveDataCargoImage|BU_632[4]PP|caption=Es}} | |||
| hitboxes = | |||
{{MoveDataCargoImage|BU_632[4]P|caption=Normal|hitbox=yes}} | |||
{{MoveDataCargoImage|BU_632[4]PP|caption=Es|hitbox=yes}} | |||
| info = | |||
An effective command throw that is core to the offense RPS of VSAV. If you expect people to be 1-hit teching your attacks, just dash and ES throw them. This adds a 3rd layer of offense to Bulleta's onslaught. | |||
{{AttackDataCargo-VSAV/Query|BU_632[4]P}} | |||
{{AttackDataCargo-VSAV/Query|BU_632[4]PP}} | |||
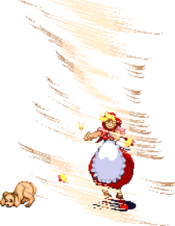
Crucial move, the ES version is an excellent way to spend meter. This can be done directly out of dash without losing her low profile state, allowing you to dash under moves like Bee 5MP. The regular version must be input with MP or HP, but you should prefer MP to avoid HP leaks. The ES version can be input with any two punches, LP+MP is preferred. | |||
When this move is input normally (full half circle 63214), it has an input overlap with 214P, which will come out if the opponent is not in range for the grab. This is a dreadful leak, and the only way to fix it is by omitting the 1 in the half circle input. The input 6324LP+MP is an extremely useful option select that will either give ES throw or 5LP, one of Bulleta's safest buttons to whiff. For this OS, it's important to know that you can do the 632 input while dashing without breaking your dash: think of it as 6632, then 4+LP+MP. | |||
This throw, as a reversal, will beat meaties (if in range). This can be input as (hold P), 6324 (release P). You can also do 63241 before releasing P to block low. Avoid 63214 so you don't wake up with reversal 214P. | |||
}} | |||
==== Pursuits ==== | |||
=====<font style="visibility:hidden; float:right">8P or 8K</font>===== | |||
: | {{MoveDataCargo | ||
| title = PURSUIT | |||
| input = 8P or 8K | |||
| images = | |||
{{MoveDataCargoImage|BU_8P_or_8K|caption=Normal}} | |||
{{MoveDataCargoImage|BU_8PP_or_8KK|caption=}} | |||
| hitboxes = | |||
{{MoveDataCargoImage|BU_8P_or_8K|1|caption=|hitbox=yes}} | |||
{{MoveDataCargoImage|BU_8P_or_8K|2|caption=Normal|hitbox=yes}} | |||
{{MoveDataCargoImage|BU_8PP_or_8KK|1|caption=|hitbox=yes}} | |||
{{MoveDataCargoImage|BU_8PP_or_8KK|2|caption=|hitbox=yes}} | |||
{{MoveDataCargoImage|BU_8PP_or_8KK|3|caption=|hitbox=yes}} | |||
{{MoveDataCargoImage|BU_8PP_or_8KK|4|caption=Es|hitbox=yes}} | |||
| info = | |||
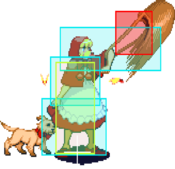
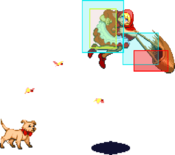
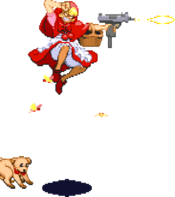
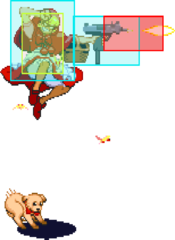
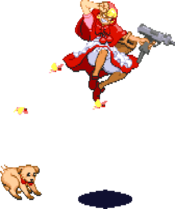
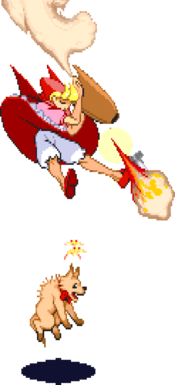
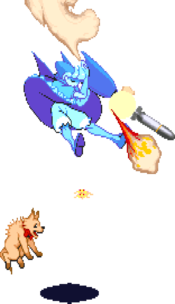
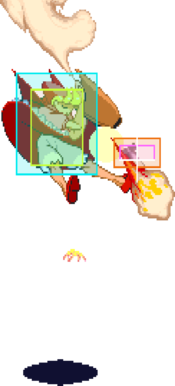
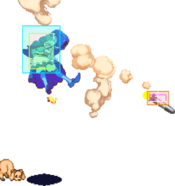
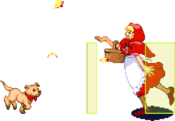
Bulleta leaps a considerable distance and shoots downward onto her opponent, getting pushed back upwards. Whiff or not, this pursuit is essential to Bulleta's gameplay. It homes in to wherever the opponent is knocked down while still being very fast. Bulleta maintains an offensive advantage after a pursuit. It's not a super strong mix, but you can keep the offense go-go-going. Aim to close as much distance as possible before inputting the pursuit to maximize your post pursuit Okizeme opportunity. | |||
{{AttackDataCargo-VSAV/Query|BU_8P_or_8K}} | |||
{{AttackDataCargo-VSAV/Query|BU_8PP_or_8KK}} | |||
This does big damage & often is used to deathblow. ES Pursuit enables the Mirage Reduction Bug. | |||
}} | |||
==== Ex Moves ==== | |||
: | =====<font style="visibility:hidden; float:right">412[6]PP</font>===== | ||
{{MoveDataCargo | |||
| title = COOL HUNTING | |||
| input = 412[6]PP | |||
| images = | |||
{{MoveDataCargoImage|BU_412[6]PP|caption=}} | |||
| hitboxes = | |||
{{MoveDataCargoImage|BU_412[6]PP|caption=|hitbox=yes}} | |||
| info = | |||
Good for air state Cheap Kills & specific punishes like Jedah using a full screen Dio Sega. The lower row of missiles do not cause chip damage. It is extremely punishable on whiff | |||
{{AttackDataCargo-VSAV/Query|BU_412[6]PP_C}} | |||
{{AttackDataCargo-VSAV/Query|BU_412[6]PP}} | |||
}} | |||
== | =====<font style="visibility:hidden; float:right">412[6]KK</font>===== | ||
{{MoveDataCargo | |||
| title = BEAUTIFUL MEMORY | |||
| input = 412[6]KK | |||
| images = | |||
{{MoveDataCargoImage|BU_412[6]KK|caption=}} | |||
| hitboxes = | |||
{{MoveDataCargoImage|BU_412[6]KK|caption=|hitbox=yes}} | |||
| info = | |||
Bulleta's go-to reversal tool. It does not full connect when the opponent is in an air-state. Bulleta is invincible until the first frame she is active, due to this it does often trade. The trade is in Bulleta's favor as you can link a combo here. The move is highly punishable on block. | |||
{{AttackDataCargo-VSAV/Query|BU_412[6]KK}} | |||
}} | |||
: | =====<font style="visibility:hidden; float:right">632[4]KK</font>===== | ||
{{MoveDataCargo | |||
| title = APPLE FOR YOU | |||
| input = 632[4]KK | |||
| images = | |||
{{MoveDataCargoImage|BU_632[4]KK|caption=}} | |||
| hitboxes = | |||
{{MoveDataCargoImage|BU_632[4]KK|caption=|hitbox=yes}} | |||
| info = | |||
An unblockable attack that only connects when the opponent is standing. Awful on whiff, but it does slightly more damage than 6324PP, so it has some use as a punish option. Not safe as a reversal option (loses to meaties). | |||
{{AttackDataCargo-VSAV/Query|BU_632[4]KK}} | |||
}} | |||
== Dark Force == | |||
''' | ''' The Killing Time - Same strength P + K''' | ||
: All versions are the same. All of Bulleta's punches will be replaced with an instant missile that corresponds to the strength pushed, but you will keep all your kicks. That means you can dash into missiles, do multiple missiles at once, etc. Jumping and pressing will do the [2]8 Missile, pressing any P will be a high Missile, and crouching with any P will be a low Missile. Since you keep your kicks, this can be used regularly to move in with 66LK and pressure with lots of missiles, but it sees more use as an escape tool. Try to cover your deactivation with a missile by inputting back dash LP then deactivate. It is important to deactivate as soon as you are safe. Bulleta's DF loses to access to her Punch attacks which puts her at a disadvantage in neutral. Note that while in DF Bulleta can combo out of kicks into crouching P missiles to get that knockdown allowing a safe deactivate. | |||
==Colors== | |||
[[File:colors-bulleta.png]] | |||
== Notable Players == | == Notable Players == | ||
=== Japan === | |||
Japanese Player Index: http://www21.atwiki.jp/vsplayer/pages/23.html | Japanese Player Index: http://www21.atwiki.jp/vsplayer/pages/23.html | ||
{| class="wikitable" | {| class="wikitable" | ||
| Line 709: | Line 720: | ||
|Kanto region | |Kanto region | ||
| | | | ||
| | |Bulleta GOD. | ||
|- | |- | ||
| | |Sako | ||
|style="text-align:center;"| — | |style="text-align:center;"| — | ||
|style="text-align:center;"| LK [[file:bulleta_color_lk_small.png]] | |style="text-align:center;"| LK [[file:bulleta_color_lk_small.png]] | ||
|Kansai region | |Kansai region | ||
|http://twitter.com/sakonoko<br>http://twitter.com/akikiwww | |http://twitter.com/sakonoko<br>http://twitter.com/akikiwww | ||
|Retired | |OG Bulleta GOD<br>Execution is the best in the world<br>Retired | ||
|- | |- | ||
|SuperMotiMoti | |SuperMotiMoti | ||
| Line 723: | Line 734: | ||
|Kansai region | |Kansai region | ||
|http://twitter.com/supermotimoti | |http://twitter.com/supermotimoti | ||
| | |Awesome ground/footsies game | ||
|- | |- | ||
|Touhou | |Touhou | ||
| Line 730: | Line 741: | ||
|Kanto region | |Kanto region | ||
|http://twitter.com/tohololovitch | |http://twitter.com/tohololovitch | ||
| | |He is also an established IaMP player. | ||
|- | |||
|Akashi | |||
|style="text-align:center;"| — | |||
|style="text-align:center;"| LK [[file:bulleta_color_lk_small.png]] | |||
|Kanto region | |||
|http://twitter.com/game_overwork | |||
|http://orangech.tumblr.com <br>Recently Married DD-Sas. Congrats! | |||
|} | |||
=== North America === | |||
{| class="wikitable" | |||
!width="95"|Name (English) | |||
!width="105"| Name (Japanese) | |||
!width="70"| Color | |||
!width="125"|Location | |||
!Contact | |||
!Notes | |||
|- | |||
|Kain | |||
|ケイン | |||
|style="text-align:center;"| HK [[file:bulleta_color_hp_small.png]] | |||
|California, USA | |||
|https://twitter.com/KainZC7 | |||
|Long time player that is considered an execution monster. He started as a Lei-Lei player and has a pocket Bishamon. Has a long history with Hokuto No Ken too. | |||
|- | |||
|Fee Bee | |||
|フィービー | |||
|style="text-align:center;"| PP [[file:bulleta_color_pp_small.png]] | |||
|Kentucky, USA | |||
|https://twitter.com/feebeetweety | |||
|Recent player that has found success. She also organizes the Beginner's tournaments. | |||
|- | |||
|Goose | |||
|グース | |||
|style="text-align:center;"| KK [[file:bulleta_color_kk_small.png]] | |||
|Pacific Northwest, USA | |||
|https://twitter.com/chooseagoose | |||
|VMPNW's resident Bulleta. | |||
|- | |||
|- | |||
|Baco | |||
|ベイコ | |||
|style="text-align:center;"| MK [[file:bulleta_color_mk_small.png]] | |||
|NorCal, USA | |||
|https://twitter.com/beikho | |||
|Originally from east coast, now resides in CA. | |||
|- | |||
|EmptyShiki | |||
|エンプティーシキ | |||
|style="text-align:center;"| LP [[file:bulleta_color_lp_small.png]] | |||
|Chicago, USA | |||
|https://twitter.com/Emptyshiki | |||
|Long time player. Has a ridiculous amount of CPS2 boards. | |||
|- | |||
|KeyChain | |||
|キーチェイン | |||
|style="text-align:center;"| MK [[file:bulleta_color_mk_small.png]] | |||
|New York | |||
| | |||
|Started in the pandemic & quickly grew to power. They come from 3S as a strong contender in that game. | |||
|- | |- | ||
|} | |} | ||
=== Europe === | |||
{| class="wikitable" | |||
!width="95"|Name (English) | |||
!width="105"| Name (Japanese) | |||
!width="70"| Color | |||
!width="125"|Location | |||
!Contact | |||
!Notes | |||
|- | |||
|Bansheebot | |||
| | |||
|style="text-align:center;"| MK [[file:bulleta_color_mk_small.png]] | |||
|France | |||
|https://twitter.com/Bansheebot69 | |||
|French favorite, everybody love him. Will land Sako combos against you | |||
|- | |||
|} | |||
=== South America === | |||
{| class="wikitable" | |||
!width="95"|Name (English) | |||
!width="105"| Name (Japanese) | |||
!width="70"| Color | |||
!width="125"|Location | |||
!Contact | |||
!Notes | |||
|- | |||
|MendyPHX | |||
|メンディPHX | |||
|style="text-align:center;"| KK [[file:bulleta_color_kk_small.png]] | |||
|São Paulo, Brazil | |||
|https://twitter.com/MendyPHX | |||
|Recent player that attends offline events with the NekoPunchi guys. | |||
|- | |||
{{VSav}} | {{VSav}} | ||
[[Category:Vampire Savior]] | [[Category:Vampire Savior]] | ||
[[Category:Bulleta]] | |||
Latest revision as of 10:24, 4 June 2024
Introduction
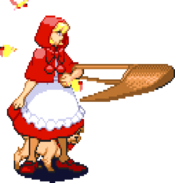
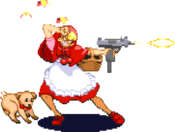
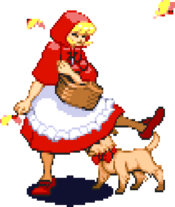
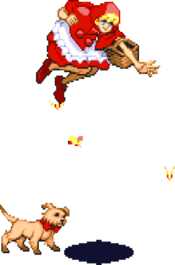
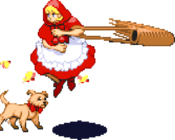
Bulleta (バレッタ), also known as Baby Bonnie Hood, the Dark Hunter.
A thrill seeker who enjoys the hunt, to the point where she does it for the sport of the hunt rather than the pursuit of money. Because of this, she is mainly described as an antithesis to Donovan. She hunts solely for sport, while Donovan hunts to find meaning in his existence. As a profit-seeking Dark Hunter, she pretends to act like a defenseless girl as a way to trick her prey in order for them to get closer to her. Many of her hunting skills include stabbing her opponents with weapons such as knives, and using guns for shooting down her prey.
Bulleta is infamous for her execution ceiling. She has fantastic movement & projectile durability. This synergy makes her zoning & neutral game very effective. She is one of the few characters who gets wins with Time Overs. If you are willing to commit to an execution grind & play patiently, Bulleta is the right choice for you.
Gameplay
Primary objectives:
- Gain air-resets to setup her amazing jump-in offense. Chicken block to 9MP is strong
- Use missiles as uncontested anti-airs
- Leverage your movement to be evasive and play patiently
- Abuse instant overheads to overwhelm the opponent
- Convert combos when the opponent is standing into huge damage & corner positioning
- Utilize dashing offensive options to open-up the opponent
| Strengths | Weaknesses |
|---|---|
|
|
Movement
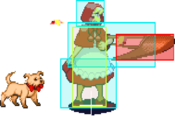
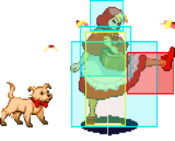
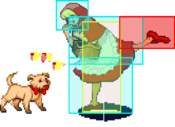
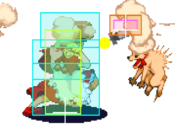
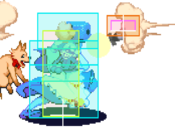
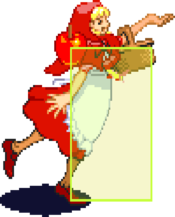
Walk: Bulleta has an average walk speed. Dashing is usually better than walking, but dashing shifts your hurtbox down and away. Walking has a tall hurtbox that doesn't extend too far in front of you. Bulleta can use her walk as a spacing tool when the opponent is trying to tag her dashing hurtbox.
Dash: This is how you should usually be moving on the ground. Watching any Bulleta player, you'll notice how often dashing is required. The startup of the dash covers a large distance very quickly, allowing it to be 'cancelled' with any normal or crouch or back input. If you only need to move a short distance, simply tap LP or press back out of your dash.
Double Jump: Bulleta is the only character in the game with a double jump! This gives her very good air positioning & run away, and also allows you to avoid many things on the ground. Use double jump where applicable to get in your opponent or stay evasive, but the most important thing about Bulleta's jump is to know when to chicken guard and when to air chain.
Normal Moves
Standing Normals
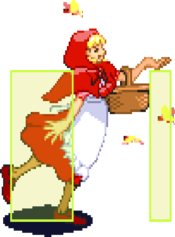
5LP
| Startup | Active | Recovery | Hit Adv. | Block Adv. | Renda Bonus |
|---|---|---|---|---|---|
| 4 | 4 | 8 | 10 | 9 | H: 13 G: 12 |
| Guard | Cancel | Invuln | Red Damage | White Damage | Gauge |
| mid | yes | - | 7 | 2 | H: 6 G: 3 W: 0 |
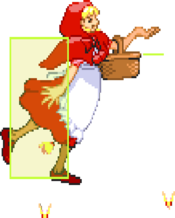
5MP
| Startup | Active | Recovery | Hit Adv. | Block Adv. | Renda Bonus |
|---|---|---|---|---|---|
| 6 | 3 | 18 | 6 | 5 | N/A |
| Guard | Cancel | Invuln | Red Damage | White Damage | Gauge |
| mid | yes | - | 16 | 6 | H: 15 G: 9 W: 3 |
5HP
| Startup | Active | Recovery | Hit Adv. | Block Adv. | Renda Bonus |
|---|---|---|---|---|---|
| 9 | 3{(3)3}x6 | 27 | -16 | -17 | N/A |
| Guard | Cancel | Invuln | Red Damage | White Damage | Gauge |
| mid | no | - | 7x7 | 3x7 | H: 9+3x6 G: 7+1x6 W: 6 |
5LK
| Startup | Active | Recovery | Hit Adv. | Block Adv. | Renda Bonus |
|---|---|---|---|---|---|
| 6 | 4 | 8 | 4 | 3 | H: 7 G: 6 |
| Guard | Cancel | Invuln | Red Damage | White Damage | Gauge |
| mid | yes | - | 7 | 3 | H: 6 G: 3 W: 0 |
5MK
| Startup | Active | Recovery | Hit Adv. | Block Adv. | Renda Bonus |
|---|---|---|---|---|---|
| 8 | 6 | 11 | 4 | 3 | N/A |
| Guard | Cancel | Invuln | Red Damage | White Damage | Gauge |
| mid | yes | - | 17 | 7 | H: 15 G: 9 W: 3 |
5HK
| Startup | Active | Recovery | Hit Adv. | Block Adv. | Renda Bonus |
|---|---|---|---|---|---|
| 17 | 50 | 31 | - | -5 | N/A |
| Guard | Cancel | Invuln | Red Damage | White Damage | Gauge |
| mid | no | - | 21 | 8 | H: 24 G: 15 W: 6 |
Close Normals
CL.5LP
| Startup | Active | Recovery | Hit Adv. | Block Adv. | Renda Bonus |
|---|---|---|---|---|---|
| 4 | 4 | 10 | 6 | 5 | H: 9 G: 8 |
| Guard | Cancel | Invuln | Red Damage | White Damage | Gauge |
| mid | yes | - | 7 | 2 | H: 6 G: 3 W: 0 |
CL.5MP
| Startup | Active | Recovery | Hit Adv. | Block Adv. | Renda Bonus |
|---|---|---|---|---|---|
| 9 | 4 | 17 | 6 | 5 | N/A |
| Guard | Cancel | Invuln | Red Damage | White Damage | Gauge |
| mid | yes | - | 17 | 6 | H: 15 G: 9 W: 3 |
CL.5LK
| Startup | Active | Recovery | Hit Adv. | Block Adv. | Renda Bonus |
|---|---|---|---|---|---|
| 5 | 5 | 9 | 2 | 1 | H: 5 G: 4 |
| Guard | Cancel | Invuln | Red Damage | White Damage | Gauge |
| mid | yes | - | 7 | 3 | H: 6 G: 3 W: 0 |
Crouching Normals
2LP
| Startup | Active | Recovery | Hit Adv. | Block Adv. | Renda Bonus |
|---|---|---|---|---|---|
| 4 | 4 | 10 | 6 | 5 | H: 9 G: 8 |
| Guard | Cancel | Invuln | Red Damage | White Damage | Gauge |
| mid | yes | - | 7 | 3 | H: 6 G: 3 W: 0 |
2MP
| Startup | Active | Recovery | Hit Adv. | Block Adv. | Renda Bonus |
|---|---|---|---|---|---|
| 6 | 3 | 16 | 7 | 6 | N/A |
| Guard | Cancel | Invuln | Red Damage | White Damage | Gauge |
| low | yes | - | 16 | 7 | H: 15 G: 9 W: 3 |
2HP
| Startup | Active | Recovery | Hit Adv. | Block Adv. | Renda Bonus |
|---|---|---|---|---|---|
| 9 | 3{(3)3}x6 | 27 | -16 | -17 | N/A |
| Guard | Cancel | Invuln | Red Damage | White Damage | Gauge |
| mid | no | - | 7x7 | 3x7 | H: 9+3x6 G: 7+1x6 W: 6 |
2LK
| Startup | Active | Recovery | Hit Adv. | Block Adv. | Renda Bonus |
|---|---|---|---|---|---|
| 4 | 4 | 10 | 6 | 5 | H: 9 G: 8 |
| Guard | Cancel | Invuln | Red Damage | White Damage | Gauge |
| low | yes | - | 7 | 3 | H: 6 G: 3 W: 0 |
Used as an unblockable low after your opponent stand-blocks a deep J.HK. Good button to begin your crouching pushblock input with.
| Startup | Active | Recovery | Hit Adv. | Block Adv. | Renda Bonus |
|---|---|---|---|---|---|
| 4 | 4 | 10 | 6 | 5 | H: 9 G: 8 |
| Guard | Cancel | Invuln | Red Damage | White Damage | Gauge |
| low | yes | - | 7 | 3 | H: 6 G: 3 W: 0 |
2MK
| Startup | Active | Recovery | Hit Adv. | Block Adv. | Renda Bonus |
|---|---|---|---|---|---|
| 6 | 3 | 16 | 5 | 4 | N/A |
| Guard | Cancel | Invuln | Red Damage | White Damage | Gauge |
| low | yes | - | 15 | 6 | H: 15 G: 9 W: 3 |
2HK
| Startup | Active | Recovery | Hit Adv. | Block Adv. | Renda Bonus |
|---|---|---|---|---|---|
| 7 | 3 | 23 | - | -3 | N/A |
| Guard | Cancel | Invuln | Red Damage | White Damage | Gauge |
| low | no | - | 17 | 7 | H: 24 G: 15 W: 6 |
Air Normals
J.LP
| Startup | Active | Recovery | Hit Adv. | Block Adv. | Renda Bonus |
|---|---|---|---|---|---|
| 5 | 6 | 3 | - | - | N/A |
| Guard | Cancel | Invuln | Red Damage | White Damage | Gauge |
| overhead | no | - | 8 | 4 | H: 6 G: 3 W: 0 |
8J.MP
| Startup | Active | Recovery | Hit Adv. | Block Adv. | Renda Bonus |
|---|---|---|---|---|---|
| 7 | 3 | 11 | - | - | N/A |
| Guard | Cancel | Invuln | Red Damage | White Damage | Gauge |
| overhead | no | - | 17 | 6 | H: 15 G: 9 W: 3 |
9J.MP
| Startup | Active | Recovery | Hit Adv. | Block Adv. | Renda Bonus |
|---|---|---|---|---|---|
| 5 | 4 | 6 | - | - | N/A |
| Guard | Cancel | Invuln | Red Damage | White Damage | Gauge |
| overhead | no | - | 16 | 6 | H: 15 G: 9 W: 3 |
8J.HP
| Startup | Active | Recovery | Hit Adv. | Block Adv. | Renda Bonus |
|---|---|---|---|---|---|
| 13 | 3(3)3 | 9 | - | - | N/A |
| Guard | Cancel | Invuln | Red Damage | White Damage | Gauge |
| overhead | no | - | 9+9 | 4+4 | H: 15+9 G: 10+4 W: 6 |
9J.HP
| Startup | Active | Recovery | Hit Adv. | Block Adv. | Renda Bonus |
|---|---|---|---|---|---|
| 13 | 3(3)3 | 10 | - | - | N/A |
| Guard | Cancel | Invuln | Red Damage | White Damage | Gauge |
| overhead | no | - | 9+9 | 4+4 | H: 15+9 G: 10+4 W: 6 |
J.LK
| Startup | Active | Recovery | Hit Adv. | Block Adv. | Renda Bonus |
|---|---|---|---|---|---|
| 5 | 2 | 3 | - | - | N/A |
| Guard | Cancel | Invuln | Red Damage | White Damage | Gauge |
| overhead | no | - | 8 | 4 | H: 6 G: 3 W: 0 |
8J.MK
| Startup | Active | Recovery | Hit Adv. | Block Adv. | Renda Bonus |
|---|---|---|---|---|---|
| 7 | 6 | 7 | - | - | N/A |
| Guard | Cancel | Invuln | Red Damage | White Damage | Gauge |
| overhead | no | - | 17 | 7 | H: 15 G: 9 W: 3 |
9J.MK
| Startup | Active | Recovery | Hit Adv. | Block Adv. | Renda Bonus |
|---|---|---|---|---|---|
| 7 | 7 | 3 | - | - | N/A |
| Guard | Cancel | Invuln | Red Damage | White Damage | Gauge |
| overhead | no | - | 16 | 7 | H: 15 G: 9 W: 3 |
9J.HK
| Startup | Active | Recovery | Hit Adv. | Block Adv. | Renda Bonus |
|---|---|---|---|---|---|
| 11 | 4 | 20 | - | - | N/A |
| Guard | Cancel | Invuln | Red Damage | White Damage | Gauge |
| mid | no | - | 20 | 8 | H: 24 G: 15 W: 6 |
Command Normals
Tricky Basket
| Startup | Active | Recovery | Hit Adv. | Block Adv. | Renda Bonus |
|---|---|---|---|---|---|
| 12 | 4 | 17 | 4 | 3 | N/A |
| Guard | Cancel | Invuln | Red Damage | White Damage | Gauge |
| mid | no | - | 16 | 7 | H: 15 G: 9 W: 3 |
Surprise & Hop
| Startup | Active | Recovery | Hit Adv. | Block Adv. | Renda Bonus |
|---|---|---|---|---|---|
| 5 | 9 | 20 | -3 | -4 | N/A |
| Guard | Cancel | Invuln | Red Damage | White Damage | Gauge |
| mid | no | - | 15 | 7 | H: 15 G: 9 W: 3 |
3HK
| Startup | Active | Recovery | Hit Adv. | Block Adv. | Renda Bonus |
|---|---|---|---|---|---|
| 15 | 52 | 35 | - | -10 | N/A |
| Guard | Cancel | Invuln | Red Damage | White Damage | Gauge |
| mid | no | - | 21 | 8 | H: 24 G: 15 W: 6 |
Tell Me Why
| Startup | Active | Recovery | Hit Adv. | Block Adv. | Renda Bonus |
|---|---|---|---|---|---|
| 0 | 0 | 34 | - | - | N/A |
| Guard | Cancel | Invuln | Red Damage | White Damage | Gauge |
| - | no | 4-23 throw | - | 0 | H: - G: 0 W: 0 |
Dashing Normals
Stumble & Blade
| Startup | Active | Recovery | Hit Adv. | Block Adv. | Renda Bonus |
|---|---|---|---|---|---|
| 21 | 8 | 22 | -1 | -2 | N/A |
| Guard | Cancel | Invuln | Red Damage | White Damage | Gauge |
| overhead | no | - | 16 | 7 | H: 5 G: 9 W: 3 |
Normal Throws
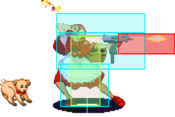
6MP or 6HP
| Startup | Active | Recovery | Hit Adv. | Block Adv. | Renda Bonus |
|---|---|---|---|---|---|
| 1 | - | 120 + landing 1 | - | - | N/A |
| Guard | Cancel | Invuln | Red Damage | White Damage | Gauge |
| throw | no | 1-72 whole body | 21 (10) | 8 (4) | H: 9 G: 0 W: 0 |
J.6P or J.4P
| Startup | Active | Recovery | Hit Adv. | Block Adv. | Renda Bonus |
|---|---|---|---|---|---|
| 1 | - | 72+45+landing 12+turning 1 | - | - | N/A |
| Guard | Cancel | Invuln | Red Damage | White Damage | Gauge |
| throw | no | 1-72 whole body | 22 (11) | 8 (4) | H: 9 G: 0 W: 0 |
Special Moves
High Smile & Missile
[4],6P
| Startup | Active | Recovery | Hit Adv. | Block Adv. | Renda Bonus |
|---|---|---|---|---|---|
| 10 | 47 | 27 | - | -1 | N/A |
| Guard | Cancel | Invuln | Red Damage | White Damage | Gauge |
| mid | no | - | 17 | 4 | H: 21 G: 18 W: 15 |
- (LP Version): This missile is best used to stop steep angled or IAD pressure. Think Q-Bee rushdown or Talbain jump-ins. It can also be worked into your close range pressure game.
- (MP Version): Nothing to note
- (HP Version): Use this on block as a frame-trap that punishes the opponents jumps or buttons.
| Startup | Active | Recovery | Hit Adv. | Block Adv. | Renda Bonus |
|---|---|---|---|---|---|
| 10 | 59 | 27 | - | -2 | N/A |
| Guard | Cancel | Invuln | Red Damage | White Damage | Gauge |
| mid | no | - | 10x3 | 3x3 | H: 0 G: 0 W: 0 |
Low Smile & Missle
[4],6K
| Startup | Active | Recovery | Hit Adv. | Block Adv. | Renda Bonus |
|---|---|---|---|---|---|
| 10 | 47 | 27 | - | -1 | N/A |
| Guard | Cancel | Invuln | Red Damage | White Damage | Gauge |
| mid | no | - | 17 | 4 | H: 21 G: 18 W: 15 |
Vary your strengths to vary your timings & stay unpredictable
| Startup | Active | Recovery | Hit Adv. | Block Adv. | Renda Bonus |
|---|---|---|---|---|---|
| 10 | 59 | 27 | - | -2 | N/A |
| Guard | Cancel | Invuln | Red Damage | White Damage | Gauge |
| mid | no | - | 10x3 | 3x3 | H: 0 G: 0 W: 0 |
Hop & Missile
[2]8P
| Startup | Active | Recovery | Hit Adv. | Block Adv. | Renda Bonus |
|---|---|---|---|---|---|
| 27 | 33 | 48 + landing 5 | - | 1 | N/A |
| Guard | Cancel | Invuln | Red Damage | White Damage | Gauge |
| mid | no | - | 17 | 4 | H: 21 G: 18 W: 15 |
- (LP Version): Smallest angle shot.
- (MP Version): Medium angle shot.
- (HP Version): Larger angle shot.
| Startup | Active | Recovery | Hit Adv. | Block Adv. | Renda Bonus |
|---|---|---|---|---|---|
| 27 | 66 | 48 + landing 5 | - | - | N/A |
| Guard | Cancel | Invuln | Red Damage | White Damage | Gauge |
| mid | no | - | 10x3 | 3x3 | H: 0 G: 0 W: 0 |
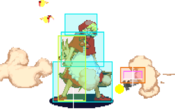
- (ES Version): Travels full screen and may be used to punish or counter play specific things, like an ES Ice Tower.
Cheer & Fire
623P
| Startup | Active | Recovery | Hit Adv. | Block Adv. | Renda Bonus |
|---|---|---|---|---|---|
| 13 | 20 | 13 | - | - | N/A |
| Guard | Cancel | Invuln | Red Damage | White Damage | Gauge |
| mid | no | - | 18 | 5 | H: 24 G: 21 W: 18 |
This version is good to kara-cancel into for meter building
| Startup | Active | Recovery | Hit Adv. | Block Adv. | Renda Bonus |
|---|---|---|---|---|---|
| 15 | 20 | 17 | - | - | N/A |
| Guard | Cancel | Invuln | Red Damage | White Damage | Gauge |
| mid | no | - | 18 | 5 | H: 24 G: 21 W: 18 |
Terrible move with no use in competitive play
| Startup | Active | Recovery | Hit Adv. | Block Adv. | Renda Bonus |
|---|---|---|---|---|---|
| 17 | 21 | 21 | - | - | N/A |
| Guard | Cancel | Invuln | Red Damage | White Damage | Gauge |
| mid | no | - | 18 | 5 | H: 24 G: 21 W: 18 |
Terrible move with no use in competitive play
| Startup | Active | Recovery | Hit Adv. | Block Adv. | Renda Bonus |
|---|---|---|---|---|---|
| 11 | 4,8x8 | 18 | - | - | N/A |
| Guard | Cancel | Invuln | Red Damage | White Damage | Gauge |
| mid | no | - | 11x9 | 3x9 | H: 0 G: 0 W: 0 |
Shyness & Strike
214P
| Startup | Active | Recovery | Hit Adv. | Block Adv. | Renda Bonus |
|---|---|---|---|---|---|
| 16-63 | 4 | 40 | - | -9 | N/A |
| Guard | Cancel | Invuln | Red Damage | White Damage | Gauge |
| mid | no | - | 19 | 4 | H: 24 G: 21 W: 18 |
Combo ender tool
| Startup | Active | Recovery | Hit Adv. | Block Adv. | Renda Bonus |
|---|---|---|---|---|---|
| 64-111 | 4 | 40 | - | -9 | N/A |
| Guard | Cancel | Invuln | Red Damage | White Damage | Gauge |
| mid | no | - | 21 | 5 | H: 24 G: 21 W: 18 |
Combo ender tool
| Startup | Active | Recovery | Hit Adv. | Block Adv. | Renda Bonus |
|---|---|---|---|---|---|
| 112-159 | 4 | 45 | - | -14 | N/A |
| Guard | Cancel | Invuln | Red Damage | White Damage | Gauge |
| mid | no | - | 23 | 6 | H: 24 G: 21 W: 18 |
Combo ender tool
| Startup | Active | Recovery | Hit Adv. | Block Adv. | Renda Bonus |
|---|---|---|---|---|---|
| 27 | 4 | 45 | - | --14 | N/A |
| Guard | Cancel | Invuln | Red Damage | White Damage | Gauge |
| mid | no | - | 28 | 8 | H: 0 G: 0 W: 0 |
Guard Cancel
623K
| Startup | Active | Recovery | Hit Adv. | Block Adv. | Renda Bonus |
|---|---|---|---|---|---|
| - | - | 39 | - | - | N/A |
| Guard | Cancel | Invuln | Red Damage | White Damage | Gauge |
| - | no | 1-29 whole body | 0 | 0 | H: 0 G: 0 W: 12 |
Command Throws
632[4]P
| Startup | Active | Recovery | Hit Adv. | Block Adv. | Renda Bonus |
|---|---|---|---|---|---|
| 2 | 1 | 38 | - | - | N/A |
| Guard | Cancel | Invuln | Red Damage | White Damage | Gauge |
| throw | no | 1 whole body | 27 | 8 | H: 21 G: 0 W: 12 |
| Startup | Active | Recovery | Hit Adv. | Block Adv. | Renda Bonus |
|---|---|---|---|---|---|
| 2 | 1 | 38 | - | - | N/A |
| Guard | Cancel | Invuln | Red Damage | White Damage | Gauge |
| throw | no | 1 whole body | 33 | 10 | H: 0 G: 0 W: 0 |
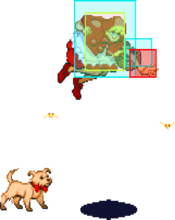
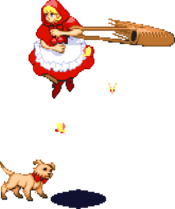
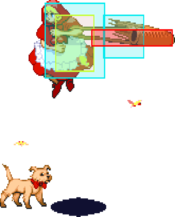
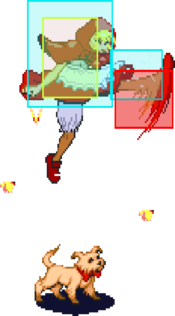
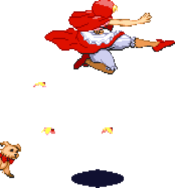
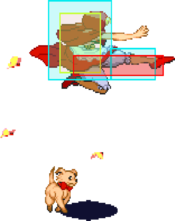
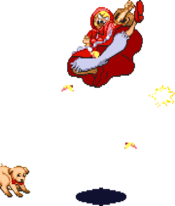
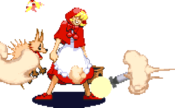
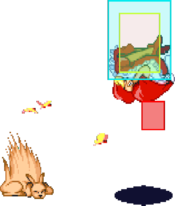
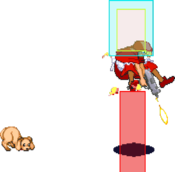
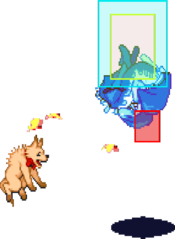
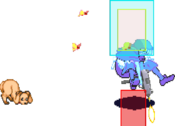
Crucial move, the ES version is an excellent way to spend meter. This can be done directly out of dash without losing her low profile state, allowing you to dash under moves like Bee 5MP. The regular version must be input with MP or HP, but you should prefer MP to avoid HP leaks. The ES version can be input with any two punches, LP+MP is preferred. When this move is input normally (full half circle 63214), it has an input overlap with 214P, which will come out if the opponent is not in range for the grab. This is a dreadful leak, and the only way to fix it is by omitting the 1 in the half circle input. The input 6324LP+MP is an extremely useful option select that will either give ES throw or 5LP, one of Bulleta's safest buttons to whiff. For this OS, it's important to know that you can do the 632 input while dashing without breaking your dash: think of it as 6632, then 4+LP+MP.
This throw, as a reversal, will beat meaties (if in range). This can be input as (hold P), 6324 (release P). You can also do 63241 before releasing P to block low. Avoid 63214 so you don't wake up with reversal 214P.Pursuits
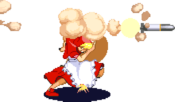
8P or 8K
| Startup | Active | Recovery | Hit Adv. | Block Adv. | Renda Bonus |
|---|---|---|---|---|---|
| 22 | 20 | landing 1 | - | - | N/A |
| Guard | Cancel | Invuln | Red Damage | White Damage | Gauge |
| mid | no | - | 1x6 | 1x6 | H: 12+2x5 G: 0 W: 6 |
| Startup | Active | Recovery | Hit Adv. | Block Adv. | Renda Bonus |
|---|---|---|---|---|---|
| 22 | 20 | landing 1 | - | - | N/A |
| Guard | Cancel | Invuln | Red Damage | White Damage | Gauge |
| mid | no | - | 1x11+5 | 1x11+3 | H: 0 G: 0 W: 0 |
Ex Moves
412[6]PP
| Startup | Active | Recovery | Hit Adv. | Block Adv. | Renda Bonus |
|---|---|---|---|---|---|
| 25 | {2(2)}x26・1 | 44 | - | -106 | N/A |
| Guard | Cancel | Invuln | Red Damage | White Damage | Gauge |
| mid | no | - | 4x27 | 2x27 | H: 0 G: 0 W: 0 |
| Startup | Active | Recovery | Hit Adv. | Block Adv. | Renda Bonus |
|---|---|---|---|---|---|
| 27 | - | - | - | - | N/A |
| Guard | Cancel | Invuln | Red Damage | White Damage | Gauge |
| mid | no | - | 3x18 | 1x18 | H: 0 G: 0 W: 0 |
412[6]KK
| Startup | Active | Recovery | Hit Adv. | Block Adv. | Renda Bonus |
|---|---|---|---|---|---|
| 17 | 17 | 38 | - | -27 | N/A |
| Guard | Cancel | Invuln | Red Damage | White Damage | Gauge |
| mid | no | 1-16 whole body | 3x7+26 | 1x7+8 | H: 0 G: 0 W: 0 |
632[4]KK
| Startup | Active | Recovery | Hit Adv. | Block Adv. | Renda Bonus |
|---|---|---|---|---|---|
| 18 | 1 | 44 | - | - | N/A |
| Guard | Cancel | Invuln | Red Damage | White Damage | Gauge |
| mid | no | - | 42 | 13 | H: 0 G: 0 W: 0 |
Dark Force
The Killing Time - Same strength P + K
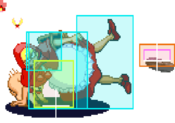
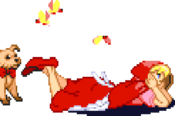
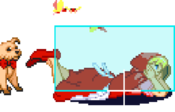
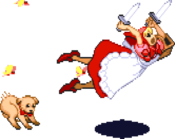
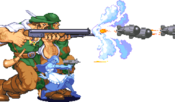
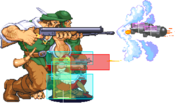
- All versions are the same. All of Bulleta's punches will be replaced with an instant missile that corresponds to the strength pushed, but you will keep all your kicks. That means you can dash into missiles, do multiple missiles at once, etc. Jumping and pressing will do the [2]8 Missile, pressing any P will be a high Missile, and crouching with any P will be a low Missile. Since you keep your kicks, this can be used regularly to move in with 66LK and pressure with lots of missiles, but it sees more use as an escape tool. Try to cover your deactivation with a missile by inputting back dash LP then deactivate. It is important to deactivate as soon as you are safe. Bulleta's DF loses to access to her Punch attacks which puts her at a disadvantage in neutral. Note that while in DF Bulleta can combo out of kicks into crouching P missiles to get that knockdown allowing a safe deactivate.
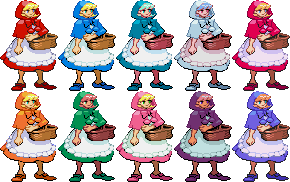
Colors
Notable Players
Japan
Japanese Player Index: http://www21.atwiki.jp/vsplayer/pages/23.html
| Name (English) | Name (Japanese) | Color | Location | Contact | Notes |
|---|---|---|---|---|---|
| Kosho | コショー | KK |
Kanto region | Bulleta GOD. | |
| Sako | — | LK |
Kansai region | http://twitter.com/sakonoko http://twitter.com/akikiwww |
OG Bulleta GOD Execution is the best in the world Retired |
| SuperMotiMoti | スーパーモチモチ | PP |
Kansai region | http://twitter.com/supermotimoti | Awesome ground/footsies game |
| Touhou | 徒歩 | LP |
Kanto region | http://twitter.com/tohololovitch | He is also an established IaMP player. |
| Akashi | — | LK |
Kanto region | http://twitter.com/game_overwork | http://orangech.tumblr.com Recently Married DD-Sas. Congrats! |
North America
| Name (English) | Name (Japanese) | Color | Location | Contact | Notes |
|---|---|---|---|---|---|
| Kain | ケイン | HK |
California, USA | https://twitter.com/KainZC7 | Long time player that is considered an execution monster. He started as a Lei-Lei player and has a pocket Bishamon. Has a long history with Hokuto No Ken too. |
| Fee Bee | フィービー | PP |
Kentucky, USA | https://twitter.com/feebeetweety | Recent player that has found success. She also organizes the Beginner's tournaments. |
| Goose | グース | KK |
Pacific Northwest, USA | https://twitter.com/chooseagoose | VMPNW's resident Bulleta. |
| Baco | ベイコ | MK |
NorCal, USA | https://twitter.com/beikho | Originally from east coast, now resides in CA. |
| EmptyShiki | エンプティーシキ | LP |
Chicago, USA | https://twitter.com/Emptyshiki | Long time player. Has a ridiculous amount of CPS2 boards. |
| KeyChain | キーチェイン | MK |
New York | Started in the pandemic & quickly grew to power. They come from 3S as a strong contender in that game. |
Europe
| Name (English) | Name (Japanese) | Color | Location | Contact | Notes |
|---|---|---|---|---|---|
| Bansheebot | MK |
France | https://twitter.com/Bansheebot69 | French favorite, everybody love him. Will land Sako combos against you |
South America
| Name (English) | Name (Japanese) | Color | Location | Contact | Notes |
|---|---|---|---|---|---|
| MendyPHX | メンディPHX | KK |
São Paulo, Brazil | https://twitter.com/MendyPHX | Recent player that attends offline events with the NekoPunchi guys. |
