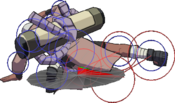
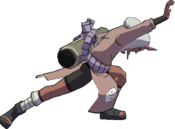
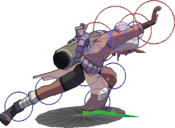
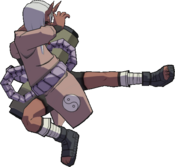
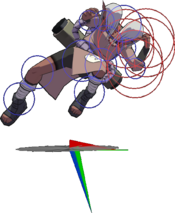
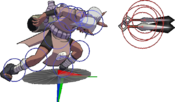
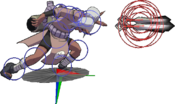
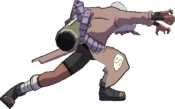
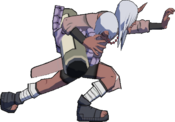
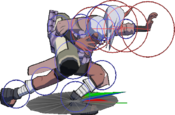
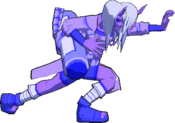
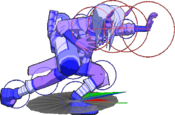
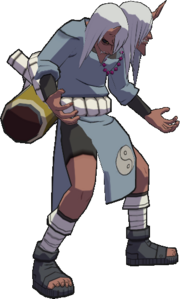
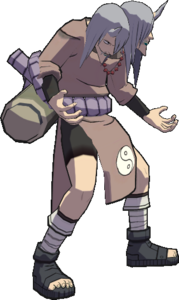
Super Naruto: Clash of Ninja 4/Sakon & Ukon: Difference between revisions
Scatteraxis (talk | contribs) (Created page with "{{Infobox-SCON4 |name = Sakon & Ukon |image = SCON4 Sakon & Ukon Portrait.png |size = 300 |health = 220 |guard = 1640 |install = |installdmgmod = }} {{TOC limit|2}} == Summary == Sakon and Ukon are the closest thing ''GNT4'' (and by extension ''SCON4'') have to a traditional stance character. Sakon is more or less a standard, close-combat fighter, and is able to be one of the most aggressive characters in the game. The dynamic shifts once transformed into Ukon, who h...") |
No edit summary |
||
| (22 intermediate revisions by 4 users not shown) | |||
| Line 2: | Line 2: | ||
|name = Sakon & Ukon | |name = Sakon & Ukon | ||
|image = SCON4 Sakon & Ukon Portrait.png | |image = SCON4 Sakon & Ukon Portrait.png | ||
|size = | |size = 300px | ||
|health = 220 | |health = 220 | ||
|guard = 1640 | |guard = 1640 | ||
|install = | |backdash = Normal | ||
|installdmgmod = | |install = Ukon | ||
|installdmgmod = 1.2x | |||
|installbackdash = Short | |||
}} | }} | ||
{{TOC limit|2}} | {{TOC limit|2}} | ||
== Summary == | == Summary == | ||
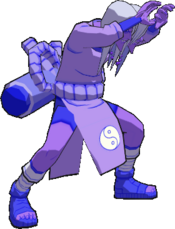
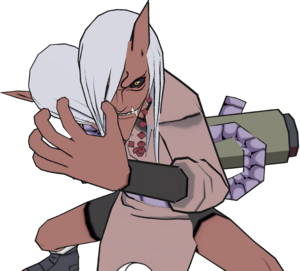
Sakon and Ukon are the closest thing ''GNT4'' (and by extension ''SCON4'') have to a traditional stance character. Sakon is more or less a standard, close-combat fighter, and is able to be one of the most aggressive characters in the game. The dynamic shifts once transformed into Ukon, who has passive super armor | Sakon and Ukon are the closest thing ''GNT4'' (and by extension ''SCON4'') have to a traditional stance character. Sakon is more or less a standard, close-combat fighter, and is able to be one of the most aggressive characters in the game. The dynamic shifts once transformed into Ukon, who has passive super armor (a state in which he still takes damage but can tank many attacks without interruption) but loses out on Sakon's pressure. Ukon's unique traits emphasize the importance of matchups, as some foes may find themselves without good options against this two-in-one fighter, especially when played hyper-defensively. | ||
== Notes == | == Notes == | ||
=== Demon Twin Jutsu === | |||
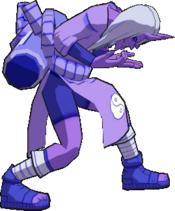
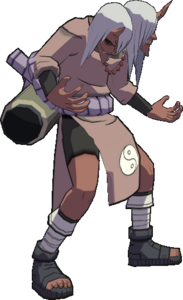
This character has two forms: '''{{NotationIcon-SCON4|sak}} Sakon and {{NotationIcon-SCON4|uk}} Ukon'''. The round always begins as Sakon. Major differences include: | |||
* {{NotationIcon-SCON4|sak}} Sakon has longer strings, better meterless combos, an air throw and more health. | |||
* {{NotationIcon-SCON4|uk}} Ukon has continuous super armor (as long as he's not airborne), higher damage on individual attacks, and the ability to block Unblockable attacks. | |||
* {{NotationIcon-SCON4|sak}} Sakon has a normal backdash, whereas {{NotationIcon-SCON4|uk}} Ukon has a short backdash. | |||
There are three ways to swap between Sakon and Ukon: | |||
* {{NotationIcon-SCON4|4}}{{NotationIcon-SCON4|A}} - Immediately swaps the current character regardless of whether the counter is activated. | |||
* {{NotationIcon-SCON4|4}}{{NotationIcon-SCON4|X}} - At the cost of 25% chakra. | |||
* {{NotationIcon-SCON4|6}}{{NotationIcon-SCON4|X}} - Switches between heads. Ukon's version transforms instantly, but Sakon's transforms when the hitbox is active. | |||
You can tell which twin is active by which head is up (Sakon is on the duo's left, Ukon is on the right), but as an additional indicator, there's a blue flash on the character every time Sakon & Ukon switch leads. | |||
== String List == | == String List == | ||
<div style="position: top: 0; display: flex; justify-content: center; background-color: #cacace;" class="movelist-toggles"> | |||
<div id="movelist-toggle-1" class="movelist-toggle-button">{{NotationIcon-SCON4|sak}}</div> | |||
<div id="movelist-toggle-2" class="movelist-toggle-button">{{NotationIcon-SCON4|uk}}</div> | |||
</div> | |||
<div id="movelist-1" class="movelist"><!-- Sakon String List --> | |||
{|class="wikitable mw-collapsible mw-collapsed" style="margin:1em auto 1em auto" | |||
|- | |||
!align="center"|String # | |||
!align="center"|Inputs | |||
!align="center"|Notes | |||
|- | |||
|align="center"|{{NotationIcon-SCON4|String}} '''01''' | |||
|{{NotationIcon-SCON4|B}}{{NotationIcon-SCON4|B}}{{NotationIcon-SCON4|B}}{{NotationIcon-SCON4|B}}{{NotationIcon-SCON4|B}} | |||
|rowspan="4"| | |||
*{{NotationIcon-SCON4|X}}Cancellable at {{NotationIcon-SCON4|B}}({{NotationIcon-SCON4|B}}) | |||
*For {{NotationIcon-SCON4|String}} '''04''', can hold the final input to change the move's effect. | |||
**If not held, {{NotationIcon-SCON4|X}}Cancellable at {{NotationIcon-SCON4|B}}{{NotationIcon-SCON4|B}}{{NotationIcon-SCON4|A}}({{NotationIcon-SCON4|A}}) | |||
|- | |||
|align="center"|{{NotationIcon-SCON4|String}} '''02''' | |||
|{{NotationIcon-SCON4|B}}{{NotationIcon-SCON4|B}}{{NotationIcon-SCON4|B}}{{NotationIcon-SCON4|B}}{{NotationIcon-SCON4|A}} | |||
|- | |||
|align="center"|{{NotationIcon-SCON4|String}} '''03''' | |||
|{{NotationIcon-SCON4|B}}{{NotationIcon-SCON4|B}}{{NotationIcon-SCON4|B}}{{NotationIcon-SCON4|A}}{{NotationIcon-SCON4|A}} | |||
|- | |||
|align="center"|{{NotationIcon-SCON4|String}} '''04''' | |||
|{{NotationIcon-SCON4|B}}{{NotationIcon-SCON4|B}}{{NotationIcon-SCON4|A}}{{NotationIcon-SCON4|A}} | |||
|- | |||
|align="center"|{{NotationIcon-SCON4|String}} '''05''' | |||
|{{NotationIcon-SCON4|6}}{{NotationIcon-SCON4|B}}{{NotationIcon-SCON4|B}}{{NotationIcon-SCON4|B}}{{NotationIcon-SCON4|B}} | |||
| | |||
|- | |||
|align="center"|{{NotationIcon-SCON4|String}} '''06''' | |||
|{{NotationIcon-SCON4|6}}{{NotationIcon-SCON4|B}}{{NotationIcon-SCON4|B}}{{NotationIcon-SCON4|B}}{{NotationIcon-SCON4|A}} | |||
| | |||
|- | |||
|align="center"|{{NotationIcon-SCON4|String}} '''07''' | |||
|{{NotationIcon-SCON4|6}}{{NotationIcon-SCON4|B}}{{NotationIcon-SCON4|B}}{{NotationIcon-SCON4|A}}{{NotationIcon-SCON4|A}} | |||
| | |||
|- | |||
|align="center"|{{NotationIcon-SCON4|String}} '''08''' | |||
|{{NotationIcon-SCON4|6}}{{NotationIcon-SCON4|B}}{{NotationIcon-SCON4|A}}{{NotationIcon-SCON4|A}} | |||
| | |||
|- | |||
|align="center"|{{NotationIcon-SCON4|String}} '''09''' | |||
|{{NotationIcon-SCON4|2}}{{NotationIcon-SCON4|B}}{{NotationIcon-SCON4|B}}{{NotationIcon-SCON4|B}}{{NotationIcon-SCON4|B}} | |||
| | |||
|- | |||
|align="center"|{{NotationIcon-SCON4|String}} '''10''' | |||
|{{NotationIcon-SCON4|2}}{{NotationIcon-SCON4|B}}{{NotationIcon-SCON4|B}}{{NotationIcon-SCON4|B}}{{NotationIcon-SCON4|A}} | |||
| | |||
|- | |||
|align="center"|{{NotationIcon-SCON4|String}} '''11''' | |||
|{{NotationIcon-SCON4|2}}{{NotationIcon-SCON4|B}}{{NotationIcon-SCON4|B}}{{NotationIcon-SCON4|A}} | |||
| | |||
*The move performed by the final input will change if the button press is delayed until Sakon lands. | |||
|- | |||
|align="center"|{{NotationIcon-SCON4|String}} '''12''' | |||
|{{NotationIcon-SCON4|2}}{{NotationIcon-SCON4|B}}{{NotationIcon-SCON4|A}} | |||
| | |||
*Can hold the final input to change the move's effect. | |||
**If not held, {{NotationIcon-SCON4|X}}Cancellable at {{NotationIcon-SCON4|2}}{{NotationIcon-SCON4|B}}({{NotationIcon-SCON4|A}}) | |||
|- | |||
|align="center"|{{NotationIcon-SCON4|String}} '''13''' | |||
|{{NotationIcon-SCON4|8}}{{NotationIcon-SCON4|B}}{{NotationIcon-SCON4|B}}{{NotationIcon-SCON4|B}} | |||
| | |||
|- | |||
|align="center"|{{NotationIcon-SCON4|String}} '''14''' | |||
|{{NotationIcon-SCON4|8}}{{NotationIcon-SCON4|B}}{{NotationIcon-SCON4|B}}{{NotationIcon-SCON4|A}} | |||
| | |||
|- | |||
|align="center"|{{NotationIcon-SCON4|String}} '''15''' | |||
|{{NotationIcon-SCON4|8}}{{NotationIcon-SCON4|B}}{{NotationIcon-SCON4|A}}{{NotationIcon-SCON4|A}} | |||
| | |||
|- | |||
|align="center"|{{NotationIcon-SCON4|String}} '''16''' | |||
|{{NotationIcon-SCON4|2}}{{NotationIcon-SCON4|A}}{{NotationIcon-SCON4|B}}{{NotationIcon-SCON4|B}}{{NotationIcon-SCON4|B}} | |||
| | |||
|- | |||
|align="center"|{{NotationIcon-SCON4|String}} '''17''' | |||
|{{NotationIcon-SCON4|2}}{{NotationIcon-SCON4|A}}{{NotationIcon-SCON4|B}}{{NotationIcon-SCON4|B}}{{NotationIcon-SCON4|A}} | |||
| | |||
|- | |||
|align="center"|{{NotationIcon-SCON4|String}} '''18''' | |||
|{{NotationIcon-SCON4|2}}{{NotationIcon-SCON4|A}}{{NotationIcon-SCON4|B}}{{NotationIcon-SCON4|A}} | |||
| | |||
*The move performed by the final input will change if the button press is delayed until Sakon lands. | |||
|- | |||
|align="center"|{{NotationIcon-SCON4|String}} '''19''' | |||
|{{NotationIcon-SCON4|2}}{{NotationIcon-SCON4|A}}{{NotationIcon-SCON4|A}}{{NotationIcon-SCON4|B}}{{NotationIcon-SCON4|B}}{{NotationIcon-SCON4|B}} | |||
| | |||
|- | |||
|align="center"|{{NotationIcon-SCON4|String}} '''20''' | |||
|{{NotationIcon-SCON4|2}}{{NotationIcon-SCON4|A}}{{NotationIcon-SCON4|A}}{{NotationIcon-SCON4|B}}{{NotationIcon-SCON4|B}}{{NotationIcon-SCON4|A}} | |||
| | |||
|- | |||
|align="center"|{{NotationIcon-SCON4|String}} '''21''' | |||
|{{NotationIcon-SCON4|2}}{{NotationIcon-SCON4|A}}{{NotationIcon-SCON4|A}}{{NotationIcon-SCON4|B}}{{NotationIcon-SCON4|A}}{{NotationIcon-SCON4|A}} | |||
| | |||
|- | |||
|align="center"|{{NotationIcon-SCON4|String}} '''22''' | |||
|{{NotationIcon-SCON4|2}}{{NotationIcon-SCON4|A}}{{NotationIcon-SCON4|A}}{{NotationIcon-SCON4|A}} | |||
| | |||
|- | |||
|align="center"|{{NotationIcon-SCON4|String}} '''23''' | |||
|{{NotationIcon-SCON4|run}}{{NotationIcon-SCON4|A}}{{NotationIcon-SCON4|A}}{{NotationIcon-SCON4|A}} | |||
| | |||
|} | |||
</div> | |||
<div id="movelist-2" class="movelist"><!-- Ukon String List --> | |||
{|class="wikitable mw-collapsible mw-collapsed" style="margin:1em auto 1em auto" | |||
|- | |||
!align="center"|String # | |||
!align="center"|Inputs | |||
!align="center"|Notes | |||
|- | |||
|align="center"|{{NotationIcon-SCON4|String}} '''01''' | |||
|{{NotationIcon-SCON4|B}}{{NotationIcon-SCON4|B}}{{NotationIcon-SCON4|B}} | |||
|rowspan="3"| | |||
*{{NotationIcon-SCON4|X}}Cancellable at {{NotationIcon-SCON4|B}}({{NotationIcon-SCON4|B}}) | |||
*For {{NotationIcon-SCON4|String}} '''03''', can hold the final input to change the move's effect. | |||
**If not held, {{NotationIcon-SCON4|X}}Cancellable at {{NotationIcon-SCON4|B}}{{NotationIcon-SCON4|B}}{{NotationIcon-SCON4|A}}({{NotationIcon-SCON4|A}}) | |||
|- | |||
|align="center"|{{NotationIcon-SCON4|String}} '''02''' | |||
|{{NotationIcon-SCON4|B}}{{NotationIcon-SCON4|B}}{{NotationIcon-SCON4|A}}{{NotationIcon-SCON4|B}} | |||
|- | |||
|align="center"|{{NotationIcon-SCON4|String}} '''03''' | |||
|{{NotationIcon-SCON4|B}}{{NotationIcon-SCON4|B}}{{NotationIcon-SCON4|A}}{{NotationIcon-SCON4|A}} | |||
|- | |||
|align="center"|{{NotationIcon-SCON4|String}} '''04''' | |||
|{{NotationIcon-SCON4|2}}{{NotationIcon-SCON4|B}}{{NotationIcon-SCON4|B}} | |||
| | |||
|- | |||
|align="center"|{{NotationIcon-SCON4|String}} '''05''' | |||
|{{NotationIcon-SCON4|2}}{{NotationIcon-SCON4|B}}{{NotationIcon-SCON4|A}}{{NotationIcon-SCON4|B}} | |||
| | |||
|- | |||
|align="center"|{{NotationIcon-SCON4|String}} '''06''' | |||
|{{NotationIcon-SCON4|2}}{{NotationIcon-SCON4|B}}{{NotationIcon-SCON4|A}}{{NotationIcon-SCON4|A}} | |||
| | |||
*Can hold the final input to change the move's effect. | |||
**If not held, {{NotationIcon-SCON4|X}}Cancellable at {{NotationIcon-SCON4|2}}{{NotationIcon-SCON4|B}}{{NotationIcon-SCON4|A}}({{NotationIcon-SCON4|A}}) | |||
|- | |||
|align="center"|{{NotationIcon-SCON4|String}} '''07''' | |||
|{{NotationIcon-SCON4|6}}{{NotationIcon-SCON4|B}}{{NotationIcon-SCON4|B}}{{NotationIcon-SCON4|B}} | |||
| | |||
|- | |||
|align="center"|{{NotationIcon-SCON4|String}} '''08''' | |||
|{{NotationIcon-SCON4|6}}{{NotationIcon-SCON4|B}}{{NotationIcon-SCON4|B}}{{NotationIcon-SCON4|A}} | |||
| | |||
|- | |||
|align="center"|{{NotationIcon-SCON4|String}} '''09''' | |||
|{{NotationIcon-SCON4|6}}{{NotationIcon-SCON4|B}}{{NotationIcon-SCON4|A}}{{NotationIcon-SCON4|A}} | |||
| | |||
|- | |||
|align="center"|{{NotationIcon-SCON4|String}} '''10''' | |||
|{{NotationIcon-SCON4|4}}{{NotationIcon-SCON4|B}}{{NotationIcon-SCON4|B}} | |||
| | |||
|- | |||
|align="center"|{{NotationIcon-SCON4|String}} '''11''' | |||
|{{NotationIcon-SCON4|8}}{{NotationIcon-SCON4|B}}{{NotationIcon-SCON4|B}}{{NotationIcon-SCON4|B}} | |||
| | |||
|- | |||
|align="center"|{{NotationIcon-SCON4|String}} '''12''' | |||
|{{NotationIcon-SCON4|8}}{{NotationIcon-SCON4|B}}{{NotationIcon-SCON4|B}}{{NotationIcon-SCON4|A}} | |||
| | |||
|- | |||
|align="center"|{{NotationIcon-SCON4|String}} '''13''' | |||
|{{NotationIcon-SCON4|8}}{{NotationIcon-SCON4|B}}{{NotationIcon-SCON4|A}}{{NotationIcon-SCON4|A}} | |||
| | |||
|- | |||
|align="center"|{{NotationIcon-SCON4|String}} '''14''' | |||
|{{NotationIcon-SCON4|2}}{{NotationIcon-SCON4|A}}{{NotationIcon-SCON4|B}}{{NotationIcon-SCON4|B}} | |||
| | |||
|- | |||
|align="center"|{{NotationIcon-SCON4|String}} '''15''' | |||
|{{NotationIcon-SCON4|2}}{{NotationIcon-SCON4|A}}{{NotationIcon-SCON4|A}}{{NotationIcon-SCON4|A}} | |||
| | |||
*Can hold the final input to change the move's effect. | |||
**If not held, {{NotationIcon-SCON4|X}}Cancellable at {{NotationIcon-SCON4|2}}{{NotationIcon-SCON4|A}}{{NotationIcon-SCON4|A}}({{NotationIcon-SCON4|A}}) | |||
|- | |||
|align="center"|{{NotationIcon-SCON4|String}} '''16''' | |||
|{{NotationIcon-SCON4|run}}{{NotationIcon-SCON4|A}}{{NotationIcon-SCON4|A}}{{NotationIcon-SCON4|A}} | |||
| | |||
|} | |||
</div> | |||
==Weak Attacks== | ==Weak Attacks== | ||
===<big>5B</big>=== | ===<big>5B</big>=== | ||
{{MoveData | {{MoveData | ||
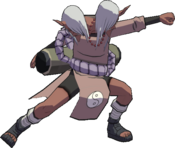
|image = SCON4_Sakon | |image = SCON4_Sakon-Ukon_5B.png | ||
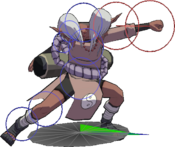
|hitbox = SCON4_Sakon | |hitbox = SCON4_Sakon-Ukon_5B_hitbox.png | ||
|caption = | |caption = | ||
|name = {{NotationIcon-SCON4|B}} | |name = {{NotationIcon-SCON4|B}} | ||
| Line 28: | Line 224: | ||
|data = | |data = | ||
{{AttackData-SCON4 | {{AttackData-SCON4 | ||
|damage = | |damage = 12 | ||
|hitlevel = | |hitlevel = High | ||
|startup = | |startup = 14 | ||
|active = | |active = 3 | ||
|recovery = | |recovery = 29 | ||
|guarddmg = - | |guarddmg = - | ||
|blockstun = - | |blockstun = - | ||
| Line 39: | Line 235: | ||
|throwinvul = - | |throwinvul = - | ||
|description = | |description = | ||
* Can go into {{NotationIcon-SCON4|B}}({{NotationIcon-SCON4|B}}) on whiff. | * Can go into {{NotationIcon-SCON4|B}}({{NotationIcon-SCON4|B}}) on whiff. | ||
5B goes into a unique second jab kick (a mid, despite looking a low). Sakon 5BBB is true on block. 5BBA is true on block for both forms. | |||
}} | }} | ||
}} | }} | ||
| Line 46: | Line 242: | ||
===<big>6B</big>=== | ===<big>6B</big>=== | ||
{{MoveData | {{MoveData | ||
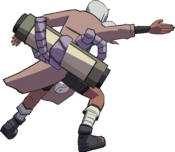
|image = SCON4_Sakon | |image = SCON4_Sakon-Ukon_6B.png | ||
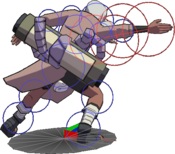
|hitbox = SCON4_Sakon | |hitbox = SCON4_Sakon-Ukon_6B_hitbox.png | ||
|caption = | |caption = | ||
|name = {{NotationIcon-SCON4|6}}{{NotationIcon-SCON4|B}} | |name = {{NotationIcon-SCON4|6}}{{NotationIcon-SCON4|B}} | ||
| Line 53: | Line 249: | ||
|data = | |data = | ||
{{AttackData-SCON4 | {{AttackData-SCON4 | ||
|damage = | |damage = 17 | ||
|hitlevel = | |hitlevel = Mid | ||
|startup = | |startup = 21 | ||
|active = | |active = 3 | ||
|recovery = | |recovery = 35 | ||
|guarddmg = - | |guarddmg = - | ||
|blockstun = - | |blockstun = - | ||
| Line 64: | Line 260: | ||
|throwinvul = - | |throwinvul = - | ||
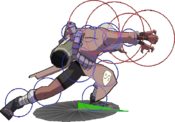
|description = | |description = | ||
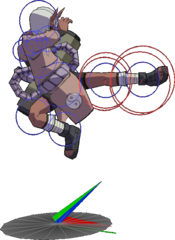
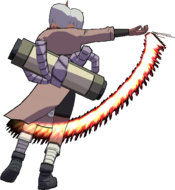
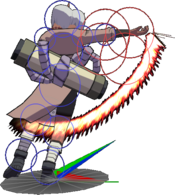
An ungraceful full-body arm slam. Causes a low spinning launch on hit. Crushes early in startup, but is his worst normal overall. | |||
}} | }} | ||
}} | }} | ||
| Line 70: | Line 266: | ||
===<big>2B</big>=== | ===<big>2B</big>=== | ||
{{MoveData | {{MoveData | ||
|image = SCON4_Sakon | |image = SCON4_Sakon-Ukon_2B.png | ||
|hitbox = SCON4_Sakon | |hitbox = SCON4_Sakon-Ukon_2B_hitbox.png | ||
|caption = | |caption = | ||
|name = {{NotationIcon-SCON4|2}}{{NotationIcon-SCON4|B}} | |name = {{NotationIcon-SCON4|2}}{{NotationIcon-SCON4|B}} | ||
| Line 77: | Line 273: | ||
|data = | |data = | ||
{{AttackData-SCON4 | {{AttackData-SCON4 | ||
|damage = | |damage = 12 | ||
|hitlevel = | |hitlevel = Low | ||
|startup = | |startup = 18 | ||
|active = | |active = 3 | ||
|recovery = | |recovery = 32 | ||
|guarddmg = - | |guarddmg = - | ||
|blockstun = - | |blockstun = - | ||
| Line 88: | Line 284: | ||
|throwinvul = - | |throwinvul = - | ||
|description = | |description = | ||
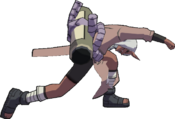
Low kick. Does not sweep or turn the opponent. 2BB is the knee followup instead of going into 8B like jab string. | |||
}} | }} | ||
}} | }} | ||
| Line 94: | Line 290: | ||
===<big>4B</big>=== | ===<big>4B</big>=== | ||
{{MoveData | {{MoveData | ||
|image = SCON4_Sakon | |image = SCON4_Sakon-Ukon_4B.png | ||
|hitbox = SCON4_Sakon | |hitbox = SCON4_Sakon-Ukon_4B_hitbox.png | ||
|caption = | |caption = | ||
|name = {{NotationIcon-SCON4|4}}{{NotationIcon-SCON4|B}} | |name = {{NotationIcon-SCON4|4}}{{NotationIcon-SCON4|B}} | ||
| Line 101: | Line 297: | ||
|data = | |data = | ||
{{AttackData-SCON4 | {{AttackData-SCON4 | ||
|damage = | |damage = 15 | ||
|hitlevel = | |hitlevel = Mid | ||
|startup = | |startup = 28 | ||
|active = | |active = 5 | ||
|recovery = | |recovery = 36 | ||
|guarddmg = - | |guarddmg = - | ||
|blockstun = - | |blockstun = - | ||
| Line 112: | Line 308: | ||
|throwinvul = - | |throwinvul = - | ||
|description = | |description = | ||
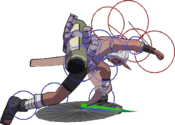
A reel back palm strike- a decent guard frame attack in terms of speed, similar to Kimi. Staggers on hit. Ukon's has a B string followup into running B. | |||
}} | }} | ||
}} | }} | ||
| Line 118: | Line 314: | ||
===<big>8B</big>=== | ===<big>8B</big>=== | ||
{{MoveData | {{MoveData | ||
|image = SCON4_Sakon | |image = SCON4_Sakon-Ukon_8B.png | ||
|hitbox = SCON4_Sakon | |hitbox = SCON4_Sakon-Ukon_8B_hitbox.png | ||
|caption = | |caption = | ||
|name = {{NotationIcon-SCON4|8}}{{NotationIcon-SCON4|B}} | |name = {{NotationIcon-SCON4|8}}{{NotationIcon-SCON4|B}} | ||
| Line 125: | Line 321: | ||
|data = | |data = | ||
{{AttackData-SCON4 | {{AttackData-SCON4 | ||
|damage = | |damage = 12 | ||
|hitlevel = | |hitlevel = High | ||
|startup = | |startup = 18 | ||
|active = | |active = 3 | ||
|recovery = | |recovery = 35 | ||
|guarddmg = - | |guarddmg = - | ||
|blockstun = - | |blockstun = - | ||
| Line 136: | Line 332: | ||
|throwinvul = - | |throwinvul = - | ||
|description = | |description = | ||
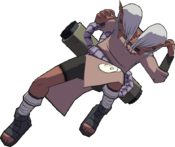
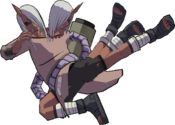
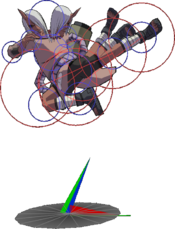
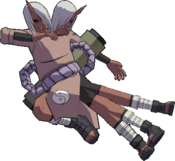
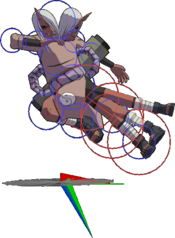
Jump kick. Launches and lifts the opponent on block. | |||
}} | }} | ||
}} | }} | ||
| Line 142: | Line 338: | ||
===<big>Running B</big>=== | ===<big>Running B</big>=== | ||
{{MoveData | {{MoveData | ||
|image = SCON4_Sakon | |image = SCON4_Sakon-Ukon_runB.png | ||
|hitbox = SCON4_Sakon | |hitbox = SCON4_Sakon-Ukon_runB_hitbox.png | ||
|caption = | |caption = | ||
|name = {{NotationIcon-SCON4|run}}{{NotationIcon-SCON4|B}} | |name = {{NotationIcon-SCON4|run}}{{NotationIcon-SCON4|B}} | ||
| Line 149: | Line 345: | ||
|data = | |data = | ||
{{AttackData-SCON4 | {{AttackData-SCON4 | ||
|damage = | |damage = 18 | ||
|hitlevel = | |hitlevel = Mid | ||
|startup = | |startup = 19 | ||
|active = | |active = 4 | ||
|recovery = | |recovery = 43 | ||
|guarddmg = - | |guarddmg = - | ||
|blockstun = - | |blockstun = - | ||
| Line 160: | Line 356: | ||
|throwinvul = - | |throwinvul = - | ||
|description = | |description = | ||
A running punch which does flying launch on hit. | |||
}} | }} | ||
}} | }} | ||
| Line 166: | Line 362: | ||
===<big>j.B</big>=== | ===<big>j.B</big>=== | ||
{{MoveData | {{MoveData | ||
|image = SCON4_Sakon | |image = SCON4_Sakon-Ukon_jB.png | ||
|hitbox = SCON4_Sakon | |hitbox = SCON4_Sakon-Ukon_jB_hitbox.png | ||
|caption = | |caption = | ||
|name = {{NotationIcon-SCON4|air}}{{NotationIcon-SCON4|B}} | |name = {{NotationIcon-SCON4|air}}{{NotationIcon-SCON4|B}} | ||
| Line 173: | Line 369: | ||
|data = | |data = | ||
{{AttackData-SCON4 | {{AttackData-SCON4 | ||
|damage = | |damage = 14 | ||
|hitlevel = | |hitlevel = Mid | ||
|startup = | |startup = 16 | ||
|active = | |active = 8 | ||
|recovery = | |recovery = Until landing | ||
|guarddmg = - | |guarddmg = - | ||
|blockstun = - | |blockstun = - | ||
| Line 184: | Line 380: | ||
|throwinvul = - | |throwinvul = - | ||
|description = | |description = | ||
An overhead elbow strike that does ground-bounce on hit. Is decently fast and does not push on block, leading to very strong strike throw mix. | |||
}} | }} | ||
}} | }} | ||
| Line 191: | Line 387: | ||
===<big>5A</big>=== | ===<big>5A</big>=== | ||
{{MoveData | {{MoveData | ||
|image = SCON4_Sakon | |image = SCON4_Sakon-Ukon_5A.png | ||
|hitbox = SCON4_Sakon | |image2 =SCON4_Sakon-Ukon_5A_Charge.png | ||
|hitbox = SCON4_Sakon-Ukon_5A_hitbox.png | |||
|hitbox2 = SCON4_Sakon-Ukon_5A_charge_hitbox.png | |||
|caption = Uncharged | |||
|caption2 = Charged | |||
|hitboxCaption = Uncharged | |||
|hitboxCaption2 = Charged | |||
|name = {{NotationIcon-SCON4|A}} | |name = {{NotationIcon-SCON4|A}} | ||
|input = | |input = | ||
| Line 208: | Line 410: | ||
|throwinvul = - | |throwinvul = - | ||
|description = | |description = | ||
A snarky kunai toss, throwing 2 uncharged and 4 charged in a tight-knit group. One of the better basic projectiles due to decent startup and recovery. | |||
}} | }} | ||
}} | }} | ||
| Line 214: | Line 416: | ||
===<big>6A</big>=== | ===<big>6A</big>=== | ||
{{MoveData | {{MoveData | ||
|image = SCON4_Sakon | |image = SCON4_Sakon-Ukon_6A.png | ||
|hitbox = SCON4_Sakon | |hitbox = SCON4_Sakon-Ukon_6A_hitbox.png | ||
|caption = | |caption = | ||
|name = {{NotationIcon-SCON4|6}}{{NotationIcon-SCON4|A}} | |name = {{NotationIcon-SCON4|6}}{{NotationIcon-SCON4|A}} | ||
| Line 221: | Line 423: | ||
|data = | |data = | ||
{{AttackData-SCON4 | {{AttackData-SCON4 | ||
|damage = | |damage = 8, 10×2 | ||
|hitlevel = | |hitlevel = Mid | ||
|startup = | |startup = 25 | ||
|active = | |active = 2(1)1(2)1 | ||
|recovery = | |recovery = 28 | ||
|guarddmg = - | |guarddmg = - | ||
|blockstun = - | |blockstun = - | ||
| Line 232: | Line 434: | ||
|throwinvul = - | |throwinvul = - | ||
|description = | |description = | ||
* | *Super cancel point | ||
Multiple fists barrage. If [A] is held, pushes on block or sends flying on hit instead of leaving the opponent in place. | |||
}} | }} | ||
}} | }} | ||
| Line 238: | Line 441: | ||
===<big>2A</big>=== | ===<big>2A</big>=== | ||
{{MoveData | {{MoveData | ||
|image = SCON4_Sakon | |image = SCON4_Sakon-Ukon_2A.png | ||
|hitbox = SCON4_Sakon | |hitbox = SCON4_Sakon-Ukon_2A_hitbox.png | ||
|caption = | |caption = | ||
|name = {{NotationIcon-SCON4|2}}{{NotationIcon-SCON4|A}} | |name = {{NotationIcon-SCON4|2}}{{NotationIcon-SCON4|A}} | ||
| Line 245: | Line 448: | ||
|data = | |data = | ||
{{AttackData-SCON4 | {{AttackData-SCON4 | ||
|damage = | |damage = 17 | ||
|hitlevel = | |hitlevel = Low | ||
|startup = | |startup = 15 | ||
|active = | |active = 3 | ||
|recovery = | |recovery = 36 | ||
|guarddmg = - | |guarddmg = - | ||
|blockstun = - | |blockstun = - | ||
| Line 256: | Line 459: | ||
|throwinvul = - | |throwinvul = - | ||
|description = | |description = | ||
A fast, low swipe which high crushes (late, on 18(?)) but low profiles most options. The main defining move of the two characters, allowing strong aggro turn-taking, and 2AB is usable on whiff. Sakon and Ukon have different B followups. | |||
}} | }} | ||
}} | }} | ||
| Line 262: | Line 465: | ||
===<big>4A</big>=== | ===<big>4A</big>=== | ||
{{MoveData | {{MoveData | ||
|image = SCON4_Sakon | |image = SCON4_Sakon-Ukon_4A.png | ||
|hitbox = SCON4_Sakon | |hitbox = SCON4_Sakon-Ukon_4A_hitbox.png | ||
|caption = | |caption = | ||
|name = {{NotationIcon-SCON4|4}}{{NotationIcon-SCON4|A}} | |name = {{NotationIcon-SCON4|4}}{{NotationIcon-SCON4|A}} | ||
| Line 271: | Line 474: | ||
|damage = - | |damage = - | ||
|hitlevel = - | |hitlevel = - | ||
|startup = | |startup = 14 | ||
|active = | |active = 36 | ||
|recovery = | |recovery = 16 | ||
|guarddmg = - | |guarddmg = - | ||
|blockstun = - | |blockstun = - | ||
| Line 280: | Line 483: | ||
|throwinvul = - | |throwinvul = - | ||
|description = | |description = | ||
Counter. At startup, immediately swaps between Sakon and Ukon. Upon activation, knocks the opponent away. Not sped up like many other 4A's in Super. | |||
On catch, they grow an arm and hit the opponent with an unblockable punch, 30 damage. | |||
}} | }} | ||
}} | }} | ||
| Line 286: | Line 491: | ||
===<big>8A</big>=== | ===<big>8A</big>=== | ||
{{MoveData | {{MoveData | ||
|image = SCON4_Sakon | |image = SCON4_Sakon-Ukon_8A.png | ||
|hitbox = SCON4_Sakon | |hitbox = SCON4_Sakon-Ukon_8A_hitbox.png | ||
|caption = | |caption = | ||
|name = {{NotationIcon-SCON4|8}}{{NotationIcon-SCON4|A}} | |name = {{NotationIcon-SCON4|8}}{{NotationIcon-SCON4|A}} | ||
| Line 293: | Line 498: | ||
|data = | |data = | ||
{{AttackData-SCON4 | {{AttackData-SCON4 | ||
|damage = | |damage = 7, 10×2, 19 | ||
|hitlevel = | |hitlevel = Mid×4 | ||
|startup = | |startup = 21 | ||
|active = | |active = 3(2)1(2)1(2)1 | ||
|recovery = | |recovery = 49 | ||
|guarddmg = - | |guarddmg = - | ||
|blockstun = - | |blockstun = - | ||
| Line 304: | Line 509: | ||
|throwinvul = - | |throwinvul = - | ||
|description = | |description = | ||
Multiple legs barrage. Sakon/Ukon ascends with the attack at a 45 degree angle. Very good for getting meter due to high damage multi-hits. Ukon's version has extra recovery on landing. | |||
}} | }} | ||
}} | }} | ||
| Line 310: | Line 515: | ||
===<big>Running A</big>=== | ===<big>Running A</big>=== | ||
{{MoveData | {{MoveData | ||
|image = SCON4_Sakon | |image = SCON4_Sakon-Ukon_runA.png | ||
|hitbox = SCON4_Sakon | |hitbox = SCON4_Sakon-Ukon_runA_hitbox.png | ||
|caption = | |caption = | ||
|name = {{NotationIcon-SCON4|run}}{{NotationIcon-SCON4|A}} | |name = {{NotationIcon-SCON4|run}}{{NotationIcon-SCON4|A}} | ||
| Line 317: | Line 522: | ||
|data = | |data = | ||
{{AttackData-SCON4 | {{AttackData-SCON4 | ||
|damage = | |damage = 18 | ||
|hitlevel = | |hitlevel = Mid | ||
|startup = | |startup = 21 | ||
|active = | |active = 7 | ||
|recovery = | |recovery = 30 | ||
|guarddmg = - | |guarddmg = - | ||
|blockstun = - | |blockstun = - | ||
| Line 328: | Line 533: | ||
|throwinvul = - | |throwinvul = - | ||
|description = | |description = | ||
An uppercut slash which lifts on block and launches on hit. Generally inferior to 2A, unless you are looking for a 1-hit Y-Cancel. | |||
}} | }} | ||
}} | }} | ||
| Line 334: | Line 539: | ||
===<big>j.A</big>=== | ===<big>j.A</big>=== | ||
{{MoveData | {{MoveData | ||
|image = SCON4_Sakon | |image = SCON4_Sakon-Ukon_jA.png | ||
|hitbox = SCON4_Sakon | |hitbox = SCON4_Sakon-Ukon_jA_hitbox.png | ||
|caption = | |caption = | ||
|name = {{NotationIcon-SCON4|air}}{{NotationIcon-SCON4|A}} | |name = {{NotationIcon-SCON4|air}}{{NotationIcon-SCON4|A}} | ||
| Line 341: | Line 546: | ||
|data = | |data = | ||
{{AttackData-SCON4 | {{AttackData-SCON4 | ||
|damage = | |damage = 7×2, 10 | ||
|hitlevel = | |hitlevel = Mid | ||
|startup = | |startup = 25 | ||
|active = | |active = Until landing | ||
|recovery = - | |recovery = - | ||
|guarddmg = - | |guarddmg = - | ||
| Line 352: | Line 557: | ||
|throwinvul = - | |throwinvul = - | ||
|description = | |description = | ||
Multiple legs barrage. A divekick which hits multiple times and can be {{NotationIcon-SCON4|yc}}-cancelled upon touching the ground. | |||
}} | }} | ||
}} | }} | ||
| Line 359: | Line 564: | ||
===<big>5Y</big>=== | ===<big>5Y</big>=== | ||
{{MoveData | {{MoveData | ||
|image = SCON4_Sakon | |image = SCON4_Sakon-Ukon_5Y.png | ||
|caption = | |caption = | ||
|name = {{NotationIcon-SCON4|Y}} | |name = {{NotationIcon-SCON4|Y}} | ||
| Line 365: | Line 570: | ||
|data = | |data = | ||
{{AttackData-SCON4 | {{AttackData-SCON4 | ||
|damage = - | |damage = 20 | ||
|hitlevel = - | |||
|startup = 1 | |||
|active = 1 | |||
|recovery = 48 | |||
|guarddmg = - | |||
|blockstun = - | |||
|advhit = - | |||
|advblock = - | |||
|throwinvul = - | |||
|description = | |||
*'''Standard Throw''' | |||
}} | |||
}} | |||
===<big>j.Y</big>=== | |||
{{MoveData | |||
|image = SCON4_Sakon-Ukon_jY.png | |||
|caption = | |||
|name = {{NotationIcon-SCON4|Air}}{{NotationIcon-SCON4|Y}} | |||
|input = | |||
|data = | |||
{{AttackData-SCON4 | |||
|damage = 20 | |||
|hitlevel = - | |hitlevel = - | ||
|startup = | |startup = 1 | ||
|active = | |active = 1 | ||
|recovery = | |recovery = Until Landing + 9 | ||
|guarddmg = - | |guarddmg = - | ||
|blockstun = - | |blockstun = - | ||
| Line 376: | Line 604: | ||
|throwinvul = - | |throwinvul = - | ||
|description = | |description = | ||
* | *'''Standard Air Throw''' | ||
*Only usable by {{NotationIcon-SCON4|sak}} | |||
}} | }} | ||
}} | }} | ||
==Special== | ==Special== | ||
===<big>5X</big>=== | ===<big>5X/6X</big>=== | ||
{{MoveData | {{MoveData | ||
|image = SCON4_Sakon | |image = SCON4_Sakon-Ukon_5X.png | ||
|hitbox = SCON4_Sakon | |hitbox = SCON4_Sakon-Ukon_5X_hitbox.png | ||
|image2 =SCON4_Sakon-Ukon_6X.png | |||
|hitbox2 = SCON4_Sakon-Ukon_6X_hitbox.png | |||
|caption = {{NotationIcon-SCON4|X}} | |||
|caption2 = {{NotationIcon-SCON4|6}} {{NotationIcon-SCON4|X}} | |||
|hitboxCaption = {{NotationIcon-SCON4|X}} | |||
|hitboxCaption2 = {{NotationIcon-SCON4|6}} {{NotationIcon-SCON4|X}} | |||
|name = {{NotationIcon-SCON4|X}} or {{NotationIcon-SCON4|6}}{{NotationIcon-SCON4|X}} | |||
|input = | |||
|data = | |||
{{AttackData-SCON4 | |||
|damage = 10, 68 | |||
|hitlevel = Mid | |||
|startup = 24 | |||
|active = 2 | |||
|recovery = 36 | |||
|guarddmg = - | |||
|blockstun = - | |||
|advhit = - | |||
|advblock = - | |||
|throwinvul = - | |||
|description = | |||
*Costs 100% (4 bars) chakra | |||
Sakon and Ukon use their multiple strike attacks and pummel their foe. Performing this super with 6X will make Sakon and Ukon switch heads during startup. | |||
}} | |||
}} | |||
===<big>2X</big>=== | |||
{{MoveData | |||
|image = SCON4_Sakon-Ukon_2X.png | |||
|hitbox = SCON4_Sakon-Ukon_2X_hitbox.png | |||
|caption = | |caption = | ||
|name = {{NotationIcon-SCON4|X}} | |name = {{NotationIcon-SCON4|2}}{{NotationIcon-SCON4|X}} | ||
|input = | |input = | ||
|data = | |data = | ||
{{AttackData-SCON4 | {{AttackData-SCON4 | ||
|damage = | |damage = 60+6 | ||
|hitlevel = - | |hitlevel = - | ||
|startup = - | |startup = - | ||
| Line 401: | Line 660: | ||
|throwinvul = - | |throwinvul = - | ||
|description = | |description = | ||
* | * Costs 75% (3 bars) chakra | ||
* Disables KnJ on hit | |||
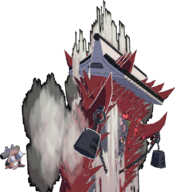
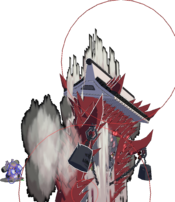
Sakon/Ukon summons a giant wall at the location of their opponent. Very fast, hard to avoid and great for punishing substitutions. | |||
}} | }} | ||
}} | }} | ||
===<big> | ===<big>4X</big>=== | ||
{{MoveData | {{MoveData | ||
|image = SCON4_Sakon | |image = SCON4_Sakon-Ukon_4X.png | ||
|caption = | |caption = | ||
|name = {{NotationIcon-SCON4| | |name = | ||
|input = {{NotationIcon-SCON4|4}}{{NotationIcon-SCON4|X}} | |||
|data = | |data = | ||
{{AttackData-SCON4 | {{AttackData-SCON4 | ||
| Line 418: | Line 678: | ||
|startup = - | |startup = - | ||
|active = - | |active = - | ||
|recovery = | |recovery = 52 Total | ||
|guarddmg = - | |guarddmg = - | ||
|blockstun = - | |blockstun = - | ||
| Line 425: | Line 685: | ||
|throwinvul = - | |throwinvul = - | ||
|description = | |description = | ||
* | *Costs 25% (1 bar) chakra | ||
Switches between Sakon and Ukon heads. Faster than 4A but does not have a counter. | |||
}} | }} | ||
}} | }} | ||
== Strategy == | ==Strategy== | ||
===Strengths=== | |||
* {{NotationIcon-SCON4|uk}} Ukon's super armor allows him to interrupt his opponent's strings and take back his turn if they are not careful with their string or move selection. When Ukon has the health lead, he can repeatedly trade hits to close out rounds. | |||
* {{NotationIcon-SCON4|uk}} Ukon can block all supers in the game. | |||
* {{NotationIcon-SCON4|sak}} Sakon has one of the longer meterless loops in the game ({{NotationIcon-SCON4|B}}{{NotationIcon-SCON4|B}}{{NotationIcon-SCON4|B}}{{NotationIcon-SCON4|B}} > {{NotationIcon-SCON4|B}}) and can get 10 or 11 hits including a finishing {{NotationIcon-SCON4|B}}{{NotationIcon-SCON4|B}}{{NotationIcon-SCON4|X}}. | |||
* {{NotationIcon-SCON4|2}}{{NotationIcon-SCON4|A}}({{NotationIcon-SCON4|A}}) is one of the best lows in the game and staggers on hit. | |||
* Raw and in-string versions of {{NotationIcon-SCON4|6}}{{NotationIcon-SCON4|A}} are super cancel points. | |||
* {{NotationIcon-SCON4|2}}{{NotationIcon-SCON4|X}} is one of the better alternate supers in the game, quickly summoning a large wall at the location of the opponent. Sakon/Ukon can checkmate opponents by looping {{NotationIcon-SCON4|B}}{{NotationIcon-SCON4|B}} and waiting until a substitution to perform {{NotationIcon-SCON4|B}}{{NotationIcon-SCON4|B}}{{NotationIcon-SCON4|2}}{{NotationIcon-SCON4|X}}. {{NotationIcon-SCON4|2}}{{NotationIcon-SCON4|X}} can also punish projectiles or whiffs from anywhere on the screen. | |||
===Weaknesses=== | |||
* {{NotationIcon-SCON4|uk}} Super armor can be broken by sweeps and all launchers. | |||
* {{NotationIcon-SCON4|uk}} Players who over-rely on super armor will see their low health quickly depleted, as opponents take advantage of a mashing Ukon by choosing moves which break super armor. Ukon may also struggle to mount a comeback from low health, as trading hits becomes a losing proposition. | |||
* {{NotationIcon-SCON4|uk}} Multi-hit moves will do unscaled damage, dealing a lot more damage to Ukon. Fire attacks such as Sasuke {{NotationIcon-SCON4|6}}{{NotationIcon-SCON4|A}} will be a death sentence if Ukon is caught by it, as Ukon does not experience hitstun through super armor and thus is left in an unsubbable position. | |||
* {{NotationIcon-SCON4|sak}} Many of Sakon's strings and combo options involve aerial juggles which can't be {{NotationIcon-SCON4|YC}}-cancelled or may drop at the wall without proper adjustment. | |||
* Aside from {{NotationIcon-SCON4|2}}{{NotationIcon-SCON4|X}}, extremely limited options at long range (basic projectile, poor run attacks and no teleport). | |||
====Other Notes==== | |||
* {{NotationIcon-SCON4|2}}{{NotationIcon-SCON4|A}}{{NotationIcon-SCON4|YC}} is the highest damage combo filler. {{NotationIcon-SCON4|2}}{{NotationIcon-SCON4|A}}{{NotationIcon-SCON4|A}}{{NotationIcon-SCON4|YC}} does less damage per hit but has higher meter build and is easier to execute | |||
* The triple punch ({{NotationIcon-SCON4|B}}{{NotationIcon-SCON4|B}}{{NotationIcon-SCON4|A}}{{NotationIcon-SCON4|A}}{{NotationIcon-SCON4|X}}, {{NotationIcon-SCON4|6}}{{NotationIcon-SCON4|A}} and {{NotationIcon-SCON4|2}}{{NotationIcon-SCON4|B}}{{NotationIcon-SCON4|A}}) is a super cancel point. | |||
* {{NotationIcon-SCON4|8}}{{NotationIcon-SCON4|A}} does high amounts of damage and builds lots of meter due to it being a multi-hit attack. It also can easily break guards. | |||
* {{NotationIcon-SCON4|2}}{{NotationIcon-SCON4|A}}{{NotationIcon-SCON4|A}} hits twice OTG. {{NotationIcon-SCON4|B}}{{NotationIcon-SCON4|B}}{{NotationIcon-SCON4|A}} can hit three times OTG. | |||
* Near walls, Sakon should use {{NotationIcon-SCON4|8}}{{NotationIcon-SCON4|B}}{{NotationIcon-SCON4|A}} instead of {{NotationIcon-SCON4|8}}{{NotationIcon-SCON4|B}}{{NotationIcon-SCON4|B}}, since combos near walls with the latter are near impossible. | |||
* {{NotationIcon-SCON4|2}}{{NotationIcon-SCON4|X}} has two large hitboxes; one centered at the top of wall and one at the bottom. The hitboxes are also disjointed- especially the upper hitbox which hits far above the model of the wall. In total, the attack is active for 15 frames. For characters with standard air R-KNJ, the attack can be avoided with an air R-KNJ used during any of the three frames preceding the attack connecting. The first active frame is the frame after the dust clouds appear, or two frames after Sakon's hands touch the ground. Because L-KNJ has fewer invulnerable frames, it can't be used to avoid the attack. The attack does have a blind spot, in the middle of the wall (just below the "roof"). If the victim is further away from Sakon (for example, after a throw), the blind spot contributes to a slightly larger air R-KNJ escape window- about five frames instead of three because they will reappear in the blind spot. | |||
==Colors== | |||
{{ColorGallery | filePrefix=SCON4_Sakon & Ukon_Color_ | imageFileTypes=png| imageWidths=200 | imageHeights=300 | colors= | |||
{{ColorGallery/Color|1| text=Default ({{NotationIcon-SCON4|A}}) }} | |||
{{ColorGallery/Color|2| text=Color 2 ({{NotationIcon-SCON4|Y}}) }} | |||
{{ColorGallery/Color|3| text=Color 3 ({{NotationIcon-SCON4|X}}) }} | |||
}} | |||
==Notable Players== | |||
:{{Template:PlayerListDisclaimer}} | |||
{| class="wikitable" | |||
!width="95"|Name | |||
!width="70"|Usual Color | |||
!width="125"|Region | |||
!Contact | |||
!Example Play | |||
|- | |||
|Paradise | |||
|style="text-align:center;"|[[File:SCON4_Sakon & Ukon_Color_2.png|110px]] | |||
|[[File:Flag_us.png]]<br>United States | |||
|Unavailable | |||
|[https://replaytheater.app/?game=scon4&c1=Sakon+%26+Ukon&p1=Paradise Paradise Replaytheater] | |||
|- | |||
|} | |||
{| class="wikitable" | |||
!width="95"|Name | |||
!width="70"|Usual Color | |||
!width="125"|Region | |||
!Contact | |||
!Example Play | |||
|- | |||
|Kitaeo | |||
|style="text-align:center;"|[[File:SCON4_Sakon & Ukon_Color_3.png|110px]] | |||
|[[File:Flag_us.png]]<br>United States | |||
|Unavailable | |||
|[https://replaytheater.app/?game=scon4&c1=Sakon+%26+Ukon&p1=Kitaeo Kitaeo Replaytheater] | |||
|- | |||
|} | |||
== Navigation == | == Navigation == | ||
{{Navbox-SCON4}} | {{Navbox-SCON4}} | ||
[[Category:Sakon | [[Category:Sakon and Ukon (SCON4)]] | ||
[[Category:Super Naruto: Clash of Ninja 4]] | [[Category:Super Naruto: Clash of Ninja 4]] | ||
Latest revision as of 14:26, 30 March 2024
| Sakon & Ukon
| |
|---|---|
| |
| Health: | 220 |
| Guard Gauge: | 1640 |
| Backdash Type: | Normal |
| Install (Ukon) | |
| Install Damage Modifier: | 1.2x |
| Install Backdash Type: | Short |
Summary
Sakon and Ukon are the closest thing GNT4 (and by extension SCON4) have to a traditional stance character. Sakon is more or less a standard, close-combat fighter, and is able to be one of the most aggressive characters in the game. The dynamic shifts once transformed into Ukon, who has passive super armor (a state in which he still takes damage but can tank many attacks without interruption) but loses out on Sakon's pressure. Ukon's unique traits emphasize the importance of matchups, as some foes may find themselves without good options against this two-in-one fighter, especially when played hyper-defensively.
Notes
Demon Twin Jutsu
This character has two forms: ![]() Sakon and
Sakon and ![]() Ukon. The round always begins as Sakon. Major differences include:
Ukon. The round always begins as Sakon. Major differences include:
 Sakon has longer strings, better meterless combos, an air throw and more health.
 Ukon has continuous super armor (as long as he's not airborne), higher damage on individual attacks, and the ability to block Unblockable attacks.
 Sakon has a normal backdash, whereas
  Ukon has a short backdash.
There are three ways to swap between Sakon and Ukon:

 - Immediately swaps the current character regardless of whether the counter is activated.
 - At the cost of 25% chakra.
 - Switches between heads. Ukon's version transforms instantly, but Sakon's transforms when the hitbox is active.
You can tell which twin is active by which head is up (Sakon is on the duo's left, Ukon is on the right), but as an additional indicator, there's a blue flash on the character every time Sakon & Ukon switch leads.
String List
| String # | Inputs | Notes |
|---|---|---|
| ||
| ||
| ||
| ||
| String # | Inputs | Notes |
|---|---|---|
| ||
| ||
| ||
Weak Attacks
5B
Toggle Hitboxes Toggle Hitboxes
|
|---|
6B
Toggle Hitboxes Toggle Hitboxes
|
|---|
2B
Toggle Hitboxes Toggle Hitboxes
|
|---|
4B
Toggle Hitboxes Toggle Hitboxes
|
|---|
8B
Toggle Hitboxes Toggle Hitboxes
|
|---|
Running B
Toggle Hitboxes Toggle Hitboxes
|
|---|
j.B
Toggle Hitboxes Toggle Hitboxes
|
|---|
Strong Attacks
5A
Uncharged Uncharged Charged Charged
|
|
|---|---|
Toggle Hitboxes Toggle Hitboxes
|
6A
Toggle Hitboxes Toggle Hitboxes
|
|---|
2A
Toggle Hitboxes Toggle Hitboxes
|
|---|
4A
Toggle Hitboxes Toggle Hitboxes
|
|---|
8A
Toggle Hitboxes Toggle Hitboxes
|
|---|
Running A
Toggle Hitboxes Toggle Hitboxes
|
|---|
j.A
Toggle Hitboxes Toggle Hitboxes
|
|---|
Throws
5Y
j.Y
Special
5X/6X
Toggle Hitboxes Toggle Hitboxes
|
|---|
2X
Toggle Hitboxes Toggle Hitboxes
|
|---|
4X
Strategy
Strengths
 Ukon's super armor allows him to interrupt his opponent's strings and take back his turn if they are not careful with their string or move selection. When Ukon has the health lead, he can repeatedly trade hits to close out rounds.
 Ukon can block all supers in the game.
 Sakon has one of the longer meterless loops in the game (


 >
>  ) and can get 10 or 11 hits including a finishing

 .
.
 (
( ) is one of the best lows in the game and staggers on hit.
- Raw and in-string versions of

 are super cancel points.
 is one of the better alternate supers in the game, quickly summoning a large wall at the location of the opponent. Sakon/Ukon can checkmate opponents by looping
 and waiting until a substitution to perform


 .
. 
 can also punish projectiles or whiffs from anywhere on the screen.
Weaknesses
 Super armor can be broken by sweeps and all launchers.
 Players who over-rely on super armor will see their low health quickly depleted, as opponents take advantage of a mashing Ukon by choosing moves which break super armor. Ukon may also struggle to mount a comeback from low health, as trading hits becomes a losing proposition.
 Multi-hit moves will do unscaled damage, dealing a lot more damage to Ukon. Fire attacks such as Sasuke
 will be a death sentence if Ukon is caught by it, as Ukon does not experience hitstun through super armor and thus is left in an unsubbable position.
 Many of Sakon's strings and combo options involve aerial juggles which can't be
  -cancelled or may drop at the wall without proper adjustment.
- Aside from

 , extremely limited options at long range (basic projectile, poor run attacks and no teleport).
Other Notes


 is the highest damage combo filler.


 does less damage per hit but has higher meter build and is easier to execute
- The triple punch (


 ,
, 
 and
and 

 ) is a super cancel point.
 does high amounts of damage and builds lots of meter due to it being a multi-hit attack. It also can easily break guards.

 hits twice OTG.

 can hit three times OTG.
- Near walls, Sakon should use


 instead of

 , since combos near walls with the latter are near impossible.
 has two large hitboxes; one centered at the top of wall and one at the bottom. The hitboxes are also disjointed- especially the upper hitbox which hits far above the model of the wall. In total, the attack is active for 15 frames. For characters with standard air R-KNJ, the attack can be avoided with an air R-KNJ used during any of the three frames preceding the attack connecting. The first active frame is the frame after the dust clouds appear, or two frames after Sakon's hands touch the ground. Because L-KNJ has fewer invulnerable frames, it can't be used to avoid the attack. The attack does have a blind spot, in the middle of the wall (just below the "roof"). If the victim is further away from Sakon (for example, after a throw), the blind spot contributes to a slightly larger air R-KNJ escape window- about five frames instead of three because they will reappear in the blind spot.
Colors
Notable Players
- Disclaimer: This list is derived from community input and is in no way comprehensive or a form of ranking of any kind. Our community criteria can be found here.
| Name | Usual Color | Region | Contact | Example Play |
|---|---|---|---|---|
| Paradise | 
|
United States |
Unavailable | Paradise Replaytheater |
| Name | Usual Color | Region | Contact | Example Play |
|---|---|---|---|---|
| Kitaeo | 
|
United States |
Unavailable | Kitaeo Replaytheater |
