Super Naruto: Clash of Ninja 4/Kimimaro: Difference between revisions
Jump to navigation
Jump to search

Scatteraxis (talk | contribs) (→Throws) |
|||
| (36 intermediate revisions by 4 users not shown) | |||
| Line 2: | Line 2: | ||
|name = Kimimaro | |name = Kimimaro | ||
|image = SCON4 Kimimaro Portrait.png | |image = SCON4 Kimimaro Portrait.png | ||
|size = | |size = 300px | ||
|health = 210 | |health = 210 | ||
|guard = 1680 | |guard = 1680 | ||
|backdash = Normal | |||
|install = | |install = | ||
|installdmgmod = | |installdmgmod = | ||
}} | }} | ||
{{TOC limit|2}} | {{TOC limit|2}} | ||
== Summary == | == Summary == | ||
Largely unchanged from his Vanilla counterpart, Kimimaro does not have access to much in the way of unique mechanics or tricks. Rather, he is a physical combatant who hits hard with slicing bone attacks and his giant dinosaur tail. The leader of the Sound Five has made many a ninja, genin and jounin alike, cry foul of his sheer efficiency grounding their health bar to zero. | |||
Largely unchanged from his Vanilla counterpart, Kimimaro does not have access to much in the way of unique mechanics or tricks. Rather, he is a physical combatant who hits hard with slicing bone attacks and giant dinosaur tail. The leader of the | |||
== Notes == | == Notes == | ||
== String List == | == String List == | ||
{|class="wikitable mw-collapsible mw-collapsed" style="margin:1em auto 1em auto" | |||
|- | |||
!align="center"|String # | |||
!align="center"|Inputs | |||
!align="center"|Notes | |||
|- | |||
|align="center"|{{NotationIcon-SCON4|String}} '''01''' | |||
|{{NotationIcon-SCON4|B}}{{NotationIcon-SCON4|B}}{{NotationIcon-SCON4|B}}{{NotationIcon-SCON4|B}}{{NotationIcon-SCON4|B}} | |||
|rowspan="5"|{{NotationIcon-SCON4|X}}Cancellable at {{NotationIcon-SCON4|B}}({{NotationIcon-SCON4|B}}) | |||
|- | |||
|align="center"|{{NotationIcon-SCON4|String}} '''02''' | |||
|{{NotationIcon-SCON4|B}}{{NotationIcon-SCON4|B}}{{NotationIcon-SCON4|B}}{{NotationIcon-SCON4|B}}{{NotationIcon-SCON4|A}} | |||
|- | |||
|align="center"|{{NotationIcon-SCON4|String}} '''03''' | |||
|{{NotationIcon-SCON4|B}}{{NotationIcon-SCON4|B}}{{NotationIcon-SCON4|B}}{{NotationIcon-SCON4|A}}{{NotationIcon-SCON4|A}} | |||
|- | |||
|align="center"|{{NotationIcon-SCON4|String}} '''04''' | |||
|{{NotationIcon-SCON4|B}}{{NotationIcon-SCON4|B}}{{NotationIcon-SCON4|A}}{{NotationIcon-SCON4|B}}{{NotationIcon-SCON4|A}} | |||
|- | |||
|align="center"|{{NotationIcon-SCON4|String}} '''05''' | |||
|{{NotationIcon-SCON4|B}}{{NotationIcon-SCON4|B}}{{NotationIcon-SCON4|A}}{{NotationIcon-SCON4|A}}{{NotationIcon-SCON4|A}} | |||
|- | |||
|align="center"|{{NotationIcon-SCON4|String}} '''06''' | |||
|{{NotationIcon-SCON4|6}}{{NotationIcon-SCON4|B}}{{NotationIcon-SCON4|B}}{{NotationIcon-SCON4|B}} | |||
| | |||
|- | |||
|align="center"|{{NotationIcon-SCON4|String}} '''07''' | |||
|{{NotationIcon-SCON4|6}}{{NotationIcon-SCON4|B}}{{NotationIcon-SCON4|B}}{{NotationIcon-SCON4|A}}{{NotationIcon-SCON4|B}}{{NotationIcon-SCON4|A}} | |||
| | |||
|- | |||
|align="center"|{{NotationIcon-SCON4|String}} '''08''' | |||
|{{NotationIcon-SCON4|6}}{{NotationIcon-SCON4|B}}{{NotationIcon-SCON4|B}}{{NotationIcon-SCON4|A}}{{NotationIcon-SCON4|A}}{{NotationIcon-SCON4|A}} | |||
| | |||
|- | |||
|align="center"|{{NotationIcon-SCON4|String}} '''09''' | |||
|{{NotationIcon-SCON4|6}}{{NotationIcon-SCON4|B}}{{NotationIcon-SCON4|A}}{{NotationIcon-SCON4|B}}{{NotationIcon-SCON4|B}}{{NotationIcon-SCON4|B}} | |||
| | |||
|- | |||
|align="center"|{{NotationIcon-SCON4|String}} '''10''' | |||
|{{NotationIcon-SCON4|6}}{{NotationIcon-SCON4|B}}{{NotationIcon-SCON4|A}}{{NotationIcon-SCON4|B}}{{NotationIcon-SCON4|B}}{{NotationIcon-SCON4|A}} | |||
| | |||
|- | |||
|align="center"|{{NotationIcon-SCON4|String}} '''11''' | |||
|{{NotationIcon-SCON4|6}}{{NotationIcon-SCON4|B}}{{NotationIcon-SCON4|A}}{{NotationIcon-SCON4|B}}{{NotationIcon-SCON4|A}}{{NotationIcon-SCON4|A}} | |||
| | |||
|- | |||
|align="center"|{{NotationIcon-SCON4|String}} '''12''' | |||
|{{NotationIcon-SCON4|6}}{{NotationIcon-SCON4|B}}{{NotationIcon-SCON4|A}}{{NotationIcon-SCON4|A}}{{NotationIcon-SCON4|A}} | |||
| | |||
|- | |||
|align="center"|{{NotationIcon-SCON4|String}} '''13''' | |||
|{{NotationIcon-SCON4|2}}{{NotationIcon-SCON4|B}}{{NotationIcon-SCON4|B}}{{NotationIcon-SCON4|B}} | |||
| | |||
|- | |||
|align="center"|{{NotationIcon-SCON4|String}} '''14''' | |||
|{{NotationIcon-SCON4|2}}{{NotationIcon-SCON4|B}}{{NotationIcon-SCON4|A}}{{NotationIcon-SCON4|B}} | |||
| | |||
|- | |||
|align="center"|{{NotationIcon-SCON4|String}} '''15''' | |||
|{{NotationIcon-SCON4|2}}{{NotationIcon-SCON4|B}}{{NotationIcon-SCON4|A}}{{NotationIcon-SCON4|A}}{{NotationIcon-SCON4|B}} | |||
| | |||
|- | |||
|align="center"|{{NotationIcon-SCON4|String}} '''16''' | |||
|{{NotationIcon-SCON4|2}}{{NotationIcon-SCON4|B}}{{NotationIcon-SCON4|A}}{{NotationIcon-SCON4|A}}{{NotationIcon-SCON4|A}} | |||
| | |||
|- | |||
|align="center"|{{NotationIcon-SCON4|String}} '''17''' | |||
|{{NotationIcon-SCON4|8}}{{NotationIcon-SCON4|B}}{{NotationIcon-SCON4|A}} | |||
| | |||
|- | |||
|align="center"|{{NotationIcon-SCON4|String}} '''18''' | |||
|{{NotationIcon-SCON4|run}}{{NotationIcon-SCON4|B}}{{NotationIcon-SCON4|B}} | |||
| | |||
|- | |||
|align="center"|{{NotationIcon-SCON4|String}} '''19''' | |||
|{{NotationIcon-SCON4|run}}{{NotationIcon-SCON4|B}}{{NotationIcon-SCON4|A}} | |||
| | |||
|- | |||
|align="center"|{{NotationIcon-SCON4|String}} '''20''' | |||
|{{NotationIcon-SCON4|6}}{{NotationIcon-SCON4|A}}{{NotationIcon-SCON4|A}}{{NotationIcon-SCON4|A}}{{NotationIcon-SCON4|A}} | |||
| | |||
|- | |||
|align="center"|{{NotationIcon-SCON4|String}} '''21''' | |||
|{{NotationIcon-SCON4|6}}{{NotationIcon-SCON4|A}}{{NotationIcon-SCON4|A}}{{NotationIcon-SCON4|B}}{{NotationIcon-SCON4|A}} | |||
| | |||
|- | |||
|align="center"|{{NotationIcon-SCON4|String}} '''22''' | |||
|{{NotationIcon-SCON4|6}}{{NotationIcon-SCON4|A}}{{NotationIcon-SCON4|B}}{{NotationIcon-SCON4|B}}{{NotationIcon-SCON4|B}} | |||
| | |||
|- | |||
|align="center"|{{NotationIcon-SCON4|String}} '''23''' | |||
|{{NotationIcon-SCON4|6}}{{NotationIcon-SCON4|A}}{{NotationIcon-SCON4|B}}{{NotationIcon-SCON4|B}}{{NotationIcon-SCON4|A}} | |||
| | |||
|- | |||
|align="center"|{{NotationIcon-SCON4|String}} '''24''' | |||
|{{NotationIcon-SCON4|6}}{{NotationIcon-SCON4|A}}{{NotationIcon-SCON4|B}}{{NotationIcon-SCON4|A}}{{NotationIcon-SCON4|A}} | |||
| | |||
|- | |||
|align="center"|{{NotationIcon-SCON4|String}} '''25''' | |||
|{{NotationIcon-SCON4|2}}{{NotationIcon-SCON4|A}}{{NotationIcon-SCON4|B}}{{NotationIcon-SCON4|B}}{{NotationIcon-SCON4|B}} | |||
| | |||
|- | |||
|align="center"|{{NotationIcon-SCON4|String}} '''26''' | |||
|{{NotationIcon-SCON4|2}}{{NotationIcon-SCON4|A}}{{NotationIcon-SCON4|B}}{{NotationIcon-SCON4|B}}{{NotationIcon-SCON4|A}} | |||
| | |||
|- | |||
|align="center"|{{NotationIcon-SCON4|String}} '''27''' | |||
|{{NotationIcon-SCON4|2}}{{NotationIcon-SCON4|A}}{{NotationIcon-SCON4|B}}{{NotationIcon-SCON4|A}}{{NotationIcon-SCON4|A}} | |||
| | |||
|- | |||
|align="center"|{{NotationIcon-SCON4|String}} '''28''' | |||
|{{NotationIcon-SCON4|2}}{{NotationIcon-SCON4|A}}{{NotationIcon-SCON4|A}}{{NotationIcon-SCON4|A}} | |||
| | |||
|- | |||
|align="center"|{{NotationIcon-SCON4|String}} '''29''' | |||
|{{NotationIcon-SCON4|8}}{{NotationIcon-SCON4|A}}{{NotationIcon-SCON4|B}} | |||
| | |||
|- | |||
|align="center"|{{NotationIcon-SCON4|String}} '''30''' | |||
|{{NotationIcon-SCON4|8}}{{NotationIcon-SCON4|A}}{{NotationIcon-SCON4|A}}{{NotationIcon-SCON4|B}} | |||
| | |||
|- | |||
|align="center"|{{NotationIcon-SCON4|String}} '''31''' | |||
|{{NotationIcon-SCON4|8}}{{NotationIcon-SCON4|A}}{{NotationIcon-SCON4|A}}{{NotationIcon-SCON4|A}} | |||
| | |||
|} | |||
==Weak Attacks== | ==Weak Attacks== | ||
| Line 30: | Line 154: | ||
|data = | |data = | ||
{{AttackData-SCON4 | {{AttackData-SCON4 | ||
|damage = | |damage = 13 | ||
|hitlevel = | |hitlevel = High | ||
|startup = 13 | |startup = 13 | ||
|active = 2 | |active = 2 | ||
|recovery = | |recovery = 30 | ||
|guarddmg = | |guarddmg = 195 | ||
|blockstun = | |blockstun = 19 | ||
|advhit = - | |advhit = - | ||
|advblock = - | |advblock = -11 | ||
|throwinvul = - | |throwinvul = - | ||
|description = | |description = | ||
*'''Primary Jab.''' | *'''Primary Jab.''' | ||
* Can go into {{NotationIcon-SCON4|B}}({{NotationIcon-SCON4|B}}) on whiff. | * Can go into {{NotationIcon-SCON4|B}}({{NotationIcon-SCON4|B}}) on whiff. | ||
5BB is -9 with 2 active frames. Double hits on-the-ground (OTG). | 5BB is 23F blockstun, -9 on block with 2 active frames (Kimimaro BBX is a just-frame). Double hits on-the-ground (OTG). | ||
}} | }} | ||
}} | }} | ||
| Line 56: | Line 180: | ||
|data = | |data = | ||
{{AttackData-SCON4 | {{AttackData-SCON4 | ||
|damage = | |damage = 20 | ||
|hitlevel = | |hitlevel = Mid | ||
|startup = | |startup = 18 | ||
|active = | |active = 4 | ||
|recovery = | |recovery = 34 | ||
|guarddmg = | |guarddmg = 300 | ||
|blockstun = | |blockstun = 18 | ||
|advhit = - | |advhit = - | ||
|advblock = - | |advblock = -18 | ||
|throwinvul = - | |throwinvul = - | ||
|description = | |description = | ||
| Line 80: | Line 204: | ||
|data = | |data = | ||
{{AttackData-SCON4 | {{AttackData-SCON4 | ||
|damage = | |damage = 12, 18 | ||
|hitlevel = | |hitlevel = Low | ||
|startup = | |startup = 16 | ||
|active = | |active = 4(12)2 | ||
|recovery = | |recovery = 32 | ||
|guarddmg = | |guarddmg = 180, 270 | ||
|blockstun = | |blockstun = 18×2 | ||
|advhit = - | |advhit = - | ||
|advblock = - | |advblock = - | ||
| Line 104: | Line 228: | ||
|data = | |data = | ||
{{AttackData-SCON4 | {{AttackData-SCON4 | ||
|damage = | |damage = 26 | ||
|hitlevel = | |hitlevel = Mid | ||
|startup = | |startup = 28 | ||
|active = | |active = 5 | ||
|recovery = | |recovery = 34 | ||
|guarddmg = | |guarddmg = 390 | ||
|blockstun = | |blockstun = 7 | ||
|advhit = - | |advhit = - | ||
|advblock = - | |advblock = - | ||
|throwinvul = - | |throwinvul = - | ||
|description = | |description = | ||
One of the more notorious 4B's of the game. Massive upwards tail swipe that spinning launches the victim and links to combos. Lifts on block. | One of the more notorious 4B's of the game. Massive upwards tail swipe that spinning launches the victim and links to combos. Lifts on block. Sometimes can low profile things during the wind up, and also low crushes during the little hop right before active frames. The upward swing and tail disjoint also makes it potentially usable as an anti-air too. | ||
{{FlagData-SCON4 | |||
|highcrush = | |||
|lowcrush = frames 21~ | |||
|midcrush = | |||
|autoguard = frames 2~19 | |||
|chipdmg = | |||
|unsub = | |||
|meterdrain = | |||
|throwinvul = | |||
}} | |||
}} | }} | ||
}} | }} | ||
| Line 128: | Line 262: | ||
|data = | |data = | ||
{{AttackData-SCON4 | {{AttackData-SCON4 | ||
|damage = | |damage = 20 | ||
|hitlevel = | |hitlevel = Mid | ||
|startup = | |startup = 17 | ||
|active = | |active = 4 | ||
|recovery = | |recovery = 41 | ||
|guarddmg = | |guarddmg = 300 | ||
|blockstun = | |blockstun = 7 | ||
|advhit = - | |advhit = - | ||
|advblock = - | |advblock = - | ||
|throwinvul = - | |throwinvul = - | ||
|description = | |description = | ||
A back flip kick which spinning launches. Seldom used due to its recovery. Can link to 5B | * Lifts on block | ||
A back flip kick which spinning launches. Seldom used due to its recovery. Can link to 5B when it connects on a high up opponent, such as after a throw. | |||
{{FlagData-SCON4 | |||
|highcrush = | |||
|lowcrush = frames 12~ | |||
|midcrush = | |||
|chipdmg = | |||
|unsub = | |||
|meterdrain = | |||
|throwinvul = | |||
}} | |||
}} | }} | ||
}} | }} | ||
| Line 152: | Line 296: | ||
|data = | |data = | ||
{{AttackData-SCON4 | {{AttackData-SCON4 | ||
|damage = | |damage = 15 | ||
|hitlevel = | |hitlevel = High | ||
|startup = | |startup = 22 | ||
|active = | |active = 4 | ||
|recovery = | |recovery = 36 | ||
|guarddmg = | |guarddmg = 225 | ||
|blockstun = | |blockstun = 18 | ||
|advhit = - | |advhit = - | ||
|advblock = - | |advblock = -19 | ||
|throwinvul = - | |throwinvul = - | ||
|description = | |description = | ||
Jumping run attack with a upwards tail swipe string. | Jumping run attack with a upwards tail swipe string. | ||
{{FlagData-SCON4 | |||
|highcrush = | |||
|lowcrush = frames 7~29 | |||
|midcrush = | |||
|chipdmg = | |||
|unsub = | |||
|meterdrain = | |||
|throwinvul = | |||
}} | |||
}} | }} | ||
}} | }} | ||
| Line 176: | Line 329: | ||
|data = | |data = | ||
{{AttackData-SCON4 | {{AttackData-SCON4 | ||
|damage = | |damage = 18 | ||
|hitlevel = | |hitlevel = Mid | ||
|startup = | |startup = 15 | ||
|active = | |active = 4 | ||
|recovery = - | |recovery = - | ||
|guarddmg = | |guarddmg = 420 | ||
|blockstun = | |blockstun = 28 | ||
|advhit = - | |advhit = - | ||
|advblock = - | |advblock = - | ||
|throwinvul = - | |throwinvul = - | ||
|description = | |description = | ||
One of Kimi's best moves. Quick overhead tail swipe which bounces the opponent or pushes on block. Recovery is cancelled if Kimi lands on the ground. | One of Kimi's best moves. Quick overhead tail swipe which bounces the opponent on hit or pushes on block. Recovery is cancelled if Kimi lands on the ground. Is able to hit behind Kimi on later frames, so it can be used as a cross-up mix on the opponent's wakeup or to keep him safe from people running under him. | ||
}} | }} | ||
}} | }} | ||
| Line 200: | Line 353: | ||
|data = | |data = | ||
{{AttackData-SCON4 | {{AttackData-SCON4 | ||
|damage = | |damage = 5+2 x2 | ||
|hitlevel = - | |hitlevel = - | ||
|startup = | |startup = 22, 25 | ||
|active = | |active = Until hit | ||
|recovery = - | |recovery = - | ||
|guarddmg = - | |guarddmg = - | ||
| Line 224: | Line 377: | ||
|data = | |data = | ||
{{AttackData-SCON4 | {{AttackData-SCON4 | ||
|damage = | |damage = 16 | ||
|hitlevel = | |hitlevel = High | ||
|startup = | |startup = 24 | ||
|active = | |active = 4 | ||
|recovery = | |recovery = 31 | ||
|guarddmg = | |guarddmg = 240 | ||
|blockstun = | |blockstun = 23 | ||
|advhit = - | |advhit = - | ||
|advblock = - | |advblock = -10 | ||
|throwinvul = - | |throwinvul = - | ||
|description = | |description = | ||
A lunging overhead slash. Rarely used. | A lunging overhead slash. Rarely used. | ||
{{FlagData-SCON4 | |||
|highcrush = | |||
|lowcrush = frames 5~23 | |||
|midcrush = | |||
|chipdmg = | |||
|unsub = | |||
|meterdrain = | |||
|throwinvul = | |||
}} | |||
}} | }} | ||
}} | }} | ||
| Line 248: | Line 410: | ||
|data = | |data = | ||
{{AttackData-SCON4 | {{AttackData-SCON4 | ||
|damage = | |damage = 18 | ||
|hitlevel = | |hitlevel = Low | ||
|startup = | |startup = 18 | ||
|active = | |active = 6 | ||
|recovery = | |recovery = 33 | ||
|guarddmg = | |guarddmg = 270 | ||
|blockstun = | |blockstun = 18 | ||
|advhit = - | |advhit = - | ||
|advblock = - | |advblock = -19 | ||
|throwinvul = - | |throwinvul = - | ||
|description = | |description = | ||
| Line 274: | Line 436: | ||
|damage = - | |damage = - | ||
|hitlevel = - | |hitlevel = - | ||
|startup = | |startup = 10 | ||
|active = | |active = 26 | ||
|recovery = | |recovery = 17 | ||
|guarddmg = - | |guarddmg = - | ||
|blockstun = - | |blockstun = - | ||
| Line 296: | Line 458: | ||
|data = | |data = | ||
{{AttackData-SCON4 | {{AttackData-SCON4 | ||
|damage = | |damage = 7x4 | ||
|hitlevel = | |hitlevel = Mid | ||
|startup = | |startup = 16 | ||
|active = | |active = 3(... | ||
|recovery = - | |recovery = - | ||
|guarddmg = | |guarddmg = 105×4 | ||
|blockstun = - | |blockstun = - | ||
|advhit = - | |advhit = - | ||
| Line 308: | Line 470: | ||
|description = | |description = | ||
Kimi's "dancing" spin into the air. Carries the opponent with him inflicting lots of chip damage when blocked. Can also be used as a janky substitution punish. | Kimi's "dancing" spin into the air. Carries the opponent with him inflicting lots of chip damage when blocked. Can also be used as a janky substitution punish. | ||
{{FlagData-SCON4 | |||
|highcrush = | |||
|lowcrush = frames 16~ | |||
|midcrush = | |||
|chipdmg = | |||
|unsub = | |||
|meterdrain = | |||
|throwinvul = | |||
}} | |||
}} | }} | ||
}} | }} | ||
| Line 320: | Line 491: | ||
|data = | |data = | ||
{{AttackData-SCON4 | {{AttackData-SCON4 | ||
|damage = | |damage = 25 | ||
|hitlevel = | |hitlevel = High | ||
|startup = | |startup = 16 | ||
|active = | |active = 15 | ||
|recovery = | |recovery = 31 | ||
|guarddmg = | |guarddmg = 375 | ||
|blockstun = | |blockstun = 23 | ||
|advhit = - | |advhit = - | ||
|advblock = - | |advblock = -20 | ||
|throwinvul = - | |throwinvul = - | ||
|description = | |description = | ||
Dino tackle! Sudden and far-reaching. Knocks the opponent down on hit. | Dino tackle! Sudden and far-reaching. Knocks the opponent down on hit. | ||
{{FlagData-SCON4 | |||
|highcrush = | |||
|lowcrush = frames 8~37 | |||
|midcrush = | |||
|chipdmg = | |||
|unsub = | |||
|meterdrain = | |||
|throwinvul = | |||
}} | |||
}} | }} | ||
}} | }} | ||
| Line 344: | Line 524: | ||
|data = | |data = | ||
{{AttackData-SCON4 | {{AttackData-SCON4 | ||
|damage = | |damage = | ||
|hitlevel = - | |hitlevel = - | ||
|startup = | |startup = 13 | ||
|active = | |active = Until hit | ||
|recovery = - | |recovery = - | ||
|guarddmg = - | |guarddmg = - | ||
| Line 355: | Line 535: | ||
|throwinvul = - | |throwinvul = - | ||
|description = | |description = | ||
Kimi throws a few bone bullets down at a 45 degree angle. Slightly slower than standard | Kimi throws a few bone bullets down at a 45 degree angle. Slightly slower than standard air shanks but has a better forward spread. | ||
}} | }} | ||
}} | }} | ||
| Line 368: | Line 548: | ||
|data = | |data = | ||
{{AttackData-SCON4 | {{AttackData-SCON4 | ||
|damage = | |damage = 20 | ||
|hitlevel = - | |hitlevel = - | ||
|startup = | |startup = 1 | ||
|active = | |active = 1 | ||
|recovery = | |recovery = 48 | ||
|guarddmg = - | |guarddmg = - | ||
|blockstun = - | |blockstun = - | ||
| Line 427: | Line 607: | ||
|throwinvul = - | |throwinvul = - | ||
|description = | |description = | ||
Dance of the Clematis. Kimi brandishes a giant bone construct and spears the opponent. The activator has Kimi lunge forward with seven active frames making it effective as a wake-up-super (WUS) or to whiff punish an unsuspecting foe. | |||
}} | }} | ||
}} | }} | ||
| Line 451: | Line 631: | ||
|throwinvul = - | |throwinvul = - | ||
|description = | |description = | ||
* | * Real-time super | ||
Kimi's Dance of the Seedling Fern jutsu where he summons a field of bone trees completely surrounding him. Hits multiple times, but the way the trees spawn is semi-random so the damage of this super is sometimes variable. Tends to hit more times when Kimi has open space in front of him; generally, Kimi wants to be far from the wall for higher amounts of damage. Can be used as a sub punish or a "checkmate" move if the opponent is at low health and will die regardless of whether they choose to substitute or not, alongside being a backturn unblockable. The attack can be 4B'd irrespective of positioning, though the victim will still take chip damage. | |||
}} | }} | ||
}} | }} | ||
== Strategy == | == Strategy == | ||
While he lacks any true tick throws or teleport cross-ups, Kimi deals lots of guard damage and has a number of viable options and whiff strings which keep opponents guessing. | |||
* {{NotationIcon-SCON4|b}}, {{NotationIcon-SCON4|b}}{{NotationIcon-SCON4|b}}, {{NotationIcon-SCON4|6}}{{NotationIcon-SCON4|b}}{{NotationIcon-SCON4|b}}, {{NotationIcon-SCON4|6}}{{NotationIcon-SCON4|a}}, and {{NotationIcon-SCON4|2}}{{NotationIcon-SCON4|b}} (depending on opponent) are safe strings | |||
* {{NotationIcon-SCON4|B}}{{NotationIcon-SCON4|B}}{{NotationIcon-SCON4|B}}, {{NotationIcon-SCON4|B}}{{NotationIcon-SCON4|B}}{{NotationIcon-SCON4|A}}, {{NotationIcon-SCON4|B}}{{NotationIcon-SCON4|B}}{{NotationIcon-SCON4|A}}{{NotationIcon-SCON4|A}} on whiff | |||
* {{NotationIcon-SCON4|Air}}{{NotationIcon-SCON4|B}} as a low committal poke | |||
* Some characters without standard air shanks struggle to punish Kimi's {{NotationIcon-SCON4|B}}{{NotationIcon-SCON4|B}}{{NotationIcon-SCON4|B}} or {{NotationIcon-SCON4|B}}{{NotationIcon-SCON4|B}}{{NotationIcon-SCON4|B}}{{NotationIcon-SCON4|B}} | |||
* {{NotationIcon-SCON4|4}}{{NotationIcon-SCON4|B}} is a high damage launcher with guard frames | |||
** Large hitbox | |||
** Five active frames | |||
** May low profile incoming attacks | |||
** Jumps during the attack with low crush frames | |||
** Functions as an effective anti-air option | |||
** Highly rewarding to land due to its damage and link to {{NotationIcon-SCON4|B}} while building chakra | |||
* {{NotationIcon-SCON4|8}}{{NotationIcon-SCON4|B}}{{NotationIcon-SCON4|A}} can be done on whiff and high and low crushes at several points.<br /> | |||
* Kimimaro has several strong punishes for missed ground techs | |||
** {{NotationIcon-SCON4|2}}{{NotationIcon-SCON4|B}} hits twice OTG, as does {{NotationIcon-SCON4|B}}{{NotationIcon-SCON4|B}} | |||
** {{NotationIcon-SCON4|B}}{{NotationIcon-SCON4|B}}{{NotationIcon-SCON4|2}}{{NotationIcon-SCON4|X}} combos OTG, making Kimi capable of closing rounds suddenly after a missed tech | |||
** {{NotationIcon-SCON4|Air}}{{NotationIcon-SCON4|B}} is quick enough to hit OTG from the air when the opportunity arises | |||
* At the wall, a blocked {{NotationIcon-SCON4|Air}}{{NotationIcon-SCON4|B}} can lead to a guaranteed {{NotationIcon-SCON4|X}} due to the extended blockstun from pushing on block. | |||
== Matchups == | |||
=== {{NotationIcon-SCON4|Shino}} === | |||
* j.A can destroy 5A bugs | |||
==Colors== | |||
{{ColorGallery | filePrefix=SCON4_Kimimaro_Color_ | imageFileTypes=png| imageWidths=200 | imageHeights=300 | colors= | |||
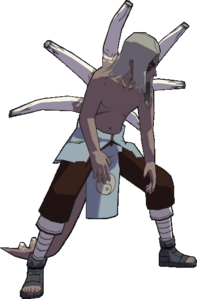
{{ColorGallery/Color|1| text=Default ({{NotationIcon-SCON4|A}}) }} | |||
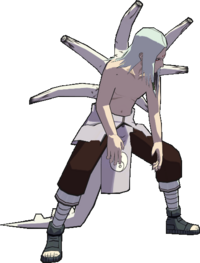
{{ColorGallery/Color|2| text=Color 2 ({{NotationIcon-SCON4|Y}}) }} | |||
{{ColorGallery/Color|3| text=Color 3 ({{NotationIcon-SCON4|X}}) }} | |||
}} | |||
==Changes from Vanilla== | |||
''This list may be outdated. Please feel free to update if need be. | |||
* WUK: uses the 2A(A) animation | |||
* Grabbable Moves: JA | |||
* 5B: elbow hitbox removed; hand hitbox made smaller for first frame only | |||
* 5B(B): improved by 6 frames on hit and block | |||
* 5BBB(B): has more lift on the second hit; does not lift on block | |||
* 6B: turns back turned people around on hit, more lift | |||
* 6B(B): more stun | |||
* 6BB(B): replaced with 4B | |||
* 6BAA(A): added as 6AAA(A) | |||
* 2B(B): now launches | |||
* 8B: has spinning knockback and ends sooner, more lift on hit | |||
* 6A: more hitstun, more lift on hit, swapped with 6A(A); hitbox appears one frame sooner | |||
* 6A(B): increased hit stun | |||
* 6A(A): made a strong hit, swapped with 6A | |||
* 6AA(A): made a strong hit, launches | |||
* 6AAA(A): does one more damage on each hit with less lift and better connection in the air | |||
* 8A(B): less lift on hit | |||
* 8A(A): less lift on hit | |||
* 4A: window for activation increased | |||
* A4A: all hits are unblockable except the last, links better on airborne | |||
* 2A(A): has more lift on hit | |||
* 2AA(A): added as 6AAA(A) | |||
* 5X: hitbox appears 5 frames sooner with adjusted hitbox | |||
* 2X: bones that did 6 damage now do 5 damage | |||
* GRKnJ: intangibility removed; made a mid from a high | |||
* ARKnJ: intangibility removed | |||
==Resources== | |||
===Gameplay footage=== | |||
[https://replaytheater.app/?game=scon4&c1=Kimimaro Kimimaro Replaytheater] | |||
==Notable Players== | |||
:{{Template:PlayerListDisclaimer}} | |||
{| class="wikitable" | |||
!width="95"|Name | |||
!width="70"|Usual Color | |||
!width="125"|Region | |||
!Contact | |||
!Example Play | |||
|- | |||
|Ricky ant | |||
|style="text-align:center;"|[[File:SCON4 Kimimaro Color 1.png|110px]] | |||
|[[File:Flag_do.png]]<br>Dominican Republic | |||
|Unavailable | |||
|[https://replaytheater.app/?game=scon4&c1=Kimimaro&p1=Ricky+ant Ricky ant matches] | |||
|- | |||
|} | |||
== Navigation == | == Navigation == | ||
Latest revision as of 07:26, 18 June 2024
| Kimimaro
| |
|---|---|

| |
| Health: | 210 |
| Guard Gauge: | 1680 |
| Backdash Type: | Normal |
Summary
Largely unchanged from his Vanilla counterpart, Kimimaro does not have access to much in the way of unique mechanics or tricks. Rather, he is a physical combatant who hits hard with slicing bone attacks and his giant dinosaur tail. The leader of the Sound Five has made many a ninja, genin and jounin alike, cry foul of his sheer efficiency grounding their health bar to zero.
Notes
String List
| String # | Inputs | Notes |
|---|---|---|
Weak Attacks
5B
  |
|
|---|---|
Toggle Hitboxes Toggle Hitboxes
|
6B
  |
|
|---|---|
Toggle Hitboxes Toggle Hitboxes
|
2B
  |
|
|---|---|
Toggle Hitboxes Toggle Hitboxes
|
4B
Toggle Hitboxes Toggle Hitboxes
|
|---|
8B
  |
|
|---|---|
Toggle Hitboxes Toggle Hitboxes
|
Running B
  |
|
|---|---|
Toggle Hitboxes Toggle Hitboxes
|
j.B
  |
|
|---|---|
Toggle Hitboxes Toggle Hitboxes
|
Strong Attacks
5A
Toggle Hitboxes Toggle Hitboxes
|
|---|
6A
Toggle Hitboxes Toggle Hitboxes
|
|---|
2A
Toggle Hitboxes Toggle Hitboxes
|
|---|
4A
Toggle Hitboxes Toggle Hitboxes
|
|---|
8A
Toggle Hitboxes Toggle Hitboxes
|
|---|
Running A
Toggle Hitboxes Toggle Hitboxes
|
|---|
j.A
Toggle Hitboxes Toggle Hitboxes
|
|---|
Throws
5Y
j.Y
Special
5X
Toggle Hitboxes Toggle Hitboxes
|
|---|
2X
Toggle Hitboxes Toggle Hitboxes
|
|---|
Strategy
While he lacks any true tick throws or teleport cross-ups, Kimi deals lots of guard damage and has a number of viable options and whiff strings which keep opponents guessing.
 , ,
, ,  ,
,  , and
, and  (depending on opponent) are safe strings
- , , on whiff
 as a low committal poke
- Some characters without standard air shanks struggle to punish Kimi's or
 is a high damage launcher with guard frames
- Large hitbox
- Five active frames
- May low profile incoming attacks
- Jumps during the attack with low crush frames
- Functions as an effective anti-air option
- Highly rewarding to land due to its damage and link to while building chakra
 can be done on whiff and high and low crushes at several points.
- Kimimaro has several strong punishes for missed ground techs
- hits twice OTG, as does
 combos OTG, making Kimi capable of closing rounds suddenly after a missed tech
- is quick enough to hit OTG from the air when the opportunity arises
- At the wall, a blocked can lead to a guaranteed due to the extended blockstun from pushing on block.
Matchups
 Shino
Shino
- j.A can destroy 5A bugs
Colors
Default ()

Color 2 ( )
)

Color 3 ()

Changes from Vanilla
This list may be outdated. Please feel free to update if need be.
- WUK: uses the 2A(A) animation
- Grabbable Moves: JA
- 5B: elbow hitbox removed; hand hitbox made smaller for first frame only
- 5B(B): improved by 6 frames on hit and block
- 5BBB(B): has more lift on the second hit; does not lift on block
- 6B: turns back turned people around on hit, more lift
- 6B(B): more stun
- 6BB(B): replaced with 4B
- 6BAA(A): added as 6AAA(A)
- 2B(B): now launches
- 8B: has spinning knockback and ends sooner, more lift on hit
- 6A: more hitstun, more lift on hit, swapped with 6A(A); hitbox appears one frame sooner
- 6A(B): increased hit stun
- 6A(A): made a strong hit, swapped with 6A
- 6AA(A): made a strong hit, launches
- 6AAA(A): does one more damage on each hit with less lift and better connection in the air
- 8A(B): less lift on hit
- 8A(A): less lift on hit
- 4A: window for activation increased
- A4A: all hits are unblockable except the last, links better on airborne
- 2A(A): has more lift on hit
- 2AA(A): added as 6AAA(A)
- 5X: hitbox appears 5 frames sooner with adjusted hitbox
- 2X: bones that did 6 damage now do 5 damage
- GRKnJ: intangibility removed; made a mid from a high
- ARKnJ: intangibility removed
Resources
Gameplay footage
Notable Players
- Disclaimer: This list is derived from community input and is in no way comprehensive or a form of ranking of any kind. Our community criteria can be found here.
| Name | Usual Color | Region | Contact | Example Play |
|---|---|---|---|---|
| Ricky ant |
|
Dominican Republic |
Unavailable | Ricky ant matches |