Super Naruto: Clash of Ninja 4/Zabuza: Difference between revisions
Jump to navigation
Jump to search

(→8B) |
Scatteraxis (talk | contribs) (→5X) |
||
| (40 intermediate revisions by 2 users not shown) | |||
| Line 10: | Line 10: | ||
|content1= | |content1= | ||
== Summary == | == Summary == | ||
"The Demon of the Hidden Mist" was generally overshadowed in Vanilla GNT4 by his fellow swordsman, {{NotationIcon-SCON4|Kisame}}. Both were characterized by their big hitboxes, | "The Demon of the Hidden Mist" was generally overshadowed in Vanilla GNT4 by his fellow swordsman, {{NotationIcon-SCON4|Kisame}}. Both were very similar, characterized by their big hitboxes, damage, and slow attacks, though Zabuza lacked his counterpart's crucial chakra drain without much else to make up for it. In ''Super'', Zabuza is one of the more dramatically re-worked characters. Compared to Kisame, Zabuza benefits from better movement options, such as 4A and running A teleports, new and improved strings on block, his 8A anti-KNJ, and a 4X reversal. A moveset befitting a master of stealth and murder. | ||
== | == Character Traits == | ||
* '''Very high guard damage strings.''' Zabuza can easily guard break opponents with just one or two if the opponent doesn't do the proper escapes. | |||
* '''Combo demon.''' Zabuza has such a wide array of EMPIRE combo routes possible that can also bait & punish KnJ in the middle (8B, 8A, j.6A) and also end in super because he has two 3-bar supers ({{NotationIcon-SCON4|yc}} > super is easy). | |||
* '''Two reversal supers''', one of them safe on block and the other can guard crush on block. | |||
* '''Decent okizeme mix''' between j.A being plus or even Phantom Sword unblockable, and 6[A] guard crush | |||
'''Super Cancel Points''' | |||
* {{NotationIcon-SCON4|B}}({{NotationIcon-SCON4|B}}) | |||
}} | }} | ||
| Line 185: | Line 192: | ||
|data = | |data = | ||
{{AttackData-SCON4 | {{AttackData-SCON4 | ||
|damage = | |damage = 15 | ||
|hitlevel = | |hitlevel = High | ||
|startup = 15 | |startup = 15 | ||
|active = 2 | |active = 2 | ||
|recovery = | |recovery = 29 | ||
|guarddmg = - | |guarddmg = - | ||
|blockstun = | |blockstun = 19 | ||
|advhit = - | |advhit = - | ||
|advblock = - | |advblock = -10 | ||
|throwinvul = - | |throwinvul = - | ||
|description = | |description = | ||
*'''Primary Jab.''' | *'''Primary Jab.''' | ||
* Can go into {{NotationIcon-SCON4|B}}({{NotationIcon-SCON4|B}}) on whiff. | * Can go into {{NotationIcon-SCON4|B}}({{NotationIcon-SCON4|B}}) on whiff. | ||
5BB is -6 on block | |||
}} | }} | ||
}} | }} | ||
| Line 210: | Line 218: | ||
|data = | |data = | ||
{{AttackData-SCON4 | {{AttackData-SCON4 | ||
|damage = | |damage = 14 | ||
|hitlevel = | |hitlevel = Mid | ||
|startup = 21 | |startup = 21 | ||
|active = 4 | |active = 4 | ||
|recovery = | |recovery = 34 | ||
|guarddmg = - | |guarddmg = - | ||
|blockstun = | |blockstun = 15 | ||
|advhit = - | |advhit = - | ||
|advblock = - | |advblock = -21 | ||
|throwinvul = - | |throwinvul = - | ||
|description = | |description = | ||
Far-reaching dashing elbow. | Far-reaching dashing elbow. Strings into sword attacks on connect, but the hitboxes don't come out until Zabuza has already moved a decent distance so at close ranges it can whiff easily if he is even slightly off-axis. Also has low crush frames, but they don't start until the frame before the move goes active so it's pretty poor for crushing outside of WUK. | ||
{{FlagData-SCON4 | {{FlagData-SCON4 | ||
|highcrush = | |highcrush = | ||
| Line 243: | Line 251: | ||
|data = | |data = | ||
{{AttackData-SCON4 | {{AttackData-SCON4 | ||
|damage = | |damage = 13 | ||
|hitlevel = | |hitlevel = Low | ||
|startup = 20 | |startup = 20 | ||
|active = 4 | |active = 4 | ||
|recovery = | |recovery = 31 | ||
|guarddmg = - | |guarddmg = - | ||
|blockstun = | |blockstun = 23 | ||
|advhit = - | |advhit = - | ||
|advblock = - | |advblock = -10 | ||
|throwinvul = - | |throwinvul = - | ||
|description = | |description = | ||
Classic low sweep, further range than many because Zabuza is tall. | |||
2BB low crushes and also flying screen launches on hit for carry and combos. | |||
{{FlagData-SCON4 | {{FlagData-SCON4 | ||
|highcrush = frames 15~43 | |highcrush = frames 15~43 | ||
| Line 276: | Line 286: | ||
|data = | |data = | ||
{{AttackData-SCON4 | {{AttackData-SCON4 | ||
|damage = | |damage = 26 | ||
|hitlevel = | |hitlevel = Mid | ||
|startup = 38 | |startup = 38 | ||
|active = 4 | |active = 4 | ||
|recovery = | |recovery = 44 | ||
|guarddmg = - | |guarddmg = - | ||
|blockstun = - | |blockstun = - | ||
| Line 287: | Line 297: | ||
|throwinvul = - | |throwinvul = - | ||
|description = | |description = | ||
Fundamentally crappy 4B; incredibly slow to start up and slow to recover, and has the same close-range issue as 6B where it whiffs easily if even slightly off-axis in CQC. At least Zabz can do strings on connect. | |||
{{FlagData-SCON4 | {{FlagData-SCON4 | ||
|highcrush = | |highcrush = | ||
| Line 310: | Line 320: | ||
|data = | |data = | ||
{{AttackData-SCON4 | {{AttackData-SCON4 | ||
|damage = | |damage = 13 | ||
|hitlevel = | |hitlevel = High | ||
|startup = | |startup = 18 | ||
|active = 4 | |active = 4 | ||
|recovery = | |recovery = 31 | ||
|guarddmg = - | |guarddmg = - | ||
|blockstun = | |blockstun = 14 | ||
|advhit = - | |advhit = - | ||
|advblock = - | |advblock = -9 | ||
|throwinvul = - | |throwinvul = - | ||
|description = | |description = | ||
| Line 338: | Line 348: | ||
{{MoveData | {{MoveData | ||
|image = SCON4_Zabuza_runB.png | |image = SCON4_Zabuza_runB.png | ||
|hitbox = SCON4_Zabuza_runB_hitbox.png | |||
|caption = | |caption = | ||
|name = {{NotationIcon-SCON4|run}}{{NotationIcon-SCON4|B}} | |name = {{NotationIcon-SCON4|run}}{{NotationIcon-SCON4|B}} | ||
| Line 343: | Line 354: | ||
|data = | |data = | ||
{{AttackData-SCON4 | {{AttackData-SCON4 | ||
|damage = | |damage = 20 | ||
|hitlevel = | |hitlevel = Mid | ||
|startup = 19 | |startup = 19 | ||
|active = 3 | |active = 3 | ||
|recovery = | |recovery = 32 | ||
|guarddmg = - | |guarddmg = - | ||
|blockstun = | |blockstun = 23 | ||
|advhit = - | |advhit = - | ||
|advblock = - | |advblock = -10 | ||
|throwinvul = - | |throwinvul = - | ||
|description = | |description = | ||
| Line 373: | Line 384: | ||
{{MoveData | {{MoveData | ||
|image = SCON4_Zabuza_jB.png | |image = SCON4_Zabuza_jB.png | ||
|hitbox = SCON4_Zabuza_jB_hitbox.png | |||
|caption = | |caption = | ||
|name = {{NotationIcon-SCON4|air}}{{NotationIcon-SCON4|B}} | |name = {{NotationIcon-SCON4|air}}{{NotationIcon-SCON4|B}} | ||
| Line 378: | Line 390: | ||
|data = | |data = | ||
{{AttackData-SCON4 | {{AttackData-SCON4 | ||
|damage = | |damage = 20 | ||
|hitlevel = - | |hitlevel = - | ||
|startup = - | |startup = - | ||
| Line 402: | Line 414: | ||
|data = | |data = | ||
{{AttackData-SCON4 | {{AttackData-SCON4 | ||
|damage = | |damage = 20 | ||
|hitlevel = | |hitlevel = Mid | ||
|startup = 29 | |startup = 29 | ||
|active = 3 | |active = 3 | ||
|recovery = 41 | |recovery = 41 | ||
|guarddmg = - | |guarddmg = - | ||
|blockstun = | |blockstun = 23 | ||
|advhit = - | |advhit = - | ||
|advblock = - | |advblock = -19 | ||
|throwinvul = - | |throwinvul = - | ||
|description = | |description = | ||
| Line 425: | Line 437: | ||
|data = | |data = | ||
{{AttackData-SCON4 | {{AttackData-SCON4 | ||
|damage = | |damage = 20 | ||
|hitlevel = | |hitlevel = Mid | ||
|startup = 31 | |startup = 31 | ||
|active = 5 | |active = 5 | ||
|recovery = 34 | |recovery = 34 | ||
|guarddmg = - | |guarddmg = - | ||
|blockstun = | |blockstun = 23 | ||
|advhit = - | |advhit = - | ||
|advblock = - | |advblock = -14 | ||
|throwinvul = - | |throwinvul = - | ||
|description = | |description = | ||
* Can be charged by holding {{NotationIcon-SCON4|A}} | * Can be charged by holding {{NotationIcon-SCON4|A}} | ||
Horizontal sword slash that can hit sidesteps due to its direction and active frames, and strings into Zabuza's sword string on connect. Charged version is an instant guard break. | Horizontal sword slash that can hit sidesteps due to its direction and active frames, and strings into the rest of Zabuza's sword string on connect. Charged version is an instant guard break, good for oki situations especially when close to walls where it can still track up/down rolls and hit thanks to the range. | ||
}} | }} | ||
}} | }} | ||
| Line 449: | Line 461: | ||
|data = | |data = | ||
{{AttackData-SCON4 | {{AttackData-SCON4 | ||
|damage = | |damage = 18 | ||
|hitlevel = | |hitlevel = Low | ||
|startup = 28 | |startup = 28 | ||
|active = 3 | |active = 3 | ||
|recovery = 37 | |recovery = 37 | ||
|guarddmg = - | |guarddmg = - | ||
|blockstun = | |blockstun = 23 | ||
|advhit = - | |advhit = - | ||
|advblock = -16 | |advblock = -16 | ||
| Line 496: | Line 508: | ||
|data = | |data = | ||
{{AttackData-SCON4 | {{AttackData-SCON4 | ||
|damage = | |damage = 17 | ||
|hitlevel = | |hitlevel = Mid | ||
|startup = 27 | |startup = 27 | ||
|active = 8 | |active = 8 | ||
| Line 553: | Line 565: | ||
|data = | |data = | ||
{{AttackData-SCON4 | {{AttackData-SCON4 | ||
|damage = | |damage = 15 | ||
|hitlevel = | |hitlevel = Mid | ||
|startup = 17 | |startup = 17 | ||
|active = 3 | |active = 3 | ||
|recovery = 9+9L | |recovery = 9+9L | ||
|guarddmg = - | |guarddmg = - | ||
|blockstun = | |blockstun = 23 | ||
|advhit = - | |advhit = - | ||
|advblock = plus | |advblock = plus | ||
| Line 567: | Line 579: | ||
Zabuza trades having a fast air projectile like most characters to instead have a massive arcing swordsman sword slash. {{NotationIcon-SCON4|air}}{{NotationIcon-SCON4|A}} is one of Zabuza's absolute best tools in his entire moveset that can work for almost everything due to the speed and range of the attack. It leads to plus frames on block for pressure, staggers on hit for combos, can help him mash out of pressure reset and mix attempts after he gets lifted on block, and also uniquely neutralizes projectiles it swings through. However, it's also one of the few moves in the game that is completely throw vulnerable, so while his control with this attack is very good it's not foolproof to characters and players who are ready to air throw him if he's spamming it too predictably. | Zabuza trades having a fast air projectile like most characters to instead have a massive arcing swordsman sword slash. {{NotationIcon-SCON4|air}}{{NotationIcon-SCON4|A}} is one of Zabuza's absolute best tools in his entire moveset that can work for almost everything due to the speed and range of the attack. It leads to plus frames on block for pressure, staggers on hit for combos, can help him mash out of pressure reset and mix attempts after he gets lifted on block, and also uniquely neutralizes projectiles it swings through. However, it's also one of the few moves in the game that is completely throw vulnerable, so while his control with this attack is very good it's not foolproof to characters and players who are ready to air throw him if he's spamming it too predictably. | ||
When {{NotationIcon-SCON4|air}}{{NotationIcon-SCON4|A}} connects with the opponent on Zabuza's very last frame before landing, | When {{NotationIcon-SCON4|air}}{{NotationIcon-SCON4|A}} connects with the opponent on Zabuza's very last frame before landing, a [[Super Naruto: Clash of Ninja 4/Esoterica#Phantom_Sword_Glitch|Phantom Sword]] can occur, allowing it to double as meterless unblockable oki at any time. | ||
{{FlagData-SCON4 | {{FlagData-SCON4 | ||
|throwinvul=None | |throwinvul=None | ||
| Line 582: | Line 594: | ||
|data = | |data = | ||
{{AttackData-SCON4 | {{AttackData-SCON4 | ||
|damage = | |damage = 15 | ||
|hitlevel = | |hitlevel = High | ||
|startup = 17 | |startup = 17 | ||
|active = 3 | |active = 3 | ||
|recovery = 9+9L | |recovery = 9+9L | ||
|guarddmg = - | |guarddmg = - | ||
|blockstun = | |blockstun = 23 | ||
|advhit = | |advhit = Launch | ||
|advblock = plus | |advblock = plus | ||
|throwinvul = - | |throwinvul = - | ||
|description = | |description = | ||
* | * Flying screen launch on hit | ||
Horizontal air sword slash. Another great air-to-air option, especially since it can start or continue combos on airborne opponents unlike his {{NotationIcon-SCON4|air}}{{NotationIcon-SCON4|A}} thanks to flying screen launch. Make sure that Zabuza's at the right height when using this, since the hitbox doesn't really hit any lower than the sword appears (whiffs very easily on short standing characters, like the Konoha 11). | |||
}} | }} | ||
}} | }} | ||
| Line 678: | Line 691: | ||
{{AttackData-SCON4 | {{AttackData-SCON4 | ||
|damage = 83 | |damage = 83 | ||
|hitlevel = | |hitlevel = Mid | ||
|startup = 19 | |startup = 19 | ||
|active = 4 | |active = 4 | ||
| Line 688: | Line 701: | ||
|throwinvul = - | |throwinvul = - | ||
|description = | |description = | ||
* Cinematic super | |||
* Costs 100% (4 bars) chakra | * Costs 100% (4 bars) chakra | ||
Zabuza does a fast and far dash forward with his greatsword, spearing the opponent and following up with slashes while | Zabuza does a fast and far dash forward with his greatsword as the activator, spearing the opponent and following up with slashes while hidden in the mist. Can be used for a quick mid-stage punish to zoning just like Chidori, just with better practical range and hitboxes. Hell, the hitboxes and their interpolation is generous enough to where sometimes it can even hit KnJ and other close range teleports behind Zabuza even if it doesn't look like it would. | ||
Standard combo ender for {{NotationIcon-SCON4|B}}{{NotationIcon-SCON4|B}}{{NotationIcon-SCON4|X}}, but can also go after 2BB close to walls if you can't hit the just-frame. | Standard combo ender for {{NotationIcon-SCON4|B}}{{NotationIcon-SCON4|B}}{{NotationIcon-SCON4|X}}, but can also go after 2BB close to walls if you can't hit the just-frame. | ||
{{FlagData-SCON4 | |||
|unsub = yes | |||
}} | |||
}} | }} | ||
}} | }} | ||
| Line 704: | Line 721: | ||
{{AttackData-SCON4 | {{AttackData-SCON4 | ||
|damage = 77 <br> (12*2, 13*3, 30) | |damage = 77 <br> (12*2, 13*3, 30) | ||
|hitlevel = | |hitlevel = Mid | ||
|startup = 25 | |startup = 25 | ||
|active = 66 | |active = 66 | ||
| Line 714: | Line 731: | ||
|throwinvul = - | |throwinvul = - | ||
|description = | |description = | ||
* Requires 75% (3 bars) chakra, but will consume all chakra | * Requires 75% (3 bars) chakra to use, but will consume all chakra when executed. | ||
Rapid spinning slashes that hit 360 degrees around Zabuza. Deals less damage than 5X, but in exchange, it can be used as an anti-KnJ super if the opponent's going to try to escape his combos. Foolproof on air RKnJ and LKnJs, but can still lose to grounded RKnJs that | Rapid spinning slashes that hit 360 degrees around Zabuza and deals massive guard damage as well, being able to guard bar break many characters from full if all 6 hits connect. Deals less damage than 5X, but in exchange, it can be used as an anti-KnJ super if the opponent's going to try to escape his combos, and also has some reversal crush frames for getting out of sticky situations. Foolproof on air RKnJ and LKnJs, but can still lose to grounded RKnJs that duck very low (such as {{NotationIcon-SCON4|Kankuro}} or {{NotationIcon-SCON4|Orochimaru}}). Also is great for chipping the opponent out at the same time as forcing a guard break, leading to situational checkmates when used as okizeme. | ||
{{FlagData-SCON4 | |||
|highcrush = frames 11~36 | |||
|lowcrush = | |||
|midcrush = frames 11~36 | |||
|chipdmg = | |||
|unsub = yes | |||
|meterdrain = | |||
|throwinvul = | |||
|autoguard = | |||
}} | |||
}} | }} | ||
}} | }} | ||
| Line 728: | Line 755: | ||
{{AttackData-SCON4 | {{AttackData-SCON4 | ||
|damage = 45 | |damage = 45 | ||
|hitlevel = | |hitlevel = Mid | ||
|startup = 14 | |startup = 14 | ||
|active = 4 | |active = 4 | ||
| Line 739: | Line 766: | ||
|description = | |description = | ||
* Costs 75% (3 bars) chakra | * Costs 75% (3 bars) chakra | ||
Zabuza grabs the opponent out of whatever they were doing and and decks them in the face. This super is a hitgrab with relatively low damage and low range, but | Zabuza grabs the opponent out of whatever they were doing and and decks them in the face. This super is a hitgrab with relatively low damage and low range, but is a true crush reversal and also has very low recovery, being even safer on block and whiff than jabs. | ||
On hit, can be followed up with OTG 6BB afterward if close to walls. | |||
{{FlagData-SCON4 | |||
|highcrush = frames 1~15 | |||
|lowcrush = | |||
|midcrush = frames 1~15 | |||
|chipdmg = | |||
|unsub = yes | |||
|meterdrain = | |||
|throwinvul = | |||
|autoguard = | |||
}} | |||
}} | }} | ||
}} | }} | ||
| Line 762: | Line 799: | ||
{{ColorGallery/Color|3| text=Color 3 ({{NotationIcon-SCON4|X}}) }} | {{ColorGallery/Color|3| text=Color 3 ({{NotationIcon-SCON4|X}}) }} | ||
}} | }} | ||
==Changes from Vanilla== | |||
(May be outdated, please let wiki editors know if there are further updates) | |||
* All non sword attacks do -2 damage (except 5B and 5B(B)) | |||
* 5B: elbow hitbox does not show up on the first frame | |||
* 5B(B): appears and disappears one frame later | |||
* 5B(A): Changed to 2A with all follow-ups | |||
* 6B: turns back turned opponents around on hit | |||
* 5BBB(B): can be delayed | |||
* 2B: Now does a custom animation, taken from ''Bloody Roar: Extreme''. Hits as a low sweep with string follow-ups | |||
* 8B: has less endlag; transitions to A faster; more lift; can transition on whiff | |||
* JB: ground hit stuns longer; grabbable | |||
* 5A: hitbox appears one frame sooner as an untechable bounce as a high hit; frame 3 to the end does not bounce; hilt hitbox does not appear on the two frames | |||
* 5AAA follow ups changed: | |||
** A does vanilla; is a hard knockdown | |||
** 2A does vanilla B follow up | |||
** B follow up changed to be a custom 8A teleport | |||
* 6A: charge is faster, 1C breaks guard easier, other charges do less guard damage; 3C is a hard knockdown | |||
* 4A: Reversible teleport similar in function to Vanilla Itachi and Orochimaru. | |||
* 2A: Lift reduced | |||
* 2A(A): Added with follow-ups, same as 5AA(A) | |||
* 8A: Instead performs Kisame's A4A attack, a big, arcing slash from front to back. High crush and spinning launch. | |||
* JA: phantom sword works with both players; has one more active frame | |||
* J6A: added as a new move | |||
* 5Y: made overhead throw | |||
* 2Y: is slam throw | |||
* 4X: Reversal hit-grab with high and mid crush frames | |||
* 2X: is immune to highs and mids on startup, requires 75% meter, links better on air hits, damage reduced; hilt hitbox on first revolution is slightly bigger | |||
==Resources== | |||
===Guides and Info=== | |||
* [https://youtu.be/YtYnE99AJTY Zabuza video guide] | |||
===Gameplay footage=== | |||
* [https://replaytheater.app/?game=scon4&c1=Zabuza Zabuza Replaytheater] | |||
==Notable Players== | |||
:{{Template:PlayerListDisclaimer}} | |||
{| class="wikitable" | |||
!width="95"|Name | |||
!width="70"|Usual Color | |||
!width="125"|Region | |||
!Contact | |||
!Example Play | |||
|- | |||
|Paradise | |||
|style="text-align:center;"|[[File:SCON4 Zabuza Color 1.png|110px]] | |||
|[[File:Flag_us.png]]<br>United States | |||
|Unavailable | |||
|[https://replaytheater.app/?game=scon4&c1=Zabuza&p1=Paradise Paradise matches] | |||
|- | |||
|} | |||
== Navigation == | == Navigation == | ||
Latest revision as of 19:05, 9 March 2024
Summary
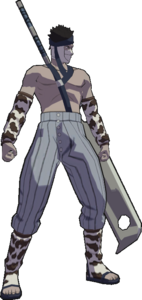
"The Demon of the Hidden Mist" was generally overshadowed in Vanilla GNT4 by his fellow swordsman, ![]() Kisame. Both were very similar, characterized by their big hitboxes, damage, and slow attacks, though Zabuza lacked his counterpart's crucial chakra drain without much else to make up for it. In Super, Zabuza is one of the more dramatically re-worked characters. Compared to Kisame, Zabuza benefits from better movement options, such as 4A and running A teleports, new and improved strings on block, his 8A anti-KNJ, and a 4X reversal. A moveset befitting a master of stealth and murder.
Kisame. Both were very similar, characterized by their big hitboxes, damage, and slow attacks, though Zabuza lacked his counterpart's crucial chakra drain without much else to make up for it. In Super, Zabuza is one of the more dramatically re-worked characters. Compared to Kisame, Zabuza benefits from better movement options, such as 4A and running A teleports, new and improved strings on block, his 8A anti-KNJ, and a 4X reversal. A moveset befitting a master of stealth and murder.
Character Traits
- Very high guard damage strings. Zabuza can easily guard break opponents with just one or two if the opponent doesn't do the proper escapes.
- Combo demon. Zabuza has such a wide array of EMPIRE combo routes possible that can also bait & punish KnJ in the middle (8B, 8A, j.6A) and also end in super because he has two 3-bar supers (
 > super is easy).
 - Two reversal supers, one of them safe on block and the other can guard crush on block.
- Decent okizeme mix between j.A being plus or even Phantom Sword unblockable, and 6[A] guard crush
Super Cancel Points
 ()
()
| Zabuza
| |
|---|---|

| |
| Health: | 230 |
| Guard Gauge: | 1840 |
| Backdash Type: | Normal |
String List
| String # | Inputs | Notes |
|---|---|---|
| ||
| ||
| ||
| ||
| ||
Weak Attacks
5B
  |
|
|---|---|
Toggle Hitboxes Toggle Hitboxes
|
6B
  |
|
|---|---|
Toggle Hitboxes Toggle Hitboxes
|
2B
  |
|
|---|---|
Toggle Hitboxes Toggle Hitboxes
|
4B
  |
|
|---|---|
Toggle Hitboxes Toggle Hitboxes
|
8B
  |
|
|---|---|
Toggle Hitboxes Toggle Hitboxes
|
Running B
  |
|
|---|---|
Toggle Hitboxes Toggle Hitboxes
|
j.B
  |
|
|---|---|
Toggle Hitboxes Toggle Hitboxes
|
Strong Attacks
5A
6A
2A
4A
8A
Running A
j.A
j.6A
Throws
5Y
2Y
j.Y
Specials
5X
2X
4X
Strategy
- j.A can be considered the signature swordsmen attack for both Zabuza and Kisame. Its big, vertical hitbox controls space and is useful for both approaches and defensive retreats. When it connects with the oppponent's guard as Zabuza descends, it frequently results in frame advantage because the attack animation is automatically cancelled once Zabuza lands on the ground. Zabuza can use this frame advantage to perform a strike/throw mix, made more potent due to Zabuza's high damage 2Y slam throw.
- On hit, j.A staggers, also resulting in a strike/throw mix, though Zabuza can combo with an attack if he desires.
- The phantom sword glitch gives Zabuza access to an unblockable aerial attack if the user has good timing.
- Defensively, j.A is one of the strongest counters in the game to opposing strings which lift Zabuza into the air.
- Zabuza can jump back and j.A to punish opponents attempting to take back their turn following a Zabuza blockstring.
- For okizeme, if the opponent uses neutral get up or wake-up-kick (WUK), Zabuza can jump over the opponent and then double jump back to the front side and j.A, crossing up their guard or punishing WUK.
- Both swordsmen have a faster backwalk than most other characters. This allows them to walk backwards out of some strings where other characters cannot.
- Zabuza's combo game has some advantages by walls, corners or on small stages, gaining access to combos which utilize 5B6B, 2BB, 2AA, and 8A.
- 2X can be used during guard pressure to threaten a guard break.
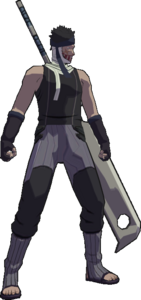
Colors
Default ( )
)

Color 2 ( )
)

Color 3 ( )
)

Changes from Vanilla
(May be outdated, please let wiki editors know if there are further updates)
- All non sword attacks do -2 damage (except 5B and 5B(B))
- 5B: elbow hitbox does not show up on the first frame
- 5B(B): appears and disappears one frame later
- 5B(A): Changed to 2A with all follow-ups
- 6B: turns back turned opponents around on hit
- 5BBB(B): can be delayed
- 2B: Now does a custom animation, taken from Bloody Roar: Extreme. Hits as a low sweep with string follow-ups
- 8B: has less endlag; transitions to A faster; more lift; can transition on whiff
- JB: ground hit stuns longer; grabbable
- 5A: hitbox appears one frame sooner as an untechable bounce as a high hit; frame 3 to the end does not bounce; hilt hitbox does not appear on the two frames
- 5AAA follow ups changed:
- A does vanilla; is a hard knockdown
- 2A does vanilla B follow up
- B follow up changed to be a custom 8A teleport
- 6A: charge is faster, 1C breaks guard easier, other charges do less guard damage; 3C is a hard knockdown
- 4A: Reversible teleport similar in function to Vanilla Itachi and Orochimaru.
- 2A: Lift reduced
- 2A(A): Added with follow-ups, same as 5AA(A)
- 8A: Instead performs Kisame's A4A attack, a big, arcing slash from front to back. High crush and spinning launch.
- JA: phantom sword works with both players; has one more active frame
- J6A: added as a new move
- 5Y: made overhead throw
- 2Y: is slam throw
- 4X: Reversal hit-grab with high and mid crush frames
- 2X: is immune to highs and mids on startup, requires 75% meter, links better on air hits, damage reduced; hilt hitbox on first revolution is slightly bigger
Resources
Guides and Info
Gameplay footage
Notable Players
- Disclaimer: This list is derived from community input and is in no way comprehensive or a form of ranking of any kind. Our community criteria can be found here.
| Name | Usual Color | Region | Contact | Example Play |
|---|---|---|---|---|
| Paradise |
|
United States |
Unavailable | Paradise matches |