Super Naruto: Clash of Ninja 4/Zabuza: Difference between revisions
Jump to navigation
Jump to search

Scatteraxis (talk | contribs) (→5X) |
Scatteraxis (talk | contribs) |
||
| Line 702: | Line 702: | ||
Standard combo ender for {{NotationIcon-SCON4|B}}{{NotationIcon-SCON4|B}}{{NotationIcon-SCON4|X}}, but can also go after 2BB close to walls if you can't hit the just-frame. | Standard combo ender for {{NotationIcon-SCON4|B}}{{NotationIcon-SCON4|B}}{{NotationIcon-SCON4|X}}, but can also go after 2BB close to walls if you can't hit the just-frame. | ||
{{FlagData-SCON4 | |||
|unsub = yes | |||
}} | |||
}} | }} | ||
}} | }} | ||
| Line 731: | Line 734: | ||
|midcrush = frames 11~36 | |midcrush = frames 11~36 | ||
|chipdmg = | |chipdmg = | ||
|unsub = | |unsub = yes | ||
|meterdrain = | |meterdrain = | ||
|throwinvul = | |throwinvul = | ||
| Line 767: | Line 770: | ||
|midcrush = frames 1~15 | |midcrush = frames 1~15 | ||
|chipdmg = | |chipdmg = | ||
|unsub = | |unsub = yes | ||
|meterdrain = | |meterdrain = | ||
|throwinvul = | |throwinvul = | ||
Revision as of 16:29, 17 December 2023
Summary
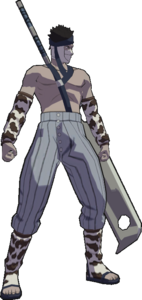
"The Demon of the Hidden Mist" was generally overshadowed in Vanilla GNT4 by his fellow swordsman, ![]() Kisame. Both were characterized by their big hitboxes, big damage, and slow attacks, though Zabuza lacked his counterpart's crucial chakra drain. In Super, Zabuza is one of the more dramatically re-worked characters. Compared to Kisame, Zabuza benefits from better movement options, such as 4A and running A teleports, superior strings on block, his 8A anti-KNJ, and a 4X reversal. A moveset befitting a master of stealth and murder.
Kisame. Both were characterized by their big hitboxes, big damage, and slow attacks, though Zabuza lacked his counterpart's crucial chakra drain. In Super, Zabuza is one of the more dramatically re-worked characters. Compared to Kisame, Zabuza benefits from better movement options, such as 4A and running A teleports, superior strings on block, his 8A anti-KNJ, and a 4X reversal. A moveset befitting a master of stealth and murder.
Character Traits
- Very high guard damage strings. Zabuza can easily guard break opponents with just

 x2.
x2. - Anti-KnJ potential between 8A combos and 2X
- Two reversal supers.
| Zabuza
| |
|---|---|

| |
| Health: | 230 |
| Guard Gauge: | 1840 |
| Backdash Type: | Normal |
String List
| String # | Inputs | Notes |
|---|---|---|
| ||
| ||
| ||
| ||
| ||
Weak Attacks
5B
  |
|
|---|---|
Toggle Hitboxes Toggle Hitboxes
|
6B
  |
|
|---|---|
Toggle Hitboxes Toggle Hitboxes
|
2B
  |
|
|---|---|
Toggle Hitboxes Toggle Hitboxes
|
4B
  |
|
|---|---|
Toggle Hitboxes Toggle Hitboxes
|
8B
  |
|
|---|---|
Toggle Hitboxes Toggle Hitboxes
|
Running B
  |
|
|---|---|
Toggle Hitboxes Toggle Hitboxes
|
j.B
  |
|
|---|---|
Toggle Hitboxes Toggle Hitboxes
|
Strong Attacks
5A
6A
2A
4A
8A
Running A
j.A
j.6A
Throws
5Y
2Y
j.Y
Specials
5X
2X
4X
Strategy
- j.A can be considered the signature swordsmen attack for both Zabuza and Kisame. Its big, vertical hitbox controls space and is useful for both approaches and defensive retreats. When it connects with the oppponent's guard as Zabuza descends, it frequently results in frame advantage because the attack animation is automatically cancelled once Zabuza lands on the ground. Zabuza can use this frame advantage to perform a strike/throw mix, made more potent due to Zabuza's high damage 2Y slam throw.
- On hit, j.A staggers, also resulting in a strike/throw mix, though Zabuza can combo with an attack if he desires.
- The phantom sword glitch gives Zabuza access to an unblockable aerial attack if the user has good timing.
- Defensively, j.A is one of the strongest counters in the game to opposing strings which lift Zabuza into the air.
- Zabuza can jump back and j.A to punish opponents attempting to take back their turn following a Zabuza blockstring.
- For okizeme, if the opponent uses neutral get up or wake-up-kick (WUK), Zabuza can jump over the opponent and then double jump back to the front side and j.A, crossing up their guard or punishing WUK.
- Both swordsmen have a faster backwalk than most other characters. This allows them to walk backwards out of some strings where other characters cannot.
- Zabuza's combo game has some advantages by walls, corners or on small stages, gaining access to combos which utilize 5B6B, 2BB, 2AA, and 8A.
- 2X can be used during guard pressure to threaten a guard break.
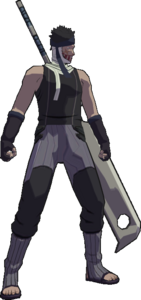
Colors
Default ()

Color 2 ( )
)

Color 3 ( )
)

Changes from Vanilla
(May be outdated, please let wiki editors know if there are further updates)
- All non sword attacks do -2 damage (except 5B and 5B(B))
- 5B: elbow hitbox does not show up on the first frame
- 5B(B): appears and disappears one frame later
- 5B(A): Changed to 2A with all follow-ups
- 6B: turns back turned opponents around on hit
- 5BBB(B): can be delayed
- 2B: Now does a custom animation, taken from Bloody Roar: Extreme. Hits as a low sweep with string follow-ups
- 8B: has less endlag; transitions to A faster; more lift; can transition on whiff
- JB: ground hit stuns longer; grabbable
- 5A: hitbox appears one frame sooner as an untechable bounce as a high hit; frame 3 to the end does not bounce; hilt hitbox does not appear on the two frames
- 5AAA follow ups changed:
- A does vanilla; is a hard knockdown
- 2A does vanilla B follow up
- B follow up changed to be a custom 8A teleport
- 6A: charge is faster, 1C breaks guard easier, other charges do less guard damage; 3C is a hard knockdown
- 4A: Reversible teleport similar in function to Vanilla Itachi and Orochimaru.
- 2A: Lift reduced
- 2A(A): Added with follow-ups, same as 5AA(A)
- 8A: Instead performs Kisame's A4A attack, a big, arcing slash from front to back. High crush and spinning launch.
- JA: phantom sword works with both players; has one more active frame
- J6A: added as a new move
- 5Y: made overhead throw
- 2Y: is slam throw
- 4X: Reversal hit-grab with high and mid crush frames
- 2X: is immune to highs and mids on startup, requires 75% meter, links better on air hits, damage reduced; hilt hitbox on first revolution is slightly bigger
Resources
Guides and Info
Gameplay footage
Notable Players
- Disclaimer: This list is derived from community input and is in no way comprehensive or a form of ranking of any kind. Our community criteria can be found here.
| Name | Usual Color | Region | Contact | Example Play |
|---|---|---|---|---|
| Paradise |
|
United States |
Unavailable | Paradise matches |