Trini Kwan
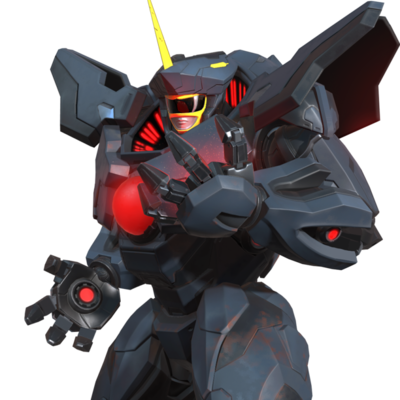
Mighty Morphin' Yellow Ranger (with Dragon Armor)
Introduction
Health: 1300
Walk Speed: 400 Forward, 325 Back
When the Mighty Morphin' Power Rangers were viciously attacked by the Black Dragon, a powerful Zord from another dimension with the capability to warp Ranger powers, they were in for the fight of their lives. After he was defeated, Trini was able to refashion the Zord into a powerful suit of enhanced armor.
Overview
Trini, in her fancy new Dragon Armor, fills the role of the game's grappler. While playing neutral with her often requires a lot of patience and strong reads thanks to her weak mobility, she can turn most openings into pretty explosive damage. She's an exceptional anchor, sporting easy ways to dump meter and possibly the best Megazord usage in the game. While playing her on point can be something of a struggle, it seems like a pretty fair trade-off for having one of the best assist attacks in the game. Trini is a fantastic support character, though that isn't to say she's unable to hold her own. It's just that doing so will require a bit of finesse from you.
Playstyle
|
Dragon Armor Trini is a big body with a ton of health, big buttons, and powerful specials |
| Pros |
Cons |
- Trini Missile - Trini's 5S beam, 4S command throw, 6S missile, and jS stomp are all great tag out options that can control large sections of the screen
- Beam Assist - Trini's beam assist is strong as a neutral and combo extension tool. It synergizes well with many characters
- A Literal Tank - Trini has the largest health pool in the game. She can not be consistently ToD'd by most characters outside of infinites
- Pringles - Trini can somewhat reliably chip out opponents with smart, defensive play and good Zord usage
|
- Armor is Heavy - While Trini's backwards movement is average, her forward mobility is reliant on committal 4S cancels
- Big Body, Big Problems - Many characters have unique mixups and instant overheads on Trini. Her size makes it harder for her to get out of pressure than the rest of the cast
- Big Bad Buttons - While Trini has a few good buttons, her normals are overall subpar and unsafe. She is forced to use her few good tools in almost every situation
- Don't Miss - Trini's specials are incredibly unsafe if used incorrectly and are easily punished
- Zord Battery - While Trini can somewhat consistently go for chip kills, that strategy feeds Zord meter to the opponent
- Matchup Spread - The combination of Trini's weaknesses give her losing matchups against everyone
|
Normal Moves
5L
5L
|
| Damage
|
Guard
|
Startup
|
Active
|
Recovery
|
Frame Adv (Block)
|
Frame Adv (Hit)
|
| 50
|
High/Low/Air
|
6
|
-
|
-
|
-5
|
-
|
Slash.
Steps forward so has more range for punishes than 2L.
|
|
5LL
5LL
|
| Damage
|
Guard
|
Startup
|
Active
|
Recovery
|
Frame Adv (Block)
|
Frame Adv (Hit)
|
| 50
|
High/Low/Air
|
-
|
-
|
-
|
-2
|
-
|
|
|
|
5LLL
5LLL
|
| Damage
|
Guard
|
Startup
|
Active
|
Recovery
|
Frame Adv (Block)
|
Frame Adv (Hit)
|
| 70
|
High/Low/Air
|
-
|
-
|
-
|
-8
|
-
|
Can combo into 5MM if timed right.
|
|
5M
5M
|
| Damage
|
Guard
|
Startup
|
Active
|
Recovery
|
Frame Adv (Block)
|
Frame Adv (Hit)
|
| 30, 30
|
High/Low/Air
|
13
|
-
|
-
|
-4
|
-
|
Downward slash. Hits twice.
|
|
5MM
5MM
|
| Damage
|
Guard
|
Startup
|
Active
|
Recovery
|
Frame Adv (Block)
|
Frame Adv (Hit)
|
| 30, 30
|
High/Low/Air
|
-
|
-
|
-
|
-16
|
-
|
Upward slash that launches opponent. Hits twice.
|
|
5H
5H
|
| Damage
|
Guard
|
Startup
|
Active
|
Recovery
|
Frame Adv (Block)
|
Frame Adv (Hit)
|
| 60
|
High/Low/Air
|
16
|
-
|
-
|
-7
|
-
|
Headbutt. Has 1 hit of armor.
|
|
5HH
5HH
|
| Damage
|
Guard
|
Startup
|
Active
|
Recovery
|
Frame Adv (Block)
|
Frame Adv (Hit)
|
| 70
|
High/Low/Air
|
-
|
-
|
-
|
-12
|
-
|
A fierce headbutt. Causes Stagger.
In the corner combos into 5HH again to cause knockdown.
|
|
2L
2L
|
| Damage
|
Guard
|
Startup
|
Active
|
Recovery
|
Frame Adv (Block)
|
Frame Adv (Hit)
|
| 50
|
Low/Air
|
7
|
-
|
-
|
+3
|
-
|
Low slash. Your main combo starter.
|
|
2M
2M
Armored Headbutt
|
| Damage
|
Guard
|
Startup
|
Active
|
Recovery
|
Frame Adv (Block)
|
Frame Adv (Hit)
|
| 70
|
High/Low
|
13
|
-
|
-
|
-9
|
-
|
|
|
|
2H
2H
|
| Damage
|
Guard
|
Startup
|
Active
|
Recovery
|
Frame Adv (Block)
|
Frame Adv (Hit)
|
| 80
|
Low/Air
|
14
|
-
|
-
|
0
|
-
|
A fierce tail whip. Causes pop-up effect.
|
|
j.L
j.L
|
| Damage
|
Guard
|
Startup
|
Active
|
Recovery
|
Frame Adv (Block)
|
Frame Adv (Hit)
|
| 40
|
High/Air
|
6
|
-
|
-
|
-
|
-
|
|
|
|
j.M
j.M
|
| Damage
|
Guard
|
Startup
|
Active
|
Recovery
|
Frame Adv (Block)
|
Frame Adv (Hit)
|
| 65
|
High/Air
|
19
|
-
|
-
|
-
|
-
|
Spikes opponent causing ground bounce.
|
|
j.H
j.H
|
| Damage
|
Guard
|
Startup
|
Active
|
Recovery
|
Frame Adv (Block)
|
Frame Adv (Hit)
|
| 75
|
High/Air
|
16
|
-
|
-
|
-
|
-
|
|
|
|
Special Moves
5S
Mega Beam
5S
|
| Damage
|
Guard
|
Startup
|
Active
|
Recovery
|
Frame Adv (Block)
|
Frame Adv (Hit)
|
| 6x17, 40
|
High/Low/Air
|
20
|
-
|
-
|
-16
|
-
|
18 hit laser for 142 max damage. Hits OTG.
Can be done after any move that knocks the opponent down to add damage - Throw, EX, 4S, or 5HHHH in the corner. Can be canceled into Super.
|
|
4S
Jet Rush
4S
|
| Damage
|
Guard
|
Startup
|
Active
|
Recovery
|
Frame Adv (Block)
|
Frame Adv (Hit)
|
| 50, 120
|
Throw
|
41
|
-
|
-
|
-
|
-
|
Trini rockets forward and grabs opponent then blasts them. Causes wall bounce.
Depending on spacing can be caught by 2L to combo. Can be S canceled between frames 21 and 43. Projectile invulnerable after frame 19.
|
|
6S
Missile Charge
6S
|
| Damage
|
Guard
|
Startup
|
Active
|
Recovery
|
Frame Adv (Block)
|
Frame Adv (Hit)
|
| 120
|
High/Low
|
45
|
-
|
-
|
-51
|
-
|
Rocket jump. Very unsafe but can be canceled into super. 5S can sometimes combo but is very angle dependent. Can be canceled into j.S on hit or block.
|
|
j.S
Dragon Pound
j.S
|
| Damage
|
Guard
|
Startup
|
Active
|
Recovery
|
Frame Adv (Block)
|
Frame Adv (Hit)
|
| 75
|
Low
|
-
|
-
|
-
|
-
|
-
|
Ground pound creating an area of damage. Hits low and is a reverse launcher. OTG on knock downed opponents.
|
|
EX Attack
5L+S
Mega Launch
5S+L
|
| Damage
|
Guard
|
Startup
|
Active
|
Recovery
|
Frame Adv (Block)
|
Frame Adv (Hit)
|
| 230
|
High/Low
|
28
|
-
|
-
|
-20
|
-
|
Trini perfoms an altered version of her 5MM, which transitions into the laser beam from her Forward Throw on hit. Causes Wall bounce.
|
|
Throws
Forward Throw
Forward Throw
5M+H/6M+H
|
| Damage
|
Guard
|
Startup
|
Active
|
Recovery
|
Frame Adv (Block)
|
Frame Adv (Hit)
|
| 101
|
Throw
|
-
|
-
|
-
|
-
|
-
|
|
|
|
Back Throw
Back Throw
4M+H
|
| Damage
|
Guard
|
Startup
|
Active
|
Recovery
|
Frame Adv (Block)
|
Frame Adv (Hit)
|
| 101
|
Throw
|
-
|
-
|
-
|
-
|
-
|
Throws opponent across screen with 3 hits.
|
|
Super
Super
Havoc Laser
H+S "Saber-tooth Tiger!" "Saber-tooth Tiger!"
|
| Damage
|
Guard
|
Startup
|
Active
|
Recovery
|
Frame Adv (Block)
|
Frame Adv (Hit)
|
| 10x24, 150
|
High/Low/Air
|
-
|
-
|
-
|
-67
|
-
|
25 hit Laser for 390 total damage.
|
|
Tag Actions
Assist
Assist
Mega Beam
A1/A2
|
| Damage
|
Guard
|
Startup
|
Active
|
Recovery
|
Frame Adv (Block)
|
Frame Adv (Hit)
|
| 6x17, 40
|
High/Low/Air
|
-
|
-
|
-
|
-
|
-
|
Assist laser hits for 110 total damage. Hits OTG.
|
|
Swap Strike
Swap Strike
A1/A2+S
|
| Damage
|
Guard
|
Startup
|
Active
|
Recovery
|
Frame Adv (Block)
|
Frame Adv (Hit)
|
| 70
|
High/Low/Air
|
25
|
-
|
-
|
-3
|
-
|
|
|
|
Strategy
Team Synergy
Combos
Tested in version 2.9.2
Solo
2L, 0 Bar starter
2L5MM6S jS 2L5MM jLjH jLjH jLjM 5HH jH 5LLL 5M2H 2L5M2H 2L5M2H EX 5M EX 5S video example
2L, 1 Bar starter
2L5MM6S jS 2L5MM jLjH jLjH jLjM 5HH jH 5LLL 5M2H 2L5M2H 2L5M2H EX 5M5S Super video example
Throw, 0 Bar starter
ForwardThrow 5MM6S jS 2L5MM jLjH jLjH jLjM 5HH jH 5LLL 5M2H 2L5M2H 2L5HH 5S Super video example
Throw, 1 Bar starter
ForwardThrow 5MM6S jS 2L5MM jLjH jLjH jLjM 5HH jH 5LLL 5M2H 2L5M2H 2L2H EX 5S Super video example
Back Throw, 0 Bar starter
BackThrow 5MM6S jS 2L5MM jLjH jLjH jLjM 5HH jH 5LLL 5M2H 2L5M2H 2L5HH 5S Super video example
Back Throw, 1 Bar starter
BackThrow 5MM6S jS 2L5MM jLjH jLjH jLjM 5HH jH 5LLL 5M2H 2L5M2H 2L2H EX 5S Super video example
4S, 0 Bar starter
4S 5MM6S jS 2L5MM jLjH jLjH jLjM 5HH jH 5LLL 5M2H 2L5M2H 2L5HH 5S Super video example
4S, 1 Bar starter
4S 5MM6S jS 2L5MM jLjH jLjH jLjM 5HH jH 5LLL 5M2H 2L5M2H 2L5M2H EX 5S Super video example
6S, 0 Bar starter
6S jS 2L5MM jLjH jLjH jLjM 5HH jH 5LLL 5M2H 2L5M2H 2L5HH 5M2H EX 5MM EX 5S video example
6S, 1 Bar starter
6S jS 2L5MM jLjH jLjH jLjM 5HH jH 5LLL 5M2H 2L5M2H 2L5HH 5M2H EX 5MM6S Super video example
EX, 1 Bar starter
EX 5MM6S jS 2L5MM jLjH jLjH jLjM 5HH jH 5LLL 5M2H 2L5M2H 2L5HH 5S Super video example
EX, 2 Bar starter
EX 5MM6S jS 2L5MM jLjH jLjH jLjM 5HH jH 5LLL 5M2H 2L5M2H 2L5M2H EX 5S Super video example
Colors
External Links


.png)

.png)

.png)
.png)

.png)


