|
|
| Line 353: |
Line 353: |
| {{MoveData | | {{MoveData |
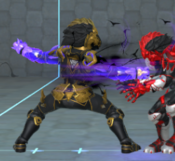
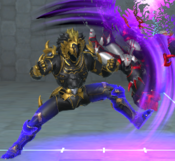
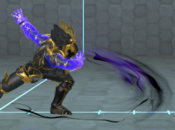
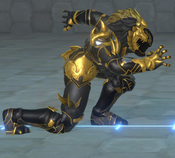
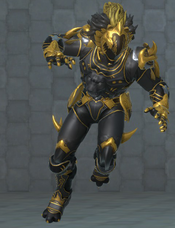
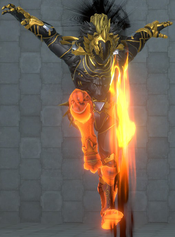
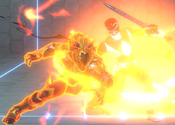
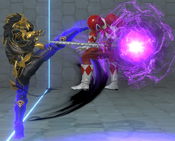
| |image=BTFG_DAI_4S.png | | |image=BTFG_DAI_4S.png |
| | |caption=Wall Cling |
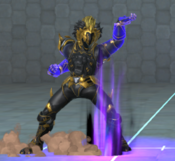
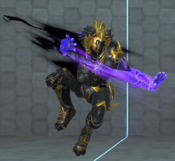
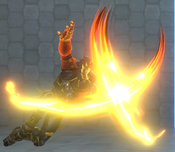
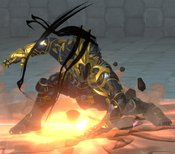
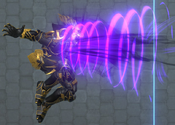
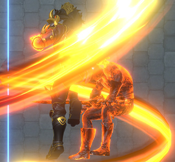
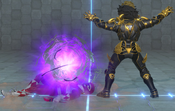
| |image2=BTFG_DAI_4SL.png | | |image2=BTFG_DAI_4SL.png |
| | |caption2=~L |
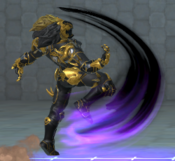
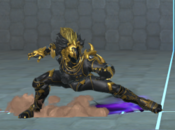
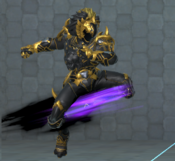
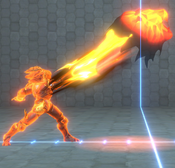
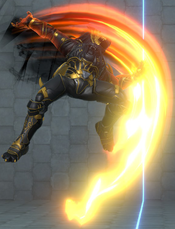
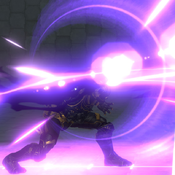
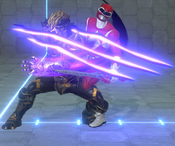
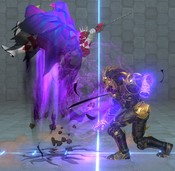
| |image3=BTFG_DAI_4SM.png | | |image3=BTFG_DAI_4SM.png |
| | |caption3=~M |
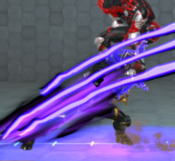
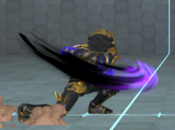
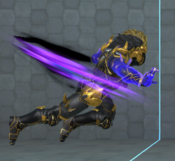
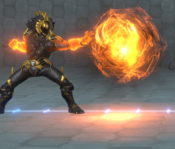
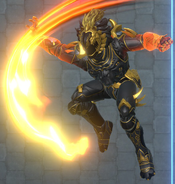
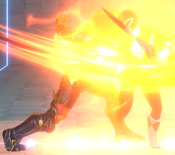
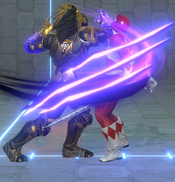
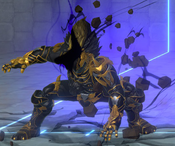
| |image4=BTFG_DAI_4SH.png | | |image4=BTFG_DAI_4SH.png |
| | |caption4=~H |
| |image5=BTFG_DAI_4SS.png | | |image5=BTFG_DAI_4SS.png |
| | |caption5=Drop down |
| |name=4S | | |name=4S |
| |data= | | |data= |
Revision as of 12:35, 11 January 2021
Introduction
Health: 1100
Walk Speed: - forward, - back
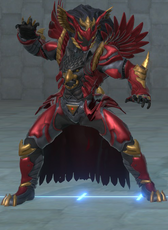
Dai Shi is an ancient and evil eight-headed Chinese dragon that initiated the "Beast War", believing that humans should be destroyed and that animals should rule the planet. However, Optimus Primal and the Maximals locked him away in their temple after beating him in battle many years ago. But now, finally, after ten thousand years he's free.
Overview
Dai Shi has slow walkspeed and an okay wavedash, but has very powerful mobility with 4S wall cling, 6S demon flip, and to a lesser extent 5S armored command run. He has a lot of options to move around the screen both backwards and forwards. His normals are just okay in the startup and damage department, but the ability to cancel them into movement and a wide variety of special moves makes Dai Shi stylish and unpredictable. Be evasive and wait for the perfect moment to go in: float like a butterfly and sting like a beast!
Normal Moves
5L
5L
|
| Damage
|
Guard
|
Startup
|
Active
|
Recovery
|
Frame Adv (Block)
|
Frame Adv (Hit)
|
| 40
|
High/Low/Air
|
-
|
-
|
-
|
-
|
-
|
Standard jab. Causes a flipout during a juggle.
|
|
5LL
5LL
|
| Damage
|
Guard
|
Startup
|
Active
|
Recovery
|
Frame Adv (Block)
|
Frame Adv (Hit)
|
| -
|
High/Low/Air
|
-
|
-
|
-
|
-
|
-
|
|
5LLL
5LLL
|
| Damage
|
Guard
|
Startup
|
Active
|
Recovery
|
Frame Adv (Block)
|
Frame Adv (Hit)
|
| -
|
High/Low/Air
|
-
|
-
|
-
|
-
|
-
|
Spinning knockdown. Cancellable by 5S
|
|
5M
5M
|
| Damage
|
Guard
|
Startup
|
Active
|
Recovery
|
Frame Adv (Block)
|
Frame Adv (Hit)
|
| 50
|
High/Low/Air
|
-
|
-
|
-
|
-
|
-
|
Moves Dai Shi forward a little bit.
|
|
5MM
5MM
|
| Damage
|
Guard
|
Startup
|
Active
|
Recovery
|
Frame Adv (Block)
|
Frame Adv (Hit)
|
| -
|
High/Low/Air
|
-
|
-
|
-
|
-
|
-
|
|
5MMM
5MMM
|
| Damage
|
Guard
|
Startup
|
Active
|
Recovery
|
Frame Adv (Block)
|
Frame Adv (Hit)
|
| -
|
High/Low/Air
|
-
|
-
|
-
|
-
|
-
|
Spinning knockdown that heals Dai Shi for a small amount - combos into EX
|
|
5H
5H
|
| Damage
|
Guard
|
Startup
|
Active
|
Recovery
|
Frame Adv (Block)
|
Frame Adv (Hit)
|
| 60
|
-
|
-
|
-
|
-
|
-
|
-
|
Moves Dai Shi forward a lot: nearly half screen. Sliding knockdown on air hit.
|
|
5HH
5HH
|
| Damage
|
Guard
|
Startup
|
Active
|
Recovery
|
Frame Adv (Block)
|
Frame Adv (Hit)
|
| -
|
High/Low/Air
|
-
|
-
|
-
|
-
|
-
|
Performs a special cancellable launch: probably Dai Shi's best juggle starter since it does more damage than 4H. Not jump cancellable.
|
|
5HHH
5HHH
|
| Damage
|
Guard
|
Startup
|
Active
|
Recovery
|
Frame Adv (Block)
|
Frame Adv (Hit)
|
| -
|
High/Low/Air
|
-
|
-
|
-
|
-
|
-
|
Ground bounces. Not cancellable, but you can combo off it solo by linking into another normal.
|
|
4H
4H
|
| Damage
|
Guard
|
Startup
|
Active
|
Recovery
|
Frame Adv (Block)
|
Frame Adv (Hit)
|
| 30, 40
|
High/Low
|
-
|
-
|
-
|
-
|
-
|
Standard launcher. Jump cancellable, air unblockable, two per combo.
|
|
2L
2L
|
| Damage
|
Guard
|
Startup
|
Active
|
Recovery
|
Frame Adv (Block)
|
Frame Adv (Hit)
|
| 40
|
Low/Air
|
-
|
-
|
-
|
-
|
-
|
|
|
|
2M
2M
|
| Damage
|
Guard
|
Startup
|
Active
|
Recovery
|
Frame Adv (Block)
|
Frame Adv (Hit)
|
| 40
|
Low/Air
|
-
|
-
|
-
|
-
|
-
|
|
2H
2H
|
| Damage
|
Guard
|
Startup
|
Active
|
Recovery
|
Frame Adv (Block)
|
Frame Adv (Hit)
|
| 60
|
Low/Air
|
-
|
-
|
-
|
-
|
-
|
Spiral knockdown. Cancellable.
|
|
j.L
j.L
|
| Damage
|
Guard
|
Startup
|
Active
|
Recovery
|
Frame Adv (Block)
|
Frame Adv (Hit)
|
| 35
|
High/Air
|
-
|
-
|
-
|
-
|
-
|
|
|
|
j.M
j.M
|
| Damage
|
Guard
|
Startup
|
Active
|
Recovery
|
Frame Adv (Block)
|
Frame Adv (Hit)
|
| 35
|
High/Air
|
-
|
-
|
-
|
-
|
-
|
Hits at a downward angle, both in front and crossup.
|
|
j.H
j.H
|
| Damage
|
Guard
|
Startup
|
Active
|
Recovery
|
Frame Adv (Block)
|
Frame Adv (Hit)
|
| 30
|
High/Air
|
-
|
-
|
-
|
-
|
-
|
Groundbounces on air hit once per combo (hard knockdown otherwise).
|
|
Special Moves
5S
5S Run startup Run startup ~L ~L ~M ~M ~H ~H
|
| Version
|
Damage
|
Guard
|
Startup
|
Active
|
Recovery
|
Frame Adv (Block)
|
Frame Adv (Hit)
|
| Run
|
70
|
High/Low/Air
|
-
|
-
|
-
|
-
|
-
|
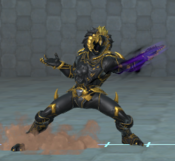
Dai Shi starts his command run. There's a decent amount of startup before he starts running. The run itself has 4 hits of armor (he takes no damage, but it can be broken by certain moves and any throw). The move can be cancelled into several followups as soon as Dai Shi finishes crouching down: much sooner than the armor kicks in, but not as fast as Shadow Ranger's stance cancels. Dai shi can cancel any time during the run as well, but the armor goes away when he does. If you do nothing during the run, Dai Shi will perform a swipe attack that wall bounces on juggle hit and crumples on ground hit.
|
| Version
|
Damage
|
Guard
|
Startup
|
Active
|
Recovery
|
Frame Adv (Block)
|
Frame Adv (Hit)
|
| ~L
|
70
|
High/Low/Air
|
-
|
-
|
-
|
-
|
-
|
Berserker slash. Consists of 2 hits, the first will cause a stagger state and restand the opponent if in a juggle sate, the second hit will cause a wallbounce. You can cancel either hit with 5S, ideally the first, as it leads to further combo opportunities, the restand allowing you to continue combos well past the juggle limiter.
|
| Version
|
Damage
|
Guard
|
Startup
|
Active
|
Recovery
|
Frame Adv (Block)
|
Frame Adv (Hit)
|
| ~M
|
20, 70
|
None
|
-
|
-
|
-
|
-
|
-
|
Does not hit standing, but hits anything in the air at a 45 degree angle. Floats the opponent towards you for any juggle you can think of. Great anti air and combo move (once per combo).
|
| Version
|
Damage
|
Guard
|
Startup
|
Active
|
Recovery
|
Frame Adv (Block)
|
Frame Adv (Hit)
|
| ~H
|
83 total across 10 hits
|
High/Low/Air
|
-
|
-
|
-
|
-
|
-
|
Dai Shi does a small hop backwards and then places a stationary fireball where he just was. The fireball stays out for about 3 seconds, or until it makes contact with something (even another projectile, so it's not good in fireball wars). Dai Shi cannot place another fireball while his first one is still out. The opponent will be stuck for 10 hits on hit or block, and on hit will receive a spiral knockdown. On block, the opponent can pushblock multiple times. On air block, you cannot hit them with an air unblockable move while they are stuck, but you can mix them up high/low when they are grounded. The startup is kind of long, so use it while your opponent is knocked down, or stuck blocking an assist or Zord. Try tagging to another character after telling Dai Shi to place the fireball on top of an opponent, and then perform a high/low mixup!
|
| Version
|
Damage
|
Guard
|
Startup
|
Active
|
Recovery
|
Frame Adv (Block)
|
Frame Adv (Hit)
|
| ~S
|
-
|
n/a
|
-
|
-
|
-
|
-
|
-
|
Run cancel. It's very fast and puts you in a neutral state after a few frames.
|
|
4S
4S Wall Cling Wall Cling ~L ~L ~M ~M ~H ~H Drop down Drop down
|
| Version
|
Damage
|
Guard
|
Startup
|
Active
|
Recovery
|
Frame Adv (Block)
|
Frame Adv (Hit)
|
| Cling
|
-
|
n/a
|
-
|
-
|
-
|
-
|
-
|
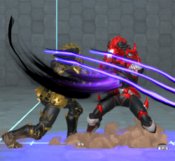
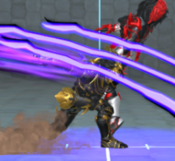
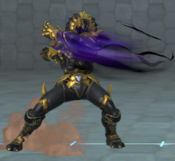
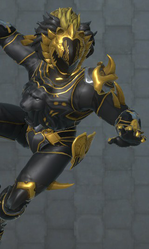
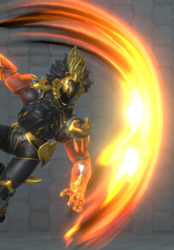
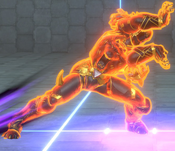
Dai Shi flies at a 45 degree angle to the wall behind him and clings to it. He has 6 (!) possible followups: the 4 described below, tap up to jump forward at a 45 degree angle, or 6S for demon flip with even more followups (see 6S for details)! If he does nothing for a few seconds, he will automatically perform the 5S followup (let go). The closer Dai Shi is to the wall when he uses this move, the lower he will cling. The camera is locked while Dai Shi is on the wall (a little buggy as of patch 1.6.2: nothing too bad, but expect fixes). Dai Shi can call assists while on the wall. If hit with a jab while on the wall, Dai Shi will flip out as though he were in a juggle state. The leap up is not invincible in any way (except to throws), but it can be evasive.
|
| Version
|
Damage
|
Guard
|
Startup
|
Active
|
Recovery
|
Frame Adv (Block)
|
Frame Adv (Hit)
|
| ~L
|
60
|
High/Air
|
-
|
-
|
-
|
-
|
-
|
Downward swipe that leaves Dai Shi on the wall. Causes a spiral knockdown. You can keep using this to reset your wall cling and stay on the wall if you want to.
|
| Version
|
Damage
|
Guard
|
Startup
|
Active
|
Recovery
|
Frame Adv (Block)
|
Frame Adv (Hit)
|
| ~M
|
70
|
High/Air
|
-
|
-
|
-
|
-
|
-
|
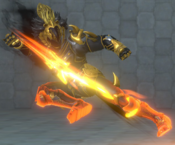
Fast divekick that hits overhead and wallbounces. Yeah. 45 degree angle so it will whiff if they are too close or too far.
|
| Version
|
Damage
|
Guard
|
Startup
|
Active
|
Recovery
|
Frame Adv (Block)
|
Frame Adv (Hit)
|
| ~H
|
-
|
n/a
|
-
|
-
|
-
|
-
|
-
|
Dai Shi dashes to the opposite wall. This move does not hit, is not invincible in any way, and is not cancellable in any way. For positioning only. Usually jump or 6S demon flip is better because you can act out of them.
|
| Version
|
Damage
|
Guard
|
Startup
|
Active
|
Recovery
|
Frame Adv (Block)
|
Frame Adv (Hit)
|
| ~S
|
-
|
n/a
|
-
|
-
|
-
|
-
|
-
|
Drop down. It's very fast and immediately puts you in a neutral state, where you can block or perform a jumping attack and hit overhead.
|
|
6S
6S
|
| Version
|
Damage
|
Guard
|
Startup
|
Active
|
Recovery
|
Frame Adv (Block)
|
Frame Adv (Hit)
|
| Flip
|
-
|
Low/Air
|
-
|
-
|
-
|
-
|
-
|
Dai Shi starts his demon flip that tracks the opponent. If the opponent is halfscreen or closer it will cross up, otherwise it will not. Can be performed from the ground or from wall cling (4S). Has followups on every button, but they cannot be performed until the peak of the flip and later. If he does nothing, he lands and performs a low sliding kick that causes a spiral knockdown. Can convert off this kick solo in the corner by linking a normal, not sure midscreen. Hits OTG, but 6S~L is better for that most of the time if you have not used it yet (solo conversion not possible with OTG kick, besides super). Can call assists any time during the flip. Can be plink cancelled into Super or EX on hit
|
| Version
|
Damage
|
Guard
|
Startup
|
Active
|
Recovery
|
Frame Adv (Block)
|
Frame Adv (Hit)
|
| ~L
|
70
|
High/Air
|
-
|
-
|
-
|
-
|
-
|
Downward swipe that hits Dai Shi's front and causes a ground bounce. Can be crouched under if performed as early as possible at the peak of the demon flip. The mixup is between doing this late in the flip and hitting overhead, doing it so late that Dai Shi lands during startup and then performs a low or throw, or doing nothing and getting the low kick. If the opponent stands up at certain spacings, you can mix up between this and crossup M followup, but if they crouch until late in the demon flip it becomes less ambiguous. Hits OTG unlimited times, but every time after the first gives a little ground bounce that needs a precise 2L or an assist to continue the combo.
|
| Version
|
Damage
|
Guard
|
Startup
|
Active
|
Recovery
|
Frame Adv (Block)
|
Frame Adv (Hit)
|
| ~M
|
70
|
High/Air
|
-
|
-
|
-
|
-
|
-
|
Identical to the L followup in pretty much every way, except it hits behind Dai Shi instead and does not hit early enough to OTG (unsure if it still has OTG properties).
|
| Version
|
Damage
|
Guard
|
Startup
|
Active
|
Recovery
|
Frame Adv (Block)
|
Frame Adv (Hit)
|
| ~H
|
60
|
High/Low/Air
|
-
|
-
|
-
|
-
|
-
|
Dai Shi stops his momentum and does a kick straight downwards similar to Drakkon, Trini, etc. Can do pretty ambiguous left/rights especially combined with the M followup, but can't convert into more damage combo solo unless it hits super meaty. Use assists and zords. Since it alters your momentum and L/M don't, it can be a good way to cancel the demon flip if you don't want to get antiaired.
|
| Version
|
Damage
|
Guard
|
Startup
|
Active
|
Recovery
|
Frame Adv (Block)
|
Frame Adv (Hit)
|
| ~S
|
70
|
High/Low/Air
|
-
|
-
|
-
|
-
|
-
|
Same as j.S, including height restriction. Another good option for bailing out of the demon flip if you need to.
|
|
j.S
j.S
|
| Damage
|
Guard
|
Startup
|
Active
|
Recovery
|
Frame Adv (Block)
|
Frame Adv (Hit)
|
| 70
|
High/Low/Air
|
-
|
-
|
-
|
-
|
-
|
Stops Dai Shi's air momentum and moves him backwards a little bit while putting out a big hitbox. Wallbounces. Has a pretty tall height restriction, so will never hit a crouching enemy and barely hits standing. Great air to air. Can be cancelled into from any jump normal.
|
|
EX Attack
5L+S
5S+L
|
| Damage
|
Guard
|
Startup
|
Active
|
Recovery
|
Frame Adv (Block)
|
Frame Adv (Hit)
|
| 6x30, 70
|
High/Low/Air
|
-
|
-
|
-
|
-
|
-
|
Goes halfscreen and consists of 2 hits, one mid, and one low. Different to other EXes in that it has Armour instead of invincibility frames, meaning it's vulnerable to Throw if you input it on wake-up. Ground bounces, can continue combo with assist or zord.
|
|
Throws
Forward Throw
Forward Throw
5M+H/6M+H
|
| Damage
|
Guard
|
Startup
|
Active
|
Recovery
|
Frame Adv (Block)
|
Frame Adv (Hit)
|
| 91
|
Throw
|
6
|
-
|
-
|
-
|
-
|
Can be canceled into 6S demon flip for a full combo solo.
|
|
Back Throw
Back Throw
4M+H
|
| Damage
|
Guard
|
Startup
|
Active
|
Recovery
|
Frame Adv (Block)
|
Frame Adv (Hit)
|
| 101
|
Throw
|
6
|
-
|
-
|
-
|
-
|
Need assists or zord to combo, I think, but pops them up pretty well for it.
|
|
Super
Super
Super
H+S
|
| Damage
|
Guard
|
Startup
|
Active
|
Recovery
|
Frame Adv (Block)
|
Frame Adv (Hit)
|
| -
|
High/Low/Air
|
-
|
-
|
-
|
-
|
-
|
MAXIMUM SPIDER (kind of)! Dai Shi leaps to the wall behind him, super flash, leaps around the screen in a set pattern, and then reappears in his initial spot. Not all of the hits will connect all of the time, but it will never be minus or unsafe on hit barring some bizarre circumstance. Hard knockdown.
|
|
Tag Actions
Assist
Assist
A1/A2
|
| Damage
|
Guard
|
Startup
|
Active
|
Recovery
|
Frame Adv (Block)
|
Frame Adv (Hit)
|
| 70
|
High/Low/Air
|
-
|
-
|
-
|
-
|
-
|
Same as 6SL (Berserker Slash). Can tag to Dai Shi after the cross through for a tag-or-not 50/50. Not bad in combos, and can tag to Dai Shi after the hit and still continue.
|
|
Swap Strike
Swap Strike
2A1/A2+S
|
| Damage
|
Guard
|
Startup
|
Active
|
Recovery
|
Frame Adv (Block)
|
Frame Adv (Hit)
|
| 70
|
High/Low/Air
|
6
|
-
|
-
|
+7
|
-
|
Arguably the best swap strike in the game, due to the advantage you get from it on block. Excellent in making blockstrings safe/as a wake-up option
|
|
Team Synergy
If you have an assist with good lockdown or knockdown, that can give you time to use 5SH, 5S, and/or set up a demon flip mixup. Dai Shi's assist works best when you are pressuring the opponent, and lets you perform a 50/50 mixup into more pressure.
Combos
Theory
Launchers (1 per combo): 4H, 5HH (grounded only, not jump cancellable)
Wall bounces (1 per combo): j.S, 4SM, 5S on air hit
Ground bounces (1 per combo): 5HHH, j.H on air hit, 6SL
Crumples (1 per combo): 5S on ground hit
Special state (1 per combo): 5SM
Staggers: none
Sliding knockdowns: 5H on air hit, used up wallbounce moves
OTGs: 6SL, 6S, super
Dai Shi cannot chain directly from 5M normals into 4H, but can chain into 2M and then 4H.
If a lock down assist hits and you have time, the best way to continue the combo is probably with 5S.
If you want to extend a combo with assist at the end, one way is to do OTG 6S and extend with assist.
Solo
(2L >) 5MM > 5HHH > 2L > 5MM > 5H > 6S~L > 5MM > 5H > 6S~L > 2L > 5M > 2M > 4H > 5S~M > j.L > j.M > j.S > 2L > 5MM > EX > Super
Basic bnb. Perform the second 6S~L as low to the ground as you can in order to get the pickup with 2L. You can choose to end with 5MM > 5H to set up a 5S~H orb for oki if you wish.
Assist combos
5L > 5M > 5H > assist name > 5L > 5M > 5H
Example combo
Videos
Dai Shi combo video by Star 55 (2020)
Colors
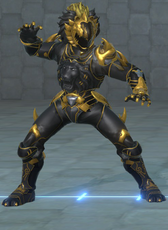
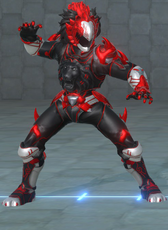
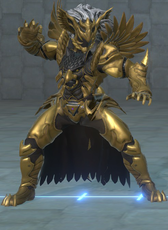
Phantom Beast King skin
External Links

