Power Rangers: Battle for the Grid/Red Ranger: Difference between revisions
Akaragitsune (talk | contribs) |
Akaragitsune (talk | contribs) |
||
| (24 intermediate revisions by 2 users not shown) | |||
| Line 1: | Line 1: | ||
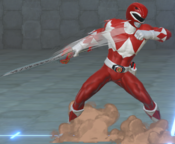
[[image:BFTG_RED_Profile.png |<center><font size="4"><b>Jason Lee Scott <br> Mighty Morphin' Red Ranger</b></font></center>|thumb|400px|right]] | [[image:BFTG_RED_Profile.png |<center><font size="4"><b>Jason Lee Scott <br> Mighty Morphin' Red Ranger</b></font></center>|thumb|400px|right]] | ||
{{Content Box|content= | |||
<div style="display: flex;justify-content: start;align-items:center;flex-wrap: wrap;"> | |||
{{FP Button|{{#if: {{{sub|}}} | {{BASEPAGENAME}} | {{FULLPAGENAME}} }}|Overview}} | |||
{{FP Button|{{#if: {{{sub|}}} | {{BASEPAGENAME}}/Combos | {{FULLPAGENAME}}/Combos }}|Combos}} | |||
{{FP Button|{{#if: {{{sub|}}} | {{BASEPAGENAME}}/Resets| {{FULLPAGENAME}}/Resets}}|Resets / Incoming Setups}} | |||
{{FP Button|{{#if: {{{sub|}}} | {{BASEPAGENAME}}/Team Building| {{FULLPAGENAME}}/Team Building}}|Assist/Tagouts}} | |||
{{FP Button|{{#if: {{{sub|}}} | {{BASEPAGENAME}}/Strategy | {{FULLPAGENAME}}/Strategy }}|Strategy / Counter Strategy }} | |||
{{FP Button|{{#if: {{{sub|}}} | {{BASEPAGENAME}}/Videos | {{FULLPAGENAME}}/Videos }}|Videos }} | |||
<div class="mizubutton">[https://twitter.com/hashtag/BFTG_RED?src=hashtag_click #BFTG_RED]</div> | |||
</div> | |||
}}<noinclude>[[Category:Power Rangers: Battle for the Grid]]</noinclude> | |||
{{TOClimit|2}} | {{TOClimit|2}} | ||
| Line 12: | Line 24: | ||
==Overview== | ==Overview== | ||
Jason is a fairly straightforward character who stands his ground. His 2H is jump-cancelable and is used to start air combos, but it doesn't launch by itself, letting him do extended combos against grounded opponents. Similarly, his assist doesn't launch, which helps other characters extend grounded combos. Combining an offensive rushdown style with decent zoning properties, he's an easy character that helps you learn the basics of the game. | Jason is a fairly straightforward character who stands his ground. His 2H is jump-cancelable and is used to start air combos, but it doesn't launch by itself, letting him do extended combos against grounded opponents. Similarly, his assist doesn't launch, which helps other characters extend grounded combos. Combining an offensive rushdown style with decent zoning properties, he's an easy character that helps you learn the basics of the game. | ||
{{StrengthsAndWeaknesses | |||
| intro = '''Jason Lee Scott''' is an all-rounder character with an incredible assist | |||
| pros = | |||
*'''Support Value''' - Jason possesses a fast ,forward moving, multi-hitting assist that also crosses up, creating easy sandwiches | |||
*'''Yeah I mashed''' - Jason unquestionably has one of the best 2Ls in the game, being an incredibly quick and decently sized low | |||
*'''Sniper''' - Jason's j.S gunshot has incredible durability and also a ton of hitstun, allowing for some pretty nutty confirms with plinkdashing | |||
*'''Outta there''' - 4S acts as a great tool to safely disengage from most blockstrings | |||
| cons= | |||
*'''No mix''' - Jason's lack of overhead options can make opening your opponent up quite a struggle | |||
*'''The spice of life''' - Jason's best routes require a lot of adjustments in timing depending on what character is being juggled | |||
|tablewidth=80 | |||
}} | |||
==Normal Moves== | ==Normal Moves== | ||
| Line 115: | Line 140: | ||
|frameAdv=0 | |frameAdv=0 | ||
|description= | |description= | ||
* | *Spinning knockdown | ||
}} | }} | ||
}} | }} | ||
| Line 454: | Line 479: | ||
|recovery= | |recovery= | ||
|frameAdv=-26 | |frameAdv=-26 | ||
|description= | |description=*Stagger | ||
If | *Restand | ||
Two part EX. If first part connects, stagger will be used and it will restand your opponent. Second part can be done regardless of if the stagger is available or not. | |||
}} | }} | ||
| Line 475: | Line 502: | ||
|recovery= | |recovery= | ||
|frameAdv= | |frameAdv= | ||
|description= | |description=*Wallbounce | ||
Perform a series of attacks that end with a spinning kick. Can be followed up with 6S. | Perform a series of attacks that end with a spinning kick. Can be followed up with dash 2H or 6S after the wallbounce. | ||
}} | }} | ||
}} | }} | ||
| Line 495: | Line 522: | ||
|recovery= | |recovery= | ||
|frameAdv= | |frameAdv= | ||
|description= | |description=*Launcher | ||
Switches sides with the opponent and slices them. | Switches sides with the opponent and slices them. Uses a launcher, and leaves Jason able to combo after. | ||
}} | }} | ||
}} | }} | ||
| Line 564: | Line 591: | ||
=Strategy= | =Strategy= | ||
Jason is a fairly straightforward character - he | Jason is a fairly straightforward character - he kills off most hits, but doesn't have the greatest mixups in the world. He can, however, play neutral very well using his j.S gunshot and his 4ss gunshots to keep the opponent glued in place until they make a mistake he can capitalize on with damage or pressure. In addition, Jason has access to routes that build a metric ton of meter, and save important states like spins and wallbounce, if you learn his blaster loops. | ||
This makes him an incredible "control" character, forcing the opponent to play the kind of neutral you want, and capitalizing on any slipups with massive damage. | |||
===Solo=== | ===Solo=== | ||
Jason's easiest routes will kill most characters, but not everyone - so solo he sometimes has to opt for resets. His best reset opportunities are doing 5L on an airborne opponent, and then dashing under. In the corner, if timed properly, this can be either a real or fake crossunder, and is basically invisible until you're hitting the opponent. | |||
==Team Synergy== | ==Team Synergy== | ||
Jason is at his best being a midliner on your team. Putting him here gives you access to his strengths - his assist to use for mixups or neutral skips, and his high meter gain - while avoiding his weaknesses as a solo character, like his lack of solo mix | Jason is at his best being a midliner on your team. Putting him here gives you access to his strengths - his assist to use for mixups or neutral skips, and his high meter gain - while avoiding his weaknesses as a solo character, like his lack of meaningful solo mix. He is formidable when combined with a point who can get him hits from a distance. | ||
=Combos= | =Combos= | ||
| Line 578: | Line 605: | ||
===Beginner Combos=== | ===Beginner Combos=== | ||
[https://imgur.com/ | [https://imgur.com/AzTojOc Corner] | ||
2l 2m 2h j.lms 5m 5h 2h j.ms j.lms 5m 5m 5m 2m (2l 5m 5m 2m)x3 5hh 5m 2m 5h EX 66 5l 2lllll 5m 5hh 6sss SUPER 6sss | |||
[https://imgur.com/82xw2R3 Midscreen] | |||
2l 5m 5hh 5m 2h j.ms j.lms 5m 5h 2h j.lms 5m 5m 5m 2m (2l 5m 5m 2m)x3 5hh EX 66 5l 2lllll 5m 5hh 6sss SUPER 6sss | |||
[https://imgur.com/YMcTBpP Side-Switch] | |||
2l 2m 2h j.lms 66 5m 5h 2h j.ms j.lms 5m 5m 5m 2m (2l 5m 5m 2m)x3 5hh 5mm EX 66 5l 2lllll 5m 5hh 6sss SUPER 6sss | |||
[https://imgur.com/Nld5LSb Ex Starter(Corner)] | |||
EX 66 5l 2lllL j.LMS 66 5m 5h 2h j.ms j.lms 5m 5m 5m 2m (2l 5m 5m 2m)x3 5hh 5L RESET | |||
[https://imgur.com/fLdQrrE EX Starter(Midscreen)] | |||
EX 66 5l 2lllll 5m 5hh 5m 2h j.ms j.lms 5m 5m 5m 2m (2l 5m 5m 2m)x3 5hh 5m 2h 5s 6sss SUPER | |||
[https://imgur.com/XIq7UKq EX Starter(Back to corner)] | |||
EX 66 5l 2lllll 5m 5hh 5mm 5m 2m 2h j.lms 5m 5m 5m (2l 5m 5m 2m)x3 5hh 5m 2h 5s 6sss SUPER 6sss | |||
[https://imgur.com/NI79aJl Throw(Back to corner)] | |||
THROW 66 2h j.ms j.lms 5m 5h 2h j.ms j.lms 5m 5m 2m (2l 5m 5m 2m)x2 2l 5m 5m 5hh EX 66 5l 2llll 5m 5hh 5L RESET | |||
[https://imgur.com/F6a49Pw Throw (Corner)] | |||
THROW 66 2h j.lms 66 5m 5h 2h j.ms j.lms 5m 5m 5m 2m (2l 5m 5m 2m)x3 5hh EX 66 5l 2lllll 5m 5hh 5L RESET | |||
[https://imgur.com/3B4vl09 Backthrow(Back to corner)] | |||
THROW 5m 5m 2m (2l 5m 5m 2m)x3 5hh 5mm 5m 2m 5h 2h j.lms 5m 5m 5m 2m EX 66 5l 2lllll 5m 5hh 5L RESET | |||
[https://imgur.com/i4FkNST Backthrow(Midscreen)] | |||
THROW 5m 5h 2h j.MS j.LMS 5m 5m 5m 2m (2l 5m 5m 2m)x3 5hh 5mm 5m 5h EX 66 5l 2lllll 5m 5hh 5L RESET | |||
===Blaster loops=== | ===Blaster loops=== | ||
Jason's combo game at higher levels is reliant on juggling people as long as possible by using Jason's air gunshot, as the move does decent damage and builds a healthy amount of bar. | Jason's combo game at higher levels is reliant on juggling people as long as possible by using Jason's air gunshot, as the move does decent damage and builds a healthy amount of bar. | ||
These loops are done by doing j.LMS with some delays between each button press | These loops are done by doing j.LMS with some delays between each button press. If done properly, these loops can build almost 3 bars, and will kill meter positive from most starters. | ||
To perform the loop, use a launcher, jump, and then after your first j.LM or j.MS to stabilize, re-jump and while rising, press j.L. At the top of your jump, do j.M to keep them at the same height. Then, while falling, j.S so that they fall onto your gunshot. | |||
===Basic blaster loop routes=== | ===Basic blaster loop routes=== | ||
[https://imgur.com/ | [https://imgur.com/P19HhY2 Side Switch] | ||
2l 2m 2h j.LMS 66 5m 5h 2h j.MS (J.LMS)x10 j.HS EX 66 5l 2lllll 5m 5hh 6sss SUPER 6sss | |||
[https://imgur.com/O4RWZYg EX(Back to corner)] | |||
EX 66 5l 2lllll 5m 5hh 2h (j.lms)x10 j.HS 2h 5s 6sss SUPER | |||
[https://imgur.com/3gkrMVi EX(Midscreen)] | |||
EX 66 5l 2lllll 5m 5hh 5m 5h 2h j.lm (j.lms)x9 j.HS 2h 5s 6sss super | |||
[https://imgur.com/AfWp7Rp EX(Corner)] | |||
EX 66 5l 2llll 2m 2h j.lms 66 5m 5h 2h j.ms (j.lms)x8 j.LHS 6SSS SUPER | |||
[https://imgur.com/NZSDuu3 Throw(Back to corner)] | |||
THROW 66 2h (J.LMS)x2 dashjump j.LMS 5m 5h 2h j.lm (j.LMS)x6 j.HS EX 66 5l 2lllll 5m 5hh 6sss SUPER 6sss | |||
[https://imgur.com/DGe2LVp Throw(Corner)] | |||
THROW 66 2h j.LMS 66 5m 5h 2h j.MS (j.lms)x8 j.HS EX 66 5l 2lllll 5m 5hh 6sss SUPER 6sss | |||
[https://imgur.com/thAPC0d Backthrow(Back to corner)] | |||
THROW 5m 2h (j.lms)x12 j.HS EX 66 5l 2lllll 5m 5hh 6sss SUPER 6sss | |||
===2L Plinks=== | ===2L Plinks=== | ||
Jason's damage drops | Jason's damage drops slightly when doing midscreen routes because he has to use his second launcher early, taking away some damage and meter gain from his enders. The solution to this is to [https://youtu.be/6dEvwkQoOzM plink] into a dash from 2L. Doing this allows Jason to carry an opponent further on the screen while saving a launcher, effectively increasing his available damage. | ||
===Plinked Routes=== | |||
[https://imgur.com/DAO4ySd Plink sideswitch] | |||
2l 2m 2h j.lms 66 2l 5m~l 5h 2h (j.lms)x10 j.LH EX 66 5l 2lllll 5m 5hh 6sss SUPER 6sss | |||
[https://imgur.com/ | |||
[https://imgur.com/HCIdhS2 Plink Coast to Coast] | |||
2l 2m 5h 2h j.LM (j.lms)x2 dashjump j.lms (2l 5M~L)x3 5h 2h (j.lms)x6 j.LHS EX 66 5l 2lllll 5m 5hh 6sss SUPER 6sss | |||
[https://imgur.com/HMUIJ8j Plink throw(Back to corner)] | |||
THROW (5m~L)x2 2h (j.LMS)x2 dashjump j.lms (2l 5M~L)x2 5h 2h (j.lms)x6 j.HS EX 66 5l 2lllll 5m 5hh 6sss SUPER 6sss | |||
[https://imgur.com/y8qjaCN Plink throw(Corner)] | |||
THROW 66 2h j.lms 2l 5M~L 5h 2h (j.LMS)x9 j.HS EX 66 5l 2lllll 5mm 5hh 6sss SUPER 6sss | |||
[https://imgur.com/ | [https://imgur.com/7CTTsP2 Plink Backthrow(Corner)] | ||
THROW 5m 5hh 66 5m (2l 5M~L 5m)x3 5h 2h (j.LMS)x8 EX 66 5l 2lllll 5m 5hh 6sss SUPER 6sss | |||
[https://imgur.com/HbDBFRy Plink EX(Corner)] | |||
EX 66 5l 2lllll 2m 2h j.ms 66 (2l 5M~L 5m)x2 2l 5M~L 5h 2h (j.lms)x7 j.MHS 6sss SUPER 6sss | |||
[https:// | [https://imgur.com/5ewlMaY Plink EX(Midscreen)] | ||
EX 66 5l 2lllll 5m 5hh 66 5m 2l 5M~L 5h 2h (j.lms)x9 j.HS 2h 5s 6sss SUPER | |||
===Zord combos=== | |||
''All zord combos shown are done post-juggle limit.'' | |||
[https://imgur.com/7Bwu9lt SPD MegaZord loop] | |||
6sss ZORD (H call) j.S (6s(h call)ss j.s)x2 6sss | |||
[https://imgur.com/ | [https://imgur.com/AobFXmu DinoZord loop] | ||
6sss ZORD (6S(H CALL)SS J.S)x3 6SSS | |||
[https://imgur.com/bPs6Lkj DragonZord Drill loop] | |||
6SSS ZORD (L CALL) 6s j.S (6SS(ZORD L CALL)S j.S)x2 6SSS | |||
[https://imgur.com/ | [https://imgur.com/7fcFCzM DragonZord Stomp Loop] | ||
6SSS ZORD (M CALL) (5L 66 5l 2lll 5m 5hh (m call))x2 -> regular combo | |||
[https://imgur.com/4fBCBoY Samurai Zord Stab loop] | |||
6sss ZORD (h call) 6s j.S (6ss(h call)s j.s)x2 6sss | |||
[https://imgur.com/ | [https://imgur.com/dH7OExV Samurai Zord Dorito loop] | ||
6sss ZORD (M call) 6s j.S jumpback j.S (6s(m call)s j.S jumpback j.s)x2 6sss | |||
===Videos=== | ===Videos=== | ||
| Line 677: | Line 769: | ||
<!--Example: "Character" combo video by "name of content creator" (2018).--> | <!--Example: "Character" combo video by "name of content creator" (2018).--> | ||
[https:// | [https://imgur.com/a/C9NU7my Jason wiki combos by Akaragitsune] (2022) | ||
[https:// | [https://youtu.be/yQDtGBDT5jM Jason beginner's guide by Fisto] (2022) | ||
==Colors== | ==Colors== | ||
Latest revision as of 12:37, 3 January 2023
Introduction
Health: 1000
Walk Speed: 900 forward, 375 back
Chain Rules: Magic Series
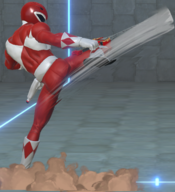
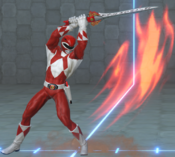
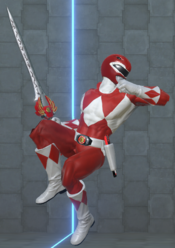
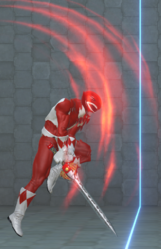
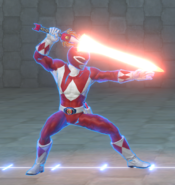
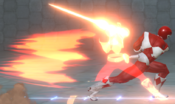
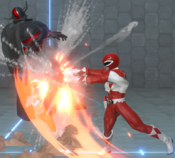
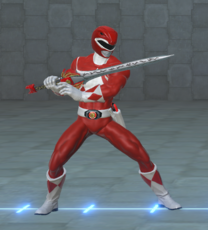
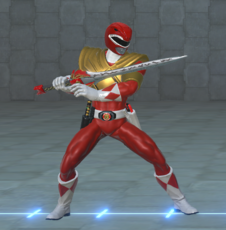
Jason Lee Scott is the original MMPR Red Ranger and a natural born leader. A 17-year-old black belt, Jason's sly smile betrays his rugged young warrior mantle to reveal a kid next door with a bit of a mischievous streak.
Overview
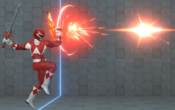
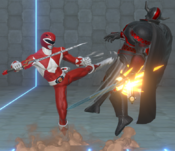
Jason is a fairly straightforward character who stands his ground. His 2H is jump-cancelable and is used to start air combos, but it doesn't launch by itself, letting him do extended combos against grounded opponents. Similarly, his assist doesn't launch, which helps other characters extend grounded combos. Combining an offensive rushdown style with decent zoning properties, he's an easy character that helps you learn the basics of the game.
| Jason Lee Scott is an all-rounder character with an incredible assist | |
| Pros | Cons |
|
|
Normal Moves
5L
5L
|
|---|
5LL
5LL
|
|---|
5LLL
5LLL
|
|---|
5LLLL
5LLLL
|
|---|
5M
5M
|
|---|
5MM
5MM
|
|---|
5H
5H
|
|---|
5HH
5HH
|
|---|
2L
2L
|
|---|
2M
2M
|
|---|
2H
2H
Tyranno Upper |
|---|
j.L
j.L
|
|---|
j.M
j.M
|
|---|
j.H
j.H
|
|---|
Special Moves
5S
Titanus Counter
5S |
|---|
4S
Back Roll
4S |
|---|
6S
Triple Slice
6S |
|---|
j.S
Air Blaster Shot
j.S |
|---|
EX Attack
5S+L
Triple Threat
5S+L |
|---|
Throws
Forward Throw
Forward Throw
5M+H/6M+H |
|---|
Back Throw
Back Throw
4M+H |
|---|
Super
Tyranno Charge H+S Bionic arm! Bionic arm!
|
|---|
Tag Actions
Assist
Assist
Triple Slice A1/A2 |
|---|
Swap Strike
Swap Strike
A1/A2+S |
|---|
Strategy
Jason is a fairly straightforward character - he kills off most hits, but doesn't have the greatest mixups in the world. He can, however, play neutral very well using his j.S gunshot and his 4ss gunshots to keep the opponent glued in place until they make a mistake he can capitalize on with damage or pressure. In addition, Jason has access to routes that build a metric ton of meter, and save important states like spins and wallbounce, if you learn his blaster loops.
This makes him an incredible "control" character, forcing the opponent to play the kind of neutral you want, and capitalizing on any slipups with massive damage.
Solo
Jason's easiest routes will kill most characters, but not everyone - so solo he sometimes has to opt for resets. His best reset opportunities are doing 5L on an airborne opponent, and then dashing under. In the corner, if timed properly, this can be either a real or fake crossunder, and is basically invisible until you're hitting the opponent.
Team Synergy
Jason is at his best being a midliner on your team. Putting him here gives you access to his strengths - his assist to use for mixups or neutral skips, and his high meter gain - while avoiding his weaknesses as a solo character, like his lack of meaningful solo mix. He is formidable when combined with a point who can get him hits from a distance.
Combos
Beginner Combos
2l 2m 2h j.lms 5m 5h 2h j.ms j.lms 5m 5m 5m 2m (2l 5m 5m 2m)x3 5hh 5m 2m 5h EX 66 5l 2lllll 5m 5hh 6sss SUPER 6sss
2l 5m 5hh 5m 2h j.ms j.lms 5m 5h 2h j.lms 5m 5m 5m 2m (2l 5m 5m 2m)x3 5hh EX 66 5l 2lllll 5m 5hh 6sss SUPER 6sss
2l 2m 2h j.lms 66 5m 5h 2h j.ms j.lms 5m 5m 5m 2m (2l 5m 5m 2m)x3 5hh 5mm EX 66 5l 2lllll 5m 5hh 6sss SUPER 6sss
EX 66 5l 2lllL j.LMS 66 5m 5h 2h j.ms j.lms 5m 5m 5m 2m (2l 5m 5m 2m)x3 5hh 5L RESET
EX 66 5l 2lllll 5m 5hh 5m 2h j.ms j.lms 5m 5m 5m 2m (2l 5m 5m 2m)x3 5hh 5m 2h 5s 6sss SUPER
EX 66 5l 2lllll 5m 5hh 5mm 5m 2m 2h j.lms 5m 5m 5m (2l 5m 5m 2m)x3 5hh 5m 2h 5s 6sss SUPER 6sss
THROW 66 2h j.ms j.lms 5m 5h 2h j.ms j.lms 5m 5m 2m (2l 5m 5m 2m)x2 2l 5m 5m 5hh EX 66 5l 2llll 5m 5hh 5L RESET
THROW 66 2h j.lms 66 5m 5h 2h j.ms j.lms 5m 5m 5m 2m (2l 5m 5m 2m)x3 5hh EX 66 5l 2lllll 5m 5hh 5L RESET
THROW 5m 5m 2m (2l 5m 5m 2m)x3 5hh 5mm 5m 2m 5h 2h j.lms 5m 5m 5m 2m EX 66 5l 2lllll 5m 5hh 5L RESET
THROW 5m 5h 2h j.MS j.LMS 5m 5m 5m 2m (2l 5m 5m 2m)x3 5hh 5mm 5m 5h EX 66 5l 2lllll 5m 5hh 5L RESET
Blaster loops
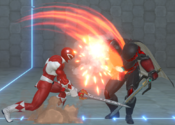
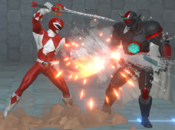
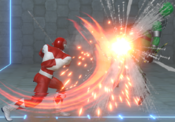
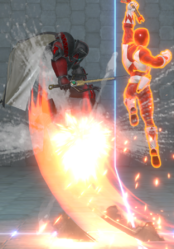
Jason's combo game at higher levels is reliant on juggling people as long as possible by using Jason's air gunshot, as the move does decent damage and builds a healthy amount of bar. These loops are done by doing j.LMS with some delays between each button press. If done properly, these loops can build almost 3 bars, and will kill meter positive from most starters. To perform the loop, use a launcher, jump, and then after your first j.LM or j.MS to stabilize, re-jump and while rising, press j.L. At the top of your jump, do j.M to keep them at the same height. Then, while falling, j.S so that they fall onto your gunshot.
Basic blaster loop routes
2l 2m 2h j.LMS 66 5m 5h 2h j.MS (J.LMS)x10 j.HS EX 66 5l 2lllll 5m 5hh 6sss SUPER 6sss
EX 66 5l 2lllll 5m 5hh 2h (j.lms)x10 j.HS 2h 5s 6sss SUPER
EX 66 5l 2lllll 5m 5hh 5m 5h 2h j.lm (j.lms)x9 j.HS 2h 5s 6sss super
EX 66 5l 2llll 2m 2h j.lms 66 5m 5h 2h j.ms (j.lms)x8 j.LHS 6SSS SUPER
THROW 66 2h (J.LMS)x2 dashjump j.LMS 5m 5h 2h j.lm (j.LMS)x6 j.HS EX 66 5l 2lllll 5m 5hh 6sss SUPER 6sss
THROW 66 2h j.LMS 66 5m 5h 2h j.MS (j.lms)x8 j.HS EX 66 5l 2lllll 5m 5hh 6sss SUPER 6sss
THROW 5m 2h (j.lms)x12 j.HS EX 66 5l 2lllll 5m 5hh 6sss SUPER 6sss
2L Plinks
Jason's damage drops slightly when doing midscreen routes because he has to use his second launcher early, taking away some damage and meter gain from his enders. The solution to this is to plink into a dash from 2L. Doing this allows Jason to carry an opponent further on the screen while saving a launcher, effectively increasing his available damage.
Plinked Routes
2l 2m 2h j.lms 66 2l 5m~l 5h 2h (j.lms)x10 j.LH EX 66 5l 2lllll 5m 5hh 6sss SUPER 6sss
2l 2m 5h 2h j.LM (j.lms)x2 dashjump j.lms (2l 5M~L)x3 5h 2h (j.lms)x6 j.LHS EX 66 5l 2lllll 5m 5hh 6sss SUPER 6sss
THROW (5m~L)x2 2h (j.LMS)x2 dashjump j.lms (2l 5M~L)x2 5h 2h (j.lms)x6 j.HS EX 66 5l 2lllll 5m 5hh 6sss SUPER 6sss
THROW 66 2h j.lms 2l 5M~L 5h 2h (j.LMS)x9 j.HS EX 66 5l 2lllll 5mm 5hh 6sss SUPER 6sss
THROW 5m 5hh 66 5m (2l 5M~L 5m)x3 5h 2h (j.LMS)x8 EX 66 5l 2lllll 5m 5hh 6sss SUPER 6sss
EX 66 5l 2lllll 2m 2h j.ms 66 (2l 5M~L 5m)x2 2l 5M~L 5h 2h (j.lms)x7 j.MHS 6sss SUPER 6sss
EX 66 5l 2lllll 5m 5hh 66 5m 2l 5M~L 5h 2h (j.lms)x9 j.HS 2h 5s 6sss SUPER
Zord combos
All zord combos shown are done post-juggle limit.
6sss ZORD (H call) j.S (6s(h call)ss j.s)x2 6sss
6sss ZORD (6S(H CALL)SS J.S)x3 6SSS
6SSS ZORD (L CALL) 6s j.S (6SS(ZORD L CALL)S j.S)x2 6SSS
6SSS ZORD (M CALL) (5L 66 5l 2lll 5m 5hh (m call))x2 -> regular combo
6sss ZORD (h call) 6s j.S (6ss(h call)s j.s)x2 6sss
6sss ZORD (M call) 6s j.S jumpback j.S (6s(m call)s j.S jumpback j.s)x2 6sss
Videos
Jason wiki combos by Akaragitsune (2022)
Jason beginner's guide by Fisto (2022)
Colors
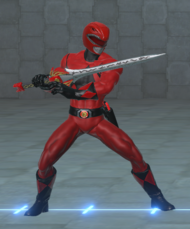
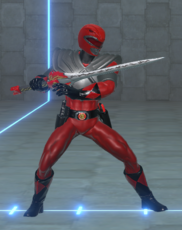
Dragon Shield Skin
External Links
- Twitter hashtag: #BFTG_RED
