|
|
| Line 12: |
Line 12: |
|
| |
|
| Unlike the rest of the cast Lauren does not sport a traditional forward dash and instead can run by dashing and holding forward. This is incredibly fast and paired with her running jump which is significantly lower to the ground than her standing/walking jump allows for some incredibly fast overhead attacks and side-switches. | | Unlike the rest of the cast Lauren does not sport a traditional forward dash and instead can run by dashing and holding forward. This is incredibly fast and paired with her running jump which is significantly lower to the ground than her standing/walking jump allows for some incredibly fast overhead attacks and side-switches. |
| | |
| | {{StrengthsAndWeaknesses |
| | | intro = '''Lauren Shiba''' is a highly mobile character with huge buttons, a run rather than a dash, and a unique double jump |
| | | pros = |
| | *'''Neutral Domination''' - As the active character, Lauren has very strong neutral tools with her huge sword normals, easily accessible projectile reflect, and fast run |
| | *'''Floor is Lava''' - Lauren's double jump can be used to avoid anti-airs, escape from an opponent's Zord, set up solo left/right mixups, and can be manipulated by her jH and jS |
| | *'''Restricted Air Space''' - Lauren has a very strong anti-air that can stop jumps from most distances, including crossups |
| | *'''Support Value''' - Lauren's assist and numerous tag out options give her great support value on any team |
| | *'''Parry This, Filthy Casual''' - Lauren can set up unblockable resets from almost any starter |
| | | cons= |
| | *'''No Escape from Crossing Fate''' - Lauren has a relatively weak backdash which makes her reliant on 64L and jumping to escape away from pressure |
| | *'''Middling Damage''' - Lauren has mediocre and somewhat inconsistent damage as a solo character. She can struggle to kill characters without assists ready for unblockable resets |
| | *'''Feels Weird Man''' - Lauren's run, double jump, and pseudo-motion inputs give her a different feel than the rest of the cast, which is weird to many players |
| | *'''Execution''' - Lauren has higher execution requirements than much of the roster |
| | |tablewidth=80 |
| | }} |
|
| |
|
| ==Normal Moves== | | ==Normal Moves== |
Revision as of 12:25, 13 October 2022
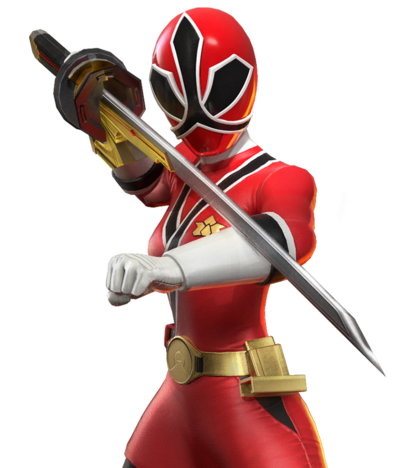
Lauren Shiba
Super Samurai Red Ranger Introduction
Health: 950
Walk Speed: - forward, - back
Sweet, tough, and kind-hearted, Lauren Shiba took over the role of Red Samurai Ranger momentarily and led the team against Nighlok. Lauren spent her life mastering the sealing symbol in secret, while her younger brother Jayden led the Samurai Rangers until her return. After Lauren used the Sealing Symbol on Master Xandred, she relinquished her leadership role back to Jayden to finish the fight.
Overview
Lauren can control space at a distance with her long range buttons, and can also put the pressure on her opponent with strong lockdown special moves (especially with teammates). She is the only character with a double jump (j.S). She is one of several characters with a stance.
Unlike the rest of the cast Lauren does not sport a traditional forward dash and instead can run by dashing and holding forward. This is incredibly fast and paired with her running jump which is significantly lower to the ground than her standing/walking jump allows for some incredibly fast overhead attacks and side-switches.
Playstyle
|
Lauren Shiba is a highly mobile character with huge buttons, a run rather than a dash, and a unique double jump |
| Pros |
Cons |
- Neutral Domination - As the active character, Lauren has very strong neutral tools with her huge sword normals, easily accessible projectile reflect, and fast run
- Floor is Lava - Lauren's double jump can be used to avoid anti-airs, escape from an opponent's Zord, set up solo left/right mixups, and can be manipulated by her jH and jS
- Restricted Air Space - Lauren has a very strong anti-air that can stop jumps from most distances, including crossups
- Support Value - Lauren's assist and numerous tag out options give her great support value on any team
- Parry This, Filthy Casual - Lauren can set up unblockable resets from almost any starter
|
- No Escape from Crossing Fate - Lauren has a relatively weak backdash which makes her reliant on 64L and jumping to escape away from pressure
- Middling Damage - Lauren has mediocre and somewhat inconsistent damage as a solo character. She can struggle to kill characters without assists ready for unblockable resets
- Feels Weird Man - Lauren's run, double jump, and pseudo-motion inputs give her a different feel than the rest of the cast, which is weird to many players
- Execution - Lauren has higher execution requirements than much of the roster
|
Normal Moves
5L
5L
|
| Damage
|
Guard
|
Startup
|
Active
|
Recovery
|
Frame Adv (Block)
|
Frame Adv (Hit)
|
| -
|
High/Low/Air
|
5
|
-
|
-
|
-6
|
-
|
- Forced Flipout (on airborne opponents)
Standard jab.
|
|
5LL
5LL
|
| Damage
|
Guard
|
Startup
|
Active
|
Recovery
|
Frame Adv (Block)
|
Frame Adv (Hit)
|
| -
|
High/Low/Air
|
-
|
-
|
-
|
-
|
-
|
Lauren moves backwards while swinging her sword.
|
|
64L
64L
|
| Damage
|
Guard
|
Startup
|
Active
|
Recovery
|
Frame Adv (Block)
|
Frame Adv (Hit)
|
| -
|
High/Low/Air
|
13
|
-
|
-
|
-4
|
-
|
Same as 5LL. You cannot cancel any normals into it. Reflects projectiles. Excellent tool in neutral, since Lauren's backdash leaves quite a bit to be desired, this move is the go-to for backwards movement.
|
|
2L
2L
|
| Damage
|
Guard
|
Startup
|
Active
|
Recovery
|
Frame Adv (Block)
|
Frame Adv (Hit)
|
| -
|
Low/Air
|
5
|
-
|
-
|
1
|
-
|
|
|
|
5M
5M
|
| Damage
|
Guard
|
Startup
|
Active
|
Recovery
|
Frame Adv (Block)
|
Frame Adv (Hit)
|
| -
|
High/Low/Air
|
-
|
-
|
-
|
-
|
-
|
Forward stab that reaches quite far (about two and a half character lengths). Long, fast poke with good risk reward.
|
|
5MM
5MM
|
| Damage
|
Guard
|
Startup
|
Active
|
Recovery
|
Frame Adv (Block)
|
Frame Adv (Hit)
|
| -
|
Low/Air
|
-
|
-
|
-
|
-
|
-
|
Lauren moves forward and swings, knocking the opponent up into the air a little bit.
|
|
5MMM
5MMM
|
| Damage
|
Guard
|
Startup
|
Active
|
Recovery
|
Frame Adv (Block)
|
Frame Adv (Hit)
|
| -
|
High/Low/Air(1) High/Air(2)
|
-
|
-
|
-
|
-
|
-
|
•Standing and Juggle ground bounce depending on hit
•Pseudo spin state
•Cancels into air EX
Lauren jumps up into the air, hitting the opponent with her knee on the way up, and comes down with an overhead.
|
|
2M
2M
|
| Damage
|
Guard
|
Startup
|
Active
|
Recovery
|
Frame Adv (Block)
|
Frame Adv (Hit)
|
| -
|
High/Low
|
-
|
-
|
-
|
-
|
-
|
•Launcher
Not a huge hitbox, and does not move Lauren forward. It is one of the better anti-airs in the game, but it is by no means the best.
|
|
5H
5H
|
| Damage
|
Guard
|
Startup
|
Active
|
Recovery
|
Frame Adv (Block)
|
Frame Adv (Hit)
|
| -
|
High/Low/Air
|
-
|
-
|
-
|
-
|
-
|
Big sword hit that reaches halfscreen. Powerful push block punish option.
|
|
5HH
5HH
|
| Damage
|
Guard
|
Startup
|
Active
|
Recovery
|
Frame Adv (Block)
|
Frame Adv (Hit)
|
| -
|
High/Low/Mid
|
-
|
-
|
-
|
-
|
-
|
- Staggers when opponent is standing
- Wall bounces an opponent being juggled
High committal followup off of 5H, try to cover this with an assist so that you can tag to safety if the 5H doesn't hit. Can be cancelled into EX or snapback on block. Snap is the safer option, but EX potentially nets a higher reward as you can tag in another character for a follow up or super/zord.
|
|
46H
46H
|
| Damage
|
Guard
|
Startup
|
Active
|
Recovery
|
Frame Adv (Block)
|
Frame Adv (Hit)
|
| -
|
High/Low/Air(1) High/Air(2)
|
7
|
-
|
-
|
0
|
-
|
•Ground bounces
Same as 5MMM. Cannot be cancelled into from any normal. Ignores juggle limit post-juggle.
|
|
2H
2H
|
| Damage
|
Guard
|
Startup
|
Active
|
Recovery
|
Frame Adv (Block)
|
Frame Adv (Hit)
|
| -
|
Low/Air
|
16
|
-
|
-
|
-11
|
-
|
Double sweep. Both hits are cancelable into special moves, but you usually cannot do anything after the first hit. Not super useful outside of combos because it is not safe on block, and has a lot of start-up.
|
|
j.L
j.L
|
| Damage
|
Guard
|
Startup
|
Active
|
Recovery
|
Frame Adv (Block)
|
Frame Adv (Hit)
|
| -
|
High/Air
|
-
|
infinite
|
-
|
-
|
-
|
Lauren stabs her sword straight down. Big crossup hitbox, but not a lot of hitstun.
|
|
j.M
j.M
|
| Damage
|
Guard
|
Startup
|
Active
|
Recovery
|
Frame Adv (Block)
|
Frame Adv (Hit)
|
| -
|
High/Air
|
-
|
-
|
-
|
-
|
-
|
Lauren slashes pretty far horizontally in front of her. Maybe the longest range air normal in the game. Also has a crossup hitbox, but not as big as j.L.
|
|
j.H
j.H
|
| Damage
|
Guard
|
Startup
|
Active
|
Recovery
|
Frame Adv (Block)
|
Frame Adv (Hit)
|
| -
|
High/Air
|
-
|
-
|
-
|
-
|
-
|
•Ground bounces
Lauren moves forward very slightly, and then slashes below and behind her.
|
|
Special Moves
5S
5S
|
| Damage
|
Guard
|
Startup
|
Active
|
Recovery
|
Frame Adv (Block)
|
Frame Adv (Hit)
|
| -
|
High/Mid/Low
|
-
|
-
|
-
|
-
|
-
|
•Wall bounces
Sword stance. If no other input is performed, she performs multiple swords strikes that reach about halfscreen.
|
|
5SS
5SS
|
| Damage
|
Guard
|
Startup
|
Active
|
Recovery
|
Frame Adv (Block)
|
Frame Adv (Hit)
|
| -
|
-
|
-
|
-
|
-
|
-
|
-
|
Cancels stance and returns Lauren to a neutral state.
|
|
5S4S
5S4S
|
| Damage
|
Guard
|
Startup
|
Active
|
Recovery
|
Frame Adv (Block)
|
Frame Adv (Hit)
|
| -
|
High/Low/Air
|
-
|
-
|
-
|
-
|
-
|
•Launcher
Lauren performs a flame pillar that reaches up to the sky. Launches on the last hit. Hits OTG. Can also be performed by holding S after 5S, and then holding 4. Useful for anti-airing in certain situations, and to pick up an awkward combo. It is incredibly unsafe on block, so use it sparingly.
|
|
5S6S
5S6S
|
| Damage
|
Guard
|
Startup
|
Active
|
Recovery
|
Frame Adv (Block)
|
Frame Adv (Hit)
|
| -
|
High/Low/Air
|
-
|
-
|
-
|
-
|
-
|
•OTGs
Lauren stabs the ground and 13 butterflies come out and fly forward in an arc (to about halfscreen), locking the opponent down for a long time on hit or block. The stab itself hits OTG and knocks the opponent into the air. Can also be performed by holding S after 5S, and then holding 6.
|
|
4S
4S
|
| Damage
|
Guard
|
Startup
|
Active
|
Recovery
|
Frame Adv (Block)
|
Frame Adv (Hit)
|
| -
|
-
|
-
|
-
|
-
|
-
|
-
|
Lauren becomes invincible and dashes backwards into sword stance. Also reflects projectiles. One difference from the 5S sword stance is that this version's neutral followup (sword strikes) can be cancelled into another followup (flame pillar, butterflies, or stance cancel) during the first hit's active frames (on whiff or on connection).
|
|
6S
6S
|
| Damage
|
Guard
|
Startup
|
Active
|
Recovery
|
Frame Adv (Block)
|
Frame Adv (Hit)
|
| -
|
Low/Air
|
-
|
-
|
-
|
-
|
-
|
•OTGs
Lauren tosses a 10 hit flame carpet onto the ground. Once all 10 hits connect on hit or block, the fire can no longer hit. Hits OTG, and can be followed up after on air hit. Opponent must be high enough for Lauren to recover in time for follow-up. When used as an OTG, you can always follow it up with 2L if you are close enough.
|
|
j.S
j.S
|
| Damage
|
Guard
|
Startup
|
Active
|
Recovery
|
Frame Adv (Block)
|
Frame Adv (Hit)
|
| -
|
-
|
-
|
-
|
-
|
-
|
-
|
Double jump. Can be angled forward or back with 6 or 4. Can be cancelled into from any jumping normal on hit or block, which also corrects Lauren's left/right facing. Lauren can perform any normal afterwards. Can only ever be performed once per jump. Can also be performed out of backdash.
|
|
EX Special
5L+S
5S+L
|
| Damage
|
Guard
|
Startup
|
Active
|
Recovery
|
Frame Adv (Block)
|
Frame Adv (Hit)
|
| -
|
-
|
-
|
-
|
-
|
-
|
-
|
Lauren jumps up behind the opponent while striking them. Has a followup. Assists cannot be called unless the followup is performed first.
|
|
5L+SS
5S+L
|
| Damage
|
Guard
|
Startup
|
Active
|
Recovery
|
Frame Adv (Block)
|
Frame Adv (Hit)
|
| -
|
-
|
-
|
-
|
-
|
-
|
-
|
EX autocombo! Same as j.L+S. Can't be performed on block. It costs no meter: can't think of any reason not to use it every time.
|
|
j.L+S
j.S+L
|
| Damage
|
Guard
|
Startup
|
Active
|
Recovery
|
Frame Adv (Block)
|
Frame Adv (Hit)
|
| -
|
-
|
-
|
-
|
-
|
-
|
-
|
Air EX. Not invincible. Can sometimes be followed up by 2L in the corner.
|
|
Throws
Forward Throw
Forward Throw
5M+H/6M+H
|
| Damage
|
Guard
|
Startup
|
Active
|
Recovery
|
Frame Adv (Block)
|
Frame Adv (Hit)
|
| -
|
Throw
|
-
|
-
|
-
|
-
|
-
|
•Spin state
Can be special move cancelled.
|
|
Back Throw
Back Throw
4M+H
|
| Damage
|
Guard
|
Startup
|
Active
|
Recovery
|
Frame Adv (Block)
|
Frame Adv (Hit)
|
| -
|
Throw
|
-
|
-
|
-
|
-
|
-
|
•Causes OTG knockdown
Puts the opponent in a sliding knockdown state.
|
|
Super
Super
Super
H+S
|
| Damage
|
Guard
|
Startup
|
Active
|
Recovery
|
Frame Adv (Block)
|
Frame Adv (Hit)
|
| -
|
-
|
-
|
-
|
-
|
-
|
-
|
•OTGs
Lauren shoots a fast-moving fireball that performs a cinematic super on hit. Pretty long recovery.
|
|
Tag Actions
Assist
Assist
A1/A2
|
| Damage
|
Guard
|
Startup
|
Active
|
Recovery
|
Frame Adv (Block)
|
Frame Adv (Hit)
|
| -
|
High/Low/Mid
|
-
|
-
|
-
|
-
|
-
|
•OTGs
Lauren jumps out and performs 5S~6S.
|
|
Swap Strike
Swap Strike
A1/A2+S
|
| Damage
|
Guard
|
Startup
|
Active
|
Recovery
|
Frame Adv (Block)
|
Frame Adv (Hit)
|
| -
|
-
|
-
|
-
|
-
|
-
|
-
|
Long range for a swap strike.
|
|
Strategy
Lauren is a character with a versatile kit. 6S 2H has a high risk, but it also has a high reward because it can kill with an optimal enough combo. 6S 2H can be reflexed be Lauren, Anubis Cruger, and Scorpina. There are a lot of characters who can punish it. 5S-6S is a bit safer since you are not whiffing a button, but rather you are launching projectiles. The butterflies can keep her safe as she runs in. Her rushdown game is pretty good. Her dash jump allows for ambiguous cross ups. Her run is incredible threatening to the opponent. You still have to be careful because they can hit you out of it. Her jump dash(jS) is great for avoiding projectiles and gaining space. If they do manage to hit you, you can still block. 64L is a great stalling tool against projectile spam. It reflects projectile and recovers quickly.
Lauren is a character with a versatile kit but generally wants to stay around the mid-range.
Neutral
Use her gigantic pokes to call out the opponent's movement and whiff punish. Use her forward run in combination with her 64L for a non-linear movement pattern to bait approaches while reflecting enemy projectiles and counterpoking. In most matchups, you can control the ground by placing 6s and punishing any enemy approaches by pushblocking them into the carpet or reflecting projectiles with 64L. However, watch out for the opponent's long pokes such as Gia 4S or Zedd 5H because if Lauren gets hit, the carpet goes away. If the opponent refuses to approach or throw projectiles, then we can start doing 5S~6S to chip and provide cover for our own approach, we can 6S2H6S for a full-screen poke, we can dash 5M or 5H for a hard callout option, or we can approach using dash jump normals.
Offense
Dash jump normals are going to be your safest means of offense, vary her approach with j.S to bait anti-airs and alternate between her different jumping normals to make her trickier to anti-air. If the opponent blocks on the ground, you're at a fairly large advantage, allowing you to either continue your offense or reset back to neutral. However, if the opponent manages to block you in the air, try not to end the air blockstring in j.H as that will leave you at the largest disadvantage.
Team Synergy
On point, she has multiple moves that control a lot of space for a long time, so they provide good opportunities to tag. Her flame carpet (6S) is a great tool to do before a tag out after killing a character. This holds the opponent still allowing for a mix-up. Characters with a standing overhead benefit from this as they can do an unblockable setup if you have all three characters.
Lauren has lost a lot of damage potential in the patch 2.6, so you might need to swap in a character with high post juggle damage to get the kill. Alternatively, you could go for a reset to finish a character off. You can setup unblockables with 46H.
Assist
Her assist can lock down opponents for a long time and OTGs when performed at close range can be good for combos in the corner.
Combos
Solo
5MHH dash 5M2M jLMSLM 5M2M jLMSLMH 5MM2H EX
Beginner BnB (video)
5MHH 6S 5MMH2H 5MMHH (5MM2H)x3 2L2M6S 2M6S 46H Ex(If possible) Super
C2C combo
5MH2H (5MM2H)x5 2L5M (2M6S)x2 46H (RESET[Option 1])or(EX Super[Option 2, when possible])
Corner Combo
Assist combos
2L5MHH dash 5L2L5MMH2H 5MM2H(until 19ish hits) Tag into Anubis Cruger 4H 4SS 5S-L (5S-H)x2 4SSS Super back-throw 5S-M (jSS 5S-H 5S dash 5S[More damage])or(5S-L 5S-H 5S dash 5S[Easier and still kills])
Universal C2C/Midscreen/Corner ToD with Doggy assist example
Resets
5L dash 2L
5L dash-jump jL
5L dash throw
5L 46H
5L 5M~L 9.j.H
5L 65 M~L
Unblockable setups
5L 6M~L , assist > 9j.H tag~low
Videos
Lauren Beginner Bnb combo video by Star55 (2021)
Colors
External Links


.png)
.png)


