Chun-Li
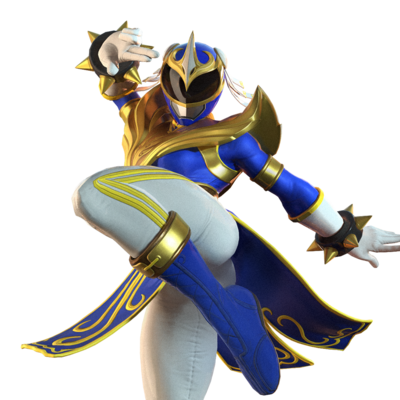
Blue Phoenix Ranger Introduction
Chun-Li was the apple of her father's eye. He taught her to love martial arts, and, as a dedicated cop, passed to her his sense of justice. His disappearance was the defining moment of her life, compelling her to train obsessively and to join Interpol. She was central to bringing down the crime ring Shadaloo (headed by M. Bison, whom she blamed for the loss of her dad). Now she's spirited into the world of the Power Rangers. With a Power Coin she morphs into the Blue Phoenix Ranger, a much-needed reinforcement in the battle to protect all worlds from the schemes of Lord Zedd.
Overview
Chun is a lightning-fast character with fast overhead IAD pokes as well as a speedy 2M slide giving her unreactable mixups at close to mid range. Her hitboxes can be stuffed pre emptively, so it's a good idea to make the opponent block something before initiating offense with these pokes. L kikoken is excellent at covering approaches and has very little recovery. Typical Chun gameplay consists of L kikokens at mid to long range and poking with IAD j.H and 2M once the opponent blocks a kikoken or assist.
Playstyle
|
Chun Li is an incredibly powerful character that can play the rushdown or zoning game |
| Pros |
Cons |
- Pick A Top Tier - Chun Li's tools are often the best for any given category. She has a complete gameplan and no bad matchups
- Run Faster Jump Higher - Chun Li has some of the best grounded and aerial movement in the game
- Overheads - Chun Li's instant-air-dash buttons give her access to very fast, low commitment overheads that can be used as mixup tools or pokes while holding backwards charge
- Which Side Are You On? - Chun Li has arguably the best solo left/right mixups in the game with airdash j2M and 6[M]
- Tag Out Options - Chun Li's j2M and 6[M] are strong tag out options that can set up unblockables in neutral or mid combo
- Zoning - Chun Li's projectiles are very durable and multiple can be put on the screen at any time
|
- Low Health - 900HP gives Chun Li the lowest health pool in the game which makes her incredibly easy to kill with any opening
- Afraid of Commitment - Chun Li's lows are committal and need to be protected or hit confirmed
- Always Be Charging - Chun Li is one of only two characters with true motion inputs and she has a high APM compared to other characters
|
Normal Moves
5L
5L
|
| Damage
|
Guard
|
Startup
|
Active
|
Recovery
|
Frame Adv (Block)
|
Frame Adv (Hit)
|
| -
|
High/Low/Air
|
5
|
-
|
-
|
-10
|
-
|
Pretty stubby jab. Good for 5L resets, but prefer 2L over 5L for plink pressure or standing confirms.
|
|
5M
5M
|
| Damage
|
Guard
|
Startup
|
Active
|
Recovery
|
Frame Adv (Block)
|
Frame Adv (Hit)
|
| -
|
High/Low/Air
|
7
|
-
|
-
|
-10
|
-
|
The confirm button. If the opponent is slightly airborne while Chun is still on the ground, dash 5M is the most consistent and lenient pickup tool she has. Use this to confirm off of stray zord hits, assist hits, or any other attack that leaves the opponent juggled. Delay 2M afterward for a consistent conversion into your full combo.
|
|
5MM
5MM
|
| Damage
|
Guard
|
Startup
|
Active
|
Recovery
|
Frame Adv (Block)
|
Frame Adv (Hit)
|
| -
|
High/Low/Air
|
-
|
-
|
-
|
-7
|
-
|
This move is mostly combo fodder. It builds a lot of meter but also adds quite a bit of juggle penalty. Mainly used in EX Kikoken loops, but is useful sometimes to chain into 5MMM for conversions into hard knockdown.
|
|
5MMM
5MMM
|
| Damage
|
Guard
|
Startup
|
Active
|
Recovery
|
Frame Adv (Block)
|
Frame Adv (Hit)
|
| -
|
High/Low/Air
|
-
|
-
|
-
|
-13
|
-
|
|
6M
Kasairyuu
6M
|
| Damage
|
Guard
|
Startup
|
Active
|
Recovery
|
Frame Adv (Block)
|
Frame Adv (Hit)
|
| -
|
High/Air
|
27
|
-
|
-
|
+2
|
-
|
|
6MHold
Kaisaryuu (Fake-Out)
6M (Hold)
|
| Damage
|
Guard
|
Startup
|
Active
|
Recovery
|
Frame Adv (Block)
|
Frame Adv (Hit)
|
| -
|
-
|
-
|
-
|
-
|
-
|
-
|
|
5H
5H
|
| Damage
|
Guard
|
Startup
|
Active
|
Recovery
|
Frame Adv (Block)
|
Frame Adv (Hit)
|
| -
|
High/Low/Air
|
9
|
-
|
-
|
-12
|
-
|
|
5HH
5HH
|
| Damage
|
Guard
|
Startup
|
Active
|
Recovery
|
Frame Adv (Block)
|
Frame Adv (Hit)
|
| -
|
High/Low/Air
|
-
|
-
|
-
|
-8
|
-
|
|
5HHH
5HHH
|
| Damage
|
Guard
|
Startup
|
Active
|
Recovery
|
Frame Adv (Block)
|
Frame Adv (Hit)
|
| -
|
High/Low/Air
|
-
|
-
|
-
|
-13
|
-
|
|
2L
2L
|
| Damage
|
Guard
|
Startup
|
Active
|
Recovery
|
Frame Adv (Block)
|
Frame Adv (Hit)
|
| -
|
High/Low/Air
|
4
|
-
|
-
|
-2
|
-
|
|
2M
2M
|
| Damage
|
Guard
|
Startup
|
Active
|
Recovery
|
Frame Adv (Block)
|
Frame Adv (Hit)
|
| -
|
Low/Air
|
10
|
-
|
-
|
-8
|
-
|
Very fast low poke. Can be stuffed pre emptively. If pushblocked, it leaves Chun too far to continue blockstrings.
|
|
2H
2H
|
| Damage
|
Guard
|
Startup
|
Active
|
Recovery
|
Frame Adv (Block)
|
Frame Adv (Hit)
|
| -
|
High/Low/Air
|
9
|
-
|
-
|
-13
|
-
|
|
j.L
j.L
|
| Damage
|
Guard
|
Startup
|
Active
|
Recovery
|
Frame Adv (Block)
|
Frame Adv (Hit)
|
| -
|
High/Air
|
4
|
-
|
-
|
-
|
-
|
|
j.M
j.M
|
| Damage
|
Guard
|
Startup
|
Active
|
Recovery
|
Frame Adv (Block)
|
Frame Adv (Hit)
|
| -
|
High/Air
|
7
|
-
|
-
|
-
|
-
|
|
j.2M
j.2M
|
| Damage
|
Guard
|
Startup
|
Active
|
Recovery
|
Frame Adv (Block)
|
Frame Adv (Hit)
|
| -
|
High/Air
|
7
|
-
|
-
|
-
|
-
|
|
j.H
j.H
|
| Damage
|
Guard
|
Startup
|
Active
|
Recovery
|
Frame Adv (Block)
|
Frame Adv (Hit)
|
| -
|
High/Air
|
8
|
-
|
-
|
-
|
-
|
|
wallcling
Sankaku Tobi
Hold away from the wall during a jump
|
| Damage
|
Guard
|
Startup
|
Active
|
Recovery
|
Frame Adv (Block)
|
Frame Adv (Hit)
|
| -
|
-
|
-
|
-
|
-
|
-
|
-
|
|
Special Moves
5S
Tenkukyaku
5S
|
| Damage
|
Guard
|
Startup
|
Active
|
Recovery
|
Frame Adv (Block)
|
Frame Adv (Hit)
|
| -
|
High/Low
|
11
|
-
|
-
|
-15
|
-
|
|
j.S
Youshoukyaku
j.S
|
| Damage
|
Guard
|
Startup
|
Active
|
Recovery
|
Frame Adv (Block)
|
Frame Adv (Hit)
|
| -
|
High/Air
|
11
|
-
|
-
|
-
|
-
|
|
28
Spinning Bird Kick
2(Hold)8 L/M/H
|
| Damage
|
Guard
|
Startup
|
Active
|
Recovery
|
Frame Adv (Block)
|
Frame Adv (Hit)
|
| -
|
-
|
-
|
-
|
-
|
-
|
-
|
|
28b
Shouheiki Hanchu Kyaku
H during SBK
|
| Damage
|
Guard
|
Startup
|
Active
|
Recovery
|
Frame Adv (Block)
|
Frame Adv (Hit)
|
| -
|
-
|
-
|
-
|
-
|
-
|
-
|
|
46
Kikoken
4(Hold)6 L/M/H
|
| Damage
|
Guard
|
Startup
|
Active
|
Recovery
|
Frame Adv (Block)
|
Frame Adv (Hit)
|
| -
|
-
|
-
|
-
|
-
|
-
|
-
|
|
236
Hyakuretsukyaku
236 L/M/H
|
| Damage
|
Guard
|
Startup
|
Active
|
Recovery
|
Frame Adv (Block)
|
Frame Adv (Hit)
|
| -
|
-
|
-
|
-
|
-
|
-
|
-
|
|
236b
Tenku Hasha Kyaku
H during H Hyakuretsukyaku
|
| Damage
|
Guard
|
Startup
|
Active
|
Recovery
|
Frame Adv (Block)
|
Frame Adv (Hit)
|
| -
|
-
|
-
|
-
|
-
|
-
|
-
|
|
j236
Airborne Hyakuretsukyaku
j.236 L/M/H
|
| Damage
|
Guard
|
Startup
|
Active
|
Recovery
|
Frame Adv (Block)
|
Frame Adv (Hit)
|
| -
|
-
|
-
|
-
|
-
|
-
|
-
|
|
j236b
Jimen Hanchou Han-en Shu
H During H Airborne Hyakuretsukyaku
|
| Damage
|
Guard
|
Startup
|
Active
|
Recovery
|
Frame Adv (Block)
|
Frame Adv (Hit)
|
| -
|
-
|
-
|
-
|
-
|
-
|
-
|
|
EX Special
5L+S
5S+L
|
| Damage
|
Guard
|
Startup
|
Active
|
Recovery
|
Frame Adv (Block)
|
Frame Adv (Hit)
|
| -
|
-
|
-
|
-
|
-
|
-
|
-
|
Whiff Cancels
Cancels into the following moves on whiff:
|
|
EX28
28+2 of L/M/H
|
| Damage
|
Guard
|
Startup
|
Active
|
Recovery
|
Frame Adv (Block)
|
Frame Adv (Hit)
|
| -
|
-
|
-
|
-
|
-
|
-
|
-
|
Whiff Cancels
Cancels into the following moves on whiff:
|
|
EX46
46+2 of L/M/H
|
| Damage
|
Guard
|
Startup
|
Active
|
Recovery
|
Frame Adv (Block)
|
Frame Adv (Hit)
|
| -
|
-
|
-
|
-
|
-
|
-
|
-
|
|
EX236
236+2 of L/M/H
|
| Damage
|
Guard
|
Startup
|
Active
|
Recovery
|
Frame Adv (Block)
|
Frame Adv (Hit)
|
| -
|
-
|
-
|
-
|
-
|
-
|
-
|
|
EXj236
j236+2 of L/M/H
|
| Damage
|
Guard
|
Startup
|
Active
|
Recovery
|
Frame Adv (Block)
|
Frame Adv (Hit)
|
| -
|
-
|
-
|
-
|
-
|
-
|
-
|
|
Throws
Forward Throw
Forward Throw
5M+H/6M+H
|
| Damage
|
Guard
|
Startup
|
Active
|
Recovery
|
Frame Adv (Block)
|
Frame Adv (Hit)
|
| -
|
Throw
|
-
|
-
|
-
|
-
|
-
|
|
Back Throw
Back Throw
4M+H
|
| Damage
|
Guard
|
Startup
|
Active
|
Recovery
|
Frame Adv (Block)
|
Frame Adv (Hit)
|
| -
|
Throw
|
-
|
-
|
-
|
-
|
-
|
|
Super
Super
Super
H+S
|
| Damage
|
Guard
|
Startup
|
Active
|
Recovery
|
Frame Adv (Block)
|
Frame Adv (Hit)
|
| -
|
-
|
-
|
-
|
-
|
-
|
-
|
|
Tag Actions
Assist
Assist
A1/A2
|
| Damage
|
Guard
|
Startup
|
Active
|
Recovery
|
Frame Adv (Block)
|
Frame Adv (Hit)
|
| -
|
-
|
-
|
-
|
-
|
-
|
-
|
|
Swap Strike
Swap Strike
A1/A2+S
|
| Damage
|
Guard
|
Startup
|
Active
|
Recovery
|
Frame Adv (Block)
|
Frame Adv (Hit)
|
| -
|
-
|
-
|
-
|
-
|
-
|
-
|
|
Team Synergy
Combos
Solo
2M > 5H > 2H > 5S > j.2MM adc > j.2MM > j.M > j.H > j.236M > [5M > 2M > 5H > j.ad > j.2MM > j.M > j.H > j.236M]x2 > 5M > 2M > 2H > [4]6H~H > [dash 5LL > 5MM > 5HH > [4]6L+M]x2 > dash 5LL > 5MM > 5HH > 5S > [2]8H~H > j.ad > j.2M > j.236H~H > [2]8L~H
Corner to corner that works from most starters. There are lots of points where you'll have to delay the combo in order to maintain the correct height.
Assist combos
5L > 5M > 5H > assist name > 5L > 5M > 5H
Example combo
Videos
Colors
Class of 93' Skin
External Links


