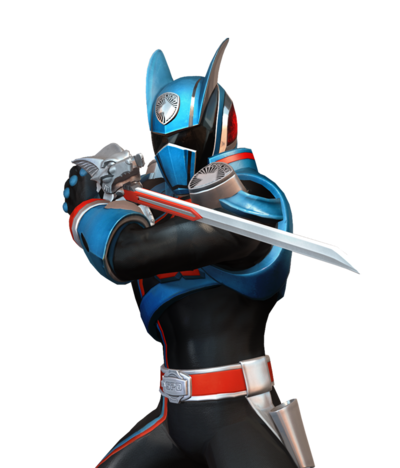
Anubis "Doggie" Cruger
SPD Shadow Ranger Introduction
Anubis "Doggie" Cruger is the commander of the Space Patrol Delta. He also acts as the SPD Shadow ranger and is a very good boy.
Overview
Doggie's stance not only effectively gives him effectively 3 extra special moves compared to other characters, but instantly canceling out of it is a strong pressure tool and enables Doggie to keep opponents juggled without having to use launchers, bounces, or any other resource. That, combined with his ability to combo after super, gives Doggie easy access to highly damaging combos.
Normal Moves
5L
5L
|
| Damage
|
Guard
|
Startup
|
Active
|
Recovery
|
Frame Adv (Block)
|
Frame Adv (Hit)
|
| -
|
LA
|
7f
|
-
|
-
|
-
|
-
|
standing low, good fast normal to use when you're plus and in their face to catch jumpouts.
|
|
5LL
5LL
|
| Damage
|
Guard
|
Startup
|
Active
|
Recovery
|
Frame Adv (Block)
|
Frame Adv (Hit)
|
| -
|
HLA
|
-
|
-
|
-
|
-
|
-
|
Knockdown kick. You rarely want this move to actually come out
|
|
5M
5M
|
| Damage
|
Guard
|
Startup
|
Active
|
Recovery
|
Frame Adv (Block)
|
Frame Adv (Hit)
|
| -
|
HLA
|
9f
|
-
|
-
|
-
|
-
|
Party starter. Pretty average hitbox for a medium but leads to scary pressure and damaging combos. Dash 5M is a decent approach/whiff punish.
|
|
5MM
5MM
|
| Damage
|
Guard
|
Startup
|
Active
|
Recovery
|
Frame Adv (Block)
|
Frame Adv (Hit)
|
| -
|
HLA
|
-
|
-
|
-
|
-
|
-
|
+3 after stance cancel. A second hitbox that you can put out after 5M, used in juggles a lot.
|
|
5MMM
5MMM
|
| Damage
|
Guard
|
Startup
|
Active
|
Recovery
|
Frame Adv (Block)
|
Frame Adv (Hit)
|
| -
|
HLA
|
-
|
-
|
-
|
-
|
-
|
Restands/Staggers on hit. Side swaps on hit/block. Good tool to combo from super with if you have enough juggle limit left. Very punishable on block so the side swap property there is mostly only useful if you have an assist covering you and/or are swapping characters.
|
|
5H
5H
|
| Damage
|
Guard
|
Startup
|
Active
|
Recovery
|
Frame Adv (Block)
|
Frame Adv (Hit)
|
| -
|
HLA
|
11f
|
-
|
-
|
-
|
-
|
+4 after stance cancel. Bigger, slower version of 5M.
|
|
5HH
5HH
|
| Damage
|
Guard
|
Startup
|
Active
|
Recovery
|
Frame Adv (Block)
|
Frame Adv (Hit)
|
| -
|
HLA
|
-
|
-
|
-
|
-
|
-
|
Slash through that knocks the opponent away. Lots of recovery as you'd expect on an auto combo. Can cancel into super but nothing else. Useful for when you confirm a 5H late and aren't in a position where 2H is a great idea.
|
|
4H
4H
|
| Damage
|
Guard
|
Startup
|
Active
|
Recovery
|
Frame Adv (Block)
|
Frame Adv (Hit)
|
| -
|
HL
|
8f
|
-
|
-
|
-
|
-
|
Anti-air. Pretty fast, jump cancelable and cancelable into stance stuff. In the corner 4H>4S works. Moves doggie backwards which can be helpful for Anti-airing but also makes it a little hard to use in pressure. Cannot kara cancel into throw for some reason.
|
|
2L
2L
|
| Damage
|
Guard
|
Startup
|
Active
|
Recovery
|
Frame Adv (Block)
|
Frame Adv (Hit)
|
| -
|
HLA
|
5f
|
-
|
-
|
-
|
-
|
Jab. Fastest option to mash out of strings. Also useful in juggles midscreen when 5M is too slow to hit before the opponent falls outside it's range. Can be linked into from heavy stance cancels until hitstun deteriorates.
|
|
2M
2M
|
| Damage
|
Guard
|
Startup
|
Active
|
Recovery
|
Frame Adv (Block)
|
Frame Adv (Hit)
|
| -
|
LA
|
8f
|
-
|
-
|
-
|
-
|
Low, slower than 5A but big range. Cancelable into 5H and 4H. 5M/5MM tend to be better options in combos, but the ability to chain into 4H is very useful when juggle limit is full. In neutral the low hitbox and range make this a very key move.
|
|
2H
2H
|
| Damage
|
Guard
|
Startup
|
Active
|
Recovery
|
Frame Adv (Block)
|
Frame Adv (Hit)
|
| -
|
LA
|
16f
|
-
|
-
|
-
|
-
|
+3 after stance cancel. Pretty standard sword sweep, causes a spinning knockdown and is limited to 2 in combos (a third 2H will cause flip out). Stance canceling this move is Doggie's primary way to start juggles from a standing hit, the high launch from a juggled hit is also helpful to correct for accidentally delaying juggles.
|
|
j.L
j.L
|
| Damage
|
Guard
|
Startup
|
Active
|
Recovery
|
Frame Adv (Block)
|
Frame Adv (Hit)
|
| -
|
HA
|
-
|
-
|
-
|
-
|
-
|
A normal jump in, which makes it weird for doggie.
|
|
j.M
j.M
|
| Damage
|
Guard
|
Startup
|
Active
|
Recovery
|
Frame Adv (Block)
|
Frame Adv (Hit)
|
| -
|
HA
|
-
|
-
|
-
|
-
|
-
|
Drop kick, on hit/block doggie will jump back which can make conversions awkward, but also allows for weird double cross-ups.
|
|
j.H
j.H
|
| Damage
|
Guard
|
Startup
|
Active
|
Recovery
|
Frame Adv (Block)
|
Frame Adv (Hit)
|
| -
|
HA
|
-
|
-
|
-
|
-
|
-
|
A pretty normal heavy sword slash, except that it causes a huge amount of landing recovery as doggie rolls and strikes a cool pose. The end of the pose is cancelable so it's not as awful as it looks, but it's enough to make whiffing a j.H extremely bad. Causes a ground bounce on air hit
|
|
Special Moves
5S
5S
|
| Version
|
Damage
|
Guard
|
Startup
|
Active
|
Recovery
|
Frame Adv (Block)
|
Frame Adv (Hit)
|
| Stance
|
-
|
n/a
|
-
|
-
|
-
|
-
|
-
|
Doggie enters stance, there's some startup before stance moves can be done, but not a lot.
|
| Version
|
Damage
|
Guard
|
Startup
|
Active
|
Recovery
|
Frame Adv (Block)
|
Frame Adv (Hit)
|
| ~L
|
-
|
HLA
|
-
|
-
|
-
|
-
|
-
|
Mist finer, will wall bounce if the opponent makes it to the wall. Immediately can cancel into a second slash with another press of L, if you're far from the corner you can get 2 before the opponent hits the wall and bounces off. The recovery can be partially canceled by pressing S and going back into stance. This can let you slash a third time to pick up after the wall bounce. If a slash connects on an opponent after Doggie has used his wallbounce it'll cause a sliding knockdown.
|
| Version
|
Damage
|
Guard
|
Startup
|
Active
|
Recovery
|
Frame Adv (Block)
|
Frame Adv (Hit)
|
| ~M
|
-
|
HLA
|
-
|
-
|
-
|
-
|
-
|
UPPER. Dash forward launcher which can be jump canceled or canceled back into stance by pressing S. Because you can go straight back into stance this lets Doggie chain 2 launchers back to back and/or launch into mist finer into isinia
|
| Version
|
Damage
|
Guard
|
Startup
|
Active
|
Recovery
|
Frame Adv (Block)
|
Frame Adv (Hit)
|
| ~H
|
-
|
HLA
|
-
|
-
|
-
|
-
|
-
|
Doggie channels the power of his wife, Isinia, and uses it to do a captain commando super. Connects after a sliding knockdown which makes it a common ender, it also does a good bit of chip and takes up a ton of space if you can manage to get it out in neutral. The hitbox is the light blade and becomes active as soon as that animation starts, if you catch an opponent behind you and get all the hits to connect it'll build roughly a full bar which makes this a staple in combos. Ends with a wall bounce or sliding knockdown if Doggie used his wallbounce already.
|
| Version
|
Damage
|
Guard
|
Startup
|
Active
|
Recovery
|
Frame Adv (Block)
|
Frame Adv (Hit)
|
| ~S
|
-
|
n/a
|
-
|
-
|
-
|
-
|
-
|
Stance cancel. While not instant, it's very fast. If you want a faster stance cancel you can backdash out of stance and then crouch cancel the backdash (1A+B to do both in one frame). The backdash cancel is better in almost every way theoretically, but double tapping S is an easier input and also much less likely to be removed in a future patch.
|
| Version
|
Damage
|
Guard
|
Startup
|
Active
|
Recovery
|
Frame Adv (Block)
|
Frame Adv (Hit)
|
| ~664S
|
-
|
HA
|
-
|
-
|
-
|
-
|
-
|
Stance forward dash into overhead. The overhead isn't necessary, if you want you can just dash forward and then leave stance and go low or throw or whatever. The Overhead doesn't chain into any normals but it does cancel back into stance and will combo into mist finer or upper. Useful for when your opponent is scared of frame traps and wants to try and block it all out.
|
|
4S
4S
|
| Version
|
Damage
|
Guard
|
Startup
|
Active
|
Recovery
|
Frame Adv (Block)
|
Frame Adv (Hit)
|
| 4S
|
-
|
HA
|
-
|
-
|
-
|
-
|
-
|
Teleport kick, ground bounces. Doesn't track like the assist version does, but hits overhead unlike the assist. Realistically the overhead isn't a very good mix-up solo, but you can swap out to an assist and make it scarier, or cover the screen up with a bunch of explosions or something. Also this move is a rekka. If you've already used your ground bounce this move will knockdown and the rekka followups wont connect.
|
| Version
|
Damage
|
Guard
|
Startup
|
Active
|
Recovery
|
Frame Adv (Block)
|
Frame Adv (Hit)
|
| 4SS
|
-
|
HLA
|
-
|
-
|
-
|
-
|
-
|
Slashy slash. timing for this is weirdly specific after Doggie has landed from the teleport, but if you delay too much it'll whiff. Vs a grounded opponent you can just mash it out, but vs a juggled opponent you may need to delay a bit. Can cancel into stance and connect a mist finer
|
| Version
|
Damage
|
Guard
|
Startup
|
Active
|
Recovery
|
Frame Adv (Block)
|
Frame Adv (Hit)
|
| 4SSS
|
-
|
HLA
|
-
|
-
|
-
|
-
|
-
|
uppercut slash. Finishes out the rekka, launches the opponent pretty far. Cancelable into super when Doggie lands. Going for all rekka hits is good when you're out of juggle limit after a super but have a ground bounce still.
|
|
6S
6S
|
| Damage
|
Guard
|
Startup
|
Active
|
Recovery
|
Frame Adv (Block)
|
Frame Adv (Hit)
|
| -
|
n/a
|
-
|
-
|
-
|
-
|
-
|
Counter, will also reflect fireballs. Has some recovery even after a reflect, which can make reflecting projectiles a bad idea if there's multiple on screen. Can reflect any projectile, even Gia's super.
|
|
j.S
j.S
|
| Version
|
Damage
|
Guard
|
Startup
|
Active
|
Recovery
|
Frame Adv (Block)
|
Frame Adv (Hit)
|
| j.S
|
-
|
HLA
|
-
|
-
|
-
|
-
|
-
|
diagonal down air version of 5S~L. Stops Doggie in the air which can mess with anti-air attempts.
|
| Version
|
Damage
|
Guard
|
Startup
|
Active
|
Recovery
|
Frame Adv (Block)
|
Frame Adv (Hit)
|
| j.SS
|
-
|
HLA
|
-
|
-
|
-
|
-
|
-
|
straight ahead air version of 5S~L
|
|
EX Special
5L+S
5S+L
|
| Damage
|
Guard
|
Startup
|
Active
|
Recovery
|
Frame Adv (Block)
|
Frame Adv (Hit)
|
| -
|
HLA
|
-
|
-
|
-
|
-
|
-
|
SPD emergency. Doggie does his 4H animation and then the final hit of 4S rekka. Invun, cancelable to super but tends to not combo unless you cancel early.
|
|
Throws
Forward Throw
Forward Throw
5M+H/6M+H
|
| Damage
|
Guard
|
Startup
|
Active
|
Recovery
|
Frame Adv (Block)
|
Frame Adv (Hit)
|
| -
|
Throw
|
-
|
-
|
-
|
-
|
-
|
Doggie puts you in T H E B O X, from which you cannot jump. Enables some silly setups.
|
|
Back Throw
Back Throw
4M+H
|
| Damage
|
Guard
|
Startup
|
Active
|
Recovery
|
Frame Adv (Block)
|
Frame Adv (Hit)
|
| -
|
Throw
|
-
|
-
|
-
|
-
|
-
|
Doggie can solo combo off his back throw with either 5S~L, 5S~M, or just straight up super.
|
|
Super
Super
Super
H+S
|
| Damage
|
Guard
|
Startup
|
Active
|
Recovery
|
Frame Adv (Block)
|
Frame Adv (Hit)
|
| -
|
HLA
|
-
|
-
|
-
|
-
|
-
|
SHADOW SABRE. JUSTICE. SERVED. Not invincible but pretty fast, crumples which means followup hits juggle and it always side swaps, but since 5MMM restands and side swaps you can make it give you not that situation. This super is incredibly good, especially given Doggie's great meter gain, the fact that he doesn't need launchers/bounces to keep up juggles, and the sheer number of special moves he has which will keep combos alive when juggle limit is up. This super is the soul of Doggie.
|
|
Tag Actions
Assist
Assist
A1/A2
|
| Damage
|
Guard
|
Startup
|
Active
|
Recovery
|
Frame Adv (Block)
|
Frame Adv (Hit)
|
| -
|
HLA
|
-
|
-
|
-
|
-
|
-
|
Teleport kick. Unlike 4S this tracks, which makes it a lot more useful. It doesn't hit overhead though.
|
|
Swap Strike
Swap Strike
A1/A2+S
|
| Damage
|
Guard
|
Startup
|
Active
|
Recovery
|
Frame Adv (Block)
|
Frame Adv (Hit)
|
| -
|
HLA
|
-
|
-
|
-
|
-
|
-
|
Standard swap strike, Doggie's combos are very damaging, but also very long. If you have some damage on an assist they might heal it all back by the time you finish your TOD, so consider snapping sometimes.
|
|
Team Synergy
Doggie's main weakness is that his neutral isn't spectacular, a teammate who can open opponents up and then tag Doggie in are good partners, especially if they don't use up a wall bounce so that Doggie can build bar from backhit 5S~H.
Combos
Solo
5MM > 5H > 2H > 5S~S > 5MM > 5H > 2H > 5S~S > 5MM > 5H > 2H > 5S~S > 5MM > 5H > super > back throw > 5S~M > 5S~S > 4H > 4SS > 5S~L > 5S~H > super
Solo double super corner combo. Does a little over 1k which TODs non-big body characters. Pre-super this builds around 1 bar, post super it builds an extra bar. Isinia can be wonky and not give you enough hits for the meter to do super if you mist finer too high.
5MM > 5H > 2H > 5S~S > 5MM > 5H > 2H > 5S~S > 5MM > 5H > 2H > 5S~S > 5MMM > back throw > 5S~M > 5S~S > 4H > 4SS > 5S~L > 5S~H > super > back throw > 5S~L > 5S~H
same as above but doing the back throw earlier to build a second bar. Unfortunately the back throw sequence uses up all your bounces/launches so there's not much you can do to extend from the super.
Assist combos
Super > filler > call Jen assist > second super > Jen missiles hit
Jen's missiles take long enough that you can call her before super, and then have them hit OTG after for an extension
Videos
Colors
Template:Colors-BFTG
External Links


