Wonderful World/Ryuza: Difference between revisions
No edit summary |
Zero-Sennin (talk | contribs) No edit summary |
||
| Line 1: | Line 1: | ||
{{TOClimit|2}} | {{TOClimit|2}} | ||
[[image:WanWan_Ryuza_Profile.JPEG|<center><font size="4"><b>Ryuza Lengrand<br><small><small>リュウザ・ラングラン</small></small></b></font></center> | |||
'''Age:''' 22 | |||
<br> | |||
'''Occupation:''' Knight | |||
<br> | |||
'''Height:''' 197cm | |||
<br> | |||
'''Weight:''' 73 kg | |||
<br> <!--DO NOT ADD THE THREE SIZES OF ANY OF THE FEMME CHARACTERS FROM THE PROFILES, THAT SHIT'S WEIRD.--> | |||
'''Likes:''' Collecting weapons, researching magic | |||
<br> | |||
'''Dislikes:''' Office work | |||
<br> | |||
'''Values:''' The Knights of Eimer | |||
<br> | |||
'''Weapon:''' A sword called "Black Wolf Fang", and black flames|frame|right]] | |||
== | == Character Specific Data == | ||
'''Health''': - | |||
== | == Playstyle == | ||
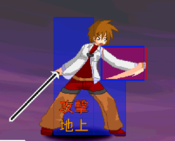
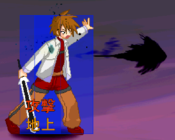
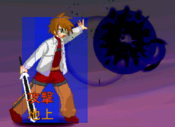
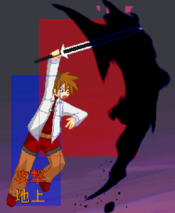
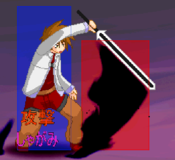
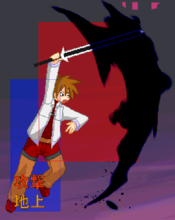
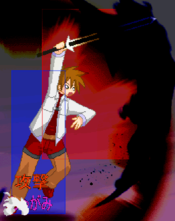
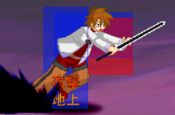
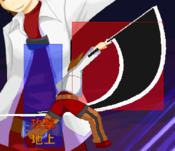
Ryuza is a basic shoto-type character, with strong pressure, big hitboxes, reasonable pokes, and good damage. His Original Action keeps him just as well-rounded by letting him burn meter to do even better versions of his special moves. While this means that he generally has a pretty good time with most matchups he has to face, he also doesn't excel in any particular area--other characters can outmatch him in their specialties, and he also needs meter to set up pressure. That said, he's a solid pick for a first-timer if none of the other characters sit right with you. | |||
{{ProConTable|width=50 | |||
|pros= | |||
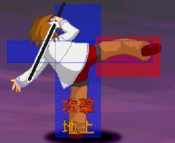
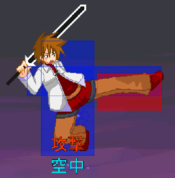
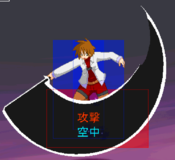
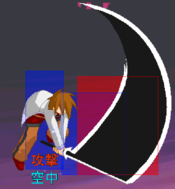
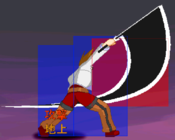
* '''Powerful all-rounder,''' with a little bit of everything in his kit--big hitboxes, a strong reversal (623P), projectiles, pokes (5S/5HS), and lockdown (236K). | |||
* '''Meter-efficient conversions thanks to his Original Action,''' allowing him to extend his combos and even his pressure. | |||
* '''Generally flat matchup spread,''' allowing him to fight most other characters without having to worry too much about getting into a bad matchup. | |||
|cons= | |||
* '''Needs meter for mixup,''' since it's based in having his Original Action available. | |||
* '''Can be outmatched in various categories''' by other characters who do his individual things better. | |||
* '''Slower buttons have longer recovery''' and tend to be a bit slow, making them more dangerous to whiff.. | |||
}} | |||
==== | == Movelist == | ||
{| class="wikitable" | |||
|- | |||
| colspan=2 style="background:#B0B0B0" | '''Special Skills''' | |||
|- | |||
| Sure Kill / 必殺 || Use {{#invoke:InputsWanWan|toIcons|5O}} to execute any special move (costs 50% of the Skill Gauge) | |||
|- | |||
| colspan=2 style="background:#B0B0B0" | '''Skills''' | |||
|- | |||
| Kokuen / 黒炎 || {{#invoke:InputsWanWan|toIcons|236P/K}} | |||
|- | |||
| Hitenshou / 飛天焼 || {{#invoke:InputsWanWan|toIcons|623S/HS}} (air OK) | |||
|- | |||
| Urahiten / 裏飛天 || {{#invoke:InputsWanWan|toIcons|421S/HS}} | |||
|- | |||
| Yasouken / 夜葬剣 || {{#invoke:InputsWanWan|toIcons|214P/K}} | |||
|- | |||
| colspan=2 style="background:#B0B0B0" | '''Finishing Skills (cost 100% of the Skill Gauge)''' | |||
|- | |||
| Makoku / 魔刻 || {{#invoke:InputsWanWan|toIcons|2146HS}} | |||
|- | |||
|} | |||
== Special Skills Overview == | |||
All of Ryuza's Original Actions act essentially as EX moves. By executing any of his Skills and using {{#invoke:InputsWanWan|toIcons|5O}} as the last input instead of the regular one, Ryuza will burn 50% of his Skill Gauge and do an enhanced version of that Skill. Similar to a Skill Break, using one of his Skills in this manner will put your meter gain on cooldown. | |||
==Normal Moves== | == Normal Moves == | ||
====== <font style="visibility:hidden" size="0">5P</font> ====== | ====== <font style="visibility:hidden" size="0">5P</font> ====== | ||
{{MoveData | {{MoveData | ||
| Line 57: | Line 79: | ||
|GFA=-5 | |GFA=-5 | ||
|AFA=-5 | |AFA=-5 | ||
|description=Standard jab. Startup looks slow, but Wonderful World is a 100FPS game, in a 60FPS this would be a standard 4F jab ((60/100)*8) | |description=Standard jab. Startup looks slow, but Wonderful World is a 100FPS game, in a 60FPS this would be a standard 4F jab ((60/100)*8). | ||
}} | }} | ||
}} | }} | ||
| Line 187: | Line 209: | ||
}} | }} | ||
====== <font style="visibility:hidden" size="0"> | ====== <font style="visibility:hidden" size="0">j.P</font> ====== | ||
{{MoveData | {{MoveData | ||
|image=WW_Ryuza_jP.png | |image=WW_Ryuza_jP.png | ||
|caption= | |caption= | ||
|name= | |name=j.P | ||
|data= | |data= | ||
{{AttackData-WW | {{AttackData-WW | ||
| Line 201: | Line 223: | ||
|GFA=0 | |GFA=0 | ||
|AFA=0 | |AFA=0 | ||
|description=Standard, fast air jab. Good as a jump-in | |description=Standard, fast air jab. Good as a jump-in. | ||
}} | }} | ||
}} | }} | ||
====== <font style="visibility:hidden" size="0"> | ====== <font style="visibility:hidden" size="0">j.K</font> ====== | ||
{{MoveData | {{MoveData | ||
|image=WW_Ryuza_jK.png | |image=WW_Ryuza_jK.png | ||
|caption= | |caption= | ||
|name= | |name=j.K | ||
|data= | |data= | ||
{{AttackData-WW | {{AttackData-WW | ||
| Line 223: | Line 245: | ||
}} | }} | ||
====== <font style="visibility:hidden" size="0"> | ====== <font style="visibility:hidden" size="0">j.S</font> ====== | ||
{{MoveData | {{MoveData | ||
|image=WW_Ryuza_jS.png | |image=WW_Ryuza_jS.png | ||
|caption= | |caption= | ||
|name= | |name=j.S | ||
|data= | |data= | ||
{{AttackData-WW | {{AttackData-WW | ||
| Line 241: | Line 263: | ||
}} | }} | ||
====== <font style="visibility:hidden" size="0"> | ====== <font style="visibility:hidden" size="0">j.HS</font> ====== | ||
{{MoveData | {{MoveData | ||
|image=WW_Ryuza_jHS.png | |image=WW_Ryuza_jHS.png | ||
|caption= | |caption= | ||
|name= | |name=j.HS | ||
|data= | |data= | ||
{{AttackData-WW | {{AttackData-WW | ||
| Line 259: | Line 281: | ||
}} | }} | ||
== | == Universal Moves == | ||
====== <font style="visibility:hidden" size="0">6HS</font> ====== | |||
{{MoveData | {{MoveData | ||
|image=WW_Ryuza_6HS.png | |image=WW_Ryuza_6HS.png | ||
|input={{#invoke:InputsWanWan|toIcons|6HS}} | |||
|caption= | |caption= | ||
|name= | |name= Just Break | ||
|data= | |data= | ||
{{AttackData-WW | {{AttackData-WW | ||
|damage= | |damage= | ||
|guard=High | |||
|startup=41 | |startup=41 | ||
|active= | |active=- | ||
|recovery= | |recovery=- | ||
|level= | |canceltype=foobar | ||
|level=- | |||
|GFA=-9 | |GFA=-9 | ||
|AFA=-9 | |AFA=-9 | ||
| Line 277: | Line 304: | ||
}} | }} | ||
== | ====== <font style="visibility:hidden" size="0">Throw</font> ====== | ||
====== <font style="visibility:hidden" size="0"> | {{MoveData | ||
|image=WanWan_CharaName_Throw.PNG | |||
|input=When close, {{#invoke:InputsWanWan|toIcons|4/6HS}} | |||
|caption= | |||
|name= Throw | |||
|data= | |||
{{AttackData-WW | |||
|damage= | |||
|guard= | |||
|startup=1 | |||
|active=- | |||
|recovery=- | |||
|canceltype=- | |||
|level=1 | |||
|GFA=? | |||
|AFA=? | |||
|description= Ryuza grabs the opponent and gives them a flame choke. | |||
}} | |||
}} | |||
====== <font style="visibility:hidden" size="0">Air Throw</font> ====== | |||
{{MoveData | |||
|image=WanWan_CharaName_AirThrow.PNG | |||
|input= {{#invoke:InputsWanWan|toIcons|j4/6HS}} when close | |||
|caption= | |||
|name= Air Throw | |||
|data= | |||
{{AttackData-WW | |||
|damage= | |||
|guard= | |||
|startup=1 | |||
|active=- | |||
|recovery=- | |||
|canceltype=- | |||
|level=1 | |||
|GFA=? | |||
|AFA=? | |||
|description= An air version of the ground throw. | |||
}} | |||
}} | |||
== Skills == | |||
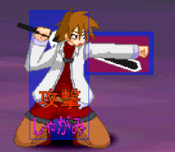
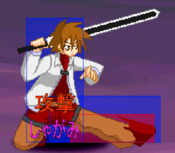
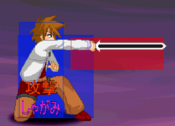
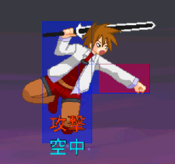
====== <font style="visibility:hidden" size="0">236P/K</font> ====== | |||
{{MoveData | {{MoveData | ||
|image=WW_Ryuza_236P.png | |image=WW_Ryuza_236P.png | ||
| Line 288: | Line 357: | ||
|image4=WW_Ryuza_236O2.png | |image4=WW_Ryuza_236O2.png | ||
|caption4=236O Part 2 | |caption4=236O Part 2 | ||
|name= | |name=Kokuen<br><small>黒炎</small> | ||
|input= | |input= {{#invoke:InputsWanWan|toIcons|236P/K}} | ||
|data= | |data= | ||
{{AttackData-WW | {{AttackData-WW | ||
|version=P | |version=P | ||
|damage= | |damage= | ||
|guard=Mid | |||
|startup=17 | |startup=17 | ||
|active= | |active=- | ||
|recovery= | |recovery=- | ||
|level= | |canceltype=foobarbar | ||
|GFA=-28 | |level=1 | ||
|AFA= | |GFA=-28 (point-blank) | ||
|AFA=? | |||
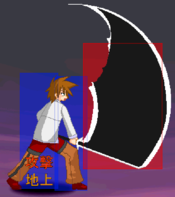
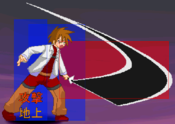
|description=Ryuza throws out a bunch of dark fire from his hands, start up and properties depend on which version used. P version travels the length of the screen. Safe, quick startup. | |description=Ryuza throws out a bunch of dark fire from his hands, start up and properties depend on which version used. P version travels the length of the screen. Safe, quick startup. | ||
}} | }} | ||
| Line 306: | Line 377: | ||
|version=K | |version=K | ||
|damage= | |damage= | ||
|guard=Mid | |||
|startup=44 | |startup=44 | ||
|active= | |active=- | ||
|recovery= | |recovery=- | ||
|level= | |canceltype=foobarbar | ||
|GFA=-14 | |level=1 | ||
|GFA= -14 to +31 | |||
|AFA=Varies | |AFA=Varies | ||
|description=Slow startup, and limited range. However it's massive frame advantage on block, making it useful in oki and corner pressure. Also note the chip damage from this move can add up. | |description=Slow startup, and limited range. However it's massive frame advantage on block, making it useful in oki and corner pressure. Also note the chip damage from this move can add up. | ||
| Line 318: | Line 391: | ||
|version=O | |version=O | ||
|damage= | |damage= | ||
|guard=Mid | |||
|startup=15 | |startup=15 | ||
|active= | |active=- | ||
|recovery= | |recovery=- | ||
|level= | |canceltype=foobarbar | ||
|GFA=+37 | |level=1 | ||
|GFA= +37 | |||
|AFA= | |AFA= | ||
|description=Starts up fast like the P version and travels the whole screen but faster. When it connects it will explode for multiple hits creating frame advantage. Very easy to use this move for continuing blockstrings and combos. | |description=Starts up fast like the P version and travels the whole screen but faster. When it connects it will explode for multiple hits creating frame advantage. Very easy to use this move for continuing blockstrings and combos. | ||
| Line 328: | Line 403: | ||
}} | }} | ||
====== <font style="visibility:hidden" size="0"> | ====== <font style="visibility:hidden" size="0">623S/HS</font> ====== | ||
{{MoveData | {{MoveData | ||
|image=WW_Ryuza_623S.png | |image=WW_Ryuza_623S.png | ||
| Line 338: | Line 413: | ||
|image4=WW_Ryuza_623O.png | |image4=WW_Ryuza_623O.png | ||
|caption4=623O | |caption4=623O | ||
|name= | |name=Hitenshou<br><small>飛天焼</small> | ||
|input= | |input={{#invoke:InputsWanWan|toIcons|623S/HS}} | ||
|data= | |data= | ||
{{AttackData-WW | {{AttackData-WW | ||
| Line 378: | Line 453: | ||
}} | }} | ||
====== <font style="visibility:hidden" size="0"> | ====== <font style="visibility:hidden" size="0">421S/HS</font> ====== | ||
{{MoveData | {{MoveData | ||
|image=WW_Ryuza_421S.png | |image=WW_Ryuza_421S.png | ||
| Line 386: | Line 461: | ||
|image3=WW_Ryuza_421O.png | |image3=WW_Ryuza_421O.png | ||
|caption3=421O | |caption3=421O | ||
|name= | |name=Urahiten<br><small>裏飛天</small> | ||
|input= | |input={{#invoke:InputsWanWan|toIcons|421S/HS}} | ||
|data= | |data= | ||
{{AttackData-WW | {{AttackData-WW | ||
| Line 426: | Line 501: | ||
}} | }} | ||
====== <font style="visibility:hidden" size="0"> | ====== <font style="visibility:hidden" size="0">214P/K</font> ====== | ||
{{MoveData | {{MoveData | ||
|image=WW_Ryuza_214.png | |image=WW_Ryuza_214.png | ||
| Line 436: | Line 511: | ||
|image4=WW_Ryuza_214O.png | |image4=WW_Ryuza_214O.png | ||
|caption4=214O | |caption4=214O | ||
|name= | |name=Yasouken<br><small>夜葬剣</small> | ||
|input= | |input={{#invoke:InputsWanWan|toIcons|214P/K}} | ||
|data= | |data= | ||
{{AttackData-WW | {{AttackData-WW | ||
| Line 475: | Line 550: | ||
}} | }} | ||
}} | }} | ||
== Finishing Skills == | |||
== | ====== <font style="visibility:hidden" size="0">2146HS</font> ====== | ||
{{MoveData | {{MoveData | ||
|image=WW_Ryuza_2146HS.png | |image=WW_Ryuza_2146HS.png | ||
|caption= | |caption= | ||
|name= | |name=Makoku<br><small>魔刻</small> | ||
|input=2146HS | |input= {{#invoke:InputsWanWan|toIcons|2146HS}} | ||
|data= | |data= | ||
{{AttackData-WW | {{AttackData-WW | ||
|version= | |version= | ||
|damage= | |damage= | ||
|startup=15 | |guard=Mid | ||
|active= | |startup=15 | ||
|recovery= | |active=- | ||
|level= | |recovery=- | ||
|canceltype=- | |||
|level=1 | |||
|GFA=-22 | |GFA=-22 | ||
|AFA= | |AFA=? | ||
|description=Ryuza swings out with his sword, impales the opponent then swings them over in an explosion of dark flames. This move has a lot of range, and speed. It doesn't have a whole lot of raw damage, but it does just as much damage at the end of a combo as it would out in the open making it really good for ending rounds. | |description=Ryuza swings out with his sword, impales the opponent then swings them over in an explosion of dark flames. This move has a lot of range, and speed. It doesn't have a whole lot of raw damage, but it does just as much damage at the end of a combo as it would out in the open making it really good for ending rounds. | ||
}} | }} | ||
}} | }} | ||
== Gameplan & Strategy== | |||
== | ===Neutral Game=== | ||
f.5S, j.S, and j.HS all have amazing range and should be used liberally so that your opponent will learn to respect the ranges Ryuza operates in. If you are having difficulty getting near you can toss out some 236P to build meter and restrict movement. Nothing too complex here, but don't forget that you want to use j.K or j.HS if they are above you in the air, j.S is for below you. | |||
Ryuza has no real anti air normals... however f.5S can swat careless approaches out of the air easily, and not much will beat a DP. Try not to let them get so close you don't have time to get out a DP. | |||
=== | ===Pressuring=== | ||
Ryuza's pressure game is really simple, and it doesn't really need to be anything more. His range lets him sit comfortably at a range where most (exceptions for characters like Lemius and Orphe) characters can't really do much. Like most characters his 2P is frame advantage, so make sure to use it for frame traps and tick throw setups. | |||
==== | ====Jump Cancels==== | ||
Both Ryuza's f.5S and 5HS are jump cancelable, so later in your blockstrings you pretty much always have it available to you. You can jumpback, then delay an airdash back in, IAD, or simply jump over your opponent and crossup with a j.S. On taller characters you can also do a high j.S > j.HS on the way down to create stronger frame advantage. | |||
====Dark Flame Pressure==== | |||
This is pretty straight forward, against a respectful opponent you can just cancel into 236K which will generate a ton of frame advantage and allow you to dash back in. Depending on how they answer you should adjust accordingly. 236P isn't really good to be used from close up, but when you are pushed out more and you toss it out you can create a frame trap by doing a f.5S after it is blocked. Of course if you have the meter to spare (whether or not you consider it worth it to use 50% meter to get close is up to you), you can always cancel into a 236O which is a pretty effective way to get back in (note that some chars have ways to escape it such as Duna 623K and Aiwhen's teleports). | |||
===Okizeme=== | |||
214P or 214K Knockdown, then Meaty 236K is a very easy and simple way to force a block. | |||
With 214P ender in the corner, the opponent will be pushed out slightly. If you mix up the distance you walk forward before an IAD you can create a hard to see crossup or no-crossup mixup. | |||
623HS Knockdown: Not really enough time for a meaty 236K except for on respectful opponents. Just do a meaty 2K or 2S or something. IAD j.S isn't a bad option. Blocking reversals is also a good option. | |||
j.623HS Knockdown: Not really the greatest situation ever, but not bad for Ryuza considering he has a ton of range anyways. If you do a short dash then f.5S most characters will have to backdash or airblock it. You sort of go straight into your further range pressure game here, probably why you should end your longer combos early at a grounded 623HS for more frame advantage. | |||
== Combos == | |||
== Videos == | |||
== External Links == | |||
== Colors == | |||
{{Colors-WW | {{Colors-WW | ||
|Character= | |Character=WanWan_CharaName_Color_ | ||
}} | }} | ||
{{WW}} | {{WW}} | ||
[[Category:Wonderful World]] | [[Category:Wonderful World]] | ||
Revision as of 21:49, 3 December 2022
Character Specific Data
Health: -
Playstyle
Ryuza is a basic shoto-type character, with strong pressure, big hitboxes, reasonable pokes, and good damage. His Original Action keeps him just as well-rounded by letting him burn meter to do even better versions of his special moves. While this means that he generally has a pretty good time with most matchups he has to face, he also doesn't excel in any particular area--other characters can outmatch him in their specialties, and he also needs meter to set up pressure. That said, he's a solid pick for a first-timer if none of the other characters sit right with you.
| Strengths | Weaknesses |
|---|---|
|
|
Movelist
Special Skills Overview
All of Ryuza's Original Actions act essentially as EX moves. By executing any of his Skills and using ![]() as the last input instead of the regular one, Ryuza will burn 50% of his Skill Gauge and do an enhanced version of that Skill. Similar to a Skill Break, using one of his Skills in this manner will put your meter gain on cooldown.
as the last input instead of the regular one, Ryuza will burn 50% of his Skill Gauge and do an enhanced version of that Skill. Similar to a Skill Break, using one of his Skills in this manner will put your meter gain on cooldown.
Normal Moves
5P
5P
|
|---|
5K
5K
|
|---|
5S
f.5S
|
|---|
5HS
5HS
|
|---|
2P
2P
|
|---|
2K
2K
|
|---|
2S
2S
|
|---|
2HS
2HS
|
|---|
j.P
j.P
|
|---|
j.K
j.K
|
|---|
j.S
j.S
|
|---|
j.HS
j.HS
|
|---|
Universal Moves
6HS
Throw
Air Throw
Skills
236P/K
236P 236P 236K 236K 236O Part 1 236O Part 1 236O Part 2 236O Part 2
|
|---|
623S/HS
623S 623S 623HS Part 1 623HS Part 1 623HS Part 2 623HS Part 2 623O 623O
|
|---|
421S/HS
421S 421S 421HS 421HS 421O 421O
|
|---|
214P/K
214 Startup 214 Startup P Version P Version K version K version 214O 214O
|
|---|
Finishing Skills
2146HS
Gameplan & Strategy
Neutral Game
f.5S, j.S, and j.HS all have amazing range and should be used liberally so that your opponent will learn to respect the ranges Ryuza operates in. If you are having difficulty getting near you can toss out some 236P to build meter and restrict movement. Nothing too complex here, but don't forget that you want to use j.K or j.HS if they are above you in the air, j.S is for below you.
Ryuza has no real anti air normals... however f.5S can swat careless approaches out of the air easily, and not much will beat a DP. Try not to let them get so close you don't have time to get out a DP.
Pressuring
Ryuza's pressure game is really simple, and it doesn't really need to be anything more. His range lets him sit comfortably at a range where most (exceptions for characters like Lemius and Orphe) characters can't really do much. Like most characters his 2P is frame advantage, so make sure to use it for frame traps and tick throw setups.
Jump Cancels
Both Ryuza's f.5S and 5HS are jump cancelable, so later in your blockstrings you pretty much always have it available to you. You can jumpback, then delay an airdash back in, IAD, or simply jump over your opponent and crossup with a j.S. On taller characters you can also do a high j.S > j.HS on the way down to create stronger frame advantage.
Dark Flame Pressure
This is pretty straight forward, against a respectful opponent you can just cancel into 236K which will generate a ton of frame advantage and allow you to dash back in. Depending on how they answer you should adjust accordingly. 236P isn't really good to be used from close up, but when you are pushed out more and you toss it out you can create a frame trap by doing a f.5S after it is blocked. Of course if you have the meter to spare (whether or not you consider it worth it to use 50% meter to get close is up to you), you can always cancel into a 236O which is a pretty effective way to get back in (note that some chars have ways to escape it such as Duna 623K and Aiwhen's teleports).
Okizeme
214P or 214K Knockdown, then Meaty 236K is a very easy and simple way to force a block.
With 214P ender in the corner, the opponent will be pushed out slightly. If you mix up the distance you walk forward before an IAD you can create a hard to see crossup or no-crossup mixup.
623HS Knockdown: Not really enough time for a meaty 236K except for on respectful opponents. Just do a meaty 2K or 2S or something. IAD j.S isn't a bad option. Blocking reversals is also a good option.
j.623HS Knockdown: Not really the greatest situation ever, but not bad for Ryuza considering he has a ton of range anyways. If you do a short dash then f.5S most characters will have to backdash or airblock it. You sort of go straight into your further range pressure game here, probably why you should end your longer combos early at a grounded 623HS for more frame advantage.
Combos
Videos
External Links
Colors
| P Button | K Button | S Button | HS Button |
|---|---|---|---|
| O Button | SP Button | Hidden | |
