Wonderful World/Aiwhen: Difference between revisions
No edit summary |
Zero-Sennin (talk | contribs) |
||
| (32 intermediate revisions by 5 users not shown) | |||
| Line 1: | Line 1: | ||
[[image: | {{TOClimit|2}} | ||
[[image:WanWan_Aiwhen_Profile.JPEG|<center><font size="4"><b>Aiwhen Iize<br><small><small>アイウェン・イーゼ</small></small></b></font></center> | |||
< | |||
'''Age:''' 14 | '''Age:''' 14 | ||
<br> | <br> | ||
| Line 9: | Line 8: | ||
<br> | <br> | ||
'''Weight:''' 39kg | '''Weight:''' 39kg | ||
<br> <!--DO NOT ADD THE THREE SIZES OF ANY OF THE FEMME CHARACTERS FROM THE PROFILES, THAT SHIT'S WEIRD.--> | |||
'''Likes:''' Knife-throwing practice | |||
<br> | <br> | ||
'''Dislikes:''' Demons | |||
'''Dislikes:''' | |||
<br> | <br> | ||
'''Values:''' | '''Values:''' Family Photos | ||
<br> | <br> | ||
'''Weapon:''' | '''Weapon:''' "Lindblum", a set of magical wind daggers, and support from wind magic|frame|right]] | ||
|frame|right]] | |||
== | == Character Specific Data == | ||
*'''Health:''' 540 | |||
*'''Starting Guts Correction:''' 70% | |||
*'''Guts Correction:''' 75% | |||
*'''Total Effective Health:''' 666 | |||
*'''Weight:''' Light | |||
*'''Shave Rate:''' 20% | |||
*'''Combo Correction Value:''' 1% | |||
== Playstyle == | |||
Aiwhen is a high-mobility character that specializes in rushdown tactics; her Original Abilities, combined with high run speed and special moves that shift her position extremely quickly, more or less ensure that a good Aiwhen player is impossible to shake off or track easily. She also has powerful 50/50 options and happens to build meter extremely quickly, allowing her to utilize BRKs and Finish Skills for high bursts of damage. | |||
Aiwhen | |||
Aiwhen is | However, Aiwhen has three significant weakpoints. First, she '''''cannot afford to get hit, ever;''''' her life pool is very, very small, and most characters in the game can destroy her off of one or two touches. Second, she needs meter to really pump out damage--without it, her combo damage is relatively low unless she gets very specific starters. Lastly, even with meter, her damage output is noticeably lower than most other characters in the game; Aiwhen wins matches by getting in and running oppressive setups, whittling the opponent down bit by bit. | ||
= | {{ProConTable | ||
|pros= | |||
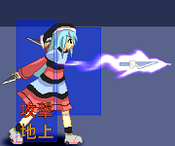
< | * '''Obnoxiously fast and hard to track or catch.''' Aiwhen's run speed, 236P, 236K, triple jumps, airdashes, and the teleporting functionality of her Original Ability all contribute to her breakneck, high-speed gameplay and make her one of the quickest characters in the game, if not the quickest outright. | ||
* '''Strong 50/50 options.''' j.214S is an extremely-low height overhead with a hard knockdown when TK'd, making it a potent threat from many of her jump-cancelable normals, while her 2K is one of her farthest reaching lows and pairs well with her movement speed. | |||
* '''Great meter gain.''' It's easy for Aiwhen to make frequent use of BRKs, 22O, and Finish Skills to set up combos, reposition herself, or dump damage. | |||
|cons= | |||
* '''<u>Extremely</u> fragile.''' Aiwhen's low health and poor guts scaling means she '''''must''''' avoid getting hit as much as possible. An enemy that manages to catch her slipping will obliterate her in a combo or two if they hit her with the right starter, have enough resources, or both. | |||
* '''Needs meter to be flexible.''' Aiwhen needs to have meter on hand in order to successfully press her advantages; she can work without it, but loses some of her most dangerous setups and combos. | |||
* '''Low base damage without resources.''' Getting in on the opponent to knock them down and run mix is a large part of Aiwhen's gameplan; she does not see high damage returns from single hits or meterless combos, so meter cashout is what pushes her damage up, and even then it's a little low compared to other characters in the cast. Without meter, Aiwhen's damage output drops significantly. | |||
}} | |||
= | == Movelist == | ||
{| | {| class="wikitable" | ||
|- | |- | ||
| colspan=2 style="background:#B0B0B0" | '''Original Abilities''' | |||
|- | |||
| Whirlwind / ワールウィンド || {{#invoke:InputsWanWan|toIcons|5O}}, or {{#invoke:InputsWanWan|toIcons|4/6O}} (air OK) | |||
|- | |||
| Vanish Haze / バニッシュヘイズ || {{#invoke:InputsWanWan|toIcons|22O}} (air OK) (uses 50% of the Skill Gauge) | |||
|- | |||
| Triple Jump / 3段ジャンプ || Has three jumps. | |||
|- | |||
| Double Air Dash / 多段空中ダッシュ || Can airdash twice. | |||
|- | |||
| colspan=2 style="background:#B0B0B0" | '''Command Moves''' | |||
|- | |||
| High Slash / ハイスラッシュ || {{#invoke:InputsWanWan|toIcons|4S}} | |||
|- | |||
| colspan=2 style="background:#B0B0B0" | '''Skills''' | | colspan=2 style="background:#B0B0B0" | '''Skills''' | ||
|- | |- | ||
| Rapid Edge / ラピッドエッジ || | | Rapid Edge / ラピッドエッジ || {{#invoke:InputsWanWan|toIcons|236S}} (air OK) | ||
|- | |- | ||
| | | Excel Cut / エクセルカット || {{#invoke:InputsWanWan|toIcons|S}} during ground Rapid Edge | ||
|- | |||
| Fantasy Blossom / ファンシーブロッサム || {{#invoke:InputsWanWan|toIcons|HS}} during ground Rapid Edge | |||
|- | |||
| Soar Maiden / ソアーメイデン || {{#invoke:InputsWanWan|toIcons|623S/HS}} (air OK) | |||
|- | |||
| Tempest Honeymoon / テンペストハネムーン || {{#invoke:InputsWanWan|toIcons|236P/K}} | |||
|- | |||
| Pure Dream / ピュアドリーム || {{#invoke:InputsWanWan|toIcons|j214S}} | |||
|- | |||
| Shattered Memory / シャッタードメモリー || {{#invoke:InputsWanWan|toIcons|214K}} | |||
|- | |||
| colspan=2 style="background:#B0B0B0" | '''Finishing Skills (cost 100% of the Skill Gauge)''' | |||
|- | |- | ||
| | | Fairy Dance / フェアリーダンス || {{#invoke:InputsWanWan|toIcons|2146HS}} | ||
|- | |- | ||
| Beautiful Delete / ビューティフルデリート || {{#invoke:InputsWanWan|toIcons|214214S}} (air OK) | |||
|- | |||
| Beautiful Delete / ビューティフルデリート || | |||
|} | |} | ||
= | == Original Ability Overview == | ||
Aiwhen's passive Original Abilities give her the ability to triple jump or double air dash. She can double jump and do one airdash, or vice versa, but cannot triple jump and double airdash in the same jump action. | |||
Whirlwind (5O) will allow her to immediately teleport-dash in a particular direction, with some caveats explained in the frame data below; her 22O, Vanish Haze, uses 50% of the Skill Gauge and puts its gain on cooldown for a bit, but guarantees a sideswitch when used. | |||
== Normal Moves and Original Abilities == | |||
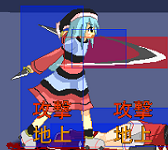
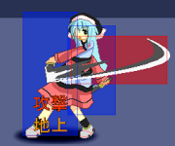
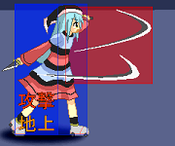
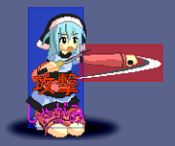
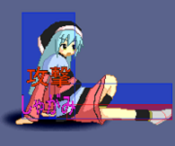
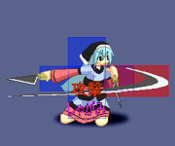
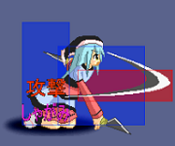
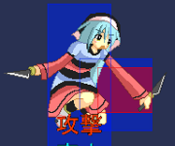
====== <font style="visibility:hidden" size="0">5P</font> ====== | |||
{{MoveData | |||
|image=WanWan_Aiwhen_5P.png | |||
|caption= | |||
|name=5P | |||
|data= | |||
{{AttackData-WW | |||
|damage=2 | |||
|startup=8 | |||
|active=5 | |||
|recovery=25 | |||
|level=1 | |||
|GFA=-5 | |||
|AFA=-5 | |||
|description=- | |||
}} | |||
}} | |||
====== <font style="visibility:hidden" size="0">5K</font> ====== | |||
{{MoveData | |||
|image=WanWan_Aiwhen_5K.png | |||
|caption= | |||
|name=5K | |||
|data= | |||
{{AttackData-WW | |||
|damage=3 | |||
|startup=12 | |||
|active=10 | |||
|recovery=20 | |||
|level=1 | |||
|GFA=-5 | |||
|AFA=-5 | |||
|description=- | |||
}} | |||
}} | |||
====== <font style="visibility:hidden" size="0">cl.5S</font> ====== | |||
{{MoveData | |||
|image=WanWan_Aiwhen_cl5S.png | |||
|caption= | |||
|name=cl.5S | |||
|data= | |||
{{AttackData-WW | |||
|damage=10 | |||
|startup=- | |||
|active=- | |||
|recovery=- | |||
|level=2 | |||
|GFA=- | |||
|AFA=- | |||
|description=- | |||
}} | |||
}} | |||
====== <font style="visibility:hidden" size="0">5S</font> ====== | |||
{{MoveData | |||
|image=WanWan_Aiwhen_f5S.png | |||
|caption= | |||
|name=f.5S | |||
|data= | |||
{{AttackData-WW | |||
|damage=9 | |||
|startup=17 | |||
|active=3 | |||
|recovery=47 | |||
|level=2 | |||
|GFA=-20 | |||
|AFA=-20 | |||
|description=- | |||
}} | |||
}} | |||
====== <font style="visibility:hidden" size="0">5HS</font> ====== | |||
{{MoveData | |||
|image=WanWan_Aiwhen_5HS.png | |||
|caption= | |||
|name=5HS | |||
|data= | |||
{{AttackData-WW | |||
|damage=18 | |||
|startup=19 | |||
|active=3 | |||
|recovery=50 | |||
|level=2 | |||
|GFA=-15 | |||
|AFA=-25 | |||
|description=- | |||
}} | |||
}} | |||
====== <font style="visibility:hidden" size="0">2P</font> ====== | |||
{{MoveData | |||
|image=WanWan_Aiwhen_2P.png | |||
|caption= | |||
|name=2P | |||
|data= | |||
{{AttackData-WW | |||
|damage=2 | |||
|startup=7 | |||
|active=5 | |||
|recovery=18 | |||
|level=1 | |||
|GFA=+2 | |||
|AFA=+2 | |||
|description=- | |||
}} | |||
}} | |||
====== <font style="visibility:hidden" size="0">2K</font> ====== | |||
{{MoveData | |||
|image=WanWan_Aiwhen_2K.png | |||
|caption= | |||
|name=2K | |||
|data= | |||
{{AttackData-WW | |||
|damage=1 | |||
|startup=10 | |||
|active=5 | |||
|recovery=20 | |||
|level=1 | |||
|GFA=0 | |||
|AFA=0 | |||
|description=- | |||
}} | |||
}} | |||
====== <font style="visibility:hidden" size="0">2S</font> ====== | |||
{{MoveData | |||
|image=WanWan_Aiwhen_2S.png | |||
|caption= | |||
|name=2S | |||
|data= | |||
{{AttackData-WW | |||
|damage=9 | |||
|startup=13 | |||
|active=5 | |||
|recovery=25 | |||
|level=2 | |||
|GFA=+3 | |||
|AFA=-7 | |||
|description=- | |||
}} | |||
}} | |||
====== <font style="visibility:hidden" size="0">2HS</font> ====== | |||
{{MoveData | |||
|image=WanWan_Aiwhen_2HS.png | |||
|caption= | |||
|name=2HS | |||
|data= | |||
{{AttackData-WW | |||
|damage=19 | |||
|startup=16 | |||
|active=3 | |||
|recovery=36 | |||
|level=2 | |||
|GFA=-6 | |||
|AFA=-14 | |||
|description=- | |||
}} | |||
}} | |||
====== <font style="visibility:hidden" size="0">j.P</font> ====== | |||
{{MoveData | |||
|image=WanWan_Aiwhen_jP.png | |||
|caption= | |||
|name=j.P | |||
|data= | |||
{{AttackData-WW | |||
|damage=1 | |||
|startup=8 | |||
|active=5 | |||
|recovery=20 | |||
|level=1 | |||
|GFA=0 | |||
|AFA=0 | |||
|description=- | |||
}} | |||
}} | |||
====== <font style="visibility:hidden" size="0">j.K</font> ====== | |||
{{MoveData | |||
|image=WanWan_Aiwhen_jK.png | |||
|caption= | |||
|name=j.K | |||
|data= | |||
{{AttackData-WW | |||
|damage=3 | |||
|startup=12 | |||
|active=5 | |||
|recovery=28 | |||
|level=1 | |||
|GFA=-8 | |||
|AFA=-8 | |||
|description=- | |||
}} | |||
}} | |||
====== <font style="visibility:hidden" size="0">j.S</font> ====== | |||
{{MoveData | |||
|image=WanWan_Aiwhen_jS.png | |||
|caption= | |||
|name=j.S | |||
|data= | |||
{{AttackData-WW | |||
|damage=7 | |||
|startup=17 | |||
|active=3 | |||
|recovery=44 | |||
|level=2 | |||
|GFA=-14 | |||
|AFA=-24 | |||
|description=- | |||
}} | |||
}} | |||
====== <font style="visibility:hidden" size="0">j.HS</font> ====== | |||
{{MoveData | |||
|image=WanWan_Aiwhen_jHS.png | |||
|caption= | |||
|name=j.HS | |||
|data= | |||
{{AttackData-WW | |||
|damage=14 | |||
|startup=19 | |||
|active=3 | |||
|recovery=46 | |||
|level=2 | |||
|GFA=-16 | |||
|AFA=-26 | |||
|description=- | |||
}} | |||
}} | |||
====== <font style="visibility:hidden" size="0">5O</font> ====== | |||
{{MoveData | |||
|image=WanWan_Aiwhen_5O.png | |||
|caption= | |||
|name= Whirlwind<br><small>ワールウィンド</small> | |||
|input={{#invoke:InputsWanWan|toIcons|5O}} (air OK), or {{#invoke:InputsWanWan|toIcons|4/6O}} | |||
|data= | |||
{{AttackData-WW | |||
|damage= | |||
|startup=19 | |||
|active=3 | |||
|recovery=46 | |||
|level=- | |||
|GFA=- | |||
|AFA=- | |||
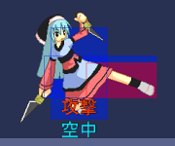
|description=Aiwhen's Original Ability causes her to teleport. It has various uses, from doing mixups to escaping pressure and dodging attacks. You can cancel most of her normals on hit or block into it as well. When using it, be careful; it does have a bit of startup and recovery, so you can get punished for abusing it. 5O teleports in place, 4O and 6O (only usable on the ground) teleport backward and forward respectively, and j.O serves as a fastfall, teleporting Aiwhen to the ground. | |||
}} | |||
}} | |||
====== <font style="visibility:hidden" size="0">22O/j.22O</font> ====== | |||
{{MoveData | |||
|image=WanWan_Aiwhen_22O.png | |||
|caption= Costs 50% of the Skill Gauge. | |||
|name=Vanish Haze<br><small>バニッシュヘイズ</small> | |||
|input={{#invoke:InputsWanWan|toIcons|22O}} (air OK) | |||
|data= | |||
{{AttackData-WW | |||
|damage= | |||
|startup=19 | |||
|active=- | |||
|recovery=46 | |||
|level=- | |||
|GFA=- | |||
|AFA=- | |||
|description=Aiwhen sideswitches to the air behind the opponent at a very low height. It's usable after a lot of skills, meaning that she can reposition herself at a moment's notice and start running shenanigans if she's got the meter to let rip. | |||
}} | |||
}} | |||
== Universal Moves == | |||
====== <font style="visibility:hidden" size="0">6HS</font> ====== | |||
{{MoveData | |||
|image=WanWan_Aiwhen_6HS.png | |||
|input={{#invoke:InputsWanWan|toIcons|6HS}} | |||
|caption= | |||
|name= Just Break | |||
|data= | |||
{{AttackData-WW | |||
|damage=34 | |||
|guard=High | |||
|startup=41 | |||
|active=- | |||
|recovery=- | |||
|canceltype=foobar | |||
|level=- | |||
|GFA=-9 | |||
|AFA=-9 | |||
|description=Standard universal overhead, decent startup. | |||
}} | |||
}} | |||
====== <font style="visibility:hidden" size="0">Throw</font> ====== | |||
{{MoveData | |||
|image=WanWan_CharaName_Throw.PNG | |||
|input=When close, {{#invoke:InputsWanWan|toIcons|4/6HS}} | |||
|caption= | |||
|name= Throw | |||
|data= | |||
{{AttackData-WW | |||
|damage=60 | |||
|guard= | |||
|startup=1 | |||
|active=- | |||
|recovery=- | |||
|canceltype=- | |||
|level=1 | |||
|GFA=? | |||
|AFA=? | |||
|description= Aiwhen grabs the opponent and cuts them twice to knock them down. | |||
}} | |||
}} | |||
====== <font style="visibility:hidden" size="0">Air Throw</font> ====== | |||
{{MoveData | |||
|image=WanWan_CharaName_AirThrow.PNG | |||
|input= {{#invoke:InputsWanWan|toIcons|j4/6HS}} when close | |||
|caption= | |||
|name= Air Throw | |||
|data= | |||
{{AttackData-WW | |||
|damage=50 | |||
|guard= | |||
|startup=1 | |||
|active=- | |||
|recovery=- | |||
|canceltype=- | |||
|level=1 | |||
|GFA=? | |||
|AFA=? | |||
|description= Aiwhen uses one slash to knock the opponent down and away from her. | |||
}} | |||
}} | |||
== Skills == | |||
====== <font style="visibility:hidden" size="0">236S</font> ====== | |||
{{MoveData | |||
|image=WanWan_Aiwhen_236S.png | |||
|name=Rapid Edge<br><small>ラピッドエッジ</small> | |||
|input= {{#invoke:InputsWanWan|toIcons|236S}} (air OK) | |||
|data= | |||
{{AttackData-WW | |||
|version = Ground | |||
|damage=31 | |||
|guard=Low | |||
|startup=17 | |||
|active=- | |||
|recovery=- | |||
|canceltype=foobarbar | |||
|level=1 | |||
|GFA=-28 (point-blank) | |||
|AFA=? | |||
|description=Aiwhen dashes across the ground, traveling full screen. The hitbox isn't active long enough to ''hit'' from full screen, but whether Aiwhen hits or not she will always wind up behind the opponent; if they're in the corner she'll push them out. | |||
}} | |||
{{AttackData-WW | |||
|header=no | |||
|version = Air | |||
|damage=34 | |||
|guard=Mid | |||
|startup=17 | |||
|active=- | |||
|recovery=- | |||
|canceltype=foobarbar | |||
|level=1 | |||
|GFA=-28 (point-blank) | |||
|AFA=? | |||
|description=An aerial verison of 236S, similar in many aspects aside from the fact that it will not steal the corner from the opponent unless it hits them. | |||
}} | |||
{{AttackData-WW | |||
|header=no | |||
|version = 236S~S (ground only)<br><small>Excel Cut / エクセルカット</small> | |||
|damage=19 | |||
|guard=Low | |||
|startup=17 | |||
|active=- | |||
|recovery=- | |||
|canceltype=foobarbar | |||
|level=1 | |||
|GFA=-28 (point-blank) | |||
|AFA=? | |||
|description=Aiwhen dashes back at the opponent and cuts their ankles. Can only be used after the ground version of Rapid Edge. | |||
}} | |||
{{AttackData-WW | |||
|header=no | |||
|version = 236S~HS (ground only)<br><small>Fantasy Blossom / ファンシーブロッサム</small> | |||
|damage=27 | |||
|guard=Mid | |||
|startup=17 | |||
|active=- | |||
|recovery=- | |||
|canceltype=foobarbar | |||
|level=1 | |||
|GFA=-28 (point-blank) | |||
|AFA=? | |||
|description=Aiwhen dashes back at the opponent and does a spinning whirl with two knives. Can only be used after the ground version of Rapid Edge. | |||
}} | |||
}} | |||
====== <font style="visibility:hidden" size="0">623S/HS</font> ====== | |||
{{MoveData | |||
|image=WanWan_Aiwhen_623S.png | |||
|caption= | |||
|name=Soar Maiden<br><small>ソアーメイデン</small> | |||
|input={{#invoke:InputsWanWan|toIcons|623S/HS}} | |||
|data= | |||
{{AttackData-WW | |||
|version=S | |||
|damage=30 | |||
|guard=M | |||
|startup=13 | |||
|active= | |||
|recovery=-71 | |||
|canceltype= | |||
|level= | |||
|GFA= | |||
|AFA= | |||
|description=Aiwhen's DP. The S version does one slash and is air blockable, but allows for combos on counterhit, making it a good callout tool thanks to its high vertical reach. | |||
}} | |||
{{AttackData-WW | |||
|header=no | |||
|version=HS | |||
|guard=M | |||
|damage=81 | |||
|startup=7 | |||
|active= | |||
|recovery= | |||
|canceltype=BRK | |||
|level= | |||
|GFA=-82 | |||
|AFA=- | |||
|description=HS version does three slashes, with the last bringing Aiwhen back to the ground. It is air unblockable, has a BRK point after the first hit to make it safe or combo after it, and you can use 22O after the last hit | |||
}} | |||
}} | |||
====== <font style="visibility:hidden" size="0">236P/K</font> ====== | |||
{{MoveData | |||
|image=WanWan_Aiwhen_236P.png | |||
|name=Rapid Edge<br><small>ラピッドエッジ</small> | |||
|input= {{#invoke:InputsWanWan|toIcons|236P/K}} | |||
|data= | |||
{{AttackData-WW | |||
|version=P | |||
|damage=16 | |||
|guard=Mid | |||
|startup=17 | |||
|active=- | |||
|recovery=- | |||
|canceltype=foobarbar | |||
|level=1 | |||
|GFA=-28 (point-blank) | |||
|AFA=? | |||
|description=Aiwhen throws one of her daggers out horizontally. On hit or block, Aiwhen will move to a position relative to the opponent. the P version teleports behind the opponent. Do not whiff this move as it has terrible recovery; you won't recover until the dagger is off the stage itself and are left in a counterhit state until then. Best to only use it in blockstrings for mixups. Be wary when using P version in the corner and it lands on block; you can be thrown out of its recovery. | |||
}} | |||
{{AttackData-WW | |||
|version=K | |||
|header=no | |||
|damage=12 | |||
|guard=Mid | |||
|startup=17 | |||
|active=- | |||
|recovery=- | |||
|canceltype=foobarbar | |||
|level=1 | |||
|GFA=-28 (point-blank) | |||
|AFA=? | |||
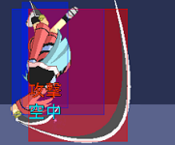
|description=On hit or block, the K version makes Aiwhen teleport-jump to a point above and in front of the opponent; she regains control not long after the peak of the jump, allowing her to use her air normals, double jump, or double air dash. Be careful of getting anti-aired afterward if your opponent calls out what you're going to do next. | |||
}} | |||
}} | |||
====== <font style="visibility:hidden" size="0">j.214S</font> ====== | |||
{{MoveData | |||
|image=WanWan_Aiwhen_j214S_1.png | |||
|image2=WanWan_Aiwhen_j214S_2.png | |||
|name=Pure Dream<br><small>ピュアドリーム</small> | |||
|input= {{#invoke:InputsWanWan|toIcons|j214S}} | |||
|data= | |||
{{AttackData-WW | |||
|damage=51 | |||
|guard=Mid | |||
|startup=17 | |||
|active=- | |||
|recovery=- | |||
|canceltype=BRK | |||
|level=1 | |||
|GFA=-28 (point-blank) | |||
|AFA=? | |||
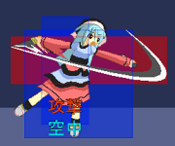
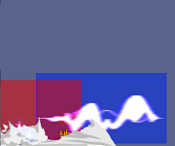
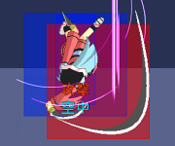
|description=Aiwhen does a flurry of spinning slashes in the air. When TK'd, it's an instant overhead into knockdown, or can be BRK'd into a combo of your choice if you've got the meter to spend. In aircombos, the opponent can tech if you do this move from three jumps high. | |||
}} | |||
}} | |||
====== <font style="visibility:hidden" size="0">214K</font> ====== | |||
{{MoveData | |||
|image=WanWan_Aiwhen_214K.png | |||
|name=Shattered Memory<br><small>シャッタードメモリー</small> | |||
|input={{#invoke:InputsWanWan|toIcons|214K}} | |||
|data= | |||
{{AttackData-WW | |||
|damage=59 | |||
|startup=20 | |||
|active= | |||
|recovery= | |||
|level= | |||
|GFA=-22 | |||
|AFA= | |||
|description=Hitgrab that starts with a kick; if it's not blocked, Aiwhen uses a turning followup slash that lets her pass through the opponent. Despite the slow startup, the recovery is very short, allowing Aiwhen to combo the opponent in midair afterward or just move in to press the advantage. | |||
}} | |||
}} | |||
== Finish Skills == | |||
====== <font style="visibility:hidden" size="0">2146HS</font> ====== | |||
{{MoveData | |||
|image=WanWan_Aiwhen_2146HS.png | |||
|caption= | |||
|name=Fairy Dance<br><small>フェアリーダンス</small> | |||
|input= {{#invoke:InputsWanWan|toIcons|2146HS}} | |||
|data= | |||
{{AttackData-WW | |||
|version= | |||
|damage=290 | |||
|guard=Mid | |||
|startup=15 | |||
|active=- | |||
|recovery=- | |||
|canceltype=- | |||
|level=1 | |||
|GFA=-22 | |||
|AFA=? | |||
|description=Autocombo reversal Finish Skill that will hit within half-screen distance, and will work if it hits an opponent picked up off the ground; Aiwhen's invul time lasts until about 3 frames after the superflash. The final hit does a set amount of damage, and the move can be BRK'd right after the last hit. | |||
}} | |||
}} | |||
====== <font style="visibility:hidden" size="0">214214S</font> ====== | |||
{{MoveData | |||
|image=WanWan_Aiwhen_214214S.png | |||
|caption= | |||
|name=Beautiful Delete<br><small>ビューティフルデリート</small> | |||
|input= {{#invoke:InputsWanWan|toIcons|214214S}} <br>(air OK) | |||
|data= | |||
{{AttackData-WW | |||
|version= | |||
|damage=215 | |||
|guard=Mid | |||
|startup=15 | |||
|active=- | |||
|recovery=- | |||
|canceltype=- | |||
|level=1 | |||
|GFA=-22 | |||
|AFA=? | |||
|description=A full-screen Finish Skill that combos from any of Aiwhen's cancelable moves. It even floats the opponent long enough for additional combo followups without using meter. The air version will have Aiwhen land directly below where she used Beautiful Delete. | |||
}} | |||
}} | |||
== Gameplan & Strategy== | |||
In general, Aiwhen wants to get in, force a knockdown, and run oppressive mixup. | |||
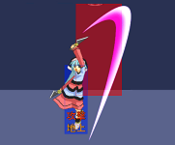
== Neutral Game == | ===Neutral Game=== | ||
Aiwhen's neutral is very good, she has a great jump-in (j.S), good horizontal range, three jumps, two airdashes and a fast run speed followed by a good low (2K). Against opponents who use slower/riskier options, you can use 4/6O to teleport to a more desireable spot, and in the air you can use the O button to instantly teleport to the ground. | Aiwhen's neutral is very good, she has a great jump-in (j.S), good horizontal range, three jumps, two airdashes and a fast run speed followed by a good low (2K). Against opponents who use slower/riskier options, you can use 4/6O to teleport to a more desireable spot, and in the air you can use the O button to instantly teleport to the ground. | ||
== Pressuring == | ===Pressuring=== | ||
= Combos = | == Combos == | ||
Aiwhen's combo game is very important because youre essentially tickling the opponent to death. tk.236S combos are key to her higher damage combos, but they can be hard to master. | Aiwhen's combo game is very important because youre essentially tickling the opponent to death. tk.236S combos are key to her higher damage combos, but they can be hard to master. | ||
Her air combos go by this format: | Her air combos go by this format: | ||
| Line 95: | Line 664: | ||
• You can do a triple jump to extend the air combo a bit more, and deal more damage, but this will result in the opponent airteching before they hit the ground, even after j.214S. | • You can do a triple jump to extend the air combo a bit more, and deal more damage, but this will result in the opponent airteching before they hit the ground, even after j.214S. | ||
== BnBs == | === BnBs === | ||
'''Meterless, Anywhere:''' xx > 236P/K/S | '''Meterless, Anywhere:''' xx > 236P/K/S | ||
| Line 118: | Line 687: | ||
*Situational 236P loop only achievable in the corner. | *Situational 236P loop only achievable in the corner. | ||
== Confirms == | === Confirms === | ||
'''Meterless, Anywhere''' [(CH or low to the ground)(j.)236S > 2S 5HS] / 6HS > [TK236S > 2P/S 5HS]xN > [Airchain]xN | '''Meterless, Anywhere''' [(CH or low to the ground)(j.)236S > 2S 5HS] / 6HS > [TK236S > 2P/S 5HS]xN > [Airchain]xN | ||
*Meterless confirm into TK loop that works on most of the cast. | *Meterless confirm into TK loop that works on most of the cast. | ||
| Line 128: | Line 697: | ||
*OTG confirm into super, for tacking on extra damage. | *OTG confirm into super, for tacking on extra damage. | ||
== OTG's == | === OTG's === | ||
j[xx]x2>214s, 236s, and any grabs will all put the opponent on knockdown. With Aiwhen OTG'ing should not be though of for extra damage but rather be used to get extra meter or force the opponent to perform a recovery and give you an extra chance to punish with another air combo. Aiwhen will not do much damage aside from a 100% meter OTG. With Aiwhen you can do a varied amount of OTG strings but not all of them are in favor for Aiwhen. | j[xx]x2>214s, 236s, and any grabs will all put the opponent on knockdown. With Aiwhen OTG'ing should not be though of for extra damage but rather be used to get extra meter or force the opponent to perform a recovery and give you an extra chance to punish with another air combo. Aiwhen will not do much damage aside from a 100% meter OTG. With Aiwhen you can do a varied amount of OTG strings but not all of them are in favor for Aiwhen. | ||
| Line 155: | Line 724: | ||
*Currently having a weird glitch where performing the break on the corner right side as player 1 will Aiwhen still on the left side even after the break, which will not allow you to perform the OTG so be careful of that. | *Currently having a weird glitch where performing the break on the corner right side as player 1 will Aiwhen still on the left side even after the break, which will not allow you to perform the OTG so be careful of that. | ||
== Post OTG Game == | === Post OTG Game === | ||
For post OTG, you are left with lots of options with Aiwhen. If you do any of the OTG's (aside from OTG #2) the opponent will have the ability to recover in the air which will work in your favor if you pressure them right or punish them also. The best option is to keep some form of pressure up, but be wary of the characters that have reversal | For post OTG, you are left with lots of options with Aiwhen. If you do any of the OTG's (aside from OTG #2) the opponent will have the ability to recover in the air which will work in your favor if you pressure them right or punish them also. The best option is to keep some form of pressure up, but be wary of the characters that have reversal DPs. You are at an advantage with most characters and are always able to keep a constant stream of pressure so do not be afraid to put pressure on. | ||
== Okizeme == | === Okizeme === | ||
Aiwhen wants to use all her tools in a creative or unpredictable manner to keep from getting blocked or jumped out of. | Aiwhen wants to use all her tools in a creative or unpredictable manner to keep from getting blocked or jumped out of. | ||
| Line 166: | Line 735: | ||
You can cross opponents up in the corner with 6O, 236P, and 22O as well. | You can cross opponents up in the corner with 6O, 236P, and 22O as well. | ||
= | == Matchups == | ||
'''[[Wonderful World/Chartette | Chartette]]:''' The most polarizing/depressing matchup you will ever play in your life. Chartette can end your life in one hit while you're there constantly doing 20 tk loops and teleporting left right and diagonally. In all seriousness, this matchup is not bad, and arguably in Aiwhen's favor which is saying a lot when you consider Chartette's matchup spread. Using teleports to punish her is a good idea, since almost every button she presses on the ground is pretty slow and leaves her vulnerable, and your air mobility can help you jump over her 236HS rock slam, and help you punish any bad neutral attempt coming from the Chartette. Be very careful not to get touched, as Aiwhen's abysmal defense values really shine in this matchup. | |||
== Videos == | |||
= | |||
== | == External Links == | ||
== | == Colors == | ||
= | {{Colors-WW | ||
|Character=WanWan_CharaName_Color_ | |||
}} | |||
{{WW}} | {{WW}} | ||
[[Category:Wonderful World]] | [[Category:Wonderful World]] | ||
Latest revision as of 23:09, 24 May 2023
Character Specific Data
- Health: 540
- Starting Guts Correction: 70%
- Guts Correction: 75%
- Total Effective Health: 666
- Weight: Light
- Shave Rate: 20%
- Combo Correction Value: 1%
Playstyle
Aiwhen is a high-mobility character that specializes in rushdown tactics; her Original Abilities, combined with high run speed and special moves that shift her position extremely quickly, more or less ensure that a good Aiwhen player is impossible to shake off or track easily. She also has powerful 50/50 options and happens to build meter extremely quickly, allowing her to utilize BRKs and Finish Skills for high bursts of damage.
However, Aiwhen has three significant weakpoints. First, she cannot afford to get hit, ever; her life pool is very, very small, and most characters in the game can destroy her off of one or two touches. Second, she needs meter to really pump out damage--without it, her combo damage is relatively low unless she gets very specific starters. Lastly, even with meter, her damage output is noticeably lower than most other characters in the game; Aiwhen wins matches by getting in and running oppressive setups, whittling the opponent down bit by bit.
| Strengths | Weaknesses |
|---|---|
|
|
Movelist
Original Ability Overview
Aiwhen's passive Original Abilities give her the ability to triple jump or double air dash. She can double jump and do one airdash, or vice versa, but cannot triple jump and double airdash in the same jump action.
Whirlwind (5O) will allow her to immediately teleport-dash in a particular direction, with some caveats explained in the frame data below; her 22O, Vanish Haze, uses 50% of the Skill Gauge and puts its gain on cooldown for a bit, but guarantees a sideswitch when used.
Normal Moves and Original Abilities
5P
5P
|
|---|
5K
5K
|
|---|
cl.5S
cl.5S
|
|---|
5S
f.5S
|
|---|
5HS
5HS
|
|---|
2P
2P
|
|---|
2K
2K
|
|---|
2S
2S
|
|---|
2HS
2HS
|
|---|
j.P
j.P
|
|---|
j.K
j.K
|
|---|
j.S
j.S
|
|---|
j.HS
j.HS
|
|---|
5O
22O/j.22O
Costs 50% of the Skill Gauge. Costs 50% of the Skill Gauge.
|
|---|
Universal Moves
6HS
Throw
Air Throw
Skills
236S
623S/HS
236P/K
j.214S
214K
Finish Skills
2146HS
214214S
Gameplan & Strategy
In general, Aiwhen wants to get in, force a knockdown, and run oppressive mixup.
Neutral Game
Aiwhen's neutral is very good, she has a great jump-in (j.S), good horizontal range, three jumps, two airdashes and a fast run speed followed by a good low (2K). Against opponents who use slower/riskier options, you can use 4/6O to teleport to a more desireable spot, and in the air you can use the O button to instantly teleport to the ground.
Pressuring
Combos
Aiwhen's combo game is very important because youre essentially tickling the opponent to death. tk.236S combos are key to her higher damage combos, but they can be hard to master. Her air combos go by this format: • Loop j.K and j.S, end with j.HS and double jump, repeat, then end with j.214S • You can do a triple jump to extend the air combo a bit more, and deal more damage, but this will result in the opponent airteching before they hit the ground, even after j.214S.
BnBs
Meterless, Anywhere: xx > 236P/K/S
- Basic BnB; use P and K for mixups or 236S for oki. You can also replace 236P with 5/6O.
50% meter, Anywhere: xx > 623HS > 22O > j.S j.HS > dj. > j.S j.HS j.S j.HS > j.214S
- Basic 50% meter combo for when you are too new or lazy to go into tk.236S loops.
50%-100% Meter, Anywhere: xx > 236S BRK/214214S > 5S 5HS > [tk.236S > 2P 5HS]xN > air combo > j.214S
- Aiwhen's TK loop and her most important BnB. If you have the meter for it, you can use 214214S as your launcher instead of 236S BRK, as it will allow you to build meter during your combo (25%~).
- For the number of repetitions of the TK loop you can do, it varies upon the character. On some such as Ryuza, you can get up to 5, while smaller characters such as Semnia you can only do 3 (average is 4 on most of the cast).
50% Meter, Anywhere: tk.214S > BRK > [2P 5HS tk.236S]xN > air combo > j.214S
- Instant overhead combo into tk.236S loops.
100% Meter, Anywhere tk.j.S > j.214214S > (dash) > [2P 5HS tk.236S]xN > air combo > j.214S
- Instant overhead j.S into high damage.
Meterless, Anywhere 6HS overhead > 236P > 5S > tk.236S > [2P 5HS tk.236S]xN > air combo > j.214S
Meterless, Corner: xx > 236P > (2P > xx > 236P)x2(?) > xx > 236P/K/S
- Situational 236P loop only achievable in the corner.
Confirms
Meterless, Anywhere [(CH or low to the ground)(j.)236S > 2S 5HS] / 6HS > [TK236S > 2P/S 5HS]xN > [Airchain]xN
- Meterless confirm into TK loop that works on most of the cast.
+100% Meter, Anywhere ... > Aircombo > j214214S > 5P/2S 5HS > Aircombo/TK loop
- Super extender. With combos that have fewer hits, going into the TK loop is possible.
+100% Meter, Anywhere OTG xx > 2146HS
- OTG confirm into super, for tacking on extra damage.
OTG's
j[xx]x2>214s, 236s, and any grabs will all put the opponent on knockdown. With Aiwhen OTG'ing should not be though of for extra damage but rather be used to get extra meter or force the opponent to perform a recovery and give you an extra chance to punish with another air combo. Aiwhen will not do much damage aside from a 100% meter OTG. With Aiwhen you can do a varied amount of OTG strings but not all of them are in favor for Aiwhen.
OTG #1 Meterless Anywhere
Dash -> 2K -> 5S -> 5HS
This is the most basic setup so that all characters will be above Aiwhen when the opponent recovers. This can lead to an extra punish if done right or force the opponent to chicken block which puts you in control to keep another blockstring going or even perform a DP.
OTG #2 100% Meter Anywhere
Dash -> 2K -> 5S -> 5HS -> 2146HS
This is the OTG in which Aiwhen can do a surprising amount of damage. While it is always better to save meter for a TK loop combo or 100% loop combo, this OTG is still very useful to memorize if you feel you need that extra bit of damage to finish off the match or you just have extra meter to spare. Also note that this will put the opponent back into otg so you can redo another chain or let them wakeup.
OTG #3 Meterless Anywhere*
Dash -> 2K -> 5S -> 5HS -> 236S
Dash -> 2K -> 5HS -> 236S
This one is also a little helpful for pulling that extra bit of damage and giving you a little more meter. It will also change the position you are facing so it can help with constantly changing direction against an opponent which can lead to many things to do.
- (This one is dependent on character size. Smaller character such as Aiwhen, Sasari, Lunathia, Lemius, Orphe, Cielo will have the 236S whiff so you are restricted to the second OTG in this case.)
OTG #4 Meterless Anywhere
Dash -> 2K -> 5HS -> 236P
Dash -> 2K -> 5HS -> 236K
This one will teleport you either behind or forward depending on which version you do. This will give you advantage's in setups when the opponent recovers in midair.
OTG #5 50% Meterless Anywhere*
Dash -> 2K -> 5S -> 5HS -> 236S (BRK) -> 5K -> 5HS -> jP -> jK -> jS -> jHS -> 214S
This one is a bit tricky. This is also only going to work on characters that are not small (see OTG #3). This combo is honestly not worth it at all unless you need that extra tick of damage to win because this will not give you much extra damage despite it being a longer chain then everything on here. It also has the hardest timing because you cannot be late on any of the followups after the break or the opponent can recover and go back into a neutral game. Use rarely but it is still handy to know about this combo.
- Currently having a weird glitch where performing the break on the corner right side as player 1 will Aiwhen still on the left side even after the break, which will not allow you to perform the OTG so be careful of that.
Post OTG Game
For post OTG, you are left with lots of options with Aiwhen. If you do any of the OTG's (aside from OTG #2) the opponent will have the ability to recover in the air which will work in your favor if you pressure them right or punish them also. The best option is to keep some form of pressure up, but be wary of the characters that have reversal DPs. You are at an advantage with most characters and are always able to keep a constant stream of pressure so do not be afraid to put pressure on.
Okizeme
Aiwhen wants to use all her tools in a creative or unpredictable manner to keep from getting blocked or jumped out of.
tk.214S is an instant overhead that causes hard knockdown, using your 236P/K projectiles can cause easy resets mid ground string, 22O is basically an unblockable for how unpredictable it is. Her teleports are really useful for resets as well, and you can jump over them on knockdown and press j.O for an easy left/right mixup that if done correctly can even fool you sometimes. j.S is another instant overhead that can combo into j.214214S into loops for relatively high damage. You can cross opponents up in the corner with 6O, 236P, and 22O as well.
Matchups
Chartette: The most polarizing/depressing matchup you will ever play in your life. Chartette can end your life in one hit while you're there constantly doing 20 tk loops and teleporting left right and diagonally. In all seriousness, this matchup is not bad, and arguably in Aiwhen's favor which is saying a lot when you consider Chartette's matchup spread. Using teleports to punish her is a good idea, since almost every button she presses on the ground is pretty slow and leaves her vulnerable, and your air mobility can help you jump over her 236HS rock slam, and help you punish any bad neutral attempt coming from the Chartette. Be very careful not to get touched, as Aiwhen's abysmal defense values really shine in this matchup.
Videos
External Links
Colors
| P Button | K Button | S Button | HS Button |
|---|---|---|---|
| O Button | SP Button | Hidden | |
