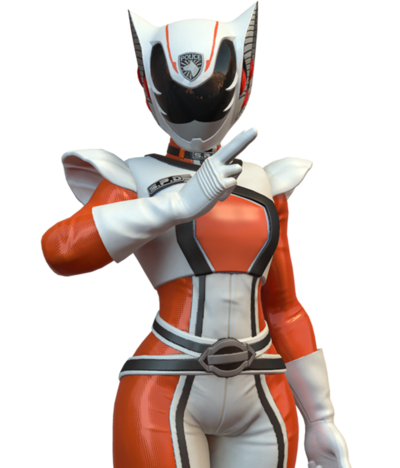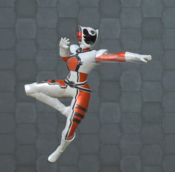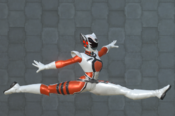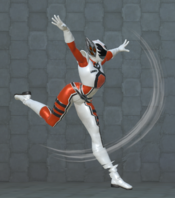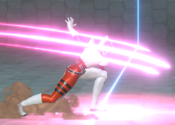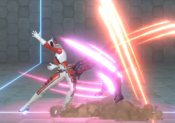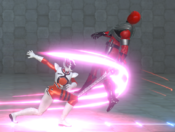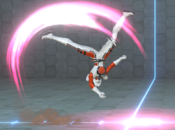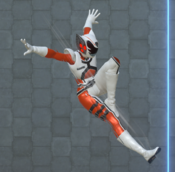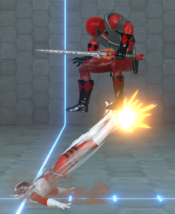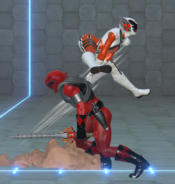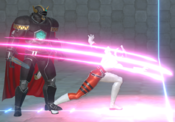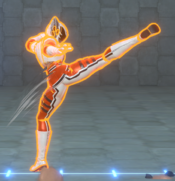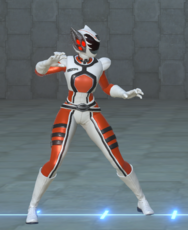
Katherine 'Kat' Manx
SPD Kat Ranger
Introduction
Health: 1000
Walk Speed: 1050 Forward, 580 Back
Chain Rules: Magic Series
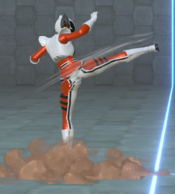
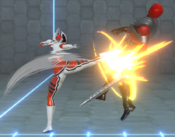
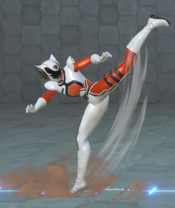
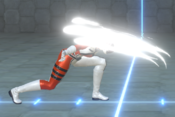
Kat designed most of the S.P.D. Rangers' weapons and is Commander Cruger's trusted assistant and friend. Supreme Commander Birdie recruits her to central command. She returns to Earth with a temporary Morpher and becomes the Kat Ranger.
Overview
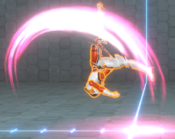
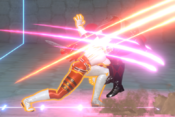
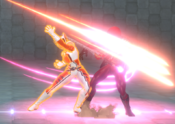
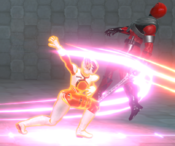
Kat is a rushdown character with some of the best mobility in the game. Sporting a rekka for extended blockstrings, a cartwheel attack for establishing pressure (and even setting up tricky cross-up situations), and a divekick to help mix up her approach, Kat is a very sticky character that can be hard to keep away, but she can also be very slippery, weaving in and out of the opponent's range with her mobility and her backflip special move, which can be used similarly to Slayer's Dandy Step in Guilty Gear. Combined with great combo potential from any starter, simplicity and an excellent lockdown assist, Kat is sure to justify any spot on your team.
Playstyle
|
Kat Manx is a fast rushdown character with a highly versatile assist |
| Pros |
Cons |
- Support Value - Kat possesses a forward moving, multi-hitting but gapped assist, which can blowup badly timed pushblocks
- Cirque de Soleil - To make up for her lack of projectiles or big buttons, Kat’s specials allow for her to navigate around obstacles, disengage with a situation, or begin a sandwich
- Damage - Off most starters, most combos will end up killing an opponent or if not, leave them shy of death
- I Mixed Myself tbh - After a flipout, Kat’s 2M can end up on either side of the opponent, and can lead to a kara throw even if they blocked correctly
|
- Linear - With a lack of projectiles or means to remove them, Kat’s approach will almost always be the same
|
Normal Moves
5L
|
| Damage
|
Guard
|
Startup
|
Active
|
Recovery
|
Frame Adv (Block)
|
Frame Adv (Hit)
|
| 35
|
High/Low/Air
|
4f
|
-
|
-
|
+4
|
-
|
Standard jab. Can be used during juggles to flip the opponent out and set up a crossunder with 6S + assist or with dash 2M, if your combo will not kill.
|
|
5LL
|
| Damage
|
Guard
|
Startup
|
Active
|
Recovery
|
Frame Adv (Block)
|
Frame Adv (Hit)
|
| 60
|
High/Low/Air
|
-
|
-
|
-
|
-7
|
-
|
- Knocks down. Can be linked with 2M after knockdown and lead into a full combo.
|
|
2L Low #1: A New Low Low #1: A New Low
|
| Damage
|
Guard
|
Startup
|
Active
|
Recovery
|
Frame Adv (Block)
|
Frame Adv (Hit)
|
| 35
|
Low/Air
|
4f
|
-
|
-
|
-3
|
-
|
Nice to start pressure with at close range because it chains into itself and will catch an opponent trying to jump out. Easy way to continue a juggle combo after a 2H 5S starter.
|
|
5M
|
| Damage
|
Guard
|
Startup
|
Active
|
Recovery
|
Frame Adv (Block)
|
Frame Adv (Hit)
|
| 45
|
High/Low/Air
|
7f
|
-
|
-
|
-6
|
-
|
Hits at an upward angle. Good for juggle combos. Can be used to pick up for juggles directly after 2H 5S juggle starter, but 2L 5M is much easier for just a little wasted juggle time.
|
|
5MM
|
| Damage
|
Guard
|
Startup
|
Active
|
Recovery
|
Frame Adv (Block)
|
Frame Adv (Hit)
|
| 65
|
High/Low/Air
|
-
|
-
|
-
|
-8
|
-
|
|
|
|
2M Low #2: The Lows Strike Back Low #2: The Lows Strike Back
|
| Damage
|
Guard
|
Startup
|
Active
|
Recovery
|
Frame Adv (Block)
|
Frame Adv (Hit)
|
| 55
|
Low/Air
|
9f
|
-
|
-
|
-4
|
-
|
Moves forward very far. Reaches nearly halfscreen if you cancel dash into 2M: very good approach and long range punish. Also hits behind Kat: can be used for crossunders on incoming or after a jab reset. Followup moves will turn Kat around to face the opponent. If you have time, you can dash under and 2M back to the original side for a double crossunder.
|
|
4M
Sky High
|
| Damage
|
Guard
|
Startup
|
Active
|
Recovery
|
Frame Adv (Block)
|
Frame Adv (Hit)
|
| 70
|
High/Low
|
12f
|
-
|
-
|
-12
|
-
|
Standard launcher and dedicated anti-air. Like most launchers, it is air-unblockable except on incoming.
|
|
5H
|
| Damage
|
Guard
|
Startup
|
Active
|
Recovery
|
Frame Adv (Block)
|
Frame Adv (Hit)
|
| 65
|
High/Low/Air
|
17f
|
-
|
-
|
-8
|
-
|
|
|
|
5HH
|
| Damage
|
Guard
|
Startup
|
Active
|
Recovery
|
Frame Adv (Block)
|
Frame Adv (Hit)
|
| 70
|
High/Low/Air
|
-
|
-
|
-
|
-10
|
-
|
|
|
|
2H Low #3: Revenge of the Lows Low #3: Revenge of the Lows
|
| Damage
|
Guard
|
Startup
|
Active
|
Recovery
|
Frame Adv (Block)
|
Frame Adv (Hit)
|
| 80
|
Low/Air
|
9f
|
-
|
-
|
-11
|
-
|
Cancellable sweep. 2H 5S is a great way to start a juggle combo after a grounded hit confirm.
|
|
6H Pulling double duty Pulling double duty
|
| Damage
|
Guard
|
Startup
|
Active
|
Recovery
|
Frame Adv (Block)
|
Frame Adv (Hit)
|
| 80
|
High/Low/Air
|
16f
|
-
|
-
|
-6
|
-
|
- Animation is identical to 5HH but has different properties. Cannot be used in a magic series except for after 5H.
- Can be cancelled into 4S/5S/6S on hit and block. 4S after a blocked 6H is a very safe exit strategy.
Against airborne opponents, this move uses a wallbounce and finishes in a hard knockdown. This means it can either be picked up before they hit the floor or with an OTG move; both of which lead to a full combo. Can juggle off 5H.
|
|
j.L
|
| Damage
|
Guard
|
Startup
|
Active
|
Recovery
|
Frame Adv (Block)
|
Frame Adv (Hit)
|
| 50
|
High/Air
|
5f
|
-
|
-
|
-
|
-
|
|
|
|
j.M
|
| Damage
|
Guard
|
Startup
|
Active
|
Recovery
|
Frame Adv (Block)
|
Frame Adv (Hit)
|
| 60
|
High/Air
|
7f
|
-
|
-
|
-
|
-
|
Good for cross-ups and as an air-to-air against specific matchups.
|
|
j.H
|
| Damage
|
Guard
|
Startup
|
Active
|
Recovery
|
Frame Adv (Block)
|
Frame Adv (Hit)
|
| 65
|
High/Air
|
7f
|
-
|
-
|
-
|
-
|
Groundbounces on air hit, good hitstun on grounded hit.
|
|
Special Moves
5S
Kat Scratch
5S Shades of Wolf Fang Fist Shades of Wolf Fang Fist
|
| Version
|
Damage
|
Guard
|
Startup
|
Active
|
Recovery
|
Frame Adv (Block)
|
Frame Adv (Hit)
|
Kat Scratch
5S
|
20, 10x2
|
High/Low/Air
|
9f
|
-
|
-
|
-19
|
-
|
Kat Scratch 2
5SS
|
20, 10x2
|
High/Low/Air
|
-
|
-
|
-
|
-16
|
-
|
Kat Scratch 3
5SSS
|
90
|
High/Low/Air
|
-
|
-
|
-
|
-24
|
-
|
Rekka-type move. Can cancel first and second hits into 4S or 6S. Can plink 4S~L or 6S~L to cancel first or second hit into EX. Very little blockstun on all three rekkas which means on block it is possible to be jabbed out between each rekka. Third rekka launches grounded opponents.
|
|
4S
Backflip
4S
|
| Version
|
Damage
|
Guard
|
Startup
|
Active
|
Recovery
|
Frame Adv (Block)
|
Frame Adv (Hit)
|
Backflip
4S
|
0
|
High/Low/Air
|
8
|
-
|
-
|
-
|
-
|
- Invincible to strikes and projectiles between frames 8-27.
This backflip is one of the few meterless moves in the game with some invincibility. Invincibility starts around the time Kat's hands touch the ground, and ends around the time her feet touch the ground again. It can still be punished, but it can get you away from someone trying to jab punish a rekka.
|
Cunning Charge
4SS
|
90
|
High/Low/Air
|
31
|
-
|
-
|
-3
|
-
|
Tap S again to do a dash attack. This dash attack staggers, restands, and is plus on block in almost all situations. The dash attack has a pretty big hitbox and can out-prioritize or trade with a lot of moves. Because cat can only do this move by first springing back, she's usually not close enough for the first active frame to hit, the listed startup and advantage are the startup and advantage for doing this point blank, which basically only happens if you're cornered. When done without Kat's back to the wall the startup is longer and the advantage is better, generally being plus
|
|
6S
Catwheel
6S
|
30x2
| Damage
|
Guard
|
Startup
|
Active
|
Recovery
|
Frame Adv (Block)
|
Frame Adv (Hit)
|
| 30x2
|
High/Low/Air
|
15f
|
-
|
-
|
-2
|
-
|
- OTG, uses OTG bounce.
- Projectile-immune from frames 7-24.
- Can be cancelled into 4S on block/hit.
- Can be cancelled into a plink EX with 4S~L on block or hit.
This wheel kick is safe on block, links to light attacks on hit and is an excellent approach against zoning characters.
Two excellent uses in pressure: the first is that you can cancel a pressure string into this move if you think your opponent will pushblock, and get right back in. 6S also crosses the opponent up without hitting when you are close enough: call an assist or Zord and then do 6S to hit from the back. Tag to your assist to hit from the front after all! Good in juggles for corner carry.
Be wary of using this in juggles while in the corner as it will passthrough female bodies and Eric.
|
|
j.S
Kat Dive
j.S
|
60
| Damage
|
Guard
|
Startup
|
Active
|
Recovery
|
Frame Adv (Block)
|
Frame Adv (Hit)
|
| 60
|
High/Low/Air
|
12f
|
-
|
-
|
-
|
-
|
Divekick. Being able to alter your air trajectory is a great thing to be able to do. You can combo off this divekick on grounded hit if it hits low enough (around most characters' stomachs). Causes a comboable spiral knockdown on air hit. Safe on block. Can cross up even in the corner: if you divekick someone who is completely cornered, it will hit in front and then Kat will land behind the opponent. You can use this to set up some tricky left/rights with assists or Zord. Hits OTG. You have to wait until you reach about head height after a jump before you can hit the button: it will not come out if you hit S too early.
|
|
EX Attack
Kat Frenzy
5S+L
|
| Damage
|
Guard
|
Startup
|
Active
|
Recovery
|
Frame Adv (Block)
|
Frame Adv (Hit)
|
| 35x3, 40x2, 70
|
High/Low/Air
|
8+5f
|
-
|
-
|
-16
|
-
|
- If the first hits are blocked, the rest of the move will not come out.
As of version 1.3, Kat's EX Attack has her perform 6S, then proceeds to perform the entire 5S chain. Has some invincibility.
Can cancel from first or second rekka with 6S~L (6H hold and quickly hit L). Can combo super after.
|
|
Throws
Forward Throw
Forward Throw
5M+H/6M+H
|
| Damage
|
Guard
|
Startup
|
Active
|
Recovery
|
Frame Adv (Block)
|
Frame Adv (Hit)
|
| 61
|
Throw
|
6
|
-
|
-
|
-
|
-
|
Can jump-cancel early in the animation for a huge combo, though the throw scales significantly.
|
|
Back Throw
Back Throw
4M+H
|
| Damage
|
Guard
|
Startup
|
Active
|
Recovery
|
Frame Adv (Block)
|
Frame Adv (Hit)
|
| 121
|
Throw
|
6
|
-
|
-
|
-
|
-
|
No combo solo, but can combo with an assist.
|
|
Super
Kat Stunners
H+S
|
| Damage
|
Guard
|
Startup
|
Active
|
Recovery
|
Frame Adv (Block)
|
Frame Adv (Hit)
|
| 15x17, 120
|
High/Low/Air
|
10+1f
|
-
|
-
|
-32
|
-
|
Good damage and good chip. Extremely unsafe on block and whiff. Hard knockdown. If the opponent is a little too high up, only some of the rockets will connect and the move will sometimes become unsafe on hit.
|
|
Tag Actions
Assist
Assist
Kat Scratch
A1/A2
|
| Damage
|
Guard
|
Startup
|
Active
|
Recovery
|
Frame Adv (Block)
|
Frame Adv (Hit)
|
| 10x3, 9x3, 50
|
High/Low/Air
|
-
|
-
|
-
|
-
|
-
|
Pretty much identical to Yamcha's assist in Dragon Ball FighterZ. Amazing assist for combo-building. Last hit launches on ground hit. Pretty good lockdown assist to keep the opponent still for mixups, but each swipe does not have a lot of blockstun, so careful planning is needed to not leave gaps. Pushes back farther than any other assist in the game, so it has some utility for zoning teams, but she's not that helpful for that purpose until the opponent is right in your face.
|
|
Swap Strike
Swap Strike
A1/A2+S
|
| Damage
|
Guard
|
Startup
|
Active
|
Recovery
|
Frame Adv (Block)
|
Frame Adv (Hit)
|
| 70
|
High/Low/Air
|
6
|
-
|
-
|
-
|
-
|
Faster than EX Attack, making it a little more reliable as a reversal, but far less damaging. Forces a character switch on hit; knocks down if only one character remains.
Same animation and range as 5MM.
|
|
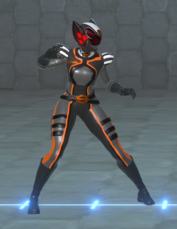
Colors
External Links
