Skullgirls/Eliza: Difference between revisions
m (added new beginner video) |
m (→Supers: added one more part to crimson scourge) |
||
| (17 intermediate revisions by 5 users not shown) | |||
| Line 79: | Line 79: | ||
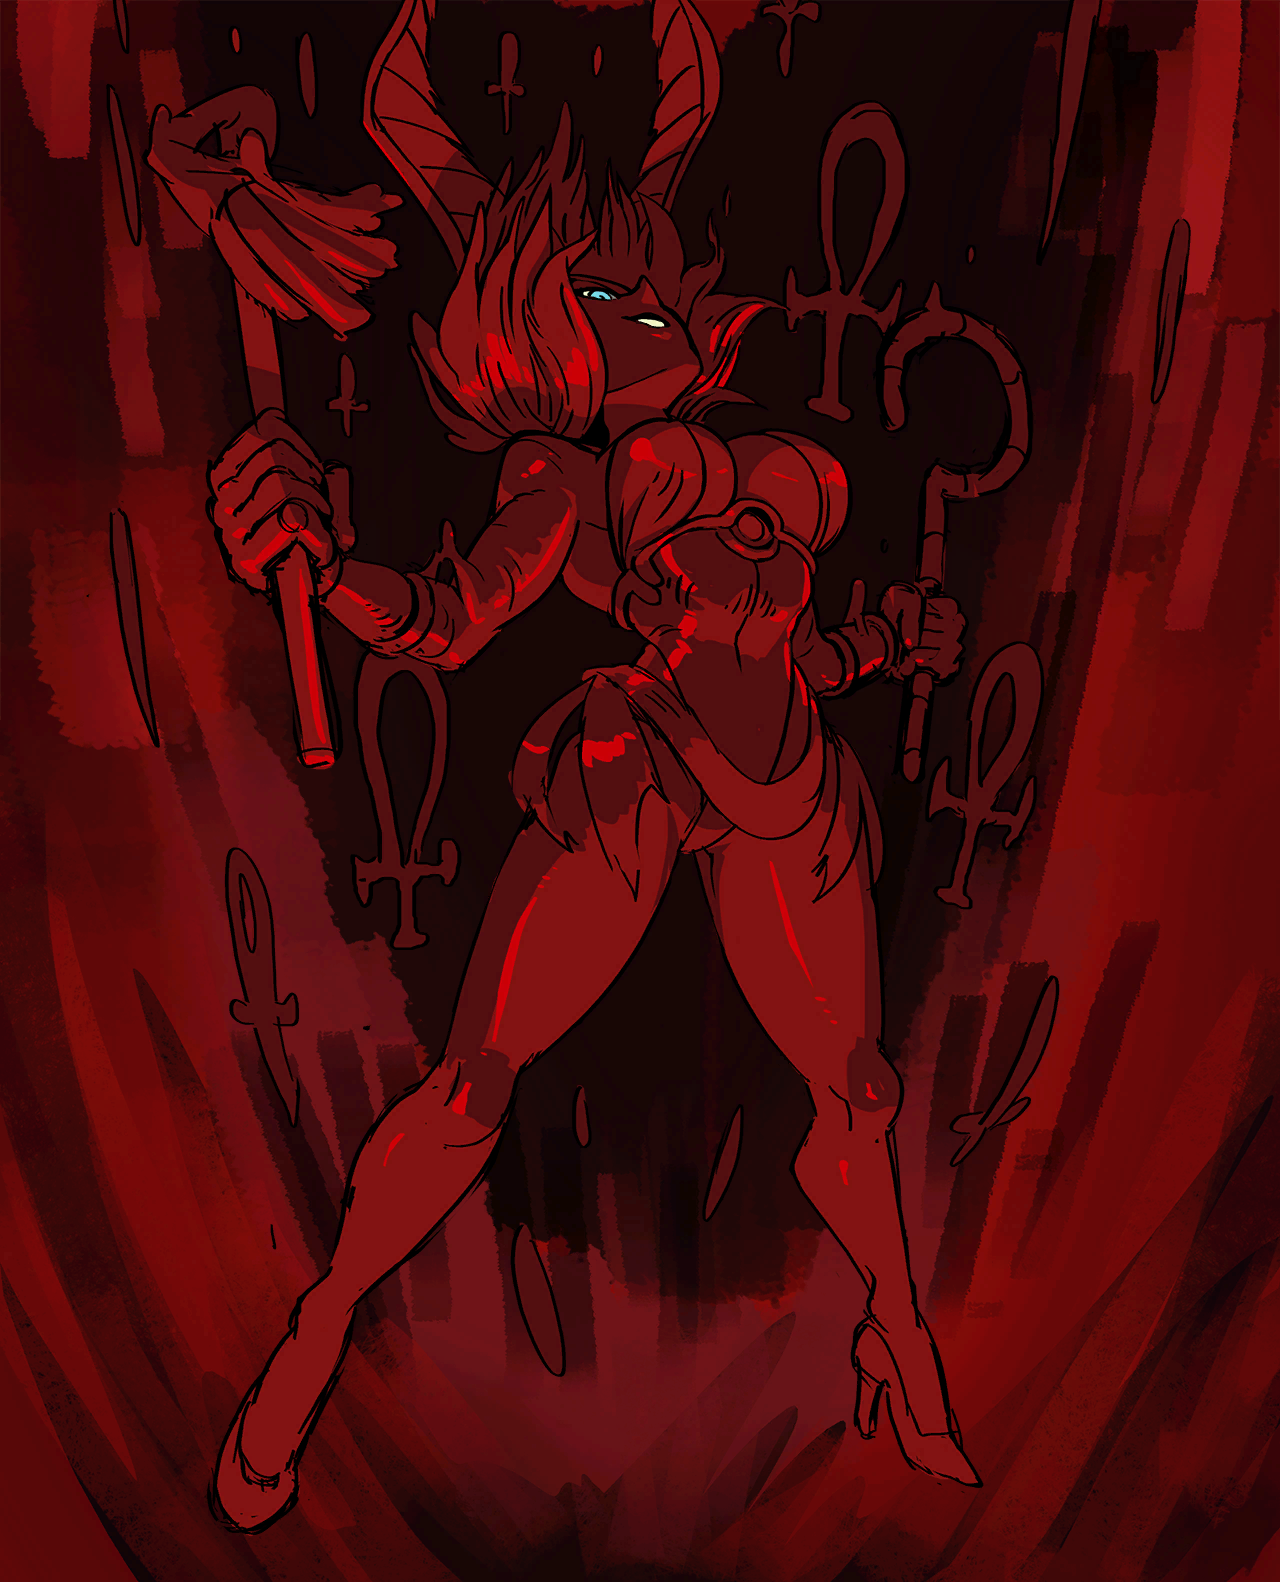
[[Image:SG_eli_sekhmet.png|500px|thumb]] | [[Image:SG_eli_sekhmet.png|500px|thumb]] | ||
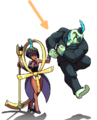
* Sekhmet has unlimited armor against most attacks. | * Sekhmet has unlimited armor against most attacks. | ||
** Sekhmet's armor reduces damage by 25%. For comparison, characters with armor on their specials/supers (Bella/Fukua/Band) have 50% reduction, and characters with armor on their normals (Robo/Beo/PW) have no reduction. | ** Sekhmet's armor reduces damage by 25%. For comparison, characters with armor on their specials/supers (Bella/Fukua/Band/Marie) have 50% reduction, and characters with armor on their normals (Robo/Beo/PW) have no reduction. | ||
** The opponent can only break the armor and send Sekhmet back to Eliza by landing a sweep, throw, hitgrab, snapback, or burst. | ** The opponent can only break the armor and send Sekhmet back to Eliza by landing a sweep, throw, hitgrab, snapback, or burst. | ||
*** It must be noted, but if Sekhmet is not committing to a move, she can tech all normal throws. | *** It must be noted, but if Sekhmet is not committing to a move, she can tech all normal throws. | ||
| Line 89: | Line 89: | ||
* Attacking the opponent with any of Sekhmet's blood weapons will cause the opponent to leave blood drops on the ground. When Sekhmet returns, Eliza can pick up the blood to heal herself. | * Attacking the opponent with any of Sekhmet's blood weapons will cause the opponent to leave blood drops on the ground. When Sekhmet returns, Eliza can pick up the blood to heal herself. | ||
** The maximum amount of blood that can be spawned at a given time is 25 drops. With each drop healing 200HP, up to 5000HP. | ** The maximum amount of blood that can be spawned at a given time is 25 drops. With each drop healing 200HP, up to 5000HP. | ||
* The LP, MP, and HP attacks from <b>Sekhmet's Turn</b> summons Sekhmet as she attacks with the corresponding button. She can use these, along with her 1 crouching and 3 jumping normals, in relatively easy chain combos but has no specials | * The LP, MP, and HP attacks from <b>Sekhmet's Turn</b> summons Sekhmet as she attacks with the corresponding button. She can use these, along with her 1 crouching and 3 jumping normals, in relatively easy chain combos but has no specials or throws, but does have a super, Crimson Scourge. | ||
<br clear=all/> | <br clear=all/> | ||
| Line 158: | Line 158: | ||
* The height of the launched opponent sets up perfectly to be confirmed into Dive of Horus for very easy anti-air confirms. | * The height of the launched opponent sets up perfectly to be confirmed into Dive of Horus for very easy anti-air confirms. | ||
* Disjointed, fast, large anti-air normal that can be canceled into special moves to be made relatively safe. | * Disjointed, fast, large anti-air normal that can be canceled into special moves to be made relatively safe. | ||
** Minor low-profile frames 1-2, fully low-profiles on frame 3 | |||
* Especially good to use for incoming setups on opponents for an easy left/right that combos into Dive of Horus (can be land cancel punished) | * Especially good to use for incoming setups on opponents for an easy left/right that combos into Dive of Horus (can be land cancel punished) | ||
<br> | <br> | ||
| Line 420: | Line 421: | ||
<br> | <br> | ||
* Eliza attacks with a bloody pharaoh's beard and snake crown. Although this is slower than 5LP, shorter characters can't crouch underneath this jab. | * Eliza attacks with a bloody pharaoh's beard and snake crown. Although this is slower than 5LP, shorter characters can't crouch underneath this jab. | ||
* | * Reaches further than 5LP, making it useful as a combo ender when you've used 5LK and 5LP won't reach | ||
* Also has niche usage as an otg pickup instead of 5lk | |||
<br> | <br> | ||
| | | | ||
| Line 473: | Line 475: | ||
* Eliza attacks low with a sphinx's paws, then sneezes the nose off of her own face for a projectile second hit. | * Eliza attacks low with a sphinx's paws, then sneezes the nose off of her own face for a projectile second hit. | ||
* Due to having short recovery, this move is typically prefered in blockstrings over 2MK to keep Eliza somewhat safe, even from early pbgc attempts. | * Due to having short recovery, this move is typically prefered in blockstrings over 2MK to keep Eliza somewhat safe, even from early pbgc attempts. | ||
* | * On its own, the first hit of 2MP is a perfectly serviceable move, and it is not recommended to use the second part, especially on block and in assist carry combos. | ||
** 2MPx2 has variable frame advantage depending on spacing, even allowing conversions such as 2MPx2 > 214MP at max range. This is pretty precise, however, and at a range that is typically inaccessible during a standard combo. The only practical use for the second part is as a hitconfirm tool, but at the cost of scaling and minimal damage. | |||
<br> | <br> | ||
| | | | ||
| Line 542: | Line 545: | ||
* The bloody cat scratch reaches relatively far, has quick start up, and is Eliza's best way to start an ground chain from a low attack. | * The bloody cat scratch reaches relatively far, has quick start up, and is Eliza's best way to start an ground chain from a low attack. | ||
* Eliza's leg and cat are extended hurtboxes from the first frame. | * Eliza's leg and cat are extended hurtboxes from the first frame. | ||
* | * 2LK will always connect after Crimson Scourge > Return | ||
<br> | <br> | ||
| | | | ||
| Line 718: | Line 721: | ||
<br> | <br> | ||
* Bloody sun rays hit in a wide arc in front of and below Eliza. Combining this attack with Eliza's angled air dash can hit an opponent as a cross up. | * Bloody sun rays hit in a wide arc in front of and below Eliza. Combining this attack with Eliza's angled air dash can hit an opponent as a cross up. | ||
* Cancelling the rising version of this move will lower your airdash a noticeable amount that can lead to very complicated resets | * Cancelling the rising version of this move will lower your airdash a noticeable amount that can lead to very complicated resets. | ||
* | * This move's massive hurtbox appears before the hitbox, so exercise caution when using it. | ||
<br> | <br> | ||
| | | | ||
| Line 789: | Line 791: | ||
| | | | ||
<br> | <br> | ||
* | * This move's far reach makes it a great poke and air-to-airs, however at its further ranges, you will need to convert with either an airdash cancel (adc jLK > jHP and adc jMK are generally consistent), j214HP , or j214LP jM if you are low to the ground. | ||
* Keeps opponents up on hit in air strings, making this move somewhat useful to setup air reset opportunities | * Keeps opponents up on hit in air strings, making this move somewhat useful to setup air reset opportunities | ||
* Hurtbox appears before hitbox | * Hurtbox appears before hitbox | ||
| Line 1,715: | Line 1,716: | ||
| hitstun=N/A | | hitstun=N/A | ||
| blockstun=18 | | blockstun=18 | ||
| onhit={{Property-SG|Hard KD}} | | onhit={{Property-SG|Hard KD}} (+44) | ||
| onblock=-32 | | onblock=-32 | ||
| onpushblock= | | onpushblock= | ||
| Line 1,740: | Line 1,741: | ||
| name=Crimson Scourge | | name=Crimson Scourge | ||
| subtitle=Level 1 | | subtitle=Level 1 | ||
| input='''(Sekhmet Only)''' {{NotationIcon-SG|236}} + {{NotationIcon-SG|K}} + {{NotationIcon-SG|K}} | | input='''(Sekhmet/With Taunt Only)''' {{NotationIcon-SG|236}} + {{NotationIcon-SG|K}} + {{NotationIcon-SG|K}} | ||
|{{AttackData-SG | | |{{AttackData-SG | | ||
| guard=Mid | | guard=Mid | ||
| Line 1,760: | Line 1,761: | ||
<br> | <br> | ||
* Sekhmet lunges at the opponent and upon contact, does her signature attack that spawns 8 blood drops, heals for 75% of the damage it does, and crumples the opponent which allows followups. | * Sekhmet lunges at the opponent and upon contact, does her signature attack that spawns 8 blood drops, heals for 75% of the damage it does, and crumples the opponent which allows followups. | ||
* This move can be done as Eliza, but only after performing her full taunt. | |||
* Repositions Eliza's anchor directly behind Sekhmet to allow her to follow up easier. | * Repositions Eliza's anchor directly behind Sekhmet to allow her to follow up easier. | ||
* Useful for DHC followups. | * Useful for DHC followups, and as a DHC itself if prepared. | ||
* While recovering, Hathor's Return can be inputted early to return to the anchor as fast as possible. Returning using this method also prevents any life drain that would occur. | * While recovering, Hathor's Return can be inputted early to return to the anchor as fast as possible. Returning using this method also prevents any life drain that would occur. | ||
* If this super is performed a second time in a combo, the opponent gets put into a blue-bounce state. | |||
** If this super is DHC'd out of on the second use, you will still be able to continue the combo. | |||
<br> | <br> | ||
| | | | ||
| Line 1,833: | Line 1,837: | ||
| | | | ||
<br> | <br> | ||
* Eliza leans forward with Sekhmet standing straight up out of Eliza's back, making for a doubly provocative gesture. As long as she successfully completes the animation, | * Eliza leans forward with Sekhmet standing straight up out of Eliza's back, making for a doubly provocative gesture. | ||
* As long as she successfully completes the animation, Eliza will be able to perform Crimson Scourge without needing to be in Sekhmet. | |||
<br> | <br> | ||
| | | | ||
| Line 1,982: | Line 1,987: | ||
== Players to Watch == | == Players to Watch == | ||
{{PlayerList|colorPrefix=SG_eli_color|data= | {{PlayerList|colorPrefix=SG_eli_color|data= | ||
{{PlayerListEntry | |||
|name = Vending<br> | |||
|color = 24 | |||
|region = PL | |||
|regionNote = | |||
|status = Active | |||
|notes = {{CharLink-SG|eli| H spiral}} / {{CharLink-SG|squ| drag'n'bite}} / {{CharLink-SG|big| H-brass}} <br>Next generation Eliza pushing the character itself to the maximum, while freestyling and robbing. <br>[https://www.youtube.com/watch?v=pM3ol5PEMIw Example Play] | |||
}} | |||
{{PlayerListEntry | |||
|name = Bootyballspoepeyes | |||
|color = 15 | |||
|region = us | |||
|status = Active | |||
|notes = {{CharLink-SG|val| 2MK}} / {{CharLink-SG|dbl| H Bomber}} / {{CharLink-SG|eli| H Spiral}} <br>bbp👍 <br>[https://www.youtube.com/live/V9d7N5Nft6k?si=avHE-iKEbVCoBUsp&t=2748 Example Play] | |||
}} | |||
{{PlayerListEntry | |||
|name = Halibel | |||
|color = 26 | |||
|region = us | |||
|status = Active | |||
|notes = {{CharLink-SG|eli| H Spiral}} / {{CharLink-SG|fuk| L Shadow}} <br>lab monster for da optimals.iajdiedjydtjadjadjadj <br>[https://youtu.be/vIPImpbOmGE?si=vN_gv76kE-5afoHD&t=1394 Example Play] | |||
}} | |||
{{PlayerListEntry | {{PlayerListEntry | ||
|name = Namlay <br> | |name = Namlay <br> | ||
| Line 1,987: | Line 2,014: | ||
|color = 23 | |color = 23 | ||
|region = us | |region = us | ||
|status = | |status = inactive | ||
|notes = {{CharLink-SG|eli| Axe}} / {{CharLink-SG|par| H shot}} / {{CharLink-SG|big| H A-train}} <br>She who Balls<br>[https://www.youtube.com/watch?v=1jX4k1K1Fn8&t=125s Example Play] | |notes = {{CharLink-SG|eli| Axe}} / {{CharLink-SG|par| H shot}} / {{CharLink-SG|big| H A-train}} <br>She who Balls<br>[https://www.youtube.com/watch?v=1jX4k1K1Fn8&t=125s Example Play] | ||
}} | }} | ||
| Line 2,001: | Line 2,028: | ||
|color = 11 | |color = 11 | ||
|region = us | |region = us | ||
|status = | |status = inactive | ||
|notes = {{CharLink-SG|dbl| L Bomber}} / {{CharLink-SG|squ| DnB}} / {{CharLink-SG|eli| H Spiral}} <br>Hi <br>[https://www.youtube.com/watch?v=nUK8NyWMp_U Example Play] | |notes = {{CharLink-SG|dbl| L Bomber}} / {{CharLink-SG|squ| DnB}} / {{CharLink-SG|eli| H Spiral}} <br>Hi <br>[https://www.youtube.com/watch?v=nUK8NyWMp_U Example Play] | ||
}} | }} | ||
| Line 2,016: | Line 2,043: | ||
|region = us | |region = us | ||
|regionNote = CA | |regionNote = CA | ||
|status = | |status = inactive | ||
|notes = {{CharLink-SG|cer| H LNL}} / {{CharLink-SG|eli| Butcher's}} / {{CharLink-SG|big| H Train}} <br>Creator of the self titled [http://skullheart.com/index.php?threads/pleasures-eliza-guide.9355/ Eliza guide]. <br>[https://www.youtube.com/watch?v=1K0hFvlx51Q&feature=youtu.be&t=2012 Example Play] | |notes = {{CharLink-SG|cer| H LNL}} / {{CharLink-SG|eli| Butcher's}} / {{CharLink-SG|big| H Train}} <br>Creator of the self titled [http://skullheart.com/index.php?threads/pleasures-eliza-guide.9355/ Eliza guide]. <br>[https://www.youtube.com/watch?v=1K0hFvlx51Q&feature=youtu.be&t=2012 Example Play] | ||
}} | }} | ||
| Line 2,024: | Line 2,051: | ||
|region = us | |region = us | ||
|regionNote = IL | |regionNote = IL | ||
|status = Lurking | |status = Lurking probably | ||
|notes = N/A <br>Yes, he is rich. <br>[https://www.youtube.com/watch?v=LMybW9e0ly4&feature=youtu.be&t=20m47s Example Play] | |notes = N/A <br>Yes, he is rich. <br>[https://www.youtube.com/watch?v=LMybW9e0ly4&feature=youtu.be&t=20m47s Example Play] | ||
}} | }} | ||
| Line 2,031: | Line 2,058: | ||
|color = 7 | |color = 7 | ||
|region = NL | |region = NL | ||
|status = | |status = probably inactive idk | ||
|notes = {{CharLink-SG|eli| Butcher's}} / {{CharLink-SG|dbl| L Bomber}} / {{CharLink-SG|rfo| H Beam}} <br>Mother of Eliza players, Neutral monster and years long Eliza activist.<br>[https://www.youtube.com/watch?v=R3fzqU7vwGQ&ab_channel=SinclairMoreau Example Play] | |notes = {{CharLink-SG|eli| Butcher's}} / {{CharLink-SG|dbl| L Bomber}} / {{CharLink-SG|rfo| H Beam}} <br>Mother of Eliza players, Neutral monster and years long Eliza activist.<br>[https://www.youtube.com/watch?v=R3fzqU7vwGQ&ab_channel=SinclairMoreau Example Play] | ||
}} | }} | ||
}} | }} | ||
{{SG}} | {{SG}} | ||
Latest revision as of 13:43, 30 June 2024
Story
Eliza is the celebrity diva of New Meridian’s premiere nightclub, Bastet’s Den. Unbeknownst to the club’s patrons, however, she’s also been host to the skeletal Parasite Sekhmet for untold years. Widely known for her blood drive charities, in reality these serve to feed Sekhmet and maintain Eliza’s ageless beauty. Recently discovered and blackmailed by the Medici into pursuing the Skull Heart, Eliza’s ancient ambitions stir once more…
Overview
Eliza has a vast array of offensive tools that make her both a very scary rushdown character when she’s in the opponent’s face, but also play confident in mid-range as well, letting her get in as she pleases.
- Midrange and Close-up Pressure: Eliza's large buttons combined with her fast moves and air dash make her close up pressure hard to pushblock out, making her very deadly when she corners the opponent. However Eliza doesn't just do well close-up, she is good at midrange too! Her large pokes in her jMK, 2LK, and 5HP cover a large amount of space, and she gets especially dangerous with her DP: Upper Khat (623P). H Khat covers a large range, is very tall, strike invulnerable, and jump cancelable, making it both a full combo starter and a safe assist punish tool. Because it can reach so far, on top of most throws being very short, Eliza can throw out this DP as a midrange that can be very difficult for the opponent to contest with, making her a very deadly character from even just the round start spacing!
- Sekhmet Armor: With the Sekhmet's Turn (214 P) special, Eliza retreats to the background as her skeleton Sekhmet comes under direct player control. Sekhmet has it's own unique moveset, unlimited armor against most moves, and can only be hit via throws, snapbacks, bursts, or any kind of armor-breaking move or sweep. Summoning Sekhmet can be a way to armor through attacks or for unique conversions. If she is blocked, using her basic chain route and mixing up between her low and overhead can be a risky and expensive mixup.
- Servant Summons: All of Eliza's servant summon special moves demand unique countermeasures from the opponent. The Throne of Isis (236 LK) can absorb an unlimited number of projectile hits without breaking, does not count as a projectile itself, but can be broken by a carefully placed non-projectile attack. Horace counts as a projectile during Dive of Horus (236 MK), so he can trade with another projectile, get hit out of his attack, or trade directly with an opponent and cause a ground bounce anyway. Albus has no vulnerable boxes during Weight of Anubis (236 HK); he can throw an opponent while the opponent has no way of interacting with Albus. All of these attacks can continue and will hit even if Eliza happens to get hit during her recovery.
|
|
|
| Pros | Cons |
|
|

Stats
Chains
| Standing | 3 Buttons: |
|---|---|
| Crouching | 3 Buttons: |
| Air | 6 Buttons: |
Movement
| Weight | Dash | Double Jump | Airdash | IAD Lockout |
|---|---|---|---|---|
| Medium (Light outside of combos) | Step | No | Yes | 8 |
Wakeup Time
| Forward Tech | Backward Tech | Sliding KD | Hard KD | Crumple |
|---|---|---|---|---|
| 39 | 40 | 88 | 34 | 32 |
Assists
Dive of Horus (default assist)
H Osiris Spiral (default assist
Butcher's Blade (214MP)
Carpenter's Axe (214HP)
Dive of Horus (default assist)
Dropping Horus on the opponent forces the opponent to block high and causes a ground bounce on hit, setting up a combo opportunity for the point character. Eliza doesn't take any damage if her servant takes a hit. For the assist version of this attack, if Eliza is hit at any point during her recovery, Horus will automatically go into his hitstun too, potentially canceling out his attack on the way down, so use with caution.
H Osiris Spiral (default assist)
Lockdown assist that does a high amount of chip damage. Can also function well in neutral by acting as a wall allows certain characters to get resources.
Butcher's Blade (214MP)
Sekhmet’s multihit attacks have unlimited armor, making this assist very strong as a lockdown tool that can’t be stopped during its active frames or armor frames. Using Sekhmet assists will drain Eliza's health.
Carpenter's Axe (214HP)
Sekhmets overhead axe attack has considerable startup, but when combined with Sekhmets natural unlimited armor, this assist can setup strong high/low setups that are tough to challenge. Using Sekhmet assists will drain Eliza's health.
Move List
Character Mechanic: Sekhmet

- Sekhmet has unlimited armor against most attacks.
- Sekhmet's armor reduces damage by 25%. For comparison, characters with armor on their specials/supers (Bella/Fukua/Band/Marie) have 50% reduction, and characters with armor on their normals (Robo/Beo/PW) have no reduction.
- The opponent can only break the armor and send Sekhmet back to Eliza by landing a sweep, throw, hitgrab, snapback, or burst.
- It must be noted, but if Sekhmet is not committing to a move, she can tech all normal throws.
- Hitting Sekhmet with a snapback always gives a wallbounce for a punish rather than forcing her off screen, but causes 75% scaling.
- Hitting Sekhmet with a sweep causes a knockdown that is both vulnerable and a red bounce, which allows a follow up combo. For most characters, this is the only way their sweep can start a combo.
- Keeping Sekhmet out drains Eliza's health over time, starting at a rate of 2HP/1f up to 8HP/1f. Additionally, whenever Sekhmet attacks, a chunk of health will be lost.
- When using Sekhmet as an assist, life drain is always at its max, and the assist will be locked out for longer than a normal assist after use due to the health drain, even if she is not hit.
- Eliza cannot die from this health drain alone; instead she will be left with 1 HP.
- When using Sekhmet as an assist, life drain is always at its max, and the assist will be locked out for longer than a normal assist after use due to the health drain, even if she is not hit.
- Attacking the opponent with any of Sekhmet's blood weapons will cause the opponent to leave blood drops on the ground. When Sekhmet returns, Eliza can pick up the blood to heal herself.
- The maximum amount of blood that can be spawned at a given time is 25 drops. With each drop healing 200HP, up to 5000HP.
- The LP, MP, and HP attacks from Sekhmet's Turn summons Sekhmet as she attacks with the corresponding button. She can use these, along with her 1 crouching and 3 jumping normals, in relatively easy chain combos but has no specials or throws, but does have a super, Crimson Scourge.
Standing Normals
  Wadjab Toggle Hitboxes Toggle Hitboxes
|
| |||||||||||||||||||||||||||||||||||
| ||||||||||||||||||||||||||||||||||||
|
| ||||||||||||||||||||||||||||||||||||
  Siren Serpopards Toggle Hitboxes Toggle Hitboxes
|
| ||||||||||||||||||||||||||||||||||
| |||||||||||||||||||||||||||||||||||
|
| |||||||||||||||||||||||||||||||||||
  Sirocco Storm Toggle Hitboxes Toggle Hitboxes
|
| |||||||||||||||||||||||||||||||||||
| ||||||||||||||||||||||||||||||||||||
| ||||||||||||||||||||||||||||||||||||
| ||||||||||||||||||||||||||||||||||||
|
| ||||||||||||||||||||||||||||||||||||
  Sandal Wedge Toggle Hitboxes Toggle Hitboxes
|
| ||||||||||||||||||||||||||||||||||
| |||||||||||||||||||||||||||||||||||
|
| |||||||||||||||||||||||||||||||||||
  Chaos Banish Toggle Hitboxes Toggle Hitboxes
|
| |||||||||||||||||||||||||||||||||||
| ||||||||||||||||||||||||||||||||||||
| ||||||||||||||||||||||||||||||||||||
|
| ||||||||||||||||||||||||||||||||||||
  Solar Arc Toggle Hitboxes Toggle Hitboxes
|
| |||||||||||||||||||||||||||||||||||
| ||||||||||||||||||||||||||||||||||||
| ||||||||||||||||||||||||||||||||||||
|
| ||||||||||||||||||||||||||||||||||||
Crouching Normals
  Nemes Set Toggle Hitboxes Toggle Hitboxes
|
| |||||||||||||||||||||||||||||||||||
| ||||||||||||||||||||||||||||||||||||
| ||||||||||||||||||||||||||||||||||||
|
| ||||||||||||||||||||||||||||||||||||
  Middle of the Sphynx Toggle Hitboxes Toggle Hitboxes
|
| |||||||||||||||||||||||||||||||||||
| ||||||||||||||||||||||||||||||||||||
| ||||||||||||||||||||||||||||||||||||
|
| ||||||||||||||||||||||||||||||||||||
  Isis Wings Toggle Hitboxes Toggle Hitboxes
|
| ||||||||||||||||||||||||||||||||||
| |||||||||||||||||||||||||||||||||||
|
| |||||||||||||||||||||||||||||||||||
  Bast's Cuff Toggle Hitboxes Toggle Hitboxes
|
| ||||||||||||||||||||||||||||||||||
| |||||||||||||||||||||||||||||||||||
|
| |||||||||||||||||||||||||||||||||||
  Sobek Slide Toggle Hitboxes Toggle Hitboxes
|
| ||||||||||||||||||||||||||||||||||
| |||||||||||||||||||||||||||||||||||
|
| |||||||||||||||||||||||||||||||||||
  Solar Barge Toggle Hitboxes Toggle Hitboxes
|
| ||||||||||||||||||||||||||||||||||
| |||||||||||||||||||||||||||||||||||
|
| |||||||||||||||||||||||||||||||||||
Jumping Normals
  Sistrum Shake Toggle Hitboxes Toggle Hitboxes
|
| ||||||||||||||||||||||||||||||||||
| |||||||||||||||||||||||||||||||||||
|
| |||||||||||||||||||||||||||||||||||
  Crescent Scribe Toggle Hitboxes Toggle Hitboxes
|
| ||||||||||||||||||||||||||||||||||
| |||||||||||||||||||||||||||||||||||
|
| |||||||||||||||||||||||||||||||||||
  Aten Array Toggle Hitboxes Toggle Hitboxes
|
| ||||||||||||||||||||||||||||||||||
| |||||||||||||||||||||||||||||||||||
|
| |||||||||||||||||||||||||||||||||||
  Low Glyph Toggle Hitboxes Toggle Hitboxes
|
| ||||||||||||||||||||||||||||||||||
| |||||||||||||||||||||||||||||||||||
|
| |||||||||||||||||||||||||||||||||||
  High Glyph Toggle Hitboxes Toggle Hitboxes
|
| ||||||||||||||||||||||||||||||||||
| |||||||||||||||||||||||||||||||||||
|
| |||||||||||||||||||||||||||||||||||
  Hesat Head Toggle Hitboxes Toggle Hitboxes
|
| ||||||||||||||||||||||||||||||||||
| |||||||||||||||||||||||||||||||||||
|
| |||||||||||||||||||||||||||||||||||
Universal Mechanics
  Lower Domain Toggle Hitboxes Toggle Hitboxes
|
| ||||||||||||||||||||||||||||||||||
| |||||||||||||||||||||||||||||||||||
|
| |||||||||||||||||||||||||||||||||||
  Upper Domain Toggle Hitboxes Toggle Hitboxes
|
| ||||||||||||||||||||||||||||||||||
| |||||||||||||||||||||||||||||||||||
|
| |||||||||||||||||||||||||||||||||||
  Chauffeur Service Toggle Hitboxes Toggle Hitboxes
|
| ||||||||||||||||||||||||||||||||||
| |||||||||||||||||||||||||||||||||||
|
| |||||||||||||||||||||||||||||||||||
  Exile from Aaru Toggle Hitboxes Toggle Hitboxes
|
| ||||||||||||||||||||||||||||||||||
| |||||||||||||||||||||||||||||||||||
|
| |||||||||||||||||||||||||||||||||||
Specials
  "Rise!" Toggle Hitboxes Toggle Hitboxes
|
| |||||||||||||||||||||||||||||||||||
| ||||||||||||||||||||||||||||||||||||
| ||||||||||||||||||||||||||||||||||||
| ||||||||||||||||||||||||||||||||||||
| ||||||||||||||||||||||||||||||||||||
| ||||||||||||||||||||||||||||||||||||
| ||||||||||||||||||||||||||||||||||||
|
| ||||||||||||||||||||||||||||||||||||
  "Mummify!" Toggle Hitboxes Toggle Hitboxes
|
| |||||||||||||||||||||||||||||||||||
| ||||||||||||||||||||||||||||||||||||
| ||||||||||||||||||||||||||||||||||||
| ||||||||||||||||||||||||||||||||||||
|
| ||||||||||||||||||||||||||||||||||||
  "Boys!" Toggle Hitboxes Toggle Hitboxes
|
| ||||||||||||||||||||||||||||||||||
| |||||||||||||||||||||||||||||||||||
|
| |||||||||||||||||||||||||||||||||||
  "Horace." Toggle Hitboxes Toggle Hitboxes
|
| ||||||||||||||||||||||||||||||||||
| |||||||||||||||||||||||||||||||||||
|
| |||||||||||||||||||||||||||||||||||
  "Albus!" Toggle Hitboxes Toggle Hitboxes
|
| ||||||||||||||||||||||||||||||||||
| |||||||||||||||||||||||||||||||||||
|
| |||||||||||||||||||||||||||||||||||
 |
| |||||||||||||||||||||||||||
| ||||||||||||||||||||||||||||
|
| ||||||||||||||||||||||||||||
Sekhmet Moves
  Warrior's Khopesh Toggle Hitboxes Toggle Hitboxes
|
| |||||||||||||||||||||||||||||||||||
| ||||||||||||||||||||||||||||||||||||
| ||||||||||||||||||||||||||||||||||||
| ||||||||||||||||||||||||||||||||||||
|
| ||||||||||||||||||||||||||||||||||||
  Sekhem Lunge Toggle Hitboxes Toggle Hitboxes
|
| ||||||||||||||||||||||||||||||||||
| |||||||||||||||||||||||||||||||||||
|
| |||||||||||||||||||||||||||||||||||
  Butcher's Blade Toggle Hitboxes Toggle Hitboxes
|
| ||||||||||||||||||||||||||||||||||
| |||||||||||||||||||||||||||||||||||
|
| |||||||||||||||||||||||||||||||||||
  Carpenter's Axe Toggle Hitboxes Toggle Hitboxes
|
| ||||||||||||||||||||||||||||||||||
| |||||||||||||||||||||||||||||||||||
|
| |||||||||||||||||||||||||||||||||||
 Sekhem Dive Toggle Hitboxes Toggle Hitboxes
|
| ||||||||||||||||||||||||||||||||||
| |||||||||||||||||||||||||||||||||||
|
| |||||||||||||||||||||||||||||||||||
 Ptahxe Toggle Hitboxes Toggle Hitboxes
|
| ||||||||||||||||||||||||||||||||||
| |||||||||||||||||||||||||||||||||||
|
| |||||||||||||||||||||||||||||||||||
  Signature Attack Toggle Hitboxes Toggle Hitboxes
|
| ||||||||||||||||||||||||||||||||||
| |||||||||||||||||||||||||||||||||||
|
| |||||||||||||||||||||||||||||||||||
  Toggle Hitboxes Toggle Hitboxes
|
| ||||||||||||||||||||||||||||||||||
| |||||||||||||||||||||||||||||||||||
|
| |||||||||||||||||||||||||||||||||||
 |
| |||||||||||||||||||||||||||
| ||||||||||||||||||||||||||||
|
| ||||||||||||||||||||||||||||
Supers
  "She who mauls!" Toggle Hitboxes Toggle Hitboxes
|
| |||||||||||||||||||||||||||||||||||
| ||||||||||||||||||||||||||||||||||||
|
| ||||||||||||||||||||||||||||||||||||
  "No mercy... the clutches of eternity!" Toggle Hitboxes Toggle Hitboxes
|
| ||||||||||||||||||||||||||||||||||
| |||||||||||||||||||||||||||||||||||
|
| |||||||||||||||||||||||||||||||||||
  *Sekhmet laughs manaiacally* Toggle Hitboxes Toggle Hitboxes
|
| ||||||||||||||||||||||||||||||||||
| |||||||||||||||||||||||||||||||||||
|
| |||||||||||||||||||||||||||||||||||
  "Sunrise! High noon! Sunset!" Toggle Hitboxes Toggle Hitboxes
|
| ||||||||||||||||||||||||||||||||||
| |||||||||||||||||||||||||||||||||||
|
| |||||||||||||||||||||||||||||||||||
Taunt
 "Keep young and beautiful!"
|
| |||||||||||||||||||||||||||
| ||||||||||||||||||||||||||||
|
| ||||||||||||||||||||||||||||
 "Kiss kiss"
|
| |||||||||||||||||||||||||||
| ||||||||||||||||||||||||||||
| ||||||||||||||||||||||||||||
Colors

|

|

|

|

|
|---|---|---|---|---|
Color 1 Default color palette. |
Color 2 Based on Cleopatra (as portrayed by Elizabeth Taylor) from Cleopatra. |
Color 3 Based on Eliza from Tekken Revolution. |
Color 4 Original alternate color palette. |
Color 5 Original alternate color palette. |

|

|

|

|

|
Color 6 Original alternate color palette. |
Color 7 Original color palette based on bloody Eliza from her story mode. |
Color 8 Based on Princess Iset from Vindictus. |
Color 9 Based on Jedah from the Darkstalkers / Vampire series. Includes Albus as Jon Talbain. |
Color 10 Based on C. Viper from Street Fighter 4; includes Albus as Rufus and Horace as Goku. |

|

|

|

|

|
Color 11 Based on Tharja from Fire Emblem: Awakening. |
Color 12 Based on Dr. Doom from Marvel vs Capcom 2. |
Color 13 Based on I-No from Guilty Gear. |
Color 14 Based on Queen Odette from Odin Sphere. |
Color 15 Based on Dio Brando from Jojo's Bizarre Adventure: Stardust Crusaders; includes Albus and Horace as The World. |

|

|

|

|

|
Color 16 Based on Faye Valentine from Cowboy Bebop; includes Albus as Spike Spiegel and Horace as Jet Black. |
Color 17 Based on Velvet from Odin Sphere. |
Color 18 Based on Ragyō Kiryūin from Kill la Kill; includes Sekhmet as Life Fibers, Albus as Rei Hoomaru, and Horace as COVERS. |
Color 19 Based on Red from Transistor; includes Sekhmet as The Process. |
Color 20 Original alternate color palette. |

|

|

|

|

|
Color 21 Based on Porrim Maryam from MS Paint Adventures. Crowdfunding request. |
Color 22 Original alternate color palette. Crowdfunding request. |
Color 23 Based on Urien from Street Fighter 3; includes Sekhmet as Twelve, Albus as Gill, and Horace as Necro. |
Color 24 Based on Raven from Teen Titans; includes Sekhmet as Trigon and Albus and Horace as Beast Boy. Crowdfunding request. |
Color 25 Based on Elizabeth from Persona 3; includes Sekhmet as Thanatos. |

|

|

|

|

|
Color 26 Based on Ana from Overwatch. |
Color 27 Based on Sora from Kingdom Hearts III. |
Color 28 Based on Lapis Lazuli from Steven Universe. |
Color 29 Based on Ajna from Indivisible. |
Color 30 ? |

|

|
|||
Color 31 Based on Kikuri-Hime from Shin Megami Tensei (Nocturne onward). |
Color 32 Based on Astarte from Castlevania. |
|||
Intro Poses
Eliza has 3 different intro poses that can be selected by holding a light, medium or heavy button during the loading screen before a match.

|
Intro pose 1: Hold Sekmet emerges from a pool of blood. Gaze into the face of your death! Your cells shall betray you! |

|
Intro pose 2: Hold Eliza poses with sunglasses and a stylish purse. How do I look? Yes, I am rich! |

|
Intro pose 3: Hold Eliza's servants carry her upon a palanquin. Albus! Horace! I shouldn't be long. Yes, boss! Happy hunting! It's gonna be your funeral! |
Win Poses
Eliza's single win pose has 8 variants, and the winning player can select a variant by holding a button at the end of the match.
Additionally, Sekhmet has her own win pose if the round ends with her summoned.

|
Winpose 1: Hold How do I look? |

|
Winpose 2: Hold Yes, I am rich. |

|
Winpose 3: Hold Victory looks good on me. |

|
Winpose 4: Hold Boys! Prepare the limo! |

|
Winpose 5: Hold I could go for a dip right about now... |

|
Winpose 6: Hold I give the orders! |

|
Winpose 7: Hold How do I look? |

|
Winpose 8: Hold Deal with it! |
Players to Watch
Disclaimer: This list is derived from community input and is in no way comprehensive or a form of ranking of any kind. Our community criteria can be found here.
| Usual Color | Handles/Links | Region | Status | Notes |
|---|---|---|---|---|
|
Vending |
Poland |
Active | Next generation Eliza pushing the character itself to the maximum, while freestyling and robbing. Example Play |
|
Bootyballspoepeyes | United States |
Active | bbp👍 Example Play |
 |
Halibel | United States |
Active | lab monster for da optimals.iajdiedjydtjadjadjadj Example Play |
|
Namlay |
United States |
inactive | She who Balls Example Play |
|
Aristal @Aristal159 |
Brazil |
Active | Keep young and beautiful Example Play |
|
Fuzzy_Snugs |
United States |
inactive | Hi Example Play |
|
LazyDiablos |
United States |
Inactive(?) | Example Play |
|
PleasureThatCutsWind @PleasureTCW |
United States CA |
inactive | Creator of the self titled Eliza guide. Example Play |
|
RoyalHeart v2 @BloomingLotusV2 |
United States IL |
Lurking probably | N/A Yes, he is rich. Example Play |
|
Sinclair Sinclair Moreau |
Netherlands |
probably inactive idk | Mother of Eliza players, Neutral monster and years long Eliza activist. Example Play |


