|
|
| Line 1,487: |
Line 1,487: |
| |- | | |- |
| | Caio Lugon || style="text-align:center;"| [[File:SG_cer_color19.png|enter|180px]] | | | Caio Lugon || style="text-align:center;"| [[File:SG_cer_color19.png|enter|180px]] |
| | Brazil || M Fibber / Cerecopter / Pillar || [https://twitter.com/Caio_Lugon @Caio_Lugon] || Active || Farofa || [https://youtu.be/O-kPmpZ3EWk Link] | | | Brazil || M Fibber / Cerecopter / Pillar || [https://twitter.com/Caio_Lugon @Caio_Lugon] || Active || Farofa || [https://www.youtube.com/watch?v=gMz8QLP_230 Link] |
| |} | | |} |
|
| |
|
Revision as of 22:58, 13 November 2020
Story
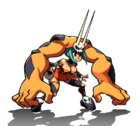
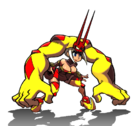
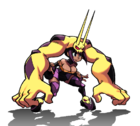
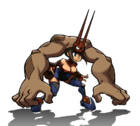
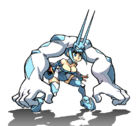
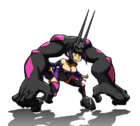
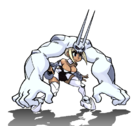
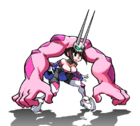
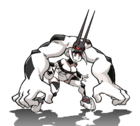
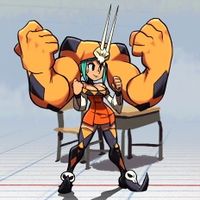
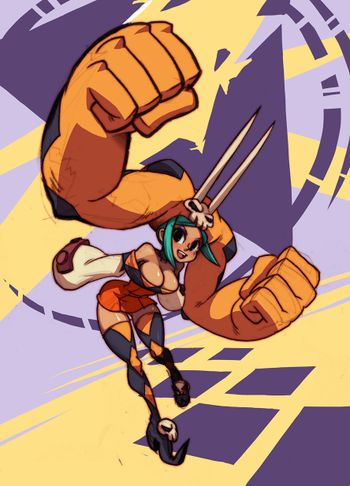
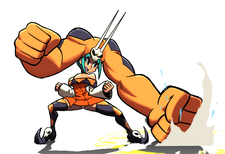
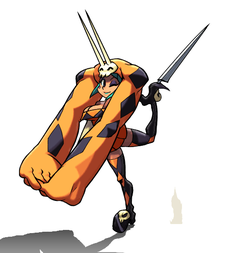
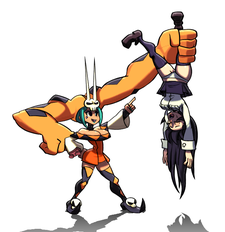
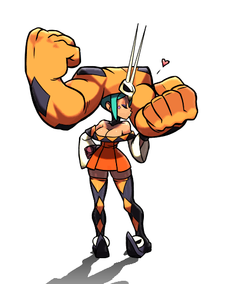
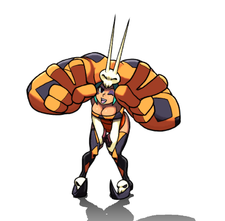
The biggest sensation in the Cirque des Cartes, Cerebella is a tumbling, soaring dynamo of star power: throughout the Canopy Kingdom, she’s admired for her enormous strength and alluring curves. Sadly, this acrobatic orphan only desires the attention of one man, mobster Vitale Medici, who took her in and became the closest thing to a father she’s ever known.
While inherently good, Cerebella serves the mafia as a leg-breaker when not performing in the circus. Cerebella is the only person capable of controlling her powerful Living Weapon hat, Vice-Versa, so Vitale is stingy with his affections to keep her fighting in his corner.
Basics
For more guides and resources jump to the External Links section.
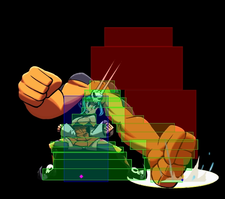
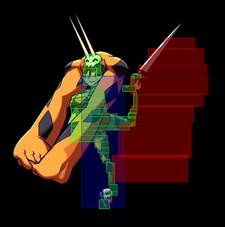
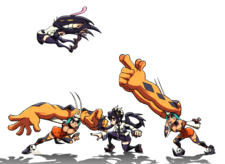
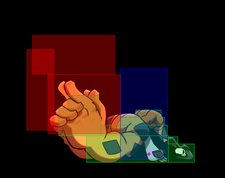
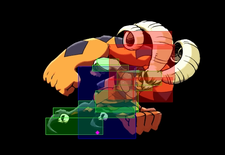
Cerebella is a grappler with a diverse tool-kit and has excellent hurtboxes/hitboxes on many of her normals. Her command grabs can turn many situations into a 50/50, and she has the tools to incorporate a variety of nasty resets into her combos.
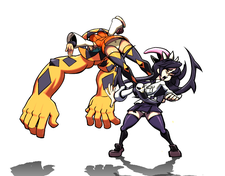
- Command grabs: Cerebella has two command grabs, Merry Go-Rilla (214LP+LK) and Diamond Drop (236LP+LK). MGR has excellent range and DD is the fastest meterless move in the game. To complement these throw options, she has Excellebella (623LP+LK) which is air unblockable during the rising portion of the opponent's jump, and a good 2LK to tag opponents attempting to jump away.
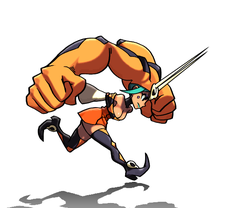
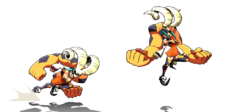
- Movement: Cerebella has a few unique movement options to get close and threaten mixups. In addition to a double jump, her jHP will glide through the air if held down. She has an armored run special move ([4]6K) which has several followups.
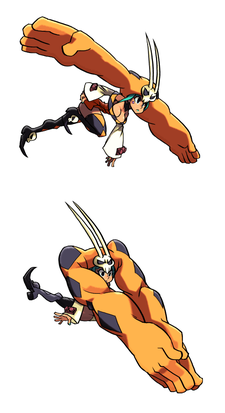
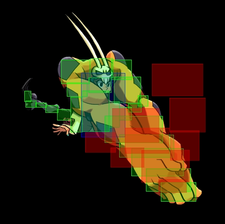
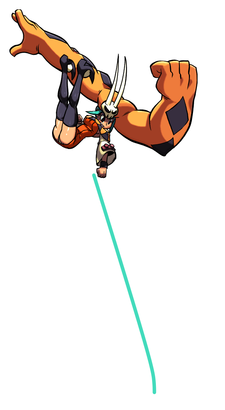
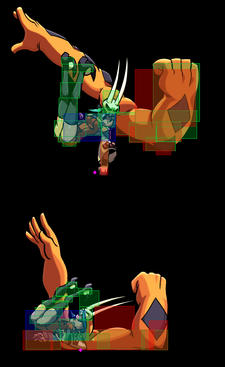
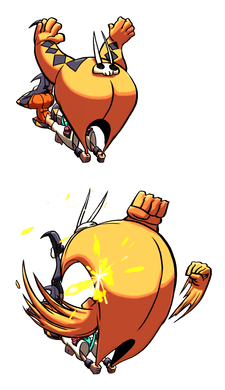
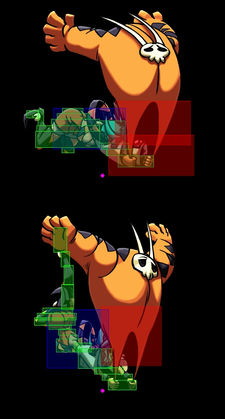
- Kanchou: One of the run followups is Kanchou, a move that will pass through the opponent and hit crossup. While it's incredibly unsafe on block, it's potentially unseeable, is a high damage combo starter, and has the option to feint and pass through the opponent without attacking. This is far from Cerebella's only mixup option, but it can add another layer of explosiveness to her reset game.
| Strengths |
Weaknesses
|
- Huge toolkit, prepared for nearly any situation
- Big buttons that are often favorably disjoint
- High damage
- Great metered reversals
- Great assists
- Great DHCs
|
- Middling reversal options without meter - has a few options, but all of them have big flaws.
- Fairly bad ground dashes (somewhat made up for with her command run)
- Weak solo pressure, easily pushblocked out and has to take risks to get back in
|
Important Moves
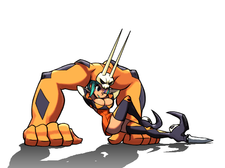
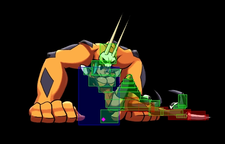
- 2LK - Fast, low hitting attack with good reach. Gut check them with this, and make them suspect to throws.
- Merry Go-Rilla (214LP+LK) - Far reaching command grab. Use this at the same range you would poke with 2LK and mix-up crouch blocking opponents
- jMP - Excellent all around air normal
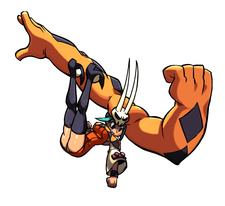
- jHP - Both a movement option and disjointed air-to-air. When just tapping it to attack, it will halt her jump momentum. You can also hold HP to glide through the air and release to attack.
- jHK - Jump in with lots of vertical reach and is active for a long time.
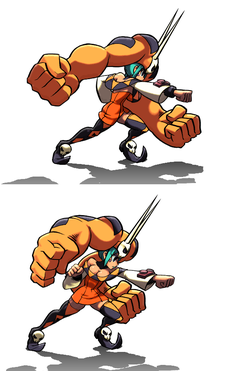
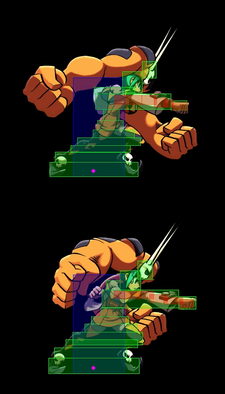
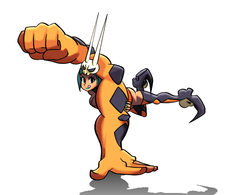
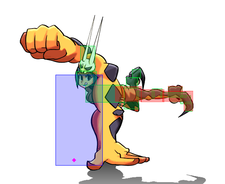
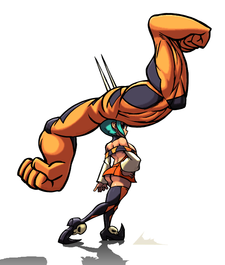
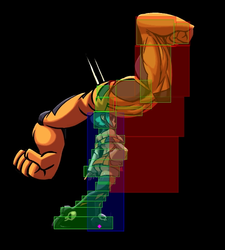
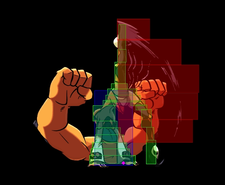
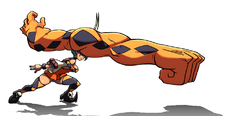
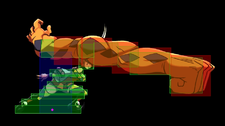
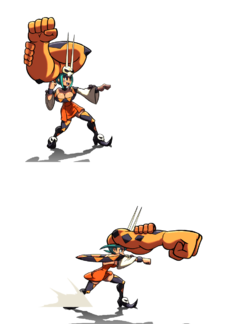
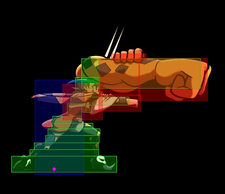
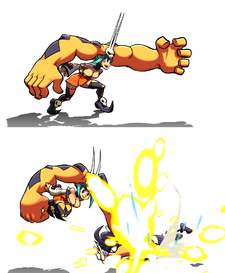
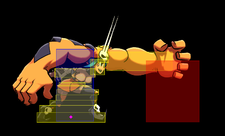
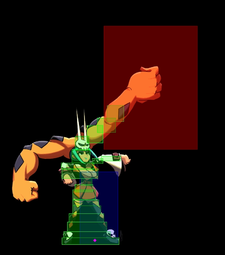
- 6HP - Her furthest reaching attack, and causes a sliding knockdown. Be careful using it too predictably, as it's slow and easy to punish on whiff.
- Reversals:
- Diamond Dynamo (236PP) is a level 1 reversal super which has a great anti-air hitbox and leads into a combo with a DHC, or if it ends near the corner.
- 360 (360LP+LK) is the most damaging level 1 reversal in the game and the damage can be exchanged for a follow up combo to maintain momentum.
- Use wakeup LnL (236HP) before either of these to armor through attacks and confirm your reversal will work.
Stats
Chains
| Standing
|
3 Buttons:  or or  → →  or or  → →  or or 
|
| Crouching
|
3 Buttons:  or or  → →  or or  → →  or or 
|
| Air
|
5 Buttons:  → →  → →  → →  → →  or or 
|
Movement
| Weight
|
Dash
|
Double Jump
|
Airdash
|
IAD Lockout
|
| Medium
|
Step
|
Yes
|
No
|
N/A
|
Wakeup Time
| Forward Tech
|
Backward Tech
|
Sliding KD
|
Hard KD
|
Crumple
|
| 34
|
35
|
4
|
34
|
32
|
Move List
Standing Normals
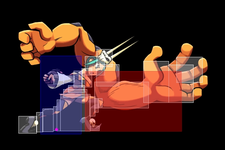
Tune Up Toggle Hitboxes Toggle Hitboxes
|
| 5LP
|
s.
|
|
| x1
|
Guard
|
Properties
|
Damage
|
Meter
|
On Hit
|
On Block
|
On Pushblock
|
| Mid
|
Chains Into Self
|
300
|
2.5%
|
-3
|
±0
|
|
| Startup
|
Active
|
Recovery
|
Hit Stun
|
Block Stun
|
Hit Stop
|
Super Hit Stop
|
| 6
|
2
|
18
|
16
|
19
|
7
|
N/A
|
|
|
|
| x2
|
Guard
|
Properties
|
Damage
|
Meter
|
On Hit
|
On Block
|
On Pushblock
|
| Mid
|
-
|
300
|
2.5%
|
±0
|
+3
|
|
| Startup
|
Active
|
Recovery
|
Hit Stun
|
Block Stun
|
Hit Stop
|
Super Hit Stop
|
| 6
|
2
|
15
|
16
|
19
|
7
|
N/A
|
|
|
|
- Can chain into 2LP instead of 5LP x2.
- Tied for Cerebella's fastest normal with 2LP.
|
|
|
Medici Shakedown Toggle Hitboxes Toggle Hitboxes
|
| 5MP
|
s.
|
|
| Guard
|
Properties
|
Damage
|
Meter
|
On Hit
|
On Block
|
On Pushblock
|
| Mid
|
-
|
600
|
7.5%
|
Stagger (+44 / +59 CH) OR +2
|
+5
|
|
| Startup
|
Active
|
Recovery
|
Hit Stun
|
Block Stun
|
Hit Stop
|
Super Hit Stop
|
| 12
|
3
|
18
|
22
|
25
|
9
|
N/A
|
|
|
|
- Staggers a grounded opponent if it hasn't been chained into.
- Crossup hitbox
|
|
|
Tent Stake Hammer Toggle Hitboxes Toggle Hitboxes
|
| 5HP
|
s.
|
|
| Guard
|
Properties
|
Damage
|
Meter
|
On Hit
|
On Block
|
On Pushblock
|
| Mid
|
-
|
1000
|
10%
|
+1,
KD (vs air)
|
-10
|
|
| Startup
|
Active
|
Recovery
|
Hit Stun
|
Block Stun
|
Hit Stop
|
Super Hit Stop
|
| 17
|
3
|
26
|
29
|
18
|
11
|
N/A
|
|
|
|
- Causes knockdown on air hit
- Gives the opponent significant downwards momentum when air blocked.
- Combos into Level 3 (214PP).
|
|
|
Point Cut Toggle Hitboxes Toggle Hitboxes
|
| 5LK
|
s.
|
|
| Guard
|
Properties
|
Damage
|
Meter
|
On Hit
|
On Block
|
On Pushblock
|
| Mid
|
-
|
400
|
2.5%
|
+5
|
+2
|
|
| Startup
|
Active
|
Recovery
|
Hit Stun
|
Block Stun
|
Hit Stop
|
Super Hit Stop
|
| 9
|
2
|
14
|
20
|
17 (19 vs air)
|
7
|
N/A
|
|
|
|
- Moves Cerebella backwards on frame 3, then forwards past her original position.
- When kara canceled with MGR, it can connect at point blank. (video)
|
|
|
Cugine Kick Toggle Hitboxes Toggle Hitboxes
|
| 5MK
|
s.
|
|
| Guard
|
Properties
|
Damage
|
Meter
|
On Hit
|
On Block
|
On Pushblock
|
| Mid
|
-
|
600
|
7.5%
|
+2
|
+5
|
|
| Startup
|
Active
|
Recovery
|
Hit Stun
|
Block Stun
|
Hit Stop
|
Super Hit Stop
|
| 11
|
2
|
23
|
26
|
29
|
9
|
N/A
|
|
|
|
|
|
|
|
Adagio Swing Toggle Hitboxes Toggle Hitboxes
|
| 5HK
|
s.
|
|
| Guard
|
Properties
|
Damage
|
Meter
|
On Hit
|
On Block
|
On Pushblock
|
| High(2nd hit)
|
-
|
600, 700
|
10% x2
|
+3
|
-2
|
|
| Startup
|
Active
|
Recovery
|
Hit Stun
|
Block Stun
|
Hit Stop
|
Super Hit Stop
|
| 15
|
3, (20), 4
|
20
|
25, 26
|
26, 21
|
10, 12
|
N/A
|
|
|
|
- The first hit pops the opponent into the air.
- Gives a sudden jolt of forward movement on frame 4.
- High profile hurtbox
- Builds a ton of meter for a normal, twice the normal amount.
|
|
|
Crouching Normals
Kneecapper Toggle Hitboxes Toggle Hitboxes
|
| 2LP
|
c.
|
|
| Guard
|
Properties
|
Damage
|
Meter
|
On Hit
|
On Block
|
On Pushblock
|
| Mid
|
-
|
250
|
2.5%
|
+2
|
+5
|
|
| Startup
|
Active
|
Recovery
|
Hit Stun
|
Block Stun
|
Hit Stop
|
Super Hit Stop
|
| 6
|
2
|
13
|
16
|
19
|
7
|
N/A
|
|
|
|
- Tied for fastest normal with 5LP, but has more range.
|
|
|
Enforcer Elbow Toggle Hitboxes Toggle Hitboxes
|
| 2MP
|
c.
|
|
| Guard
|
Properties
|
Damage
|
Meter
|
On Hit
|
On Block
|
On Pushblock
|
| Mid
|
-
|
550
|
7.5%
|
-1
|
-9
|
|
| Startup
|
Active
|
Recovery
|
Hit Stun
|
Block Stun
|
Hit Stop
|
Super Hit Stop
|
| 14
|
6
|
21
|
25
|
17
|
10
|
N/A
|
|
|
|
- Moves Cerebella forward. Preferred kara button to extend range of command throws, and for punishes at further range.
- Unable to crossup opponents not already in hitstun.
|
|
|
Boost-iere Toggle Hitboxes Toggle Hitboxes
|
| 2HP
|
c.
|
|
| Guard
|
Properties
|
Damage
|
Meter
|
On Hit
|
On Block
|
On Pushblock
|
| Mid
|
Launcher
|
950
|
10%
|
-1
|
-14
|
|
| Startup
|
Active
|
Recovery
|
Hit Stun
|
Block Stun
|
Hit Stop
|
Super Hit Stop
|
| 14
|
3
|
30
|
31
|
18
|
12
|
N/A
|
|
|
|
|
|
|
|
Diamond Scratch Toggle Hitboxes Toggle Hitboxes
|
| 2LK
|
c.
|
|
| Guard
|
Properties
|
Damage
|
Meter
|
On Hit
|
On Block
|
On Pushblock
|
| Low
|
-
|
325
|
2.5%
|
+3
|
+6
|
|
| Startup
|
Active
|
Recovery
|
Hit Stun
|
Block Stun
|
Hit Stop
|
Super Hit Stop
|
| 8
|
3
|
10
|
15
|
18
|
7
|
N/A
|
|
|
|
- Low starter with good range and speed.
|
|
|
Loop de Loop Toggle Hitboxes Toggle Hitboxes
|
| 2MK
|
c.
|
|
| Guard
|
Properties
|
Damage
|
Meter
|
On Hit
|
On Block
|
On Pushblock
|
| Mid
|
Launcher
|
550
|
7.5%
|
+4
|
-8
|
|
| Startup
|
Active
|
Recovery
|
Hit Stun
|
Block Stun
|
Hit Stop
|
Super Hit Stop
|
| 11
|
2
|
24
|
29
|
17
|
9
|
N/A
|
|
|
|
- Launches the opponent to a lower height than 2HP.
|
|
|
Medici Legbreaker Toggle Hitboxes Toggle Hitboxes
|
| 2HK
|
c.
|
|
| Guard
|
Properties
|
Damage
|
Meter
|
On Hit
|
On Block
|
On Pushblock
|
| Low
|
Sweep
|
1100
|
10%
|
Soft KD (Invuln.)
|
±0
|
|
| Startup
|
Active
|
Recovery
|
Hit Stun
|
Block Stun
|
Hit Stop
|
Super Hit Stop
|
| 18
|
2
|
16
|
14
|
17
|
10
|
N/A
|
|
|
|
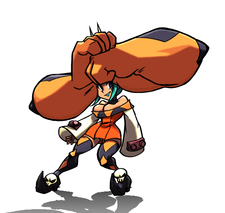
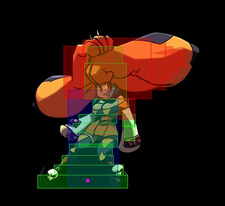
- Low profile hurtbox
- Even frame advantage on block, unusual for a sweep.
- Runstop canceling this move does not change its frame advantage.
|
|
|
Jumping Normals
Trapeze Act Toggle Hitboxes Toggle Hitboxes
|
| jLP
|
j.
|
|
| x1
|
Guard
|
Properties
|
Damage
|
Meter
|
On Hit
|
On Block
|
On Pushblock
|
| Mid
|
Chains Into Self
|
250
|
2.5%
|
-21
|
-4
|
|
| Startup
|
Active
|
Recovery
|
Hit Stun
|
Block Stun
|
Hit Stop
|
Super Hit Stop
|
| 6
|
2
|
37
|
17
|
20
|
7
|
N/A
|
|
|
|
| x2, x3, ...
|
Guard
|
Properties
|
Damage
|
Meter
|
On Hit
|
On Block
|
On Pushblock
|
| Mid
|
Chains Into Self
|
250, 100, 100…
|
2.5%...
|
-12
|
-4
|
|
| Startup
|
Active
|
Recovery
|
Hit Stun
|
Block Stun
|
Hit Stop
|
Super Hit Stop
|
| 1
|
2, (3), 2, (3)...
|
28
|
17…
|
20…
|
7, 5, 5, 5…
|
N/A
|
|
|
|
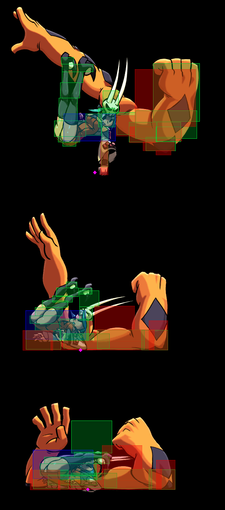
- Tied for fastest air normal in the game.
- Press jLP again to chain into jLP xN, a follow up that can be done an indefinite number of times (see bottom two hitboxes).
- Chaining the same move into itself can't trigger IPS if the first hit does not trigger IPS.
|
|
|
Slap Chop Toggle Hitboxes Toggle Hitboxes
|
| jMP
|
j.
|
|
| Guard
|
Properties
|
Damage
|
Meter
|
On Hit
|
On Block
|
On Pushblock
|
| High
|
-
|
575
|
7.5%
|
+10 OR KD (vs air, chained into)
|
+4
|
|
| Startup
|
Active
|
Recovery
|
Hit Stun
|
Block Stun
|
Hit Stop
|
Super Hit Stop
|
| 14
|
3
|
17
|
31 (29 vs air)
|
23
|
11
|
N/A
|
|
|
|
- Chaining into this move will cause a knockdown on air hit.
|
|
|
Glide n' Clap Toggle Hitboxes Toggle Hitboxes
|
| jHP
|
j.
|
|

|
Guard
|
Properties
|
Damage
|
Meter
|
On Hit
|
On Block
|
On Pushblock
|
| High
|
75% Damage Scaling
|
950
|
7.5%
|
KD (vs air)
|
+4
|
|
| Startup
|
Active
|
Recovery
|
Hit Stun
|
Block Stun
|
Hit Stop
|
Super Hit Stop
|
| 7, (35), 8
|
3
|
15
|
34
|
37
|
11
|
N/A
|
|
|
|
[  ] ]
|
Guard
|
Properties
|
Damage
|
Meter
|
On Hit
|
On Block
|
On Pushblock
|
| N/A
|
-
|
N/A
|
N/A
|
N/A
|
N/A
|
|
| Startup
|
Active
|
Recovery
|
Hit Stun
|
Block Stun
|
Hit Stop
|
Super Hit Stop
|
| 7, (35)
|
N/A
|
12
|
N/A
|
N/A
|
N/A
|
N/A
|
|
|
|
- Alters Cerebella's air momentum.
- Hold j[HP] to glide.
- Release HP during a glide to perform jHP. If held until the end, Cerebella won't perform jHP.
- The glide can be canceled into j2MP or Grab Bag (j236LP+LK)
- Only one glide can be preformed per jump and it can't be used after a double jump.
- Can be used as an instant overhead
- On hit as IOH after landing: ~+12
- On block as IOH after landing: ~+15
|
|
|
Single Cut Toggle Hitboxes Toggle Hitboxes
|
| jLK
|
j.
|
|
| Guard
|
Properties
|
Damage
|
Meter
|
On Hit
|
On Block
|
On Pushblock
|
| High
|
-
|
300
|
2.5%
|
+2
|
+5
|
|
| Startup
|
Active
|
Recovery
|
Hit Stun
|
Block Stun
|
Hit Stop
|
Super Hit Stop
|
| 7
|
4
|
12
|
17
|
20
|
7
|
N/A
|
|
|
|
|
|
|
|
Brilliant Dropkick Toggle Hitboxes Toggle Hitboxes
|
| jMK
|
j.
|
|
| Guard
|
Properties
|
Damage
|
Meter
|
On Hit
|
On Block
|
On Pushblock
|
| High
|
-
|
650
|
7.5%
|
+1
|
+4
|
|
| Startup
|
Active
|
Recovery
|
Hit Stun
|
Block Stun
|
Hit Stop
|
Super Hit Stop
|
| 14
|
11
|
8
|
19
|
22
|
10
|
N/A
|
|
|
|
|
|
Princess Cut Toggle Hitboxes Toggle Hitboxes
|
| jHK
|
j.
|
|
| Guard
|
Properties
|
Damage
|
Meter
|
On Hit
|
On Block
|
On Pushblock
|
| High
|
-
|
950
|
10%
|
KD (vs air)
|
-5
|
|
| Startup
|
Active
|
Recovery
|
Hit Stun
|
Block Stun
|
Hit Stop
|
Super Hit Stop
|
| 13
|
10
|
16
|
28
|
31
|
11
|
N/A
|
|
|
|
- Causes knockdown on air hit.
- Gives the opponent significant downwards momentum when air blocked.
|
|
|
Command Normals
Titan Knuckle Toggle Hitboxes Toggle Hitboxes
|
| 6HP
|
 + + 
|
|
| Guard
|
Properties
|
Damage
|
Meter
|
On Hit
|
On Block
|
On Pushblock
|
| Mid
|
-
|
1600
|
10%
|
Sliding KD
|
-5
|
|
| Startup
|
Active
|
Recovery
|
Hit Stun
|
Block Stun
|
Hit Stop
|
Super Hit Stop
|
| 21
|
3
|
22
|
26
|
19
|
14
|
N/A
|
|
|
|
- Hurtbox lingers after active frames.
|
|
|
Unbreakable Elbow Toggle Hitboxes Toggle Hitboxes
|
| j2MP
|
j. + + 
|
|
| Guard
|
Properties
|
Damage
|
Meter
|
On Hit
|
On Block
|
On Pushblock
|
| High
|
-
|
800
|
7.5%
|
KD
|
-16 (-2 IOH)
|
|
| Startup
|
Active
|
Recovery
|
Hit Stun
|
Block Stun
|
Hit Stop
|
Super Hit Stop
|
| 11*
|
until ground, 4
|
17
|
24
|
22
|
12
|
N/A
|
|
|
|
- Alters Cerebella's air momentum downwards.
- Crossup hitbox
- Has a minimum of 4 active frames, which occur when Cerebella hits the ground. This applies even when the button is pressed very low to the ground, potentially giving this move instant startup.
- Instant j2MP startup is at least 17f. If done as soon as possible after jumping, this move gains 2 frames of startup, or 1f if done after 1f of jump animation.
|
|
|
Universal Mechanics
Cere-rana Toggle Hitboxes Toggle Hitboxes
|
| Throw
|
 + + 
|
|
| Guard
|
Properties
|
Damage
|
Meter
|
On Hit
|
On Block
|
On Pushblock
|
| Throw
|
50% Damage Scaling
|
1000
|
5%, 10%%
|
KD
|
N/A
|
|
| Startup
|
Active
|
Recovery
|
Hit Stun
|
Block Stun
|
Hit Stop
|
Super Hit Stop
|
| 7
|
1
|
28
|
N/A
|
N/A
|
N/A
|
N/A
|
|
|
|
- Moves Cerebella forward during startup. Because of this, the range is actually much better than the hitbox implies.
- Combo: Throw (into corner) > OTG 2LK. Midscreen you can only Dynamo or Pummel Horse on some characters (hard).
|
|
|
The Flying Wisegirl Toggle Hitboxes Toggle Hitboxes
|
| Air Throw
|
 + +  (in air) (in air)
|
|
| Guard
|
Properties
|
Damage
|
Meter
|
On Hit
|
On Block
|
On Pushblock
|
| Air Throw
|
50% Damage Scaling
|
200 x3, 800
|
0%, 3% x3, 6%
|
KD
|
N/A
|
|
| Startup
|
Active
|
Recovery
|
Hit Stun
|
Block Stun
|
Hit Stop
|
Super Hit Stop
|
| 7
|
3
|
18
|
N/A
|
N/A
|
N/A
|
N/A
|
|
|
|
- Combo: Air throw > jLP 2MK or jLK 2MK. Air throw > jHK can work if the air throw is high enough.
|
|
|
Break-in Elbow Toggle Hitboxes Toggle Hitboxes
|
|
| Guard
|
Properties
|
Damage
|
Meter
|
On Hit
|
On Block
|
On Pushblock
|
| Mid
|
Tag
|
500
|
7.50%
|
Sliding KD
|
-36
|
|
| Startup
|
Active
|
Recovery
|
Hit Stun
|
Block Stun
|
Hit Stop
|
Super Hit Stop
|
| 20
|
(Until ground), 2
|
41
|
10
|
13
|
12
|
N/A
|
|
|
|
- Trajectory is angled slightly forward, giving this tag crossup potential.
- * Does not look visually similar to a sliding KD (the opponent won't slide across the floor), but behaves like one in the sense that it won't cause a blue bounce if you don't use OTG to combo.
|
|
|
Hammer Toss Toggle Hitboxes Toggle Hitboxes
|
|
| Guard
|
Properties
|
Damage
|
Meter
|
On Hit
|
On Block
|
On Pushblock
|
| Mid
|
Snapback
|
0
|
-100%
|
N/A
|
-37
|
|
| Startup
|
Active
|
Recovery
|
Hit Stun
|
Block Stun
|
Hit Stop
|
Super Hit Stop
|
| 12 + 3
|
3
|
22
|
N/A
|
13
|
13
|
9
|
|
|
|
- Moves Cerebella backwards slightly. Use 2MP > 5HK(1) > Snapback to ensure it won't whiff in a combo.
|
|
|
Specials
"Backatcha!" Toggle Hitboxes Toggle Hitboxes
|
| Diamond Deflector
|
 + + 
|
|
| Whiff
|
Guard
|
Properties
|
Damage
|
Meter
|
On Hit
|
On Block
|
On Pushblock
|
| N/A
|
-
|
N/A
|
(2.5%)
|
N/A
|
N/A
|
|
| Startup
|
Active
|
Recovery
|
Hit Stun
|
Block Stun
|
Hit Stop
|
Super Hit Stop
|
| 22
|
N/A
|
21
|
N/A
|
N/A
|
N/A
|
N/A
|
|
|
|
| Reflection
|
Guard
|
Properties
|
Damage
|
Meter
|
On Hit
|
On Block
|
On Pushblock
|
| Mid
|
85% Damage Scaling, Invuln. (Proj.), Projectile
|
300 (100)
|
5.1%
|
Stagger
|
N/A
|
|
| Startup
|
Active
|
Recovery
|
Hit Stun
|
Block Stun
|
Hit Stop
|
Super Hit Stop
|
| N/A
|
--
|
N/A
|
29
|
32
|
0 (8 on block)
|
N/A
|
|
|
|
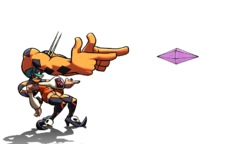
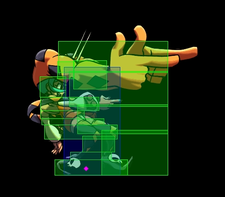
- When any projectile that comes in contact with Cerebella during this move, it's reflected back as its own gem projectile that travels horizontally and absorbs all other projectiles in its way.
- The gem from a successful deflect causes a stagger on hit, even against air opponents who will fall to the ground then enter stagger.
- Unlike other moves that cause stagger, hitting with multiple gems will not put the opponent in a regular hitstun; the stagger length is simply reset.
- Cerebella becomes invulnerable to projectiles during the recovery of a successful reflect.
- Reflecting a poison vial from Valentine will get rid of any previous poision effect.
- Window for reflection is 22f total, beginning with the first frame of start up.
|
|
|
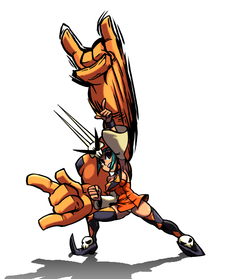
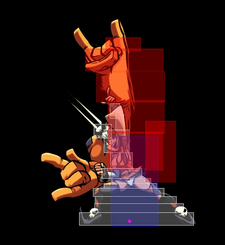
"Rock n' roll!" Toggle Hitboxes Toggle Hitboxes
|
| Devil Horns
|
 + + 
|
|
| Guard
|
Properties
|
Damage
|
Meter
|
On Hit
|
On Block
|
On Pushblock
|
| Mid
|
Invuln. (Full)
|
1200 (100)
|
(2.5%), 13.84%
|
KD
|
-29
|
|
| Startup
|
Active
|
Recovery
|
Hit Stun
|
Block Stun
|
Hit Stop
|
Super Hit Stop
|
| 18
|
3
|
48
|
18
|
21
|
16
|
N/A
|
|
|
|
- Meterless reversal, but will only hit characters right next to or directly above Cerebella.
- Significant super cancel window after active frames.
|
|
|
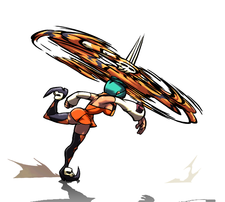
"Spin to win!" Toggle Hitboxes Toggle Hitboxes
|
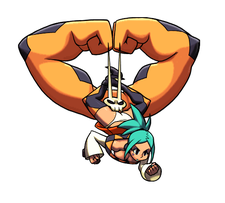
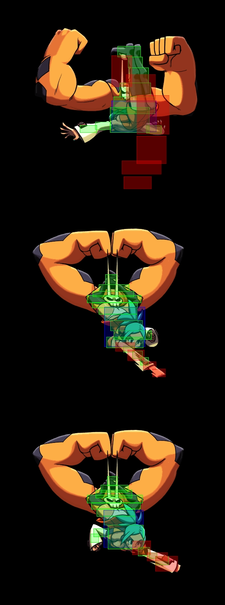
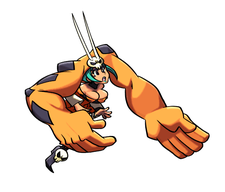
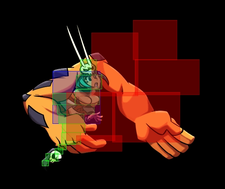
| Cerecopter
|
 + + 
|
|
| Guard
|
Properties
|
Damage
|
Meter
|
On Hit
|
On Block
|
On Pushblock
|
| Mid
|
-
|
275 x7, 500 (20 x7, 300)
|
(2.5%) 2.5% x7, 3.6%
|
KD
|
-18
|
|
| Startup
|
Active
|
Recovery
|
Hit Stun
|
Block Stun
|
Hit Stop
|
Super Hit Stop
|
| 19
|
2, 4, 4, 4, 4, 4, 4, 4
|
34
|
12 x7, 16
|
15 x7, 19
|
2 x7, 12
|
N/A
|
|
|
|
- Crossup hitbox
- Moves Cerebella forward
|
|
|
Toggle Hitboxes Toggle Hitboxes
|
|
|
|
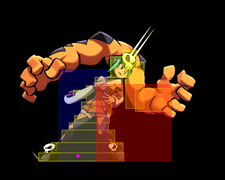
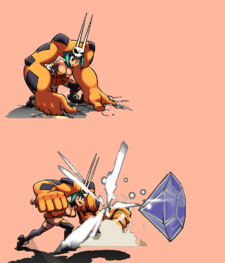
- Point blank command grab.
- Fastest startup in the game for a meterless move (4f).
- Sends the opponent behind Cerebella far away enough where Cerebella can't convert unless they're thrown into the corner. In that case, (micro dash) 2LK will convert. Midscreen, 6HP can tack on some extra damage. Dynamo can lead to a conversion via corner pickup, DHC, or an appropriate assist. See Conversions for more information.
|
|
|
"Round and round we go!" Toggle Hitboxes Toggle Hitboxes
|
|
| Guard
|
Properties
|
Damage
|
Meter
|
On Hit
|
On Block
|
On Pushblock
|
| Command Grab
|
55% Damage Scaling
|
0, 2300
|
(2.5%) 3%, 7%
|
KD
|
N/A
|
|
| Startup
|
Active
|
Recovery
|
Hit Stun
|
Block Stun
|
Hit Stop
|
Super Hit Stop
|
| 10
|
3
|
29
|
N/A
|
N/A
|
N/A
|
N/A
|
|
|
|
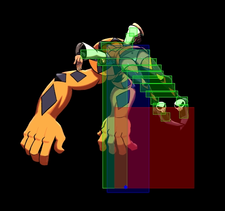
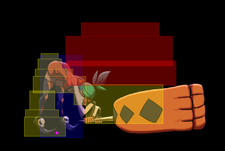
- Mid range command grab with a deadzone which causes it to whiff at point blank on most characters. Works at point blank against Big Band and Beowulf, and at farther ranges than from other characters.
- Kara throw with 2MP to extend the range (Input 2MP, then special cancel into MGR as Cerebella moves forward). Kara throw with 5LK allows you to throw the entire cast except Squigly at point blank. (video)
- Combo: Micro dash 2LK > 2MK, jMP > jHK restand works on the majority of the cast. 2LP > 2MP > 2HP, jLPx3 > jHP is an easier, less optimal conversion.
|
|
|
"I'll slap you senseless!" Toggle Hitboxes Toggle Hitboxes
|
|
| Guard
|
Properties
|
Damage
|
Meter
|
On Hit
|
On Block
|
On Pushblock
|
| Anti-Air Grab
|
50% Damage Scaling
|
0, 150 x5, 900
|
(2.5%) 5%, 2% x5, 5.4%
|
KD
|
-13
|
|
| Startup
|
Active
|
Recovery
|
Hit Stun
|
Block Stun
|
Hit Stop
|
Super Hit Stop
|
| 10
|
2
|
33
|
N/A
|
21
|
N/A (11 on block)
|
N/A
|
|
|
|
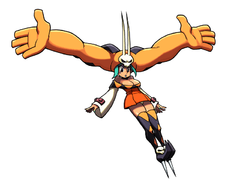
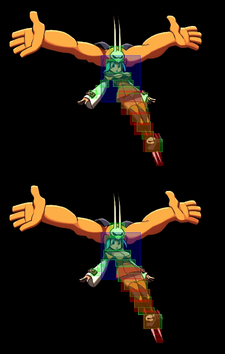
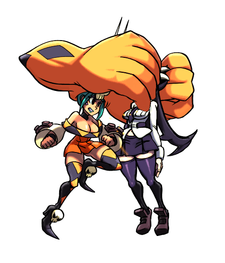
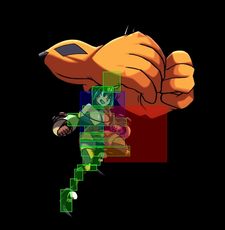
- Unblockable during the rising portion of the opponent's jump.
- Very big hitbox
- Combo: OTG 2LK (corner), Dyanmo (midscreen)
- Builds the most meter out of any of Cerebella's moves. Builds significantly less meter when used for a second time in a combo.
- As assist: meter gain significantly reduced, 33% damage scaling.
|
|
|
"Try this on!" Toggle Hitboxes Toggle Hitboxes
|
|
| Guard
|
Properties
|
Damage
|
Meter
|
On Hit
|
On Block
|
On Pushblock
|
| Air Throw
|
Invuln. (Throw)
|
0, 150 xN, 1200 *
|
(2.5%), 0%, 2.5% xN, 6.6667%
|
KD
|
N/A
|
|
| Startup
|
Active
|
Recovery
|
Hit Stun
|
Block Stun
|
Hit Stop
|
Super Hit Stop
|
| 14
|
until ground
|
60**
|
N/A
|
N/A
|
N/A
|
N/A
|
|
|
|
- A unqiue techable air grab with a special move input.
- Only a 6f window to throw tech (down from 14f for normal air throws).
- When Cerebella misses, she hits the ground and has the ability to ground tech. If no ground tech is chosen, there is an additional 12 frames of vulnerable recovery and some more additional invulnerable recovery.
- The number of hits before the final hit is determined by the height Grab Bag connects at.
|
|
|
|
|
|
| Guard
|
Properties
|
Damage
|
Meter
|
On Hit
|
On Block
|
On Pushblock
|
| N/A
|
Armor (1 hit)
|
N/A
|
3.33%
|
N/A
|
N/A
|
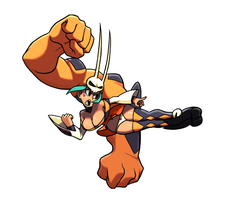
|
| Startup
|
Active
|
Recovery
|
Hit Stun
|
Block Stun
|
Hit Stop
|
Super Hit Stop
|
| 1
|
N/A
|
16
|
N/A
|
N/A
|
N/A
|
N/A
|
|
|
|
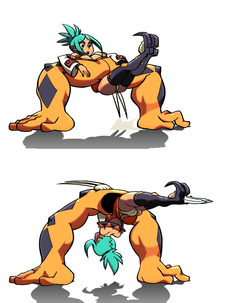
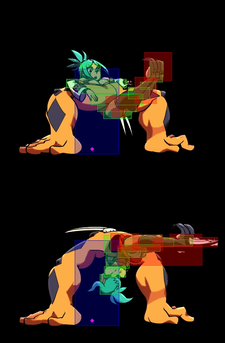
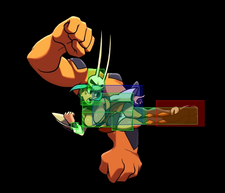
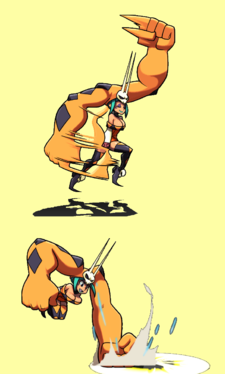
- Cerebella charges forward with 1 hit of armor. Using the run is faster than her normal dash, but a bit more committal.
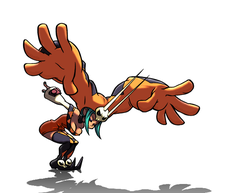
During this move she has access to 3 different follow up moves: Kanchou (MP or MK), Battle Butt (HP or HK), or Pummel Horse (LP+LK). The run can be stopped manually by pressing LP or LK.
- The strength of the kick move used determines how long the run will go for before automatically stopping. LK is short, MK is medium, and HK is long. Since you can manually Run Stop at any point during the run anyway, this is a bit pointless. Always use the HK run when trying to cover ground.
- Holding a button which corresponds to a follow up while inputting run will execute the follow up the fastest possible way. For example: Inputting run with [4]6HK while holding MK will immediately perform Kanchou. Watch this video for a more in depth explanation and other possible shortcuts. Doing instant run followups will always execute at least 1 frame of run.
|
|
|
|
|
| Run Stop
|
During Tumbling Run:
 / / 
|
|
| Guard
|
Properties
|
Damage
|
Meter
|
On Hit
|
On Block
|
On Pushblock
|
| N/A
|
-
|
N/A
|
0%
|
N/A
|
N/A
|
|
| Startup
|
Active
|
Recovery
|
Hit Stun
|
Block Stun
|
Hit Stop
|
Super Hit Stop
|
| N/A
|
N/A
|
16
|
N/A
|
N/A
|
N/A
|
N/A
|
|
|
|
- Stops the run with 16f of recovery. Instant run stop is often used in combos and pressure.
- The first armored frame in the frame data graph is from the first frame of run needed to execute this run follow-up.
- To select as an assist, input [4]6LPLK on the custom assist selection.
|
|
|
"Buweh~" Toggle Hitboxes Toggle Hitboxes
|
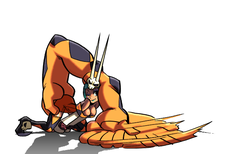
| Kanchou
|
During Tumbling Run:
 / / 
|
|
| Activation
|
Guard
|
Properties
|
Damage
|
Meter
|
On Hit
|
On Block
|
On Pushblock
|
| Mid
|
Invuln. (Proj.) (Frame 3)
|
1000 (100)
|
(2.5%), 13.84%
|
Wall Bounce (once per combo),
KD
|
-25
|
|
| Startup
|
Active
|
Recovery
|
Hit Stun
|
Block Stun
|
Hit Stop
|
Super Hit Stop
|
| 2, (at most 28), 8
|
4
|
42
|
17
|
20
|
18
|
N/A
|
|
|
|
| Feint
|
Guard
|
Properties
|
Damage
|
Meter
|
On Hit
|
On Block
|
On Pushblock
|
| N/A
|
Invuln. (Proj.) (Frame 3)
|
N/A
|
(2.5%)
|
N/A
|
N/A
|
|
| Startup
|
Active
|
Recovery
|
Hit Stun
|
Block Stun
|
Hit Stop
|
Super Hit Stop
|
| N/A
|
N/A
|
43
|
N/A
|
N/A
|
N/A
|
N/A
|
|
|
|
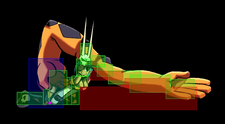
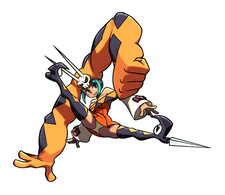
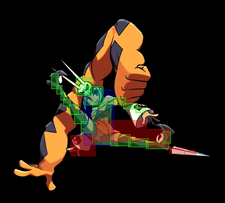
- Cerebella attempts to pass through the opponent as MK is held, and only executes the attack as long as she successfully crosses up.
- The portion of this attack where Cerebella passes through the opponent is also projectile invulnerable.
- Tapping MK will do a feint, where she attempts to crossup but will not perform the move.
- The entire recovery of the feint, after the projectile invulnerable frames, is super cancelable.
- The time it takes to cross up can vary depending on distance and character width. This is especially noticeable on Big Band.
- Using this move for the 2nd time in a combo will result in a regular knockdown.
- The first armored frame in the frame data graph is from the first frame of run needed to execute this run follow-up.
- To select as an assist, input [4]6MPMK on the custom assist selection.
|
|
|
Toggle Hitboxes Toggle Hitboxes
|
| Battle Butt
|
During Tumbling Run:
 / / 
|
|
| Guard
|
Properties
|
Damage
|
Meter
|
On Hit
|
On Block
|
On Pushblock
|
| Mid
|
Armor (2 hits)
|
1400 OR 2000*
(150 OR 500)
|
(2.5%), 9.47%
|
KD
|
-19
|
|
| Startup
|
Active
|
Recovery
|
Hit Stun
|
Block Stun
|
Hit Stop
|
Super Hit Stop
|
| 11
|
8
|
28
|
13
|
16
|
14 OR 25*
|
N/A
|
|
|
|
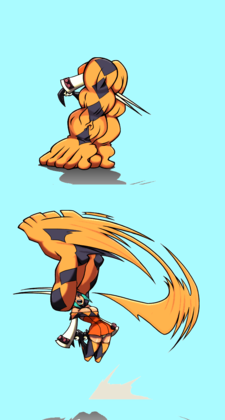
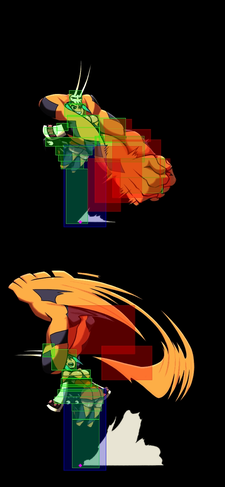
- A quick attack with 2 hits of armor independent from Tumbling Run
- Cerebella is airborne during the active and recovery frames of the headbutt, making it impossible to cancel to super or to be thrown.
- Damage increases to 2000, hitstop increases to 25, and adds a bonus points visual effect when the opponent is at 1500 HP or lower.
- The first armored frame in the frame data graph is from the first frame of run needed to execute this run follow-up.
- To select as an assist, input [4]6HPHK on the custom assist selection.
|
|
|
"Magnifique!" Toggle Hitboxes Toggle Hitboxes
|
| Pummel Horse
|
During Tumbling Run:
 + + 
|
|
| Guard
|
Properties
|
Damage
|
Meter
|
On Hit
|
On Block
|
On Pushblock
|
| High
|
Invuln. (Throw),
45% Damage Scaling,
Hit Grab
|
0, 175 x6 (100)
|
(2.5%), 5%, 0% x6
|
Stagger (+19 / +34 CH) OR +4
|
-37
|
|
| Startup
|
Active
|
Recovery
|
Hit Stun
|
Block Stun
|
Hit Stop
|
Super Hit Stop
|
| 25
|
3
|
58
|
N/A, 48
|
24
|
N/A, 0 (11 on block)
|
N/A
|
|
|
|
- An overhead hit grab which has a lengthy animation and staggers on hit. Invulnerable to throws and scales the combo to 45%.
- A 2MP can always be linked afterwards, regardless if the opponent shakes the stagger.
- Can't be selected as an assist.
- Only advances the damage scaling one hit for the entire move (propery of grabs).
- The first armored frame in the frame data graph is from the first frame of run needed to execute this run follow-up.
|
|
|
Supers
Toggle Hitboxes Toggle Hitboxes
|
Diamond Dynamo
Level 1
|
 + +  + + 
|
|
| Guard
|
Properties
|
Damage
|
Meter
|
On Hit
|
On Block
|
On Pushblock
|
| Mid
|
Invuln. (Full)
|
300 x8, 2100 (80 x8, 200)
|
-100%
|
Ground Bounce
|
-34
|
|
| Startup
|
Active
|
Recovery
|
Hit Stun
|
Block Stun
|
Hit Stop
|
Super Hit Stop
|
| 6 + 6
|
14, 14, 14, 14, 14, 14, 14, 11, (13), 6
|
54
|
30 x8, 22
|
33 x8, 25
|
3 x8, 17
|
7
|
|
|
|
- A reversal super with a good hitbox, and also used in combos from her command grabs.
- Combo: OTG 2LK (corner). Some midscreen options are available, see the Combos page for more information.
- The first hit will not hit as crossup if the opponent is not in hitstun.
- The first three hits will prevent dead opponents from becoming invulnerable once they reach a wall, to prevent a situation where Dynamo is punishable by the incoming character on hit.
- There is a larger-than-normal buffer for attacks after Dynamo:
- 0f buffer for normal throws
- 5f buffer for normals and held instant Tumbling Run followups
- 6f buffer for supers, empty Tumbling Run, snaps, and other specials
- 9f buffer for assist calls
- On hit, dash inputs are disabled for 13f after recovery.
|
|
|
"Here we go! Get ready for a showstopper!" Toggle Hitboxes Toggle Hitboxes
|
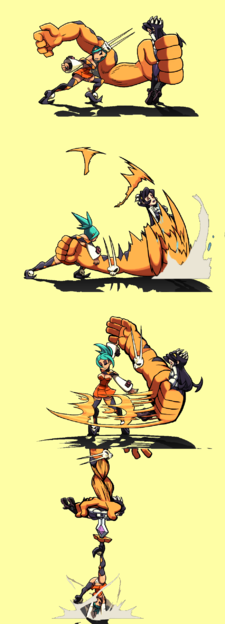
Ultimate Showstopper
Level 1
|
 + +  + + 
|
|
|
|
- A fully invulnerable command grab that cannot be jumped after the flash (0f startup after the flash, 1f of super flash hitstop).
- As a DHC, it has an additional 1f of post-flash startup and removes all hitstop on the opponent, making it always jumpable.
- Can cancel into Devil Horns (623MP) before the final hit, granting a follow up combo. If it starts a combo and is cancelled into Devil Horns, both the Devil Horns and the chain after will be Stage 2 (ie. doesn't build undizzy, not tracked by IPS). This conversion can do more damage than the final hit would have without spending more meter (albeit at the cost of undizzy). See the Combos page for more information.
- Can DHC after the final, damaging hit.
|
|
|
"A girl's best friend!" Toggle Hitboxes Toggle Hitboxes
|
Diamonds Are Forever
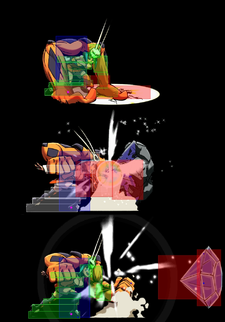
Level 3
|
 + +  + + 
|
|
| Guard
|
Properties
|
Damage
|
Meter
|
On Hit
|
On Block
|
On Pushblock
|
| Low (1st hit), Mid
|
Hyper Armor,
45% Minimum Scaling,
Projectile
|
0, 2400, 2800 (0, 600, 400)
|
-300%
|
Wall Bounce
|
+14
|
|
| Startup
|
Active
|
Recovery
|
Hit Stun
|
Block Stun
|
Hit Stop
|
Super Hit Stop
|
| 28
|
5, (29 + 0), 5, (8), --
|
35
|
35, 30, 25
|
38, 33, 28
|
15, 8, 20
|
5
|
|
|
|
- A two part super with the entire duration protected by hyper armor, which can be hit any number of times without breaking and cannot be swept.
- The first part, before the flash, has extremely slow startup, hits low, and does no damage. This part of the attack can't hit airborne opponents.
- The second part is after the flash where Cerebella punches (2400 damage) and hurls a diamond forward (2800 damage). The punch will only hit up close.
- The diamond will pass through and destroy all oncoming enemy projectiles and cause a wall bounce on hit.
- Combo: (wait for wall bounce) dash > OTG 2LK (midscreen). Corner: see the Combos page.
- Up close the attack is very safe, but the opponent can challenge a follow up from Cerebella with a PBGC.
- If used as a DHC, the move has an additional 1f of start up after the flash.
|
|
|
Taunt
"Come on, babe..."
|
|
| Guard
|
Properties
|
Damage
|
Meter
|
On Hit
|
On Block
|
On Pushblock
|
| N/A
|
-
|
N/A
|
0%
|
N/A
|
N/A
|
|
| Startup
|
Active
|
Recovery
|
Hit Stun
|
Block Stun
|
Hit Stop
|
Super Hit Stop
|
| N/A
|
N/A
|
81
|
N/A
|
N/A
|
N/A
|
N/A
|
|
|
|
- Increases the chance of Scribble Cat appearing after a successful Lock N' Load to 25%.
|
|
|
"Adieu!"
|
| Assist Taunt
|
Automatically done after an assist move
|
|
| Guard
|
Properties
|
Damage
|
Meter
|
On Hit
|
On Block
|
On Pushblock
|
| Mid
|
-
|
N/A
|
0%
|
N/A
|
N/A
|
|
| Startup
|
Active
|
Recovery
|
Hit Stun
|
Block Stun
|
Hit Stop
|
Super Hit Stop
|
| N/A
|
N/A
|
36
|
N/A
|
N/A
|
N/A
|
N/A
|
|
|
|
- Amount of time it takes for the character to turn invulnerable after they finish performing their assist action.
- Longer recovery → more time to punish the assist.
|
|
|
Colors
Intro Poses
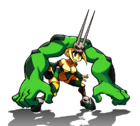
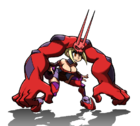
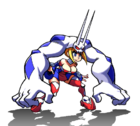
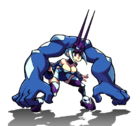
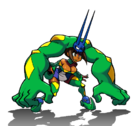
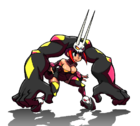
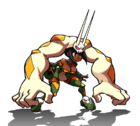
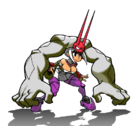
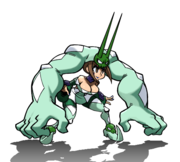
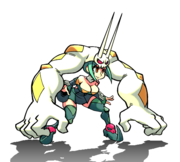
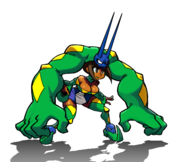
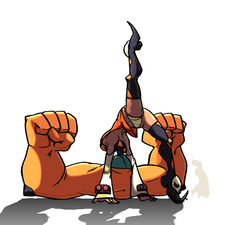
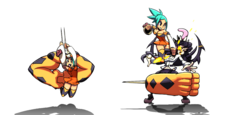
Cerebella has 3 different intro poses that can be selected by holding a light, medium or heavy button during the loading screen before a match.

|
Intro pose 1:
Hold  OR OR 
Cerebella flexes her arms.
Perfection!
Rock it!
|

|
Intro pose 2:
Hold  OR OR 
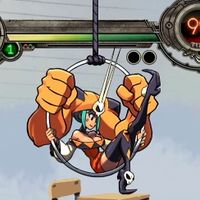
Cerebella is lifted in from an aerial hoop and then does a one legged pose.
They want more!
Magnifique!
Teehee!
|

|
Intro pose 3:
Hold  OR OR 
Cerebella spins her hat and then puts it on and does a "Praise the Sun!" pose.
Now for the main attraction!
Hang on to your hat!
|
Notable Players
This is absolutely not a conclusive list! Bella is a popular character, and there are a lot of strong players in every region. If you'd like to be included on the list, please reach out to the wiki maintainers.
| Name (English/Japanese) |
Color
|
Location |
Team |
Contact |
Status |
Notes |
Example Play
|
| ShakyFingers |

|
AR, USA |
Saw/ H-Train/ H LNL |
@ShakeyFingers |
Active |
PSN's premier Bella player, owner of arcane knowledge. Optimal combos and absurd setups. |
Link
|
| Mocktopus |

|
FL, USA |
H LNL/ M Extend |
- |
Active(?) |
Old SG player. Plays fortune point now I think(?) |
Link
|
| Dekillsage |

|
NY, USA |
H Hairball/ Copter/ H Brass |
- |
Active |
Bombos. |
Link
|
| SwiftfoxDash |

|
TX, USA |
L George/ H LNL |
- |
Active |
Rocking Pea/Bella since the long ago, consistent top 8 placements and a very strong player. |
Link
|
| Cloudking |

|
NJ, USA |
H Bypass/ Excella/ H Bomber |
@cloudking211 |
Active |
Consistent top 8 presence, strongest Val/Bella/Double player. |
Link
|
| SeaJay |

|
NSW, Australia |
H Bypass/ Excella/ M Extend |
Twitter: @SeaJay4444
Discord: SeaJay#4444 |
Active |
Intermediate OCE Bella player. Battlebutt+assist addict.
Has a youtube channel with lots of Bella tech. |
Link
|
| Caio Lugon |

|
Brazil |
M Fibber / Cerecopter / Pillar |
@Caio_Lugon |
Active |
Farofa |
Link
|
NOTE: These tables are still WIP, mostly the notes/descriptions. - Seen
External Links
When browsing Skullheart, keep in mind it was most active when the game was on an older patch.
| General
|
|
| Characters
|
|
|
|
|
| Mechanics
|
|
| Other
|
|
