Wonderful World/Aiwhen: Difference between revisions
(Fixed level 1 headers) |
No edit summary |
||
| Line 367: | Line 367: | ||
[[Category:Wonderful World]] | [[Category:Wonderful World]] | ||
== Colors == | |||
Revision as of 14:18, 3 October 2022
Background
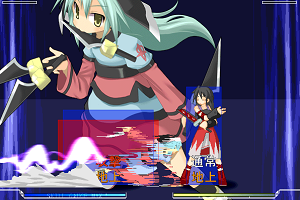
Aiwhen is the youngest hunter belonging to the special troops "Magoku" of the Berga country. Her father died of illness while attaining a sense of mind, & she does not have much memory. When Aiwhen was young, her mother and sister were killed by a demon in front of her and she had a very strong grudge. She does not know how to live by herself rather than saying she is a Demon Hunter for the sake of an enemy, Aiwhen has a clause that just clears up resentment for the time being. Aiwhen is a dangerous daughter who when seeing a demon, it is a danger who is unnecessary and slashed with no questions, and even she is coming home with a lot of bruises. Still the ability is still developing, and she's always worried about her colleague Lynia. She tends to avoid being deeply in touch with people. Aiwhen thinks that the Knight Orders and Bounty Hunters are incompetent, she sees no particular reason to burn a sense of opposition beyond necessity, she tries to be a friend to those younger than her, but it results to her losing in a childish manner. Aiwhen admires well for adult women.
Game Play
Aiwhen has amazing mobility and is able to relentlessly attack without too much fear of retaliation. Good balance of skills, but because of very low life a single mistake could leave you hurting. Her single hits are small damage so she needs to rely on long combos which will both build her a lot of Skill Gauge as well as build the opponent as lot of Counter Gauge.
Aiwhen is recommended for players who like mixing opponents up in vortex hell or die trying.
Character Specific Data
Total Life - 540
Combo Hits Before Damage Reduction -
Move List
Strategy
As Aiwhen, you want to get in with your really good buttons, and try to force a knockdown to run your oppressive mixup game.
Neutral Game
Aiwhen's neutral is very good, she has a great jump-in (j.S), good horizontal range, three jumps, two airdashes and a fast run speed followed by a good low (2K). Against opponents who use slower/riskier options, you can use 4/6O to teleport to a more desireable spot, and in the air you can use the O button to instantly teleport to the ground.
Pressuring
Combos
Aiwhen's combo game is very important because youre essentially tickling the opponent to death. tk.236S combos are key to her higher damage combos, but they can be hard to master. Her air combos go by this format: • Loop j.K and j.S, end with j.HS and double jump, repeat, then end with j.214S • You can do a triple jump to extend the air combo a bit more, and deal more damage, but this will result in the opponent airteching before they hit the ground, even after j.214S.
BnBs
Meterless, Anywhere: xx > 236P/K/S
- Basic BnB; use P and K for mixups or 236S for oki. You can also replace 236P with 5/6O.
50% meter, Anywhere: xx > 623HS > 22O > j.S j.HS > dj. > j.S j.HS j.S j.HS > j.214S
- Basic 50% meter combo for when you are too new or lazy to go into tk.236S loops.
50%-100% Meter, Anywhere: xx > 236S BRK/214214S > 5S 5HS > [tk.236S > 2P 5HS]xN > air combo > j.214S
- Aiwhen's TK loop and her most important BnB. If you have the meter for it, you can use 214214S as your launcher instead of 236S BRK, as it will allow you to build meter during your combo (25%~).
- For the number of repetitions of the TK loop you can do, it varies upon the character. On some such as Ryuza, you can get up to 5, while smaller characters such as Semnia you can only do 3 (average is 4 on most of the cast).
50% Meter, Anywhere: tk.214S > BRK > [2P 5HS tk.236S]xN > air combo > j.214S
- Instant overhead combo into tk.236S loops.
100% Meter, Anywhere tk.j.S > j.214214S > (dash) > [2P 5HS tk.236S]xN > air combo > j.214S
- Instant overhead j.S into high damage.
Meterless, Anywhere 6HS overhead > 236P > 5S > tk.236S > [2P 5HS tk.236S]xN > air combo > j.214S
Meterless, Corner: xx > 236P > (2P > xx > 236P)x2(?) > xx > 236P/K/S
- Situational 236P loop only achievable in the corner.
Confirms
Meterless, Anywhere [(CH or low to the ground)(j.)236S > 2S 5HS] / 6HS > [TK236S > 2P/S 5HS]xN > [Airchain]xN
- Meterless confirm into TK loop that works on most of the cast.
+100% Meter, Anywhere ... > Aircombo > j214214S > 5P/2S 5HS > Aircombo/TK loop
- Super extender. With combos that have fewer hits, going into the TK loop is possible.
+100% Meter, Anywhere OTG xx > 2146HS
- OTG confirm into super, for tacking on extra damage.
OTG's
j[xx]x2>214s, 236s, and any grabs will all put the opponent on knockdown. With Aiwhen OTG'ing should not be though of for extra damage but rather be used to get extra meter or force the opponent to perform a recovery and give you an extra chance to punish with another air combo. Aiwhen will not do much damage aside from a 100% meter OTG. With Aiwhen you can do a varied amount of OTG strings but not all of them are in favor for Aiwhen.
OTG #1 Meterless Anywhere
Dash -> 2K -> 5S -> 5HS
This is the most basic setup so that all characters will be above Aiwhen when the opponent recovers. This can lead to an extra punish if done right or force the opponent to chicken block which puts you in control to keep another blockstring going or even perform a DP.
OTG #2 100% Meter Anywhere
Dash -> 2K -> 5S -> 5HS -> 2146HS
This is the OTG in which Aiwhen can do a surprising amount of damage. While it is always better to save meter for a TK loop combo or 100% loop combo, this OTG is still very useful to memorize if you feel you need that extra bit of damage to finish off the match or you just have extra meter to spare. Also note that this will put the opponent back into otg so you can redo another chain or let them wakeup.
OTG #3 Meterless Anywhere*
Dash -> 2K -> 5S -> 5HS -> 236S
Dash -> 2K -> 5HS -> 236S
This one is also a little helpful for pulling that extra bit of damage and giving you a little more meter. It will also change the position you are facing so it can help with constantly changing direction against an opponent which can lead to many things to do.
- (This one is dependent on character size. Smaller character such as Aiwhen, Sasari, Lunathia, Lemius, Orphe, Cielo will have the 236S whiff so you are restricted to the second OTG in this case.)
OTG #4 Meterless Anywhere
Dash -> 2K -> 5HS -> 236P
Dash -> 2K -> 5HS -> 236K
This one will teleport you either behind or forward depending on which version you do. This will give you advantage's in setups when the opponent recovers in midair.
OTG #5 50% Meterless Anywhere*
Dash -> 2K -> 5S -> 5HS -> 236S (BRK) -> 5K -> 5HS -> jP -> jK -> jS -> jHS -> 214S
This one is a bit tricky. This is also only going to work on characters that are not small (see OTG #3). This combo is honestly not worth it at all unless you need that extra tick of damage to win because this will not give you much extra damage despite it being a longer chain then everything on here. It also has the hardest timing because you cannot be late on any of the followups after the break or the opponent can recover and go back into a neutral game. Use rarely but it is still handy to know about this combo.
- Currently having a weird glitch where performing the break on the corner right side as player 1 will Aiwhen still on the left side even after the break, which will not allow you to perform the OTG so be careful of that.
Post OTG Game
For post OTG, you are left with lots of options with Aiwhen. If you do any of the OTG's (aside from OTG #2) the opponent will have the ability to recover in the air which will work in your favor if you pressure them right or punish them also. The best option is to keep some form of pressure up, but be wary of the characters that have reversal DP's. You are at an advantage with most characters and are always able to keep a constant stream of pressure so do not be afraid to put pressure on.
Okizeme
Aiwhen wants to use all her tools in a creative or unpredictable manner to keep from getting blocked or jumped out of.
tk.214S is an instant overhead that causes hard knockdown, using your 236P/K projectiles can cause easy resets mid ground string, 22O is basically an unblockable for how unpredictable it is. Her teleports are really useful for resets as well, and you can jump over them on knockdown and press j.O for an easy left/right mixup that if done correctly can even fool you sometimes. j.S is another instant overhead that can combo into j.214214S into loops for relatively high damage. You can cross opponents up in the corner with 6O, 236P, and 22O as well.
Match-ups
Chartette: The most polarizing/depressing matchup you will ever play in your life. Chartette can end your life in one hit while you're there constantly doing 20 tk loops and teleporting left right and diagonally. In all seriousness, this matchup is not bad, and arguably in Aiwhen's favor which is saying a lot when you consider Chartette's matchup spread. Using teleports to punish her is a good idea, since almost every button she presses on the ground is pretty slow and leaves her vulnerable, and your air mobility can help you jump over her 236HS rock slam, and help you punish any bad neutral attempt coming from the Chartette. Be very careful not to get touched, as Aiwhen's abysmal defense values really shine in this matchup.
Move Details
Special Skills
Whirlwind - Aiwhen's Special Skill causes her to teleport via the use of the O button. Her teleport has various uses, from doing mixups to escaping pressure and dodging attacks. You can cancel most of her normals on hit or block into it as well. When using it, be careful as it does have a bit of startup and recovery, so you can get punished for abusing it. 5O teleports in place, 4/6O teleport forward and back, and j.O serves as a fastfall, teleporting Aiwhen to the ground.
Specials
| Rapid Edge - (j.)236S [ BRK ] | |||
| Aiwhen does a quick dash forward, slashing the opponent for knockdown, a staple in her BnBs. Can be useful in neutral, but don't be reckless with it since you can be hit out of it pretty easily. | |||
| Solar Maiden - 623S/HS [ BRK, Air Unblockable(HS version only) ] | |||
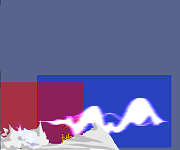
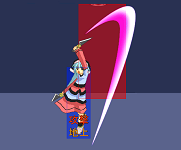
| Aiwhen's DP. S version does one slash and is airblockable, not sure why you would use this in comparison to HS version. HS version does two slashes and is air unblockable. It is also BRK-able to make it safe or combo after it. Works as a reversal, has good vertical reach. | |||
| Tempest Honeymoon - 236P/K | |||
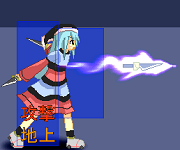
| Aiwhen throws one of her daggers out horizontally. On hit or block, Aiwhen will teleport to the opponent. P version teleports behind the opponent, K version teleports above and in front of them. Do not whiff this move as it has terrible recovery; you won't recover until the dagger is off the stage itself and are left in a counterhit state until then. Best to only use it in blockstrings for mixups. Also, be wary when using P version in the corner and it lands on block; you can be thrown out of its recovery. With K version, be wary of anti-airs. Another thing to note is that this can also hit projectiles and take effect, teleporting still relevant to the opponent's location. | |||
|
|
Pure Dream - j.214S [ BRK ] | ||
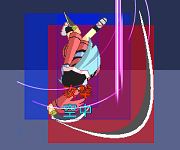
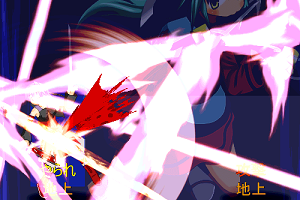
| Aiwhen does a flurry of spinning slashes in the air. When TK'd, it's an instant overhead into knockdown, or can be BRK'd into a combo of your choice if you've got the meter to spend. In aircombos, the opponent can tech if you do this move from three jumps high. |
Finishing Moves
| Fairy Dance - 2146HS [ BRK ] | |
| Autocombo super that hits about half-screen forward. Will work if it hits an OTG'd opponent. Final hit does a set amount of damage. Can be BRK'd to followup with a combo. | |
| Beautiful Delete - (j.)214214S | |
| Hits the whole screen. Can be comboed after. |
Command Normals
| Just Break - 6HS [ <property1>, <property2> ] | |
| <description> |
Normals
| 5P [ <property1>, <property2> ] | |
| <description> | |
| 2P [ <property1>, <property2> ] <notation> > <cancelsintothis>, <andthis...> | |
| <description> | |
| 5K [ <property1>, <property2> ] | |
| <description> | |
| 2K [ <property1>, <property2> ] | |
| <description> | |
| cl.5S [ <property1>, <property2> ] | |
| <description> | |
| f.5S [ <property1>, <property2> ] | |
| <description> | |
| 2S [ <property1>, <property2> ] | |
| <description> | |
| 5HS [ <property1>, <property2> ] | |
| <description> | |
| 2HS [ <property1>, <property2> ] | |
| <description> |
Air Normals
| j.P [ <property1>, <property2> ] | |
| <description> | |
| j.K [ <property1>, <property2> ] <notation> > <cancelsintothis>, <andthis...> | |
| <description> | |
| j.S [ <property1>, <property2> ] | |
| <description> | |
| j.HS [ <property1>, <property2> ] | |
| <description> |
Frame Data
Normals
| Move | Startup | Duration | Recovery | Total | Attack Level | Grounded Frame Advantage | Aerial Frame Advantage |
|---|---|---|---|---|---|---|---|
| 5P | _ | _ | _ | _ | _ | _ | _ |
| 5K | _ | _ | _ | _ | _ | _ | _ |
| cl.5S | _ | _ | _ | _ | _ | _ | _ |
| f.5S | _ | _ | _ | _ | _ | _ | _ |
| 5HS | _ | _ | _ | _ | _ | _ | _ |
| 2P | _ | _ | _ | _ | _ | _ | _ |
| 2K | _ | _ | _ | _ | _ | _ | _ |
| 2S | _ | _ | _ | _ | _ | _ | _ |
| 2HS | _ | _ | _ | _ | _ | _ | _ |
| j.P | _ | _ | _ | _ | _ | _ | _ |
| j.K | _ | _ | _ | _ | _ | _ | _ |
| j.S | _ | _ | _ | _ | _ | _ | _ |
| j.HS | _ | _ | _ | _ | _ | _ | _ |
| 6HS | _ | _ | _ | _ | _ | _ | _ |
Specials
| Move | Startup | Duration | Recovery | Total | Attack Level | Grounded Frame Advantage | Aerial Frame Advantage |
|---|---|---|---|---|---|---|---|
| <special1> | _ | _ | _ | _ | _ | _ | _ |
| <special2> | _ | _ | _ | _ | _ | _ | _ |
Finishing Skills
| Move | Startup | Duration | Recovery | Total | Attack Level | Grounded Frame Advantage | Aerial Frame Advantage |
|---|---|---|---|---|---|---|---|
| <super1> | _ | _ | _ | _ | _ | _ | _ |
| <super2> | _ | _ | _ | _ | _ | _ | _ |
Notes
- *1: <note1>
- *2: <note2>
