Eternal Fighter Zero/Akiko Minase: Difference between revisions
(→Basic Combos: Formatting) |
(→Advanced Combos: Formatting) |
||
| Line 1,117: | Line 1,117: | ||
::*Basic corner knife loop with BIC. If you find 5BBC tricky, replace with 5ABC. | ::*Basic corner knife loop with BIC. If you find 5BBC tricky, replace with 5ABC. | ||
=== | ===Advanced Combos=== | ||
:Advanced Combo replays can be found [https://mega.nz/#!gN90nK6J!e-tnRtS4Lcz6Swppp_OWVfSE-Xte6gZ9UiZAXbOw1rk here]. | :Advanced Combo replays can be found [https://mega.nz/#!gN90nK6J!e-tnRtS4Lcz6Swppp_OWVfSE-Xte6gZ9UiZAXbOw1rk here]. | ||
Revision as of 08:19, 23 June 2024

Introduction
Minase Akiko (水瀬 秋子) excels when she is in the air – she has access to two air dashes, a forward ground dash that places her airborne and some of the best air normals in the game. Her jB is especially potent in combination with her hoverdash, as it is fast, stays active for a very long time, and hits up to 5 times. She can freely control the number of hits it does by choosing when to cancel it into her jC, if at all, which allows her to cancel jB to land earlier. As if the variable number of high hits wasn’t hard enough to block, she can also spray the opponent with her fire extinguisher, which drains RF meter, and makes it harder to see the following mixup. Add in the ability to corner cross up, slow down time, and dish out tons of damage, and you get a character with huge momentum swings off of single touch in neutral. Her main weakness lies in her near-nonexistent ground game, poor defense, and the precision and practice it takes to best convert off her hits.
Akiko is a supporting character of Kanon, a visual novel produced by Key in 1999. She is the housewife of the Minase home, and is both Nayuki's mother and Yuiichi's aunt. She has a very understanding and compassionate nature, and is always been there for Nayuki while she was growing up. During Kanon, Akiko is quick to accept the various supernatural events that may take place concerning Yuiichi, and supports him as family during the difficult times.
Akiko was added to EFZ's cast in Memorial Edition.
Stage: In Front of the Minase House (Night) (水瀬家前(夜))
BGM: Last regrets
Character-Specific Notes
- Akiko can airdash twice.
- Akiko's ground dash is actually a hoverdash that moves up at around a 30 degree angle. Her "dashing" attacks will be air normals. Her hoverdash does not count as an airdash, so she is free to jump or double airdash from her "ground" dash.
- Akiko briefly disappears during her hoverdash and backdash, allowing her to pass through opponents while being invisible and invincible. Akiko is invincible during frames 6-13.66 of her backdash, and from frame 7 to between frames 16 to 29.66 during her hoverdash, depending on how long it's held.
- If Akiko manages to curse her opponent with her "No more mischief, okay?" super, the opponent will have a pale blue aura, and a "Time" gauge will appear under Akiko's life gauge. This time gauge displays the amount of time remaining on the curse. While the opponent is cursed, they will be unable to perform certain actions determined by the level of the curse.
Normal Moves
| Frame Data Help | |
|---|---|
| The notation for the move lists can be found under Controls. | |
| Cells filled with a "-" indicate a placeholder. Cells filled by a "/" indicate a non-applicable field. | |
| Values separated by a "~" (X~Y) indicate a range or variance. A "~" preceding a single value (~X) may indicate approximation. A "-" separating frame values of a property (X-Y) indicate the duration of the property. | |
| Cell data accompanied by a ※ indicate properties unusual to the template. Explanations for such properties can be found at another ※ in the description. If a move requires multiple ※'s, subscripts will be attached to indicate relation (※1, ※2, ※3...). | |
| Frame data with decimal values .33 or .66 relate to subframes. | |
| Version | Used for moves with multiple special attacks on one motion. |
| Damage | The base damage value that the specific hit will do. See damage scaling for more information. |
| Proration | Base value Power% reduces by per hit. |
| Juggle | Juggle value used to determine juggle time after a move hits an aerial or juggle state opponent. |
| Guard | Indicates how the move must be blocked, if it can be blocked at all.
Low: Crouch Block |
| Property | Shows what properties the move has and the time (in frames) that these properties are active. Example: "I: 0.33-9", which means the move is invulnerable on the first subframe of the move until the 9th full frame (or 27th subframe).
I: Full Invincibility |
| Startup | Indicates where the move's first active hitbox is. |
| Active | Total frames the hitbox is active for. |
| Recovery | Total frames until the character can block. Note: After the recovery of any action, before any other action may occur, there exists 1 frame in which the only action you may take is to block. |
| Adv Hit | Frame advantage on hit. |
| Adv Block | Frame advantage on block. |
| Cancel | Possible cancel options.
N: Normals |
Standing
5A
5A  |
|---|
c5B
c5B  |
|---|
f5B
f5B  |
|---|


5C
5C   |
|---|
Crouching
2A
2A  |
|---|
2B
2B  |
|---|
2C
2C  |
|---|
Jumping
j5A
j5A  |
|---|
j5B
j5B  Hits 1-4 Hits 1-4  Hit 5 Hit 5
|
|---|
j5C
j5C  |
|---|
Throws
Ground Throw
Ground Throw Close 6C/4C  |
|---|
Air Throw
Air Throw Close j6C  |
|---|
Special Moves
Specials
236*
An ingredient's freshness is important 食材は鮮度が大事ですよ 236*  236A 236A  236B 236B
|
|---|
623*
Let's quickly finish preparing 仕込みは素早く済ませましょう 623*   Final hit Final hit
|
Akiko leaps into the air with her kitchen knife outstretched. All versions are rekkas with the ability to score "clean" final hits which do more damage and prevent the opponent from being able to tech. The precise logic for clean hits can be found here. |
|---|
214*
Please remain calm at this time どんな時も慌てない事ですよ 214*  |
|---|
41236*
Taking care of the cleaning 掃除はこまめに 41236*    |
|---|
Eternity Specials
236236*
Planning for the worst 失敗は次に活かしましょう 236236*  236236A 236236A  236236B 236236B  236236C 236236C
|
Akiko uses her super human strength to swing a vehicle over her head and onto the opponent. |
|---|
641236*
This is the secret of 1-second approval これが了承一秒の秘訣です 641236*  AKA Timeslow AKA Timeslow
|
Akiko poses, then slows down time for everything other than herself. While this effect is active, Akiko's opponent moves and acts at a third of the speed they normally do, while also spending triple the time in hitstun and blockstun. Other entities such as puppets or projectiles (even Akiko's) are also affected, but installs/debuffs will still drain at their usual rate. The effect will continue to tick during superflash/hitstop and will instantly end if Akiko is hit. |
|---|
214214*
No more mischief, okay? 悪戯は駄目ですよ? 214214*  |
Akiko points her finger a short distance away from her. If the opponent is hit, they will be knocked down about half screen away and become cursed for 333.33 frames (~5 seconds). The effects of the curse depend on the version used. Curse timer still ticks during superflash/hitstop. |
|---|
Final Memory
FM
There is also some that isn't sweet 甘くないのも有りますよ 2 A 2 B C   |
|---|
Strategy
Movement
- Movement is key to Akiko's gameplan. She will be spending the majority of her time airborne, weaving in and out of range in neutral, trying to catch her opponent off guard or doing something risky. She has access to an extendable rising dash which causes her to disappear and become completely invulnerable, making it difficult for the opponent to properly anti air any rising dash approaches. While airborne, she has access to two air dashes and one air jump. It's important to note that after Akiko has used an air dash she becomes incapable of using her air jump. Mixing these movement options with her superior air normals makes her a menace to deal with.
Normals & Specials in Neutral
Grounded
- Akiko's grounded arsenal is rather lacking. Her most useful neutral grounded normal is f5B which has an impressive hitbox that can be useful for anti airs, but it has the downside of being air blockable. You'll mostly be focusing on using 236A/B and 214B when grounded, making use of f5B sparingly to try and catch aerial opponents.

- 236A/B works in cycles. You will always start the match on {1}, and any use of 236A or 236B will move you forward to {2}. In practice, this means you can completely avoid using the less than useful projectiles in 236B's cycle by doing [236B{1} 236B{2} 236A{3}] or [236A{1} 236B{2} 236A{3}]. 236B{2} is your most useful projectile to FIC. You'll mostly want to avoid using 236B{3}, and all cycles of 236A are usable.
- 214B isn't just an okizeme tool, you can also sneak it out in neutral to keep your opponent on their toes. 214B moves forward slowly and can be useful to slowly chip away at the BIC of an overly patient foe. 214C is also incredible for this due to it's speed and RF meter drain on hit.
Aerial
- jB is just incredible. 8 total active frames for the broom twirl, and after a gap, 2F for the final hit. In neutral, this move can be used as a surprisingly hard to deal with wall when doing j8 jB, making sure to time the jB closer to the ground so you're able to cancel the recovery upon landing. Doing this only becomes potent when you're making full use of her aerial mobility to keep your opponent guessing.
- jC is huge, both for the hitbox and the way it extends Akiko's hurtbox. It also easily leads into juggles if you catch an opponent airborne. j7 dj9 djC can be an incredible hassle tool if spaced properly and with caution. For hassling, you're aiming to hit nearer the tip in order to make anti airs and RG punishes harder. Certain characters like Kaori, Mishio and Ayu have absolutely no problem anti airing this, so be careful how you use it in those matchups. Overall, use jC approaches with caution.
Wait, that's it?!
- Pretty much. Akiko's tool set is by far the most predictable in the game. She has to make up for it by abusing her movement options, surprising her opponent, properly baiting anti airs and reversals, and above all making every stray hit count. Once Akiko gets that stray hit, she can more often than not convert into large damage and unseeable, looping okizeme.
Taking Initiative in Neutral
- Most of the time in matches you'll be zoning with projectiles and poking with jC, taking time to build meter and fishing for stray hits in neutral. You will want to sprinkle in some surprise approaches to keep your opponent on their toes, however. Taking initiative and attempting to approach your opponent can be tough, but she definitely has the tools to make it work.
- The key groundwork for this is keeping your opponent guessing when you'll use your movement options. [j66 j44], [j7 j9 .. j44], [66 j7], [66 j44] are all examples of neutral movement that can be used to keep your opponent guessing when you'll actually approach. There are plenty more variations on this, and all Akiko players are encouraged to become familiar with all of her movement options, what positions they place her in, and what approach options she has access to from them. Watching match videos of high level Akiko players is helpful for learning her options.
- Keep track of your 236A/B cycles and make use of 236A/B FIC to create approach opportunities. This is by far Akiko's most reliable way to approach.
- Neutral time-slow activation can also be powerful. The higher the level the better, but it does have diminishing returns. Level 2 is ideal but expensive, level 1 can be too short, and level 3 is slightly too long and very expensive. Level 1 is still useful however, and level 3 is really only useful when the match is almost over and your opponent has very little health left. Upon neutral level 3 time slow activation, the opponent will usually just double jump due to Akiko's lack of juggle combos during time slow, especially on an opponent high in the air.
Patience
- Patience is your best friend. The more time Akiko is left in neutral, the scarier she becomes, allowing her to whiff normals to build super meter and passively build RF meter. The more desperate your opponent is to stop this from happening, the more risks they will take. The more risks your opponent takes, the more opportunities you have to punish them for taking them! Akiko strives off this, getting ridiculous damage from strange starters in neutral leading into her looping okizeme.
Combos, Meter, and Snowballing Momentum
- Akiko's main strengths lies in how easily she's able to convert from stray hits into huge damage, meter gain and oki. Her combos are very long, made even longer by the double vacuum ender after knife loops in the corner. Building a large chunk of super and RF meter back is why she snowballs so easily, especially when she's already got 2+ super stocks built, giving her access to looping time slow okizeme. Once she has ample meter built, Akiko can take more risks, as all she really needs is one knockdown for an opportunity to end the round, even if she has no BIC.
- In the RF meter meta game, Akiko has a clear advantage over the rest of the cast.
- The combo options she has access to from any RF meter level work anywhere, deal a lot of damage, and build RF meter back in time for hitconfirms or pressure after okizeme.
- Akiko does not rely on IC for her offensive gameplan and is more than happy to sit on Blue RF in neutral and fish for hits, as all she needs is one hit into a knockdown to start running her oppressive okizeme game. In this way, she does not feel the strategical downsides of having Blue RF in stock in the same way other characters might.
- Thanks to combo flexibility and how her juggle combo pieces function, she does not rely on full Blue RF for her Blue IC combos, allowing her to take more risky trades in neutral with jC without fearing the lost Blue RF.
- 214* gives Akiko the unique ability to control the enemy's RF meter generation, although this can be a double edged sword. There are points where it may be better to let the opponent build Blue RF. If the opponent is close to Blue RF and Akiko uses 214A/B, all she might be doing is helping the enemy delay generating Blue RF for the right hitconfirm. It can sometimes be better to back off, let their meter build to maximum, and then start playing around it, making use of 214* to slowly chip away at their RF meter levels.
- All of these factors lead to some particular advantages.
- Akiko has a lot more to gain in neutral when both characters are on Blue RF. She can chip away at the RF meter with 214B while playing runaway. She can fish for hits in ways Akiko herself can convert from but the opponent will struggle to convert from if Akiko makes a mistake and gets hit. Any Blue IC combo Akiko does manage to connect guarantees the opponent's Blue RF will be fully drained.
Combos
- Akiko is capable of converting most hitconfirms into disgustingly large damage and okizeme, all the while building insane amounts of meter as she does it. Akiko players should be aiming to make the most out of any and all stray air hits they connect with and convert into corner carries and looping okizeme.
| Notation Help | |
|---|---|
| Disclaimer: Combos are written by various contributors, some combo notations may deviate slightly from the notation listed below. For more information, see Controls | |
| IC | Input Instant Charge (22C) when you have the right amount of RF Meter. |
| FIC | Input Flicker Instant Charge (22C) when you have the right amount of RF Meter. |
| {X/Y/Z} | Move X or Y or Z can be used. |
| #* | Indicates that any of A, B and C may be used with #. Example: 214*. |
| [<- X] [-> X] | Side switch notation. All inputs grouped by the square brackets are performed facing the arrow's direction. They are still written as if they were done facing right, however. |
| [X]xN | Loop the inputs in the square brackets as many times as N. |
| c5B | Proximity normal only usable while close. |
| f5B | Proximity normal only usable outside of c5B range or when cancelled from another normal. Known as far 5B. |
| jX | Button X is input during your first jump. |
| djX | Button X is input during your double jump. |
| X(whiff) | Indicates that X is intended to whiff. |
| X(tech trap) | Indicates a combo ender intended to catch the opponent's air tech. The most common kind of tech trap is j6C, which will air throw early techs and jC later techs. Executionally identical to X(whiff) but different in purpose. |
| ~ | Indicates a followup for moves which have them. Example: 236A~236A. |
| .. | Indicates a short delay. |
| IAD | Indicates an Instant Air Dash. |
| IABD | Indicates an Instant Air Back Dash. |
| (X) | X move is omittable from the combo. |
| tk.X | Indicates the motion "X" is input immediately after leaving the ground. Stands for tiger knee. |
Regarding Knife Loops
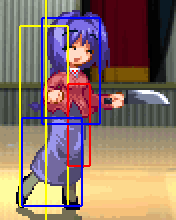 5C's higher damage hitbox.
- Akiko has two different hitboxes on her 5C. The inital hitbox (shown above) is much smaller but does 200 more damage than the later, larger hitbox. Ideally you want to hit with the smaller hitbox as much as you can, but it's not always possible due to spacing. For newer players, just being aware of this hitbox is enough - focus on completing knife loops even if you use the larger hitbox instead.
- Being aware of the power% of your combo is also important - below 62% 5BBC / 5ABC will no longer combo properly. Between 58% and 61.9%, c5B 5C or 5AC will work. If in doubt, go into 41236A early.
- Certain characters drop out of 5BBC and 5BC quite easily. It is sometimes safer to use 5ABC and 5AC when comboing these characters, especially at lower Power%. The following is a list of the problematic characters:
- Rumi, Nayuki (asleep), Sayuri, Doppel
Basic Combos
- Basic Combo replays can be found here.
Meterless
- Anywhere
- (jB/jC) 2ABC 623A wait until juggle meter almost gone 623A immediately 421A (replay1-1)
- (jB/jC) 2ABC 623A wait until juggle meter almost gone 623A immediately 421A (replay1-1)
- Does about 2450 damage and doesn't require IC or super. The timing written here for the 623A knife special is an approximation, but it should get you within the right timeframe for an "explosive" hit, also known as a clean hit. This combo can easily be linked from the jB or jC jumpins, which Akiko should already be using often.
Red IC
- Anywhere
- (jB/jC) 2ABC 623C 623C 421C 623C 421C 623C (replay1-2)
- (jB/jC) 2ABC 623C 623C 421C 623C 421C 623C (replay1-2)
- Getting the higher damage clean hit is challenging. This rekka has two different clean hits, one dealing a lot more damage than the other.
- Corner
- 2AABC IC walk forward 5BBC walk forward 5BBC 41236A 41236A 214B (replay1-3)
- 2AABC IC walk forward 5BBC walk forward 5BBC 41236A 41236A 214B (replay1-3)
- If you find 5BBC too hard, you can use 5ABC instead.
- 66jB(5hits) walk forward 5B 2C IC walk forward [5BBC]x2 41236A 41236A 214B (replay1-4)
- 66jB(5hits) walk forward 5B 2C IC walk forward [5BBC]x2 41236A 41236A 214B (replay1-4)
- Replace 5BBC with 5ABC if you have trouble.
- 66jB(5hits) c5B 2C IC c5B .. 5C 5BBC c5B .. 5C 41236A 41236A 214B (replay1-5)
- 66jB(5hits) c5B 2C IC c5B .. 5C 5BBC c5B .. 5C 41236A 41236A 214B (replay1-5)
- The height management in this combo can be tricky. Learning this will teach you how to delay hits to manage height.
Blue IC
- Midscreen
- (jB/jC) 2ABC IC c5B jC(3hits) land jB(1hit) j66 jB(2hits) jC(whiff) land c5B jB(1hit) jC(2hits) j66 jB(5hits) land c5B 5C 5BBC 41236A 41236A 214B (replay1-6)
- (jB/jC) 2ABC IC c5B jC(3hits) land jB(1hit) j66 jB(2hits) jC(whiff) land c5B jB(1hit) jC(2hits) j66 jB(5hits) land c5B 5C 5BBC 41236A 41236A 214B (replay1-6)
- Corner to corner carry showing how Akiko is able to juggle from anywhere into knife loops. jC(whiff) can be used to cancel jB early, allowing you to land without dealing all 5 hits of jB.
- Corner
- (jB/jC) 2ABC IC walk forward 5BBC walk forward [5BBC]x3 41236A 41236A 214B (replay 1-7)
- (jB/jC) 2ABC IC walk forward 5BBC walk forward [5BBC]x3 41236A 41236A 214B (replay 1-7)
- Basic corner knife loop with BIC. If you find 5BBC tricky, replace with 5ABC.
Advanced Combos
- Advanced Combo replays can be found here.
Red IC
- Anywhere as long as there's plenty of space either side of the opponent
- 2AAB(C) 623C 623C 421C 623C 421C 623C (replay 1-4)
- 2AAB(C) 623C 623C 421C 623C 421C 623C (replay 1-4)
- Akiko's most important combo. Works from basically any starter. Second video shows how 2C will whiff at certain ranges, making it crucial to be able to know when it's safer to omit 2C and go into 623C early.
- Corner
- 66jB(1-4) land cancel 2ABC IC [5BBC]x2 41236A 41236A (replay 1-1)
- 66jB(1-4) land cancel 2ABC IC [5BBC]x2 41236A 41236A (replay 1-1)
- 66jB(5hits) walk forward c5B 5C 5BBC c5B 5C 41236A 41236A (replay 1-2)
- 66jB(5hits) walk forward c5B 5C 5BBC c5B 5C 41236A 41236A (replay 1-2)
- Only works if you land point blank after the jB. If you land too far away, just do the [5BBC]x2 post IC route.
- 2AABC IC [c5B f5B 5C]x2 41236A 41236A (replay 1-3)
- 2AABC IC [c5B f5B 5C]x2 41236A 41236A (replay 1-3)
Blue IC
- Anywhere
- 2AABC IC...
- 66B(5hits) c5B 2C IC...
- 66B(1-4hits) land cancel 2ABC IC...
- jC(1hit) 2ABC IC...
- jC(3hits) c5B 2C IC...
- 2AABC IC...
- ...c5B jC(3hits) djC(1hits) dj66 djB(1hit) djC (1hit) land jB(1hit) jC(3hits) land jB(1hit) jC(1hit) c5B 5C 5BBC c5B 5C 41236A 41236A (replay 1-5 and replay 1-6)
- ...c5B jC(3hits) djC(1hits) dj66 djB(1hit) djC (1hit) land jB(1hit) jC(3hits) land jB(1hit) jC(1hit) c5B 5C 5BBC c5B 5C 41236A 41236A (replay 1-5 and replay 1-6)
- All instances of c5B 2C after jump-ins can be replaced by 2ABC and the combo will still work, although it will be less damage. When you reach the corner, you will need to start to j8 instead of j9 or else the combo will likely drop.
- Doesn't work on Mayu, Ayu, Nayuki (asleep), Sayuri, Kano, and Unknown. Works but is unreliable on Makoto and Misuzu.
- 2AABC IC c5B j9 .. jC(2hits) land jC(3hits) .. djB(1hit) djC(1hit) land jB(1hit) jC(3hits) djB(1hit) djC(1hit) land c5B 5C 5BBC c5B 5C 41236A 41236A
- 2AABC IC c5B j9 .. jC(2hits) land jC(3hits) .. djB(1hit) djC(1hit) land jB(1hit) jC(3hits) djB(1hit) djC(1hit) land c5B 5C 5BBC c5B 5C 41236A 41236A
- Max damage corner carry for small body characters. While this combo is higher damage than the one listed just above, it appears to be unreliable on the standard sized or larger characters. More testing needed.
- jC(2hits) 5B 2C IC c5B jC(3hits) djC(1hits) dj66 djB(1hit) djC (1hit) land jB(1hit) jC(3hits) land jB(1hit) jC(1hit) c5B 5C [5BBC]x2 41236A 41236A (replay1-7)
- jC(2hits) 5B 2C IC c5B jC(3hits) djC(1hits) dj66 djB(1hit) djC (1hit) land jB(1hit) jC(3hits) land jB(1hit) jC(1hit) c5B 5C [5BBC]x2 41236A 41236A (replay1-7)
- Route specifically for the jC(2hits) starter.
- 2AABC IC c5B j9 .. jC(2hits) land jB(1hit) jC(2hits) land jB(1hit) jC(2hits) j66 jB(2hits) j66 jB(2hits) jC(whiff) land c5B 5C 5ABC 5BBC 41236A 41236A
- 2AABC IC c5B j9 .. jC(2hits) land jB(1hit) jC(2hits) land jB(1hit) jC(2hits) j66 jB(2hits) j66 jB(2hits) jC(whiff) land c5B 5C 5ABC 5BBC 41236A 41236A
- Alternate version of the above combos for use vs characters with tricky juggle hurtboxes, like Ayu and Kano.
- Corner
- 2AABC IC c5B j9 .. jC(2hits) 5C jC(3hits) djB(1hit) djC(2hit) djB(1hit) djB(1hit) c5B 5C 5BBC c5B 5C [41236A]x2
- 2AABC IC c5B j9 .. jC(2hits) 5C jC(3hits) djB(1hit) djC(2hit) djB(1hit) djB(1hit) c5B 5C 5BBC c5B 5C [41236A]x2
- Akiko's most reliable max damage combo. Works on the majority of the cast without adjustments. Doesn't work on Mizuka, Sayuri, Unknown, and Ayu. Unreliable on Nayuki (asleep).
- 2AABC IC c5B j8 jC(2hits) 5C j8 jC(3hits) djB(1hit) djC(2hits) djB(1hit) djC(1hit) c5B 5C 5BBC c5B 5C [41236A]x2
- 2AABC IC c5B j8 jC(2hits) 5C j8 jC(3hits) djB(1hit) djC(2hits) djB(1hit) djC(1hit) c5B 5C 5BBC c5B 5C [41236A]x2
- Practical max damage vs Mizuka, Ayu.
- 2AABC IC c5B j8 jC(2hits) 5C j8 jC(3hits) djB(1hit) djC(2hits) djB(1hit) djC(1hit) c5B 5C 5ABC c5B 5C [41236A]x2
- 2AABC IC c5B j8 jC(2hits) 5C j8 jC(3hits) djB(1hit) djC(2hits) djB(1hit) djC(1hit) c5B 5C 5ABC c5B 5C [41236A]x2
- Practical max damage vs Sayuri, Nayuki (asleep).
Okizeme
- Akiko has some powerful okizeme due to a few factors. Firstly, jB is 5 hits and the amount of hits can be adjusted freely by whiff cancelling into jC. Well timed jump-ins or IADs can also cause this effect without having to use jC cancels, using a "land cancel" instead. Akiko's fire extinguisher special (214A/B/C) obscures the screen where it is placed, making it even harder to block. Akiko's time-slow super, which slows down the opponent and leaves Akiko at normal speeds. Finally, Akiko's vacuum special move will always leave a gap in the corner, allowing five possible ways Akiko can break your guard.
jB Mixups
- Universal mixup option. Can be paired with time slow and fire extinguisher to make the mixup even harder to block or respond to.
- Below are some simple time-slow setups to be used after 41236Ax2 in the corner:
- 641236A 214B IAD jB
- 2B(whiff) 641236B IAD jB
- 2B(whiff) 214B 641236C IAD jB
- Notes: Some of these do not work so well on fast rising characters like Mizuka. These actions are to be performed as soon as you regain control of your character after the final 41236A.
- After 623A clean hit in the corner, an immediate 641236A upon landing into an instant air dash jB is a safejump setup. If they reversal and don't IC, you get a chance to punish. If they do nothing, they have to block the jB mixup. If you get a hit, you can confirm back into 623A rekka clean hit and repeat the setup.
Win Quotes
| Japanese | English |
|---|---|
|
怪我にはこのジャムが |
This jam works wonders |
|
あら、お疲れですか? |
Oh my, are you tired? |
|
了承 |
Understood. |
|
失敗を恐れないこと |
Fear not your mistakes, |
|
あらあら |
My my, |
|
(To Ayu) |
(To Ayu) |
|
(To Nayuki) |
(To Nayuki) |
|
(To Makoto) |
(To Makoto) |
|
(To Misuzu) |
(To Misuzu) |
|
(To Kanna) |
(To Kanna) |
|
(To Akiko) |
(To Akiko) |
Colors

In-game References
External References
- Akiko's backdash (with matching dust clouds) is based on Slayer's backdash, from the Guilty Gear series.
Kanon References
- The house in the background of her stage is the Minase household, where Akiko lives.
- Akiko's "Planning for the worst" move is a reference to an event that takes place during Kanon.
- The name of Akiko's "This is the secret of 1-second approval" move is a reference to how Akiko usually approves anything requiring her permission after only one second.
- The yellow jam Akiko serves during her "There is also some that isn't sweet" move is a reference to her infamously inedible jam that she likes to feed to others during Kanon.