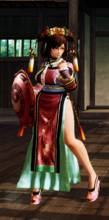
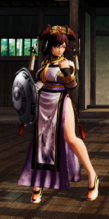
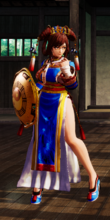
Samurai Shodown/Wu-Ruixiang: Difference between revisions
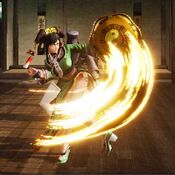
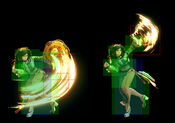
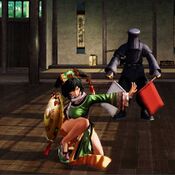
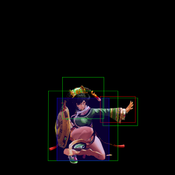
Beansprouts (talk | contribs) m (→2C) |
(→White Tiger Fangs: more detail about setting trap) |
||
| (326 intermediate revisions by 17 users not shown) | |||
| Line 1: | Line 1: | ||
[[File: | {| class="wikitable" style="float:right; margin-left:10px;" | ||
|- | |||
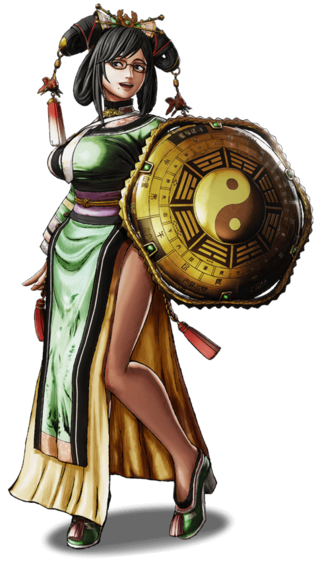
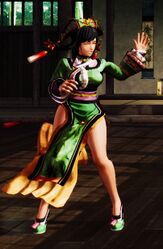
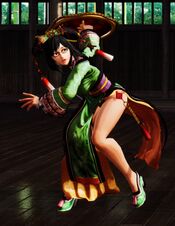
|[[File:SamSho_Wu_Profile.png|320px|center|]] | |||
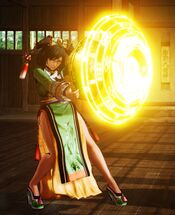
<center><font size="4"><b>Wu-Ruixiang</b></br>呉瑞香, Wú-Ruìxiāng</font></center> | |||
|- | |||
| {{#lst:Samurai Shodown/System Data|Wu Data}} | |||
|} | |||
{{TOClimit|2}} | {{TOClimit|2}} | ||
==Introduction== | ==Introduction== | ||
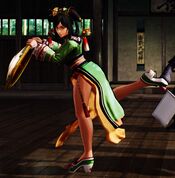
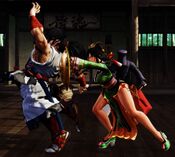
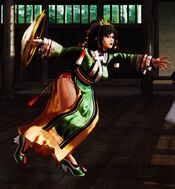
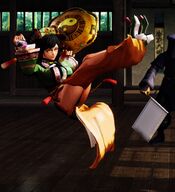
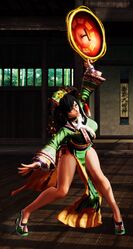
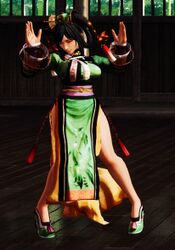
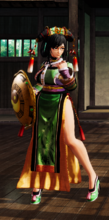
Wu-Ruixiang’s most defining feature is without a doubt her ground traps, which makes her a character for lab monsters who like to find crazy setups and stylish juggles. Though she can also be played as a more traditional zoner, of which she has arguably the best projectile game out of the entire cast, with high, medium and low fireballs that become active very early in their animation. Her shield counter can also reflect projectiles, in addition to being a strong anti-aggression tool. Ruixiang’s WFT is fast and covers a huge area, making it risky for the opponent to challenge her zoning. | |||
However, these traits come at the cost of surprisingly stubby and quite laggy normals. Her defense isn’t spotless either as she somewhat struggles with anti-airing and her damage is way below average without setups. Combined with slow movement and floaty jump, she has a hard time positioning herself properly. So it's crucial for Ruixiang to keep the opponent far away, or else she crumbles very easily. | |||
== | {{ProConTable | ||
|intro=<center>[[File:SS_Wu_Icon.png|40px]] '''Wu-Ruixiang''' is a trap-based zoner who lays mines on the ground to create opportunities for herself.</center> | |||
|pros= | |||
* '''Oppressive traps:''' Wu's 623S ground trap makes her neutral risky to maneuver around. Missteps into traps can be juggled off of on hit for huge damage (including SSM from close enough distance). Blocked traps can lead to unblockable setups, 50/50 mixups, and solid guard crush pressure. | |||
* '''Strong zoning:''' Wu's projectiles cover a lot of air space and knockdown on hit, allowing her to set up more traps. | |||
* '''Great WFT:''' Wu has one of the best anti-air WFTs in the game. She can also cancel into her WFT and juggle it off of trap easily. | |||
* '''Guard points:''' The guard points on her forward run, 66A and n.2B allow Wu unique opportunities to reverse pressure. | |||
* '''Good anti-airs:''' Using 2B, n.2B, 22A, and her counter, Wu can keep antsy opponents out of the air and gets good oki for doing so. | |||
|cons= | |||
* '''Bad pokes:''' Wu's grounded pokes have poor range, slow startup, and high recovery, making it hard to compete with other characters on the ground if she can't get her zoning game going. | |||
* '''Poor air game:''' Wu's jump is floaty and her short air normals make it hard for her to air-to-air or control space when off the ground. | |||
* '''Poor SSM:''' Wu's SSM has slow startup and short range, making SSM punishes harder for her than other characters. | |||
* '''High recovery:''' Wu's projectile and trap placement both have very high recovery and she can take a lot of damage off a bad read while zoning. | |||
* '''Terrible when Disarmed:''' She literally loses all of her specials when disarmed, which is an integral part of her whole zoning toolkit.''' | |||
}} | |||
==Gameplan== | |||
===Neutral=== | ===Neutral=== | ||
Her neutral is mostly zone and AA opponents (22A, 236C) if they try to jump for it. | |||
===Okizeme=== | ===Okizeme=== | ||
'''22C'''<br> | |||
If Wu gets a knockdown in the corner she can use 22C to be +10 to +5 depending on if they roll or not and will catch all tech rolls. If they take the hit Wu can easily convert because of how meaty the special hits. Sample idea of this would be 66D > microwalk back 22C. | |||
<br> | |||
*If they get hit you can follow up with many different options | |||
:* normal(restand) > 623A | |||
:* 214C | |||
:* WFT | |||
:* Issen (it will also sometimes hit a mid screen opponent as well but you need to run) | |||
===623S=== | |||
* '''On hit''' | |||
:* SSM | |||
:* normal(restand) > 623A or B | |||
:* WFT | |||
:* 66C | |||
:* Issen | |||
* '''Close range 623S options on block''' | |||
:* B+C(overhead) is good | |||
:* 6D, if your opponent blocks a 6D you have enough time for a free tick grab (with this setup you need to time the 6D properly because the spikes have thrown invul for a certain period. Practice this in training mode for consistency). | |||
:* 6D if hits you can frame trap into 2A | |||
* '''Far Range 623s''' | |||
:* 66D/f.2C(safer option due to pushback) | |||
:* 661/6643 B+C for an instant running overhead | |||
==Normal Moves== | ==Normal Moves== | ||
| Line 32: | Line 65: | ||
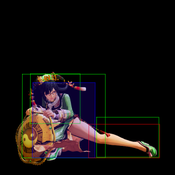
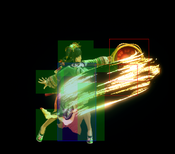
====== <font style="visibility:hidden" size="0">5A</font> ====== | ====== <font style="visibility:hidden" size="0">5A</font> ====== | ||
{{MoveData | {{MoveData | ||
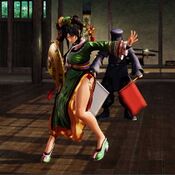
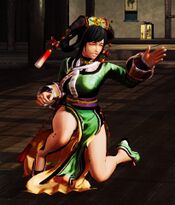
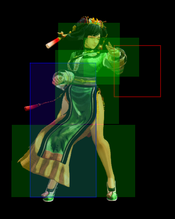
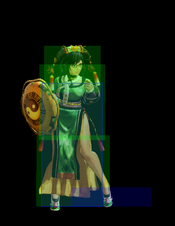
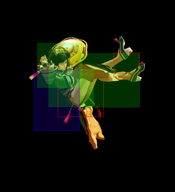
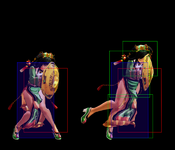
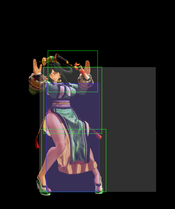
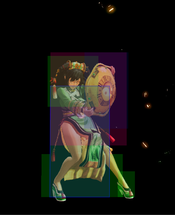
|image= | |image=SS7 ruixiang 5A.jpg | ||
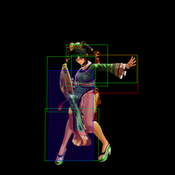
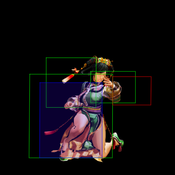
|hitbox=SS7 ruixiang 5A hb.png | |||
|caption= | |caption= | ||
|name=5A | |name=5A | ||
| Line 39: | Line 73: | ||
|damage= 40 | |damage= 40 | ||
|guard= Mid | |guard= Mid | ||
|startup= | |startup=7 | ||
|active= | |active=3 | ||
|recovery= | |recovery= | ||
|hitAdv= | |hitAdv=-3 | ||
| | |total=22 | ||
|blockAdv= | |blockAdv=-5 | ||
|guardDmg=5 | |||
|cancel= Yes | |cancel= Yes | ||
| | |recoil= Yes | ||
|deflect= Yes | |deflect= Yes | ||
|unarmed= | |unarmed=No | ||
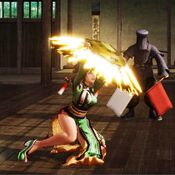
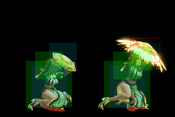
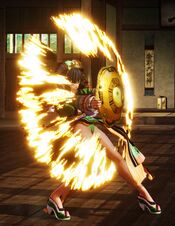
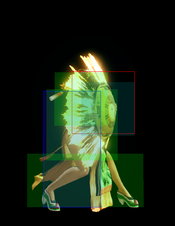
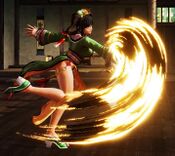
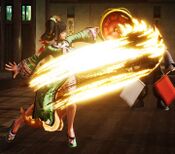
|description= A quick swat with the | |description= A quick swat with the shield. Cancellable, but no real combo potential. | ||
}} | }} | ||
}} | }} | ||
| Line 55: | Line 90: | ||
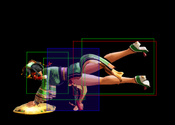
====== <font style="visibility:hidden" size="0">5B</font> ====== | ====== <font style="visibility:hidden" size="0">5B</font> ====== | ||
{{MoveData | {{MoveData | ||
|image= | |image=SS7 ruixiang 5B.jpg | ||
|hitbox=SS7 ruixiang 5B hb.png | |||
|caption= | |caption= | ||
|name=5B | |name=5B | ||
|data= | |data= | ||
{{AttackData-SS2019 | {{AttackData-SS2019 | ||
|damage= | |damage= 100 [80,20] | ||
|guard= Mid | |guard= Mid | ||
|startup= | |startup=12,22 | ||
|active= | |active=4,3 | ||
|recovery= | |recovery= | ||
|hitAdv= | |hitAdv=-8 | ||
| | |total=46 | ||
|blockAdv= | |blockAdv=-12 | ||
|guardDmg=10 | |||
|cancel= Yes | |cancel= Yes | ||
| | |recoil= Yes | ||
|deflect= Yes | |deflect= Yes | ||
|unarmed= | |unarmed=No | ||
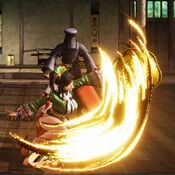
|description= 2- | |description= 2-hit medium slash with okay range (little less than half screen). Can be cancelled after the 1st hit, but not after the 2nd. | ||
}} | }} | ||
}} | }} | ||
| Line 78: | Line 115: | ||
====== <font style="visibility:hidden" size="0">5C</font> ====== | ====== <font style="visibility:hidden" size="0">5C</font> ====== | ||
{{MoveData | {{MoveData | ||
|image= | |image=SS7 ruixiang 5C.jpg | ||
|hitbox=SS7 ruixiang 5C hb.png | |||
|caption= | |caption= | ||
|name=5C | |name=5C | ||
| Line 85: | Line 123: | ||
|damage= 240 | |damage= 240 | ||
|guard= Mid | |guard= Mid | ||
|startup= | |startup=24 | ||
|active= | |active=2 | ||
|recovery= | |recovery= | ||
|hitAdv= | |hitAdv=-5 | ||
| | |total=69 | ||
|blockAdv= | |blockAdv=-16 | ||
|guardDmg=25 | |||
|cancel= No | |cancel= No | ||
| | |recoil= Yes | ||
|deflect= | |deflect= Disarm | ||
|unarmed= | |unarmed=No | ||
|description= Kind of a baby hard slash with | |description= Kind of a baby hard slash with slow startup, short range and no special cancelling. It's +11 frames on recoil cancels, thus she can bait the opponent trying to punish. | ||
}} | }} | ||
}} | }} | ||
| Line 101: | Line 140: | ||
====== <font style="visibility:hidden" size="0">2A</font> ====== | ====== <font style="visibility:hidden" size="0">2A</font> ====== | ||
{{MoveData | {{MoveData | ||
|image= | |image=SS7 ruixiang 2A.jpg | ||
|hitbox=SS7 ruixiang 2A hb.png | |||
|caption= | |caption= | ||
|name=2A | |name=2A | ||
| Line 108: | Line 148: | ||
|damage= 40 | |damage= 40 | ||
|guard= Mid | |guard= Mid | ||
|startup= | |startup=8 | ||
|active= | |active=3 | ||
|recovery= | |recovery= | ||
|hitAdv= | |hitAdv=-4 | ||
| | |total=24 | ||
|blockAdv= | |blockAdv=-5 | ||
|guardDmg=5 | |||
|cancel= Yes | |cancel= Yes | ||
| | |recoil= Yes | ||
|deflect= Yes | |deflect= Yes | ||
|unarmed= | |unarmed=No | ||
|description= | |description=Like 5A but lower to the ground and 1 frame slower. Cancellable, but no real combo potential. | ||
}} | }} | ||
}} | }} | ||
| Line 124: | Line 165: | ||
====== <font style="visibility:hidden" size="0">2B</font> ====== | ====== <font style="visibility:hidden" size="0">2B</font> ====== | ||
{{MoveData | {{MoveData | ||
|image= | |image=SS7 ruixiang 2B.jpg | ||
|hitbox=SS7 ruixiang 2B hb.png | |||
|caption= | |caption= | ||
|name=2B | |name=2B | ||
| Line 131: | Line 173: | ||
|damage= 100 | |damage= 100 | ||
|guard= Mid | |guard= Mid | ||
|startup= | |startup=10 | ||
|active= | |active=2 | ||
|recovery= | |recovery= | ||
|hitAdv= | |hitAdv=-2 | ||
| | |total=36 | ||
|blockAdv= | |blockAdv=-12 | ||
|cancel= | |guardDmg=10 | ||
| | |cancel= Yes | ||
|recoil= Yes | |||
|deflect= Yes | |deflect= Yes | ||
|unarmed= | |unarmed=No | ||
|description= | |description=Ruixiang's main anti-air, is decently quick and reaches far up. Can cancel into WFT in any range, cancelling into 214S would whiff at far ranges. | ||
}} | }} | ||
}} | }} | ||
| Line 147: | Line 190: | ||
====== <font style="visibility:hidden" size="0">2C</font> ====== | ====== <font style="visibility:hidden" size="0">2C</font> ====== | ||
{{MoveData | {{MoveData | ||
|image= | |image=SS7 ruixiang 2C.jpg | ||
|hitbox=SS7 ruixiang 2C hb.png | |||
|caption= | |caption= | ||
|name=2C | |name=2C | ||
| Line 154: | Line 198: | ||
|damage= 160 | |damage= 160 | ||
|guard= Low | |guard= Low | ||
|startup= | |startup=18 | ||
|active= | |active=3 | ||
|recovery= | |recovery= | ||
|hitAdv= | |hitAdv=KD | ||
| | |total=56 | ||
|blockAdv= | |blockAdv=-15 | ||
|guardDmg=25 | |||
|cancel= No | |cancel= No | ||
| | |recoil= No | ||
|deflect= No | |deflect= No | ||
|unarmed= | |unarmed=No | ||
|description= This is her farthest-reaching low. | |description= This is her farthest-reaching low. The startup is slow, but it knocks down, and also catches jump startup and backdash. Although pretty minus on block, the pushback makes this okay. | ||
}} | }} | ||
}} | }} | ||
| Line 171: | Line 216: | ||
====== <font style="visibility:hidden" size="0">n.5A</font> ====== | ====== <font style="visibility:hidden" size="0">n.5A</font> ====== | ||
{{MoveData | {{MoveData | ||
|image= | |image=SS7 ruixiang n5A.jpg | ||
|hitbox=SS7 ruixiang n5A hb.png | |||
|caption= | |caption= | ||
|name=n.5A | |name=n.5A | ||
|data= | |data= | ||
{{AttackData-SS2019 | {{AttackData-SS2019 | ||
|damage= | |damage= 30 | ||
|guard= | |guard= Mid | ||
|startup= | |startup=6 | ||
|active= | |active=4 | ||
|recovery= | |recovery= | ||
|hitAdv= | |hitAdv=+3 | ||
| | |total=15 | ||
|blockAdv= | |blockAdv=0 | ||
|cancel= | |guardDmg=5 | ||
| | |cancel= Yes | ||
|deflect= | |recoil= No | ||
|unarmed= | |deflect= No | ||
|description= | |unarmed=No | ||
|description= "Talk-to-the-hand" smack. Cancellable, but no real combo potential. | |||
}} | }} | ||
}} | }} | ||
| Line 194: | Line 241: | ||
====== <font style="visibility:hidden" size="0">n.5B</font> ====== | ====== <font style="visibility:hidden" size="0">n.5B</font> ====== | ||
{{MoveData | {{MoveData | ||
|image= | |image=SS7 ruixiang n5B.jpg | ||
|hitbox=SS7 ruixiang n5B hb.png | |||
|caption= | |caption= | ||
|name=n.5B | |name=n.5B | ||
|data= | |data= | ||
{{AttackData-SS2019 | {{AttackData-SS2019 | ||
|damage= | |damage= 90 | ||
|guard= | |guard= Mid | ||
|startup= | |startup=10 | ||
|active= | |active=3 | ||
|recovery= | |recovery= | ||
|hitAdv= | |hitAdv=+3 | ||
| | |total=31 | ||
|blockAdv= | |blockAdv=-12 | ||
|cancel= | |guardDmg=10 | ||
| | |cancel= Yes | ||
|deflect= | |recoil= Yes | ||
|unarmed= | |deflect= Yes | ||
|description= | |unarmed=No | ||
|description= Quick shield bash that combos into any 214S and WFT. However the proximity range is very short. | |||
}} | }} | ||
}} | }} | ||
| Line 217: | Line 266: | ||
====== <font style="visibility:hidden" size="0">n.5C</font> ====== | ====== <font style="visibility:hidden" size="0">n.5C</font> ====== | ||
{{MoveData | {{MoveData | ||
|image= | |image=SS7 ruixiang n5C.jpg | ||
|hitbox=SS7 ruixiang n5C hb.png | |||
|caption= | |caption= | ||
|name=n.5C | |name=n.5C | ||
|data= | |data= | ||
{{AttackData-SS2019 | {{AttackData-SS2019 | ||
|damage= | |damage= 200(100) | ||
|guard= | |guard= Mid | ||
|startup= | |startup=15(22) | ||
|active= | |active=2(1) | ||
|recovery= | |recovery= | ||
|hitAdv= | |hitAdv=+5(+12) | ||
| | |total=48 | ||
|blockAdv= | |blockAdv=-28 | ||
|cancel= | |guardDmg=25 | ||
| | |cancel= No | ||
|deflect= | |recoil= Yes | ||
|unarmed= | |deflect=Disarm | ||
|description= | |unarmed=No | ||
|description= Another slow-ish hard slash. If the first hit whiffs, the second hit knocks down the air opponent. | |||
}} | }} | ||
}} | }} | ||
| Line 240: | Line 291: | ||
====== <font style="visibility:hidden" size="0">n.2A</font> ====== | ====== <font style="visibility:hidden" size="0">n.2A</font> ====== | ||
{{MoveData | {{MoveData | ||
|image= | |image=SS7 ruixiang n2A.jpg | ||
|hitbox=SS7 ruixiang n2A hb.png | |||
|caption= | |caption= | ||
|name=n.2A | |name=n.2A | ||
|data= | |data= | ||
{{AttackData-SS2019 | {{AttackData-SS2019 | ||
|damage= | |damage= 30 | ||
|guard= | |guard= Mid | ||
|startup= | |startup=7 | ||
|active= | |active=4 | ||
|recovery= | |recovery= | ||
|hitAdv= | |hitAdv=+3 | ||
| | |total=16 | ||
|blockAdv= | |blockAdv=0 | ||
|cancel= | |guardDmg=5 | ||
| | |cancel= Yes | ||
|deflect= | |recoil=No | ||
|unarmed= | |deflect= No | ||
|description= | |unarmed=No | ||
|description= Just the crouching version of n.5A, still hits mid as well. Cancellable, but no real combo potential. | |||
}} | }} | ||
}} | }} | ||
| Line 263: | Line 316: | ||
====== <font style="visibility:hidden" size="0">n.2B</font> ====== | ====== <font style="visibility:hidden" size="0">n.2B</font> ====== | ||
{{MoveData | {{MoveData | ||
|image= | |image=SS7 ruixiang n2B.jpg | ||
|hitbox=SS7 ruixiang n2B hb.png | |||
|caption= | |caption= | ||
|name=n.2B | |name=n.2B | ||
|data= | |data= | ||
{{AttackData-SS2019 | {{AttackData-SS2019 | ||
|damage= | |damage= 80 | ||
|guard= | |guard= Mid | ||
|startup= | |startup=7 | ||
|active= | |active=3 | ||
|recovery= | |recovery= | ||
|hitAdv= | |hitAdv=+2 | ||
| | |total=29 | ||
|blockAdv= | |blockAdv=-12 | ||
|cancel= | |guardDmg=10 | ||
| | |cancel= Yes | ||
|deflect= | |recoil=Yes | ||
|unarmed= | |deflect= Yes | ||
|description= | |unarmed=No | ||
|description=Another pretty quick upwards shield bash with anti-air potential, though struggles against big disjointed aerials. Has a guard point 4-6f. However the proximity range is very short. | |||
}} | }} | ||
}} | }} | ||
| Line 286: | Line 341: | ||
====== <font style="visibility:hidden" size="0">n.2C</font> ====== | ====== <font style="visibility:hidden" size="0">n.2C</font> ====== | ||
{{MoveData | {{MoveData | ||
|image= | |image=SS7 ruixiang n2C.jpg | ||
|hitbox=SS7 ruixiang n2C hb.png | |||
|caption= | |caption= | ||
|name=n.2C | |name=n.2C | ||
|data= | |data= | ||
{{AttackData-SS2019 | {{AttackData-SS2019 | ||
|damage= | |damage= 180 [150,30] | ||
|guard= | |guard= Mid | ||
|startup= | |startup=16 | ||
|active= | |active=2,1 | ||
|recovery= | |recovery= | ||
|hitAdv= | |hitAdv=+8 | ||
| | |total=51 | ||
|blockAdv= | |blockAdv=-28 | ||
|cancel= | |guardDmg=25 | ||
| | |cancel= No | ||
|deflect= | |recoil=Yes | ||
|unarmed= | |deflect=Disarm | ||
|description= | |unarmed=No | ||
|description= More damage than far 2C but no knockdown, also hits mid instead of low. Attacks twice with the second hit pulling the opponent closer, which combos into guaranteed n.2B. | |||
}} | }} | ||
}} | }} | ||
| Line 310: | Line 367: | ||
====== <font style="visibility:hidden" size="0">5D</font> ====== | ====== <font style="visibility:hidden" size="0">5D</font> ====== | ||
{{MoveData | {{MoveData | ||
|image= | |image=SS7 Ruixiang 5D.jpg | ||
|hitbox=SS7 ruixiang 5D hb.png | |||
|caption= | |caption= | ||
|name=5D | |name=5D | ||
|data= | |data= | ||
{{AttackData-SS2019 | {{AttackData-SS2019 | ||
|damage= | |damage=50 | ||
|guard= | |guard=Mid | ||
|startup= | |startup=9 | ||
|active= | |active=3 | ||
|recovery= | |recovery= | ||
|hitAdv= | |hitAdv=-2 | ||
| | |total=26 | ||
|blockAdv= | |blockAdv=-3 | ||
|cancel= | |guardDmg=5 | ||
| | |cancel=No | ||
|deflect= | |recoil=No | ||
|unarmed= | |deflect=No | ||
|description= | |unarmed=Yes | ||
|description=Standard kick, it's ok but nothing special. | |||
}} | }} | ||
}} | }} | ||
| Line 333: | Line 392: | ||
====== <font style="visibility:hidden" size="0">6D</font> ====== | ====== <font style="visibility:hidden" size="0">6D</font> ====== | ||
{{MoveData | {{MoveData | ||
|image= | |image=SS7 ruixiang 6D.jpg | ||
|hitbox=SS7 ruixiang 6D hb.png | |||
|caption= | |caption= | ||
|name=6D | |name=6D | ||
|data= | |data= | ||
{{AttackData-SS2019 | {{AttackData-SS2019 | ||
|damage= | |damage=30 | ||
|guard= | |guard=Low | ||
|startup= | |startup=13 | ||
|active= | |active=2 | ||
|recovery= | |recovery=10 | ||
|hitAdv= | |hitAdv=+2 | ||
| | |total=23 | ||
|blockAdv= | |blockAdv=-1 | ||
|cancel= | |guardDmg=5 | ||
| | |cancel=No | ||
|deflect= | |recoil=No | ||
|unarmed= | |deflect= No | ||
|description= | |unarmed= Yes | ||
|description=Because of little pushback and a false animation this can be good for tick throws if the opponent isn't ready. | |||
}} | }} | ||
}} | }} | ||
| Line 356: | Line 417: | ||
====== <font style="visibility:hidden" size="0">2D</font> ====== | ====== <font style="visibility:hidden" size="0">2D</font> ====== | ||
{{MoveData | {{MoveData | ||
|image= | |image=SS7 ruixiang 2D.jpg | ||
|hitbox=SS7 ruixiang 2D hb.png | |||
|caption= | |caption= | ||
|name=2D | |name=2D | ||
|data= | |data= | ||
{{AttackData-SS2019 | {{AttackData-SS2019 | ||
|damage= | |damage=20 | ||
|guard= | |guard=Low | ||
|startup= | |startup=7 | ||
|active= | |active=4 | ||
|recovery= | |recovery= | ||
|hitAdv= | |hitAdv=0 | ||
| | |total=22 | ||
|blockAdv= | |blockAdv=-6 | ||
|cancel= | |guardDmg=5 | ||
| | |cancel=No | ||
|deflect= | |recoil=No | ||
|unarmed= | |deflect= No | ||
|description= | |unarmed= Yes | ||
|description=Lowers her hurtbox slightly, allowing her to slip under some moves and projectiles like Ruixiang's 236B. | |||
}} | }} | ||
}} | }} | ||
| Line 379: | Line 442: | ||
====== <font style="visibility:hidden" size="0">3D</font> ====== | ====== <font style="visibility:hidden" size="0">3D</font> ====== | ||
{{MoveData | {{MoveData | ||
|image= | |image=SS7 ruixiang 3D.jpg | ||
|hitbox=SS7 ruixiang 3D hb.png | |||
|caption= | |caption= | ||
|name=3D | |name=3D | ||
|data= | |||
{{AttackData-SS2019 | |||
|damage=70 | |||
|guard=Low | |||
|startup=15 | |||
|active=4 | |||
|recovery= | |||
|hitAdv=KD | |||
|total=56 | |||
|blockAdv=-26 | |||
|guardDmg=5 | |||
|cancel=No | |||
|recoil=No | |||
|deflect= No | |||
|unarmed= Yes | |||
|description=Not very useful compared to her 66D, which is an all around better move. | |||
}} | |||
}} | |||
===Dash Normals=== | |||
====== <font style="visibility:hidden" size="0">66</font> ====== | |||
{{MoveData | |||
|image=SS7 ruixiang 66.png | |||
|hitbox=SS7 ruixiang 66 hb.png | |||
|caption= | |||
|name=66 | |||
|data= | |data= | ||
{{AttackData-SS2019 | {{AttackData-SS2019 | ||
|damage= | |damage= | ||
|guard= | |guard= | ||
|startup= | |startup=15 | ||
|active= | |active= | ||
|recovery= | |recovery= | ||
|hitAdv= | |hitAdv= | ||
| | |total= | ||
|blockAdv= | |blockAdv= | ||
|guardDmg= | |||
|cancel= | |cancel= | ||
| | |recoil= | ||
|deflect= | |deflect= | ||
|unarmed= | |unarmed=No | ||
|description= | |description=It has a guard point against air attack and overhead (but not projectile), it takes about 30% of the screen to run for GP to become active. | ||
}} | }} | ||
}} | }} | ||
====== <font style="visibility:hidden" size="0">66A</font> ====== | ====== <font style="visibility:hidden" size="0">66A</font> ====== | ||
{{MoveData | {{MoveData | ||
|image= | |image=SS7 ruixiang 66A.jpg | ||
|hitbox=SS7 ruixiang 66A hb.png | |||
|caption= | |caption= | ||
|name=66A | |name=66A | ||
|data= | |data= | ||
{{AttackData-SS2019 | {{AttackData-SS2019 | ||
|damage= | |damage=30 | ||
|guard= | |guard=Mid | ||
|startup= | |startup=9 | ||
|active= | |active=3 | ||
|recovery= | |recovery= | ||
|hitAdv= | |hitAdv=-5 | ||
| | |total=24 | ||
|blockAdv= | |blockAdv=-20 | ||
|cancel= | |guardDmg=5 | ||
| | |cancel=Yes | ||
|deflect= | |recoil=Yes | ||
|unarmed= | |deflect= Yes | ||
|description= | |unarmed= No | ||
|description=Its range is short, but it has a guard point before and during the attack (GP active from frame 7~11, while attack active from frame 9~11, it even GP the special counter 421D of her own). Can be used to nullify projectiles and pokes, but can be risky. Cancellable, but no real combo potential. | |||
}} | }} | ||
}} | }} | ||
| Line 426: | Line 518: | ||
====== <font style="visibility:hidden" size="0">66B</font> ====== | ====== <font style="visibility:hidden" size="0">66B</font> ====== | ||
{{MoveData | {{MoveData | ||
|image= | |image=SS7 ruixiang 66B.jpg | ||
|hitbox=SS7 ruixiang 66B hb.png | |||
|caption= | |caption= | ||
|name=66B | |name=66B | ||
|data= | |data= | ||
{{AttackData-SS2019 | {{AttackData-SS2019 | ||
|damage= | |damage=100 [80,20] | ||
|guard= | |guard=Mid | ||
|startup= | |startup=14,25 | ||
|active= | |active=4,3 | ||
|recovery= | |recovery= | ||
|hitAdv= | |hitAdv=-3 | ||
| | |total=44 | ||
|blockAdv= | |blockAdv=-36 | ||
|cancel= | |guardDmg=10 | ||
| | |cancel=Yes | ||
|deflect= | |recoil=Yes | ||
|unarmed= | |deflect=Disarm | ||
|description= | |unarmed= No | ||
|description=Great combo tool for throw and also great whiff punish tool as well. Can whiff cancel this into traps or fireballs. Cancellable at the 1st hit, but not at the 2nd hit. | |||
}} | }} | ||
}} | }} | ||
| Line 449: | Line 543: | ||
====== <font style="visibility:hidden" size="0">66C</font> ====== | ====== <font style="visibility:hidden" size="0">66C</font> ====== | ||
{{MoveData | {{MoveData | ||
|image= | |image=SS7 ruixiang 66C.jpg | ||
|hitbox=SS7 ruixiang 66C hb.png | |||
|caption= | |caption= | ||
|name=66C | |name=66C | ||
|data= | |data= | ||
{{AttackData-SS2019 | {{AttackData-SS2019 | ||
|damage= | |damage=150 | ||
|guard= | |guard=Mid | ||
|startup= | |startup=16 | ||
|active= | |active=2 | ||
|recovery= | |recovery= | ||
|hitAdv= | |hitAdv=KD | ||
| | |total=66 | ||
|blockAdv= | |blockAdv=-15 | ||
|cancel= | |guardDmg=20 | ||
| | |cancel=No | ||
|deflect= | |recoil=No | ||
|unarmed= | |deflect=Disarm | ||
|description= | |unarmed= No | ||
|description=Not very fast, but decent running normal. | |||
}} | }} | ||
}} | }} | ||
| Line 472: | Line 568: | ||
====== <font style="visibility:hidden" size="0">66D</font> ====== | ====== <font style="visibility:hidden" size="0">66D</font> ====== | ||
{{MoveData | {{MoveData | ||
|image= | |image=SS7 ruixiang 66D.jpg | ||
|hitbox=SS7 ruixiang 66D hb.png | |||
|caption= | |caption= | ||
|name=66D | |name=66D | ||
|data= | |data= | ||
{{AttackData-SS2019 | {{AttackData-SS2019 | ||
|damage= | |damage=70 | ||
|guard= | |guard=Low | ||
|startup= | |startup=9 | ||
|active= | |active=10 | ||
|recovery= | |recovery=33 | ||
|hitAdv= | |hitAdv=KD(+84) | ||
| | |total=49 | ||
|blockAdv= | |blockAdv=-18~-9 | ||
|cancel= | |guardDmg=5 | ||
| | |cancel=No | ||
|deflect= | |recoil=No | ||
|unarmed= | |deflect= No | ||
|description= | |unarmed=Yes | ||
|description=Pretty useful slide, as it's her fastest knockdown move and has good range, just space it carefully to avoid punish (it keeps moving forward during active frames). Good low profile during active frames, could slip under moves like Yashamaru's 5B. | |||
}} | }} | ||
}} | }} | ||
| Line 496: | Line 594: | ||
====== <font style="visibility:hidden" size="0">j.A</font> ====== | ====== <font style="visibility:hidden" size="0">j.A</font> ====== | ||
{{MoveData | {{MoveData | ||
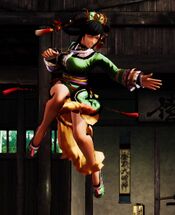
|image= | |image=SS7 ruixiang jA.jpg | ||
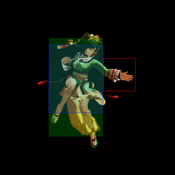
|hitbox=SS7 ruixiang jA hb.png | |||
|caption= | |caption= | ||
|name=j.A | |name=j.A | ||
|data= | |data= | ||
{{AttackData-SS2019 | {{AttackData-SS2019 | ||
|damage= | |damage=30 | ||
|guard= | |guard=High | ||
|startup= | |startup=6 | ||
|active= | |active=5 | ||
|recovery= | |recovery= | ||
|hitAdv= | |hitAdv= | ||
| | |total= | ||
|blockAdv= | |blockAdv= | ||
|cancel= | |guardDmg=5 | ||
| | |cancel=No | ||
|deflect= | |recoil=No | ||
|unarmed= | |deflect= No | ||
|description= | |unarmed=No | ||
|description=Her fastest air normal, but pitiful range and damage. | |||
}} | }} | ||
}} | }} | ||
| Line 519: | Line 619: | ||
====== <font style="visibility:hidden" size="0">j.B</font> ====== | ====== <font style="visibility:hidden" size="0">j.B</font> ====== | ||
{{MoveData | {{MoveData | ||
|image= | |image=SS7 ruixiang jB.jpg | ||
|hitbox=SS7 ruixiang jB hb.png | |||
|caption= | |caption= | ||
|name=j.B | |name=j.B | ||
|data= | |data= | ||
{{AttackData-SS2019 | {{AttackData-SS2019 | ||
|damage= | |damage=100 | ||
|guard= | |guard=High | ||
|startup= | |startup=7 | ||
|active= | |active=3 | ||
|recovery= | |recovery= | ||
|hitAdv= | |hitAdv= | ||
| | |total= | ||
|blockAdv= | |blockAdv= | ||
|cancel= | |guardDmg=10 | ||
| | |cancel=No | ||
|deflect= | |recoil=No | ||
|unarmed= | |deflect= No | ||
|description= | |unarmed=No | ||
|description=Your go to air-to-air normal, only 1 frame slower than j.A but better damage and reach. | |||
}} | }} | ||
}} | }} | ||
| Line 542: | Line 644: | ||
====== <font style="visibility:hidden" size="0">j.C</font> ====== | ====== <font style="visibility:hidden" size="0">j.C</font> ====== | ||
{{MoveData | {{MoveData | ||
|image= | |image=SS7 ruixiang jC.jpg | ||
|hitbox=SS7 ruixiang jC hb.png | |||
|caption= | |caption= | ||
|name=j.C | |name=j.C | ||
|data= | |data= | ||
{{AttackData-SS2019 | {{AttackData-SS2019 | ||
|damage= | |damage=140 | ||
|guard= | |guard=High | ||
|startup= | |startup=12 | ||
|active= | |active=2 | ||
|recovery= | |recovery= | ||
|hitAdv= | |hitAdv= | ||
| | |total= | ||
|blockAdv= | |blockAdv= | ||
|cancel= | |guardDmg=20 | ||
| | |cancel=No | ||
|deflect= | |recoil=No | ||
|unarmed= | |deflect= No | ||
|description= | |unarmed=No | ||
|description=Not a move you'll use very much, considering Ruixiang's slow jump. | |||
}} | }} | ||
}} | }} | ||
| Line 565: | Line 669: | ||
====== <font style="visibility:hidden" size="0">j.D</font> ====== | ====== <font style="visibility:hidden" size="0">j.D</font> ====== | ||
{{MoveData | {{MoveData | ||
|image= | |image=SS7 ruixiang jD.jpg | ||
|hitbox=SS7 ruixiang jD hb.png | |||
|caption= | |caption= | ||
|name=j.D | |name=j.D | ||
|data= | |data= | ||
{{AttackData-SS2019 | {{AttackData-SS2019 | ||
|damage= | |damage=30 | ||
|guard= | |guard=High | ||
|startup= | |startup=11 | ||
|active= | |active=7 | ||
|recovery= | |recovery= | ||
|hitAdv= | |hitAdv= | ||
| | |total= | ||
|blockAdv= | |blockAdv= | ||
|cancel= | |guardDmg=5 | ||
| | |cancel=No | ||
|deflect= | |recoil=No | ||
|unarmed= | |deflect= No | ||
|description= | |unarmed=Yes | ||
|description=Standard jumping kick. | |||
}} | }} | ||
}} | }} | ||
| Line 589: | Line 695: | ||
====== <font style="visibility:hidden" size="0">u.5S</font> ====== | ====== <font style="visibility:hidden" size="0">u.5S</font> ====== | ||
{{MoveData | {{MoveData | ||
|image= | |image=SS7 ruixiang u5S.jpg | ||
|hitbox=SS7 ruixiang u5S hb.png | |||
|caption= | |caption= | ||
|name=u.5S | |name=u.5S | ||
|data= | |data= | ||
{{AttackData-SS2019 | {{AttackData-SS2019 | ||
|damage= | |damage=50 | ||
|guard= | |guard=Mid | ||
|startup= | |startup=7 | ||
|active= | |active=2 | ||
|recovery= | |recovery= | ||
|hitAdv= | |hitAdv=+3 | ||
| | |total=24 | ||
|blockAdv= | |blockAdv=-2 | ||
|cancel= | |guardDmg=5 | ||
| | |cancel=No | ||
|deflect= | |recoil=No | ||
|unarmed= | |deflect= No | ||
|description= | |unarmed=Only | ||
|description=Not very fast or long reach, but it's serviceable. | |||
}} | }} | ||
}} | }} | ||
| Line 612: | Line 720: | ||
====== <font style="visibility:hidden" size="0">u.2S</font> ====== | ====== <font style="visibility:hidden" size="0">u.2S</font> ====== | ||
{{MoveData | {{MoveData | ||
|image= | |image=SS7 ruixiang u2S.jpg | ||
|hitbox=SS7 ruixiang u2S hb.png | |||
|caption= | |caption= | ||
|name=u.2S | |name=u.2S | ||
|data= | |data= | ||
{{AttackData-SS2019 | {{AttackData-SS2019 | ||
|damage= | |damage=50 | ||
|guard= | |guard=Mid | ||
|startup= | |startup=8 | ||
|active= | |active=2 | ||
|recovery= | |recovery= | ||
|hitAdv= | |hitAdv=+2 | ||
| | |total=26 | ||
|blockAdv= | |blockAdv=-3 | ||
|cancel= | |guardDmg=5 | ||
| | |cancel=No | ||
|deflect= | |recoil=No | ||
|unarmed= | |deflect= No | ||
|description= | |unarmed=Only | ||
|description=Slower than u.5A, otherwise pretty much the same. | |||
}} | }} | ||
}} | }} | ||
| Line 635: | Line 745: | ||
====== <font style="visibility:hidden" size="0">ju.S</font> ====== | ====== <font style="visibility:hidden" size="0">ju.S</font> ====== | ||
{{MoveData | {{MoveData | ||
|image= | |image=SS7 ruixiang ujS.jpg | ||
|hitbox=SS7 ruixiang ujS hb.png | |||
|caption= | |caption= | ||
|name=ju.S | |name=ju.S | ||
|data= | |data= | ||
{{AttackData-SS2019 | {{AttackData-SS2019 | ||
|damage= | |damage=50 | ||
|guard= | |guard=High | ||
|startup= | |startup=6 | ||
|active= | |active=5 | ||
|recovery= | |recovery= | ||
|hitAdv= | |hitAdv= | ||
| | |total= | ||
|blockAdv= | |blockAdv= | ||
|cancel= | |guardDmg=5 | ||
| | |cancel=No | ||
|deflect= | |recoil=No | ||
|unarmed= | |deflect= No | ||
|description= | |unarmed=Only | ||
|description=Fast air-to-air. | |||
}} | }} | ||
}} | }} | ||
| Line 658: | Line 770: | ||
====== <font style="visibility:hidden" size="0">u.66S</font> ====== | ====== <font style="visibility:hidden" size="0">u.66S</font> ====== | ||
{{MoveData | {{MoveData | ||
|image= | |image=SS7 ruixiang u66S.jpg | ||
|hitbox=SS7 ruixiang u66S hb.png | |||
|caption= | |caption= | ||
|name=u.66S | |name=u.66S | ||
|data= | |data= | ||
{{AttackData-SS2019 | {{AttackData-SS2019 | ||
|damage= | |damage=50 | ||
|guard= | |guard=Mid | ||
|startup= | |startup=10 | ||
|active= | |active=3 | ||
|recovery= | |recovery= | ||
|hitAdv= | |hitAdv=KD | ||
| | |total=30 | ||
|blockAdv= | |blockAdv=-5 | ||
|cancel= | |guardDmg=5 | ||
| | |cancel=No | ||
|deflect= | |recoil=No | ||
|unarmed= | |deflect=No | ||
|description= | |unarmed=Only | ||
|description=Not the fastest of its kind, but gives you knockdown and time to pick up your weapon (and glasses). | |||
}} | }} | ||
}} | }} | ||
| Line 682: | Line 796: | ||
====== <font style="visibility:hidden" size="0">Guard Break</font> ====== | ====== <font style="visibility:hidden" size="0">Guard Break</font> ====== | ||
{{MoveData | {{MoveData | ||
|image= | |image=SS7 ruixiang 6CD.jpg | ||
|caption= | |hitbox=SS7 ruixiang 6CD hb.png | ||
|image2= | |caption=Forward Throw | ||
|caption2= | |image2=SS7 ruixiang 4CD.jpg | ||
|image3= | |hitbox2=SS7 ruixiang 4CD hb.png | ||
|caption3= | |caption2=Back Throw | ||
|image3=SS7 ruixiang throw whiff.jpg | |||
|caption3=Throw Whiffs | |||
|name=Guard Break (Throw) | |name=Guard Break (Throw) | ||
|input=4/5/6C+D | |input=4/5/6C+D | ||
|data= | |data= | ||
{{AttackData-SS2019 | {{AttackData-SS2019 | ||
|version=Neutral | |version=Neutral / Forward | ||
|damage= | |damage=0 | ||
|guard= | |guard=Throw | ||
|startup= | |startup=3 | ||
|active= | |active=1 | ||
|recovery= | |recovery=71 | ||
|hitAdv= | |hitAdv=+20 | ||
| | |total=74 | ||
|blockAdv= | |blockAdv=N/A | ||
|cancel= | |cancel=No | ||
| | |recoil=No | ||
|deflect= | |deflect=No | ||
|unarmed= | |unarmed=Yes | ||
|description=Universal throw. Can be followed up with an attack. | |description=Universal throw. Can be followed up with an attack. | ||
}} | }} | ||
| Line 710: | Line 826: | ||
|header=no | |header=no | ||
|version=Back | |version=Back | ||
|damage= | |damage=0 | ||
|guard= | |guard=Throw | ||
|startup= | |startup=5 | ||
|active= | |active=1 | ||
|recovery= | |recovery=69 | ||
|hitAdv= | |hitAdv=+25 | ||
| | |total=74 | ||
|blockAdv= | |blockAdv=N/A | ||
|cancel= | |cancel=No | ||
| | |recoil=No | ||
|deflect=No | |||
|unarmed=Yes | |||
|deflect= | |||
|unarmed= | |||
|description=Universal throw. Can be followed up with an attack. | |description=Universal throw. Can be followed up with an attack. | ||
}} | }} | ||
}} | }} | ||
====== <font style="visibility:hidden" size="0">Surprise Attack</font> ====== | ====== <font style="visibility:hidden" size="0">Surprise Attack</font> ====== | ||
{{MoveData | {{MoveData | ||
|image= | |image=SS7 ruixiang 5BC.jpg | ||
|hitbox=SS7 ruixiang 5BC hb.png | |||
|caption= | |caption= | ||
|name=Surprise Attack (Overhead) | |name=Surprise Attack (Overhead) | ||
| Line 752: | Line 853: | ||
{{AttackData-SS2019 | {{AttackData-SS2019 | ||
|version= | |version= | ||
|damage= | |damage=60 | ||
|guard= | |guard=High | ||
|startup= | |startup=18 | ||
|active= | |active=6 | ||
|recovery= | |recovery=33 | ||
|hitAdv= | |hitAdv=KD | ||
| | |total=56 | ||
|blockAdv= | |blockAdv=-20~-15 | ||
|cancel= | |guardDmg=10 | ||
| | |cancel=No | ||
|deflect= | |recoil=No | ||
|unarmed= | |deflect=No | ||
|description=Universal overhead. | |unarmed=Yes | ||
|description=Universal overhead. Decent startup with good range. | |||
}} | }} | ||
}} | }} | ||
| Line 770: | Line 872: | ||
====== <font style="visibility:hidden" size="0">Dodge</font> ====== | ====== <font style="visibility:hidden" size="0">Dodge</font> ====== | ||
{{MoveData | {{MoveData | ||
|image= | |image=SS7 ruixiang dodge.jpg | ||
|hitbox=SS7 ruixiang dodge hb.png | |||
|caption= | |caption= | ||
|name=Dodge | |name=Dodge | ||
| Line 779: | Line 882: | ||
|damage= | |damage= | ||
|guard= | |guard= | ||
|startup= | |startup=1 | ||
|active= | |active=16 | ||
|recovery= | |recovery=22 | ||
|hitAdv= | |hitAdv= | ||
| | |total=38 | ||
|blockAdv= | |blockAdv= | ||
|cancel= | |cancel= | ||
| | |recoil= | ||
|deflect= | |deflect= | ||
|unarmed= | |unarmed=Yes | ||
|description=Universal dodge. | |description=Universal dodge. Avoids all attacks for a brief moment, and is mainly used to avoid throws. | ||
''Complete invincibility from frames 1 to 10. Strike invincibility from frames 11 to 16.'' | |||
}} | |||
}} | |||
====== <font style="visibility:hidden" size="0">Stance Break</font> ====== | |||
{{MoveData | |||
|image=SS7 ruixiang gAB.jpg | |||
|hitbox=SS7 ruixiang gAB hb.png | |||
|caption= | |||
|name=Stance Break | |||
|input=A+B during Just Defense | |||
|data= | |||
{{AttackData-SS2019 | |||
|version= | |||
|damage=0 | |||
|guard=Mid | |||
|startup=5 | |||
|active=10 | |||
|recovery= | |||
|hitAdv=KD | |||
|total=52 | |||
|blockAdv=-24 | |||
|cancel=No | |||
|recoil= | |||
|deflect= | |||
|unarmed=Yes | |||
|description=Universal Stance Break. | |||
}} | }} | ||
}} | }} | ||
| Line 795: | Line 926: | ||
====== <font style="visibility:hidden" size="0">Counter / Blade Catch</font> ====== | ====== <font style="visibility:hidden" size="0">Counter / Blade Catch</font> ====== | ||
{{MoveData | {{MoveData | ||
|image= | |image=SS7 ruixiang deflect.jpg | ||
|hitbox=SS7 ruixiang deflect hb.png | |||
|caption=Counter | |caption=Counter | ||
|image2= | |image2=SS7 ruixiang blade catch1.jpg | ||
| | |hitbox2=SS7 ruixiang blade catch hb.png | ||
|image3=SS7 ruixiang blade catch2.jpg | |||
|caption3=Blade Catch | |||
|name=Counter / Blade Catch | |name=Counter / Blade Catch | ||
|input=236A+B | |input=236A+B | ||
| Line 804: | Line 938: | ||
{{AttackData-SS2019 | {{AttackData-SS2019 | ||
|version=Armed | |version=Armed | ||
|damage= | |damage=0 | ||
|guard= | |guard=N/A | ||
|startup= | |startup=2 | ||
|active= | |active=11 | ||
|recovery= | |recovery=34 | ||
|hitAdv= | |hitAdv=+35~+59 | ||
| | |total=46 | ||
|blockAdv= | |blockAdv=N/A | ||
|cancel= | |cancel=N/A | ||
| | |recoil=N/A | ||
|deflect= | |deflect=N/A | ||
|unarmed= | |unarmed=No | ||
|description=Universal counter. Allows you to follow up with a guaranteed attack of your own. The follow up depends on the strength of the attack you counter. If you counter a heavy slash, your opponent will be disarmed. | |description=Universal counter. Allows you to follow up with a guaranteed attack of your own. The follow up depends on the strength of the attack you counter. If you counter a heavy slash, your opponent will be disarmed. | ||
}} | }} | ||
| Line 821: | Line 955: | ||
|header=no | |header=no | ||
|version=Disarmed | |version=Disarmed | ||
|damage= | |damage=0 | ||
|guard= | |guard=N/A | ||
|startup= | |startup=2 | ||
|active= | |active=12 | ||
|recovery= | |recovery=9 | ||
|hitAdv= | |hitAdv=KD | ||
| | |total=22 | ||
|blockAdv= | |blockAdv=N/A | ||
|cancel= | |cancel=N/A | ||
| | |recoil=N/A | ||
|deflect= | |deflect=N/A | ||
|unarmed= | |unarmed=Only | ||
|description=Universal counter. While disarmed, your counter will disarm and knock away your opponent regardless of slash | |description=Universal counter. While disarmed, your counter will disarm and knock away your opponent regardless of slash countered. | ||
}} | }} | ||
}} | }} | ||
| Line 839: | Line 973: | ||
====== <font style="visibility:hidden" size="0">Rage Explosion</font> ====== | ====== <font style="visibility:hidden" size="0">Rage Explosion</font> ====== | ||
{{MoveData | {{MoveData | ||
|image= | |image=SS7 ruixiang RE.jpg | ||
|hitbox=SS7 ruixiang RE hb.png | |||
|caption= | |caption= | ||
|name=Rage Explosion | |name=Rage Explosion | ||
| Line 847: | Line 982: | ||
|version= | |version= | ||
|damage=0 | |damage=0 | ||
|guard= | |guard=Unblockable | ||
|startup= | |startup=21 | ||
|active= | |active=3 | ||
|recovery= | |recovery= | ||
|hitAdv= | |hitAdv=0 | ||
| | |total=58 | ||
|blockAdv= | |blockAdv= | ||
|cancel= | |cancel= | ||
| | |recoil= | ||
|deflect= | |deflect= | ||
|unarmed= | |unarmed=No | ||
|description=Unblockable pushback attack. | |description=Unblockable pushback attack. | ||
}} | }} | ||
| Line 864: | Line 999: | ||
====== <font style="visibility:hidden" size="0">Lightning Blade</font> ====== | ====== <font style="visibility:hidden" size="0">Lightning Blade</font> ====== | ||
{{MoveData | {{MoveData | ||
|image= | |image=SS7 ruixiang issen.jpg | ||
|hitbox=SS7 ruixiang issen hb.png | |||
|caption= | |caption= | ||
|name=Lightning Blade (Issen) | |name=Lightning Blade (Issen) | ||
| Line 871: | Line 1,007: | ||
{{AttackData-SS2019 | {{AttackData-SS2019 | ||
|version= | |version= | ||
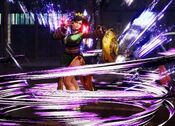
|damage= | |damage=300~709 | ||
|guard= | |guard=Mid | ||
|startup= | |startup=9 | ||
|active= | |active=8 | ||
|recovery= | |recovery= | ||
|hitAdv= | |hitAdv=KD | ||
| | |total= | ||
|blockAdv= | |blockAdv=-44 | ||
|cancel= | |cancel=No | ||
| | |recoil=No | ||
|deflect= | |deflect=No | ||
|unarmed= | |unarmed=No | ||
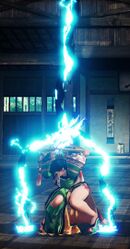
|description=Has projectile invulnerability and anti-airs. Damage scales up | |description=Has projectile invulnerability and anti-airs. Damage scales up based on remaining health. | ||
}} | }} | ||
}} | }} | ||
| Line 890: | Line 1,026: | ||
====== <font style="visibility:hidden" size="0">Black Tortoise Torrent</font> ====== | ====== <font style="visibility:hidden" size="0">Black Tortoise Torrent</font> ====== | ||
{{MoveData | {{MoveData | ||
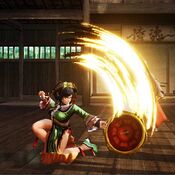
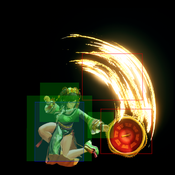
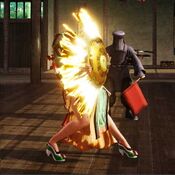
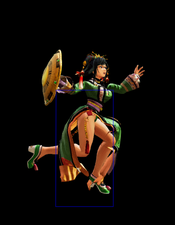
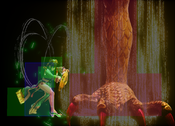
|image= | |image=SS7 ruixiang 236S.jpg | ||
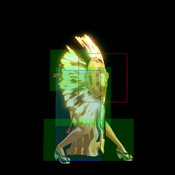
|caption= | |hitbox=SS7 ruixiang 236S hb.png | ||
|caption=玄武 (Xuánwǔ) | |||
|name=Black Tortoise Torrent | |name=Black Tortoise Torrent | ||
|input=236S | |input=236S | ||
|data= | |data= | ||
{{AttackData-SS2019 | {{AttackData-SS2019 | ||
|version= | |version=A | ||
|damage= | |damage=60 | ||
|guard= | |guard=Low | ||
|startup= | |startup=28 | ||
|active= | |||
|recovery= | |||
|hitAdv=KD | |||
|total=60 | |||
|blockAdv=-21 | |||
|guardDmg=5 | |||
|cancel= | |||
|recoil= | |||
|deflect= | |||
|unarmed=No | |||
|description=Low projectile. Actually a low and has to be crouch blocked. All versions will come out if Ruixiang is not interrupted from frame 1 to 10. | |||
}} | |||
{{AttackData-SS2019 | |||
|header=no | |||
|version=B | |||
|damage=60 | |||
|guard=Mid | |||
|startup=19 | |||
|active= | |||
|recovery= | |||
|hitAdv=KD | |||
|total=55 | |||
|blockAdv=-25 | |||
|guardDmg=5 | |||
|cancel= | |||
|recoil= | |||
|deflect= | |||
|unarmed=No | |||
|description=Middle projectile. Fastest startup and lowest recovery, but worst on block. | |||
''236B will miss on the following characters if they are offensively crouching (2 or 3 input): Baiken, Shizumaru, Nakoruru, Kazuki, Mina, Iroha, Rimururu, Tam Tam, Cham Cham. Wan-Fu (2 only), Kyoshiro (2 only)'' | |||
}} | |||
{{AttackData-SS2019 | |||
|header=no | |||
|version=C | |||
|damage=60 | |||
|guard=Mid | |||
|startup=28 | |||
|active= | |active= | ||
|recovery= | |recovery= | ||
|hitAdv= | |hitAdv=KD | ||
| | |total=60 | ||
|blockAdv= | |blockAdv=-21 | ||
|guardDmg=5 | |||
|cancel= | |cancel= | ||
| | |recoil= | ||
|deflect= | |deflect= | ||
|unarmed=No | |unarmed=No | ||
|description= | |description=High projectile. Anti-air version, only hit Earthquake standing. | ||
}} | }} | ||
}} | }} | ||
| Line 915: | Line 1,091: | ||
====== <font style="visibility:hidden" size="0">Vermilion Bird Blaze</font> ====== | ====== <font style="visibility:hidden" size="0">Vermilion Bird Blaze</font> ====== | ||
{{MoveData | {{MoveData | ||
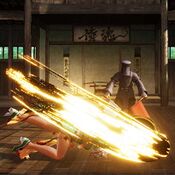
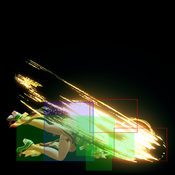
|image= | |image=SS7 ruixiang 214S.jpg | ||
|caption= | |hitbox=SS7 ruixiang 214S hb.png | ||
|caption=朱雀 (Zhūquè) | |||
|name=Vermilion Bird Blaze | |name=Vermilion Bird Blaze | ||
|input=214S | |input=214S | ||
|data= | |data= | ||
{{AttackData-SS2019 | {{AttackData-SS2019 | ||
|version= | |version=A | ||
|damage= | |damage=75 [25*3] | ||
|guard= | |guard=Mid | ||
|startup= | |startup=15 | ||
|active= | |active=12 | ||
|recovery= | |||
|hitAdv=KD(+86) | |||
|total=56 | |||
|blockAdv=-9 | |||
|guardDmg=12 | |||
|cancel= | |||
|recoil= | |||
|deflect= | |||
|unarmed=No | |||
|description=Destroys all projectiles but the main usage of this move is for combos. | |||
*Shortest range but fastest startup. | |||
*Best version to destroy projectiles with, due to lowest total frames. | |||
''214A will miss on Galford's 214A/B dog projectile.'' | |||
}} | |||
{{AttackData-SS2019 | |||
|header=no | |||
|version=B | |||
|damage=125 [25*5] | |||
|guard=Mid | |||
|startup=20 | |||
|active=18 | |||
|recovery= | |||
|hitAdv=KD(+80) | |||
|total=69 | |||
|blockAdv=-15 | |||
|guardDmg=20 | |||
|cancel= | |||
|recoil= | |||
|deflect= | |||
|unarmed=No | |||
|description=*More range than A version, but still mainly used in combos. | |||
}} | |||
{{AttackData-SS2019 | |||
|header=no | |||
|version=C | |||
|damage=160 [20*8] | |||
|guard=Mid | |||
|startup=23 | |||
|active=22 | |||
|recovery= | |recovery= | ||
|hitAdv= | |hitAdv=KD(+59) | ||
| | |total=96 | ||
|blockAdv= | |blockAdv=-36 | ||
|guardDmg=32 | |||
|cancel= | |cancel= | ||
| | |recoil= | ||
|deflect= | |deflect= | ||
|unarmed=No | |unarmed=No | ||
|description= | |description=*Longest range but slowest startup. | ||
*Only really used in combos, not to destroy projectiles. | |||
}} | }} | ||
{{AttackData-SS2019 | {{AttackData-SS2019 | ||
|header=no | |header=no | ||
|version=Rage | |version=Rage | ||
|damage= | |damage=264 [22*12] | ||
|guard= | |guard=Mid | ||
|startup= | |startup=15 | ||
|active= | |active=22 | ||
|recovery= | |recovery= | ||
|hitAdv= | |hitAdv=KD(+63) | ||
| | |total=88 | ||
|blockAdv= | |blockAdv=-32 | ||
|guardDmg=48 | |||
|cancel= | |cancel= | ||
| | |recoil= | ||
|deflect= | |deflect= | ||
|unarmed=No | |unarmed=No | ||
|description= | |description=*Rage enhanced version of 214C comes out much faster, deals more damage and does a lot of guard damage. | ||
}} | }} | ||
}} | }} | ||
| Line 957: | Line 1,177: | ||
====== <font style="visibility:hidden" size="0">White Tiger Fangs</font> ====== | ====== <font style="visibility:hidden" size="0">White Tiger Fangs</font> ====== | ||
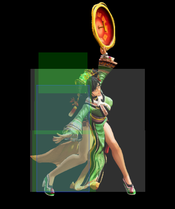
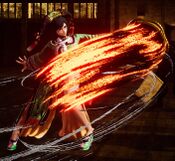
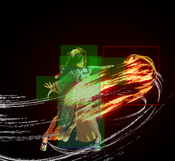
{{MoveData | {{MoveData | ||
|image= | |image=SS7 ruixiang 623S.jpg | ||
|caption= | |hitbox=SS7 ruixiang 623S hb.png | ||
|hitbox2=SS7 ruixiang 623S success hb.png | |||
|caption=白虎 (Báihǔ) | |||
|name=White Tiger Fangs | |name=White Tiger Fangs | ||
|input=623S | |input=623S | ||
|data= | |data= | ||
{{AttackData-SS2019 | {{AttackData-SS2019 | ||
|version= | |version= All | ||
|damage= | |damage=100 [20*5] | ||
|guard= | |guard=Low | ||
|startup= | |startup=53 | ||
|active= | |active=16 | ||
|recovery= | |recovery= | ||
|hitAdv= | |hitAdv=KD | ||
| | |total=68 | ||
|blockAdv= | |blockAdv=+15 | ||
|guardDmg=10 | |||
|cancel= | |cancel= | ||
| | |recoil= | ||
|deflect= | |deflect= | ||
|unarmed=No | |unarmed=No | ||
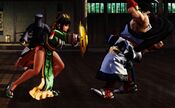
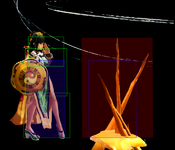
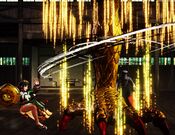
|description= | |description=Ruixiang's trap is the defining trait and her most important tool. A version sets the trap at close range, B version at mid range and C version at far range. The trap will come out if she is not interrupted from frame 1 to 20. If she sets another trap before the first one is gone, the first one will disappear at frame 20 of the second trap setting move. If the opponent is on top of the trap any time from frame 51 to 270 (total 220 frames active), the trap will attack in the next 2 frames and hit low, therefore the opponent cannot jump or backdash to avoid the trap once he steps on it, but he could block the attacks immediately after jump landing. It's extremely difficult to spot dodge or walk back/forward into the trap then block (only one frame window, because it's active for 16 frames and startup is 2 frames). It's safe to backdash to hop over the trap, but it gives more room for her to play zoning.<br> | ||
This trap could be used for zoning, okizeme, and block strings. On hit it allows for massive damaging combos with WTF/SSM/Issen. It also sets up unblockable like RE/Throw > (push into trap) Trap hit > WTF/SSM/Issen, or meaty trap + overhead. | |||
}} | }} | ||
}} | }} | ||
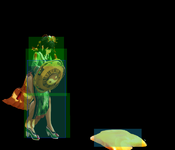
| Line 982: | Line 1,206: | ||
====== <font style="visibility:hidden" size="0">Azure Dragon Thunderstrike</font> ====== | ====== <font style="visibility:hidden" size="0">Azure Dragon Thunderstrike</font> ====== | ||
{{MoveData | {{MoveData | ||
|image= | |image=SS7 ruixiang 22S.jpg | ||
|caption= | |hitbox=SS7 ruixiang 22A hb.png | ||
|hitbox2=SS7 ruixiang 22B hb.png | |||
|hitbox3=SS7 ruixiang 22C hb.png | |||
|caption=青竜 (Qīnglóng) | |||
|name=Azure Dragon Thunderstrike | |name=Azure Dragon Thunderstrike | ||
|input=22S | |input=22S | ||
|data= | |data= | ||
{{AttackData-SS2019 | {{AttackData-SS2019 | ||
|version= | |version=A | ||
|damage= | |damage=100 | ||
|guard= | |||
|startup=15 | |||
|active=22 | |||
|recovery= | |||
|hitAdv=KD | |||
|total=59 | |||
|blockAdv=-20 | |||
|guardDmg=10 | |||
|cancel= | |||
|recoil= | |||
|deflect= | |||
|unarmed=No | |||
|description=Like 214S it also destroys all projectiles, but the main purpose is for anti-airing and combos. | |||
*Best version to destroy projectiles with, as the other versions are to slow and laggy. | |||
*Only one worth anti-airing with, but is often a bit too slow against characters with fast jumps. | |||
}} | |||
{{AttackData-SS2019 | |||
|header=no | |||
|version=B | |||
|damage=140 | |||
|guard= | |||
|startup=22 | |||
|active=33 | |||
|recovery= | |||
|hitAdv=-5 | |||
|total=73 | |||
|blockAdv=-22~+11 | |||
|guardDmg=20 | |||
|cancel= | |||
|recoil= | |||
|deflect= | |||
|unarmed=No | |||
|description=Unlike A and C versions, this doesn't knockdown. (It combos from B attacks, could be useful to push the opponent to the 623S trap, but doesn't recover fast enough for SSM.) | |||
}} | |||
{{AttackData-SS2019 | |||
|header=no | |||
|version=C | |||
|damage=180 | |||
|guard= | |guard= | ||
|startup= | |startup=35 | ||
|active= | |active=33 | ||
|recovery= | |recovery= | ||
|hitAdv= | |hitAdv=KD | ||
| | |total=86 | ||
|blockAdv= | |blockAdv=-23~+10 | ||
|guardDmg=30 | |||
|cancel= | |cancel= | ||
| | |recoil= | ||
|deflect= | |deflect= | ||
|unarmed=No | |unarmed=No | ||
|description= | |description= One of the most practical tools of this is using 22C meaty in the corner to be either +10 or +5 on block (if perfectly spaced) and it converts easily on hit. | ||
}} | }} | ||
}} | }} | ||
| Line 1,007: | Line 1,273: | ||
====== <font style="visibility:hidden" size="0">Kirin Earthen Rampage</font> ====== | ====== <font style="visibility:hidden" size="0">Kirin Earthen Rampage</font> ====== | ||
{{MoveData | {{MoveData | ||
|image= | |image=SS7 ruixiang 421D.jpg | ||
|caption= | |image2=SS7 ruixiang 421D success.jpg | ||
|hitbox=SS7 ruixiang 421D hb.png | |||
|hitbox2=SS7 ruixiang 421D success hb.png | |||
|caption=麒麟 (Qílín) | |||
|name=Kirin Earthen Rampage | |name=Kirin Earthen Rampage | ||
|input= | |input=421D | ||
|data= | |data= | ||
{{AttackData-SS2019 | {{AttackData-SS2019 | ||
|version= | |version= | ||
|damage= | |damage=200 | ||
|guard= | |guard= | ||
|startup= | |startup=8 | ||
|active= | |active=20 | ||
|recovery= | |recovery=39 | ||
|hitAdv= | |hitAdv=KD | ||
| | |total=66 | ||
|blockAdv= | |blockAdv= | ||
|guardDmg= | |||
|cancel= | |cancel= | ||
| | |recoil= | ||
|deflect= | |deflect= | ||
|unarmed=No | |unarmed=No | ||
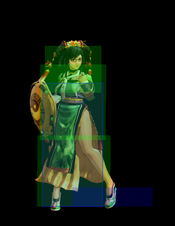
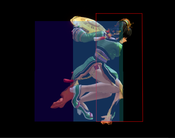
|description= | |description=She holds up the shield and will counterattack immediately if the opponent hits the shield with mid or high attack (any low attack or mid/high that doesn't touch her shield will beat it). It also reflects projectiles. | ||
''421D can't reflect projectiles from the following characters: Cham Cham (rage), Amakusa (rage), Charlotte (rage), Nakoruru (Mamahaha), Galford (Poppy), Kazuki (lv3), Mina (lv3), Sogetsu, Hanzo, Rimururu'' | |||
''421D misses projectiles from the following characters: Mina (236S>B), Tam Tam (236B), Kyoshiro'' | |||
}} | }} | ||
}} | }} | ||
| Line 1,033: | Line 1,307: | ||
===Weapon Flipping Technique=== | ===Weapon Flipping Technique=== | ||
{{MoveData | {{MoveData | ||
|image= | |image=SS7 ruixiang WFT.jpg | ||
|caption= | |hitbox=SS7 ruixiang WFT hb.png | ||
|hitbox2=SS7 ruixiang WFT2 hb.png | |||
|caption=九頭竜掌(Jiǔtóulóng) | |||
|name=Nine-Headed Dragon Strike | |name=Nine-Headed Dragon Strike | ||
|input=236B+C | |input=236B+C | ||
| Line 1,040: | Line 1,316: | ||
{{AttackData-SS2019 | {{AttackData-SS2019 | ||
|version= | |version= | ||
|damage= | |damage=420(490) | ||
|guard= | |guard=Mid | ||
|startup= | |startup=1+17 | ||
|active= | |active=3 | ||
|recovery= | |recovery= | ||
|hitAdv= | |hitAdv=KD | ||
| | |total= | ||
|blockAdv= | |blockAdv=-52 | ||
|cancel= | |cancel=No | ||
| | |recoil=No | ||
|deflect= | |deflect=No | ||
|unarmed= | |unarmed=No | ||
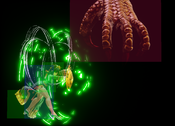
|description=Available only during Max Rage or Rage Explosion. Disarms on hit. | |description=Available only during Max Rage or Rage Explosion. Disarms on hit. A massive hitbox that covers both air and ground, significantly improves her offense and anti air. | ||
}} | }} | ||
}} | }} | ||
| Line 1,058: | Line 1,334: | ||
===Super Special Move=== | ===Super Special Move=== | ||
{{MoveData | {{MoveData | ||
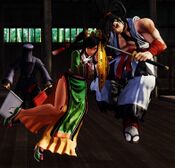
|image= | |image=SS7 ruixiang SSM1.jpg | ||
| | |hitbox=SS7 ruixiang SSM hb.png | ||
|image2=SS7 ruixiang SSM2.jpg | |||
|caption2=黄竜顕現 (Huánglóng) | |||
|name=Primordial Chaos of the Yellow Dragon | |name=Primordial Chaos of the Yellow Dragon | ||
|input=641236C+D | |input=641236C+D | ||
| Line 1,065: | Line 1,343: | ||
{{AttackData-SS2019 | {{AttackData-SS2019 | ||
|version= | |version= | ||
|damage= | |damage=675 [80,15*38,25] | ||
|guard= | |guard=Mid | ||
|startup= | |startup=10+24 | ||
|active= | |active=2 | ||
|recovery= | |recovery= | ||
|hitAdv= | |hitAdv=KD | ||
| | |total= | ||
|blockAdv= | |blockAdv=-74 | ||
|cancel= | |cancel=No | ||
| | |recoil=No | ||
|deflect= | |deflect=No | ||
|unarmed= | |unarmed=No | ||
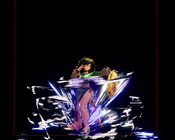
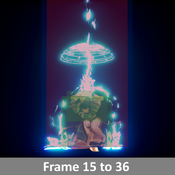
|description=Available only once per match. | |description=Available only once per match. The last hit doesn't follow regular damage scaling rules. This move is very good to use if you can hit confirm off the trap. Damage is 357 after throw (50% scale, [40,8*38,13]) | ||
}} | }} | ||
}} | }} | ||
| Line 1,084: | Line 1,362: | ||
List combos, use numpad notation. | List combos, use numpad notation. | ||
===Midscreen=== | ===Midscreen=== | ||
* '''n.5B/n.2B/5B/66B''' | |||
** '''...236B''' | |||
** '''...214S''' | |||
** '''...22A/22B''' | |||
** '''...WFT''' | |||
* '''... 2B xx WFT'''<br>''More damage than other mediums.'' | |||
* '''n.2C xx n.2B xx 214C / WFT'''<br>''New combo works in close range where near 2C would come out.'' | |||
* '''Close range 623S''' | |||
** '''... 236B''' | |||
** '''... 22C''' | |||
** '''... 214C''' | |||
** '''... WFT''' | |||
** '''... Issen''' | |||
** '''... SSM''' | |||
** '''... n.5C/j.C/n.2C''' | |||
* '''Medium range 623S''' | |||
** '''... 236B''' | |||
** '''... run up 22B/22A''' | |||
** '''... run up 214C''' | |||
** '''... WFT''' | |||
** '''... 236C xx WFT'''<br>''A little closer than mid range and character specific.'' | |||
** '''... Issen''' | |||
** '''... SSM''' | |||
** '''... 5C/j.C/66C''' | |||
* '''Far range 623S''' | |||
** '''... 236B''' | |||
** '''...run up 214C''' | |||
** '''... WFT''' | |||
** '''... Issen''' | |||
** '''... SSM'''<br>''Only connects when the trap hits from behind the opponent.'' | |||
** '''... j.C/66C''' | |||
* '''5CD / 4CD...''' | |||
** '''... (5B/66B) xx 214C / WFT''' | |||
** '''... 2B xx WFT'''<br>''More damage than 5B or 66B.'' | |||
** '''... 66B xx 22B'''<br>''Push very far away.'' | |||
** '''... mid range spikes to 236B''' | |||
** '''... mid range spikes to run up 22B/22A''' | |||
** '''... mid range spikes to run up 214C''' | |||
** '''... mid range spikes to WFT''' | |||
** '''... mid range spikes to Issen''' | |||
** '''... mid range spikes to run up SSM''' | |||
** '''... mid range spikes to 5C/66C/j.C''' | |||
* '''Deep j.C''' | |||
** '''... n.5C / 5C'''<br>''Universal j.C combo.'' | |||
** '''... (5B/66B) xx 214C / WFT''' | |||
** '''... 2B xx WFT'''<br>''More damage than 5B or 66B.'' | |||
** '''... 66B xx 22B''' | |||
===Corner=== | ===Corner=== | ||
* '''5CD / 4CD...''' | |||
* '''n.2C xx n.2B xx 214C / WFT'''<br>''New combo after grab into the corner.'' | |||
* '''Close spikes in the corner.''' | |||
** '''... 22C xx 22A/22B/n.5C''' | |||
** '''... 22C xx WFT''' | |||
** '''... 22C xx Issen''' | |||
** '''... SSM''' | |||
===Anti-Air=== | |||
* '''22C'''<br>''if opponent tries jumping out of the corner and if opponent jumps into late.'' | |||
** '''... 214C''' | |||
** '''... WFT''' | |||
** '''... Issen''' | |||
* '''236C'''<br>''If opponent tries jumping out of the corner.'' | |||
** '''... Issen''' | |||
===Guard Crush=== | |||
* '''n.5C / 5C...'''<br>''After recovery...'' | |||
** '''n.2C xx n.2B xx 214C / WFT'''<br>''Optimal GC follow up, WFT route is better than rage explosion 623A Issen combo.'' | |||
** '''SSM'''<br>''Universal SSM follow up (only after n.5C), not optimal and the opponent can burst out.'' | |||
* '''n.5C / 5C...'''<br>''Cancel recovery...'' | |||
** '''623A xx SSM'''<br>''Deals much bigger damage than non-rage n.2C combo.'' | |||
** '''623A xx 22C xx n.5C'''<br>''Corner only, deals better damage than non-rage n.2C combo.'' | |||
** '''Lightning Blade'''<br>''Universal Issen follow up, not optimal and the opponent can burst out.'' | |||
==Videos== | ==Videos== | ||
*[https://www.youtube.com/watch?v=0jeYPPc54oA Wu Ruixiang tutorial and combos] by LegendaryWolf Shirou | |||
*[https://www.youtube.com/watch?v=DWMvi9cDzsw LewdStares vs ScrubSaibot] | |||
*[https://www.youtube.com/watch?v=OTXqMvmH2dA&t=4380s Bboysonicx vs Chueko at Vortex Gallery 2022] | |||
==Colors== | ==Colors== | ||
{{Colors-SS2019 | {{Colors-SS2019 | ||
|Character= | |Character=SS_Wu | ||
}} | }} | ||
==External Links== | ==External Links== | ||
<!--To make adjustments to Wu's hashtag go to Samurai_Shodown/FAQ--> | |||
*Twitter hashtag: {{#lst:Samurai Shodown/FAQ|Wu Hashtag}} | |||
{{SS2019}} | {{SS2019}} | ||
[[Category:Samurai Shodown (2019)]] | [[Category:Samurai Shodown (2019)]] | ||
[[Category:Wu-Ruixiang]] | |||
Latest revision as of 18:44, 3 March 2023
|
呉瑞香, Wú-Ruìxiāng |
|
Introduction
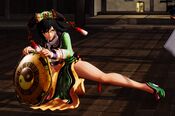
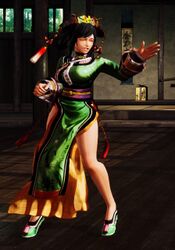
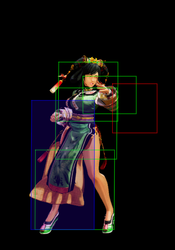
Wu-Ruixiang’s most defining feature is without a doubt her ground traps, which makes her a character for lab monsters who like to find crazy setups and stylish juggles. Though she can also be played as a more traditional zoner, of which she has arguably the best projectile game out of the entire cast, with high, medium and low fireballs that become active very early in their animation. Her shield counter can also reflect projectiles, in addition to being a strong anti-aggression tool. Ruixiang’s WFT is fast and covers a huge area, making it risky for the opponent to challenge her zoning.
However, these traits come at the cost of surprisingly stubby and quite laggy normals. Her defense isn’t spotless either as she somewhat struggles with anti-airing and her damage is way below average without setups. Combined with slow movement and floaty jump, she has a hard time positioning herself properly. So it's crucial for Ruixiang to keep the opponent far away, or else she crumbles very easily.
| Strengths | Weaknesses |
|---|---|
|
|
Gameplan
Neutral
Her neutral is mostly zone and AA opponents (22A, 236C) if they try to jump for it.
Okizeme
22C
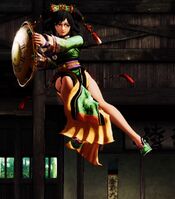
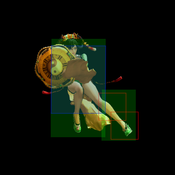
If Wu gets a knockdown in the corner she can use 22C to be +10 to +5 depending on if they roll or not and will catch all tech rolls. If they take the hit Wu can easily convert because of how meaty the special hits. Sample idea of this would be 66D > microwalk back 22C.
- If they get hit you can follow up with many different options
- normal(restand) > 623A
- 214C
- WFT
- Issen (it will also sometimes hit a mid screen opponent as well but you need to run)
623S
- On hit
- SSM
- normal(restand) > 623A or B
- WFT
- 66C
- Issen
- Close range 623S options on block
- B+C(overhead) is good
- 6D, if your opponent blocks a 6D you have enough time for a free tick grab (with this setup you need to time the 6D properly because the spikes have thrown invul for a certain period. Practice this in training mode for consistency).
- 6D if hits you can frame trap into 2A
- Far Range 623s
- 66D/f.2C(safer option due to pushback)
- 661/6643 B+C for an instant running overhead
Normal Moves
Far Slashes
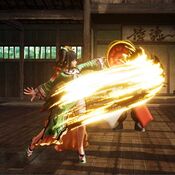
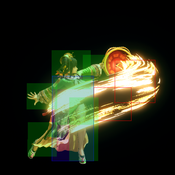
5A
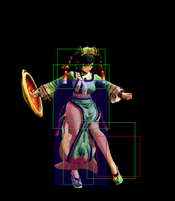
5A
|
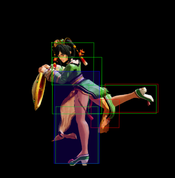
|
|---|---|
Toggle Hitboxes Toggle Hitboxes
|
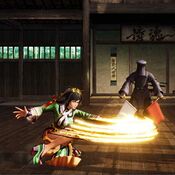
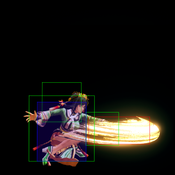
5B
5B
|
|
|---|---|
Toggle Hitboxes Toggle Hitboxes
|
5C
5C
|
|
|---|---|
Toggle Hitboxes Toggle Hitboxes
|
2A
2A
|
|
|---|---|
Toggle Hitboxes Toggle Hitboxes
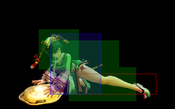
|
2B
2B
|
|
|---|---|
Toggle Hitboxes Toggle Hitboxes
|
2C
2C
|
|
|---|---|
Toggle Hitboxes Toggle Hitboxes
|
Near Slashes
n.5A
n.5A
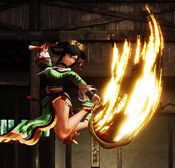
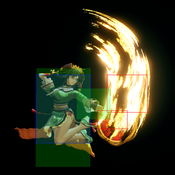
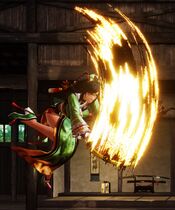
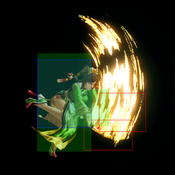
|
|
|---|---|
Toggle Hitboxes Toggle Hitboxes
|
n.5B
n.5B
|
|
|---|---|
Toggle Hitboxes Toggle Hitboxes
|
n.5C
n.5C
|
|
|---|---|
Toggle Hitboxes Toggle Hitboxes
|
n.2A
n.2A
|
|
|---|---|
Toggle Hitboxes Toggle Hitboxes
|
n.2B
n.2B
|
|
|---|---|
Toggle Hitboxes Toggle Hitboxes
|
n.2C
n.2C
|
|
|---|---|
Toggle Hitboxes Toggle Hitboxes
|
Kicks
5D
5D
|
|
|---|---|
Toggle Hitboxes Toggle Hitboxes
|
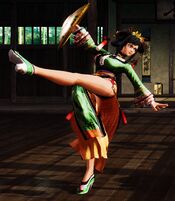
6D
6D
|
|
|---|---|
Toggle Hitboxes Toggle Hitboxes
|
2D
2D
|
|
|---|---|
Toggle Hitboxes Toggle Hitboxes
|
3D
3D
|
|
|---|---|
Toggle Hitboxes Toggle Hitboxes
|
Dash Normals
66
66
|
|
|---|---|
Toggle Hitboxes Toggle Hitboxes
|
66A
66A
|
|
|---|---|
Toggle Hitboxes Toggle Hitboxes
|
66B
66B
|
|
|---|---|
Toggle Hitboxes Toggle Hitboxes
|
66C
66C
|
|
|---|---|
Toggle Hitboxes Toggle Hitboxes
|
66D
66D
|
|
|---|---|
Toggle Hitboxes Toggle Hitboxes
|
Air Normals
j.A
j.A
|
|
|---|---|
Toggle Hitboxes Toggle Hitboxes
|
j.B
j.B
|
|
|---|---|
Toggle Hitboxes Toggle Hitboxes
|
j.C
j.C
|
|
|---|---|
Toggle Hitboxes Toggle Hitboxes
|
j.D
j.D
|
|
|---|---|
Toggle Hitboxes Toggle Hitboxes
|
Unarmed Normals
u.5S
u.5S
|
|
|---|---|
Toggle Hitboxes Toggle Hitboxes
|
u.2S
u.2S
|
|
|---|---|
Toggle Hitboxes Toggle Hitboxes
|
ju.S
ju.S
|
|
|---|---|
Toggle Hitboxes Toggle Hitboxes
|
u.66S
u.66S
|
|
|---|---|
Toggle Hitboxes Toggle Hitboxes
|
Universal Mechanics
Guard Break
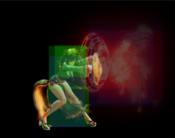
Guard Break (Throw) 4/5/6C+D Forward Throw Forward Throw Back Throw Back Throw Throw Whiffs Throw Whiffs
|
|
|---|---|
Toggle Hitboxes Toggle Hitboxes
|
Surprise Attack
Surprise Attack (Overhead)
5B+C |
|
|---|---|
Toggle Hitboxes Toggle Hitboxes
|
Dodge
Dodge
5A+B |
|
|---|---|
Toggle Hitboxes Toggle Hitboxes
|
Stance Break
Stance Break
A+B during Just Defense |
|
|---|---|
Toggle Hitboxes Toggle Hitboxes
|
Counter / Blade Catch
Counter / Blade Catch 236A+B Counter Counter Blade Catch Blade Catch
|
|
|---|---|
Toggle Hitboxes Toggle Hitboxes
|
Rage Explosion
Rage Explosion
5A+B+C |
|
|---|---|
Toggle Hitboxes Toggle Hitboxes
|
Lightning Blade
Lightning Blade (Issen)
5A+B+C during Rage Explosion |
|
|---|---|
Toggle Hitboxes Toggle Hitboxes
|
Special Moves
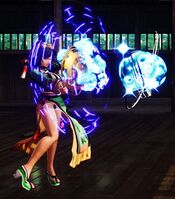
Black Tortoise Torrent
Black Tortoise Torrent 236S 玄武 (Xuánwǔ) 玄武 (Xuánwǔ)
|
|
|---|---|
Toggle Hitboxes Toggle Hitboxes
|
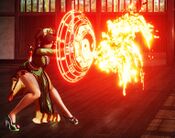
Vermilion Bird Blaze
Vermilion Bird Blaze 214S 朱雀 (Zhūquè) 朱雀 (Zhūquè)
|
|
|---|---|
Toggle Hitboxes Toggle Hitboxes
|
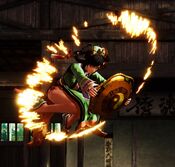
White Tiger Fangs
White Tiger Fangs 623S 白虎 (Báihǔ) 白虎 (Báihǔ)
|
|
|---|---|
Toggle Hitboxes Toggle Hitboxes
|
Azure Dragon Thunderstrike
Azure Dragon Thunderstrike 22S 青竜 (Qīnglóng) 青竜 (Qīnglóng)
|
|
|---|---|
Toggle Hitboxes Toggle Hitboxes
|
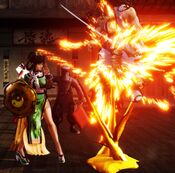
Kirin Earthen Rampage
Kirin Earthen Rampage 421D 麒麟 (Qílín) 麒麟 (Qílín)
|
|
|---|---|
Toggle Hitboxes Toggle Hitboxes
|
Supers
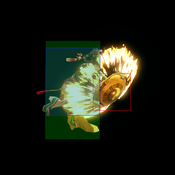
Weapon Flipping Technique
Nine-Headed Dragon Strike 236B+C 九頭竜掌(Jiǔtóulóng) 九頭竜掌(Jiǔtóulóng)
|
|
|---|---|
Toggle Hitboxes Toggle Hitboxes
|
Super Special Move
Primordial Chaos of the Yellow Dragon 641236C+D 黄竜顕現 (Huánglóng) 黄竜顕現 (Huánglóng)
|
|
|---|---|
Toggle Hitboxes Toggle Hitboxes
|
Combos
List combos, use numpad notation.
Midscreen
- n.5B/n.2B/5B/66B
- ...236B
- ...214S
- ...22A/22B
- ...WFT
- ... 2B xx WFT
More damage than other mediums.
- n.2C xx n.2B xx 214C / WFT
New combo works in close range where near 2C would come out.
- Close range 623S
- ... 236B
- ... 22C
- ... 214C
- ... WFT
- ... Issen
- ... SSM
- ... n.5C/j.C/n.2C
- Medium range 623S
- ... 236B
- ... run up 22B/22A
- ... run up 214C
- ... WFT
- ... 236C xx WFT
A little closer than mid range and character specific. - ... Issen
- ... SSM
- ... 5C/j.C/66C
- Far range 623S
- ... 236B
- ...run up 214C
- ... WFT
- ... Issen
- ... SSM
Only connects when the trap hits from behind the opponent. - ... j.C/66C
- 5CD / 4CD...
- ... (5B/66B) xx 214C / WFT
- ... 2B xx WFT
More damage than 5B or 66B. - ... 66B xx 22B
Push very far away. - ... mid range spikes to 236B
- ... mid range spikes to run up 22B/22A
- ... mid range spikes to run up 214C
- ... mid range spikes to WFT
- ... mid range spikes to Issen
- ... mid range spikes to run up SSM
- ... mid range spikes to 5C/66C/j.C
- Deep j.C
- ... n.5C / 5C
Universal j.C combo. - ... (5B/66B) xx 214C / WFT
- ... 2B xx WFT
More damage than 5B or 66B. - ... 66B xx 22B
- ... n.5C / 5C
Corner
- 5CD / 4CD...
- n.2C xx n.2B xx 214C / WFT
New combo after grab into the corner.
- Close spikes in the corner.
- ... 22C xx 22A/22B/n.5C
- ... 22C xx WFT
- ... 22C xx Issen
- ... SSM
Anti-Air
- 22C
if opponent tries jumping out of the corner and if opponent jumps into late.- ... 214C
- ... WFT
- ... Issen
- 236C
If opponent tries jumping out of the corner.- ... Issen
Guard Crush
- n.5C / 5C...
After recovery...- n.2C xx n.2B xx 214C / WFT
Optimal GC follow up, WFT route is better than rage explosion 623A Issen combo. - SSM
Universal SSM follow up (only after n.5C), not optimal and the opponent can burst out.
- n.2C xx n.2B xx 214C / WFT
- n.5C / 5C...
Cancel recovery...- 623A xx SSM
Deals much bigger damage than non-rage n.2C combo. - 623A xx 22C xx n.5C
Corner only, deals better damage than non-rage n.2C combo. - Lightning Blade
Universal Issen follow up, not optimal and the opponent can burst out.
- 623A xx SSM
Videos
- Wu Ruixiang tutorial and combos by LegendaryWolf Shirou
- LewdStares vs ScrubSaibot
- Bboysonicx vs Chueko at Vortex Gallery 2022
Colors
External Links
- Twitter hashtag: #SS_WU
