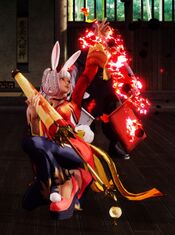
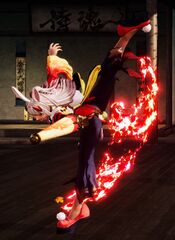
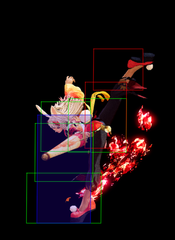
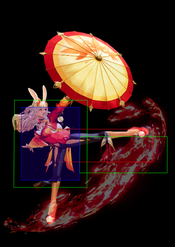
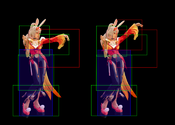
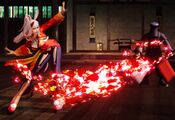
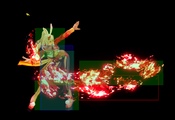
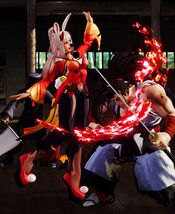
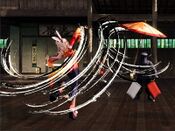
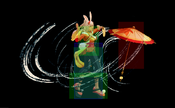
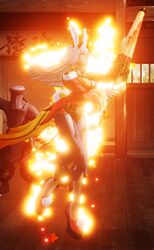
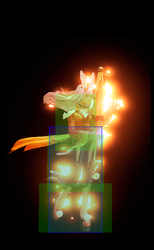
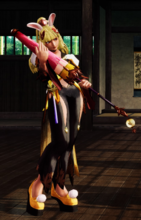
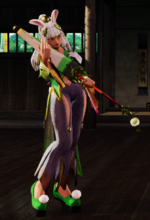
Samurai Shodown/Gongsun Li: Difference between revisions
m (→Introduction: Spelling error.) |
Scrubsaibot (talk | contribs) No edit summary |
||
| (11 intermediate revisions by 2 users not shown) | |||
| Line 18: | Line 18: | ||
{{ProConTable | {{ProConTable | ||
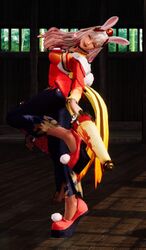
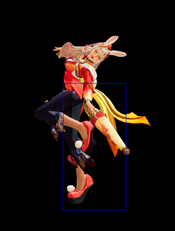
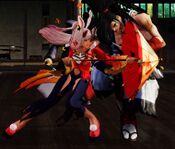
|intro=<center>[[File:SS_Gongsun_Icon.png|40px]] '''Gongsun Li''' is a runaway zoner who dictates the pace of the match with her great fireball | |intro=<center>[[File:SS_Gongsun_Icon.png|40px]] '''Gongsun Li''' is a runaway zoner who dictates the pace of the match with her great fireball, fast teleports and strong unarmed toolset.</center> | ||
|pros= | |pros= | ||
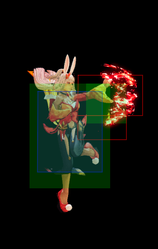
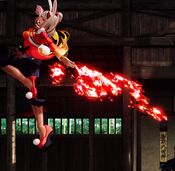
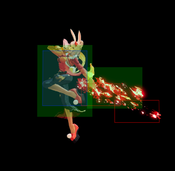
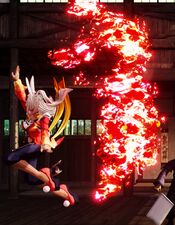
*'''Great zoning:''' Li's 214D is a great high fireball with fast startup and low recovery. She can also use the much faster and mid-hitting 236S/D "umbrella throw" to keep opponents on her toes. Furthermore, every 214D she lands fills her unique "petal gauge". When this gauge is full, her next 214D will do much more damage, gain juggle properties on hit and become advantageous on block, granting her pressure opportunities. | *'''Great zoning:''' Li's 214D is a great high fireball with fast startup and low recovery. She can also use the much faster and mid-hitting 236S/D "umbrella throw" to keep opponents on her toes. Furthermore, every 214D she lands fills her unique "petal gauge". When this gauge is full, her next 214D will do much more damage, gain juggle properties on hit and become advantageous on block, granting her pressure opportunities. | ||
| Line 56: | Line 56: | ||
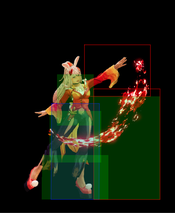
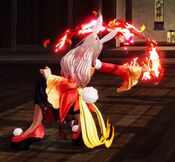
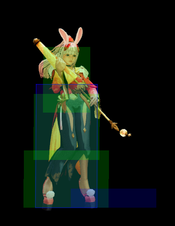
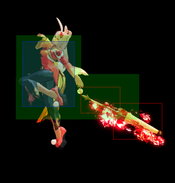
{{MoveData | {{MoveData | ||
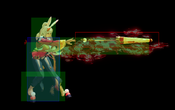
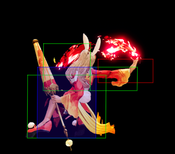
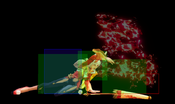
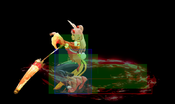
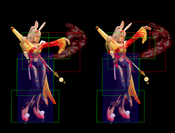
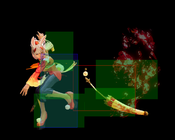
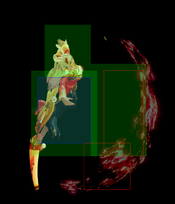
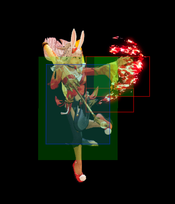
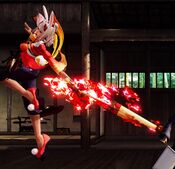
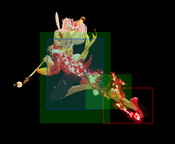
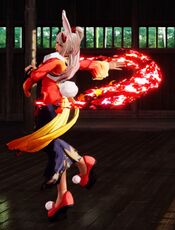
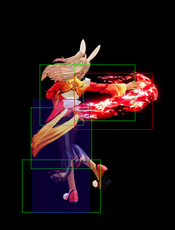
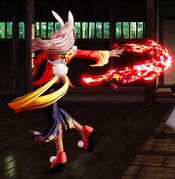
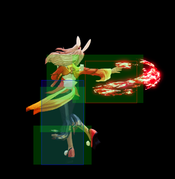
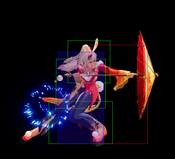
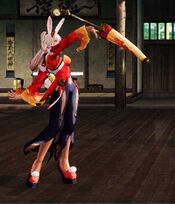
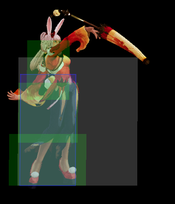
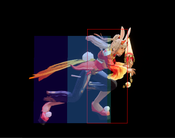
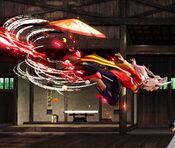
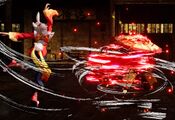
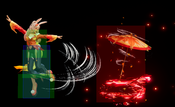
|image=SS7 GSL 5A.jpg | |image=SS7 GSL 5A.jpg | ||
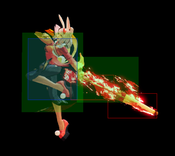
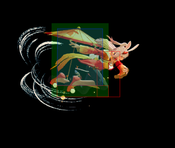
|hitbox=SS7 GSL 5A hb.png | |||
|caption= | |caption= | ||
|name=5A | |name=5A | ||
| Line 63: | Line 64: | ||
|guard=Mid | |guard=Mid | ||
|startup=7 | |startup=7 | ||
|active= | |active=3 | ||
|recovery= | |recovery= | ||
|total=23 | |total=23 | ||
| Line 80: | Line 81: | ||
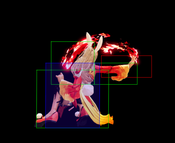
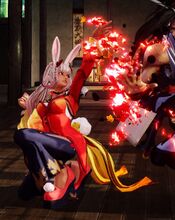
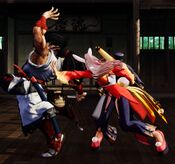
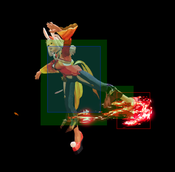
{{MoveData | {{MoveData | ||
|image=SS7 GSL 5B.jpg | |image=SS7 GSL 5B.jpg | ||
|hitbox=SS7 GSL 5B hb.png | |||
|caption= | |caption= | ||
|name=5B | |name=5B | ||
| Line 87: | Line 89: | ||
|guard=Mid | |guard=Mid | ||
|startup=15 | |startup=15 | ||
|active= | |active=4 | ||
|recovery= | |recovery= | ||
|total=39 | |total=39 | ||
| Line 104: | Line 106: | ||
{{MoveData | {{MoveData | ||
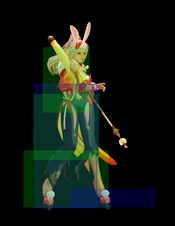
|image=SS7 GSL 5C.jpg | |image=SS7 GSL 5C.jpg | ||
|hitbox=SS7 GSL 5C hb.png | |||
|caption= | |caption= | ||
|name=5C | |name=5C | ||
| Line 111: | Line 114: | ||
|guard=Mid | |guard=Mid | ||
|startup=22 | |startup=22 | ||
|active= | |active=4 | ||
|recovery= | |recovery= | ||
|total=64 | |total=64 | ||
| Line 121: | Line 124: | ||
|deflect=Disarm | |deflect=Disarm | ||
|unarmed=No | |unarmed=No | ||
|description=Similar to 5B | |description=Similar to 5B with good damage, but much slower and vulnerable to whiff punish. | ||
}} | }} | ||
}} | }} | ||
| Line 128: | Line 131: | ||
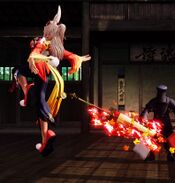
{{MoveData | {{MoveData | ||
|image=SS7 GSL 2A.jpg | |image=SS7 GSL 2A.jpg | ||
|hitbox=SS7 GSL 2A hb.png | |||
|caption= | |caption= | ||
|name=2A | |name=2A | ||
| Line 135: | Line 139: | ||
|guard=Mid | |guard=Mid | ||
|startup=5 | |startup=5 | ||
|active= | |active=5 | ||
|recovery= | |recovery= | ||
|total=20 | |total=20 | ||
| Line 152: | Line 156: | ||
{{MoveData | {{MoveData | ||
|image=SS7 GSL 2B.jpg | |image=SS7 GSL 2B.jpg | ||
|hitbox=SS7 GSL 2B hb.png | |||
|caption= | |caption= | ||
|name=2B | |name=2B | ||
| Line 159: | Line 164: | ||
|guard=Mid | |guard=Mid | ||
|startup=12 | |startup=12 | ||
|active= | |active=3 | ||
|recovery= | |recovery= | ||
|total=37 | |total=37 | ||
| Line 169: | Line 174: | ||
|deflect=Yes | |deflect=Yes | ||
|unarmed=No | |unarmed=No | ||
|description=Mid range poke which is cancellable. It doesn't hit low despite the animation. | |description=Mid range poke which is cancellable. It doesn't hit low despite the animation. Could cancel late into 214A as option select. | ||
}} | }} | ||
}} | }} | ||
| Line 176: | Line 181: | ||
{{MoveData | {{MoveData | ||
|image=SS7 GSL 2C.jpg | |image=SS7 GSL 2C.jpg | ||
|hitbox=SS7 GSL 2C hb.png | |||
|caption= | |caption= | ||
|name=2C | |name=2C | ||
| Line 183: | Line 189: | ||
|guard=Low | |guard=Low | ||
|startup=19 | |startup=19 | ||
|active= | |active=4 | ||
|recovery= | |recovery= | ||
|total=53 | |total=53 | ||
| Line 200: | Line 206: | ||
{{MoveData | {{MoveData | ||
|image=SS7 GSL 3C.jpg | |image=SS7 GSL 3C.jpg | ||
|hitbox=SS7 GSL 3C hb.png | |||
|caption=Twisting Maple | |caption=Twisting Maple | ||
|name=3C | |name=3C | ||
| Line 207: | Line 214: | ||
|guard=Low | |guard=Low | ||
|startup=17 | |startup=17 | ||
|active= | |active=4 | ||
|recovery= | |recovery= | ||
|total= | |total=45 | ||
|hitAdv=KD(+94) | |hitAdv=KD(+94) | ||
|blockAdv=- | |blockAdv=-28 | ||
|guardDmg=8 | |guardDmg=8 | ||
|cancel=No | |cancel=No | ||
| Line 226: | Line 233: | ||
{{MoveData | {{MoveData | ||
|image=SS7 GSL n5A.jpg | |image=SS7 GSL n5A.jpg | ||
|hitbox=SS7 GSL n5A hb.png | |||
|caption= | |caption= | ||
|name=n.5A | |name=n.5A | ||
| Line 233: | Line 241: | ||
|guard=Mid | |guard=Mid | ||
|startup=5 | |startup=5 | ||
|active= | |active=5 | ||
|recovery= | |recovery= | ||
|total=17 | |total=17 | ||
| Line 250: | Line 258: | ||
{{MoveData | {{MoveData | ||
|image=SS7 GSL n5B.jpg | |image=SS7 GSL n5B.jpg | ||
|hitbox=SS7 GSL n5B hb.png | |||
|caption= | |caption= | ||
|name=n.5B | |name=n.5B | ||
| Line 257: | Line 266: | ||
|guard=Mid | |guard=Mid | ||
|startup=9 | |startup=9 | ||
|active= | |active=2 | ||
|recovery= | |recovery= | ||
|total= | |total=31 | ||
|hitAdv=-2 | |hitAdv=-2 | ||
|blockAdv=-12 | |blockAdv=-12 | ||
| Line 274: | Line 283: | ||
{{MoveData | {{MoveData | ||
|image=SS7 GSL n5C.jpg | |image=SS7 GSL n5C.jpg | ||
|hitbox=SS7 GSL n5C hb.png | |||
|caption= | |caption= | ||
|name=n.5C | |name=n.5C | ||
| Line 280: | Line 290: | ||
|damage=220 | |damage=220 | ||
|guard=Mid | |guard=Mid | ||
|startup=15,23 | |startup=15,19,23 | ||
|active= | |active=3,3,3 | ||
|recovery= | |recovery= | ||
|total=45 | |total=45 | ||
| Line 291: | Line 301: | ||
|deflect=Disarm | |deflect=Disarm | ||
|unarmed=No | |unarmed=No | ||
|description=Standard near heavy slash with good damage. | |description=Standard near heavy slash with good damage, could be used for anti neutral jump. | ||
}} | }} | ||
}} | }} | ||
| Line 298: | Line 308: | ||
{{MoveData | {{MoveData | ||
|image=SS7 GSL n2A.jpg | |image=SS7 GSL n2A.jpg | ||
|hitbox=SS7 GSL n2A hb.png | |||
|caption= | |caption= | ||
|name=n.2A | |name=n.2A | ||
| Line 305: | Line 316: | ||
|guard=Mid | |guard=Mid | ||
|startup=5 | |startup=5 | ||
|active= | |active=4 | ||
|recovery= | |recovery= | ||
|total= | |total=18 | ||
|hitAdv=-1 | |hitAdv=-1 | ||
|blockAdv=-4 | |blockAdv=-4 | ||
| Line 323: | Line 334: | ||
{{MoveData | {{MoveData | ||
|image=SS7 GSL 5D.jpg | |image=SS7 GSL 5D.jpg | ||
|hitbox=SS7 GSL 5D hb.png | |||
|caption= | |caption= | ||
|name=5D | |name=5D | ||
| Line 330: | Line 342: | ||
|guard=Mid | |guard=Mid | ||
|startup=12 | |startup=12 | ||
|active= | |active=4 | ||
|recovery= | |recovery= | ||
|total=29 | |total=29 | ||
| Line 347: | Line 359: | ||
{{MoveData | {{MoveData | ||
|image=SS7 GSL 6D.jpg | |image=SS7 GSL 6D.jpg | ||
|hitbox=SS7 GSL 6D hb.png | |||
|caption= | |caption= | ||
|name=6D | |name=6D | ||
| Line 354: | Line 367: | ||
|guard=Mid | |guard=Mid | ||
|startup=20 | |startup=20 | ||
|active= | |active=3 | ||
|recovery= | |recovery= | ||
|total=45 | |total=45 | ||
| Line 371: | Line 384: | ||
{{MoveData | {{MoveData | ||
|image=SS7 GSL 2D.jpg | |image=SS7 GSL 2D.jpg | ||
|hitbox=SS7 GSL 2D hb.png | |||
|caption= | |caption= | ||
|name=2D | |name=2D | ||
| Line 378: | Line 392: | ||
|guard=Low | |guard=Low | ||
|startup=5 | |startup=5 | ||
|active= | |active=6 | ||
|recovery= | |recovery= | ||
|total=17 | |total=17 | ||
| Line 395: | Line 409: | ||
{{MoveData | {{MoveData | ||
|image=SS7 GSL 3D.jpg | |image=SS7 GSL 3D.jpg | ||
|hitbox=SS7 GSL 3D hb.png | |||
|caption= | |caption= | ||
|name=3D | |name=3D | ||
| Line 420: | Line 435: | ||
{{MoveData | {{MoveData | ||
|image=SS7 GSL 66A.jpg | |image=SS7 GSL 66A.jpg | ||
|hitbox=SS7 GSL 66A hb.png | |||
|caption= | |caption= | ||
|name=66A | |name=66A | ||
| Line 427: | Line 443: | ||
|guard=Mid | |guard=Mid | ||
|startup=5 | |startup=5 | ||
|active= | |active=5 | ||
|recovery= | |recovery= | ||
|total=32 | |total=32 | ||
| Line 444: | Line 460: | ||
{{MoveData | {{MoveData | ||
|image=SS7 GSL 66B.jpg | |image=SS7 GSL 66B.jpg | ||
|hitbox=SS7 GSL 66B hb.png | |||
|caption= | |caption= | ||
|name=66B | |name=66B | ||
| Line 451: | Line 468: | ||
|guard=Mid | |guard=Mid | ||
|startup=11 | |startup=11 | ||
|active= | |active=2 | ||
|recovery= | |recovery= | ||
|total=33 | |total=33 | ||
| Line 468: | Line 485: | ||
{{MoveData | {{MoveData | ||
|image=SS7 GSL 66C.jpg | |image=SS7 GSL 66C.jpg | ||
|hitbox=SS7 GSL 66C hb.png | |||
|caption= | |caption= | ||
|name=66C | |name=66C | ||
| Line 475: | Line 493: | ||
|guard=High | |guard=High | ||
|startup=22 | |startup=22 | ||
|active= | |active=4 | ||
|recovery= | |recovery= | ||
|total=64 | |total=64 | ||
| Line 485: | Line 503: | ||
|deflect=No | |deflect=No | ||
|unarmed=No | |unarmed=No | ||
|description=Running overhead with good damage and knocks down. | |description=Running overhead with good damage and knocks down but very punishable, airborne starting from frame 8. | ||
}} | }} | ||
}} | }} | ||
| Line 492: | Line 510: | ||
{{MoveData | {{MoveData | ||
|image=SS7 GSL 66D.jpg | |image=SS7 GSL 66D.jpg | ||
|hitbox=SS7 GSL 66D hb.png | |||
|caption= | |caption= | ||
|name=66D | |name=66D | ||
| Line 517: | Line 536: | ||
{{MoveData | {{MoveData | ||
|image=SS7 GSL jA.jpg | |image=SS7 GSL jA.jpg | ||
|hitbox=SS7 GSL jA hb.png | |||
|caption= | |caption= | ||
|name=j.A | |name=j.A | ||
| Line 524: | Line 544: | ||
|guard=High | |guard=High | ||
|startup=6 | |startup=6 | ||
|active= | |active=5 | ||
|recovery= | |recovery= | ||
|total= | |total= | ||
| Line 541: | Line 561: | ||
{{MoveData | {{MoveData | ||
|image=SS7 GSL jB.jpg | |image=SS7 GSL jB.jpg | ||
|hitbox=SS7 GSL jB hb.png | |||
|caption= | |caption= | ||
|name=j.B | |name=j.B | ||
| Line 548: | Line 569: | ||
|guard=High | |guard=High | ||
|startup=11 | |startup=11 | ||
|active= | |active=4 | ||
|recovery= | |recovery= | ||
|total= | |total= | ||
| Line 565: | Line 586: | ||
{{MoveData | {{MoveData | ||
|image=SS7 GSL jC.jpg | |image=SS7 GSL jC.jpg | ||
|hitbox=SS7 GSL jC hb.png | |||
|caption= | |caption= | ||
|name=j.C | |name=j.C | ||
| Line 572: | Line 594: | ||
|guard=High | |guard=High | ||
|startup=14 | |startup=14 | ||
|active= | |active=3 | ||
|recovery= | |recovery= | ||
|total= | |total= | ||
| Line 578: | Line 600: | ||
|blockAdv= | |blockAdv= | ||
|guardDmg=20 | |guardDmg=20 | ||
|cancel= | |cancel=Yes | ||
|recoil=No | |recoil=No | ||
|deflect=No | |deflect=No | ||
| Line 589: | Line 611: | ||
{{MoveData | {{MoveData | ||
|image=SS7 GSL jD.jpg | |image=SS7 GSL jD.jpg | ||
|hitbox=SS7 GSL jD hb.png | |||
|caption= | |caption= | ||
|name=j.D | |name=j.D | ||
| Line 596: | Line 619: | ||
|guard=High | |guard=High | ||
|startup=8 | |startup=8 | ||
|active= | |active=7 | ||
|recovery= | |recovery= | ||
|total= | |total= | ||
| Line 614: | Line 637: | ||
{{MoveData | {{MoveData | ||
|image=SS7 GSL u5A.jpg | |image=SS7 GSL u5A.jpg | ||
|hitbox=SS7 GSL u5A hb.png | |||
|caption= | |caption= | ||
|name=u.5A/B | |name=u.5A/B | ||
| Line 621: | Line 645: | ||
|guard=Mid | |guard=Mid | ||
|startup=6 | |startup=6 | ||
|active= | |active=3 | ||
|recovery= | |recovery= | ||
|total=22 | |total=22 | ||
| Line 638: | Line 662: | ||
{{MoveData | {{MoveData | ||
|image=SS7 GSL un5A.jpg | |image=SS7 GSL un5A.jpg | ||
|hitbox=SS7 GSL un5A hb.png | |||
|caption= | |caption= | ||
|name=un.5A/B | |name=un.5A/B | ||
| Line 645: | Line 670: | ||
|guard=Mid | |guard=Mid | ||
|startup=4 | |startup=4 | ||
|active= | |active=5 | ||
|recovery= | |recovery= | ||
|total=16 | |total=16 | ||
| Line 662: | Line 687: | ||
{{MoveData | {{MoveData | ||
|image=SS7 GSL u5C.jpg | |image=SS7 GSL u5C.jpg | ||
|hitbox=SS7 GSL u5C hb.png | |||
|caption= | |caption= | ||
|name=u.5C | |name=u.5C | ||
| Line 669: | Line 695: | ||
|guard=Mid | |guard=Mid | ||
|startup=17 | |startup=17 | ||
|active= | |active=2 | ||
|recovery= | |recovery= | ||
|total=53 | |total=53 | ||
| Line 686: | Line 712: | ||
{{MoveData | {{MoveData | ||
|image=SS7 GSL un5C.jpg | |image=SS7 GSL un5C.jpg | ||
|hitbox=SS7 GSL un5C hb.png | |||
|caption= | |caption= | ||
|name=un.5C | |name=un.5C | ||
| Line 693: | Line 720: | ||
|guard=Mid | |guard=Mid | ||
|startup=13 | |startup=13 | ||
|active= | |active=3 | ||
|recovery= | |recovery= | ||
|total=41 | |total=41 | ||
| Line 710: | Line 737: | ||
{{MoveData | {{MoveData | ||
|image=SS7 GSL u2A.jpg | |image=SS7 GSL u2A.jpg | ||
|hitbox=SS7 GSL u2A hb.png | |||
|caption= | |caption= | ||
|name=u.2A/B | |name=u.2A/B | ||
| Line 717: | Line 745: | ||
|guard=Mid | |guard=Mid | ||
|startup=5 | |startup=5 | ||
|active= | |active=5 | ||
|recovery= | |recovery= | ||
|total=20 | |total=20 | ||
| Line 734: | Line 762: | ||
{{MoveData | {{MoveData | ||
|image=SS7 GSL un2A.jpg | |image=SS7 GSL un2A.jpg | ||
|hitbox=SS7 GSL un2A hb.png | |||
|caption= | |caption= | ||
|name=un.2A/B | |name=un.2A/B | ||
| Line 741: | Line 770: | ||
|guard=Mid | |guard=Mid | ||
|startup=4 | |startup=4 | ||
|active= | |active=4 | ||
|recovery= | |recovery= | ||
|total=17 | |total=17 | ||
| Line 758: | Line 787: | ||
{{MoveData | {{MoveData | ||
|image=SS7 GSL u2C.jpg | |image=SS7 GSL u2C.jpg | ||
|hitbox=SS7 GSL u2C hb.png | |||
|caption= | |caption= | ||
|name=u.2C | |name=u.2C | ||
| Line 765: | Line 795: | ||
|guard=Low | |guard=Low | ||
|startup=17 | |startup=17 | ||
|active= | |active=3 | ||
|recovery= | |recovery= | ||
|total=49 | |total=49 | ||
| Line 775: | Line 805: | ||
|deflect=No | |deflect=No | ||
|unarmed=Only | |unarmed=Only | ||
|description=Less range and damage comparing to armed 2C, but faster and cancellable. | |description=Less range and damage comparing to armed 2C, but faster and cancellable, also connects after throw. | ||
}} | }} | ||
}} | }} | ||
| Line 782: | Line 812: | ||
{{MoveData | {{MoveData | ||
|image=SS7 GSL u3C.jpg | |image=SS7 GSL u3C.jpg | ||
|hitbox=SS7 GSL u3C hb.png | |||
|caption=Twisting Maple | |caption=Twisting Maple | ||
|name=u.3C | |name=u.3C | ||
| Line 789: | Line 820: | ||
|guard=Low | |guard=Low | ||
|startup=14 | |startup=14 | ||
|active= | |active=4 | ||
|recovery= | |recovery= | ||
|total=45 | |total=45 | ||
| Line 806: | Line 837: | ||
{{MoveData | {{MoveData | ||
|image=SS7 GSL ujA.jpg | |image=SS7 GSL ujA.jpg | ||
|hitbox=SS7 GSL ujA hb.png | |||
|caption= | |caption= | ||
|name=ju.A | |name=ju.A | ||
| Line 813: | Line 845: | ||
|guard=High | |guard=High | ||
|startup=5 | |startup=5 | ||
|active= | |active=5 | ||
|recovery= | |recovery= | ||
|total= | |total= | ||
| Line 830: | Line 862: | ||
{{MoveData | {{MoveData | ||
|image=SS7 GSL ujB.jpg | |image=SS7 GSL ujB.jpg | ||
|hitbox=SS7 GSL ujB hb.png | |||
|caption= | |caption= | ||
|name=ju.B | |name=ju.B | ||
| Line 837: | Line 870: | ||
|guard=High | |guard=High | ||
|startup=8 | |startup=8 | ||
|active= | |active=4 | ||
|recovery= | |recovery= | ||
|total= | |total= | ||
| Line 854: | Line 887: | ||
{{MoveData | {{MoveData | ||
|image=SS7 GSL ujC.jpg | |image=SS7 GSL ujC.jpg | ||
|hitbox=SS7 GSL ujC hb.png | |||
|caption= | |caption= | ||
|name=ju.C | |name=ju.C | ||
| Line 861: | Line 895: | ||
|guard=High | |guard=High | ||
|startup=9 | |startup=9 | ||
|active= | |active=3 | ||
|recovery= | |recovery= | ||
|total= | |total= | ||
| Line 878: | Line 912: | ||
{{MoveData | {{MoveData | ||
|image=SS7 GSL u66A.jpg | |image=SS7 GSL u66A.jpg | ||
|hitbox=SS7 GSL u66A hb.png | |||
|caption= | |caption= | ||
|name=u.66A/B | |name=u.66A/B | ||
| Line 885: | Line 920: | ||
|guard=Mid | |guard=Mid | ||
|startup=6 | |startup=6 | ||
|active= | |active=3 | ||
|recovery= | |recovery= | ||
|total=29 | |total=29 | ||
| Line 902: | Line 937: | ||
{{MoveData | {{MoveData | ||
|image=SS7 GSL u66C.jpg | |image=SS7 GSL u66C.jpg | ||
|hitbox=SS7 GSL u66C hb.png | |||
|caption= | |caption= | ||
|name=u.66C | |name=u.66C | ||
| Line 909: | Line 945: | ||
|guard=High | |guard=High | ||
|startup=19 | |startup=19 | ||
|active= | |active=4 | ||
|recovery= | |recovery= | ||
|total=51 | |total=51 | ||
| Line 919: | Line 955: | ||
|deflect=No | |deflect=No | ||
|unarmed=Only | |unarmed=Only | ||
|description=Similar to armed 66C with less damage and faster, | |description=Similar to armed 66C with less damage and faster, airborne starting from frame 5. | ||
}} | }} | ||
}} | }} | ||
| Line 927: | Line 963: | ||
{{MoveData | {{MoveData | ||
|image=SS7 GSL 6CD.jpg | |image=SS7 GSL 6CD.jpg | ||
|hitbox=SS7 GSL 6CD hb.png | |||
|caption=Neutral / Forward Throw | |caption=Neutral / Forward Throw | ||
|image2=SS7 GSL 4CD.jpg | |image2=SS7 GSL 4CD.jpg | ||
|hitbox2=SS7 GSL 4CD hb.png | |||
|caption2=Back Throw | |caption2=Back Throw | ||
|name=Guard Break (Throw) | |name=Guard Break (Throw) | ||
| Line 938: | Line 976: | ||
|guard=Throw | |guard=Throw | ||
|startup=3 | |startup=3 | ||
|active= | |active=1 | ||
|recovery=71 | |recovery=71 | ||
|hitAdv=+20 | |hitAdv=+20 | ||
| Line 955: | Line 993: | ||
|guard=Throw | |guard=Throw | ||
|startup=5 | |startup=5 | ||
|active= | |active=1 | ||
|recovery=69 | |recovery=69 | ||
|hitAdv=+25 | |hitAdv=+25 | ||
| Line 971: | Line 1,009: | ||
{{MoveData | {{MoveData | ||
|image=SS7 GSL Overhead.jpg | |image=SS7 GSL Overhead.jpg | ||
|hitbox=SS7 GSL Overhead hb.png | |||
|caption=Armed | |caption=Armed | ||
|image2=SS7 GSL uOH.jpg | |image2=SS7 GSL uOH.jpg | ||
|hitbox2=SS7 GSL uOH hb.png | |||
|caption2=Unarmed | |caption2=Unarmed | ||
|name=Surprise Attack (Overhead) | |name=Surprise Attack (Overhead) | ||
| Line 982: | Line 1,022: | ||
|guard=High | |guard=High | ||
|startup=21 | |startup=21 | ||
|active= | |active=2 | ||
|recovery= | |recovery= | ||
|hitAdv=0 | |hitAdv=0 | ||
| Line 992: | Line 1,032: | ||
|deflect=No | |deflect=No | ||
|unarmed=No | |unarmed=No | ||
|description=Universal overhead. | |description=Universal overhead with good range, airborne starting from frame 14. | ||
}} | }} | ||
{{AttackData-SS2019 | {{AttackData-SS2019 | ||
| Line 1,000: | Line 1,040: | ||
|guard=High | |guard=High | ||
|startup=23 | |startup=23 | ||
|active= | |active=2 | ||
|recovery= | |recovery= | ||
|total=45 | |total=45 | ||
| Line 1,010: | Line 1,050: | ||
|deflect=No | |deflect=No | ||
|unarmed=Only | |unarmed=Only | ||
|description=Universal unarmed overhead. | |description=Universal unarmed overhead with good range and knocks down, airborne starting from frame 8. | ||
}} | }} | ||
}} | }} | ||
| Line 1,017: | Line 1,057: | ||
{{MoveData | {{MoveData | ||
|image=SS7 GSL Dodge.jpg | |image=SS7 GSL Dodge.jpg | ||
|hitbox=SS7 GSL Dodge hb.png | |||
|caption= | |caption= | ||
|name=Dodge | |name=Dodge | ||
| Line 1,042: | Line 1,083: | ||
{{MoveData | {{MoveData | ||
|image=SS7 GSL gAB.jpg | |image=SS7 GSL gAB.jpg | ||
|hitbox=SS7 GSL gAB hb.png | |||
|caption= | |caption= | ||
|name=Stance Break | |name=Stance Break | ||
| Line 1,066: | Line 1,108: | ||
====== <font style="visibility:hidden" size="0">Counter / Blade Catch</font> ====== | ====== <font style="visibility:hidden" size="0">Counter / Blade Catch</font> ====== | ||
{{MoveData | {{MoveData | ||
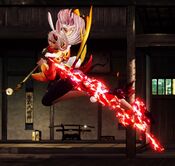
|image=SS7 GSL | |image=SS7 GSL Counter.jpg | ||
|hitbox=SS7 GSL Counter.png | |||
|caption=Counter | |caption=Counter | ||
|image2=SS7 GSL Blade catch2.jpg | |image2=SS7 GSL Blade catch1.jpg | ||
|hitbox2=SS7 GSL Blade catch hb.png | |||
|image3=SS7 GSL Blade catch2.jpg | |||
|caption2=Blade Catch | |caption2=Blade Catch | ||
|name=Counter / Blade Catch | |name=Counter / Blade Catch | ||
| Line 1,111: | Line 1,156: | ||
{{MoveData | {{MoveData | ||
|image=SS7 GSL RE.jpg | |image=SS7 GSL RE.jpg | ||
|hitbox=SS7 GSL RE hb.png | |||
|caption= | |caption= | ||
|name=Rage Explosion | |name=Rage Explosion | ||
| Line 1,120: | Line 1,166: | ||
|guard=Unblockable | |guard=Unblockable | ||
|startup=21 | |startup=21 | ||
|active= | |active=3 | ||
|recovery= | |recovery= | ||
|hitAdv=0 | |hitAdv=0 | ||
| Line 1,136: | Line 1,182: | ||
{{MoveData | {{MoveData | ||
|image=SS7 GSL Issen.jpg | |image=SS7 GSL Issen.jpg | ||
|hitbox=SS7 GSL Issen hb.png | |||
|caption= | |caption= | ||
|name=Lightning Blade (Issen) | |name=Lightning Blade (Issen) | ||
| Line 1,145: | Line 1,192: | ||
|guard=Mid | |guard=Mid | ||
|startup=9 | |startup=9 | ||
|active= | |active=8 | ||
|recovery= | |recovery= | ||
|hitAdv=KD | |hitAdv=KD | ||
| Line 1,162: | Line 1,209: | ||
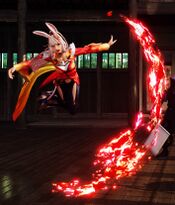
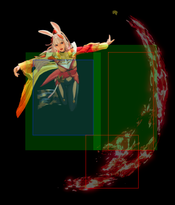
{{MoveData | {{MoveData | ||
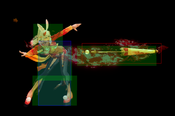
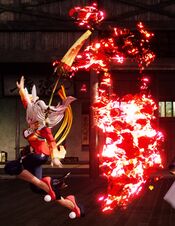
|image=SS7 GSL 214D.jpg | |image=SS7 GSL 214D.jpg | ||
|hitbox=SS7 GSL 214D hb.png | |||
|caption= | |caption= | ||
|name=Cloud Fall | |name=Cloud Fall | ||
| Line 1,167: | Line 1,215: | ||
|data= | |data= | ||
{{AttackData-SS2019 | {{AttackData-SS2019 | ||
|version= | |version=Armed | ||
|damage=50 | |damage=50 | ||
|guard=Mid | |guard=Mid | ||
|startup=17 | |startup=17 | ||
|active= | |active=34(29) | ||
|recovery= | |recovery= | ||
|hitAdv= | |hitAdv=-9 | ||
|blockAdv= | |blockAdv=-16~+16 | ||
|total=56 | |total=56 | ||
|guardDmg=5 | |guardDmg=5 | ||
| Line 1,180: | Line 1,228: | ||
|clash= | |clash= | ||
|deflect= | |deflect= | ||
|unarmed= | |unarmed=No | ||
|description= | |description= | ||
}} | }} | ||
{{AttackData-SS2019 | {{AttackData-SS2019 | ||
|version=Max | |version=Max (Armed) | ||
|header=no | |header=no | ||
|damage=170 (50,120) | |damage=170 (50,120) | ||
|guard=Mid | |guard=Mid | ||
|startup=17 | |startup=17 | ||
|active= | |active=34(29) | ||
|recovery= | |recovery= | ||
|hitAdv=KD | |hitAdv=KD | ||
|blockAdv= | |blockAdv=-3~+29 | ||
|total= | |total=49 | ||
|guardDmg=10 | |guardDmg=10 | ||
|cancel= | |cancel= | ||
|clash= | |clash= | ||
|deflect= | |deflect= | ||
|unarmed= | |unarmed=No | ||
|description=A maple leaf projectile that travels very fast, it charges the maple gauge on hit. When the maple gauge is full, the next one deplete the gauge to enhance the damage and allows follow up attacks. During max rage, it travels faster | |description=A maple leaf projectile that travels very fast, it charges the maple gauge on hit. When the maple gauge is full, the next one deplete the gauge to enhance the damage and allows follow up attacks (except WFT/Issen) and recovers sooner by 7 frames. During max rage, it travels faster (reaches full screen 5 frames earlier than normal version). No longer knocks down mid air opponents. | ||
}} | }} | ||
{{AttackData-SS2019 | |||
|version=Unarmed | |||
|header=no | |||
|damage=50 | |||
{{AttackData-SS2019 | |||
|version= | |||
|damage= | |||
|guard=Mid | |guard=Mid | ||
|startup= | |startup=15 | ||
|active= | |active=30(26) | ||
|recovery= | |recovery= | ||
| | |hitAdv=-5 | ||
| | |blockAdv=-12~+16 | ||
| | |total=50 | ||
|guardDmg= | |guardDmg=5 | ||
|cancel= | |cancel= | ||
|clash= | |clash= | ||
|deflect= | |deflect= | ||
|unarmed= | |unarmed=Only | ||
|description= | |description= | ||
}} | }} | ||
{{AttackData-SS2019 | {{AttackData-SS2019 | ||
|version= | |version=Max (Unarmed) | ||
|header=no | |header=no | ||
|damage=120 | |damage=170 (50,120) | ||
|guard=Mid | |guard=Mid | ||
|startup= | |startup=15 | ||
|active= | |active=30(26) | ||
|recovery= | |recovery= | ||
| | |hitAdv=KD (+119) | ||
| | |blockAdv=+1~+29 | ||
| | |total=43 | ||
|guardDmg= | |guardDmg=10 | ||
|cancel= | |cancel= | ||
|clash= | |clash= | ||
|deflect= | |deflect= | ||
|unarmed= | |unarmed=Only | ||
|description= | |description=Its start up is 2 frames faster while unarmed and the leaf projectile also travels faster. | ||
}} | }} | ||
}} | |||
====== <font style="visibility:hidden" size="0">Lunar Recall (Ground)</font> ====== | |||
{{MoveData | |||
|image=SS7 GSL 214A.jpg | |||
|hitbox=SS7 GSL 214A hb.png | |||
|caption=214A | |||
|image2=SS7 GSL 214B.jpg | |||
|hitbox2=SS7 GSL 214B hb.png | |||
|caption2=214B | |||
|image3=SS7 GSL 214C.jpg | |||
|hitbox3=SS7 GSL 214C hb.png | |||
|caption3=214C | |||
|name=Lunar Recall (Ground) | |||
|input=214S | |||
|data= | |||
{{AttackData-SS2019 | {{AttackData-SS2019 | ||
|version= | |version=A | ||
|damage=120 | |||
|damage= | |||
|guard=Mid | |guard=Mid | ||
|startup= | |startup=13 | ||
|active= | |active=11 | ||
|recovery= | |recovery= | ||
|total= | |total=54 | ||
|hitAdv=KD | |hitAdv=KD(+91) | ||
|blockAdv=- | |blockAdv=-17~-16 | ||
|guardDmg=20 | |guardDmg=20 | ||
|cancel= | |cancel= | ||
|clash= | |clash= | ||
|deflect= | |deflect= | ||
|unarmed=No | |unarmed=No | ||
|description= | |description= | ||
}} | }} | ||
{{AttackData-SS2019 | {{AttackData-SS2019 | ||
|version= | |version=B | ||
|damage= | |header=no | ||
|damage=135 | |||
|guard=Mid | |guard=Mid | ||
|startup= | |startup=11 | ||
|active= | |active=14 | ||
|recovery= | |recovery= | ||
|total=64 | |||
|hitAdv=KD | |hitAdv=KD | ||
|blockAdv= | |blockAdv=?? | ||
|guardDmg=20 | |guardDmg=20 | ||
|cancel= | |cancel= | ||
| Line 1,289: | Line 1,337: | ||
}} | }} | ||
{{AttackData-SS2019 | {{AttackData-SS2019 | ||
|version= | |version=C | ||
|header=no | |header=no | ||
|damage=140 | |damage=140 | ||
|guard=Mid | |guard=Mid | ||
|startup= | |startup=15 | ||
|active= | |active=31 | ||
|recovery= | |recovery= | ||
|hitAdv=KD | |total=103 | ||
|blockAdv= | |hitAdv=KD (+35) | ||
|blockAdv=-73 | |||
|guardDmg=20 | |guardDmg=20 | ||
|cancel= | |cancel= | ||
|clash= | |clash= | ||
|deflect= | |deflect= | ||
|unarmed=No | |unarmed=No | ||
|description= | |description=Li opens her umbrella on the ground and leaves it floating there, and then travels forward / backwards / upwards. The B version only hits the opponent behind her (e.g. The opponent teleports to her back or the opponent rolls behind her), it can cancel into SSM, making it possible to punish wake up DPs. The C version has invincibility against air attacks from frame 2. | ||
}} | }} | ||
}} | |||
====== <font style="visibility:hidden" size="0">Lunar Recall (Air)</font> ====== | |||
{{MoveData | |||
|image=SS7 GSL j214A.jpg | |||
|hitbox=SS7 GSL j214A hb.png | |||
|caption=214A | |||
|image2=SS7 GSL j214B.jpg | |||
|hitbox2=SS7 GSL j214B hb.png | |||
|caption2=214B | |||
|image3=SS7 GSL j214C.jpg | |||
|hitbox3=SS7 GSL j214C hb.png | |||
|caption3=214C | |||
|name=Lunar Recall (Air) | |||
|input=j.214S | |||
|data= | |||
{{AttackData-SS2019 | {{AttackData-SS2019 | ||
|version= | |version=A | ||
|damage=140 | |||
|damage= | |||
|guard=Mid | |guard=Mid | ||
|startup=15 | |startup=15 | ||
|active= | |active=20 | ||
|recovery= | |recovery=28(Landing) | ||
|hitAdv=KD | |hitAdv=KD | ||
|blockAdv= | |blockAdv= | ||
|guardDmg=20 | |guardDmg=20 | ||
|cancel= | |cancel= | ||
|clash= | |clash= | ||
|deflect= | |deflect= | ||
|unarmed=No | |unarmed=No | ||
|description= | |description= | ||
}} | }} | ||
{{AttackData-SS2019 | |||
|version=B | |||
|header=no | |||
|damage=140 | |||
{{AttackData-SS2019 | |||
|version= | |||
|damage= | |||
|guard=Mid | |guard=Mid | ||
|startup= | |startup=21 | ||
|active= | |active=14 | ||
|recovery= | |recovery=28(Landing) | ||
|hitAdv=KD | |||
|hitAdv= | |blockAdv= | ||
|blockAdv= | |guardDmg=20 | ||
|guardDmg= | |||
|cancel= | |cancel= | ||
|clash= | |clash= | ||
| Line 1,349: | Line 1,404: | ||
}} | }} | ||
{{AttackData-SS2019 | {{AttackData-SS2019 | ||
|version= | |version=C | ||
|header=no | |header=no | ||
|damage= | |damage=120 | ||
|guard=Mid | |guard=Mid | ||
|startup= | |startup=15 | ||
|active= | |active= | ||
|recovery= | |recovery=32(Landing) | ||
|hitAdv=KD | |||
|hitAdv= | |blockAdv=-24 | ||
|blockAdv=- | |guardDmg=20 | ||
|guardDmg= | |||
|cancel= | |cancel= | ||
|clash= | |clash= | ||
|deflect= | |deflect= | ||
|unarmed=No | |unarmed=No | ||
|description= | |description=Li opens her umbrella in the air and leaves it floating there, and then travels forward / backwards / downwards. The B version only hits the opponent behind her (e.g. She jumps over the opponent and uses 214B). The C version can hit cross up. (e.g. She stands next to the opponent, and then neutral jumps and 214C). | ||
}} | }} | ||
}} | |||
====== <font style="visibility:hidden" size="0">Autumn Tide</font> ====== | |||
{{MoveData | |||
|image=SS7 GSL 236S.jpg | |||
|hitbox=SS7 GSL 236S hb.png | |||
|caption=214A/B | |||
|image2=SS7 GSL 236C.jpg | |||
|hitbox2=SS7 GSL 236C hb.png | |||
|caption2=214C/D | |||
|name=Autumn Tide | |||
|input=236X | |||
|data= | |||
{{AttackData-SS2019 | {{AttackData-SS2019 | ||
|version= | |version=A | ||
|damage=30 | |damage=30 | ||
|guard=Mid | |guard=Mid | ||
|startup=17 | |startup=17 | ||
|active= | |active=10 | ||
|recovery= | |recovery= | ||
|total=58 | |total=58 | ||
| Line 1,385: | Line 1,451: | ||
}} | }} | ||
{{AttackData-SS2019 | {{AttackData-SS2019 | ||
|version= | |version=B | ||
|header=no | |header=no | ||
|damage=30 | |damage=30 | ||
|guard=Mid | |guard=Mid | ||
|startup=17 | |startup=17 | ||
|active= | |active=20 | ||
|recovery= | |recovery= | ||
|total=58 | |total=58 | ||
| Line 1,398: | Line 1,464: | ||
|cancel= | |cancel= | ||
|clash= | |clash= | ||
|deflect= | |deflect= | ||
|unarmed=No | |unarmed=No | ||
|description= | |description= | ||
}} | }} | ||
{{AttackData-SS2019 | {{AttackData-SS2019 | ||
|version= | |version=C | ||
|damage= | |header=no | ||
|guard= | |damage=30 | ||
|startup= | |guard=Mid | ||
|active= | |startup=17 | ||
|recovery= | |active=24 | ||
|total= | |recovery= | ||
|hitAdv= | |total=58 | ||
|blockAdv= | |hitAdv=-8 | ||
|guardDmg= | |blockAdv=-20 | ||
|guardDmg=5 | |||
|cancel= | |cancel= | ||
|clash= | |clash= | ||
|deflect= | |deflect= | ||
|unarmed=No | |unarmed=No | ||
| Line 1,429: | Line 1,487: | ||
}} | }} | ||
{{AttackData-SS2019 | {{AttackData-SS2019 | ||
|version= | |version=D | ||
|header=no | |header=no | ||
|damage= | |damage=30 | ||
|guard= | |guard=Mid | ||
|startup= | |startup=17 | ||
|active= | |active=13 | ||
|recovery= | |recovery= | ||
|total= | |total=58 | ||
|hitAdv= | |hitAdv=-8 | ||
|blockAdv= | |blockAdv=-20 | ||
|guardDmg= | |guardDmg=5 | ||
|cancel= | |cancel= | ||
|clash= | |clash= | ||
|deflect= | |deflect= | ||
|unarmed=No | |unarmed=No | ||
|description=Li | |description=Li throws her umbrella forward / upwards and leaves it floating, it's considered as projectile but doesn't cancel any projectile. | ||
}} | }} | ||
}} | }} | ||
== | ====== <font style="visibility:hidden" size="0">Flash Step</font> ====== | ||
=== | |||
{{MoveData | {{MoveData | ||
|image=SS7 GSL | |image=SS7 GSL TP.jpg | ||
|caption= | |hitbox=SS7 GSL TP hb.png | ||
|name= | |caption=umbrella on the ground | ||
|input= | |image2=SS7 GSL TP2.jpg | ||
|hitbox2=SS7 GSL TP2 hb.png | |||
|caption2=umbrella in the air | |||
|name=Flash Step | |||
|input=236S while umbrella floating | |||
|data= | |data= | ||
{{AttackData-SS2019 | {{AttackData-SS2019 | ||
|version= | |version=Ground | ||
|damage= | |damage=N/A | ||
|guard= | |guard= | ||
|startup= | |startup=11 | ||
|active= | |active=5 | ||
|recovery= | |recovery=10 / 29 | ||
|total=25 / 44 | |||
|hitAdv= | |||
|blockAdv= | |||
|guardDmg= | |||
|cancel= | |||
|clash= | |||
|deflect= | |||
|unarmed=No | |||
|description= | |||
}} | |||
{{AttackData-SS2019 | |||
|version=Air | |||
|header=no | |||
|damage=N/A | |||
|guard= | |||
|startup=11 | |||
|active=5 | |||
|recovery=13 / 23 | |||
|total=28 / 38 | |||
|hitAdv= | |hitAdv= | ||
|blockAdv= | |blockAdv= | ||
|guardDmg= | |||
|cancel= | |cancel= | ||
|clash= | |clash= | ||
|deflect= | |deflect= | ||
|unarmed=No | |unarmed=No | ||
|description=Available only during Max Rage or Rage Explosion. Disarms on hit. Fast WFT with short range, good for combo and anti air. | |description=Li teleports to the floating umbrella and grabs it. Although the teleport location is obvious, but the start-up and recovery is very fast. She stays in the original position from frame 1~10, and disappear from frame 11~15, and then show up at frame 16. | ||
<br>It increases recovery frames by 19/10 when umbrella is outside screen on the ground / in the air. | |||
}} | |||
}} | |||
==Supers== | |||
===Weapon Flipping Technique=== | |||
{{MoveData | |||
|image=SS7 GSL WFT.jpg | |||
|hitbox=SS7 GSL WFT hb.png | |||
|caption= | |||
|name=Gust of Illusion | |||
|input=236B+C | |||
|data= | |||
{{AttackData-SS2019 | |||
|version= | |||
|damage=384 (448) | |||
|guard=Mid | |||
|startup=1+7 | |||
|active=3 | |||
|recovery= | |||
|total= | |||
|hitAdv= | |||
|blockAdv=-40 | |||
|cancel= | |||
|clash= | |||
|deflect= | |||
|unarmed=No | |||
|description=Available only during Max Rage or Rage Explosion. Disarms on hit. Fast WFT with short range, good for combo and anti air. | |||
}} | }} | ||
}} | }} | ||
| Line 1,478: | Line 1,586: | ||
|image=SS7 GSL SSM1.jpg | |image=SS7 GSL SSM1.jpg | ||
|image2=SS7 GSL SSM2.jpg | |image2=SS7 GSL SSM2.jpg | ||
|hitbox=SS7 GSL SSM hb.png | |||
|caption= | |caption= | ||
|name=Maple Dance | |name=Maple Dance | ||
| Line 1,483: | Line 1,592: | ||
|data= | |data= | ||
{{AttackData-SS2019 | {{AttackData-SS2019 | ||
|version= | |version= | ||
|damage=670 | |damage=670 | ||
|guard=Mid | |guard=Mid | ||
|startup=10+14 | |startup=10+14 | ||
|active= | |active=4 | ||
|recovery= | |recovery= | ||
|hitAdv= | |total= | ||
|blockAdv=-50 | |hitAdv= | ||
|cancel= | |blockAdv=-50 | ||
|clash= | |cancel= | ||
|deflect= | |clash= | ||
|unarmed=No | |deflect= | ||
|description=Available only once per match. Full invincible from frame 1~10. Very unique SSM with fast start up, but can only be used after 214S & 236S. Ground 214B can cancel into SSM from frame 15, make it 39 frames while armed. | |unarmed=No | ||
}} | |description=Available only once per match. Full invincible from frame 1~10. Very unique SSM with fast start up, but can only be used after 214S & 236S. Ground 214B can cancel into SSM from frame 15, make it 39 frames while armed. | ||
}} | }} | ||
}} | |||
==Combos== | |||
List combos, use numpad notation. | |||
===Armed=== | |||
* '''n.5B xx 214A / 214C / WFT''' <br>''Standard punish combo.'' | |||
* '''66B xx 214A / 214C / WFT''' <br>''Far range punish combo.'' | |||
* '''2B xx 214A / 214C / WFT'''<br>''214A connects at all ranges, others might whiff at far range.'' | |||
* '''5CD / 4CD...''' | |||
** '''66B xx 214A / 214C / WFT''' <br>''Standard throw combo.'' | |||
** '''5C''' <br>''It only connects after back throw, more damage than 66B xx 214C'' | |||
* '''4CD xx SSM'''<br>''Works for ground or low air floating umbrella behind her, but the damage is 335 only.'' | |||
* ''' | |||
* '''jump B / C (Deep hit)...''' | * '''jump B / C (Deep hit)...''' | ||
| Line 1,519: | Line 1,631: | ||
===Unarmed=== | ===Unarmed=== | ||
* '''u.2C / 214D'''<br>''Midscreen punish combo.'' | * '''u.2C/un.5C xx 214D'''<br>''Midscreen punish combo.'' | ||
* '''5CD / 4CD...''' | * '''5CD / 4CD...''' | ||
** '''u.2C xx 214D''' <br>''Standard throw combo.'' | ** '''u.2C xx 214D''' <br>''Standard throw combo.'' | ||
** '''u.5C''' <br>''Works with its faster start up.'' | ** '''u.5C''' <br>''Works with its faster start up.'' | ||
** '''un.5C xx 214D''' <br>''More damage than 2C, corner only.'' | ** '''(walk forward) un.5C xx 214D''' <br>''More damage than 2C, corner only.'' | ||
** '''u.66C''' <br>''Knocks down the opponent to pick up weapon.'' | |||
* '''jump B / C (Deep hit)...''' | * '''jump B / C (Deep hit)...''' | ||
| Line 1,532: | Line 1,645: | ||
===Max Cloud Fall=== | ===Max Cloud Fall=== | ||
* ''' | * '''2B/n5B/66B xx 214D xx 66A / 214A''' <br>''Mid screen combo. Use 66B after grab.'' | ||
* '''2B/n5B/66B xx 214D xx 214A''' <br>''Corner combo. Works after grab.'' | |||
* '''un.5C xx 214D xx u.66A/ | * '''u.2C/un.5C xx 214D xx u.66A''' <br>''Unarmed mid screen combo. After mid screen throw, use u.2C because un.5C doesn't connect.'' | ||
* '''u.2C/un.5C xx 214D xx u.5C''' <br>''Unarmed corner combo. After grab, un.5C only connects by micro walking forward in the corner .'' | |||
===Guard Crush=== | ===Guard Crush=== | ||
Latest revision as of 14:53, 21 June 2023
|
公孫離, Gōngsūn Lí |
|
Introduction
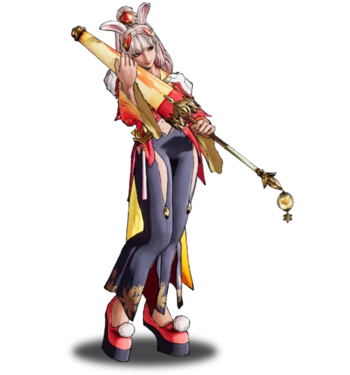
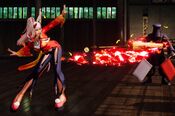
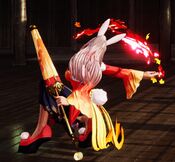
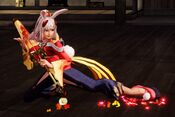
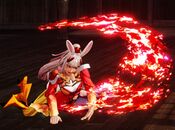
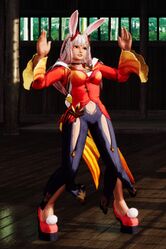
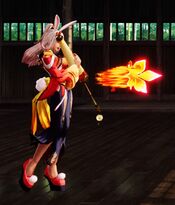
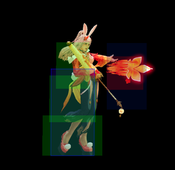
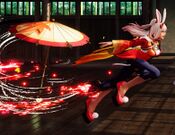
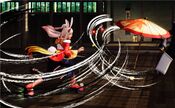
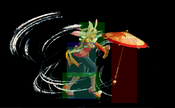
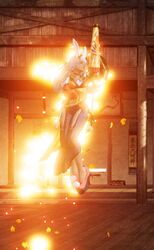
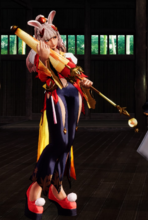
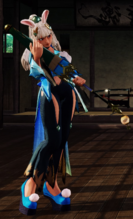
For whatever reason she's here, she's not here to fight you, she's here to dance to you. Most of her moves have a dance motif or they just look like a dance move. She doesn't have any sharp edge on her umbrella, so she would not hurt you.
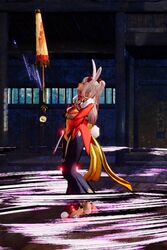
Gongsun Li has a quite different game style from the rest of cast as half of the time she will fight without her weapon. Where her umbrella is the destination for her teleports, she can't really be trapped in the corner and be at basically two places in a given time if the umbrella is within the screen bound. Her fireball is fast as well, she will not lose to any fireball war.
With these traits she is set to play a zoning style or anti-zoning, if her umbrella is set behind an opponent she can potentially teleport to punish a fireball from behind. Her umbrella setting gives her good mobility at some degree, which makes her have tricky movement and play with gimmicks.
Her neutral is pretty strong and do not struggle too much with close combat as she has great buttons both with or without her weapon, especially her air normals. But her overall movement is pretty floaty and slow making her not good against rush down style characters.
| Strengths | Weaknesses |
|---|---|
|
|
Gameplan
As much as this is a weapon based fighting game, GSL is set to play both armed and unarmed. Her gameplan is pretty flexible as she's fine at any range. When at longer range, her fast fireball can just make her chill and if her umbrella is set somewhere on the side of the opponent, she will be fine even if the opponent tries to get very close to her.
Zoning
Both armed and unarmed. On most characters, she can just throw fireballs to zone and prompt the opponent to jump for it, then she can choose to either use 214C to anti air if it's a good angle when she's armed but at anytime she can just do a neutral j.B or j.C or forward jump to air to air them, she will win 80% of the time. Keep in mind that her FB is easy to be low profiled.
Armed
When armed, her 5B is a great poke to check dash-ins, and her damage is generally higher. Most of the time is recommended to set her umbrella to an ideal place and fight unarmed since that's when she gets more of her damage on Oki and setups.
Unarmed
So an important part of GSL is to fight unarmed. Her normals remain mostly the same unarmed, but they usually have faster start up. When she set her umbrella away somewhere, she can first zone and get her Max fireball combos after throw when she gets a full charge. When her umbrella is in screen, her recovery on her teleport will be quite fast and hard to react. So she can teleport to punish from behind, get a throw, or escape from the corner.
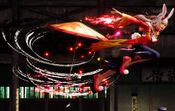
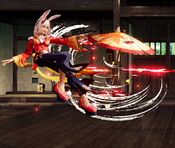
When she's disarmed her u66A/B will knock down, and it's totally a set up for blade catch when blocked since virtually no normal can actually punish it. Her u5A/B is surprisingly a good anti air for its fast start up as she use her hand to smack people out of the air. She will not likely to struggle in close combat as she is truly brawling with others.
Okizeme
Her best Oki's come from when she's unarmed. The easiest one would be her high/low mix up. Key moves: 66C, UOH, 66D, 2C.
Her 66C is an overhead both armed and unarmed, but it's quite unsafe on block, though it's a good move to catch opponents wanting to jump on wake up. The same goes for 66D where she does a split and takes forever to recover, it's not a good slide compare to most of the ones in game but it still knocks down. Her universal overhead will knock down when she's unarmed which is pretty safe on block, this move is pretty annoying though it does little damage. If you condition your opponent to stand on wake up, you can go for a 2C and cancel into fireball, though this could mean no knock down if you don't have a full charge.
Another way for her mix is her umbrella setting and teleport. As it's very quick when it's within screen bound, you can potentially go for a left/right mix up. E.g. umbrella is set to in front of the opponent if they forward roll and you stand on their face, when they roll you teleport and go for n.5B into 214A.
Normal Moves
Far Slashes
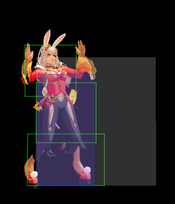
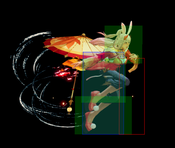
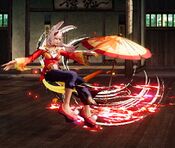
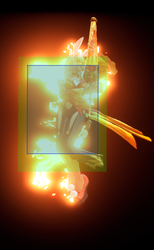
5A
5A
|
|
|---|---|
Toggle Hitboxes Toggle Hitboxes
|
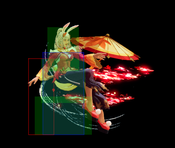
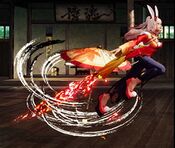
5B
5B
|
|
|---|---|
Toggle Hitboxes Toggle Hitboxes
|
5C
5C
|
|
|---|---|
Toggle Hitboxes Toggle Hitboxes
|
2A
2A
|
|
|---|---|
Toggle Hitboxes Toggle Hitboxes
|
2B
2B
|
|
|---|---|
Toggle Hitboxes Toggle Hitboxes
|
2C
2C
|
|
|---|---|
Toggle Hitboxes Toggle Hitboxes
|
3C
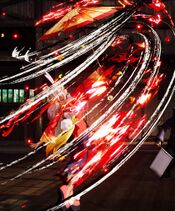
3C Twisting Maple Twisting Maple
|
|
|---|---|
Toggle Hitboxes Toggle Hitboxes
|
Near Slashes
n.5A
n.5A
|
|
|---|---|
Toggle Hitboxes Toggle Hitboxes
|
n.5B
n.5B
|
|
|---|---|
Toggle Hitboxes Toggle Hitboxes
|
n.5C
n.5C
|
|
|---|---|
Toggle Hitboxes Toggle Hitboxes
|
n.2A
n.2A
|
|
|---|---|
Toggle Hitboxes Toggle Hitboxes
|
Kicks
5D
5D
|
|
|---|---|
Toggle Hitboxes Toggle Hitboxes
|
6D
6D
|
|
|---|---|
Toggle Hitboxes Toggle Hitboxes
|
2D
2D
|
|
|---|---|
Toggle Hitboxes Toggle Hitboxes
|
3D
3D
|
|
|---|---|
Toggle Hitboxes Toggle Hitboxes
|
Dash Normals
66A
66A
|
|
|---|---|
Toggle Hitboxes Toggle Hitboxes
|
66B
66B
|
|
|---|---|
Toggle Hitboxes Toggle Hitboxes
|
66C
66C
|
|
|---|---|
Toggle Hitboxes Toggle Hitboxes
|
66D
66D
|
|
|---|---|
Toggle Hitboxes Toggle Hitboxes
|
Air Normals
j.A
j.A
|
|
|---|---|
Toggle Hitboxes Toggle Hitboxes
|
j.B
j.B
|
|
|---|---|
Toggle Hitboxes Toggle Hitboxes
|
j.C
j.C
|
|
|---|---|
Toggle Hitboxes Toggle Hitboxes
|
j.D
j.D
|
|
|---|---|
Toggle Hitboxes Toggle Hitboxes
|
Unarmed Normals
u.5S
u.5A/B
|
|
|---|---|
Toggle Hitboxes Toggle Hitboxes
|
un.5S
un.5A/B
|
|
|---|---|
Toggle Hitboxes Toggle Hitboxes
|
u.5C
u.5C
|
|
|---|---|
Toggle Hitboxes Toggle Hitboxes
|
un.5C
un.5C
|
|
|---|---|
Toggle Hitboxes Toggle Hitboxes
|
u.2S
u.2A/B
|
|
|---|---|
Toggle Hitboxes Toggle Hitboxes
|
un.2S
un.2A/B
|
|
|---|---|
Toggle Hitboxes Toggle Hitboxes
|
u.2C
u.2C
|
|
|---|---|
Toggle Hitboxes Toggle Hitboxes
|
u.3C
u.3C Twisting Maple Twisting Maple
|
|
|---|---|
Toggle Hitboxes Toggle Hitboxes
|
ju.A
ju.A
|
|
|---|---|
Toggle Hitboxes Toggle Hitboxes
|
ju.B
ju.B
|
|
|---|---|
Toggle Hitboxes Toggle Hitboxes
|
ju.C
ju.C
|
|
|---|---|
Toggle Hitboxes Toggle Hitboxes
|
u.66S
u.66A/B
|
|
|---|---|
Toggle Hitboxes Toggle Hitboxes
|
u.66C
u.66C
|
|
|---|---|
Toggle Hitboxes Toggle Hitboxes
|
Universal Mechanics
Guard Break
Guard Break (Throw) 5/6C+D / 4C+D Neutral / Forward Throw Neutral / Forward Throw Back Throw Back Throw
|
|
|---|---|
Toggle Hitboxes Toggle Hitboxes
|
Surprise Attack
Surprise Attack (Overhead) 5B+C Armed Armed Unarmed Unarmed
|
|
|---|---|
Toggle Hitboxes Toggle Hitboxes
|
Dodge
Dodge
5A+B |
|
|---|---|
Toggle Hitboxes Toggle Hitboxes
|
Stance Break
Stance Break
A+B during Just Defense |
|
|---|---|
Toggle Hitboxes Toggle Hitboxes
|
Counter / Blade Catch
Counter / Blade Catch 236A+B Counter Counter Blade Catch Blade Catch
|
|
|---|---|
Toggle Hitboxes Toggle Hitboxes
|
Rage Explosion
Rage Explosion
5A+B+C |
|
|---|---|
Toggle Hitboxes Toggle Hitboxes
|
Lightning Blade
Lightning Blade (Issen)
5A+B+C during Rage Explosion |
|
|---|---|
Toggle Hitboxes Toggle Hitboxes
|
Special Moves
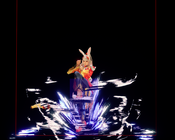
Cloud Fall
Cloud Fall
214D |
|
|---|---|
Toggle Hitboxes Toggle Hitboxes
|
Lunar Recall (Ground)
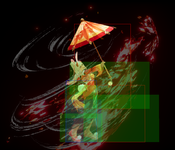
Lunar Recall (Ground) 214S 214A 214A 214B 214B 214C 214C
|
|
|---|---|
Toggle Hitboxes Toggle Hitboxes
|
Lunar Recall (Air)
Lunar Recall (Air) j.214S 214A 214A 214B 214B 214C 214C
|
|
|---|---|
Toggle Hitboxes Toggle Hitboxes
|
Autumn Tide
Autumn Tide 236X 214A/B 214A/B 214C/D 214C/D
|
|
|---|---|
Toggle Hitboxes Toggle Hitboxes
|
Flash Step
Flash Step 236S while umbrella floating umbrella on the ground umbrella on the ground umbrella in the air umbrella in the air
|
|
|---|---|
Toggle Hitboxes Toggle Hitboxes
|
Supers
Weapon Flipping Technique
Gust of Illusion
236B+C |
|
|---|---|
Toggle Hitboxes Toggle Hitboxes
|
Super Special Move
Maple Dance
641236C+D while umbrella floating |
|
|---|---|
Toggle Hitboxes Toggle Hitboxes
|
Combos
List combos, use numpad notation.
Armed
- n.5B xx 214A / 214C / WFT
Standard punish combo.
- 66B xx 214A / 214C / WFT
Far range punish combo.
- 2B xx 214A / 214C / WFT
214A connects at all ranges, others might whiff at far range.
- 5CD / 4CD...
- 66B xx 214A / 214C / WFT
Standard throw combo. - 5C
It only connects after back throw, more damage than 66B xx 214C
- 66B xx 214A / 214C / WFT
- 4CD xx SSM
Works for ground or low air floating umbrella behind her, but the damage is 335 only.
- jump B / C (Deep hit)...
- n.5B xx 214A / 214C / WFT
Standard combo. - 66B xx 214A / 214C / WFT
Optimal combo. - 2B xx 214A / 214C / WFT
The cancel might whiff at far range. - 5C / n5C
Universal combo after jump C deep hit.
- n.5B xx 214A / 214C / WFT
Unarmed
- u.2C/un.5C xx 214D
Midscreen punish combo.
- 5CD / 4CD...
- u.2C xx 214D
Standard throw combo. - u.5C
Works with its faster start up. - (walk forward) un.5C xx 214D
More damage than 2C, corner only. - u.66C
Knocks down the opponent to pick up weapon.
- u.2C xx 214D
- jump B / C (Deep hit)...
- u.2C xx 214D
Standard combo. - un.5C xx 214D
More damage than 2C, corner only. - u.5C / un.5C
Universal combo after jump C deep hit.
- u.2C xx 214D
Max Cloud Fall
- 2B/n5B/66B xx 214D xx 66A / 214A
Mid screen combo. Use 66B after grab. - 2B/n5B/66B xx 214D xx 214A
Corner combo. Works after grab.
- u.2C/un.5C xx 214D xx u.66A
Unarmed mid screen combo. After mid screen throw, use u.2C because un.5C doesn't connect. - u.2C/un.5C xx 214D xx u.5C
Unarmed corner combo. After grab, un.5C only connects by micro walking forward in the corner .
Guard Crush
- n.5C / 5C...
After recovery...- 66B xx 214A / 214C / WFT
Standard follow up.
- 66B xx 214A / 214C / WFT
- n.5C...
Cancel recovery...- Lighting Blade
Universal Issen combo. - 214B xx SSM
Leave umbrella in place for SSM. (Be careful with opponent bursting to avoid it)
- Lighting Blade
Videos
- Gongsun Li Tutorial and Combos by LegendaryWolf Shirou (2020)
- Tao vs Cochory at WNF Online Edition
Colors
External Links
Link to docs hosted in other sites.
- Twitter hashtag: #SS_LI
