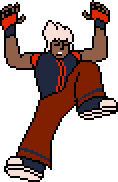
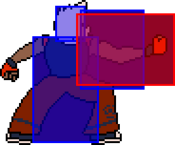
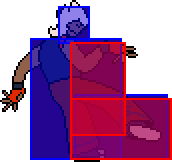
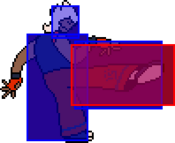
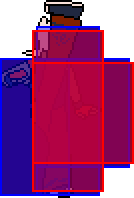
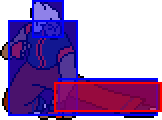
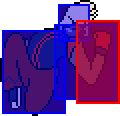
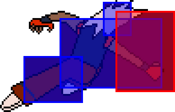
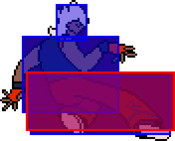
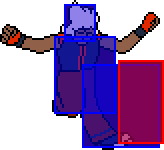
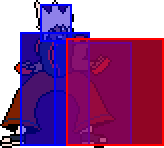
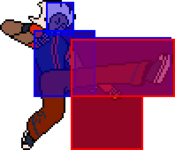
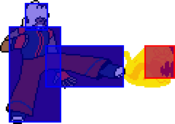
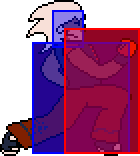
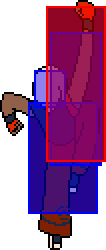
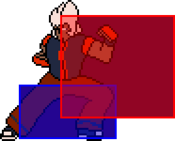
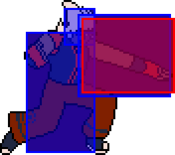
Battle Craze!!/Ajit/C-Side: Difference between revisions
< Battle Craze!! | Ajit
Jump to navigation
Jump to search
(Created page with "==Overview== {{StrengthsAndWeaknesses |intro=link|50px '''C-Ajit''' is an all rounder shoto with great damage, flashy combos, and a good answer for a lot of scenarios. |pros= *'''All-Rounder:''' C-Ajit generally has a pretty strong answer for a lot of situations and a good way to pick up off of them. *'''Neutral:''' Has some of the strongest neutral in the game with good fireballs and a parry to counter other zoning attempts. *'''Extremely powerful...") |
m (→Specials) |
||
| (34 intermediate revisions by 4 users not shown) | |||
| Line 1: | Line 1: | ||
==Overview== | ==Overview== | ||
{{StrengthsAndWeaknesses | {{StrengthsAndWeaknesses | ||
|intro=[[file:01ajit04.png|link|50px]] '''C-Ajit''' is an all rounder shoto with great damage | |intro=[[file:01ajit04.png|link|50px]] | ||
'''C-Ajit''' is an all rounder shoto with great damage, and a good answer for a lot of scenarios. | |||
|pros= | |pros= | ||
*'''All-Rounder:''' C-Ajit generally has a pretty strong answer for a lot of situations and a good way to pick up off of them. | *'''All-Rounder:''' C-Ajit generally has a pretty strong answer for a lot of situations and a good way to pick up off of them. | ||
| Line 9: | Line 10: | ||
|cons= | |cons= | ||
*'''Small normals:''' C-Ajit's normals are generally a little stubby. | *'''Small normals:''' C-Ajit's normals are generally a little stubby. | ||
*'''Damage locked behind C-tech:''' While Ajit's damage is about average, higher damage is relient on his counter and dire punishes. | |||
|tablewidth=80}} | |tablewidth=80}} | ||
==Statistics== | ==Statistics== | ||
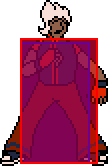
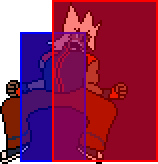
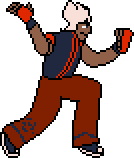
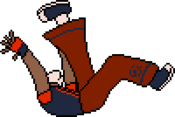
{| class= cellspacing="8" style="width:300px;border:2px solid silver;" | {| class= cellspacing="8" style="width:300px;border:2px solid silver;" | ||
| style="background-color:#AFAFAF;" | '''Trait''' | | style="background-color:#AFAFAF;" | '''Trait''' | ||
| style="background-color:#F8F8F8;text-align:center;" | '''"Tandem Link"''': Ajit gains a 5% attack bonus for the rest of the round after landing a Dire Counter or parrying with Future Sight. | | style="background-color:#F8F8F8;text-align:center;" | '''"Tandem Link"''': Ajit gains a 5% attack bonus for the rest of the round after landing a Dire Counter or parrying with Future Sight, stacking up to 4 times. | ||
|- | |- | ||
| style="background-color:#AFAFAF;" | '''Health''' | | style="background-color:#AFAFAF;" | '''Health''' | ||
| Line 21: | Line 24: | ||
| style="background-color:#FFFFFF;text-align:center;" | Run | | style="background-color:#FFFFFF;text-align:center;" | Run | ||
|} | |} | ||
==Move Overview== | ==Move Overview== | ||
===Universal Mechanics=== | ===Universal Mechanics=== | ||
| Line 27: | Line 31: | ||
|image=AJITctech.png|caption=initial parry | |image=AJITctech.png|caption=initial parry | ||
|image2=AJITctech_2.png|caption2=counterattack | |image2=AJITctech_2.png|caption2=counterattack | ||
|name=Future Sight | |name=Future Sight | ||
|input= 5CT, j.5CT | |||
|data= | |data= | ||
{{AttackData(Special)-BC | {{AttackData(Special)-BC | ||
| Line 45: | Line 50: | ||
| damage= 136 | | damage= 136 | ||
| guard= N/A | | guard= N/A | ||
| startup= 29 | | startup= 29 | ||
| advHit= N/A | | advHit= N/A | ||
| advBlock= N/A | | advBlock= N/A | ||
| punishState= Dire | | punishState= Dire | ||
| direEffect= N/A | | direEffect= N/A | ||
| description= Counter attack following the parry | | description= Counter attack following the parry. | ||
}} | }} | ||
}} | }} | ||
| Line 57: | Line 62: | ||
|image=AJITthrowF.png | |image=AJITthrowF.png | ||
|caption= | |caption= | ||
|name=Wake Up! | |name=Wake Up! | ||
|input=5GP | |||
|data= | |data= | ||
{{AttackData-BC | {{AttackData-BC | ||
| damage= 16-16-16-16-56 (120) | | damage= 16-16-16-16-56 (120) | ||
| guard= Throw Tech | | guard= Throw Tech | ||
| startup= | | startup= 4 | ||
| advHit= +11 | | advHit= +11 | ||
| advBlock= N/A | | advBlock= N/A | ||
| Line 71: | Line 77: | ||
|image=AJITthrowB.png | |image=AJITthrowB.png | ||
|caption= | |caption= | ||
|name=Back Shoot | |name=Back Shoot | ||
|input=4GP | |||
|data= | |data= | ||
{{AttackData-BC | {{AttackData-BC | ||
| damage= 120 | | damage= 120 | ||
| guard= Throw Tech | | guard= Throw Tech | ||
| startup= | | startup= 4 | ||
| advHit= +15 | | advHit= +15 | ||
| advBlock= N/A | | advBlock= N/A | ||
| Line 85: | Line 92: | ||
|image=AJITthrowJu.png | |image=AJITthrowJu.png | ||
|caption= | |caption= | ||
|name= Sunset Driver | |name= Sunset Driver | ||
|input= j.5GP | |||
|data= | |data= | ||
{{AttackData-BC | {{AttackData-BC | ||
| Line 100: | Line 108: | ||
|image=AJIT_HB.png | |image=AJIT_HB.png | ||
|caption= | |caption= | ||
|name= Heartbreaker | |name= Heartbreaker | ||
|input= 4CT while blocking | |||
|data= | |data= | ||
{{AttackData-BC | {{AttackData-BC | ||
| damage= 32 | | damage= 32 | ||
| guard= Mid | | guard= Mid | ||
| startup= | | startup= 17 | ||
| advHit= +1 | | advHit= +1 | ||
| advBlock= -23 | | advBlock= -23 | ||
| Line 111: | Line 120: | ||
}} | }} | ||
}} | }} | ||
===Normals=== | ===Normals=== | ||
====Standing==== | ====Standing==== | ||
| Line 122: | Line 132: | ||
| guard= Mid | | guard= Mid | ||
| startup= 4 | | startup= 4 | ||
| active = 2 | |||
| advHit= 0 | | advHit= 0 | ||
| advBlock= -2 | | advBlock= -2 | ||
| Line 136: | Line 147: | ||
| guard= Mid | | guard= Mid | ||
| startup= 6 | | startup= 6 | ||
| active = 2 | |||
| advHit= +5 | | advHit= +5 | ||
| advBlock= -1 | | advBlock= -1 | ||
| description= Can be linked back to lights. mostly outclassed by cl.5SK | | description= Can be linked back to lights. mostly outclassed by cl.5SK but can be better for juggles. | ||
}} | }} | ||
}} | }} | ||
| Line 150: | Line 162: | ||
| guard= Mid | | guard= Mid | ||
| startup= 9 | | startup= 9 | ||
| active = 2 | |||
| advHit= 0 | | advHit= 0 | ||
| advBlock= -6 | | advBlock= -6 | ||
| Line 156: | Line 169: | ||
}}<br> | }}<br> | ||
{{MoveData | {{MoveData | ||
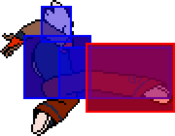
|image= | |image=AJITclLK.png | ||
|caption= | |caption= | ||
|name=5LK (close) | |name=5LK (close) | ||
| Line 164: | Line 177: | ||
| guard= Mid | | guard= Mid | ||
| startup= 4 | | startup= 4 | ||
| active = 2 | |||
| advHit= +3 | | advHit= +3 | ||
| advBlock= -1 | | advBlock= -1 | ||
| Line 170: | Line 184: | ||
}} | }} | ||
{{MoveData | {{MoveData | ||
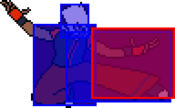
|image= | |image=AJIT5LK.png | ||
|caption= | |caption= | ||
|name=5LK (far) | |name=5LK (far) | ||
| Line 178: | Line 192: | ||
| guard= Mid | | guard= Mid | ||
| startup= 6 | | startup= 6 | ||
| active = 2 | |||
| advHit= +3 | | advHit= +3 | ||
| advBlock= -2 | | advBlock= -2 | ||
| description= | | description= Reaches farther than 5LP but has a bit more start up. | ||
}} | }} | ||
}}<br> | }}<br> | ||
| Line 192: | Line 207: | ||
| guard= Mid | | guard= Mid | ||
| startup= 7 | | startup= 7 | ||
| active = 3, 2 | |||
| advHit= +5 | | advHit= +5 | ||
| advBlock= -2 | | advBlock= -2 | ||
| Line 203: | Line 219: | ||
|data= | |data= | ||
{{AttackData-BC | {{AttackData-BC | ||
| damage= | | damage= 88 | ||
| guard= Mid | | guard= Mid | ||
| startup= 9 | | startup= 9 | ||
| advHit= | | active = 3 | ||
| advBlock= - | | advHit= +3 | ||
| description= | | advBlock= -3 | ||
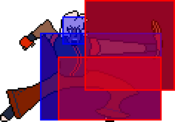
| description= Decent heavy button, typically used to cancel into your command normals at the end of ground strings.<br> | |||
Pushes Ajit a little bit forward | |||
}} | }} | ||
}}<br> | }}<br> | ||
====Crouching==== | ====Crouching==== | ||
{{MoveData | {{MoveData | ||
| Line 221: | Line 240: | ||
| guard= Mid | | guard= Mid | ||
| startup= 4 | | startup= 4 | ||
| active = 2 | |||
| advHit= 0 | | advHit= 0 | ||
| advBlock= -2 | | advBlock= -2 | ||
| description= Crouching version of 5LP, | | description= Crouching version of 5LP, nearly identical but catches low-profile. | ||
}} | }} | ||
}}<br> | }}<br> | ||
| Line 235: | Line 255: | ||
| guard= Mid | | guard= Mid | ||
| startup= 9 | | startup= 9 | ||
| active = 3 | |||
| advHit= +2 | | advHit= +2 | ||
| advBlock= -2 | | advBlock= -2 | ||
| Line 249: | Line 270: | ||
| guard= Low | | guard= Low | ||
| startup= 5 | | startup= 5 | ||
| active = 2 | |||
| advHit= +3 | | advHit= +3 | ||
| advBlock= -3 | | advBlock= -3 | ||
| Line 260: | Line 282: | ||
|data= | |data= | ||
{{AttackData-BC | {{AttackData-BC | ||
| damage= | | damage= 120 | ||
| guard= Low | | guard= Low | ||
| startup= 9 | | startup= 9 | ||
| active = 3 | |||
| advHit= +43 | | advHit= +43 | ||
| advBlock= -7 | | advBlock= -7 | ||
| Line 268: | Line 291: | ||
}} | }} | ||
}}<br> | }}<br> | ||
====Jumping==== | ====Jumping==== | ||
{{MoveData | {{MoveData | ||
| Line 279: | Line 303: | ||
| guard= Overhead | | guard= Overhead | ||
| startup= 5 | | startup= 5 | ||
| active = Inf. | |||
| advHit= - | | advHit= - | ||
| advBlock= - | | advBlock= - | ||
| description= | | description= Active until Ajit hits the ground, making it a forgiving jump in. | ||
}} | }} | ||
}}<br> | }}<br> | ||
| Line 293: | Line 318: | ||
| guard= Overhead | | guard= Overhead | ||
| startup= 7 | | startup= 7 | ||
| active = 3 | |||
| advHit= - | | advHit= - | ||
| advBlock= - | | advBlock= - | ||
| Line 307: | Line 333: | ||
| guard= Overhead | | guard= Overhead | ||
| startup= 6 | | startup= 6 | ||
| active = 4 | |||
| advHit= - | | advHit= - | ||
| advBlock= - | | advBlock= - | ||
| Line 322: | Line 349: | ||
| guard= Overhead | | guard= Overhead | ||
| startup= 9 | | startup= 9 | ||
| active = 4 | |||
| advHit= - | | advHit= - | ||
| advBlock= - | | advBlock= - | ||
| Line 327: | Line 355: | ||
}} | }} | ||
}}<br> | }}<br> | ||
====Command Normals==== | ====Command Normals==== | ||
{{MoveData | {{MoveData | ||
|image=AJIT6LP.png | |image=AJIT6LP.png | ||
|caption= | |caption= | ||
|name=6LP | |name=One-Inch-Punch | ||
|input=6LP | |||
|data= | |data= | ||
{{AttackData(Special)-BC | {{AttackData(Special)-BC | ||
| Line 337: | Line 367: | ||
| guard= Mid | | guard= Mid | ||
| startup= 14 | | startup= 14 | ||
| active = 2 | |||
| advHit= 0 | | advHit= 0 | ||
| advBlock= -3 | | advBlock= -3 | ||
| Line 347: | Line 378: | ||
|image=AJIT6LK.png | |image=AJIT6LK.png | ||
|caption= | |caption= | ||
|name=6LK | |name= Lion Fang | ||
|input= 6LK | |||
|data= | |data= | ||
{{AttackData(Special)-BC | {{AttackData(Special)-BC | ||
| damage= 80 | | damage= 80 | ||
| guard= | | guard= Overhead | ||
| startup= | | startup= 20 | ||
| active = 2 | |||
| advHit= +1 | | advHit= +1 | ||
| advBlock= -6 | | advBlock= -6 | ||
| punishState = Dire | | punishState = Dire | ||
| direEffect = Stagger | | direEffect = Stagger | ||
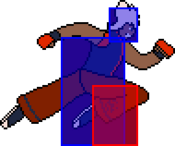
| description= Basic overhead normal. Moves Ajit forward a bit which could help in certain conversions.<br> | | description= Basic overhead normal with low-crush boxes. Moves Ajit forward a bit which could help in certain conversions.<br> | ||
Be weary when using this for mix as it puts you in Dire state and can be punished by lights and certain close heavy normals. | Be weary when using this for mix as it puts you in Dire state and can be punished by lights and certain close heavy normals. | ||
}} | }} | ||
}}<br> | }}<br> | ||
===Specials=== | ===Specials=== | ||
{{MoveData | {{MoveData | ||
|image=AJIT236P.png | |image=AJIT236P.png | ||
|caption= | |caption= | ||
|name=Lion's Sunspot | |name=Lion's Sunspot | ||
|input=236P | |||
|data= | |data= | ||
{{AttackData(Special)-BC | {{AttackData(Special)-BC | ||
| Line 384: | Line 419: | ||
|image4=AJIT214K_4.png|caption4=Roc Twister! | |image4=AJIT214K_4.png|caption4=Roc Twister! | ||
|caption= | |caption= | ||
|name=Roc Twister | |name=Roc Twister | ||
|input=214K,K,K,K, air OK | |||
|data= | |data= | ||
{{AttackData(Special)-BC | {{AttackData(Special)-BC | ||
| Line 391: | Line 427: | ||
| guard= Mid, Overhead (last hit) | | guard= Mid, Overhead (last hit) | ||
| startup= 13, 6 (aerial) | | startup= 13, 6 (aerial) | ||
| active = 3,3,2,2 | |||
| advHit= - | | advHit= - | ||
| advBlock= - | | advBlock= - | ||
| punishState = Dire | | punishState = Dire | ||
| direEffect = Ground Bounce (last hit) | | direEffect = Ground Bounce (last hit) | ||
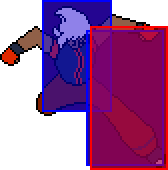
| description= Multi stage tatsu. This version makes Ajit go up higher. | | description= Multi stage tatsu. This version makes Ajit go up higher and also allows him to extend combos with it. | ||
}} | }} | ||
{{AttackData(Special)-BC | {{AttackData(Special)-BC | ||
| Line 403: | Line 440: | ||
| guard= Mid, Overhead (last hit) | | guard= Mid, Overhead (last hit) | ||
| startup= 13, 6 (aerial) | | startup= 13, 6 (aerial) | ||
| active = 3,3,2,2 | |||
| advHit= - | | advHit= - | ||
| advBlock= - | | advBlock= - | ||
| Line 408: | Line 446: | ||
| direEffect = Ground Bounce (last hit) | | direEffect = Ground Bounce (last hit) | ||
| description= Multi stage tatsu. This version makes Ajit go further horizontally.<br> | | description= Multi stage tatsu. This version makes Ajit go further horizontally.<br> | ||
Doesn't floor splat at all, mostly used to end combos in a restand for mix and for better corner carry. | |||
}} | }} | ||
}}<br> | }}<br> | ||
| Line 414: | Line 452: | ||
|image=AJIT623P_1.png | |image=AJIT623P_1.png | ||
|image2=AJIT623P_2.png | |image2=AJIT623P_2.png | ||
|image3=AJIT623P_P.png | |||
|caption= | |caption= | ||
|name=Tiger Strike | |name=Tiger Strike | ||
|input= 623P | |||
|data= | |data= | ||
{{AttackData(Special)-BC | {{AttackData(Special)-BC | ||
| Line 422: | Line 462: | ||
| guard= Mid | | guard= Mid | ||
| startup= 4 | | startup= 4 | ||
| active = 7 | |||
| advHit= +15 | | advHit= +15 | ||
| advBlock= -25 | | advBlock= -25 | ||
| punishState = Dire | | punishState = Dire | ||
| direEffect = | | direEffect = Ground Bounce (forces Tiger's Whip) | ||
| description= Ajit's Dragon Punch, this version specifically is better for combos as Ajit doesn't go as high into the air as<br | | description= Ajit's Dragon Punch, this version specifically is better for combos as Ajit doesn't go as high into the air as<br | ||
the heavy version. This version also doesn't have any invuln. Can be followed up by Tiger's Whip. | the heavy version. This version also doesn't have any invuln. Can be followed up by Tiger's Whip. | ||
| Line 434: | Line 475: | ||
| damage= 128 | | damage= 128 | ||
| guard= Mid | | guard= Mid | ||
| startup= | | startup= 7 | ||
| active = 10 | |||
| advHit= +15 | | advHit= +15 | ||
| advBlock= -33 | | advBlock= -33 | ||
| punishState = Dire | | punishState = Dire | ||
| direEffect = | | direEffect =Ground Bounce(forces Tiger's Whip) | ||
| description= An actual reversal, invuln to everything except supers on frame 1. Can be followed up by Tiger's Whip. | | description= An actual reversal, invuln to everything except supers on frame 1. Can be followed up by Tiger's Whip. | ||
}} | }} | ||
{{AttackData(Special)-BC | {{AttackData(Special)-BC | ||
| damage= | | header= no | ||
| guard= | | version= 623P~P | ||
| subtitle=Tiger's Whip | |||
| damage= 145 | |||
| guard= | |||
| startup= 4 | | startup= 4 | ||
| advHit= - | | advHit= - | ||
| Line 457: | Line 496: | ||
| description= Follow-up after Tiger Strike, can't be done on guard. | | description= Follow-up after Tiger Strike, can't be done on guard. | ||
}} | }} | ||
}} | }}<br> | ||
{{MoveData | {{MoveData | ||
|image=AJIT624P.png | |image=AJIT624P.png | ||
|caption= | |caption= | ||
|name=Dragon's Blaze | |name=Dragon's Blaze | ||
|input=63214P | |||
|data= | |data= | ||
{{AttackData(Special)-BC | {{AttackData(Special)-BC | ||
| Line 468: | Line 508: | ||
| guard= Mid | | guard= Mid | ||
| startup= 16 | | startup= 16 | ||
| active = 3 | |||
| advHit= +2 | | advHit= +2 | ||
| advBlock= -3 | | advBlock= -3 | ||
| punishState = Dire | | punishState = Dire | ||
| direEffect = Wall Bounce | | direEffect = Wall Bounce | ||
| description= Big punch, use this in block strings as it's mostly safe on block. | | description= Big punch, use this in block strings as it's mostly safe on block. Also low profiles. | ||
}} | }} | ||
{{AttackData(Special)-BC | {{AttackData(Special)-BC | ||
| Line 480: | Line 521: | ||
| guard= Mid | | guard= Mid | ||
| startup= 22 | | startup= 22 | ||
| advHit= | | active = 3 | ||
| advHit= tumble | |||
| advBlock= -2 | | advBlock= -2 | ||
| punishState = Dire | | punishState = Dire | ||
| direEffect = Wall Bounce | | direEffect = Wall Bounce | ||
| description= Bigger punch, use this in combos in the corner after 6LP. | | description= Bigger punch, use this in combos in the corner after 6LP. Also low profiles. | ||
}} | }} | ||
}}<br> | }}<br> | ||
| Line 490: | Line 532: | ||
|image=AJIT412P.png | |image=AJIT412P.png | ||
|caption= | |caption= | ||
|name=Cobra Gatling | |name=Cobra Gatling | ||
|input= 421P | |||
|data= | |data= | ||
{{AttackData(Special)-BC | {{AttackData(Special)-BC | ||
| version= LP | |||
| damage= 144 | |||
| guard= Mid | |||
| startup= 13 | |||
| active = 16 | |||
| advHit= +19 | |||
| advBlock= -20 | |||
| punishState = Dire | |||
| direEffect = Power Launch | |||
| description= Cool looking rapid punches. This is the move you want to use your Dire effect on. | |||
}} | |||
{{AttackData(Special)-BC | |||
| header= no | |||
| version= SP | |||
| damage= 168 | | damage= 168 | ||
| guard= Mid | | guard= Mid | ||
| startup= 17 | | startup= 17 | ||
| advHit= + | | active = 32 | ||
| advHit= +19 | |||
| advBlock= -20 | | advBlock= -20 | ||
| punishState = Dire | | punishState = Dire | ||
| direEffect = Power Launch | | direEffect = Power Launch | ||
| description= | | description= Slower, higher damaging version of the LP version. If you can combo into this you might as well since it does much more damage. | ||
}} | }} | ||
}} | }} | ||
===Supers=== | ===Supers=== | ||
====All-Out Attack==== | ====All-Out Attack==== | ||
| Line 508: | Line 567: | ||
|image=AJIT236236P.png | |image=AJIT236236P.png | ||
|caption= | |caption= | ||
|name=Solar Flare | |name=Solar Flare | ||
|input= 236236P | |||
|data= | |data= | ||
{{AttackData(Special)-BC | {{AttackData(Special)-BC | ||
| damage= | | damage= 216 | ||
| guard= Mid | | guard= Mid | ||
| startup= 9 | | startup= 9 | ||
| advHit= | | active = 3 | ||
| advHit= tumble | |||
| advBlock= -25 | | advBlock= -25 | ||
| punishState = Dire | | punishState = Dire | ||
| direEffect = N/A | | direEffect = N/A | ||
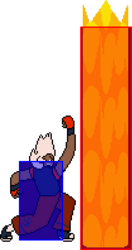
| description= Big Palm strike. Probably best as a raw punish rather than a combo ender as it's his lowest damage super. | | description= Big Palm strike with startup invulnerability. Probably best as a raw punish rather than a combo ender as it's his lowest damage super. | ||
}} | }} | ||
}}<br> | }}<br> | ||
| Line 524: | Line 585: | ||
|image=AJIT236236K.png | |image=AJIT236236K.png | ||
|caption= | |caption= | ||
|name= Exodus | |name= Exodus | ||
|input= 236236K | |||
|data= | |data= | ||
{{AttackData(Special)-BC | {{AttackData(Special)-BC | ||
| damage= | | damage= 248 | ||
| guard= Mid | | guard= Mid | ||
| startup= | | startup= 10 | ||
| active = 16 | |||
| advHit= +24 | | advHit= +24 | ||
| advBlock= -13 | | advBlock= -13 | ||
| Line 540: | Line 603: | ||
|image=AJIT214214K.png | |image=AJIT214214K.png | ||
|caption= | |caption= | ||
|name= Heatstroke | |name= Heatstroke | ||
|input=214214K, air OK | |||
|data= | |data= | ||
{{AttackData(Special)-BC | {{AttackData(Special)-BC | ||
| damage= | | damage= 232 | ||
| guard= Mid | | guard= Mid | ||
| startup= 17 | | startup= 17 | ||
| active = 4 | |||
| advHit= +24 | | advHit= +24 | ||
| advBlock= -23 | | advBlock= -23 | ||
| Line 553: | Line 618: | ||
}} | }} | ||
}} | }} | ||
====All-Out EX==== | ====All-Out EX==== | ||
{{MoveData | {{MoveData | ||
|image=AJIT236236K.png | |image=AJIT236236K.png | ||
|caption= | |caption= | ||
|name= Exodus EX | |name= Exodus EX | ||
|input=236236KK | |||
|data= | |data= | ||
{{AttackData(Special)-BC | {{AttackData(Special)-BC | ||
| damage= | | damage= 320 | ||
| guard= Mid | | guard= Mid | ||
| startup= | | startup= 8 | ||
| advHit= | | active = 16 | ||
| advHit= tumble | |||
| advBlock= -13 | | advBlock= -13 | ||
| punishState = Dire | | punishState = Dire | ||
| direEffect = N/A | | direEffect = N/A | ||
| description= Ajit's | | description= Ajit's level 2 super. Basically the exact same as Exodus but with more damage. | ||
}} | }} | ||
}} | }} | ||
====All-Out Destruction==== | ====All-Out Destruction==== | ||
{{MoveData | {{MoveData | ||
|image=AJIT214214PP.png | |image=AJIT214214PP.png | ||
|caption= | |caption= | ||
|name= Pillar of Fire, Pillar of Soul | |name= Pillar of Fire, Pillar of Soul | ||
|input=214214PP | |||
|data= | |data= | ||
{{AttackData(Special)-BC | {{AttackData(Special)-BC | ||
| damage= | | damage= 396 | ||
| guard= Mid | | guard= Mid | ||
| startup= 8 | | startup= 8 | ||
| advHit= | | active = 56 | ||
| advHit= tumble | |||
| advBlock= -29 | | advBlock= -29 | ||
| punishState = Dire | | punishState = Dire | ||
| Line 587: | Line 658: | ||
}} | }} | ||
}} | }} | ||
==General Gameplan== | ==General Gameplan== | ||
===Neutral=== | ===Neutral=== | ||
| Line 599: | Line 671: | ||
|} | |} | ||
{{Navbox-BC}} | {{Navbox-BC}} | ||
[[Category:Battle Craze!!]] | |||
[[Category:Ajit]] | |||
Latest revision as of 01:01, 29 February 2024
Overview
Playstyle
| C-Ajit is an all rounder shoto with great damage, and a good answer for a lot of scenarios. | |
| Pros | Cons |
|
|
Statistics
| Trait | "Tandem Link": Ajit gains a 5% attack bonus for the rest of the round after landing a Dire Counter or parrying with Future Sight, stacking up to 4 times. |
| Health | 1000 |
| Mobility | Run |
Move Overview
Universal Mechanics
Craze Tech
Future Sight 5CT, j.5CT initial parry initial parry counterattack counterattack
|
|---|
Throws
Wake Up!
5GP |
|---|
Back Shoot
4GP |
|---|
Sunset Driver
j.5GP |
|---|
Heartbreaker
Heartbreaker
4CT while blocking |
|---|
Normals
Standing
5LP
|
|---|
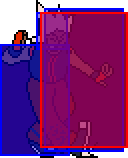
5SP (close)
|
|---|
5SP (far)
|
|---|
5LK (close)
|
|---|
5LK (far)
|
|---|
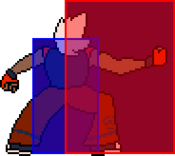
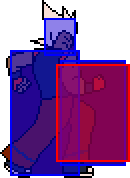
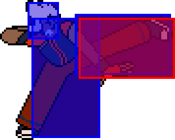
5SK (close) Second hit of cl.5SK Second hit of cl.5SK
|
|---|
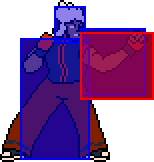
5SK (far)
|
|---|
Crouching
2LP
|
|---|
2SP
|
|---|
2LK
|
|---|
2SK
|
|---|
Jumping
j.5LP
|
|---|
j.5SP
|
|---|
j.5LK
|
|---|
j.5SK
|
|---|
Command Normals
One-Inch-Punch
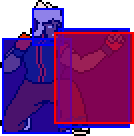
6LP |
|---|
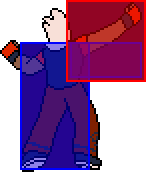
Lion Fang
6LK |
|---|
Specials
Lion's Sunspot
236P |
|---|
Roc Twister 214K,K,K,K, air OK Roc Twister! Roc Twister!
|
|---|
Tiger Strike
623P |
|---|
Dragon's Blaze
63214P |
|---|
Cobra Gatling
421P |
|---|
Supers
All-Out Attack
Solar Flare
236236P |
|---|
Exodus
236236K |
|---|
Heatstroke
214214K, air OK |
|---|
All-Out EX
Exodus EX
236236KK |
|---|
All-Out Destruction
Pillar of Fire, Pillar of Soul
214214PP |
|---|
General Gameplan
Neutral
Pressure
Defense
Combos
Light Starter
| Condition | Notation | Damage |
|---|---|---|
| idk you'll probably hit it some day | ooooo cold combo | 1 grillion |

