Eternal Fighter Zero/Doppel Nanase: Difference between revisions
Sushininja05 (talk | contribs) m (623C note) |
Sushininja05 (talk | contribs) m (→Reversals) |
||
| Line 1,510: | Line 1,510: | ||
==== Reversals ==== | ==== Reversals ==== | ||
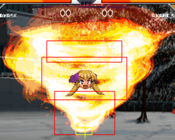
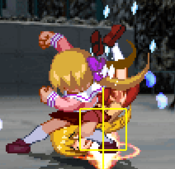
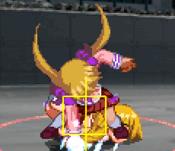
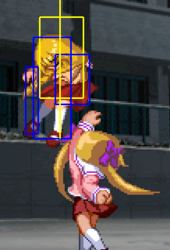
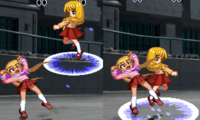
Doppel's reversal suite is exceptionally lacking compared to most characters and she doesn't really get much reward off of a lot of big invuln buttons, making it hard to contest things without betting on hail mary | Doppel's reversal suite is exceptionally lacking compared to most characters and she doesn't really get much reward off of a lot of big invuln buttons, making it hard to contest things without betting on hail mary 623A/Bs which are often a great way to get blocked/RG'd and smacked. Particularly, Doppel's 623C is a really bad reversal. It seems good since it has considerable invuln but is absolutely terrible in every other way. For starters, the recovery is very very long and its start-up doesn't make up for it. This would be fine if it moved Doppel a lot and kept the opponent in block stun, such as Neyu or Akane's 623Cs, but Doppel ends in a very obvious spinning animation in place for 30 frames where the opponent will immediately bounce away after a single blocked hit. Similar, better, reversals take about 6f to start-up while having considerable movement or reward. Doppel's 623C, absolutely has no reward since it scales terribly and requires a lot of hits to get a stable starter. For example: If you have BIC and 623C IC, your POWER gauge will be depleted tremendously since 623C uses 2% proration for 100 dmg and you need like 6-7 hits to actually convert off of it so you can't easily get a route. Not to mention, it knocks the opponent back and forth erratically, making it hard to convert in the first place and often requires you to wait out 10 hits or so to get a stable starter. Not to mention, in some rare cases you can even be punished on hit due to the lengthy recovery. This can happen against some projectile okizeme setups, or if the opponent gets hit far out and is knocked away. 236236* has far worse start-up and easily reactable superflash, but at least you get a grip of damage, good forward movement, and okizeme off of it. You're also not spending RF like 623C, which is arguably more important than meter. 214214* is completely unusable as a reversal and so is 214C, giving her very little to work with when waking up. Generally, if you're playing as Doppel you need to get used to not having reversals.<br> | ||
<br> | <br> | ||
Revision as of 00:34, 11 May 2024
Introduction
Doppel Nanase (ドッペル七瀬) uses her high priority normals and strong but committal neutral options to secure knockdowns and run scary mix-ups that loop into themselves. In the corner she gets explosive damage from wallbounce loops, ending with a special attack that leaves a gap in the corner allowing her to run her mix-ups anywhere. Doppel shares some of Rumi Nanase's unarmed normals but plays very differently.
Doppel Nanase is not featured in any Tactics or Key visual novels but she did appear on the Former Tactics Homepage and in Variety Tactics. Her victory music in EFZ is the same as the ONE characters.
Doppel was added to EFZ's cast in Bad Moon Edition.
Stage: Park on the Path to School (Night) (通学路の公園(夜))
BGM: A Would-Be Maiden (乙女希望)
Character-Specific Notes
- Doppel is able to double jump once, and air dash once.
- Doppel is one of a few characters who gain some throw invincibility after double jumping.
- Doppel's command grab follow-ups can be teched. See Maiden Capture for more information.
//mark these for deletion ![]()
![]()
Normal Moves
| Frame Data Help | |
|---|---|
| The notation for the move lists can be found under Controls. | |
| Cells filled with a "-" indicate a placeholder. Cells filled by a "/" indicate a non-applicable field. | |
| Values separated by a "~" (X~Y) indicate a range or variance. A "~" preceding a single value (~X) may indicate approximation. A "-" separating frame values of a property (X-Y) indicate the duration of the property. | |
| Cell data accompanied by a ※ indicate properties unusual to the template. Explanations for such properties can be found at another ※ in the description. If a move requires multiple ※'s, subscripts will be attached to indicate relation (※1, ※2, ※3...). | |
| Frame data with decimal values .33 or .66 relate to subframes. | |
| Version | Used for moves with multiple special attacks on one motion. |
| Damage | The base damage value that the specific hit will do. See damage scaling for more information. |
| Guard | Indicates how the move must be blocked, if it can be blocked at all.
Low: Crouch Block |
| Property | Shows what properties the move has and the time (in frames) that these properties are active. Example: "I: 0.33-9", which means the move is invulnerable on the first subframe of the move until the 9th full frame (or 27th subframe).
I: Full Invincibility |
| Startup | Indicates where the move's first active hitbox is. |
| Active | Total frames the hitbox is active for. |
| Recovery | Total frames until the character can block. Note: After the recovery of any action, before any other action may occur, there exists 1 frame in which the only action you may take is to block. |
| Adv Hit | Frame advantage on hit. |
| Adv Block | Frame advantage on block. |
| Cancel | Possible cancel options.
N: Normals |
Standing
5A
5A
|
|---|
c5B
c5B
|
|---|
f5B
f5B
|
|---|
5C
5C
|
|---|
6C
Maiden Straight
乙女ストレート 6C |
|---|
Crouching
2A
2A
|
|---|
2B
2B
|
|---|
2C
2C
|
|---|
Jumping
j5A
j5A
|
|---|
j5B
j5B
|
|---|
j5C
j5C
|
|---|
Dashing
66A
66A
|
|---|
66B
66B
|
|---|
66C
66C
|
|---|
662A
662A
|
|---|
662B
662B
|
|---|
662C
662C
|
|---|
Grabs
Ground Grab
Ground Grab
Close 6C/4C |
|---|
Air Grab
Air Grab
Close j6C |
|---|
Special Moves
Specials
623*
Maiden Typhoon 乙女タイフーン 623* 623A 623A 623B 623B 623C 623C
|
|---|
214*
Maiden Fire 乙女ファイアー 214* 214A/B 214A/B 214C 214C
|
All variants can be FIC'd during the start-up for gimmicks or for safety. |
|---|
41236*
Maiden Capture 乙女キャプチャー 41236* 41236A 41236A 41236B 41236B 41236C 41236C
|
|---|
41236*_236A
Maiden Capture Follow-ups Automatic Follow-up Automatic Follow-up 41236*~236A 41236*~236A 41236*~236B 41236*~236B
|
All 236* and 236236* follow-ups are interchangeable with 214* and 214214*. All follow-ups do not prorate! |
|---|
Eternity Specials
41236*_236A_236A
Maiden Crash Follow-ups (236A) 41236*~236A~236A 41236*~236A~236A 41236*~236A~236A~236236A 41236*~236A~236A~236236A 41236*~236A~236A~236236B 41236*~236A~236A~236236B
|
All 236* and 236236* follow-ups are interchangeable with 214* and 214214*. All follow-ups do not prorate! |
|---|
41236*_236A_236B
Maiden Crash Follow-ups (236B) 41236*~236A~236B 41236*~236A~236B 41236*~236A~236B~236236A 41236*~236A~236B~236236A 41236*~236A~236B~236236B 41236*~236A~236B~236236B
|
All 236* and 236236* follow-ups are interchangeable with 214* and 214214*. All follow-ups besides 236A~236B~236236B do not prorate! |
|---|
236236*
Maiden Finger
乙女フィンガー 236236* |
※ Starts up sooner if Doppel enters proximity of the opponent. |
|---|
214214*
Maiden Volcannon
乙女ボルカノン 214214* |
|---|
Final Memory
FM
Maiden Enlightenment 乙女開眼 Known as "Gold Doppel" Known as "Gold Doppel"
|
|---|
Strategy
Neutral
For starters, let's make something clear - Doppel does not play like a traditional grappler.
Her 41236* series of command grabs are largely useless.
For most Doppels, the 41236* series is just a combo ender via the use of 41236B, the others can see niche use as mix-ups or block string enders. Most importantly, if the opponent does get grabbed, they can tech her follow-ups.
Successfully teching a follow-up makes the opponent jump into the air creating a scramble situation, both players have equal urgency over the outcome of the tech and Doppel rarely has advantage.
Depending on the state of the game it may be advantageous to roll the dice on a follow-up, try to tech chase opponents who are predictable with their techs, or even just take the guaranteed follow-up for damage.
As a rule of thumb, nothing about the 41236* series besides 41236B is "optimal", making most of her proper "grappler" kit fake.
It's not all doom and gloom however, it's still worth going for the command grab follow-ups occasionally to keep your opponent on their toes, the damage is very worth it if you manage to get lucky, and most follow-ups don't mean giving up okizeme either.
Doppel instead focuses on using her strong normals and huge specials to bully the opponent into pressing something so she can score a knockdown into looping okizeme. She relies heavily on left/right okizeme with j.C, hi/lo safe jump okizeme with j.A and empty 2A, and occasionally using her 41236C/Normal Grab as mix-up tools.
Her supers and other special moves are either just combo fodder, neutral tools, or for okizeme.
Pressure & Defense
Doppel's pressure is very swing heavy, one second you're making them hold the blockstring of their lives and the next you're cowering in fear over their reversal or getting juggled to the corner.
Generally, Doppel is looking to make you block a lot and is fine with doing that until you relent and give her the RG battle/hit she wants, if you get too complacent with blocking she has her 41236*/Normal Grab to make you want to block her.
Likewise, on defense she's looking to press something to get out or looking for the right RG to make a move, she'll block if she has to but nobody wants to do that.
She has a suite of reversals, the highlights being 236236B and 623A, so she doesn't exactly have to respect most character's okizeme but they all come with their own drawbacks.
As such there's no good way to go about pressure or defense for her, rather just a collection of moves that you can mold into your own playstyle.
Important Moves:
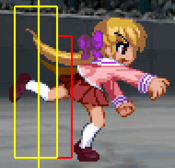
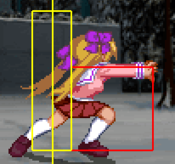
- 6C: Huge 10f active hitbox that moves Doppel a good distance forward. Surprisingly effective neutral tool if you space it to hit at the tip, great reward on hit no matter your resources.
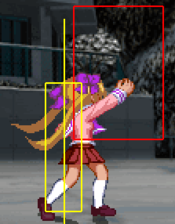
- 2B: Very good poke, although it's not as safe as it may seem since there's a small overhanging hurtbox. Still, she leans forward a lot, and if spaced right you can link this into 6C 214A for a very annoying pressure string. More on that later.
- j.C (and j.A): Big meaty air-to-air, jump-in, mix-up, whatever you want. Can be coupled with air dash cancels for opponents who block it and converts well for those who don't. Try to vary the timing, spacing, height, and movement before you do it as you're liable to get air thrown or RG'd. If the opponent gets too used to j.C, mix in some j.As to keep the opponent on their toes. j.A also is better for jump-ins since it has less recovery, start-up, and chains into itself. Usually, if you can't safely do a j.C you can safely do a j.A and chain into j.C for damage without giving up too much scaling.
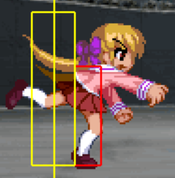
- 662C: Same as 2C except it has forward momentum, unlike 662B you don't need to IC it since it can be jump cancelled. Hitting it gives you a combo, having it blocked lets you jump cancel for an IAD hi/lo or to back off. It leads into all of her best confirms and generally is just great to throw out.
- 662B: Same as 2B except it has forward momentum, almost a god poke but she has a small lip hurtbox above her head that's easy to counter poke. Still, the extreme range of 662B lets her pick up combos from afar using IC and disrupt some opponents. Best used once the opponent is scared of your other tools or playing too passively.
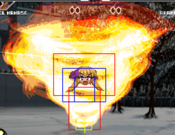
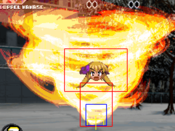
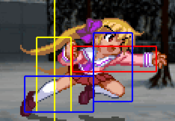
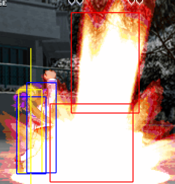
- 623* (Lariat): Very huge and very safe hitbox, given that you have IC. Demands a lot of space and respect, even if RG'd since you can sometimes mix them by performing the low or high profile version point-blank. Great for starting RG battles which lets Doppel bully the opponent into picking an option, likewise 623A/B on hit have great reward with IC. Since 623A is high profile from frame 1, it can frazzle opponents who are used to performing okizeme with 2A. 623B can do the same to some jump-ins, projectiles, and zoning. Both are heavily punishable and prone to being RG'd -> grab, so don't use them predictably or without IC in the back pocket. Avoid pressing 623C unless you absolutely have to as the reward is terrible, you spend IC, and it's very easy to punish with a full combo.
- 214*: 214A is just a good button to throw out, being very big, rewarding, and contesting a lot of space. It's also very prone to trading, usually being advantageous or neutral for Doppel since fire animation gives you more time to setup. 214B is good to buffer after a long blockstring or against a backed up opponent, it's also sometimes useful on okizeme with proper spacing since you're plus and have high reward on IC/late connect. 214C however is a huge surprise hitbox with longer active frames than 214B, not particularly useful unless you have BIC or the opponent doesn't expect it, but good to throw out just for the hell of it.
- 236236*: The 236236* series is great for the hefty invuln of the B and C variants. Unless the opponent is free to RG and punish you, you can safely ignore just about everything and take back screen real-estate, and punish any overly committal neutral options from the opponent. 236236A can also be used for it's very cheap invuln to deal with some very active projectiles or armored opponents, although these situations are far rarer. Make sure not to just throw it out randomly since it's death on block/RG (they get a guaranteed grab if it's RG'd) and there's a huge super flash which alerts opponents to your approach.
- 66[5]2AAA into...: This trick allows you to use dash momentum without getting the 662A dash normal. The [5] is important to make the dash as short as possible. Mashing 2As is really hard to contest, you can start to vary this by chaining to higher button strengths, using 214* or 623*, or using her other dash normals in place of the initial 2A. Try to stagger your 2As to catch opponents who mash, coupled with the occasional 41236A/C this can be very hard to read and sometimes open up your opponent.
- 2B/6C -> 214A...: Once you've cornered your opponent, this string can be incredibly annoying to deal with when spaced correctly. You'll want to vary the timing on each part if you plan to loop it. You can mix this with the 66[5]2AAA trick if the opponent starts fishing for RGs. You can also just RG back after 6C/214A and force opponents to respect you, or occasionally throw in a 623A to kill momentum.
- Anti-airs: Anti-airs are kind of spotty for Doppel, unlike most characters she doesn't have a go to anti-air button or DP. All of her anti-airs have some sort of draw back, which characters like Ayu or Mishio don't have to think as much about. c.5B is solid but relies on proximity and is easy to poke, 5A is okay but it's best behind an RG which leads to RG battles, 66B/662C are dashing normals which makes it hard to properly space, 2C seems like an anti-air but launches the opponent very high with poor scaling so you can't convert, 41236B just cannot anti-air despite looking like one, and 623A/B seems amazing but the hefty start-up and reliance in IC keeps it from being ideal. If any of these options work, great! But expect RG battles and the opponent to just disrespect your air space.
Reversals
Doppel's reversal suite is exceptionally lacking compared to most characters and she doesn't really get much reward off of a lot of big invuln buttons, making it hard to contest things without betting on hail mary 623A/Bs which are often a great way to get blocked/RG'd and smacked. Particularly, Doppel's 623C is a really bad reversal. It seems good since it has considerable invuln but is absolutely terrible in every other way. For starters, the recovery is very very long and its start-up doesn't make up for it. This would be fine if it moved Doppel a lot and kept the opponent in block stun, such as Neyu or Akane's 623Cs, but Doppel ends in a very obvious spinning animation in place for 30 frames where the opponent will immediately bounce away after a single blocked hit. Similar, better, reversals take about 6f to start-up while having considerable movement or reward. Doppel's 623C, absolutely has no reward since it scales terribly and requires a lot of hits to get a stable starter. For example: If you have BIC and 623C IC, your POWER gauge will be depleted tremendously since 623C uses 2% proration for 100 dmg and you need like 6-7 hits to actually convert off of it so you can't easily get a route. Not to mention, it knocks the opponent back and forth erratically, making it hard to convert in the first place and often requires you to wait out 10 hits or so to get a stable starter. Not to mention, in some rare cases you can even be punished on hit due to the lengthy recovery. This can happen against some projectile okizeme setups, or if the opponent gets hit far out and is knocked away. 236236* has far worse start-up and easily reactable superflash, but at least you get a grip of damage, good forward movement, and okizeme off of it. You're also not spending RF like 623C, which is arguably more important than meter. 214214* is completely unusable as a reversal and so is 214C, giving her very little to work with when waking up. Generally, if you're playing as Doppel you need to get used to not having reversals.
Dealing with RG
As with any pressure in EFZ, keeping your pressure timing as unpredictable as possible while still making it difficult to mash out of is crucial, Recoil Guard makes this an absolute requirement.
You can use red IC to make normally unsafe moves safe and to interrupt Recoil Guards if you manage to IC before they RG.
Also just being unpredictable and going for weird options can be effective, 41236* series is great at catching opponents off guard who love to RG.
Generally, just practice Recoil Counters and go for them more often to demand respect.
When on the back foot, the best tools to use in RG duels are 623A, 214A, 41236C, 623C, and 2A.
2A is self-explanatory, it's a great all-around button and most RG duels are just games of chicken with 1A (2A + RG) inputs and chain cancels.
623A can high profile and smack most 2As via the move's high profile, the problem is it's pretty high commitment compared to just doing 2A and looking for the opponent's RG, it's great at disrupting RG duels since characters need special punishes for it unless they want to block.
214A is situationally useful for more reactive opponents, the hitbox usually comes out just in time to trade by the time the opponent realizes you aren't hitting them with 2A.
41236C at point blank is guaranteed against some setups on a successful RG, preventing them from RG'ing back, such as Nayuki's snow bunnies or a bad jump-in.
While 623C is a very bad move, random invuln is still random invuln and it can sometimes pull you out of a very long RG duel with ease, just try not to rely on it and to keep it in the back pocket.
Use your better judgment and reactions to pick the right tool.
Combos
| Notation Help | |
|---|---|
| Disclaimer: Combos are written by various contributors, some combo notations may deviate slightly from the notation listed below. For more information, see Controls | |
| IC | Input Instant Charge (22C) when you have the right amount of RF Meter. |
| FIC | Input Flicker Instant Charge (22C) when you have the right amount of RF Meter. |
| {X/Y/Z} | Move X or Y or Z can be used. |
| #* | Indicates that any of A, B and C may be used with #. Example: 214*. |
| [<- X] [-> X] | Side switch notation. All inputs grouped by the square brackets are performed facing the arrow's direction. They are still written as if they were done facing right, however. |
| [X]xN | Loop the inputs in the square brackets as many times as N. |
| c5B | Proximity normal only usable while close. |
| f5B | Proximity normal only usable outside of c5B range or when cancelled from another normal. Known as far 5B. |
| jX | Button X is input during your first jump. |
| djX | Button X is input during your double jump. |
| X(whiff) | Indicates that X is intended to whiff. |
| X(tech trap) | Indicates a combo ender intended to catch the opponent's air tech. The most common kind of tech trap is j6C, which will air throw early techs and jC later techs. Executionally identical to X(whiff) but different in purpose. |
| ~ | Indicates a followup for moves which have them. Example: 236A~236A. |
| .. | Indicates a short delay. |
| IAD | Indicates an Instant Air Dash. |
| IABD | Indicates an Instant Air Back Dash. |
| (X) | X move is omittable from the combo. |
| tk.X | Indicates the motion "X" is input immediately after leaving the ground. Stands for tiger knee. |
- Replay pack: Mizuumi Doppel Combos
- 41236* Follow-ups aren't guaranteed, so they aren't listed in the notation.
No IC
Without IC Doppel's routes are very limited and her damage suffers without extra execution.
In this state just doing a basic chain into 6C works just about anywhere and is stable if you don't want to fish for odd buttons with demanding execution.
Anywhere
2AA c5B 5C 6C (replay 1-1)
- c5B drops on a few characters crouching, use 2B instead for consistency.
Similarly, 6C 669 okizeme doesn't work on a handful of characters.
On Kano, Mayu, Mizuka, Makoto, and Nayuki, do 2AA c5B 5C 214A instead for better oki.
Midscreen
(jC) 662C jB (delay) j.AC 5AB 662C j.C j44
- At the cost of being extremely difficult, Doppel can spend no IC or meter and get proper j44 669 okizeme and corner carry.
The trick is to instantly do jB, then delay jA until the juggle bar is almost completely gone, then instantly do jC and time 5A after.
Metered variant is also shown in the video, you can substitute the 66B 41236B for 662C jC j44 if you want.
Corner
214A 662A 5AB 66C 662A(whiff) c5B c5B 2B 6C 41236B
- Doppel can conserve IC off 214A with a very difficult 662A 5A link and a heavy delay after 5B into 66C. The result is worth it but if you aren't feeling confident then use IC to convert off 214A.
662C 66B 66C (662A(whiff) c5B 66C)x2 214214A 5AB 41236B
- Doppel can conserve IC off 662C at point-blank with an annoying 66B link. Massive damage for no IC spent, very worth it if you manage to get a lucky 662C hit.
- Why Don't We Do A Follow-up Here?
If you've noticed, all of the combos here end with just 41236B and nothing after, despite the fact 41236* has dedicated follow-ups.
Technically, if you really wanted to, all of these you could input a full follow-up series for a cool 3.5k~ damage increase at no real effort.
So why don't we? Follow-ups are techable! If they tech you give up your okizeme and it's not even a true 50/50 as 41236*~236B has no advantage this late into a combo besides building extra IC.
That isn't to say you shouldn't do it, as you can turn 5k dmg combos into 8.5k dmg combos and so on, but keep that in mind and try to make their use unpredictable.
Red IC
Doppel likes having IC to make fishing for 6C/214*/662C safe and to bail herself out of bad situations.
While Doppel still uses the same buttons to start combos: 6C/214*/662C, they're far easier to convert off of with IC instead of needing specific stray hits to convert.
Here we begin to see Doppel's wall bounce loop: (66C 662A(whiff) c5B)xN, which is as follows:
- <Starter> - Launches the opponent allowing them to be juggled. You can do this with 662C, anti-air hits, 214* series, 6C, and the 623* series. 6C is the optimal starter, but others work too.
- IC - Instant Charge, cancels the your starter early so we can use our next move before the opponent hits the ground.
- [66C - High damage wall bounce move, starts your loop. Depending on how high you hit the opponent into the wall bounce state determines how high they'll pop out after, so it's better to have 66C hit closer to the ground if you can manage it.
- 662A(whiff) - After 66C Doppel will be in between the opponent and the corner while they are bouncing off the wall. This move is used to swap back to the original side, facing the corner. 662A(whiff) can be substituted for well-timed [<- 66] [-> 66X], backdashes (at certain spacings), backwards IADs (in Gold), and sometimes just walking. But 662A(whiff) is the most consistent frame kill.
- c5B] - Stops the juggle animation and momentum, making it easier connect with 66C and start the loop again. This occasionally can be a well-timed 66B or f5B with the right height and spacing. Sometimes this step can be completely skipped by just doing [<- 66] [-> 66C] with good timing. Whether you use c5B or not depends on how much power you have left and how high your last 66C hit was.
Midscreen
2AA c5B 5C IC 662C 214214A 662C jC j44 jC(whiff) (replay 1-2)
- j44 sets up the correct distance for 669 jC okizeme, the extra jC is done to build extra meter.
Corner
2A c5B 5C 6C IC 66C 214214A 5AB 41236B (replay 1-3)
- Basic combo.
6C IC 66C [662A(whiff) c5B 66C]x2 214214A 5AB 41236B (replay 1-4)
- Doppel's 6C/2B are great pokes, this combo and the one below are example routes. Optimal combo is also embedded for when you master the normal route, which gives her back IC unlike the other one.
2B 6C IC 66C 662A(whiff) c5B 66C 214214A 5AB 41236B (replay 1-5)
- Example single wall bounce loop combo, you can easily add a second loop so this combo is merely for practice. Refer to the combo below for a more practical version.
2B 6C IC (66C 662A(whiff) c5B 66C)x2 214214A 5AB 41236B
- Very common wall bounce loop combo. If you want to be insanely optimal, you can replaced c5B with 66B for a 50~ dmg increase.
2AA c5B 5C 6C IC 66C 662A(whiff) c5B c5B 2B 6C 41236B (replay 1-6)
- Example high damage combo ender, usually used when scaling is too high to convert into wall bounce loops or with no meter after wall bounce loops.
A second version is also embedded that works on Sayuri/Unknown and is generally universal, use that version if in doubt.
41236*~auto 669/IAD... (2B 5C/j.C 5BC) 623B IC 5BC 6C 41236B
41236*~auto 669/IAD... (2B 5C/j.C 5BC) 623B IC 66C c5B 66C 214214A 5BC 41236B
- After a 41236*~auto in the corner, you get a left/right mix-up! Here are some routes for high and low post-left/right that allow you to retain corner, which is important for Doppel.
You can add in 214214A after 6C in the meterless route for extra (easier) damage than the 66C variant, or alternatively do the 66C variant but do 41236B instead of 214214A.
- A Note About Corner Combo Enders
Usually, most combos end in either [5AB 41236B~auto] or [c5B f5B 5C 41236B~auto] after 214214A.
You can substitute this with anything you want, as your ender doesn't affect okizeme but rather how far out the opponent is when you do 214214A does.
You can force left/right distance by walking back and doing raw 41236B after 214214A, but it's seldom worth the damage decrease as Doppel's high/low is pretty good anyways.
This means you can do [5BC 41236B~auto] for a nice damage increase, or [c5B f5B 5C 41236B~auto] for even more at the risk of messing up your combo.
5AB is not required, but it's the easiest so it's listed here. Likewise, [c5B c5B 2B 6C 41236B~auto] can technically be [c5B c5B 2B 6C 214214A 41236B~auto], but it's not so easy so it's not listed.
Blue IC
Doppel likes having BIC, much like any character, but for her it's mainly only used for her lacking midscreen routes.
Since she can't deal good damage at midscreen without execution and sacrificing her okizeme/corner carry, BIC is used to either corner carry or for big damage at the corner.
Midscreen
2AAB 5C IC 662C IAD jB walk forward c5B IAD jAB c5B 214214A 66C [<- 662A(whiff)] c5B c5BBC 41236B
- Double IAD route. You will need to adjust the ender after 214214A when starting further from the corner (e.g. 662C jC j44).
Corner
Shorter Version
2AA c5B 5C 6C IC 66C [662A(whiff) c5B 66C]x2 214214A 5AB 41236AB (replay 1-8)
- An easier alternative if you struggle with the optimal combos below. Very stable.
Higher Damage Versions
2B 6C IC 66C [662A(whiff) c5B 66C]x3 662A(whiff) c5B c5B 2B 6C 41236B (replay 2-1)
- Example from 2B 6C harassment.
2AA c5B 5C 6C IC 66C [<- 66] [-> 66C f5B 66C] [<- 66] [-> 66B 66C] [<- 662A(whiff)] [-> c5B f5B 6C 214214A c5B f5B 41236B]
- Very difficult and optimized corner 100% BIC 2A starter.
Gold Only
These are combos only available in Doppel's Gold mode or are preferred in Gold mode.
Normal mode combos will work while golden but have different timing due to Doppel's faster speed so Normal mode combos will require practicing.
Anywhere
(66B)xN
(662A)xN
- 1f link infinite, works anywhere but scales terribly.
Completely impractical and not really worth doing, if you are going to go for one, go for 66B since it's easier, links into 662C, and higher is damaging.
66B whiffs on crouchers, 662A doesn't whiff but it's far harder to perform.
Midscreen
662B 214A 662C 214214A [66C 214214A]x2 5AB 41236B
- Gold Doppel can conserve IC by doing 214A instead of IC after 662B, giving her easy damage and corner carry.
(jC) 662C (delay) jC (5AB (delay) jAC)xN j44
- In gold, jC and 5A come out fast enough that you can loop the jAC land 5AB route from almost anywhere in a combo.
This is just a small example combo that stops after you run out of power to continue looping it.
Second video shows a BIC variant, just play around with it.
Corner
66C 214A 66C [<- 66] 66B 66C 662A(whiff) c5B 66C 214214A 5BC 41236B
- "Optimal" ICless 1 bar corner combo.
Instead of using 6C to start combos, which is unsafe and deals less damage, 66C deals more damage and can be cancelled into 214A in gold for a full combo.
Okizeme
- Doppel has a nasty okizeme game anywhere on the screen. If you can space her knockdowns well midscreen, you'll get very hard to see 669 jC left/right/high/lows. In the corner, Doppel ends with 41236B to leave a small gap, allowing her to steal the corner for even nastier okizeme setups. She also has plenty of frame kills to make timing easier. You can find visual examples of these setups here.
- Anywhere - Any KD... (662A/66) 214B
- After any knockdown, you can do 214B for an easy meaty that leaves you plus to press anything you want after. On characters with slower wake-ups it helps to do a frame kill before 214B (i.e. 662A 214B) to not have the fire whiff entirely, but if manually timed you can have it only hit the last hitbox leaves you the most advantageous (up to +10!). Must also be spaced properly or it can be RG'd and grabbed/attacked through, but the further you stand away the less reward you get off of it. It's also very prone to being invuln'd through by characters with strong horizontal reversals. Best done near the corner as it has the highest reward there, but doing it midscreen can yield good results albeit with very awkward combos.
- Anywhere - Any KD... 668 j.C / 4 668 j.C
- After an auto follow-up you can walk back slightly (or simply wait) then do 66 to dash forward, waiting until you've slowed down to jump and let your very slow momentum carry you to the other side of them. Extremely telegraphed but can be a good way to dodge DP wake-ups or side switch. Can be somewhat ambiguous if the jump is done earlier but it's hard to do. Also, on some characters (such as Nayuki or Akiko) you can corpse push and then jump later instead of having to wait or microwalk back due to their fatter/taller hurtboxes. Best done if you got a knockdown off an awkward button and just want to put something out safely to make the opponent respect you.
- Anywhere - 41236*~auto IC... 4 IAD j.C
- During an auto follow-up, you can IC to make yourself slightly more advantageous which gives you enough time to back up and 66 IAD for an ambiguous left/right. Depending on the character different spacing and timing may apply. This mix-up is costly so it's not something to be relied on or done consistently, but it might be worth it to random someone out.
- Midscreen - Specific Starters... 669 jC / 9 j9 j66 jC / IAD jC
- Your main midscreen mix-up. Which you'll use and when depends on the spacing and character. 669 is great against mid/slow wake-ups, good timing will yield an ambiguous left/right. 9 j9 j66 jC is not to be confused with IAD jC, doing a short IAD with or without a frame kill will always result in a same-side shallow jC which is very prone to being RG'd that also you can't defend against due to landing. Instead, 9 j9 j66 jC is used from higher up to "dive bomb" down onto characters like Akiko. On characters with very small wake-up collision, instead of doing 9 j9 j66 or 669, you'll want to hold out the IAD until you're just above their head, then let go which results in an ambiguous left/right. All of these require character-specific timing and spacing, some characters are particularly annoying to get okizeme on such as Kano or Mayu thanks to their very long wake-up. While characters with very fast wake-ups (like Mizuka) you can't get any mix on.
- Specific Starters include:
- 6C
- 41236*~236A~236A~236236A
- 41236*~236A~236B~236236B
- 236236*
- (air)jC j44
- Corner - 41236B~auto... 669 jC Left/Right / ~41236B 66 IAD Left/Right
- When spaced correctly, 41236B will leave a gap in the corner that you can make harder to see by corpse pushing. To perform, you input 66 then immediately input 9, jumping forward at full speed. You then time a jC close to when you hit the ground for an ambiguous high/low, the gap you left determines if you steal corner or not. On characters with smaller waking collision, you can IAD early and use the air dash animation to hide which side you're currently on, stealing the corner as their collision grows in size. If you steal corner there are special routes to recorner the opponent to continue running your offense, otherwise doing same-side high/low shenanigans into combos works just fine.
Win Quotes
| Japanese | English |
|---|---|
|
中々のお手前 |
You're not bad. |
|
世界の何処かで |
Let's meet again, |
|
一撃必殺の境地は |
I'm still far from being able |
|
敵を侮ったか? |
Did you underestimate your enemy? |
|
加減が |
Even though |
|
(To Mizuka) |
(To Mizuka) |
|
(To Mio) |
(To Mio) |
|
(To Rumi) |
(To Rumi) |
|
(To Mai) |
(To Mai) |
Colors
In-game References
External References
- Doppel's "Maiden Typhoon" move is based on Jin Saotome's "Saotome Typhoon" move, from the Marvel vs Capcom series.
- Doppel's "Maiden Fire" move may be based on Mech Zangief's "Vodka Fire" move or potentially Dhalsim's "Yoga Flame" move, from the Marvel vs Capcom series.
- Doppel's "Maiden Finger" move is based on Domon Kasshu's "Hyper God Finger" move, from Kidou Butoden G-Gundam.
- Doppel's "Falling Maiden" move is based on Shin Akuma's "Misogi" move, from Capcom vs SNK 2.
- Doppel's "Maiden Straight" move is based on Slayer's "Mappa Hunch" move, from the Guilty Gear series.
- Doppel's "Human Floor-Burning Polisher" move is based on Jin Saotome's "Saotome Crush" move, from the Marvel vs Capcom series.
- Doppel's "Maiden Enlightenment" mode is based on Jin Saotome's "Saotome Shine" mode, from the Marvel vs Capcom series.
ONE References
- Doppel's stage is a reference to the park on the way to the school that the characters of ONE go to.
- The "Kimuchi" ramen that Doppel eats during her "Maiden Fire" move is a reference to the meal that Kouhei ate with the real Rumi on a Christmas date in the game.

