|
|
| Line 2: |
Line 2: |
| {{TOClimit|2}} | | {{TOClimit|2}} |
| == Introduction == | | == Introduction == |
| '''Kawana Misaki''' (川名 みさき) is one of the more straightforward characters in the game, with some strong but very linear frame traps, which lead into very high damage combos. She has many normals that leave her advantageous on block which can be used in tandem with her slow Reppukens and guard point moves to suffocate her opponents and threaten her grab (or super command grab). While her high/low mixups are weak, any stray hit can lead to massive damage into reversal safe oki using her Down Burst super. | | '''Kawana Misaki''' (川名 みさき) is one of the more straightforward characters in the game, with strong but linear frame traps which lead into very high damage combos. She has many normals that leave her advantageous on block which can be used in tandem with her slow Reppukens and guard point moves to suffocate her opponents and threaten her grabs. While her high/low mixups are weak, any stray hit can lead to massive damage into reversal safe oki using her Down Burst super. |
|
| |
|
| Misaki is one of the heroines of ''ONE'', a visual novel produced by ''Tactics'' in 1998. She is a 3rd-year student in the same high school as Kouhei. A girl with cold eyes but a warm smile, Misaki became blind due to an accident that occurred in her elementary years, but she doesn't let it bother her. She enjoys talking to others and getting to know other people. During ''ONE'', Misaki is one of the heroines Kouhei can pursue, first meeting her on the roof of the school during sunset. | | Misaki is one of the heroines of ''ONE'', a visual novel produced by ''Tactics'' in 1998. She is a 3rd-year student in the same high school as Kouhei. A girl with cold eyes but a warm smile, Misaki became blind due to an accident that occurred in her elementary years, but she doesn't let it bother her. She enjoys talking to others and getting to know other people. During ''ONE'', Misaki is one of the heroines Kouhei can pursue, first meeting her on the roof of the school during sunset. |
Revision as of 02:12, 25 May 2024
 Kawana Misaki
Introduction
Kawana Misaki (川名 みさき) is one of the more straightforward characters in the game, with strong but linear frame traps which lead into very high damage combos. She has many normals that leave her advantageous on block which can be used in tandem with her slow Reppukens and guard point moves to suffocate her opponents and threaten her grabs. While her high/low mixups are weak, any stray hit can lead to massive damage into reversal safe oki using her Down Burst super.
Misaki is one of the heroines of ONE, a visual novel produced by Tactics in 1998. She is a 3rd-year student in the same high school as Kouhei. A girl with cold eyes but a warm smile, Misaki became blind due to an accident that occurred in her elementary years, but she doesn't let it bother her. She enjoys talking to others and getting to know other people. During ONE, Misaki is one of the heroines Kouhei can pursue, first meeting her on the roof of the school during sunset.
Misaki was part of EFZ's original cast.
Stage: Sunset Rooftop (夕焼けの屋上)
BGM: A fine young lady at first sight (見た目はお嬢様)
Character-Specific Notes
- Misaki's dashes are some of the longest in the game, giving her the ability to go nearly full screen on all of her dashes, grounded or aerial.
- Misaki is likely the character that makes the best (and most frequent) use out of the usually unremarkable or unused counterhit mechanic.
Normal Moves
| Frame Data Help
|
| The notation for the move lists can be found under Controls.
|
| Cells filled with a "-" indicate a placeholder. Cells filled by a "/" indicate a non-applicable field.
|
| Values separated by a "~" (X~Y) indicate a range or variance. A "~" preceding a single value (~X) may indicate approximation. A "-" separating frame values of a property (X-Y) indicate the duration of the property.
|
| Cell data accompanied by a ※ indicate properties unusual to the template. Explanations for such properties can be found at another ※ in the description. If a move requires multiple ※'s, subscripts will be attached to indicate relation (※1, ※2, ※3...).
|
| Frame data with decimal values .33 or .66 relate to subframes.
|
| Version
|
Used for moves with multiple special attacks on one motion.
|
| Damage
|
The base damage value that the specific hit will do. See damage scaling for more information.
|
| Proration
|
Base value Power% reduces by per hit.
|
| Juggle
|
Juggle value used to determine juggle time after a move hits an aerial or juggle state opponent.
|
| Guard
|
Indicates how the move must be blocked, if it can be blocked at all.
Low: Crouch Block
High: Stand Block
Ground: Air Unblockable, may be blocked either Crouching or Standing
Any: Air, crouch, and stand block
Throw: Cannot be blocked, throw type hitbox that targets the collision box
Unblockable: Cannot be blocked, unblockable hitbox that targets hurtboxes
|
| Property
|
Shows what properties the move has and the time (in frames) that these properties are active. Example: "I: 0.33-9", which means the move is invulnerable on the first subframe of the move until the 9th full frame (or 27th subframe).
I: Full Invincibility
TI: Throw Invincibility
SI: Strike Invincibility
HI: Upper Body/High Invincibility
LI: Low Invincibility/Low Crush
A: Armour
G: Guard Point
|
| Startup
|
Indicates where the move's first active hitbox is.
|
| Active
|
Total frames the hitbox is active for.
|
| Recovery
|
Total frames until the character can block.
Note: After the recovery of any action, before any other action may occur, there exists 1 frame in which the only action you may take is to block.
|
| Adv Hit
|
Frame advantage on hit.
|
| Adv Block
|
Frame advantage on block.
|
| Cancel
|
Possible cancel options.
N: Normals
Sp: Specials
Su: Supers
J: Jump cancel possible on hit, block and RG
JH: Jump cancel possible on hit only
AD: Air Dash
IC: Instant Charge after hit (22C)
FIC: Flicker Instant Charge (22C, fixed IC window, regardless of hit or whiff)
R: Repeatable, always A normals. Will cancel into other A normals.
f5B/2B: Usually c5B cancel option
SB: S button cancelling, character specific. Examples: stance, summon or flight cancels.
Rekka: A special move with multiple parts that require additional inputs.
※: Special rules, see description for details (look for the ※)
|
Standing
5A
5A
|
| Damage
|
Proration
|
Juggle
|
Guard
|
Startup ¹ ²
|
Active
|
Recovery
|
Adv Hit
|
Adv Block
|
Cancel
|
| 210
|
-
|
-
|
Ground
|
6
|
1
|
7
|
+6.66
|
+5.66
|
N SP J IC ※
|
- Misaki does a backhand swipe. A decent pressure tool and a workable anti-air that can't be air blocked. This move has incredible frame advantage, although it ※cannot chain into itself or 2A. Linking into 2A is not too hard, although linking into 5A is subframe-perfect and cannot be done on EfzRevival, which only accepts inputs on full frames. Tends to whiff on crouchers.
|
|
c5B
c5B
|
| Damage
|
Proration
|
Juggle
|
Guard
|
Startup ¹ ²
|
Active
|
Recovery
|
Adv Hit
|
Adv Block
|
Cancel
|
| 420
|
-
|
-
|
Ground
|
7
|
1
|
10
|
+6
|
+4
|
N SP J IC f5B
|
- Misaki swings her back arm forward in a standing uppercut. Another decent move in Misaki's arsenal with frame advantage that sees its use as both a combo tool and clutch anti-air. Though it has its occasional use in normal ground strings, most of its combo use is either to relaunch during an air combo with 5C in the corner, or to relaunch midscreen by itself. Its range makes it fairly difficult to combo into without a Blue IC, so your timing with it will be tight. Using it as an anti-air combo starter is also somewhat risky because of the range, but it cannot be air blocked, so if somebody tries an empty jump or does something stupid, this will net you a free 3000+ damage. Be careful with this move, though, because there is gap between the distances where c.B and f.B will activate, where both of them will miss.
|
|
f5B
f5B
|
| Damage
|
Proration
|
Juggle
|
Guard
|
Startup ¹ ²
|
Active
|
Recovery
|
Adv Hit
|
Adv Block
|
Cancel
|
| 500 / 450※
|
-
|
-
|
Ground
|
11
|
2 + 2
|
13
|
0
|
-2
|
N SP IC
|
- Misaki swipes her hand down with a gush of wind. Great for long range poking due to its disjointed hitbox, though it will whiff on close opponents.
- Cannot be jump cancelled, so in order to combo as an anti-air you'll need to use 2C.
※The second hitbox deals slightly less damage.
|
|
5C
5C
|
| Damage
|
Proration
|
Juggle
|
Guard
|
Property
|
Startup ¹ ²
|
Active
|
Recovery
|
Adv Hit
|
Adv Block
|
Cancel
|
| 670
|
-
|
-
|
Ground
|
G: 3-10
|
12
|
6
|
29
|
/
|
-13
|
SP JH IC
|
- Misaki bursts waves of wind all around her. The pride of hitboxes everywhere, the size of this move is astounding. Misaki will surround herself in a small hurricane of gusts that will knock down anybody who gets hit by this move. Furthermore, it's got Guard Point and an above average active window, so this move will catch people unaware. However, it's also pretty risky to use. It has a slow startup and the Guard Point doesn't start frame 1. It can be airblocked unlike most of Misaki's grounded normals. And even though it looks like the hitbox lingers excessively, it's incredibly unsafe on block (it can only be jump cancelled on hit as well). This move has its use mainly in corner loops and combos, but it can still be a strong anti air if you know the opponent is going to go for a jump in. Otherwise, save it for combos unless you can reliably counter Recoil Guard.
|
|
Crouching
2A
2A
|
| Damage
|
Proration
|
Juggle
|
Guard
|
Startup ¹ ²
|
Active
|
Recovery
|
Adv Hit
|
Adv Block
|
Cancel
|
| 230
|
-
|
-
|
Low
|
5
|
5
|
3
|
+3
|
+2
|
N SP J IC R
|
- Misaki sticks out her arm in a palm, in what looks like a cute little jab. Easily one of Misaki's best moves. Although the range isn't the best, it's Misaki's fastest normal, an amazing pressure tool that hits low, has decent frame advantage, and cancels into itself and everything else. You'll see this move used a lot in both pressure strings, in tick throw setups, and as combo starters.
|
|
2B
2B
|
| Damage
|
Proration
|
Juggle
|
Guard
|
Startup ¹ ²
|
Active
|
Recovery
|
Adv Hit
|
Adv Block
|
Cancel
|
| 450
|
-
|
-
|
Low
|
7
|
4
|
10
|
+3
|
+1
|
N SP J IC f5B
|
- Misaki does a crouching kick. Yet another good poke. This is slightly slower than Misaki's 2A, but it still has minimal frame advantage, hits with a little more range and still combos nicely into her f.B. It can be comboed into after her A attacks or even after a j.B or j.C when the opponent is grounded, and forgoing the 2A on landing will increase your damage output for relatively little risk if you hit confirm your jump in. Additionally, this move is a universal OTG relauncher after an A Down Burst, so you can get some extra damage afterwards if you don't have the meter for another Down Burst, you just want to end the combo near the ground, or you're not comfortable trying to OTG with a 66A.
|
|
2C
2C
|
| Damage
|
Proration
|
Juggle
|
Guard
|
Startup ¹ ²
|
Active
|
Recovery
|
Adv Hit
|
Adv Block
|
Cancel
|
| 700
|
-
|
-
|
Low
|
10
|
12
|
16
|
/
|
-6
|
SP IC
|
- Misaki slides forward with a floor hugging kick. Misaki's sweep in an ode to both Bison and Slayer, this move, along with B Assault Gush is what will turn your ground strings into Misaki's true damage potential. The hitbox on this move lingers twice as long as her other non-dashing, grounded normals, and it is comboed into from nearly all of them. IC'ing it from anywhere, whether your IC is Blue or Red, will still yield damage ranging exceeding 3000 on red, and hitting even as high as the 9000s when you have full meter and have the opponent cornered. Don't throw this out wildly, though. It's unsafe on block, is slow to start, and cannot be jump cancelled under any circumstances. It can still be special cancelled though, so a Half Gush for pressure on block will help make it safe unless RG'd, which must be counter RG'd in response.
|
|
Jumping
j5A
j5A
|
| Damage
|
Proration
|
Juggle
|
Guard
|
Startup ¹ ²
|
Active
|
Recovery
|
Adv Hit
|
Adv Block
|
Cancel
|
| 240
|
-
|
-
|
High
|
6 / 6.33
|
10 / 9.66
|
8
|
/
|
/
|
N SP J AD IC R
|
- Misaki sticks out her foot at a downwards angle. Like most j.A's it can be airdash cancelled or chained into any air normal (including itself). The move is also very active, working as a very good catch for people below you, or as a great, meaty overhead on oki.
|
|
j5B
j5B
|
| Damage
|
Proration
|
Juggle
|
Guard
|
Startup ¹ ²
|
Active
|
Recovery
|
Adv Hit
|
Adv Block
|
Cancel
|
| 420
|
-
|
-
|
High
|
8
|
4
|
17
|
/
|
/
|
N SP J AD IC
|
- Misaki swipes her arm downwards in a sweeping motion. The staple move of both air combat and Misaki's air loop, j.B has a great horizontal hitbox that hits below her on both sides. Airdash cancelling it is essential, since it leads into a continuation of her air combos, and can be used for addtional pressure or mixups when guarded. You will use this move a lot, as it's probably her best jumping normal, which really says something. If you use this on Oki, you can airdash over an opponent as they get up and use it as a crossup attempt, since its hitbox is so wide. One thing to note, however, is that even though there's a wave of air above Misaki, this move seems to have no hitbox above her, so be extremely cautious in air-to-air when the opponent is above you.
|
|
j5C
j5C
|
| Damage
|
Proration
|
Juggle
|
Guard
|
Startup ¹ ²
|
Active
|
Recovery
|
Adv Hit
|
Adv Block
|
Cancel
|
| 650
|
-
|
-
|
High
|
9
|
11
|
12
|
/
|
/
|
SP J AD IC
|
- Misaki kicks both feet out into a powerful horizontal blow in front of her. Used mostly near or in the corner for combos or for an aerial GTFO, this move has massive blowback on hit. It's active for longer than her other two aerials and does the most damage, with a slightly slower startup. Because of its proration, using it in corner combos is generally best when you don't wish to use meter, and might opt for j.C 66 j.B j.C instead of normally starting from a j.B. You'll also get this if you go for an air throw and miss, and this move's hitbox and damage are not a bad alternative for opponents who tech into it. Overall, it's a good move along with her other two jumping normals.
|
|
Dashing
66A
66A
|
| Damage
|
Proration
|
Juggle
|
Guard
|
Startup ¹ ²
|
Active
|
Recovery
|
Adv Hit
|
Adv Block
|
Cancel
|
| 250
|
-
|
-
|
Ground
|
7
|
1
|
7
|
+6
|
+5
|
SP IC
|
- Misaki dashes forward and does the same swipe as she does in her 5A with slightly higher damage. One of Misaki's many great normals. This move is a staple combo tool used to continue after an IC'd 2C or Assault Gush, since it links into her c5B, which then leads into her staple j.B loop. It also works after nearly any air string, B Hyper Accel (if they're close enough to the corner), B Half Gush, and Reverse Air Raid, though its vertical hitbox is small, so you'll need to time it properly. Furthermore, it can even be used to OTG into a followup after a low or Tiger Knee'd Down Burst. Has the same frame advantage on block as 5A.
|
|
66B
66B
|
| Damage
|
Proration
|
Juggle
|
Guard
|
Startup ¹ ²
|
Active
|
Recovery
|
Adv Hit
|
Adv Block
|
Cancel
|
| 550
|
-
|
-
|
Ground
|
11
|
3
|
9
|
+5
|
+3
|
SP IC
|
- Misaki dashes into the same animation as her f.B. The same problem arises as Misaki's f.B in terms of the move's whiffing when you get in too close, so be careful with this move. It's best used as a dashing punish against people in the air, since you won't be able to cancel it into anything except one of Misaki's specials. Assault Gush might work if you land it on a grounded opponent, while Half Gush can be used for additional pressure or pushback if blocked. It's safe if blocked however (+3), so feel free to go for the punish if you see the opportunity.
|
|
66C
66C
|
| Damage
|
Proration
|
Juggle
|
Guard
|
Property
|
Startup ¹ ²
|
Active
|
Recovery
|
Adv Hit
|
Adv Block
|
Cancel
|
| 750
|
-
|
-
|
Ground
|
G: 4-14
|
17
|
10
|
22
|
/
|
-10
|
SP IC
|
- Misaki dashes into a far reaching Donkey Kick. This great range move is an excellent combo starter and catcher for people trying to jump out if you you can successfully predict it. It's granted a generous amount of guard point. This move causes wallbounce if it hits a grounded opponent along with excessive hitstun, allowing for a decent B Hyper Accel Loop if you catch them while you're deep in the corner. Doing it from further out or midscreen will generally lead to weaker followups if you go for j.B loop, but B Hyper Accel Loop will still work at certain distances. Landing it against an aerial opponent will knock them down and lead to less hitstun, so you can follow up with an IC'd B Assault Gush, or even a tight Half Gush if you can time it properly. Don't get too happy with this move, as -10 on block will force you to use it carefully.
|
|
662A
662A
|
| Damage
|
Proration
|
Juggle
|
Guard
|
Startup ¹ ²
|
Active
|
Recovery
|
Adv Hit
|
Adv Block
|
Cancel
|
| 300
|
-
|
-
|
Low
|
8
|
8
|
3
|
0
|
-1
|
SP IC
|
- Misaki dashes forwards, and crouches into her 2A with some more damage than before. This move doesn't seem to be used as often, due to the lack of its cancel properties, its slower startup than 2A, and its loss of frame advantage. That said, it prorates less than most of her other moves and can be linked into her faster normals, so it may have use as a punisher.
|
|
662B
662B
|
| Damage
|
Proration
|
Juggle
|
Guard
|
Startup ¹ ²
|
Active
|
Recovery
|
Adv Hit
|
Adv Block
|
Cancel
|
| 450
|
-
|
-
|
Low
|
7
|
4
|
9
|
/
|
+2
|
SP IC
|
- Misaki dashes into the same animation as her 2B. This move trips the opponent if it hits, leading into B Assault Gush, which can be IC'd for decent damage on Red or Blue IC. It also leads into A and C Hyper Accel (A is relatively easy, C version is a very tight hitconfirm), which ends up being difficult to follow up if you've opted to use RF meter. Its frame advantage and low property makes it an good pressure tool, and the ability to combo into B Assault Gush is nice. When Misaki is able to build up a little guard meter on the opponent, she will be able to combo a raw 662B into 5B, leading to her natural BnB for very good damage.
|
|
662C
662C
|
| Damage
|
Proration
|
Juggle
|
Guard
|
Property
|
Startup ¹ ²
|
Active
|
Recovery
|
Adv Hit
|
Adv Block
|
Cancel
|
| 600
|
-
|
-
|
Any
|
G: 7-12
|
14
|
10
|
13
|
/
|
-4
|
SP IC
|
- Misaki lunges forwards into a larger version of her j.C. A ground normal that goes airborne, leaping over low hitting moves and having guard point. This move knocks down on hit with some pretty intensive blowback that can be linked into a 2A in the corner, but IC'ing it can lead to a more vicious corner loop or Hyper Accel loop. Although this move looks like an overhead, it is very much a mid that can also be airblocked. The frame advantage on block is not bad, but Misaki usually prefers plus options over safe ones.
|
|
Grabs
Ground Grab
Ground Grab
Close 6C/4C
|
| Damage
|
Proration
|
Juggle
|
Guard
|
Startup ¹ ²
|
Active
|
Recovery
|
Adv Hit
|
Adv Block
|
Cancel
|
| 1250
|
-
|
-
|
Grab
|
5.33
|
0.66
|
23
|
/
|
/
|
None
|
Misaki jerkily lifts the opponent with one hand and slams them into the ground.
|
|
Air Grab
Air Grab
Close j6C
|
| Damage
|
Proration
|
Juggle
|
Guard
|
Startup ¹ ²
|
Active
|
Recovery
|
Adv Hit
|
Adv Block
|
Cancel
|
| 1300
|
-
|
-
|
Grab
|
2
|
1
|
/
|
/
|
/
|
None
|
Misaki tosses the opponent above and behind her.
|
|
Special Moves
Specials
236*
Half Gush
ハーフガッシュ
236* A A B B C (active frames 1, 3-5) C (active frames 1, 3-5) C (active frame 2) C (active frame 2)
|
Misaki swings her arm forwards and produces a wave of wind. All versions launch the opponent on hit. Can be used after a backdash to catch a pursuing opponent.
| Version
|
Damage
|
Proration
|
Juggle
|
Guard
|
Property
|
Startup ¹ ²
|
Active
|
Recovery
|
Adv Hit
|
Adv Block
|
Cancel
|
| A
|
650
|
-
|
-
|
Any
|
/
|
20
|
34※
|
/
|
/
|
+9
|
/
|
| Misaki
|
/
|
-
|
-
|
/
|
/
|
20※
|
/
|
23
|
/
|
/
|
FIC
|
- A very active projectile that provides great frame advantage when blocked. It travels about a quarter of the screen, having less range than even some normals.
- A good tool for combos due to its launch. Also useful for pressure, but Misaki needs to scare her opponent into blocking as it's much easier to jump over than its appearance would suggest.
- Misaki gets a full combo on counterhit, but without it (or some guard gauge) she needs FIC to convert.
- Hitbox size slightly changes many times throughout the projectile's lifespan.
- FIC timing is on frames 14-16.
※ Projectile goes inactive if Misaki is hit.
|
| B
|
650
|
-
|
-
|
Any
|
/
|
25
|
40※
|
/
|
/
|
+2
|
/
|
| Misaki
|
/
|
-
|
-
|
/
|
G: 3 - 12.66
|
25※
|
/
|
30
|
/
|
/
|
FIC
|
- Slower startup and recovery than the A version, but sports a guard point during startup, and about double the range.
- Has substantially longer hitstun, letting Misaki meterlessly combo out of this whether it hits point blank or half screen away.
- The range and combo-starting ability make this version preferred as a projectile in neutral, and Misaki can FIC to anti-air opponents jumping over it.
- Hitbox size slightly changes many times throughout the projectile's lifespan.
- FIC timing is on frames 17-20.
※ Projectile goes inactive if Misaki is hit.
|
| C
|
600 x 5
|
-
|
-
|
Any
|
/
|
9
|
5 x 5
|
/
|
/
|
-14.33 ~ +67.33
|
/
|
| Misaki
|
/
|
-
|
-
|
/
|
/
|
5.33
|
/
|
39.66
|
/
|
/
|
FIC
|
- Comes out very fast compared to the other versions and is made up of 5 short-lasting projectiles that appear farther down the screen over time. The positioning of the second projectile is pictured.
- Misaki can meterlessly combo off of the later projectiles but not the first, since the recovery is longer.
- Hitboxes are fairly taller than the normal versions.
- A gimmicky use of RF since it offers little if RG'd by the opponent. Should they block normally, they can be pushed back into the other projectiles, keeping them in blockstun. However, the opponent will need to miss multiple RG opportunities for Misaki to start running a mixup off of this without wasting her BIC on an FIC. Additionally, if used near the corner then the projectiles will start going offscreen and being wasted. Not a terrible move, but there's not really a situation where the investment is warranted.
- Projectiles come out on a 20 frame interval.
- FIC timing is on frames 7-10.
- Unlike the other versions, the projectiles do not go inactive when Misaki is hit.
|
|
623*
Hyper Accel
ハイパーアクセル
623* 623A/B 623A/B 623C 623C
|
A very effective anti-air grab. All versions put the opponent into an untechable state.
| Version
|
Damage
|
Proration
|
Juggle
|
Guard
|
Property
|
Startup ¹ ²
|
Active
|
Recovery
|
Adv Hit
|
Adv Block
|
Cancel
|
| A
|
800
|
-
|
-
|
Grab
|
HI: 1-5, ※
|
12
|
12
|
22
|
/
|
/
|
IC
|
Misaki leaps up and hurls the opponent behind her if she catches them.
- May be used as a combo ender, but the sideswitch may be inconvenient.
- Provides Misaki with good oki midscreen, and can be comboed after with IC if the opponent is thrown into the corner. Still not nearly as appealing as 623B, but the faster startup makes this version a bit more consistent as an anti-air.
※ Once Misaki leaves the ground (frame 6), she will alternate between full invulnerability and high invulnerability every 3 frames. (Ex: full invuln 6-8, high invuln 9-11, etc. until high invuln 21-23)
|
| B
|
650
|
-
|
-
|
Grab
|
HI: 1-9, ※2
|
16
|
17
|
29
|
/
|
/
|
IC
|
Similar to the A version, except Misaki flings the opponent very high into the air.
- Slower than the A version, but Misaki can combo after from anywhere on the screen and without needing IC, making this version great in combos and much more rewarding in neutral.
※2 Once Misaki leaves the ground (frame 10), she will alternate between full invulnerability and high invulnerability every 3 frames. The last high invincible state is only 2 frames as Misaki enters recovery partway through. (Ex: full invuln 10-12, high invuln 13-15, etc. until high invuln 31-32)
|
| C
|
1400
|
-
|
-
|
Grab
|
I: 1-7, HI: 8-9
|
8
|
2※3
|
24
|
/
|
/
|
IC
|
Misaki doesn't jump in this version, and on hit she repeatedly slams the opponent into the ground before smacking them into the air.
- The superior speed and invincibility combine to give Misaki an amazing response after RGing a jump in, as the opponent can't counter RG a grab. Even if it trades, Misaki sometimes still gets a combo.
- Not useful in neutral or combos like the other versions due to poor range and active frames.
※3 This move will not be able to hit if the opponent isn't airborne when the active frames start. For example, if Nayuki does her 623B and jumps into the grab after it has become active, even though the grab is still active and she is not grab invulnerable, the move will whiff.
|
|
214*
Assault Gush
アサルトガッシュ
(j)214* 214A 214A 214B Frame 1 Low Invulnerability 214B Frame 1 Low Invulnerability 214B 214B 214C 214C
|
Misaki flings herself forward and performs a different followup based on the version used. This move provides an amazing mixup option when the different versions are varied in use.
| Version
|
Damage
|
Proration
|
Juggle
|
Guard
|
Property
|
Startup ¹ ²
|
Active
|
Recovery
|
Adv Hit
|
Adv Block
|
Cancel
|
| A
|
600
|
-
|
-
|
Any
|
-
|
31
|
5
|
23
|
+6.66
|
+4.66
|
IC
|
- Misaki will go a set distance before performing an animation similar to her j.B, complete with the same wonderful width in its hitbox. It can lead into a combo, and is safe on block (~+5), and on oki, it works very well as a crossup due to the delay. Even though this move can't be reliably comboed into, and its cross up option is worthless in the corner, what makes this move great is both its ability to be comboed out of extremely easily, and the tick throw and pressure setups you get when it's blocked.
|
| B
|
580
|
-
|
-
|
Any
|
LI: 1-3, I: 4-5, LI: 6-7
|
8
|
14
|
32
|
/
|
-24
|
IC
|
- What makes the standing B version great is combo-ability, its startup, its active window, and its minor invincibility. This move combos from Misaki's sweep and most of her normals, so it's decent damage although you'll sacrifice knockdown without meter. If you IC it, you can get massive damage with or without meter. If you land it late, you can link it into 2A or 5A on landing. Next, it is tied for the fastest grounded version of this move with 214C. Following, its hitbox stays out for a good amount of time. And lastly, it has great lower body invincibility, so it'll plow through poorly executed lows.
|
| C
|
200
|
-
|
-
|
Any
|
I: 1-21
|
8
|
30
|
Until landing + 32.33
|
/
|
/
|
IC
|
| -
|
1200
|
-
|
-
|
Any
|
-
|
42
|
3
|
48
|
/
|
-29
|
IC
|
- This is one of your best reversal options period. Decent startup, knockdown on hit, and great invincibility, this move will plow through absolutely anything your opponent attempts to pressure you with on oki, rushdown or otherwise. Furthermore, it's active for nearly half a second, goes airborne, and the followup will definitely turn the tables for you. But as with all reasonable reversals, this move is also incredibly unsafe on block, so don't get predictable, especially if your RF meter has just gone red. If your RF meter is light blue, you can IC it to make it safe or lead to followups, though that's a hit or miss because even though the prorate on this move is extremely light, burning that much meter to make it safe might not be worth the attempt. Second hit only comes out if the first hit connects, hit or block.
|
| jA
|
-
|
-
|
-
|
High
|
/
|
29
|
10
|
Until landing + 6.66
|
/
|
/
|
IC
|
- The same animation as her standing A version, except this time Misaki's swipe is an overhead that causes knockdown. It will still cross up the same as the standing A version along with a better startup speed and active window, but because of the knockdown, it won't lead to much of anything. As the only off the ground overhead in your arsenal, you'll need to mix this in with the other versions due to its startup. Relying solely on it will become extremely predictable and unsafe.
|
| jB
|
-
|
-
|
-
|
Any
|
/
|
15
|
28
|
Until landing + 6.66
|
/
|
/
|
IC
|
- Looks and acts nearly the same as the Standing B Version, but with one major difference and a few minor ones. It's good if you've comboed the opponent into the corner and want to Blue IC into Misaki's Down Burst loop. Tiger Kneeing this move on an opponent waking up midscreen can lead to a crossup hit, and can be ICed for a full combo. However, it can whiff on small crouchers, so you'll need to rely on forcing them to block high with the Aerial A Overhead Version. Used in conjunction with other versions of this move, this will quickly scare opponents into wondering exactly how they need to block or even try to execute a reversal.
|
| jC
|
200
|
-
|
-
|
Any
|
/
|
0.33
|
29
|
Until landing + 6.66
|
/
|
/
|
IC
|
| -
|
1200
|
-
|
-
|
Any
|
/
|
44
|
2.66
|
Until landing + 6.66
|
/
|
/
|
IC
|
- Used best as a combo ender if you didn't IC to start the combo, or managed to keep it going long enough to build up enough meter to get it back to red before the combo ended. This move lacks the invincibility of its ground counterpart, but starts immediately, so no matter how little hitstun the opponent has left, you're pretty much guaranteed your last punch of damage and knockdown if you cancel your last normal into this.
|
|
22*
Reverse Air Raid
リバースエアレイド
22A/B A A B B
|
| Version
|
Damage
|
Proration
|
Juggle
|
Guard
|
Property
|
Startup ¹ ²
|
Active
|
Recovery
|
Adv Hit
|
Adv Block
|
Cancel
|
| A
|
/
|
-
|
-
|
/
|
/
|
6
|
18
|
10
|
/
|
/
|
None
|
| B
|
/
|
-
|
-
|
/
|
/
|
6
|
18
|
12
|
/
|
/
|
None
|
| Activation
|
650
|
-
|
-
|
Ground
|
I: 0.33 - 34
|
6.33
|
3
|
25
|
/
|
-6
|
IC
|
- Misaki steps backwards slightly and places both hands out in a catching motion. If the opponent's move is caught, Misaki will kick them high up in an untechable state, allowing her to easily start a combo.
- The B version has a slightly larger hurtbox to counter from farther away with, but also has slightly more recovery than the A version.
- This move has some crippling setbacks. First, neither version can catch low attacks; this move will only work against mids and overheads, not lows, throws, or projectiles. Second, the opponent can IC or reversal on reaction to being countered, and it can be safejumped, or even just whiff! Third, this move has relatively slow startup for a counter, and cannot be used as a wakeup reversal. Use this intelligently, or maybe just don't use it...
- Misaki is thankfully invulnerable for the entire counter animation should the opponent not get hit.
- Since Misaki's collision box steps back with her, throws can sometimes whiff against this move. Sadly, most throws will have the opponent recover before Misaki.
|
|
Eternity Specials
236236*
High-Speed Lunch
ハイスピードランチ
236236*
|
Misaki eats several plates of curry in the blink of an eye, tossing each one when finished. The angle of each plate is random, but all characters can dodge every plate by crouching close to Misaki. All versions are easily comboed into and the plates put the opponent in OTG state, although whether Misaki can combo out of it can come down to RNG. Plates are thrown every 5.66 frames.
※ Time from the first plate throw to the last.
※2 Blocking only the first plate point blank ~ blocking all plates point blank.
| Version
|
Damage
|
Proration
|
Juggle
|
Guard
|
Property
|
Startup ¹ ²
|
Active
|
Recovery
|
Adv Hit
|
Adv Block
|
Cancel
|
| A
|
170 x 15
|
-
|
-
|
Any
|
I: 1-3
|
7
|
79.66※
|
40.33
|
/
|
-100.66 ~ -21.33※2
|
None
|
| B
|
170 x 21
|
-
|
-
|
Any
|
I: 1-5
|
5
|
113.66※
|
38.33
|
/
|
-132.66 ~ -19.33※2
|
None
|
- Has full invincibility during startup, but is a bad wakeup reversal due to whiffing on crouchers and not being cancellable. 214C is superior in this regard.
|
| C
|
170 x 30
|
-
|
-
|
Any
|
I: 1-7
|
3.33
|
164.33※
|
40.33
|
/
|
-185.33 ~ -21.33※2
|
None
|
- Has full invincibility during startup, but is a bad wakeup reversal due to whiffing on crouchers and not being cancellable. 214C is superior in this regard.
- The first plate is thrown in the final frame of superflash (but is not active until superflash ends), so the time between the first and second plate throws are only 5.33 frames.
|
|
j236236*
Down Burst
ダウンバースト
j236236* Damaging physical hit (taller) and non-damaging projectile hit (wider) Damaging physical hit (taller) and non-damaging projectile hit (wider) Continuous hits at ground level Continuous hits at ground level
|
Misaki raises her hand high before pointing it down, creating a huge column of swirling wind directly below her, carrying the opponent to the ground. All versions ascend Misaki, sending her higher the more SP is used. Great for pressure and chip damage (50 per ground hit) overall.
| Version
|
Damage
|
Proration
|
Juggle
|
Guard
|
Property
|
Startup ¹ ²
|
Active
|
Recovery
|
Adv Hit
|
Adv Block
|
Cancel
|
| A
|
0※ x N※2 + 260 x 9
|
-
|
-
|
Any
|
/
|
20.33
|
1.66 x N※2 + 6 x 8 + 5.33
|
/
|
/
|
/
|
/
|
| Misaki
|
100
|
-
|
-
|
Any
|
/
|
20
|
3
|
Until landing
|
/
|
/
|
None
|
- This really is an excellent super. Used often in combos as it can be easily OTG'd after.
- Misaki will be +13.33 on block if this move is TK'd (done as early as possible from a jump) against a cornered opponent.
※ The non-damaging hits actually inflict 10 chip damage when blocked. They also prorate a combo by 1% on hit.
※2 The non-damaging hits will continue to appear below each other until they are close enough to the ground, at which time the grounded hits will begin.
|
| B
|
0※ x N※2 x 2※3 + 200 x 16
|
-
|
-
|
Any
|
/
|
20.33
|
1.66 x N※2 x 2※3 + 6 x 15 + 5.33
|
/
|
/
|
/
|
/
|
| Misaki
|
100
|
-
|
-
|
Any
|
/
|
20
|
3
|
Until landing
|
/
|
/
|
None
|
- Same as A version, but it lasts longer. This is the least used version, since the A version tends to be easier to OTG out of, and will combo back into itself for much higher damage at the same meter cost. This version still works for a lazy combo ender.
- Misaki will be +12.66 on block if this move is TK'd against a cornered opponent.
※3 After the grounded hits have begun, a second wave of non-damaging hits will occur, originating where the first one did.
|
| C
|
0※ x N※2 x 3※4 + 180 x 29
|
-
|
-
|
Any
|
/
|
20.33
|
1.66 x N※2 x 3※4 + 6 x 28 + 5.33
|
/
|
/
|
/
|
/
|
| Misaki
|
100
|
-
|
-
|
Any
|
I: 0.33 - 22.66
|
20
|
3
|
Until landing
|
/
|
/
|
None
|
- Has invincible startup and lasts forever, continuing to hit even after Misaki has landed, leading to very easy combos after. Prorates a lot, though, so your combo after won't be long without BIC. When this move is used as a pressure tool in the corner, it almost completely locks the opponent down while doing around 1500 damage in chip and giving a free mixup after landing. Rare due to its meter cost, but should you choose to spend it is remarkable.
- Misaki will be +57.33 on block if this move is TK'd against a cornered opponent.
※4 After the grounded hits have begun, two more waves of non-damaging hits will occur, originating where the first one did.
|
|
6321463214*
Turbulence
ターヴィランス
6321463214* A/B A/B C C
|
Misaki vacuums the opponent towards her for a command grab. The suction gets stronger the higher level used.
| Version
|
Damage
|
Proration
|
Juggle
|
Guard
|
Property
|
Startup ¹ ²
|
Active
|
Recovery
|
Adv Hit
|
Adv Block
|
Cancel
|
| A
|
-
|
-
|
-
|
Grab
|
I: 0.33 - 6.66
|
7.33
|
89.66
|
35
|
/
|
/
|
None
|
- Can be used as a reversal, but the invincibility does not cover the whole startup and Misaki has more reliable options, making it fringe. Can be jumped out of post-flash, so don't use it in pressure.
|
| B
|
-
|
-
|
-
|
Grab
|
I: 0.33 - 6※
|
6※
|
89.66
|
33
|
/
|
/
|
None
|
- Has the fastest startup and can't be jumped post-flash, making it the ideal version to use as an actual command grab. When used in the corner, the opponent will be slightly pulled out, letting Misaki threaten a left/right after.
- ※ Grabs during superflash, but Misaki's invincibility expires one subframe before it connects. Misaki can get hit during this subframe of superflash vulnerability, so while it's great for beating abare, it's not a true reversal.
|
| C
|
-
|
-
|
-
|
Grab
|
I: 0.33 - 16.66, HI: 17 - 60.66
|
17
|
90
|
35
|
/
|
/
|
None
|
- Looks super threatening and can grab grounded or aerial opponents but is much slower. Unless the opponent has already expended some air options while close to you, they can avoid it on reaction and punish every time by double jumping and airdashing to stall out the suction. This is just the universal answer, many characters have even better ways to stay in the air or interrupt Misaki. Pretty much a gimmick when considering the meter investment.
|
|
Final Memory
FM
High-End Crash
ハイエンドクラッシュ
222S
|
| Damage
|
Proration
|
Juggle
|
Guard
|
Startup ¹ ²
|
Active
|
Recovery
|
Adv Hit
|
Adv Block
|
Cancel
|
| 500 + 5100
|
-
|
-
|
Unblockable
|
0.33
|
40
|
19
|
/
|
/
|
IC
|
A counter with instant startup, massive damage and, unlike Misaki's other counter, will catch low attacks.
- Unfortunately, this move suffers the same flaw as other counter supers: having a very obvious and reactable superflash that near ensures it will be punished if attempted in neutral.
- This move may be useful when RGing a multihit attack or reacting to an attack during FIC freeze. Using it as a reversal in read situations is ill-advised when Misaki has cheaper options.
- The hitboxes are rather disappointing for a counter, and have an unfortunate capacity for whiffing, especially against crossups. Also, when hitting an extended hurtbox, the counter will do almost nothing, as over 90% of the damage is from the second hit, which has even worse range than the first.
- Even more disappointing is that this is the only counter in EFZ which is punishable on-trigger. If the first hit whiffs, Misaki will be vulnerable during the last 4 frames of her recovery, and if the first hit connects but the second misses, she will be vulnerable for all recovery frames and significantly minus, despite knocking the opponent down.
|
|
Strategy
Overview
- Misaki is a simple character, yet extremely effective at what she can do. Her normals are all excellent in different ways, her dashing attacks have great frame advantage that let you keep your turn forever (until they RG), and she can burst a huge chunk of damage off almost any confirm. She is one of the few characters that can use guard meter effectively, and gets good damage for it. She has a potent reversal option in 214B, due to its odd hurtbox; characters that can't hit high enough to stop this move will have a very hard time keeping their turn. Her main weakness is her mixup game, as the only one you'll always have available is her strike/throw option, which is powerful in its own right. She also has some trouble threatening space that's not right next to her. Her reppukens are okay, and her f5B/66B are fantastic, but you leave yourself open against characters with better normals. Her most powerful option in neutral may be her 2C IC, which can lead into great damage, but will lose you your RF meter if blocked. Misaki tends to have to choose between keeping her RF meter to build for a big BIC combo or to use it offensively to fish for hits more often.
Neutral
- 66B
- Neutral is probably Misaki's least favored match state. While Misaki's dash has good speed, her dash attacks leave a bit to be desired in range. 66B can threaten a lot of space, and can even confirm into a full combo in the corner, but the hurtboxes on it extend almost as far on her foot, leading to this move getting stuffed more often than expected.
- 2C IC
- 2C IC is the preferred ranged poke, as it is safe on block/RG when not right next to the opponent and can lead to good damage. Characters with good pokes can beat this easily, so landing it is harder in some matchups. Misaki also foregoes building up blue IC (BIC) to fish for 2C hits, and will have lower damage on her confirms.
- 236B
- Misaki also has 236B as a neutral tool. While this looks great, the hitboxes are smaller than the visual, and you can get punished for throwing this out without proper care. You can make this safe by FICing it, but you lose your BIC progress as well as helping out opponent reaction times. You can however try to bait an opponent to jump over your reppuken to get hit by her anti-air throw (623B).
Lockdown
- Normals and Dash Attacks
- When Misaki can get into melee range, her normals and dash attacks start to shine. Her 2A is low, has great frame data, and is the main part of her strike/throw gameplan. 66A is fast, has frame advantage, a very tall hitbox, and has special hitstop to confirm into combos. 5B has a tall hitbox, comes out fast, and is great for frame traps. 662B is the button you want to fish for when you've built up some guard meter; you can link into a c5B and get a full combo off just a very small amount. 66B is also useful here, both for catching jumpouts, and also for whiffing to go for a throw or more 2As.
- Throws
- The other part of her strike/throw gameplan. You can easily lock down an opponent and make them scared to press a button, leaving them open to be tick thrown. Misaki's throw does reasonable damage and slams them down right next to her, allowing her to continue her pressure on their wakeup. Opponents may want to mash the throw attempts, but if they guess wrong on a strike attempt Misaki can convert to a full combo for much more damage. In any place where you could tick throw, you can also use her 624624B super, as it grabs on superflash, leaving them no escape if they haven't already started jumping.
- Beating RG
- The main way for opponents to escape Misaki's lockdown is to RG at specific points. Mainly B normals, 2C, and any dash attacks. Using slow attacks like 236A, varying your timing on normals, or whiffing normals like 66A can mess up their attempts to RG and allow your lockdown to continue even longer. Stronger opponents may resort to RG into DP, or RG into 2A to beat her pressure, but Misaki has an option to beat a number of those as well: 214B. This RG trap requires good reaction times, and is usually always followed by IC. Since the hurtbox is so high up on this move, and it comes out reasonably fast, you can crush a lot of attempts to mash out of your pressure.
Reversals
- Misaki has a great non-metered reversal in 214B, but opponents that know how to stuff the move can make Misaki take much higher risks than normal, so against better opponents you may need to rely on reading the opponent to find an opening to escape.
- 214B
- Low invul from frame 1. Her hurtbox only exists in her head, and it only expands back to full size when it gains a hitbox. Crushes lows, avoids some characters normals completely, and can be ICed for safety and to convert into a full damage combo. Excellent choice in most matches, but can be stuffed hard in some others. Use it raw, RG into it, or mash it during blockstun. It can work wonders everywhere.
- 214C
- Misaki's metered version of 214B. Very fast, fully invul, but if you don't have BIC to make it safe it can result in a very heavy punish from your opponent. Use carefully, or when you have BIC. Also a good choice when you get RGed on jumping in.
- 623C (anti-air)
- A more nuanced reversal option, only to be used against aerial approaches. Fully invul until the grab hitbox appears, meaning it can trade at worst. Works well against IADs, jAs, or hoverdashes. Especially good against some characters with multihit jump attacks, like Kano jC or Akiko jB, as the grab is guaranteed to at least trade, leaving you a much jucier combo afterwards.
- 22A/B
- Technically an option, but just don't.
- 624624B
- 6f startup with 0 frames to grab (during superflash). A less reliable reversal option, but if your opponent is not doing their meaties properly, you can punish with this.
Supers
- 236236A/B/C
- Combo fodder. Usually only used when downburst combos are hard, or with very low proration amounts. You can still get OTG pickups after this, but it requires good plate RNG.
- 624624
- Misaki's command throw series. B version is the fastest and grabs on superflash, so it gets used the most as a tick throw. A is rarely used as a reversal, as it has 5f of invul on 8f of startup. C version is very slow, and can be jumped out on reaction by the entire cast. You can try to go for it if the opponent has already used all of their aerial options.
- j236236
- You'll tend to use the A version for most combos, and sometimes the C version for a very meaty oki option when you want the chip damage and guaranteed mixup afterwards. j236236A is great for tacking on damage to most of Misaki's combos, and can be OTG followed up on a fair amount of the cast, with Akiko and Ayu being extremely hard to the point of being unviable. The key is to get the j236236A as low to the ground as possible.
- 222D
- Misaki's Final Memory. Takes 3 meter and is a counter move. Superflash on frame 0, but unless the opponent is already doing their attack this won't land due to the extra reaction time given. There is a limited hitbox on this so the second part can whiff and you'll only deal 500 damage instead of 5600.
Combos
| Notation Help
|
Disclaimer: Combos are written by various contributors, some combo notations may deviate slightly from the notation listed below.
For more information, see Controls
|
| IC
|
Input Instant Charge (22C) when you have the right amount of RF Meter.
|
| FIC
|
Input Flicker Instant Charge (22C) when you have the right amount of RF Meter.
|
| {X/Y/Z}
|
Move X or Y or Z can be used.
|
| #*
|
Indicates that any of A, B and C may be used with #. Example: 214*.
|
| [<- X] [-> X]
|
Side switch notation. All inputs grouped by the square brackets are performed facing the arrow's direction. They are still written as if they were done facing right, however.
|
| [X]xN
|
Loop the inputs in the square brackets as many times as N.
|
| c5B
|
Proximity normal only usable while close.
|
| f5B
|
Proximity normal only usable outside of c5B range or when cancelled from another normal. Known as far 5B.
|
| jX
|
Button X is input during your first jump.
|
| djX
|
Button X is input during your double jump.
|
| X(whiff)
|
Indicates that X is intended to whiff.
|
| X(tech trap)
|
Indicates a combo ender intended to catch the opponent's air tech. The most common kind of tech trap is j6C, which will air throw early techs and jC later techs. Executionally identical to X(whiff) but different in purpose.
|
| ~
|
Indicates a followup for moves which have them. Example: 236A~236A.
|
| ..
|
Indicates a short delay.
|
| IAD
|
Indicates an Instant Air Dash.
|
| IABD
|
Indicates an Instant Air Back Dash.
|
| (X)
|
X move is omittable from the combo.
|
| tk.X
|
Indicates the motion "X" is input immediately after leaving the ground. Stands for tiger knee.
|
- Replays for these combos can be found here.
No IC
Midscreen
- 2A 2B f5B 2C (236A(whiff)/214A(whiff))
- Basic resourceless chain. You can input this as 2A 2BB 2C instead. Use 236A whiff for spacing, and use 214A whiff to switch sides if your closer to the corner than your opponent. Alternatively, dash twice for corner carry.
- 236B/236A(counterhit) 66A 5B jB 66 jAB 66A xN(until corner) 2A 5BC jABC dj8 .. dj6C(tech trap)
- The 66A xN needs a bit of practice to get the rhythm down, but it is her best corner carry at low proration.
- 236B 66A 5B tk j236236A 66A 5B 623B 66 2A 5BC jABC dj8 .. dj6C(tech trap)
- Max damage with downburst after a 236B hit. Timing is very tight and might not work on all characters (see combo notes at the end).
- (2A) 2C 623B ... jC 66 jBC land jABC land 5BC jABC dj8 .. dj6C(tech trap)
- High damage starter on a select few characters (such as Akane).
Corner
- Meter dump, and the go-to option for Akiko and Ayu (sometimes Mai). Possible followups are the same as downburst followups.
- If you absolutely need that extra bit of damage to kill, use 214B, otherwise they can safely tech and it's not great for Misaki. 623A will let you do a jB left/right but Misaki is probably stronger with the opponent in the corner so again, only do it if you want that mixup.
- (high guard gauge) 214B 2A 5B tk j236236A 66A 2A 5BC jABC dj8 .. dj6C(tech trap)
- If you can build up some guard meter on an opponent and catch them off guard with a 214B, you can convert into big damage for no IC cost.
- 66C 623B jC 66 jBC land jABC land 5BC jABC dj8 .. dj6C(tech trap)
- 66C has guard point on it, so this oki option can crush certain reversal options.
Red IC
Midscreen
- 2A 2B f5B 2C IC 66A xN (until corner) 2A 5BC jABC dj8 .. dj6C(tech trap)
- If a sideswitch won't get you to the corner.
- 2C IC 66A c5B jB 66 jAB 66A xN (until corner) 2A 5BC jABC dj8 .. dj6C(tech trap)
- 2C IC followup. Use if the opponent is closer to the corner than you are.
- 2C IC 66A c5B tk j236236A 66A 66A 2A 5B 623A
- Metered conversion. Tight timing on the downburst.
- Back near corner: 2A 2B f5B 2C IC 66A c5B 623B 66 2A 5BC jABC dj8 .. dj6C(tech trap)
- Low proration sideswitch route.
- Back near corner: 2C IC 66A c5B 623B jC 66 jBC land jABC land 5BC 236236A
- Sideswitch combo that shows off optional plates ender.
Corner
- 2A 2B f5B 2C 214B IC j236236A 66A 2A 5BC jABC dj8 .. dj6C(tech trap)
- Misaki's bread-and-butter. You'll be using variations of this launcher into downburst combos a lot. Requires the IC to happen after you're in the air, which is hard against some characters. Can sometimes be saved by a tk j236236A. Try to buffer the entire super during the IC freeze.
- 2A 2B f5B 2C IC 66A 5BC jABC land 5BC jABC dj8 .. dj6C(tech trap)
- If you don't have meter this is your go-to.
Blue IC
Midscreen
- 2A 2B f5B 2C BIC 66A (66A) 5B jB 66 jB 5B jB 66 jBC land jABC land 5BC jABC dj8 .. dj6C(tech trap)
- Basic no meter carry combo, should work from most distances on screen. Second 66A is optional and makes the combo easier.
- 2A 2B f5B 2C BIC 66A 5B 623B jC 66 jBC land jABC land 5BC jABC dj8 .. dj6C(tech trap)
- If you want the corner switch variety.
- 2A 2B f5B 2C BIC 66A 5B 623B IAD jC j236236A 66A 2A 5BC jABC dj8 .. dj6C(tech trap)
- Metered version, requires the IAD jC to hit low. Do this if you're the one near the corner.
- 5A/B(anti-air) 623B 66 c5B 623B 66 2A c5B 623B BIC j44 j236236A 66A 2A c5B jABC land 5BC jABC dj8 .. dj6C(tech trap)
- Off of an antiair 5A/B, usually after RG. Getting the c5B ender is easier if you 66[4]...B.
- 2ABC 214C BIC(early, on ground) 236B 236B 66 jB 66 jBC land jC 66 jBC land jABC land 5BC jABC dj8 .. dj6C(tech trap)
- Fancy combo on certain characters. Drains a little more BIC meter than her other combos.
Corner
- 2A 2B f5B 2C 214B BIC j236236A...
- The most common BIC starter in the corner. Optimal followup depends on what OTG you can get.
- ...66A(OTG) 5B jB 66 jBC j236236A 66A 2A 5BC jABC djAAA j214C
- The j214C ender can be used for any of these routes.
- ...2A(OTG) jB 66 jBC j236236A 2A jABC land 5BC jABC dj8 .. dj6C(tech trap)
- ...2B(OTG) jC 66 jBC j236236A 2B jAABC land 5BC jABC dj8 .. dj6C(tech trap)
- This particular route is character specific (works on Mio and Kaori, for example), but is high damage.
- 2A 2B f5B 2C 214B BIC djC 66 jC 5B..C.. jC 66 jBC land jABC land 5BC jABC dj8 .. dj6C(tech trap)
Mixup Conversions
RIC
- 2C 66B(whiff) tk j214B IC 66 jB land c5B jB 66 jBC land jABC land 5BC jABC dj8 .. dj6C(tech trap)
- Example crossup midscreen. Different characters will need different variations on timing.
BIC
- 66B (whiff) 624624B IAD jC (whiff) land 214B BIC 66 jC land c5B jB 66 jBC j236236A 2A jABC land 5BC jABC djAAA j214C
- The uncrossup 214B is Kano-only, but shows off the corner steal after 6321463214B.
- Instant jA 214C BIC 66 j236236A 2A 5B tk j236236A 2A jB 66 jBC j236236A 2A 5ABC jABC j214C
- Fancy instant overhead, 1f link. Only works on very tall crouchers (Nayuki, Akiko) and requires very tight timing. You can omit any of the supers and do a normal ender for big damage still. jA will whiff if affected by the variable startup bug.
Notes
If you struggle with doing many 66A's for corner carry, you can end the combo midscreen with 2A 5B 623A.
All the advanced combos above use OTG ( off the ground ). You can use these moves to OTG your opponent
- 66A can be used on all characters with an appropriate height (really hard against Ayu, Mai, Akiko)
- 2B can be used on all characters (hard against Ayu, Mai, Akiko)
- 2A can be used on these characters Kano, Kanna, Sayuri, Minagi, Nayuki (Sleep), Nayuki (Awake), Mizuka, Kaori, Unknown, Misuzu .
- 662A can be used on these characters Nagamori, Neyuki, Makoto, Sayuri, Kano, Minagi, Unknown, Nayuki, Kaori .
- c5B can be used only on Kano, Kanna, Sayuri , Nayuki (Sleep), Minagi
The above are the usual pick ups, but 2C, 214B, and TK j214C can also be used against some characters.
Okizeme
Midscreen
Left/Right
- 214B
- Jump into the opponent as they wake up and with good timing you'll hit crossup. This requires IC to convert off of.
- jB
- After 623A or airthrow, you can do a high airdash to get a left/right mixup with jB. Convert into 2BC IC to get a full combo after. Nothing fancy, but can be pretty ambiguous on certain characters.
Corner
Strike/Throw
- See above Strategy section.
Left/Right
- 624624B IAD
- A rather niche mixup option. After 624624B finishes in the corner, it will always pull the opponent 1 pixel out, leaving you room to IAD and take the corner instead. A slight corpse push will make this not cross up, and on Kano will even leave you time to land and 214B back to the other side.
Win Quotes
| Japanese
|
English
|
|
良い風だね…
毎日こういう日だと
苦労しないで
勝てるんだけどね
|
The wind feels nice...
If every day was like this
I could win
without breaking a sweat.
|
|
この風がずっと吹いて
辿り着く場所
それって一体
どこだと思う?
ふふ、変なこと
聞いちゃったかな?
|
The wind is always blowing.
Where do you
think it ends
up at?
Haha. Did I ask
something weird?
|
|
う~…
おなかが空いてて
調子が出ないよ…
|
Ugh...
I'm so hungry,
I can't fight at full power.
|
|
勝利の後のカツカレー
格別の逸品だよ
君も今度どうかな?
|
Eating katsu curry after a win
is a very special gem.
Would you like to try it with me?
|
|
目が見え無いって事
ハンデだと思った?
だったらソレが
敗因だと思うよ…
うん
|
Did you think my blindness
was a handicap?
If so, then that's
why you lost.
Definitely.
|
|
何だか良く
分からないけど
君って他人って気が
あまりしないんだ
不思議だね
|
I don't really
get it, but...
You don't feel
like a stranger to me.
How strange.
|
|
悲しい風…
すっごく辛い物を
背負っているんだね…
|
What a sad wind...
It's carrying
a heavy burden...
|
|
(To Mio)
この手ごたえは…
もしかして澪ちゃん?
ゴメン…
ちょっと気が付くのが
遅くなったかも…
|
(To Mio)
This reaction...
Are you Mio, by any chance?
I'm sorry...
It took me so long
to realize...
|
|
(To UNKNOWN)
世界が怯えてる…
君は一体
何者なのかな…?
|
(To UNKNOWN)
The world itself is frightened...
Who in the world
are you?
|
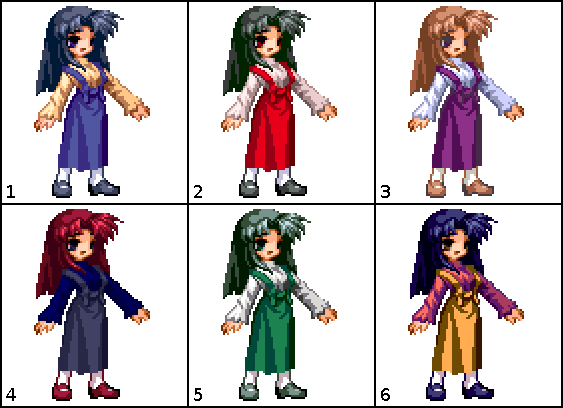
Colors
In-game References
External References
- Misaki's 2C is based on M. Bison's crouching roundhouse, from the Street Fighter series.
- Misaki's 66C is based on Ryu's "Joudan Sokutou Geri", from the Street Fighter series.
- Misaki's "Half Gush" move is based on Geese Howard's "Reppuken" move, from the Fatal Fury series.
- Misaki's "Hyper Accel" move is either based on Anji Mito's "On" move, from the Guilty Gear series, or Rose's "Soul Thru" move, from the Street Fighter series.
- Misaki's "High-Speed Lunch" move is based on Norimaro's "Hyper Strong Miracle Treasure" move, from Marvel Super Heroes vs Street Fighter.
- Misaki's "Turbulence" move is based on Leopold Goenitz's "Yamidoukoku" move, from The King of Fighters series.
- Misaki's "High-End Crash" is based on Seth's "Morote-Sho-Yoh" move, from The King of Fighters series.
ONE References
- Misaki's stage, the sunset rooftop, is where Kouhei first met Misaki in ONE.
- Misaki's use of wind based moves is a reference to her habit of standing atop the school rooftop; feeling and commenting on the wind at many points during the game.
- Misaki's "High-Speed Lunch" move is a reference to her prodigious appetite in the game.
- The huge stack of toast Akiko serves Misaki during Akiko's "There is also some that isn't sweet" move is another reference to her appetite during the game.
| General
|
|
| Characters
|
|
| Mechanics
|
|
| Guides
|
|
| Wiki
|
|


