Eternal Fighter Zero/Makoto Sawatari: Difference between revisions
| Line 72: | Line 72: | ||
{| border="0" cellspacing="5" width="1000" | {| border="0" cellspacing="5" width="1000" | ||
| width="" | [[image:Makoto5a.png|center]] | | width="" | [[image:Makoto5a.png|center|180px]] | ||
| width="" style="background:#f0f0f0;"| '''5A''' | | width="" style="background:#f0f0f0;"| '''5A''' | ||
[ Startup: 4 | Hit:+1 | Block:+0 ] | [ Startup: 4 | Hit:+1 | Block:+0 ] | ||
| Line 79: | Line 79: | ||
|- | |- | ||
| width="" | [[image: | | width="" | [[image:Makoto5b.png|center|180px]] | ||
| width="" | '''c5B''' | | width="" | '''c5B''' | ||
[ Startup: 5 | Hit:+5 | Block:+3 ] | [ Startup: 5 | Hit:+5 | Block:+3 ] | ||
| Line 85: | Line 85: | ||
[description] | [description] | ||
|- | |- | ||
| width="" | [[image:Makotof5b.png|center]] | | width="" | [[image:Makotof5b.png|center|180px]] | ||
| width="" style="background:#f0f0f0;"| '''f5B''' | | width="" style="background:#f0f0f0;"| '''f5B''' | ||
[ Startup: 10 | Hit:+0 | Block:-2 ] | [ Startup: 10 | Hit:+0 | Block:-2 ] | ||
| Line 91: | Line 91: | ||
[description] | [description] | ||
|- | |- | ||
| width="" | [[image:Makoto6b.png|center]] | | width="" | [[image:Makoto6b.png|center|180px]] | ||
| width="" style="background:#f0f0f0;"| '''6B''' | | width="" style="background:#f0f0f0;"| '''6B''' | ||
[ Startup: 21 | Hit:-2 | Block:-4 ] | [ Startup: 21 | Hit:-2 | Block:-4 ] | ||
| Line 97: | Line 97: | ||
[description] | [description] | ||
|- | |- | ||
| width="" | [[image:Makoto5c.png|center]] | | width="" | [[image:Makoto5c.png|center|180px]] | ||
| width="" | '''5CCC''' | | width="" | '''5CCC''' | ||
[ Startup: 10~26 | Hit:+0 | Block:-2 ] | [ Startup: 10~26 | Hit:+0 | Block:-2 ] | ||
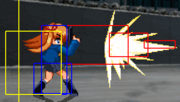
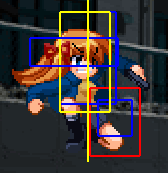
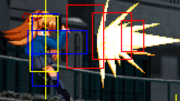
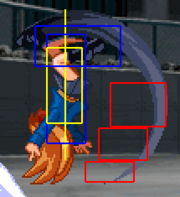
Makoto fires her gun up to 3 times. The extra two 5Cs can be tricky to time. Extremely good poke in neutral. Has a small hitbox right on the gun as Makoto points it forward. | |||
|} | |} | ||
| Line 107: | Line 107: | ||
{| border="0" cellspacing="5" width="1000" | {| border="0" cellspacing="5" width="1000" | ||
| width="" | [[image:Makoto2a.png|center]] | | width="" | [[image:Makoto2a.png|center|180px]] | ||
| width="" style="background:#f0f0f0;"| '''2A''' | | width="" style="background:#f0f0f0;"| '''2A''' | ||
[ Startup: 4 | Hit:+2 | Block:+1 ] | [ Startup: 4 | Hit:+2 | Block:+1 ] | ||
| Line 113: | Line 113: | ||
[description] | [description] | ||
|- | |- | ||
| width="" | [[image:Makoto2b.png|center]] | | width="" | [[image:Makoto2b.png|center|180px]] | ||
| width="" | '''2B''' | | width="" | '''2B''' | ||
[ Startup: 6 | Hit:+5 | Block:+3 ] | [ Startup: 6 | Hit:+5 | Block:+3 ] | ||
| Line 119: | Line 119: | ||
[description] | [description] | ||
|- | |- | ||
| width="" | [[image:Makoto2c.png|center]] | | width="" | [[image:Makoto2c.png|center|180px]] | ||
| width="" style="background:#f0f0f0;"| '''2C''' | | width="" style="background:#f0f0f0;"| '''2C''' | ||
[ Startup: 12 | Hit:--- | Block:-20 ] | [ Startup: 12 | Hit:--- | Block:-20 ] | ||
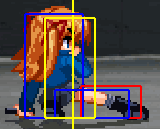
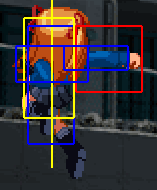
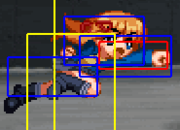
Very slow slide kick. This is your main ground combo ender and launcher. Incredibly unsafe if blocked, unless cancelled into a late 623A to catch 2A punishes. | |||
|} | |} | ||
| Line 129: | Line 129: | ||
{| border="0" cellspacing="5" width="1000" | {| border="0" cellspacing="5" width="1000" | ||
| width="" | [[image:Makotoj5a.png|center]] | | width="" | [[image:Makotoj5a.png|center|180px]] | ||
| width="" style="background:#f0f0f0;"| '''j5A''' | | width="" style="background:#f0f0f0;"| '''j5A''' | ||
[ Startup: 6 ] | [ Startup: 6 ] | ||
| Line 135: | Line 135: | ||
[description] | [description] | ||
|- | |- | ||
| width="" | [[image:Makotoj5b.png|center]] | | width="" | [[image:Makotoj5b.png|center|180px]] | ||
| width="" | '''j5B''' | | width="" | '''j5B''' | ||
[ Startup: 6 ] | [ Startup: 6 ] | ||
| Line 141: | Line 141: | ||
[description] | [description] | ||
|- | |- | ||
| width="" | [[image:Makotoj5c.png|center]] | | width="" | [[image:Makotoj5c.png|center|180px]] | ||
| width="" style="background:#f0f0f0;"| '''j5C''' | | width="" style="background:#f0f0f0;"| '''j5C''' | ||
[ Startup: 9 ] | [ Startup: 9 ] | ||
| Line 147: | Line 147: | ||
[description] | [description] | ||
|- | |- | ||
| width="" | [[image:Makotoj2c.png|center]] | | width="" | [[image:Makotoj2c.png|center|180px]] | ||
| width="" | '''j2CCC''' | | width="" | '''j2CCC''' | ||
[ Startup: 14 ] | [ Startup: 14 ] | ||
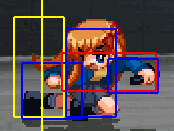
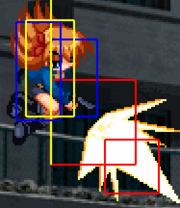
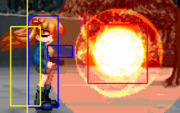
Makoto shoots downwards up to 3 times. Each shot can be delayed to a degree. Fairly good jump in. A key part to Makoto's corner loops. | |||
|} | |} | ||
| Line 157: | Line 157: | ||
{| border="0" cellspacing="5" width="1000" | {| border="0" cellspacing="5" width="1000" | ||
| width="" | [[image: | | width="" | [[image:Makoto5a.png|center|180px]] | ||
| width="" style="background:#f0f0f0;"| '''66A''' | | width="" style="background:#f0f0f0;"| '''66A''' | ||
[ Startup: 8 | Hit:+1 | Block:+0 ] | [ Startup: 8 | Hit:+1 | Block:+0 ] | ||
| Line 163: | Line 163: | ||
[description] | [description] | ||
|- | |- | ||
| width="" | [[image: | | width="" | [[image:Makoto5b.png|center|180px]] | ||
| width="" | '''66B''' | | width="" | '''66B''' | ||
[ Startup: 6 | Hit:+4 | Block:+2 ] | [ Startup: 6 | Hit:+4 | Block:+2 ] | ||
| Line 169: | Line 169: | ||
[description] | [description] | ||
|- | |- | ||
| width="" | [[image:Makoto66c.png|center]] | | width="" | [[image:Makoto66c.png|center|180px]] | ||
| width="" style="background:#f0f0f0;"| '''66C''' | | width="" style="background:#f0f0f0;"| '''66C''' | ||
[ Startup: 14 | Hit:-- | Block:-10 ] | [ Startup: 14 | Hit:-- | Block:-10 ] | ||
| Line 175: | Line 175: | ||
[description] | [description] | ||
|- | |- | ||
| width="" | [[image: | | width="" | [[image:Makoto2a.png|center|180px]] | ||
| width="" | '''662A''' | | width="" | '''662A''' | ||
[ Startup: 7 | Hit:+2 | Block:+1 ] | [ Startup: 7 | Hit:+2 | Block:+1 ] | ||
| Line 181: | Line 181: | ||
[description] | [description] | ||
|- | |- | ||
| width="" | [[image: | | width="" | [[image:Makoto2b.png|center|180px]] | ||
| width="" style="background:#f0f0f0;"| '''662B''' | | width="" style="background:#f0f0f0;"| '''662B''' | ||
[ Startup: 10 | Hit:+3 | Block:+1 ] | [ Startup: 10 | Hit:+3 | Block:+1 ] | ||
| Line 187: | Line 187: | ||
[description] | [description] | ||
|- | |- | ||
| width="" | [[image: | | width="" | [[image:Makoto2c.png|center|180px]] | ||
| width="" | '''662C''' | | width="" | '''662C''' | ||
[ Startup: 8 | Hit:-- | Block:-14 ] | [ Startup: 8 | Hit:-- | Block:-14 ] | ||
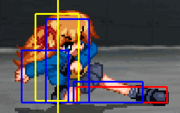
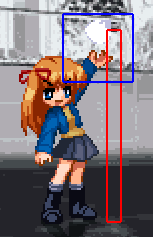
Makoto does a much quicker slide kick. Good for getting knockdowns off random f5B IC confirms. Can surprise the opponent if they're standing in neutral. | |||
|} | |} | ||
Revision as of 18:31, 11 November 2017
Introduction
Sawatari Makoto (沢渡 真琴) is a fast, tricky character who uses her many prank items to fight. Her projectiles can linger on screen for a good while after she throws them, making it easy for Makoto to keep the opponent on the defensive. Makoto is extremely suited to a lockdown style of play.
Makoto is one of the heroines of Kanon, a visual novel produced by Key in 1999. She is a mysterious girl who lost her memory of everything except her hatred towards Yuiichi. The Minase family decides to let her stay in their house until she regains her memories. Makoto really enjoys reading manga, eating pork-filled meat buns, and playing tricks on Yuiichi. During Kanon, Yuiichi vaguely remembers that they had met before in the past, but as he gets closer to the truth, Makoto's health begins to deteriorate quickly...
Stage: Shopping Street (商店街)
BGM: the fox and the grapes
Character-Specific Notes
- Makoto is able to air jump once, and air dash/backstep once.
- Makoto's air dash is unique in that it curves sharply upwards and loses forward momentum when the dash is held for too long. Because Makoto does not have any more movement options after an air dash, you should be careful about prolonging one if your opponent is nearby.
Normal Moves
The notation for the movelists can be found under Notation.
| Move | Hits | Damage | Guard | Move Cancel |
Jump Cancel |
IC Cancel |
|---|---|---|---|---|---|---|
| 5A | 1 | ? | Ground | ? | ? | ? |
| 2A | 1 | ? | Low | ? | ? | ? |
| j.A | 1 | ? | High/Air | ? | ? | ? |
| 66A | 1 | ? | Ground | ? | ? | ? |
| 662A | 1 | ? | Low | ? | ? | ? |
| 5B(c) | 1 | ? | Ground | ? | ? | ? |
| 5B(f) | 1 | ? | Ground | ? | ? | ? |
| 2B | 1 | ? | Ground | ? | ? | ? |
| j.B | 1 | ? | High/Air | ? | ? | ? |
| 66B | 1 | ? | Ground | ? | ? | ? |
| 662B | 1 | ? | Low | ? | ? | ? |
| 5C | 2 | ? | Ground | ? | ? | ? |
| 2C | 1 | ? | Low | ? | ? | ? |
| j.C | 1 | ? | Any (?) | ? | ? | ? |
| 66C | 1 | ? | ? | ? | ? | ? |
| 662C | 1 | ? | Low | ? | ? | ? |
| Throw | 2 | ? | Throw | ? | ? | ? |
| j.Throw | 2 | ? | Air Throw | ? | ? | ? |
| Three Burst | ||||||
| j.2C | 1 | ? | Any (?) | ? | ? | ? |
| True Leap | ||||||
| 6B | 1 | ? | High/Air | ? | ? | ? |
Standing
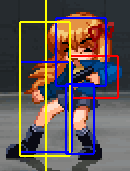
| 5A
[ Startup: 4 | Hit:+1 | Block:+0 ] [description] | |
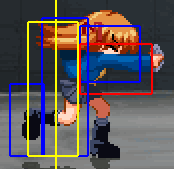
| c5B
[ Startup: 5 | Hit:+5 | Block:+3 ] [description] | |
| f5B
[ Startup: 10 | Hit:+0 | Block:-2 ] [description] | |
| 6B
[ Startup: 21 | Hit:-2 | Block:-4 ] [description] | |
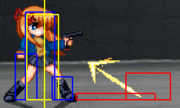
| 5CCC
[ Startup: 10~26 | Hit:+0 | Block:-2 ] Makoto fires her gun up to 3 times. The extra two 5Cs can be tricky to time. Extremely good poke in neutral. Has a small hitbox right on the gun as Makoto points it forward. |
Crouching
| 2A
[ Startup: 4 | Hit:+2 | Block:+1 ] [description] | |
| 2B
[ Startup: 6 | Hit:+5 | Block:+3 ] [description] | |
| 2C
[ Startup: 12 | Hit:--- | Block:-20 ] Very slow slide kick. This is your main ground combo ender and launcher. Incredibly unsafe if blocked, unless cancelled into a late 623A to catch 2A punishes. |
Jumping
| j5A
[ Startup: 6 ] [description] | |
| j5B
[ Startup: 6 ] [description] | |
| j5C
[ Startup: 9 ] [description] | |
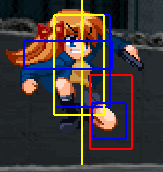
| j2CCC
[ Startup: 14 ] Makoto shoots downwards up to 3 times. Each shot can be delayed to a degree. Fairly good jump in. A key part to Makoto's corner loops. |
Dashing
Special Moves
The notation for the movelists can be found under Notation.
| Move | Hits | Damage | Guard | IC Cancel |
|---|---|---|---|---|
| Rat Fireworks | ||||
| 236A | ? | ? | ? | ? |
| 236B | ? | ? | ? | ? |
| 236C | ? | ? | ? | ? |
| Somersault Auu~ | ||||
| 623A | ? | ? | ? | ? |
| 623B | ? | ? | ? | ? |
| 623C | ? | ? | ? | ? |
| Insecticide Smoke | ||||
| 214A | ? | ? | ? | ? |
| 214B | ? | ? | ? | ? |
| 214C | ? | ? | ? | ? |
| Ricochet Shot | ||||
| 412A | ? | ? | ? | ? |
| 412B | ? | ? | ? | ? |
| 412C | ? | ? | ? | ? |
| Fox Fire [SP Level 1] | ||||
| 236236A | ? | ? | ? | ? |
| 236236B | ? | ? | ? | ? |
| 236236C | ? | ? | ? | ? |
| Ground Strafing [+Aerial, SP Level 1-3] | ||||
| 214214A | ? | ? | ? | ? |
| 214214B | ? | ? | ? | ? |
| 214214C | ? | ? | ? | ? |
| Legend of Monomi Hill [SP Level 1-3] | ||||
| 641236A | ? | ? | ? | ? |
| 641236B | ? | ? | ? | ? |
| 641236C | ? | ? | ? | ? |
| Meat Bun [1/3 HP, SP Level 3] | ||||
| 263S | 1 | 0 | ? | No |
Specials
| 236* - Rat Fireworks (ねずみ花火)
[description] | |
| 623* - Somersault Auu~ (サマーソルトあうー)
[description] | |
| 214* - Insecticide Smoke (殺虫スモーク)
[description] | |
| 412* - Ricochet Shot (跳弾)
[description] |
Eternity Specials
| 236236* - Fox Fire (狐火)
[description] | |
| 214214* - Ground Strafing (地上掃射)
[description] | |
| 641236* - Legend of Monomi Hill (ものみの丘の伝承)
[description] |
Final Memory
| 263S - Meat Bun (肉まんよー)
[description] |
Strategy, Tactics, and Combos
Combos
A very basic combo: 2AABBC→412B→[whiff 623A for crossup]?
2AAB 5BCCC 236B the absolute basic combo, no knockdown, but pushback is useful, use as guardstring, and forces opponent to react to trap. snake-traps are awesome, never forget them, as they also generate meter just throwing them out. throwing a new trap makes the previous one explode, which has a slightly larger hit box then the trigger-box and may get in a surprise hit.
2ABBC 236A Mid-screen this will cause your 236A to hit meaty. This gives you time to IAD or ground dash over to them to keep the pressure on at mid-screen and even go for the usual high/low mixups. If you airdash at the right height you can turn this into a left/right mixup by airdashing over them around the time the trap hits. Varying the timing on the airdash you can control whether the trap hits from the right, or the left.
2ABBC 641236A The standard corner combo for setting up your mixups. After 641236A use either 214B or 236236A/B to just have your way with your opponent in the way of high/low mixups. 236236A is especially useful as it moves up high enough that it won't hit your opponent unless they jump, then comes back down. This gives you the chance to throw as well as go for the usual High/low. If you're running low on meter you can cancel the 2C into 214B or 236236A/B. It cuts the damage in half, but lets you save more meter.
2AABC 641236A/B/C IC 5B j.B j.2CC 5B j.B j.2CCC standard corner loop, you can do this from farther away from corner depending on which version of super you use.
2AABC 641236A/B/C IC 5B 2Bwhiff 5BB j.B 66 j.B j.2C 5B j.B j.2CC advanced corner loop, timing the 5BB is a bit strange, and your input for the j.B 66 j.B j.C needs to be quick or you will drop the combo. add 5B j.B j.2CCC 5B j.B jc j.B if you used a full BIC, input needs to be put in incredibly quick. also allows for airtech-punish if you are fast enough.
2AABC 641236A <2-hits> IC 66B 66B j.B > cornerloop lands from anywhere and pushes all the way to corner. might be able to make it IC 66B j.B 66 j.B 66B under weird circumstances.
412C 9 j.BC 66 j.B 66B 66B j.B j.2C RF anti-air combo. you need to jump after first bullet hit or bounce will not hit, brings opponent toward you for followup and then bullet will hit again. leads into dash-attack juggle and cornerloop.
2AABC 623B IC j.B 5B > cornerloop non-super cornerloop.
2AABC 412A 5B 5B > cornerloop non-meter cornerloop.
6B 214214A/B/C overhead super
2C <hit with edge of hitbox> 236A > 6623A/B crossup input the 623 along with the dash or you won't input fast enough and push out of trap.
2C <hit with edge of hitbox> 214B > 866/96 bullet crossup not sure if this is the right one, there are many ways to crossup with bullet and this one is off memory.
corner knockdown 214B <optional 5B to buffer for smoke> 4412B > best high/low or tickthrow game the bullet keeps the opponent from jump freely. this is generally your safest corner game, but may have gaps if you don't execute quick enough. 2B is a good overhead, but IAD allows for more options, such as not air-attacking and punishing high-guard with low, or staggering your air-hits to throw off timing on the low. if smoke trap hits an airborne opponent airtech-punish with an airthrow!
236A 66 6C snake trap tick throw, if trap and throw lands in a corner, immediately 5B j.B to catch the opponent for a 1-cycle cornerloop off of the trap!
j.AB 66 j.B 66B 66B j.B j.2C > cornerloop if you time the 66Bs correctly or if you use a BIC to extend, this can go from corner to corner.
alot of the damage comes from her traps and meta-game, and not her combos; compound damage from multiple overhead hits, crossup damage, trap damage, very small things. use her traps often and the result will pay out over time. don't fish for a 2C hit-confirm for your supers! make them happen rather than push for a 2A hit or something.
- never use higher than level 1 641236 super for corner loops as you will have to cut them off short for proper juggling, with very small meter:damage payout. the difference between each level and damage is around 500. so save the meter for super orb trap or another combo.
- IC 6B VERY EARLY, and always followup up 5B. don't follow up with any other move until the 5B hits, or you'll just drop and waste your RF. if you don't IC early enough you'll drop anyway.
The Insecticide Trap
When your opponent is down in the corner, use a 214B trap to keep them in the corner for your fiendish mixup purposes. Wait until they start blocking the smoke before attacking, or else you might be on the receiving end of whatever powerful wakeup move they might use.
when they are down mid-screen use 214A and chase them into the corner.
C version is pretty situational, use it the same as A for block-string into corner, absolutely punish any airborne attempts.
- use a meaty attack to buffer the timer.
Snake Traps
A version is used off of edge-of-hitbox 2C hit-confirms. leads into crossups or tick-throw, as you can dash in quick enough that the trap does not explode first.
B version is used off of 5CCC pushback, to keep momentum during guardstrings and lack of C-knockdown.
C version does both, times 3. it puts 3 traps at both distances (it's not a random pattern), meaning use RF for both situations. in case of A-scenario, pushing them into B range is viable but not what your aiming for with this. go for as much cross up as you can, and build meter! remember off of each knockdown do some sort of cross up; 6623A/B flip-crossup, airdash crossup, throw some bullets or smoke down!.
Magic bullet
A version is for mid-screen crossup and cornerloop.
B version is for mid-screen crossup and corner oki.
C version is for pressure, AA-combo.
Win Quotes
| Japanese | English |
|---|---|
|
蜂の巣ねー |
[TRANSLATION NEEDED] |
|
なによぅ |
[TRANSLATION NEEDED] |
|
あうーっ! |
[TRANSLATION NEEDED] |
|
記憶だろうが |
[TRANSLATION NEEDED] |
|
あうーっ! |
[TRANSLATION NEEDED] |
|
(To Mio) |
(To Mio) |
|
(To Ayu) |
(To Ayu) |
|
(To Makoto) |
(To Makoto) |
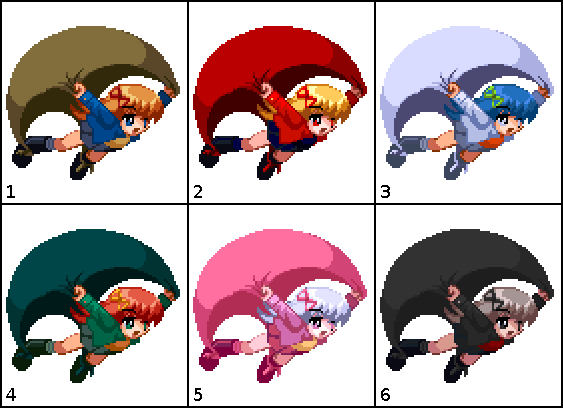
Colors
In-game References
External References
- Makoto's "Legend of Monomi Hill" move is based on Terry Bogard's "Burning Knuckle" move, from the Fatal Fury series.
- The twin guns used in Makoto's "Ground Strafing" move is a reference to Dante's guns, "Ebony & Ivory", from the Devil May Cry series. Ebony and Ivory are able to keep Dante suspended in midair as long as he's firing, just like Makoto's version. It is also based on Jin Saotome's "Blodia Vulcan" move, from the Marvel vs Capcom series.
- The shop on the right side of the background is named "CLANNAD", which is a reference to CLANNAD, another visual novel produced by Key in 2004.
Kanon References
- The shopping district in the background is where Makoto first meets Yuiichi in the game, and where they meet several times during the game.
- The fireworks that Makoto uses in her "Rat Fireworks" move is a reference to a prank she tried to pull on Yuuichi during the game.
- The name of Makoto's "Legend of Monomi Hill" move is derived from "Monomi/Scenic Hill", an important location for her in the game.
- The meat bun Makoto eats during her "Meat Bun" move is one of her favourite foods in the game.

