Skullgirls/Big Band: Difference between revisions
(Moved assist recovery to taunt section) |
m (→Specials: minor on LK a train ips) |
||
| (89 intermediate revisions by 24 users not shown) | |||
| Line 1: | Line 1: | ||
{{SG Character Intro|char=Big Band|short=big|content= | |||
==Story== | ==Story== | ||
Big Band used to be a cop, now he walks a different beat. | Big Band used to be a cop, now he walks a different beat. | ||
== | ==Overview== | ||
Big Band has a variety of large moves that can control most of the screen, and has simple but effective mixup that leads to high damage. On the flip side, his large hurtbox leaves him vulnerable to instant overheads and stray hits. To mitigate this he has a few very strong, unique defensive options with parries and armored moves. | Big Band has a variety of large moves that can control most of the screen, and has simple but effective mixup that leads to high damage. On the flip side, his large hurtbox leaves him vulnerable to instant overheads and stray hits. To mitigate this he has a few very strong, unique defensive options with parries and armored moves. | ||
| Line 12: | Line 10: | ||
* Various specials cover different angles around Big Band, granting him space control, at the risk of leaving himself vulnerable if they whiff or are blocked. | * Various specials cover different angles around Big Band, granting him space control, at the risk of leaving himself vulnerable if they whiff or are blocked. | ||
* Has very good assists to benefit the entire cast and any team, whatever their need is. | * Has very good assists to benefit the entire cast and any team, whatever their need is. | ||
* Can feint his armored rush punch moves for movement. ([4]6HK~P) | |||
* Super Sonic Jazz, his grounded level 1 super, is one of the most feared reversals in the game | * Super Sonic Jazz, his grounded level 1 super, is one of the most feared reversals in the game | ||
* Parrying allows him to deflect predictable pressure, gain meter, and punish his opponent afterwards. But over-zealousness will quickly put him in a bad position. | * Parrying allows him to deflect predictable pressure, gain meter, and punish his opponent afterwards. But over-zealousness will quickly put him in a bad position. | ||
* Some of his moves apply sound stun, which gives him different combos, conversions, and setups than other characters. | * Some of his moves apply sound stun, which gives him different combos, conversions, and setups than other characters. | ||
= | {{StrengthsAndWeaknesses | ||
[[ | | intro = [[file:SG_big_icon.png|32px]] '''Big Band''' is an enormous defensive powerhouse that controls large amount of space with his big armored attacks. | ||
| pros = | |||
<br | * '''High damage''': Big Band is arguably the highest damage character, which is only compounded by the use of assists. | ||
* '''Great reversals''': Air or ground, metered or meterless, Big Band's reversal options are very strong. | |||
* '''Excellent assists''': H Brass Knuckles, L/M Beat Extend and H A-Train are all useful assists in their own right, and at least one of them will have a place on any team. | |||
* '''Excellent damage DHCs''': When used midscreen, his Level 3 DHC does the most damage out of any Level 3. If you have the meter, Level 5 does a huge amount of damage and even converts into a combo with OTG. | |||
* '''Parry''': Big Band is the only character that can parry (Noise Cancel), which is a strong defensive option that can get him out of a lot of situations. | |||
* '''Normal throws''': Big Band's normal throw is the longest in the game and he can easily combo off it without consuming meter, OTG, or Sound Stun, leading to a very good low/throw game. His air throw has an excellent hitbox and grants easy meterless conversions. | |||
| cons= | |||
* '''Large hurtbox''': Band's enormous hurtbox makes him uniquely vulnerable against instant overheads and projectiles. Every character has instant overheads against him, and he is unable to crouch under things other characters can, like Robo-Fortune's H Beam. While it does prevent some combos and mixups from working on him, it also opens up lots of others that ''only'' work on him. | |||
* '''Slow''': Low mobility, which is only compounded by his large hurtboxes. | |||
* '''Unsafe moves''': Most of his specials are very unsafe without an assist to cover them. | |||
* '''Simple mixups''': Being large, slow, and having no airdash, Band finds it difficult to set up safe and hard-to-see left/right resets. He generally relies on simpler mixup options than other characters and tries to use his high damage to make up for it. | |||
|tablewidth=80 | |||
}} | |||
<br> | |||
<div class="heading" style="text-align: center;">'''Video Overview'''</div> | |||
<div style= "margin: 20px;">{{#ev:youtube|https://youtu.be/QMlK6ZrYVqg||center|||start=557}}</div> | |||
}} | |||
==Stats== | ==Stats== | ||
| Line 41: | Line 49: | ||
| forwardtech=39 | | forwardtech=39 | ||
| backwardtech=40 | | backwardtech=40 | ||
| slidingkd= | | slidingkd=87 | ||
| hardkd=35 | | hardkd=35 | ||
| crumple=36 | | crumple=36 | ||
| Line 48: | Line 56: | ||
| airchain=6 Buttons: {{NotationIcon-SG|LP}} → {{NotationIcon-SG|LK}} → {{NotationIcon-SG|MP}} → {{NotationIcon-SG|MK}} → {{NotationIcon-SG|HP}} → {{NotationIcon-SG|HK}} | | airchain=6 Buttons: {{NotationIcon-SG|LP}} → {{NotationIcon-SG|LK}} → {{NotationIcon-SG|MP}} → {{NotationIcon-SG|MK}} → {{NotationIcon-SG|HP}} → {{NotationIcon-SG|HK}} | ||
}} | }} | ||
==Assists== | |||
<gallery style="float:right"> | |||
Image:SG_big_dpp.png|500px|'''Beat Extend (default assist)''' | |||
Image:SG_big_bfp.png|500px|'''H Brass Knuckles (default assist)''' | |||
Image:SG_big_bfk_mh.png|500px|'''M / H Take the A Train ([4]6K)''' | |||
Image:SG_big_qcbk.png|500px|'''H Giant Step (214HK)''' | |||
Image:SG_big_taunt.png|500px|'''Taunt''' | |||
</gallery> | |||
===Beat Extend (default assist)=== | |||
* A fast [[Skullgirls/Team_Building#Invulnerable_DP_assists|invulnerable DP assist]] that's very easy to combo after due to the way it pulls them in and drops the opponent on hit. It also pulls the opponent towards Big Band on block. | |||
* L is the default assist choice. It's the fastest and has the best anti air hitbox during the invulnerable frames, but doesn't have a hitbox behind Big Band. | |||
* M has the longest horizontal range which is useful for enabling certain combos, like after Cerebella's Diamond Dynamo super. It also hits on both sides which can allow it to scoop the opponent character in situations where L cannot. | |||
* H suffers from being the slowest and having the smallest initial hitbox, but has two hits on the ground which gives it some lockdown ability, and only has the standard 3 frames of vulnerable start up frames most DP assists have. | |||
* The L and M versions have 1 and 2 extra frames of vulnerability during their startup, respectively. This brings both L and M to 5 total frames of vulnerability as an assist. | |||
* If the assist hits both characters, the assist will fall 12 frames before the point. This makes it a bit more awkward to convert into a Happy Birthday combo, but still possible in many situations. | |||
* The blockstun for each version is also decreased; 5f for L, 7f for M and H. | |||
===H Brass Knuckles (default assist)=== | |||
* An [[Skullgirls/Team_Building#Armored_assists|armored assist]] that has a lot of horizontal coverage and deals a lot of damage on counterhit. | |||
* A very popular assist due to its ability to control horizontal space, counter zoning, make many unsafe moves safer, deal big chunks to opponent assists as a countercall, and add lots of damage to combos, particularly in the corner. | |||
* Still causes a sliding knockdown animation on hit, but it's always a [[Skullgirls/Defense#Ground_Tech|green bounce]] that is ground techable very quickly after the opponent touches the ground (same as other assists that knock down). | |||
* 4f less blockstun as an assist (25f instead of 29f). | |||
* Applies 87.5% damage scaling as an assist, but more than makes up for it with its huge single-hit base damage and lengthy knockdown allowing for new combos. | |||
===M / H Take the A Train ([4]6K)=== | |||
Anti-air grab (unblockable while rising) and [[Skullgirls/Team_Building#Setup_assists|setup assist]]. On hit, the lengthy animation allows time for the point character to build resources. The M version is faster and works as an anti air attack, while the H version travels further and has more time to build resources. | |||
===H Giant Step (214HK)=== | |||
Up close, this is an overhead. From further away, it's an unblockable attack that has to be jumped over. | |||
===Taunt=== | |||
To choose this assist, press START on the custom assist input select. Big Band taunts, powering up his next level 1 super (either Super Sonic Jazz or Tympany Drive). | |||
<br clear=all/> | |||
==Move List== | ==Move List== | ||
===Character Mechanic: Sound Stun=== | |||
[[Image:SG_big_soundstun.png|500px|thumb|Big Band hits Filia with Giant Step, which inflicts Sound Stun. The added hitstop allows him to link a normal afterwards.]] | |||
* Many of Big Band's attacks cause a unique "sound stun" on hit, which has a distinctive musical note hit spark and additional hit stop for the opponent (amount varies per move). | |||
* In practice, this makes these moves much more easily comboable, since the opponent freezes in place and Band has more time to move or link other attacks. | |||
* Sound Stun can only be used once per combo. Think of it like OTG where it's a once-per-combo resource you can spend. | |||
* If Sound Stun has already been consumed, additional Sound Stun moves will still work, but it will be much more difficult or even impossible to combo afterwards. | |||
** The Sound Stun-less versions of these moves are usually a lot less plus on hit, and/or cause a {{Property-SG|Soft KD (Invuln.)}} which makes follow-ups impossible. | |||
<br clear=all/> | |||
===Standing Normals=== | ===Standing Normals=== | ||
| Line 262: | Line 315: | ||
| | | | ||
<br> | <br> | ||
* A 2 part trombone kick. Big Band can jump cancel after the second hit to use this as a standard launcher. Jump canceling after the first hit leaves the opponent at a lower height. Additionally, it is possible to jump cancel after the first hit and perform an air throw for a mix-up, and it works on every character (timing is somewhat strict). | * A 2 part trombone kick. Big Band can jump cancel after the second hit to use this as a standard launcher. Jump canceling after the first hit leaves the opponent at a lower height. | ||
* Additionally, it is possible to jump cancel after the first hit and perform an air throw for a mix-up, and it works on every character (timing is somewhat strict). | |||
* Moves Big Band forward on frame 7 (about 3/4 of a training mode grid square), but returns to his original position during recovery. | |||
<br> | <br> | ||
| | | | ||
| Line 462: | Line 517: | ||
| | | | ||
<br> | <br> | ||
* Big Band extends a tiny | * Big Band extends a tiny oboe to hit his opponent as his main low attack. The fact that it is +7 on hit makes it easy to set up low/throw mixups mid-combo. It has a pretty large vertical hitbox for a low, so it works conveniently in optimized combos. | ||
<br> | <br> | ||
| | | | ||
| Line 495: | Line 550: | ||
| | | | ||
<br> | <br> | ||
* Big Band drops to the ground, attacking above and around himself with air blasts. The low profile hurt boxes and large hit box make the attack a useful anti-air and make the tall Big Band less susceptible to instant overheads. | * Big Band drops to the ground, attacking above and around himself with air blasts. The low profile hurt boxes and large hit box make the attack a useful anti-air and make the tall Big Band less susceptible to instant overheads. On hit, the blasts draw defending characters closer to Big Band instead of pushing them away. After a fully shook beat extend, this move can be used to drop the enemy on the opposite side. | ||
<br> | <br> | ||
| | | | ||
| Line 665: | Line 720: | ||
| | | | ||
<br> | <br> | ||
* Big Band extends a tambourine for a 3-hit attack the hits below him and has generous active frames. This | * Big Band extends a tambourine for a 3-hit attack the hits below him and has generous active frames. | ||
* Doesn't hit overhead for a small period after jumping, even from an instant double jump after a jump. This makes it not useful as an instant overhead. | |||
** However, it can hit overhead from a low-to-the-ground double jump performed while falling. | |||
<br> | <br> | ||
| | | | ||
| Line 917: | Line 974: | ||
| input={{NotationIcon-SG|623}} + {{NotationIcon-SG|P}}<br>→ [[File:4.gif]] , [[File:6.gif]] , [[File:4.gif]] , [[File:6.gif]] ...<br>or → {{NotationIcon-SG|LP}} , {{NotationIcon-SG|HP}} , {{NotationIcon-SG|LP}} , {{NotationIcon-SG|HP}} ... | | input={{NotationIcon-SG|623}} + {{NotationIcon-SG|P}}<br>→ [[File:4.gif]] , [[File:6.gif]] , [[File:4.gif]] , [[File:6.gif]] ...<br>or → {{NotationIcon-SG|LP}} , {{NotationIcon-SG|HP}} , {{NotationIcon-SG|LP}} , {{NotationIcon-SG|HP}} ... | ||
|{{AttackData-SG | | |{{AttackData-SG | | ||
| version={{NotationIcon-SG|LP}} | | version= {{NotationIcon-SG|LP}} | ||
| guard=Mid | | guard =Mid | ||
| properties={{Property-SG|Invuln. (Strike)}} (Frame 2),<br>{{Property-SG|Sound Stun}} | | properties= {{Property-SG|Invuln. (Strike)}} (Frame 2),<br>{{Property-SG|Sound Stun}} | ||
| dmg=350, 350, 150 x9 (100, 100, 50 x9) | | dmg =350, 350, 150 x9 (100, 100, 50 x9) | ||
| meter=(2.5) 5.5%, 3%, 1.5% x9 | | meter= (2.5) 5.5%, 3%, 1.5% x9 | ||
| startup=8 | | startup= 8 | ||
| active=1, (6), 1 [(2), 1, (2), 1...] | | active= 1, (6), 1 [(2), 1, (2), 1...] | ||
| recovery=34 | | recovery= 34 | ||
| hitstop=2, 60, 35 x9 or 2, 33, 12 x9 (4, 9, 35 x9 on block) | | hitstop= 2, 60, 35 x9 or 2, 33, 12 x9 (4, 9, 35 x9 on block) | ||
| hitstun=18 x2, (16 x9 Shake) | | hitstun= 18 x2, (16 x9 Shake) | ||
| blockstun=18, 13, (19 x9 Shake) | | blockstun= 18, 13, (19 x9 Shake) | ||
| onhit={{Property-SG|KD}} | | onhit= {{Property-SG|KD}} | ||
| onblock=-24 | | onblock= -24 | ||
| onpushblock= | | onpushblock= | ||
| superhitstop=N/A | | superhitstop=N/A | ||
| framedata=[[File:SG_big_dplp_fd.png|left]]}} | | framedata=[[File:SG_big_dplp_fd.png|left]]}} | ||
|{{AttackData-SG | | |{{AttackData-SG | | ||
| version={{NotationIcon-SG|MP}} | | version= {{NotationIcon-SG|MP}} | ||
| guard=Mid | | guard= Mid | ||
| properties={{Property-SG|Invuln. (Strike)}},<br>{{Property-SG|Sound Stun}} | | properties= {{Property-SG|Invuln. (Strike)}},<br>{{Property-SG|Sound Stun}} | ||
| dmg=350, 550, 150 x12 (100, 100, 50 x12) | | dmg= 350, 550, 150 x12 (100, 100, 50 x12) | ||
| meter=(2.5%) 7%, 4.5%, 1.5% x12 | | meter= (2.5%) 7%, 4.5%, 1.5% x12 | ||
| startup=10 | | startup= 10 | ||
| active=3, (3), 3 [(4), 1, (2), 1...] | | active= 3, (3), 3 [(4), 1, (2), 1...] | ||
| recovery=39 | | recovery= 39 | ||
| hitstop=4, 60, 35 x12 or 4, 33, 12 x12 (8, 9, 35 x12 on block) | | hitstop= 4, 60, 35 x12 or 4, 33, 12 x12 (8, 9, 35 x12 on block) | ||
| hitstun=18 x2, (16 x12 Shake) | | hitstun= 18 x2, (16 x12 Shake) | ||
| blockstun=21, 15, (19 x12 Shake) | | blockstun=21, 15, (19 x12 Shake) | ||
| onhit={{Property-SG|KD}} | | onhit={{Property-SG|KD}} | ||
| Line 951: | Line 1,008: | ||
| framedata=[[File:SG_big_dpmp_fd.png|left]]}} | | framedata=[[File:SG_big_dpmp_fd.png|left]]}} | ||
|{{AttackData-SG | | |{{AttackData-SG | | ||
| version={{NotationIcon-SG|HP}} | | version= {{NotationIcon-SG|HP}} | ||
| guard=Mid | | guard= Mid | ||
| properties={{Property-SG|Invuln. (Full)}},<br>{{Property-SG|Sound Stun}} | | properties= {{Property-SG|Invuln. (Full)}},<br>{{Property-SG|Sound Stun}} | ||
| dmg=350 x2, 550, 150 x14 (100, 100, 100, 50 x14) | | dmg= 350 x2, 550, 150 x14 (100, 100, 100, 50 x14) | ||
| meter=(2.5%) 7%, 4.5% x2, 1.5% x9 | | meter= (2.5%) 7%, 4.5% x2, 1.5% x9 | ||
| startup=12 | | startup= 12 | ||
| active=3, (6), 3, (3), 3 [(4), 1, (2), 1...] | | active= 3, (6), 3, (3), 3 [(4), 1, (2), 1...] | ||
| recovery=36 | | recovery= 36 | ||
| hitstop=4, 2, 60, 35 x14 or 4, 2, 33, 12 x14 (4, 4, 8, 35 x14 on block) | | hitstop= 4, 2, 60, 35 x14 or 4, 2, 33, 12 x14 (4, 4, 8, 35 x14 on block) | ||
| hitstun=18 x3, (16 x14 Shake) | | hitstun= 18 x3, (16 x14 Shake) | ||
| blockstun=18 x2, 15 (19 x14 Shake) | | blockstun= 18 x2, 15 (19 x14 Shake) | ||
| onhit={{Property-SG|KD}} | | onhit= {{Property-SG|KD}} | ||
| onblock=-27 | | onblock= -27 | ||
| onpushblock= | | onpushblock= | ||
| superhitstop=N/A | | superhitstop= N/A | ||
| framedata=[[File:SG_big_dphp_fd.png|left]]}} | | framedata=[[File:SG_big_dphp_fd.png|left]]}} | ||
| | | | ||
| Line 985: | Line 1,042: | ||
** Most damaging | ** Most damaging | ||
** Anti air hitbox occurs during vulnerable frames | ** Anti air hitbox occurs during vulnerable frames | ||
** Has a 5f buffer afterwards (the shake?). | |||
* '''Assist properties''' | * '''Assist properties''' | ||
** L version has 1 additional frames of vulnerability (5f total) | ** L version has 1 additional frames of vulnerability (5f total) | ||
| Line 1,103: | Line 1,161: | ||
| dmg=0, 350, 450, 1000 (100) | | dmg=0, 350, 450, 1000 (100) | ||
| meter=(2.5%) 3%, 14% x2 | | meter=(2.5%) 3%, 14% x2 | ||
| startup=17 | | startup=11-17 | ||
| active=2 | | active=2 | ||
| recovery=34 | | recovery=34 | ||
| Line 1,113: | Line 1,171: | ||
| onpushblock= | | onpushblock= | ||
| superhitstop=N/A | | superhitstop=N/A | ||
| framedata=[[File:SG_big_bfmk_fd.png|left]]}} | | framedata=[[File:SG_big_bfmk_fast_fd.png|left]] [[File:SG_big_bfmk_fd.png|left]]}} | ||
|{{AttackData-SG | | |{{AttackData-SG | | ||
| version={{NotationIcon-SG|HK}} | | version={{NotationIcon-SG|HK}} | ||
| Line 1,135: | Line 1,193: | ||
* Instead of a simple punch, Big Band attempts to grab the opponent with this rushing attack, either directly in front of him or an upwards angle. | * Instead of a simple punch, Big Band attempts to grab the opponent with this rushing attack, either directly in front of him or an upwards angle. | ||
* {{NotationIcon-SG|LK}} | * {{NotationIcon-SG|LK}} | ||
** A true command grab that moves forward very slightly and grabs directly in front of Big Band. Much slower than his normal throw, but has better range, is untechable, and can be performed as a cancel out of normals. | ** A true command grab that moves forward very slightly and grabs directly in front of Big Band. | ||
** Much slower and less rewarding than his normal throw, but has better range, is untechable, and can be performed as a cancel out of normals. | |||
** Unlike almost every other grab or command grab, the chain afterwards will be Stage 3 - attacks will immediately be tracked by IPS and accumulate undizzy. | |||
* {{NotationIcon-SG|MK}} | * {{NotationIcon-SG|MK}} | ||
** Moves forward and grabs above Big Band at an upwards angle. Big Band | ** Moves forward and grabs above Big Band at an upwards angle. Big Band will track where the opponent, doing a faster version if they are close by and a slower version based on how far they are further out. | ||
* {{NotationIcon-SG|HK}} | * {{NotationIcon-SG|HK}} | ||
** Moves the furthest and grabs at the same angle as the MK version. Has no tracking, which effectively creates a deadzone. If the opponent is too close, Big Band will travel underneath them and whiff. | ** Moves the furthest and grabs at the same angle as the MK version. Has no tracking, which effectively creates a deadzone. If the opponent is too close, Big Band will travel underneath them and whiff. | ||
* All versions have a 5f buffer afterwards. | |||
* In the corner, the LK version can be converted into a combo with an OTG normal like 2MP. The MK and HK versions move Big Band too far back for this to be possible, so the only conversion option is to super cancel. | * In the corner, the LK version can be converted into a combo with an OTG normal like 2MP. The MK and HK versions move Big Band too far back for this to be possible, so the only conversion option is to super cancel. | ||
* The MK and HK versions are unblockable by a rising airborne opponent, but blockable on the way down. | * The MK and HK versions are unblockable by a rising airborne opponent, but blockable on the way down. | ||
| Line 1,253: | Line 1,314: | ||
* Big Band stomps the ground and attacks with an oversized kick drum pedal that hits overhead. | * Big Band stomps the ground and attacks with an oversized kick drum pedal that hits overhead. | ||
** Although the HK version and its "earthquake" consume <b>Sound Stun</b>, the attack has the same properties without it. | ** Although the HK version and its "earthquake" consume <b>Sound Stun</b>, the attack has the same properties without it. | ||
* All versions have a 5f buffer afterwards. | |||
* {{NotationIcon-SG|LK}} | * {{NotationIcon-SG|LK}} | ||
** Pulls the opponent closer to Big Band on hit. | ** Pulls the opponent closer to Big Band on hit. | ||
| Line 1,363: | Line 1,425: | ||
<br> | <br> | ||
* Big Band uses a high hat cymbal to parry incoming attacks, allowing him to riposte with an attack afterwards. | * Big Band uses a high hat cymbal to parry incoming attacks, allowing him to riposte with an attack afterwards. | ||
* On the ground, a high (→) <b>Noise Cancel</b> input will parry any incoming high or mid attack and low (↓) will parry low attacks. | * On the ground, a high (→) <b>Noise Cancel</b> input will parry any incoming high or mid attack and low (↓) will parry low attacks and all assists, regardless if they hit high or low. | ||
** In the air, high (→) parries any attack. | ** In the air, high (→) parries any attack. | ||
** Also in the air, low (↓) parries projectiles. | |||
* Throws and hitgrabs can never get parried. | * Throws and hitgrabs can never get parried. | ||
* Big Band can never parry both directions at the same time, but assist attacks can be parried either direction. | * Big Band can never parry both directions at the same time, but assist attacks can be parried either direction. | ||
* Upon a successful <b>Noise Cancel</b>, Big Band takes 75% of the incoming attack's block damage as recoverable damage, and cannot die from damage taken during parry. | * Upon a successful <b>Noise Cancel</b>, Big Band takes 75% of the incoming attack's block damage as recoverable damage, and cannot die from damage taken during parry. | ||
* The parried attack's hit stop and stun get replaced with a standardized 27f parry stop animation (29f for supers). | * The parried attack's hit stop and stun get replaced with a standardized 27f parry stop animation (29f for supers). | ||
** The parry stop can cancel to another <b>Noise Cancel</b> immediately or cancel to an attack or | ** The parry stop can cancel to another <b>Noise Cancel</b> immediately or cancel to an attack, block, jump, or dash after 12f (14f for supers). | ||
*** Parrying a sequence of combo hits increases the active window for <b>Noise Cancel</b>s by 2f and allows both high and low inputs to parry any incoming attack. | *** Parrying a sequence of combo hits increases the active window for <b>Noise Cancel</b>s by 2f and allows both high and low inputs to parry any incoming attack. | ||
* Big Band gains 41.667% of parried move as meter and 1% flat for parrying multihitting moves and projectiles(with some exceptions). | * Big Band gains 41.667% of parried move as meter and 1% flat for parrying multihitting moves and projectiles(with some exceptions). | ||
| Line 1,381: | Line 1,444: | ||
** " Time before joystick must be released or parry is invalid 7f→12f. " | ** " Time before joystick must be released or parry is invalid 7f→12f. " | ||
** "Pressing other directions during a successful parry animation will not invalidate any existing parry inputs. " | ** "Pressing other directions during a successful parry animation will not invalidate any existing parry inputs. " | ||
* | * See [[Skullgirls/Advanced_Mechanics#Parry_OS_.28Big_Band_Only.29| this page]] for option selects using parry. | ||
* See [[Skullgirls/Training_Room#Parry_Display| this page]] for information regarding the training mode parry display. | |||
<br> | <br> | ||
| | | | ||
| Line 1,417: | Line 1,481: | ||
| | | | ||
<br> | <br> | ||
* With 2 frames of armored and throw invulnerable pre-flash startup, and enough hitstop to cover the rest of the invulnerable startup, this is one of the | * With 2 frames of armored and throw invulnerable pre-flash startup, and enough hitstop to cover the rest of the invulnerable startup, this is one of the hardest to counter reversals in the game (short of blocking and punishing). After the startup, this move is still covered with one hit of armor as Big Band charges forward. Use this move to get out of almost any mixup situation and to end combos. | ||
* The final hit sends the opponent backwards, so a conversion is only possible with more meter (H Giant Step, Super Sonic Jazz/Strike Up The Band) or a specific assist like Painwheel's H Pinion Dash. | * The final hit sends the opponent backwards, so a conversion is only possible with more meter (H Giant Step, Super Sonic Jazz/Strike Up The Band) or a specific assist like Painwheel's H Pinion Dash. | ||
* Commonly abbreviated to "SSJ". | * Commonly abbreviated to "SSJ". | ||
| Line 1,492: | Line 1,556: | ||
* Big Band beats a set of timpani drums, hitting below and around himself as he hovers. Holding a direction during the attack will control Big Band's hover, which lets him follow the opponent through the air and connect with all 16 hits. The opponent lands from the final hit's knockdown before Big Band lands, so he can continue a combo after the <b>Tympany Drive</b> if he's in range to OTG with an air normal on the way down. | * Big Band beats a set of timpani drums, hitting below and around himself as he hovers. Holding a direction during the attack will control Big Band's hover, which lets him follow the opponent through the air and connect with all 16 hits. The opponent lands from the final hit's knockdown before Big Band lands, so he can continue a combo after the <b>Tympany Drive</b> if he's in range to OTG with an air normal on the way down. | ||
* If any hit from this attacks is blocked, Big Band cannot block or perform any action on the way down. | * If any hit from this attacks is blocked, Big Band cannot block or perform any action on the way down. | ||
* The first active frame is vulnerable. This will cause | * The first active frame is vulnerable. This will cause improperly spaced meaties to trade, often in Big Band's favor. | ||
<br> | <br> | ||
| | | | ||
| Line 1,509: | Line 1,573: | ||
| input=After <b>Taunt</b>,<br/> '''(Air Only)''' {{NotationIcon-SG|236}} + {{NotationIcon-SG|K}} + {{NotationIcon-SG|K}} | | input=After <b>Taunt</b>,<br/> '''(Air Only)''' {{NotationIcon-SG|236}} + {{NotationIcon-SG|K}} + {{NotationIcon-SG|K}} | ||
|{{AttackData-SG | | |{{AttackData-SG | | ||
| guard= | | guard=Mid | ||
| properties={{Property-SG|Invuln. (Full)}} (startup only),<br>{{Property-SG|No Scaling}} (last two hits),<br>{{Property-SG|Hit Grab}} (last hit),<br>{{Property-SG|Sound Stun}} | | properties={{Property-SG|Invuln. (Full)}} (startup only),<br>{{Property-SG|No Scaling}} (last two hits),<br>{{Property-SG|Hit Grab}} (last hit),<br>{{Property-SG|Sound Stun}} | ||
| dmg=275 x15, 0, 250, 1400, 0 (50 x 16) | | dmg=275 x15, 0, 250, 1400, 0 (50 x 16) | ||
| Line 1,520: | Line 1,584: | ||
| blockstun=30 x15, 23 | | blockstun=30 x15, 23 | ||
| onhit={{Property-SG|KD}} (Sound Stun),<br>{{Property-SG|Soft KD (Invuln.)}} | | onhit={{Property-SG|KD}} (Sound Stun),<br>{{Property-SG|Soft KD (Invuln.)}} | ||
| onblock=- | | onblock=-10 | ||
| onpushblock= | | onpushblock= | ||
| superhitstop=8 | | superhitstop=8 | ||
| Line 1,526: | Line 1,590: | ||
| | | | ||
<br> | <br> | ||
* When powered up with a taunt, the 16th hit of <b>Tympany Drive</b> becomes a hit grab. The additional <b>Death Toll</b> resembles Big Band's regular air throw and deals damage free from any damage scaling effects. * With <b>Sound Stun</b>, Big Band lands first and can continue the combo on the falling opponent. | * When powered up with a taunt, the 16th hit of <b>Tympany Drive</b> becomes a hit grab. The additional <b>Death Toll</b> resembles Big Band's regular air throw and deals damage free from any damage scaling effects. | ||
* With <b>Sound Stun</b>, Big Band lands first and can continue the combo on the falling opponent. | |||
** Without Sound Stun, the opponent becomes invulnerable for the knockdown and can use an immediate Ground Recovery. | ** Without Sound Stun, the opponent becomes invulnerable for the knockdown and can use an immediate Ground Recovery. | ||
* Holding a {{NotationIcon-SG|K}} button at the end will not consume the taunt. | * Holding a {{NotationIcon-SG|K}} button at the end will not consume the taunt. | ||
| Line 1,566: | Line 1,631: | ||
** Does much more damage to Big Band in any scenario, due to his large hurtbox. | ** Does much more damage to Big Band in any scenario, due to his large hurtbox. | ||
* The full attack will only trigger after a successful 7th hit, damage shows complete attack, frame data shows attack on whiff or block. | * The full attack will only trigger after a successful 7th hit, damage shows complete attack, frame data shows attack on whiff or block. | ||
* Can combo afterwards when close to the corner with OTG (eg. 2MP(1) 5HK H Beat), making this sometimes useful for converting off stray hits. | |||
<br> | <br> | ||
| | | | ||
| Line 1,592: | Line 1,658: | ||
| hitstun=35 x20, 25 | | hitstun=35 x20, 25 | ||
| blockstun=23 x21 | | blockstun=23 x21 | ||
| onhit={{Property-SG|Wall Bounce}} | | onhit={{Property-SG|Wall Bounce}}* | ||
| onblock=-21 | | onblock=-21 | ||
| onpushblock= | | onpushblock= | ||
| Line 1,600: | Line 1,666: | ||
<br> | <br> | ||
* After hitting 5MP, Big Band can play the first notes of the Skullgirls title theme. This just so happens to be the command for a level 5 super, triggering an extended super freeze while Big Band's meter gauge drains from 5 full levels to 0. With the opponent fully frozen, Big Band can play additional trumpet notes with impunity. The notes do no additional damage. | * After hitting 5MP, Big Band can play the first notes of the Skullgirls title theme. This just so happens to be the command for a level 5 super, triggering an extended super freeze while Big Band's meter gauge drains from 5 full levels to 0. With the opponent fully frozen, Big Band can play additional trumpet notes with impunity. The notes do no additional damage. | ||
**A faster button combination that still allows you to enter Satchmo Solo is 5LP 2LK 2LP 2MP. | ** A faster button combination that still allows you to enter Satchmo Solo is 5LP 2LK 2LP 2MP. | ||
* Inputting via | * Inputting via 5MP decreases the startup from 2 to 1 frame. | ||
* Choosing to not inputting {{NotationIcon-SG|236}} + {{NotationIcon-SG|P}} + {{NotationIcon-SG|P}} during the extended super freeze will put Big Band in a brief and invulnerable recovery. | * Choosing to not inputting {{NotationIcon-SG|236}} + {{NotationIcon-SG|P}} + {{NotationIcon-SG|P}} during the extended super freeze will put Big Band in a brief and invulnerable recovery. | ||
* Satchmo Deathblow ignores armor. | * Satchmo Deathblow ignores armor. | ||
* If the opponent was blocking during the flash, an orange '!!' icon appears above Big Band (the same icon used when a player gets hit low). | * If the opponent was blocking during the flash, an orange '!!' icon appears above Big Band (the same icon used when a player gets hit low). | ||
* The final hit will only wall bounce assists if one of the punches successfully hits the enemy point character. Point characters are always wall bounced. | |||
* Can always combo afterwards with OTG. On midscreen lights, it's possible to link 2LP without using OTG. | |||
* [https://youtu.be/H1uLNZf_HWg Skullgirls Tuestorials 08 - Big Band's Level 5] | * [https://youtu.be/H1uLNZf_HWg Skullgirls Tuestorials 08 - Big Band's Level 5] | ||
<br> | <br> | ||
| Line 1,673: | Line 1,741: | ||
| onpushblock = N/A | | onpushblock = N/A | ||
| superhitstop = N/A}} | | superhitstop = N/A}} | ||
| | |||
* Amount of time it takes for the character to turn invulnerable after they finish performing their assist action. | |||
* Longer recovery → more time to punish the assist. | |||
}} | }} | ||
| Line 1,706: | Line 1,777: | ||
| text27=Based on [https://guilty-gear.fandom.com/wiki/Potemkin Potemkin] from Guilty Gear Xrd. | | text27=Based on [https://guilty-gear.fandom.com/wiki/Potemkin Potemkin] from Guilty Gear Xrd. | ||
| text28=Original color palette based on the Super NES. | | text28=Original color palette based on the Super NES. | ||
| text29=Based on [https://www.mariowiki.com/Wario Wario] from the Mario franchise. | |||
| color1=SG_big_color1.png | | color1=SG_big_color1.png | ||
| color2=SG_big_color2.png | | color2=SG_big_color2.png | ||
| Line 1,733: | Line 1,805: | ||
| color26=SG_big_color26.png | | color26=SG_big_color26.png | ||
| color27=Band_27.png | | color27=Band_27.png | ||
| color28=SG_big_color28.png}} | | color28=SG_big_color28.png | ||
| color29=SG_big_color29.png}} | |||
==Intro Poses== | ==Intro Poses== | ||
| Line 1,800: | Line 1,873: | ||
|} | |} | ||
== | == Players to Watch == | ||
{{PlayerList|colorPrefix=SG_big_color|data= | |||
{{PlayerListEntry | |||
|name = 159man<br> | |||
* [ | |color = 22 | ||
|region = jp | |||
|regionNote = | |||
|status = Active(?) | |||
|notes = {{CharLink-SG|squ| Cremation}} / {{CharLink-SG|big| M-Train}} <br>The classic 159man.<br>[https://www.youtube.com/watch?v=9ct-ZbWOxu8&feature=youtu.be&t=2h4m24s Example Play] | |||
}} | |||
{{PlayerListEntry | |||
|name = Adeveis<br> | |||
|color = 3 | |||
|region = us | |||
|regionNote = IL | |||
|status = Active | |||
|notes = {{CharLink-SG|par| L Shot}} / {{CharLink-SG|squ| Cremation}} / {{CharLink-SG|big| M-Train}} <br>Test <br>[https://www.youtube.com/watch?v=4NI-mNjlZO4 Example Play] | |||
}} | |||
{{PlayerListEntry | |||
|name = bigbandpro69<br> | |||
|color = 3 | |||
|region = eu | |||
|regionNote = | |||
|status = Retired | |||
|notes = {{CharLink-SG|beo| H Hurl}} / {{CharLink-SG|big| H Brass}}<br>He '''''THE''''' ''Big Band Pro'' you know. <br>[https://www.youtube.com/watch?v=R3fzqU7vwGQ Example Play] | |||
}} | |||
{{PlayerListEntry | |||
|name = Dekillsage<br>[https://twitter.com/dekillsage @Dekillsage] | |||
|color = 2 | |||
|region = us | |||
|regionNote = | |||
|status = Active | |||
|notes = {{CharLink-SG|fil| H Updo}} / {{CharLink-SG|cer| Cerecopter}} / {{CharLink-SG|big| H Brass}} <br>5LP Master *gunshots* <br>[https://www.youtube.com/watch?v=fG15EocB3fc Example Play] | |||
}} | |||
{{PlayerListEntry | |||
|name = Jorge<br>[https://twitter.com/Jorgituzin @Jorgituzin] | |||
|color = 16 | |||
|region = br | |||
|regionNote = | |||
|status = Active | |||
|notes = {{CharLink-SG|pea| L George}} / {{CharLink-SG|beo| H Hurl}} / {{CharLink-SG|big| H Brass}} <br> <br>[https://youtu.be/Bo5cPRZUuOI?t=493 Example Play] | |||
}} | |||
{{PlayerListEntry | |||
|name = Rabbleflaggers<br>[https://twitter.com/Rabbleflaggers @Rabbleflaggers] | |||
|color = 6 | |||
|region = us | |||
|regionNote = | |||
|status = Retired | |||
|notes = {{CharLink-SG|beo| L Hurl}} / {{CharLink-SG|pwl| H Pinion}} / {{CharLink-SG|big| H Train}}<br>Parry OS shiller. Known for that one Combo Breaker 2019 comeback. <br>[https://youtu.be/2pBSGfYUZ7M?t=3955 Example Play] | |||
}} | |||
{{PlayerListEntry | |||
|name = Receita Federal<br>[https://twitter.com/MillerRobert1 @MillerRobert1] | |||
|color = 14 | |||
|region = br | |||
|regionNote = | |||
|status = Retired | |||
|notes = {{CharLink-SG|dbl| H Bomber}} / {{CharLink-SG|pea| L George}} / {{CharLink-SG|big| M Beat}} <br> <br>[https://youtu.be/HKOX92z71cU?t=923 Example Play] | |||
}} | |||
{{PlayerListEntry | |||
|name = ShakyFingers<br>[https://twitter.com/ShakeyFingers @ShakeyFingers] | |||
|color = 18 | |||
|region = us | |||
|regionNote = AR | |||
|status = Active | |||
|notes = {{CharLink-SG|rfo| 5HP}} / {{CharLink-SG|big| H Train}} / {{CharLink-SG|cer| H LNL}} <br>Saucy <br>[https://www.youtube.com/watch?v=Q3UjkjhCp60 Example Play] | |||
}} | |||
{{PlayerListEntry | |||
|name = Yaya<br> | |||
|color = 25 | |||
|region = ca | |||
|regionNote = | |||
|status = N/A | |||
|notes = Tager <br>Master of the timpani whiff into dropkick. <br>[https://www.youtube.com/watch?v=bvNjtX80Q44 Example Play] | |||
}} | |||
{{PlayerListEntry | |||
|name = CatPie<br> | |||
|color = 15 | |||
|region = US | |||
|regionNote = | |||
|status = Active | |||
|notes = {{CharLink-SG|rfo| H Beam}} / {{CharLink-SG|big| H Brass}} <br> Legendary Warrior Bongus67 <br>[https://youtu.be/huvdoZc1LjI?t=1080 Example Play] | |||
}} | |||
{{PlayerListEntry | |||
|name = Vending<br> | |||
|color = 13 | |||
|region = PL | |||
|regionNote = | |||
|status = Active | |||
|notes = {{CharLink-SG|eli| H spiral}} / {{CharLink-SG|squ| drag'n'bite}} / {{CharLink-SG|big| H-brass}} <br>Robber and Blue Lobster enthusiast. <br>[https://www.youtube.com/watch?v=qTaHFx3jUoE Example Play] | |||
}} | |||
}} | |||
{{SG}} | {{SG}} | ||
[[Category: Skullgirls]] | [[Category: Skullgirls]] | ||
[[Category: Big Band]] | [[Category: Big Band]] | ||
Latest revision as of 21:03, 21 June 2024
Story
Big Band used to be a cop, now he walks a different beat.
Overview
Big Band has a variety of large moves that can control most of the screen, and has simple but effective mixup that leads to high damage. On the flip side, his large hurtbox leaves him vulnerable to instant overheads and stray hits. To mitigate this he has a few very strong, unique defensive options with parries and armored moves.
- Various specials cover different angles around Big Band, granting him space control, at the risk of leaving himself vulnerable if they whiff or are blocked.
- Has very good assists to benefit the entire cast and any team, whatever their need is.
- Can feint his armored rush punch moves for movement. ([4]6HK~P)
- Super Sonic Jazz, his grounded level 1 super, is one of the most feared reversals in the game
- Parrying allows him to deflect predictable pressure, gain meter, and punish his opponent afterwards. But over-zealousness will quickly put him in a bad position.
- Some of his moves apply sound stun, which gives him different combos, conversions, and setups than other characters.
|
|
|
| Pros | Cons |
|
|

Stats
Chains
| Standing | 4 Buttons: |
|---|---|
| Crouching | 4 Buttons: |
| Air | 6 Buttons: |
Movement
| Weight | Dash | Double Jump | Airdash | IAD Lockout |
|---|---|---|---|---|
| Heavy | Run | Yes | No | N/A |
Wakeup Time
| Forward Tech | Backward Tech | Sliding KD | Hard KD | Crumple |
|---|---|---|---|---|
| 39 | 40 | 87 | 35 | 36 |
Assists

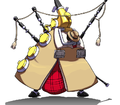
Beat Extend (default assist)
H Brass Knuckles (default assist)
![M / H Take the A Train ([4]6K)](/images/thumb/2/23/SG_big_bfk_mh.png/88px-SG_big_bfk_mh.png)
M / H Take the A Train ([4]6K)

H Giant Step (214HK)
Taunt
![M / H Take the A Train ([4]6K)](/w/File:SG_big_bfk_mh.png)
Beat Extend (default assist)
- A fast invulnerable DP assist that's very easy to combo after due to the way it pulls them in and drops the opponent on hit. It also pulls the opponent towards Big Band on block.
- L is the default assist choice. It's the fastest and has the best anti air hitbox during the invulnerable frames, but doesn't have a hitbox behind Big Band.
- M has the longest horizontal range which is useful for enabling certain combos, like after Cerebella's Diamond Dynamo super. It also hits on both sides which can allow it to scoop the opponent character in situations where L cannot.
- H suffers from being the slowest and having the smallest initial hitbox, but has two hits on the ground which gives it some lockdown ability, and only has the standard 3 frames of vulnerable start up frames most DP assists have.
- The L and M versions have 1 and 2 extra frames of vulnerability during their startup, respectively. This brings both L and M to 5 total frames of vulnerability as an assist.
- If the assist hits both characters, the assist will fall 12 frames before the point. This makes it a bit more awkward to convert into a Happy Birthday combo, but still possible in many situations.
- The blockstun for each version is also decreased; 5f for L, 7f for M and H.
H Brass Knuckles (default assist)
- An armored assist that has a lot of horizontal coverage and deals a lot of damage on counterhit.
- A very popular assist due to its ability to control horizontal space, counter zoning, make many unsafe moves safer, deal big chunks to opponent assists as a countercall, and add lots of damage to combos, particularly in the corner.
- Still causes a sliding knockdown animation on hit, but it's always a green bounce that is ground techable very quickly after the opponent touches the ground (same as other assists that knock down).
- 4f less blockstun as an assist (25f instead of 29f).
- Applies 87.5% damage scaling as an assist, but more than makes up for it with its huge single-hit base damage and lengthy knockdown allowing for new combos.
M / H Take the A Train ([4]6K)
Anti-air grab (unblockable while rising) and setup assist. On hit, the lengthy animation allows time for the point character to build resources. The M version is faster and works as an anti air attack, while the H version travels further and has more time to build resources.
H Giant Step (214HK)
Up close, this is an overhead. From further away, it's an unblockable attack that has to be jumped over.
Taunt
To choose this assist, press START on the custom assist input select. Big Band taunts, powering up his next level 1 super (either Super Sonic Jazz or Tympany Drive).
Move List
Character Mechanic: Sound Stun

- Many of Big Band's attacks cause a unique "sound stun" on hit, which has a distinctive musical note hit spark and additional hit stop for the opponent (amount varies per move).
- In practice, this makes these moves much more easily comboable, since the opponent freezes in place and Band has more time to move or link other attacks.
- Sound Stun can only be used once per combo. Think of it like OTG where it's a once-per-combo resource you can spend.
- If Sound Stun has already been consumed, additional Sound Stun moves will still work, but it will be much more difficult or even impossible to combo afterwards.
- The Sound Stun-less versions of these moves are usually a lot less plus on hit, and/or cause a Soft KD (Invuln.) which makes follow-ups impossible.
Standing Normals
  Honky Tonk Toggle Hitboxes Toggle Hitboxes
|
| |||||||||||||||||||||||||||||||||||
| ||||||||||||||||||||||||||||||||||||
| ||||||||||||||||||||||||||||||||||||
|
| ||||||||||||||||||||||||||||||||||||
  Free Form Toggle Hitboxes Toggle Hitboxes
|
| |||||||||||||||||||||||||||||||||||
| ||||||||||||||||||||||||||||||||||||
| ||||||||||||||||||||||||||||||||||||
|
| ||||||||||||||||||||||||||||||||||||
  Air Mail Special Toggle Hitboxes Toggle Hitboxes
|
| ||||||||||||||||||||||||||||||||||
| |||||||||||||||||||||||||||||||||||
|
| |||||||||||||||||||||||||||||||||||
  Hot Socks Toggle Hitboxes Toggle Hitboxes
|
| ||||||||||||||||||||||||||||||||||
| |||||||||||||||||||||||||||||||||||
|
| |||||||||||||||||||||||||||||||||||
  Pneumatic Slide Toggle Hitboxes Toggle Hitboxes
|
| |||||||||||||||||||||||||||||||||||
| ||||||||||||||||||||||||||||||||||||
| ||||||||||||||||||||||||||||||||||||
|
| ||||||||||||||||||||||||||||||||||||
  Kick Stand Toggle Hitboxes Toggle Hitboxes
|
| ||||||||||||||||||||||||||||||||||
| |||||||||||||||||||||||||||||||||||
|
| |||||||||||||||||||||||||||||||||||
Crouching Normals
  Ring-a-Ding Toggle Hitboxes Toggle Hitboxes
|
| |||||||||||||||||||||||||||||||||||
| ||||||||||||||||||||||||||||||||||||
| ||||||||||||||||||||||||||||||||||||
|
| ||||||||||||||||||||||||||||||||||||
  Glissando Toggle Hitboxes Toggle Hitboxes
|
| |||||||||||||||||||||||||||||||||||
| ||||||||||||||||||||||||||||||||||||
| ||||||||||||||||||||||||||||||||||||
|
| ||||||||||||||||||||||||||||||||||||
  Overblow Toggle Hitboxes Toggle Hitboxes
|
| ||||||||||||||||||||||||||||||||||
| |||||||||||||||||||||||||||||||||||
|
| |||||||||||||||||||||||||||||||||||
  Sharp Note Toggle Hitboxes Toggle Hitboxes
|
| ||||||||||||||||||||||||||||||||||
| |||||||||||||||||||||||||||||||||||
|
| |||||||||||||||||||||||||||||||||||
  Bass Drop Toggle Hitboxes Toggle Hitboxes
|
| ||||||||||||||||||||||||||||||||||
| |||||||||||||||||||||||||||||||||||
|
| |||||||||||||||||||||||||||||||||||
  Low Rank Toggle Hitboxes Toggle Hitboxes
|
| ||||||||||||||||||||||||||||||||||
| |||||||||||||||||||||||||||||||||||
|
| |||||||||||||||||||||||||||||||||||
Jumping Normals
  Tenor Blast Toggle Hitboxes Toggle Hitboxes
|
| ||||||||||||||||||||||||||||||||||
| |||||||||||||||||||||||||||||||||||
|
| |||||||||||||||||||||||||||||||||||
  Baritone Blast Toggle Hitboxes Toggle Hitboxes
|
| ||||||||||||||||||||||||||||||||||
| |||||||||||||||||||||||||||||||||||
|
| |||||||||||||||||||||||||||||||||||
  Bass Blast Toggle Hitboxes Toggle Hitboxes
|
| ||||||||||||||||||||||||||||||||||
| |||||||||||||||||||||||||||||||||||
|
| |||||||||||||||||||||||||||||||||||
  Jelly Roll Toggle Hitboxes Toggle Hitboxes
|
| ||||||||||||||||||||||||||||||||||
| |||||||||||||||||||||||||||||||||||
|
| |||||||||||||||||||||||||||||||||||
  Sweet Clarinet Toggle Hitboxes Toggle Hitboxes
|
| |||||||||||||||||||||||||||||||||||
| ||||||||||||||||||||||||||||||||||||
| ||||||||||||||||||||||||||||||||||||
|
| ||||||||||||||||||||||||||||||||||||
  5000lb Slam Toggle Hitboxes Toggle Hitboxes
|
| ||||||||||||||||||||||||||||||||||
| |||||||||||||||||||||||||||||||||||
|
| |||||||||||||||||||||||||||||||||||
Universal Mechanics
  Heavy Toll Toggle Hitboxes Toggle Hitboxes
|
| ||||||||||||||||||||||||||||||||||
| |||||||||||||||||||||||||||||||||||
|
| |||||||||||||||||||||||||||||||||||
  High Toll Toggle Hitboxes Toggle Hitboxes
|
| ||||||||||||||||||||||||||||||||||
| |||||||||||||||||||||||||||||||||||
|
| |||||||||||||||||||||||||||||||||||
  'A' Train Express Toggle Hitboxes Toggle Hitboxes
|
| ||||||||||||||||||||||||||||||||||
| |||||||||||||||||||||||||||||||||||
|
| |||||||||||||||||||||||||||||||||||
  Take Five Toggle Hitboxes Toggle Hitboxes
|
| ||||||||||||||||||||||||||||||||||
| |||||||||||||||||||||||||||||||||||
|
| |||||||||||||||||||||||||||||||||||
Specials
  Toggle Hitboxes Toggle Hitboxes
|
| |||||||||||||||||||||||||||||||||||
| ||||||||||||||||||||||||||||||||||||
| ||||||||||||||||||||||||||||||||||||
| ||||||||||||||||||||||||||||||||||||
|
| ||||||||||||||||||||||||||||||||||||
"Gimme a hit!" Toggle Hitboxes Toggle Hitboxes
|
| |||||||||||||||||||||||||||||||||||
| ||||||||||||||||||||||||||||||||||||
| ||||||||||||||||||||||||||||||||||||
| ||||||||||||||||||||||||||||||||||||
|
| ||||||||||||||||||||||||||||||||||||
  "Hit me!" Toggle Hitboxes Toggle Hitboxes
|
| |||||||||||||||||||||||||||||||||||
| ||||||||||||||||||||||||||||||||||||
| ||||||||||||||||||||||||||||||||||||
| ||||||||||||||||||||||||||||||||||||
|
| ||||||||||||||||||||||||||||||||||||
 |
| ||||||||||||||||||||||||||||||||||
| |||||||||||||||||||||||||||||||||||
|
| |||||||||||||||||||||||||||||||||||
  "Impression" Toggle Hitboxes Toggle Hitboxes
|
| |||||||||||||||||||||||||||||||||||
| ||||||||||||||||||||||||||||||||||||
| ||||||||||||||||||||||||||||||||||||
| ||||||||||||||||||||||||||||||||||||
|
| ||||||||||||||||||||||||||||||||||||
  "Riot!" Toggle Hitboxes Toggle Hitboxes
|
| |||||||||||||||||||||||||||||||||||
| ||||||||||||||||||||||||||||||||||||
| ||||||||||||||||||||||||||||||||||||
| ||||||||||||||||||||||||||||||||||||
|
| ||||||||||||||||||||||||||||||||||||
 "Uh-huh."
|
| |||||||||||||||||||||||||||
| ||||||||||||||||||||||||||||
|
| ||||||||||||||||||||||||||||
Supers
  "Ooohhh horn crush!" Toggle Hitboxes Toggle Hitboxes
|
| ||||||||||||||||||||||||||||||||||
| |||||||||||||||||||||||||||||||||||
|
| |||||||||||||||||||||||||||||||||||
  Toggle Hitboxes Toggle Hitboxes
|
| ||||||||||||||||||||||||||||||||||
| |||||||||||||||||||||||||||||||||||
|
| |||||||||||||||||||||||||||||||||||
  "You're gonna get beat!" Toggle Hitboxes Toggle Hitboxes
|
| ||||||||||||||||||||||||||||||||||
| |||||||||||||||||||||||||||||||||||
|
| |||||||||||||||||||||||||||||||||||
 "You're in trouble now!" Toggle Hitboxes Toggle Hitboxes
|
| ||||||||||||||||||||||||||||||||||
| |||||||||||||||||||||||||||||||||||
|
| |||||||||||||||||||||||||||||||||||
  "Join the big band!" Toggle Hitboxes Toggle Hitboxes
|
| ||||||||||||||||||||||||||||||||||
| |||||||||||||||||||||||||||||||||||
|
| |||||||||||||||||||||||||||||||||||
 "TUBA TUBA TUBA TUBA TUBA TUBA TUBA TUBA" Toggle Hitboxes Toggle Hitboxes
|
| ||||||||||||||||||||||||||||||||||
| |||||||||||||||||||||||||||||||||||
|
| |||||||||||||||||||||||||||||||||||
Taunt
 |
| |||||||||||||||||||||||||||
| ||||||||||||||||||||||||||||
|
| ||||||||||||||||||||||||||||
 "Peace out."
|
| |||||||||||||||||||||||||||
| ||||||||||||||||||||||||||||
| ||||||||||||||||||||||||||||
Colors

|

|

|

|

|
|---|---|---|---|---|
Color 1 Default color palette. |
Color 2 Based on Karl Kolchak from Karl Kolchak: The Night Stalker. |
Color 3 Based on Q's MK palette from Street Fighter 3: Third Strike. |
Color 4 Based on Michael Jackson’s costume in the Smooth Criminal music video. |
Color 5 Original alternate color palette. |

|

|

|

|

|
Color 6 Based on Big Zam from Mobile Suit Gundam. |
Color 7 Original color palette based on the sepia tones often associated with film noir. |
Color 8 Based on Dick Tracy. |
Color 9 Based on Sturm from Advance Wars. |
Color 10 Based on Nonon Jakuzure's Symphony Regalia Grave uniform from Kill la Kill. |

|

|

|

|

|
Color 11 Original color palette based on the Famicom. |
Color 12 Original color palette based on the Mega Drive. |
Color 13 Based on The Question. |
Color 14 Based on King Dedede from the Kirby series. |
Color 15 Original alternate color palette. |

|

|

|

|

|
Color 16 Based on Robocop from the original 1987 movie. |
Color 17 Based on Big the Cat from the Sonic series. |
Color 18 Based on Gato from Chrono Trigger. |
Color 19 Based on the namesake mecha from Big O. |
Color 20 Original alternate color palette. |

|

|

|

|

|
Color 21 Original alternate color palette. |
Color 22 Based on Negaduck from Darkwing Duck. |
Color 23 Based on Metal Flotsam from Dark Cloud 2. Crowdfunding request. |
Color 24 Based on Captain Spaceman from Spaceman: Unarmed and Ready to Launch. |
Color 25 Based on Robo-Ky from Guilty Gear XX. |

|

|

|

|
|
Color 26 Based on Jotaro Kujo from JoJo's Bizarre Adventure. (Unlocked by finishing 26 matches with Satchmo Death Blow) |
Color 27 Based on Potemkin from Guilty Gear Xrd. |
Color 28 Original color palette based on the Super NES. |
Color 29 Based on Wario from the Mario franchise. |
|
Intro Poses
Big Band has 4 different intro poses that can be selected by holding a button or combination of buttons during the loading screen before a match.

|
Intro pose 1: Hold Big Band walks into the screen with a magnifying glass. Eugh! |

|
Intro pose 2: Hold Big Band enters the screen using rocket power. One truth... prevails... I'm all there is of the most real. You will be prosecuted to the full extent of the jam. When the word of law falls, pick it up and hold it higher. |

|
Intro pose 3: Hold Big Band plays a tune on his saxophone before facing the opponent. (Same voicelines as Pose 2.) |

|
Intro pose 4: Hold a combination of two strengths at the same time. eg. Big Band drops from the ceiling and lands with a loud thunk sound. HRRRNNH! |
Win Poses

|
Winpose 1: Hold |

|
Winpose 2: Hold |
Trumpet
| Note | Input |
|---|---|
| Play in higher octave | |
| Play in lower octave | |
| C | |
| C# / D♭ | |
| D | |
| D# / E♭ | |
| E | |
| F | |
| F# / G♭ | |
| G | |
| G# / A♭ | |
| A | |
| A# / B♭ | |
| B |
Players to Watch
Disclaimer: This list is derived from community input and is in no way comprehensive or a form of ranking of any kind. Our community criteria can be found here.
| Usual Color | Handles/Links | Region | Status | Notes |
|---|---|---|---|---|
|
159man |
Japan |
Active(?) | The classic 159man. Example Play |
|
Adeveis |
United States IL |
Active | Test Example Play |
|
bigbandpro69 |
European Union |
Retired | He THE Big Band Pro you know. Example Play |
|
Dekillsage @Dekillsage |
United States |
Active | 5LP Master *gunshots* Example Play |
|
Jorge @Jorgituzin |
Brazil |
Active | Example Play |
|
Rabbleflaggers @Rabbleflaggers |
United States |
Retired | Parry OS shiller. Known for that one Combo Breaker 2019 comeback. Example Play |
|
Receita Federal @MillerRobert1 |
Brazil |
Retired | Example Play |
|
ShakyFingers @ShakeyFingers |
United States AR |
Active | Saucy Example Play |
|
Yaya |
Canada |
N/A | Tager Master of the timpani whiff into dropkick. Example Play |
|
CatPie |
United States |
Active | Legendary Warrior Bongus67 Example Play |
|
Vending |
Poland |
Active | Robber and Blue Lobster enthusiast. Example Play |


