Eternal Fighter Zero/Misaki Kawana: Difference between revisions
m (→Specials) |
|||
| Line 325: | Line 325: | ||
{| border="0" cellspacing="5" width="1000" | {| border="0" cellspacing="5" width="1000" | ||
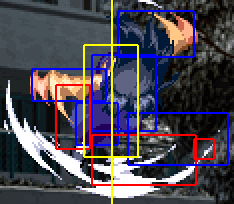
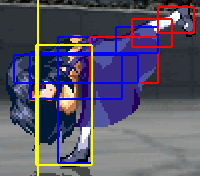
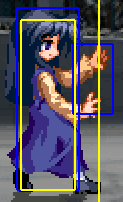
| width="" | [[image: | | width="" | [[image:Misaki214214.png|center|180px]] | ||
| width="" style="background:#f0f0f0;"| '''236236* - High-Speed Lunch (ハイスピードランチ)''' | | width="" style="background:#f0f0f0;"| '''236236* - High-Speed Lunch (ハイスピードランチ)''' | ||
| Line 337: | Line 337: | ||
** Misaki shoots out 30 plates. This version starts the fastest of the three (frame 4) and has the most invincibility from frames 1-7. Your best bet as a reversal of the three, although the meter probably isn't worth the damage and chance that the opponent with go under it. Probably Misaki's third best reversal option outside of C Assault Gush and C Turbulence. | ** Misaki shoots out 30 plates. This version starts the fastest of the three (frame 4) and has the most invincibility from frames 1-7. Your best bet as a reversal of the three, although the meter probably isn't worth the damage and chance that the opponent with go under it. Probably Misaki's third best reversal option outside of C Assault Gush and C Turbulence. | ||
|- | |- | ||
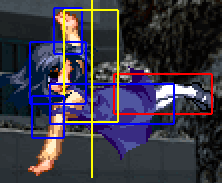
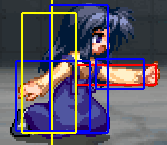
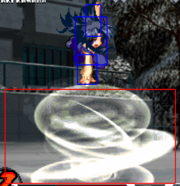
| width="" | [[image: | | width="" | [[image:Misakij236236.png|center|180px]] | ||
| width="" | '''j236236* - Down Burst (ダウンバースト)''' | | width="" | '''j236236* - Down Burst (ダウンバースト)''' | ||
Revision as of 09:50, 12 January 2018
Introduction
Kawana Misaki (川名 みさき) is a solid and mobile character who attacks with the power of wind. Her speed gives her an excellent rushdown game, and the Guard Attack property she gains on a few of her moves gives her a counter-attack that's impossible to RG if used right.
Misaki is one of the heroines of ONE, a visual novel produced by Tactics in 1998. She is a 3rd grade student in the same school as Kouhei. A girl with cold eyes but a warm smile, Misaki became blind due to an event that occured in the past. She enjoys talking to others since that is the only way she can get to know other people. Kouhei first met her on the roof of the school during sunset. During ONE, Misaki and Kouhei spend some time together, but there is an eternity, after all...
Stage: Sunset Rooftop (夕焼けの屋上)
BGM: A fine young lady at first sight (見た目はお嬢様)
Overview
Misaki stands out amongst the cast as having what may be the absolute highest damage potential in the game. Whereas most characters will use a Blue IC to barely scrape the 4000/5000 mark, Misaki can surpass that amount on combos for no meter whatsoever. Her speed lends itself well to this fact, and although she doesn't have the fastest normals in the game, most of her moves are not particularly slow. With excellent far reaching dashes, decent pressure options, great combo tools, generous amounts of autoguard, terrifying damage and the like, Misaki may very well be the stuff comebacks are made of, as she is likely the only character in the game capable of 100% combos.
Getting the opportunities for that damage, however, require a little more work to obtain. Misaki has an extremely limited high/low mixup, since she has absolutely zero grounded overheads and no command throws. Even though she has very useful oki options and plenty of cross up material, Misaki has surprisingly little mixup to work with against a cornered opponent, which is exactly where you would like to end up getting them to pull out your merciless damage potential. Additionally, while Misaki has many great ground-to-ground, air-to-ground, and anti-air options, she has nearly nothing in terms of air-to-air. All of her jumping normals only hit below her, and your only options to compensate for that are laggy or cost meter.
Pros:
- Ridiculous damage output
- Great mobility
- Decent speed normals
- Good frame advantage
- High autoguard
- Strong pressure game
- Great on the ground overall
- Excellent anti-air
- Decent air-to-ground game
- Extremely deceptive oki game
Cons:
- Almost no long-range options
- Horrible high/low mixup game
- Terrible in air-to-air
- Reliable reversals cost meter
- Generally weak to lows
- Loses options on corner oki
Overall, Misaki will thrive in the hands of players capable of getting in on opponents, and comfortable with staying there. Two combos may be all you need to take victory, and Misaki has every tool you'll need to pull them off.
Character-Specific Notes
- Misaki is able to air jump once, and air dash/backstep once.
- Misaki's dashes are some of the longest in the game, giving her the ability to go nearly full screen on all of her dashes, grounded or aerial.
Normal Moves
The notation for the movelists can be found under Notation.
| Move | Hits | Damage | Guard | Move Cancel |
Jump Cancel |
IC Cancel |
|---|---|---|---|---|---|---|
| 5A | 1 | 210 | Ground | Yes | Yes | Yes |
| 2A | 1 | 230 | Low | Yes | Yes | Yes |
| j.A | 1 | 240 | High/Air | Yes | Yes | Yes |
| 66A | 1 | 250 | Ground | Yes | No | Yes |
| 662A | 1 | 300 | Low | Yes | No | Yes |
| 5B(c) | 1 | 420 | Ground | Yes | Yes | Yes |
| 5B(f) | 1 | 500 | Ground | Yes | No | Yes |
| 2B | 1 | 400 | Low | Yes | Yes | Yes |
| j.B | 1 | 420 | High/Air | Yes | Yes | Yes |
| 66B | 1 | 550 | Ground | Yes | No | Yes |
| 662B | 1 | 450 | Low | Yes | No | Yes |
| 5C | 1 | 670 | Any | Yes | On Hit | Yes |
| 2C | 1 | 700 | Low | Yes | No | Yes |
| j.C | 1 | 650 | High/Air | Yes | Yes | Yes |
| 66C | 1 | 750 | Ground | Yes | No | Yes |
| 662C | 1 | 600 | Any | Air only | No | Yes |
| Throw | 2 | 1250 | Throw | No | No | No |
| j.Throw | 1 | 1300 | Air Throw | No | No | No |
Standing
| 5A
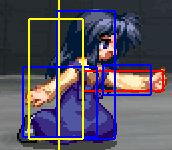
[ Startup: 6 | Hit:+6 | Block:+5 ] Misaki swipes out her arm in a backhand motion horizontally. A decent pressure tool and a workable anti-air that can't be air blocked. This is one of Misaki's faster normals (frame 6), with some strong frame advantage (+5) and versatility in that it can be cancelled into anything, although to go into her 2A you have a very lenient link. Tends to whiff on crouchers. | |
| c5B
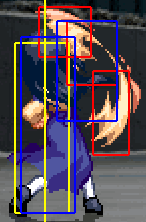
[ Startup: 7 | Hit:+6 | Block:+4 ] Misaki swings her back arm forward in a standing uppercut. Another decent move in Misaki's arsenal, this is a frame 7 swing with frame advantage (+4) that sees its use as both a combo tool and clutch anti-air. Though it has its occasional use in normal ground strings, most of its combo use is either to relaunch during an air combo with 5C in the corner, or to relaunch midscreen by itself. Its range makes it fairly difficult to combo into without a Blue IC, so your timing with it will be tight. Using it as an anti-air combo starter is also somewhat risky because of the range, but it cannot be air blocked, so if somebody tries an empty jump or does something stupid, this will net you a free 3000+ damage. Be careful with this move, though, because there is gap between the distances where c.B and f.B will activate, where both of them will miss. | |
| f5B
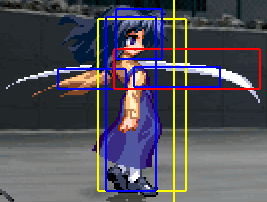
[ Startup: 11 | Hit:+0 | Block:-2 ] Miskai swipes her hand down with a gush of wind. Great for long range poking, f.B has probably the strongest range of Misaki's standing normals due to its disjointed hitbox, though it will completely whiff if you get in too close. It has a property where it will deal slightly less damage the second half of the window that the move is active, but it's decent regardless. Against air characters, this will generally knock down if they're low enough to the ground, and cannot be air blocked. On the flip side, it also cannot be jump cancelled, so in order to combo afterwards you'll need to go into the somewhat difficult hitconfirm into your 2C. | |
| 5C
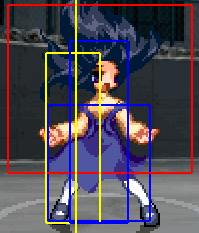
[ Startup: 12 | Hit:-- | Block:-13 ] Misaki bursts waves of wind all around her. The pride of hitboxes everywhere, the size of this move is astounding. Misaki will surround herself in a small hurricane of gusts that will knock down anybody who gets hit by this move. Furthermore, it's got 8 frames of high autoguard and an above average active window, so this move will catch people unaware. However, it's also pretty risky to use. It has a slow startup (frame 12). The autoguard doesn't go active until frame 3. It can be airblocked unlike most of Misaki's grounded normals. And even though it looks like the hitbox lingers excessively, it's incredibly unsafe on block (it can only be jump cancelled on hit as well). This move has its use mainly in corner loops and combos, but it can still be a strong anti air if you know the opponent is going to go for a jump in. Otherwise, save it for combos unless you can reliably counter Recoil Guard. |
Crouching
| 2A
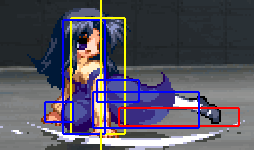
[ Startup: 5 | Hit:+3 | Block:+2 ] Misaki sticks out her arm in a palm, in what looks like a cute little jab. Easily one of Misaki's best moves. Although the range isn't the best, it's Misaki's fastest normal (frame 5), an amazing pressure tool that hits low, has decent frame advantage (+2), and cancels into itself and everything else (besides 5A, which it links to). You'll see this move used a lot in both pressure strings, in tick throw setups, and as combo starters. | |
| 2B
[ Startup: 7 | Hit:+3 | Block:+1 ] Misaki does a crouching kick. Yet another good poke. This is slightly slower than Misaki's 2A, but it still has minimum frame advantage (+1), hits with a little more range and still combos nicely into her f.B. It can be comboed into after her A attacks or even after a j.B or j.C when the opponent is grounded, and forgoing the 2A on landing will increase your damage output for relatively little risk if you hit confirm your jump in. Additionally, this move is a universal OTG relauncher after an A Down Burst, so you can get some extra damage afterwards if you don't have the meter for another Down Burst, you just want to end the combo near the ground, or you're not comfortable trying to OTG with a 66A. | |
| 2C
[ Startup: 10 | Hit:-- | Block:-6 ] Misaki slides forward with a floor hugging kick. Misaki's sweep in an ode to both Bison and Slayer, this move, along with B Assault Gush is what will turn your ground strings into Misaki's true damage potential. The hitbox on this move lingers twice as long as her other non-dashing, grounded normals, and it is comboed into from nearly all of them. IC'ing it from anywhere, whether your IC is Blue or Red, will still yield damage ranging exceeding 3000 on red, and hitting even as high as the 9000s when you have full meter and have the opponent cornered. Don't throw this out wildly, though. It's unsafe on block, is slow to start (frame 10), and cannot be jump cancelled under any circumstances. It can still be special cancelled though, so a Half Gush for pressure on block will help make it safe unless RG'd, which must be counter RG'd in response. |
Jumping
| j5A
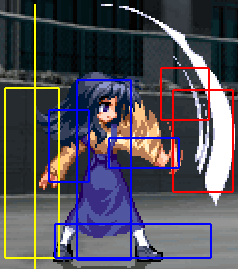
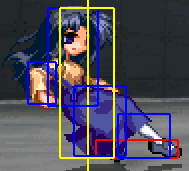
[ Startup: 6 ] Misaki sticks out her foot at a downwards angle. An extremely quick overhead (frame 6) that's nearly instant if you do it immediately off the ground, j.A cancels into itself and j.B and j.C, and can be airdash cancelled like most air normals, allowing for great pressure and combo starters. The move's hitbox also lingers for a good 10 frames, working as a very good catch for people below you, or as a great, meaty overhead on oki. | |
| j5B
[ Startup: 8 ] Misaki swipes her arm downwards in a sweeping motion. The staple move of both air combat and Misaki's air loop, j.B has a great horizontal hitbox that hits below her on both sides. Airdash cancelling it is essential, since it leads into a continuation of her air combos, and can be used for addtional pressure or mixups when guarded. You will use this move a lot, as it's probably her best jumping normal, which really says something. If you use this on Oki, you can airdash over an opponent as they get up and use it as a crossup attempt, since its hitbox is so wide. One thing to note, however, is that even though there's a wave of air above Misaki, this move seems to have no hitbox above her, so be extremely cautious in air-to-air when the opponent is above you. | |
| j5C
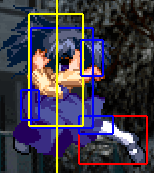
[ Startup: 9 ] Misaki kicks both feet out into a powerful horizontal blow in front of her. Used mostly near or in the corner for combos or for an aerial GTFO, this move has massive blowback on hit. It's active for longer than her other two aerials and does the most damage, with a slightly slower startup (frame 9). Because of its proration, using it in corner combos is generally best when you don't wish to use meter, and might opt for j.C 66 j.B j.C instead of normally starting from a j.B. You'll also get this if you go for an air throw and miss, and this move's hitbox and damage are not a bad alternative for opponents who tech into it. Overall, it's a good move along with her other two jumping normals. |
Dashing
Special Moves
The notation for the movelists can be found under Notation.
| Move | Hits | Damage | Guard | IC Cancel |
|---|---|---|---|---|
| Half Gush | ||||
| 236A | 1 | 650 | Any | Yes (FIC) |
| 236B | 1 | 650 | Any | Yes (FIC) |
| 236C | 1 | 600 | Any | Yes (FIC) |
| Hyper Accel | ||||
| 623A | 1 | 850 | Air Throw | Yes |
| 623B | 1 | 650 | Air Throw | Yes |
| 623C | 5 | ≈1320 | Air Throw | Yes |
| Assault Gush [+Aerial] | ||||
| 214A | 1 | 600 | Any | Yes |
| j.214A | 1 | 650 | High/Air | Yes |
| 214B | 1 | 600 | Any | Yes |
| 214C | 1 | 200 | Any | Yes |
| 1 | 1200 | Any | Yes | |
| Reverse Air Raid | ||||
| 22A/B | 1 | 650 | Counterhit | No |
| High-Speed Lunch [SP Level 1-3] | ||||
| 236236A | 15 | ≈2270 | Any | No |
| 236236B | 21 | ≈3050 | Any | No |
| 236236C | 30 | ≈4080 | Any | No |
| Down Burst [SP Level 1-3] | ||||
| j.236236A | ≈12 | ≈2150 | Any | No |
| j.236236B | ≈20 | ≈2740 | Any | No |
| j.236236C | ≈36 | ≈3580 | Any | No |
| Turbulence [SP Level 1-3] | ||||
| 6321463214A | 6 | 2400 | Unblockable | No |
| 6321463214B | 28 | 3000 | Unblockable | No |
| 6321463214C | 3 | 4200 | Unblockable | Yes |
| High-End Crash [1/3 HP, SP Level 3] | ||||
| 222S | 2 | 5500 | Counterhit | Yes |
Specials
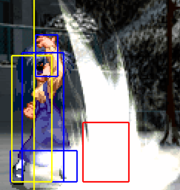
236* - Half Gush (ハーフガッシュ)
| |
623* - Hyper Accel (ハイパーアクセル)
| |
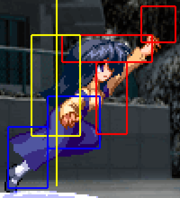
214* - Assault Gush (アサルトガッシュ)
| |
22A/B - Reverse Air Raid (リバースエアレイド)
|
Eternity Specials
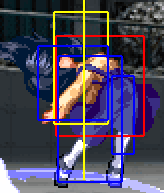
236236* - High-Speed Lunch (ハイスピードランチ)
| |
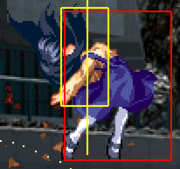
j236236* - Down Burst (ダウンバースト)
| |
6321463214* - Turbulence (ターヴィランス)
|
Final Memory
222S - High-End Crash (ハイエンドクラッシュ)
|
Strategy, Tactics, and Combos
Combos
Misaki's BnB involves hitting either launching them into or catching them in the air with a j.B, airdash cancelling it, and then following up with j.A j.B at midscreen, or j.B j.C near or in the corner. Normally from midscreen either by itself or out of a Red IC, you'll only be able to get one to two reps, but in the corner with a Blue IC, you can generally get three off of any starter, with enough time to perform an air string at the end.
Most of the time, you'll want to end those air strings with a single set of j.A (j.A) j.B j.C and then wait. If the opponent techs haphazardly, you'll be in the perfect position to jump and airthrow them to punish the tech. Furthermore, you may also want to jump cancel the last j.C into another set of j.A j.B j.C, airdash cancel and punish any techs that way. Although this is harder, you can net more damage this way.
Lastly, if you have the meter, you can end with C Assault Gush for a small buff in damage and a guaranteed knockdown.
Misaki's BnB combo starter: (close) 2ABBC [IC] 66A 5B (into air loop).
Misaki's midscreen air loop: j.B [airdash] j.AB (repeat).
Misaki's corner air loop: j.B [airdash] j.BC [land] 5BC (repeat).
No IC 2A 2B(B) 2C 623A
Red IC 2A 2B 2C 22C 66A 5B into...
Midscreen: j.B airdash j.AB 5B j.ABC j.ABC airdash (tech punish)
Corner: j.B airdash j.BC 5BC j.ABC j.ABC airdash (tech punish)
Blue IC 2A 2B 2C 22C 66A 5B into...
Midscreen: [j.B airdash j.AB 5B]xN
Corner: [j.B airdash j.BC 5BC]xN
With yourself cornered: 623B -> Corner version
If you end the combo in a corner, you may be able to use the j.ABC j.ABC airdash (tech punish) ender.
Basic combos
Red IC
Midscreen :
jC 2A2B2C IC 66A B jB 66 jAjB BC jAjBjC 9 jAjBjC - 4124 damage (rep2-1)
jAjB 2A2B2C IC 66A 66A 66A 2ABC jAjBjC 9 jAjBjC - 3685 damage (rep2-2)
Corner :
66C jB 66 jAjB 66A B 623B IC 66 B 623B BC jAjBjC - 3741 damage (rep2-3)
214B IC 66A B jB 66 jB B jB 66 jBjC jAjBjC BC jAjBjC - 4199 damage (rep2-5)
214B IC 66 jB B jB 66 jB B jB 66 jAjB BC jAjBjC 9 jAjBjC - 4143 damage (rep2-6)
2C IC 66A B jB 66 jAjB jB 66 jAjB 66A B jAjBjC 9 jAjBjC - 3822 damage (rep2-7)
2C IC 66A B jB 66 jAjB jB 66 jAjB 2A B jAjAjB 9 jAjBjC - 3671 damage (rep2-8)
Replay : Download Here
Advanced Combos
Red IC
Corner :
2A2BB2C 214B IC j236236A 2ABC jAjBjC jAjBjC - 4874 damage (rep1-1)
2A2BB2C 214B IC j236236A 2B jAjAjBjC 5B5C - 4659 damage (rep1-2)
2A2BB2C 214B IC j236236A 2BB2C 236236B - 5397 damage (rep1-3)
Blue IC
Corner :
ABB2C 214B IC j236236A 66A 5B jB 66 jBjC j236236A 66A ABC jAjBjCjAjBjC 214C - 8239 damage (rep1-4)
Midscreen :
j236236A 66A 5B jB 66 jBjC j236236A 66A ABC IC 5B jB 66 jBjC j236236A 66A ABC jAjBjC jAjBjC - 8984 damage (rep1-5)
j236236A 2A5B 623B IC 66 623B dash 5B jB 66 jBjC j236236A 2ABC jAjBjC jAjBjC 214C - 7984 damage (rep1-6)
Replay : Download Here
Notes
All the advanced combos above use OTG ( off the ground ). You can use these moves to OTG your opponent :
- 66A : can be used on all characters with an appropriate height (really hard against Ayu, Mai, Akiko)
- 2B : can be used on all characters (hard against Ayu, Mai, Akiko)
- 2A : can be used on these characters : Kano, Kanna, Sayuri, Minagi, Nayuki (Sleep), Nayuki (Awake), Mizuka, Kaori, Unknown, Misuzu .
- 662A : can be used on these characters : Nagamori, Neyuki, Makoto, Sayuri, Kano, Minagi, Unknown, Nayuki, Kaori .
- c5B : can be used only on Kano, Kanna, Sayuri , Nayuki (Sleep), Minagi
The above are the usual pick ups, but 2C, 214B, and TK j214C can also be used against some characters.
j.A to the Face
Jumping A is a great air-to-ground that will actually land fairly easily out of jumping when under C Down Burst pressure. It's difficult to land this move right off the ground against crouchers especially, so your best bet is to airdash cancel into more pressure, or go straight to j.C for the blowback and combo out of it.
Mixing with j.B
Misaki's j.B normal is one of her best crossup moves. If you get a knockdown, you can do an airdash over the opponent while they are waking up and use j.B. The crossup will be completely ambiguous depending on how you timed your dash.
Fear of Assault Gush
Mixing in the Standing A, Aerial A and Standing B versions of Assault Gush are your primary mixup oki options. Using all of them properly will scare your opponents senseless, allowing you to even walk in throw on oki on certain occasions.
Half Gusty Pressure
Extremely useful as a blockstring tool, this move is great when used occasionally, since it is susceptible to early jump outs. FIC'ing it will allow you to punish those attempts and when players attempt to beat you by going over it. The EX version will spike up multiple times and allow you to move out of it early, giving you an opportunity to cross the opponent up.
Hyper Traps
Not only can you end most of your combos in a favorable position to punish techs, Misaki can also back up and harshly punish obvious forward techs with B Hyper Accel, taking them out of the corner and throwing them across the stage back into the other. All versions of Hyper Accel can also be used to catch jump outs, start or end combos, or even put somebody who has you cornered into it.
Leap of Combo Faith
Assault Gush will lead to combos only in certain instances. Standing A version will combo on hit fairly easily, though you'll need to link in a 2A or 5A, with 2A being the easiest due to it being Misaki's fastest normal. You can technically also combo into B & C High Speed Lunch, although it's likely not worth it since you can combo into them following your 5/2A combos, and the move might outright miss even if you time it properly. You must use 2A against a crouching opponent, as 5A will generally whiff. Aerial A version will not lead to combos because it knocks down.
Both B versions can be IC'd into various things: grounded can lead to the standard 66A 5B, while IC'ing while airborne can lead to an airdash falling j.B into a relaunch, A Down Burst into OTG, or your other aerials if you want to get creative.
Both C versions can be comboed out of the same as the B versions, although the IC timing is stricter on both of them. Generally, you won't be using either of these to start combos.
Turbulence Rushdown
An interesting trick you can try with Turbulence is to do one half circle back, double tap forwards, and then do another half circle back into a button press. If you do it correctly, you can dash straight into this move, allowing you to go almost 2/3rds of the screen and activate this move immediately against unsuspecting turtles and people expecting your usual pressure. Better yet, you can do this out of an FIC'd Half Gush to mask your rush in, which will allow you to get in and either grab before the projectile hits them, or afterwards, scaring the opponent into wondering what to do. You can even throw out the move a little before your dash actually reaches the opponent, as you'll slide in as you perform the second half circle. Best used with C Turbulence to catch jumpers.
- Normal Dash Turbulence Input: 632146[6] (hold 6 until near the opponent) 3214 A/B/C
- Half Gush Buffer Input: 236 A/B/C [FIC] (During the FIC: 632146) 6[6] 3214 A/B/C. -It's best to buffer the half circle during the FIC, then dash immediately afterwards.
Win Quotes
| Japanese | English |
|---|---|
|
良い風だね… |
[TRANSLATION NEEDED] |
|
この風がずっと吹いて |
The wind is always blowing, reaching places. Is it going where I think it is? Hehe, did you hear those strange things? |
|
う~… |
Uh... I'm hungry. I guess I'm not used to this. |
|
勝利の後のカツカレー |
Katsu Curry after winning is a very special gem. How about this time, too? |
|
目が見え無いって事 |
[TRANSLATION NEEDED] |
|
何だか良く |
[TRANSLATION NEEDED] |
|
悲しい風… |
What a sad wind... It's really carrying a heavy burden... |
|
(To Mio) |
(To Mio) I'm sorry it's taking me so long to figure this out... |
|
(To UNKNOWN) |
(To UNKNOWN) Just what are you? Who was it? |
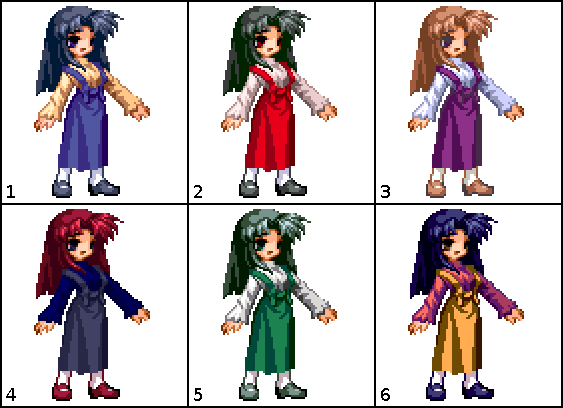
Colors
In-game References
External References
- Misaki's 2C is based on M. Bison's crouching roundhouse, from the Street Fighter series.
- Misaki's 66C is based on Ryu's "Joudan Sokutou Geri", from the Street Fighter series.
- Misaki's "Half Gush" move is based on Geese Howard's "Reppuken" move, from the Fatal Fury series.
- Misaki's "Hyper Accel" move is either based on Anji Mito's "On" move, from the Guilty Gear series, or Rose's "Soul Thru" move, from the Street Fighter series.
- Misaki's "High-Speed Lunch" move is based on Norimaro's "Hyper Strong Miracle Treasure" move, from Marvel Super Heroes vs Street Fighter.
- Misaki's "Turbulence" move is based on Leopold Goenitz's "Yamidoukoku" move, from The King of Fighters series.
- Misaki's "High-End Crash" is based on Seth's "Morote-Sho-Yoh" move, from The King of Fighters series.
ONE References
- Misaki's stage, the sunset rooftop, is where Kouhei first met Misaki in ONE.
- Misaki's use of wind based moves is a reference to her habit of standing atop the school rooftop; feeling and commenting on the wind at many points during the game.
- Misaki's "High-Speed Lunch" move is a reference to her prodigious appetite in the game.
- The huge stack of toast Akiko serves Misaki during Akiko's "There is also some that isn't sweet" move is another reference to her appetite during the game.
Links
For much more detailed information on combos, see this site. (Warning: Japanese)

