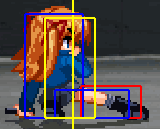
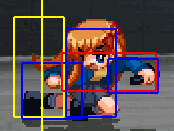
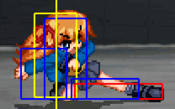
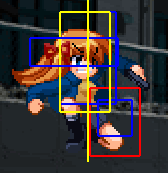
|
|
| Line 769: |
Line 769: |
| {{AttackData-EFZ | | {{AttackData-EFZ |
| |version=A | | |version=A |
| |startup= | | |startup=20 |
| |recovery= | | |recovery=52 |
| }} | | }} |
| {{AttackData-EFZ | | {{AttackData-EFZ |
| |header=no | | |header=no |
| |version=- | | |version=- |
| |damage= | | |damage=400*5 |
| |guard= | | |guard=Any |
| |startup= | | |startup=20 |
| |active= | | |active=121~278 |
| |recovery= | | |recovery= |
| |advHit= | | |advHit= |
| |advBlock= | | |advBlock= |
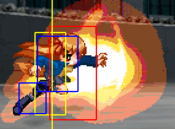
| |description=asd | | |description=Makoto conjures a huge fireball in front of her, which stays on screen for a long time. Will disappear after 5 hits or blocks, or until it times out (amount of hits doesn't affect the timer). This version slowly rises up above any character's standing height, then descends to the floor and disappears, all the while moving very slowly forward. Very useful as corner oki if you can get the opponent to block this, for example while they're already blocking a smoke trap. The gap when the fireball is at its apex height is a good opportunity to go for a throw, as it'll automatically punish most mash attempts while coming back down, and jumping out will leave the opponent blocking in the air. |
| }} | | }} |
| {{AttackData-EFZ | | {{AttackData-EFZ |
| |header=no | | |header=no |
| |version=B | | |version=B |
| |startup= | | |startup=20 |
| |recovery= | | |recovery=52 |
| }} | | }} |
| {{AttackData-EFZ | | {{AttackData-EFZ |
| |header=no | | |header=no |
| |version=- | | |version=- |
| |damage= | | |damage=400*5 |
| |guard= | | |guard=Any |
| |startup= | | |startup=20 |
| |active= | | |active=121~467 |
| |recovery= | | |recovery= |
| |advHit= | | |advHit= |
| |advBlock= | | |advBlock= |
| |description=asd | | |description=Similar to the A version, but doesn't move much besides slowly floating in place. Technically lasts much longer, but is hard to make much use of, because it gets quickly canceled out by blocking when placed on top of the opponent. Can be used as oki against some characters after a 641236A corner knockdown (2AABBC 641236A -> J7 -> 236236B) to make it impossible to act without getting hit by the fireball, forcing them to choose between a throw and fireball damage, but whether this works is highly character dependent. |
| }} | | }} |
| {{AttackData-EFZ | | {{AttackData-EFZ |
| |header=no | | |header=no |
| |version=C | | |version=C |
| |startup= | | |startup=20 |
| |recovery= | | |recovery=52 |
| }} | | }} |
| {{AttackData-EFZ | | {{AttackData-EFZ |
| |header=no | | |header=no |
| |version=B | | |version=- |
| |damage= | | |damage=400*5 |
| |guard= | | |guard=Any |
| |startup= | | |startup=20 |
| |active= | | |active=121~247 |
| |recovery= | | |recovery= |
| |advHit= | | |advHit= |
| |advBlock= | | |advBlock= |
| |description=asd | | |description=Like the A version, but also moves forward at a reasonable speed. The shortest lasting variant. Could be used midscreen the same way A version is used in corner, but not as good. Also works as a projectile cover for your approach in neutral if you don't mind spending a super bar. |
| }} | | }} |
| }} | | }} |
 Sawatari Makoto
Introduction
Sawatari Makoto (沢渡 真琴) is a fast, tricky character who uses her many prank items to fight. Her projectiles can linger on screen for a good while after she throws them, making it easy for Makoto to keep the opponent on the defensive. Makoto is extremely suited to a lockdown style of play.
Makoto is one of the heroines of Kanon, a visual novel produced by Key in 1999. She is a mysterious girl who lost her memory of everything except her hatred towards Yuiichi. The Minase family decides to let her stay in their house until she regains her memories. Makoto really enjoys reading manga, eating pork-filled meat buns, and playing tricks on Yuiichi. During Kanon, Yuiichi vaguely remembers that they had met before in the past, but as he gets closer to the truth, Makoto's health begins to deteriorate quickly...
Stage: Shopping Street (商店街)
BGM: the fox and the grapes
Character-Specific Notes
- Makoto is able to air jump once, and air dash/backstep once.
- Makoto's air dash is unique in that it curves sharply upwards and loses forward momentum when the dash is held for too long. Because Makoto does not have any more movement options after an air dash, you should be careful about prolonging one if your opponent is nearby.
Normal Moves
The notation for the movelists can be found under Notation.
| Move |
Hits |
Damage |
Guard |
Move
Cancel |
Jump
Cancel |
IC
Cancel
|
| 5A |
1 |
190 |
Ground |
Yes |
Yes |
Yes
|
| 2A |
1 |
190 |
Low |
Yes |
Yes |
Yes
|
| j.A |
1 |
180 |
High/Air |
Yes |
Yes |
Yes
|
| 66A |
1 |
190 |
Ground |
Yes |
No |
Yes
|
| 662A |
1 |
190 |
Low |
Yes |
No |
Yes
|
| 5B(c) |
1 |
400 |
Ground |
Yes |
Yes |
Yes
|
| 5B(f) |
1 |
450 |
Any |
Yes |
No |
Yes
|
| 2B |
1 |
385 |
Low |
Yes |
Yes |
Yes
|
| j.B |
1 |
380 |
High/Air |
Yes |
Yes |
Yes
|
| 66B |
1 |
360 |
Ground |
Yes |
No |
Yes
|
| 662B |
1 |
385 |
Low/Air |
Yes |
No |
Yes
|
| 5C |
2 |
575 |
Ground |
Yes |
No |
Yes
|
| 2C |
1 |
550 |
Low |
Yes |
No |
Yes
|
| j.C |
1 |
550 |
Any |
Yes |
Yes |
Yes
|
| 66C |
1 |
600 |
Any |
Yes |
No |
Yes
|
| 662C |
1 |
600 |
Low |
Yes |
No |
Yes
|
| Throw |
2 |
1200 |
Throw |
No |
No |
No
|
| j.Throw |
2 |
1100 |
Air Throw |
No |
No |
No
|
| Three Burst
|
| j.2C |
1 |
200 |
Any |
Yes |
Yes |
Yes
|
| True Leap
|
| 6B |
1 |
390 |
High/Air |
Yes |
No |
Yes
|
Standing
5A
|
| Damage
|
Proration
|
Juggle
|
Guard
|
Startup ¹ ²
|
Active
|
Recovery
|
Adv Hit
|
Adv Block
|
Cancel
|
| 190
|
-
|
-
|
Ground
|
4
|
2
|
8
|
+1
|
0
|
-
|
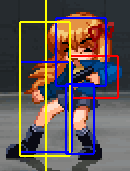
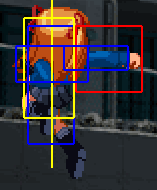
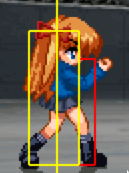
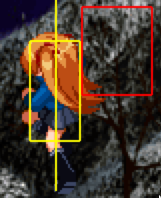
Makoto hits the opponent with her elbow. Fast startup, but the range is short even for a 5A, and due to her height it's not suitable to be used as an anti-air.
|
|
c5B
|
| Damage
|
Proration
|
Juggle
|
Guard
|
Startup ¹ ²
|
Active
|
Recovery
|
Adv Hit
|
Adv Block
|
Cancel
|
| 400
|
-
|
-
|
Ground
|
5
|
2
|
10
|
+5
|
+3
|
-
|
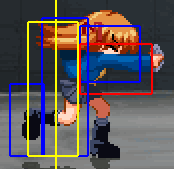
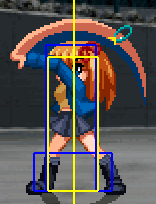
Makoto hits the opponent with a slab of konjac gel. Fast startup and a nice frame advantage make this a good move overall. Can combo into 5A/2A with frame-perfect timing. Be careful, as it can come out instead of fB when slightly out of range. A key part of her corner loops.
|
|
f5B
|
| Damage
|
Proration
|
Juggle
|
Guard
|
Startup ¹ ²
|
Active
|
Recovery
|
Adv Hit
|
Adv Block
|
Cancel
|
| 450
|
-
|
-
|
Any
|
10
|
2
|
15
|
0
|
-2
|
-
|
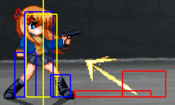
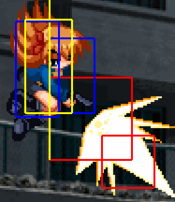
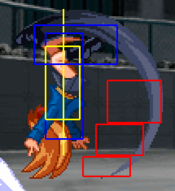
Makoto fires her gun towards the ground. Great for harassing people at a longer range without extending your own hurtbox, but difficult to convert into a full combo on a random hit. Armor breaking.
|
|
6B
|
| Damage
|
Proration
|
Juggle
|
Guard
|
Startup ¹ ²
|
Active
|
Recovery
|
Adv Hit
|
Adv Block
|
Cancel
|
| 390
|
-
|
-
|
High/Air
|
21
|
9
|
10
|
-2
|
-4
|
-
|
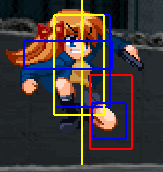
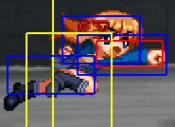
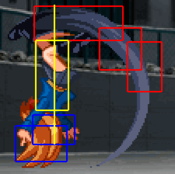
Makoto leaps into the air and hits the opponent with her knee. A decent overhead that's usually safe on block, and can be cancelled into a backdash before landing. IC after block gives you enough time to perform a jA/jB before landing for an additional mixup. Will combo into 214214 on hit, or the usual ground combos with IC. The startup can be canceled into a block while Makoto is still on the ground (first 3 frames), though this is probably a bug.
|
|
5C
5CCC
|
| Damage
|
Proration
|
Juggle
|
Guard
|
Startup ¹ ²
|
Active
|
Recovery
|
Adv Hit
|
Adv Block
|
Cancel
|
| 250
|
-
|
-
|
Ground
|
13
|
3
|
-
|
-
|
-
|
-
|
| 350
|
-
|
-
|
Any
|
20
|
2
|
22
|
0
|
-2
|
-
|
| 350*1~2
|
-
|
-
|
Any
|
26~
|
2
|
22
|
0
|
-2
|
-
|
Makoto steps forward and hits the opponent with the gun, then fires up to 3 times. The extra two 5Cs can be tricky to time and come out instantly when 5C is pressed, which makes it really difficult to combo anything off them without using IC. Excellent poke at long range, and the pushback can get you out of a bad situation if you can get the opponent to block this. Armor breaking except for the initial hit.
|
|
Crouching
2A
|
| Damage
|
Proration
|
Juggle
|
Guard
|
Startup ¹ ²
|
Active
|
Recovery
|
Adv Hit
|
Adv Block
|
Cancel
|
| 190
|
-
|
-
|
Low
|
4
|
2
|
7
|
+2
|
+1
|
-
|
Makoto leans back and performs a fast sweeping kick. Slightly shorter range than 5A, but has a slightly faster recovery. The lean also provides some protection against mid- and high hitting moves, making this move overall better than 5A. Consecutive hits sometimes drop against certain opponents, such as Shiori, who have weird hurt animations.
|
|
2B
|
| Damage
|
Proration
|
Juggle
|
Guard
|
Startup ¹ ²
|
Active
|
Recovery
|
Adv Hit
|
Adv Block
|
Cancel
|
| 385
|
-
|
-
|
Low
|
6
|
6
|
6
|
+5
|
+3
|
-
|
Makoto kneels down and hits the opponent in the legs with her gun. Good range, fairly fast, very advantageous on block and easy to combo from, this is one of Makoto's best normals. Can occasionally low-profile some high-hitting moves.
|
|
2C
|
| Damage
|
Proration
|
Juggle
|
Guard
|
Startup ¹ ²
|
Active
|
Recovery
|
Adv Hit
|
Adv Block
|
Cancel
|
| 550
|
-
|
-
|
Low
|
12
|
18
|
24
|
-
|
-20
|
-
|
Very slow slide kick. This is your main ground combo ender and launcher. Usually unsafe when blocked, depending on how late the move connects. If blocked, you can cancel this into 623A to catch a 2A punish, or you can try setting up a 412B bullet which, while unsafe, usually prevents them from landing a full combo on you. If you have enough meter for IC, you could cancel this into 236A/B or 214A/B -> FIC instead for some extra pressure.
|
|
Jumping
j5A
|
| Damage
|
Proration
|
Juggle
|
Guard
|
Startup ¹ ²
|
Active
|
Recovery
|
Adv Hit
|
Adv Block
|
Cancel
|
| 180
|
-
|
-
|
High/Air
|
6
|
15
|
5
|
-
|
-
|
-
|
Makoto hits the opponent with her knee while in the air. Stays active for a good while. For some reason the first frame of the startup is fully invulnerable (except against throws).
|
|
j5B
|
| Damage
|
Proration
|
Juggle
|
Guard
|
Startup ¹ ²
|
Active
|
Recovery
|
Adv Hit
|
Adv Block
|
Cancel
|
| 380
|
-
|
-
|
High/Air
|
6
|
10
|
9
|
-
|
-
|
-
|
A simple punch in the air, same startup duration as jA but hits directly to the side instead of below Makoto. Primary use is against opponents at the same height, but will hit a crouching opponent too.
|
|
j5C
|
| Damage
|
Proration
|
Juggle
|
Guard
|
Startup ¹ ²
|
Active
|
Recovery
|
Adv Hit
|
Adv Block
|
Cancel
|
| 550
|
-
|
-
|
Any
|
9
|
3
|
-
|
-
|
-
|
-
|
Makoto shoots directly forward while in the air. An excellent tool to keep the opponent from dashing towards you while airborne. Be careful though, as Makoto will not recover before landing if this move whiffs. Armor breaking.
|
|
j2C
j2CCC
|
| Damage
|
Proration
|
Juggle
|
Guard
|
Startup ¹ ²
|
Active
|
Recovery
|
Adv Hit
|
Adv Block
|
Cancel
|
| 200
|
-
|
-
|
Any
|
14
|
2
|
-
|
-
|
-
|
-
|
| 200*1~2
|
-
|
-
|
Any
|
17~
|
2
|
-
|
-
|
-
|
-
|
Makoto shoots downwards up to 3 times. The initial startup is quite long, but the followup shots are nearly instant. Unlike 5C, the followups can be performed at any time after the initial shot. Like j5C, Makoto will not recover before landing, but the ability to fire multiple shots and cancel into an airjump or -dash if any of them connects makes this safer to whiff than j5C. Can be used as a jump-in, though the long startup and the fact that it can be blocked low make it useless for any mixups. A key part to Makoto's corner loops. Armor breaking.
|
|
Dashing
66A
|
| Damage
|
Proration
|
Juggle
|
Guard
|
Startup ¹ ²
|
Active
|
Recovery
|
Adv Hit
|
Adv Block
|
Cancel
|
| 190
|
-
|
-
|
Ground
|
8
|
2
|
8
|
+1
|
0
|
-
|
A dashing version of her 5A that has a long startup and the same puny range, this one is mostly useless.
|
|
66B
|
| Damage
|
Proration
|
Juggle
|
Guard
|
Startup ¹ ²
|
Active
|
Recovery
|
Adv Hit
|
Adv Block
|
Cancel
|
| 360
|
-
|
-
|
Ground
|
6
|
3
|
10
|
+4
|
+2
|
-
|
A dashing version of her 5B. This move is superior to 66A in every aspect, and is a vital tool to reset her pressure. Can very rarely combo into 5/2A (needs to hit on the last 2/3 subframes).
|
|
66C
|
| Damage
|
Proration
|
Juggle
|
Guard
|
Startup ¹ ²
|
Active
|
Recovery
|
Adv Hit
|
Adv Block
|
Cancel
|
| 600
|
-
|
-
|
Any
|
14
|
23
|
10
|
-
|
-10
|
-
|
Makoto performs a leaping punch that travels about 2/3 of the screen. Interesting properties but difficult to find uses for. Unsafe when blocked early, advantageous when blocked late. Can be canceled into specials while still on the ground (technically in the air too, but Makoto doesn't have any air-usable specials), for example you can do a 66C 236A -> FIC to keep the pressure going. You could also wait until Makoto is airborne to IC it for some j5A/2A mixups. On hit, knocks down with groundbounce properties, opening up some combo opportunities.
|
|
662A
|
| Damage
|
Proration
|
Juggle
|
Guard
|
Startup ¹ ²
|
Active
|
Recovery
|
Adv Hit
|
Adv Block
|
Cancel
|
| 190
|
-
|
-
|
Low
|
7
|
3
|
6
|
+2
|
+1
|
-
|
A dashing version of her 2A. Not as bad as 66A, but still fairly useless.
|
|
662B
|
| Damage
|
Proration
|
Juggle
|
Guard
|
Startup ¹ ²
|
Active
|
Recovery
|
Adv Hit
|
Adv Block
|
Cancel
|
| 385
|
-
|
-
|
Low/Air
|
10
|
8
|
6
|
+3
|
+1
|
-
|
A dashing version of her 2B. Very useful as a dash-in, as well as oki due to the long active duration (can be +1 ~ +6 on block depending on how late it connects). Can be blocked in the air for some reason.
|
|
662C
|
| Damage
|
Proration
|
Juggle
|
Guard
|
Startup ¹ ²
|
Active
|
Recovery
|
Adv Hit
|
Adv Block
|
Cancel
|
| 600
|
-
|
-
|
Low
|
8
|
18
|
18
|
-
|
-14
|
-
|
Basically an upgraded version of her 2C. Faster startup, travels further and less recovery, though still extremely unsafe on block. A decent way to combo off a f5B IC, and into a firepunch super. Can surprise the opponent if they're standing in neutral.
|
|
Grabs
Ground Grab
Close 6C/4C
|
| Damage
|
Proration
|
Juggle
|
Guard
|
Startup ¹ ²
|
Active
|
Recovery
|
Adv Hit
|
Adv Block
|
Cancel
|
| 1200
|
-
|
-
|
Throw
|
5
|
1
|
-
|
-
|
-
|
-
|
A decent throw, Makoto grabs the opponent's shirt and if it connects, she performs a somersault kick. Traps and especially bullets make this a very useful tool, as you can force the opponent into situations with very few safe options. Usually impossible to follow up, but if you have a bullet set up beforehand, it can hit the opponent before or after the kick for some extra damage, and with a good timing it may even be possible to keep the combo going from that. Even when you can't follow up, you recover before the opponent even hits the ground, giving you plenty of time to set up your oki.
|
|
Air Grab
Close j6C
|
| Damage
|
Proration
|
Juggle
|
Guard
|
Startup ¹ ²
|
Active
|
Recovery
|
Adv Hit
|
Adv Block
|
Cancel
|
| 1100
|
-
|
-
|
Throw
|
2
|
1
|
-
|
-
|
-
|
-
|
A fairly standard airthrow, Makoto grabs the opponent and disappears into the sky with her, only to reappear on the ground stomping the opponent. As with her ground grab, this is best used together with bullets to shut down any safe options for the opponent. Recovery takes a while, so you might not be able to set up the oki you want.
|
|
Special Moves
The notation for the movelists can be found under Notation.
| Move |
Hits |
Damage |
Guard |
IC
Cancel
|
| Rat Fireworks
|
| 236A |
1 |
450 |
Any |
FIC
|
| 236B |
1 |
450 |
Any |
FIC
|
| 236C |
1~7 |
450*1~7 |
Any |
FIC
|
| Somersault Auu~
|
| 623A |
1 |
600 |
Any |
Yes
|
| 623B |
1 |
600 |
Any |
Yes
|
| 623C |
2 |
916 |
Any |
Yes
|
| Insecticide Smoke
|
| 214A |
22 |
10*22 |
Any |
FIC
|
| 214B |
17 |
10*17 |
Any |
FIC
|
| 214C |
52 |
10*52 |
Any |
FIC
|
| Ricochet Shot
|
| 412A |
1 |
500 |
Any |
No
|
| 412B |
1 |
500 |
Any |
No
|
| 412C |
8 |
500*8 |
Any |
No
|
| Fox Fire [SP Level 1]
|
| 236236A |
5 |
400*5 |
Any |
No
|
| 236236B |
5 |
400*5 |
Any |
No
|
| 236236C |
5 |
400*5 |
Any |
No
|
| Ground Strafing [+Aerial, SP Level 1-3]
|
| 214214A |
20 |
245*10 + 50*10 |
Low/Air, Any |
Yes
|
| 214214B |
34 |
200*17 + 50*17 |
Low/Air, Any |
Yes
|
| 214214C |
54 |
190*27 + 50*27 |
Low/Air, Any |
Yes
|
| Legend of Monomi Hill [SP Level 1-3]
|
| 641236A |
5 |
1859 |
Any |
Yes
|
| 641236B |
11 |
3006 |
Any |
Yes
|
| 641236C |
19 |
4558 |
Any |
Yes
|
| Meat Bun [1/3 HP, SP Level 3]
|
| 263S |
1 |
0 |
Unblockable |
No
|
Specials
Rat Fireworks
(ねずみ花火)
236*
|
| Version
|
Damage
|
Proration
|
Juggle
|
Guard
|
Startup ¹ ²
|
Active
|
Recovery
|
Adv Hit
|
Adv Block
|
Cancel
|
| A
|
-
|
-
|
-
|
-
|
11
|
-
|
29
|
-
|
-
|
-
|
| -
|
450
|
-
|
-
|
Any
|
71~142
|
2
|
-
|
-
|
-
|
-
|
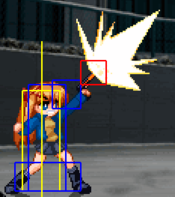
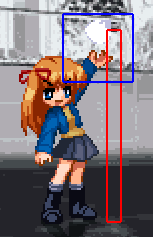
Makoto throws a firecracker about 1/3 of the screen from her. The firecracker will explode if the opponent steps on it(*), automatically about 1 second after hitting the ground, or when this move is performed again(*). It's possible to FIC this move right after throwing the firecracker for additional safety, or if you want to set up multiple firecrackers (236A 236A FIC and 236A FIC 236A both work, the firecrackers will only explode if Makoto is still in the throw animation when they hit the ground). The A version is very useful as midscreen oki, after a basic 2AABBC combo for example. The explosion is slightly larger than the detection radius, so triggering the explosion manually might catch your opponent off-guard.
(*Not while the opponent is blocking, in hitstun or knocked down)
|
| B
|
-
|
-
|
-
|
-
|
11
|
-
|
25
|
-
|
-
|
-
|
| -
|
450
|
-
|
-
|
Any
|
63~158
|
2
|
-
|
-
|
-
|
-
|
Makoto throws a firecracker about 2/3 of the screen from her. Compared to the A version, Makoto recovers slightly faster, the firecracker hits the ground earlier and lasts for about 1.5 seconds now. This version is useful in neutral to provide cover while you rush in, as oki after a 623A hit, after a blocked 5CCC to keep your momentum etc.
|
| C
|
-
|
-
|
-
|
-
|
11~13
|
-
|
21
|
-
|
-
|
-
|
| -
|
450*1~7
|
-
|
-
|
Any
|
53~425 (varies)
|
2
|
-
|
-
|
-
|
-
|
Makoto throws 7 firecrackers in a semi-random pattern that usually covers the ground from 1/3 of the screen all the way to the other side. These firecrackers last almost 6 seconds, making it very hard for the opponent to move on the ground for a long time. Do not FIC this, as the firecrackers are spawned consecutively after the start of the IC window, which means you can get anything between 1 and 6 fireworks out of it (always 1 if you've buffered the FIC). The amount of firecrackers can also be cut down if this move is otherwise interrupted during the throw frames. Otherwise follows the same rules as A and B versions, any version of this move will make all the fireworks currently on the ground explode. Use this version to gain control over the ground. Can also work as a full-screen projectile of some sort to catch an opponent off-guard, as Makoto has very few other options at max range.
|
|
Somersault Auu~
(サマーソルトあうー)
623*
|
| Version
|
Damage
|
Proration
|
Juggle
|
Guard
|
Startup ¹ ²
|
Active
|
Recovery
|
Adv Hit
|
Adv Block
|
Cancel
|
| A
|
600
|
-
|
-
|
Any
|
6
|
2
|
31
|
-
|
-11
|
-
|
Makoto performs a somersault kick. Has lower-body invulnerability between frames 2-5, so it can be used against lows, though it tends to trade due to losing most of the protection when it becomes active. Because it has no invulnerability whatsoever on the first frame, it's not usually suitable as a wakeup option. Knocks down when it hits raw or after a couple of hits, but is techable if used as a combo finisher. These shortcomings make it a somewhat lackluster move, but the fast startup and decent horizontal reach might surprise an opponent expecting f5B or 5C. Can't airdash forward after ICing this move without performing an airjump first.
|
| B
|
600
|
-
|
-
|
Any
|
6
|
2
|
29
|
-
|
-9
|
-
|
Looks similar to A version, but has upper-body invulnerability between frames 1-7 instead. This move is perhaps one of the best anti-airs in the game thanks to its fast startup, high vertical reach and very generous invulnerability. Almost always safe when blocked by an airborne opponent, and you'll usually have time to even repeat it should they try to dash back in. Recovers before the opponent can airtech on a raw hit, decent combo options with IC. Because it's Makoto's only proper anti-air, learning to use this move effectively is mandatory if you wish to play her.
|
| C
|
450
|
-
|
-
|
Any
|
6
|
2
|
-
|
-
|
-
|
-
|
| -
|
500
|
-
|
-
|
Any
|
28
|
2
|
39
|
-
|
-19
|
-
|
Makoto performs two somersaults. The first one is fully invulnerable until landing, making this your primary reversal. The second hit launches the opponent forward with wallbounce properties. A mashy opponent might try to punish the first kick too early and get caught by the second. If the opponent is close to the corner, this move can be followed up and leads into the usual corner loops, otherwise can be followed up with 412C if you have enough RF meter, 66 J9 J9 into air normals with a very tight timing (works as a tech trap too), or just tech trap with 412A (avoidable, but the bullet will bounce back making it hard for the opponent to act). Overall an above-average DP thanks to its fast startup and being able to combo without using any more resources, but extremely unsafe on block.
|
|
Insecticide Smoke
(殺虫スモーク)
214*
|
| Version
|
Damage
|
Proration
|
Juggle
|
Guard
|
Startup ¹ ²
|
Active
|
Recovery
|
Adv Hit
|
Adv Block
|
Cancel
|
| A
|
-
|
-
|
-
|
-
|
17
|
-
|
32
|
-
|
-
|
-
|
| -
|
10*22
|
-
|
-
|
Any
|
77
|
184
|
-
|
-
|
-
|
-
|
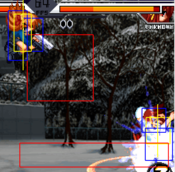
Makoto drops an insecticide smoke bomb, which will keep rolling forward on the ground while letting out puffs of smoke. Any version of this trap already on the screen will be destroyed immediately when the move is performed again. The damage this trap does by itself is minuscule, but it's very efficient at forcing the opponent to keep blocking. This version repeats a cycle of generating 6 puffs of smoke up to 3 times with gaps in between runs, and finally disappears into 4 more puffs. Can be FIC'd the moment Makoto lets go of the bomb, making it a very good option for midscreen oki when you don't have time for anything else. Can be destroyed by the opponent or other projectiles, so make sure to cover it with a meaty 2B or something similar. The gaps between cycles will give you a chance to throw the opponent, or if they're expecting that, punishing their mash or jump out attempts with other moves. Be careful, as the hitstun for the smoke is so short it can mess up your combo links (2B-> smoke-> 2C will often drop for example).
|
| B
|
-
|
-
|
-
|
-
|
17
|
-
|
32
|
-
|
-
|
-
|
| -
|
10*17
|
-
|
-
|
Any
|
67
|
73
|
-
|
-
|
-
|
-
|
Similar to the A version, but this one will not roll forward, and will simply let out 17 puffs of smoke before disappearing. This is the foundation of your corner oki, giving you time to set up other stuff such as bullets or fireballs, or some high/low mixups. Right after the smoke finishes is a good chance to go for a throw as well, especially if you have a bullet set up that'll punish the opponent's mash. This version has weird hit-eating properties which will protect Makoto from getting hit by the same attack that destroys the bomb. Especially amusing against moves like Sayuri's 41236C wallslam. Like the A version, can be FIC'd to skip the recovery.
|
| C
|
-
|
-
|
-
|
-
|
17
|
-
|
32
|
-
|
-
|
-
|
| -
|
10*52
|
-
|
-
|
Any
|
57
|
354
|
-
|
-
|
-
|
-
|
This is a direct improvement over the A version. The smoke bomb becomes active faster, and now performs 6 cycles of 8 puffs of smoke, after which it disappears into 4 more puffs for a total of 52. It also has the hit-eating properties of the B version. Despite these improvements, it's the least useful version of this move, as it's still just as fragile, and you usually won't have the meter for FIC to keep the opponent from destroying it.
|
|
Ricochet Shot
(跳弾)
412*
|
| Version
|
Damage
|
Proration
|
Juggle
|
Guard
|
Startup ¹ ²
|
Active
|
Recovery
|
Adv Hit
|
Adv Block
|
Cancel
|
| A
|
500
|
-
|
-
|
Any
|
13
|
-
|
30
|
-3
|
-5
|
-
|
Makoto fires a bullet forward and towards the ceiling at a 45 degree angle. The bullet will ricochet off the screen edges, which can make its path very hard to predict, as camera movement will affect when it hits the walls. Only one bullet is allowed at a time, unlike her other projectiles you cannot perform any version of this move while there's a bullet on screen. This version will ricochet up to 2 times before flying off the screen, and disappears on hit. Can be used for midscreen oki and sometimes as anti-air, but not as useful in neutral as B version, because the opponent can intercept and RG the bullet before you have time to catch up. Part of her meterless corner combo.
|
| B
|
500
|
-
|
-
|
Any
|
13
|
-
|
29
|
-2
|
-4
|
-
|
Same as A version, but Makoto shoots behind her instead. This version will ricochet up to 3 times. Extremely useful in both oki and neutral to limit the opponent's options. Try to have a bullet on screen at all times. If you manage to dash under a jumping opponent while escaping their pressure, you can even use this to cover your escape.
|
| C
|
500*1~8
|
-
|
-
|
Any
|
13
|
-
|
29
|
-
|
-
|
-
|
Quite possibly the best projectile in the game, this version has the same startup as A, but travels much faster, and will always ricochet 7 times until flying out of the screen. Cannot be destroyed. If it hits the opponent, it will regain its hitbox after the next bounce, giving it a theoretical maximum of 8 hits. Ignores other projectiles, which allows it to beat even moves like Shiori's shield. Gives Makoto almost complete control of the screen for a few seconds. Allows for some interesting air juggle combos that are usually impossible otherwise.
|
|
Eternity Specials
Fox Fire
(狐火)
236236*
|
| Version
|
Damage
|
Proration
|
Juggle
|
Guard
|
Startup ¹ ²
|
Active
|
Recovery
|
Adv Hit
|
Adv Block
|
Cancel
|
| A
|
-
|
-
|
-
|
-
|
20
|
-
|
52
|
-
|
-
|
-
|
| -
|
400*5
|
-
|
-
|
Any
|
20
|
121~278
|
-
|
-
|
-
|
-
|
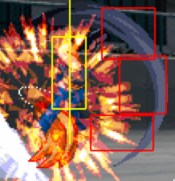
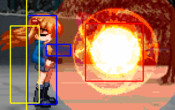
Makoto conjures a huge fireball in front of her, which stays on screen for a long time. Will disappear after 5 hits or blocks, or until it times out (amount of hits doesn't affect the timer). This version slowly rises up above any character's standing height, then descends to the floor and disappears, all the while moving very slowly forward. Very useful as corner oki if you can get the opponent to block this, for example while they're already blocking a smoke trap. The gap when the fireball is at its apex height is a good opportunity to go for a throw, as it'll automatically punish most mash attempts while coming back down, and jumping out will leave the opponent blocking in the air.
|
| B
|
-
|
-
|
-
|
-
|
20
|
-
|
52
|
-
|
-
|
-
|
| -
|
400*5
|
-
|
-
|
Any
|
20
|
121~467
|
-
|
-
|
-
|
-
|
Similar to the A version, but doesn't move much besides slowly floating in place. Technically lasts much longer, but is hard to make much use of, because it gets quickly canceled out by blocking when placed on top of the opponent. Can be used as oki against some characters after a 641236A corner knockdown (2AABBC 641236A -> J7 -> 236236B) to make it impossible to act without getting hit by the fireball, forcing them to choose between a throw and fireball damage, but whether this works is highly character dependent.
|
| C
|
-
|
-
|
-
|
-
|
20
|
-
|
52
|
-
|
-
|
-
|
| -
|
400*5
|
-
|
-
|
Any
|
20
|
121~247
|
-
|
-
|
-
|
-
|
Like the A version, but also moves forward at a reasonable speed. The shortest lasting variant. Could be used midscreen the same way A version is used in corner, but not as good. Also works as a projectile cover for your approach in neutral if you don't mind spending a super bar.
|
|
Ground Strafing
(地上掃射)
214214*
|
| Version
|
Damage
|
Proration
|
Juggle
|
Guard
|
Startup ¹ ²
|
Active
|
Recovery
|
Adv Hit
|
Adv Block
|
Cancel
|
| A
|
-
|
-
|
-
|
-
|
-
|
-
|
-
|
-
|
-
|
-
|
| -
|
-
|
-
|
-
|
-
|
-
|
-
|
-
|
-
|
-
|
-
|
|
|
| B
|
-
|
-
|
-
|
-
|
-
|
-
|
-
|
-
|
-
|
-
|
| -
|
-
|
-
|
-
|
-
|
-
|
-
|
-
|
-
|
-
|
-
|
|
|
| C
|
-
|
-
|
-
|
-
|
-
|
-
|
-
|
-
|
-
|
-
|
| -
|
-
|
-
|
-
|
-
|
-
|
-
|
-
|
-
|
-
|
-
|
|
|
|
Legend of Monomi Hill
(ものみの丘の伝承)
641236*
|
| Version
|
Damage
|
Proration
|
Juggle
|
Guard
|
Startup ¹ ²
|
Active
|
Recovery
|
Adv Hit
|
Adv Block
|
Cancel
|
| A
|
-
|
-
|
-
|
-
|
-
|
-
|
-
|
-
|
-
|
-
|
Makoto rushes forward with her hand surrounded by fire. This is Makoto's damage super as it can be IC'd on hit. Some hits can whiff depending on spacing.
|
| B
|
-
|
-
|
-
|
-
|
-
|
-
|
-
|
-
|
-
|
-
|
|
|
| C
|
-
|
-
|
-
|
-
|
-
|
-
|
-
|
-
|
-
|
-
|
|
|
|
Final Memory
Meat Bun
(肉まんよー)
263S
|
| Damage
|
Proration
|
Juggle
|
Guard
|
Startup ¹ ²
|
Active
|
Recovery
|
Adv Hit
|
Adv Block
|
Cancel
|
| 0
|
-
|
-
|
Unblockable
|
-
|
-
|
-
|
-
|
-
|
-
|
Makoto throws a meat bun into the air and attempts to catch it in her mouth. If she eats it, she regains health. The opponent has the opportunity to hit the meat bun before it reaches Makoto prevent health regeneration. Makoto is full invulnerable during this.
|
|
Strategy, Tactics, and Combos
Combos
A very basic combo: 2AABBC→412B→[whiff 623A for crossup]?
2AAB 5BCCC 236B the absolute basic combo, no knockdown, but pushback is useful, use as guardstring, and forces opponent to react to trap. snake-traps are awesome, never forget them, as they also generate meter just throwing them out. throwing a new trap makes the previous one explode, which has a slightly larger hit box then the trigger-box and may get in a surprise hit.
2ABBC 236A Mid-screen this will cause your 236A to hit meaty. This gives you time to IAD or ground dash over to them to keep the pressure on at mid-screen and even go for the usual high/low mixups. If you airdash at the right height you can turn this into a left/right mixup by airdashing over them around the time the trap hits. Varying the timing on the airdash you can control whether the trap hits from the right, or the left.
2ABBC 641236A The standard corner combo for setting up your mixups. After 641236A use either 214B or 236236A/B to just have your way with your opponent in the way of high/low mixups. 236236A is especially useful as it moves up high enough that it won't hit your opponent unless they jump, then comes back down. This gives you the chance to throw as well as go for the usual High/low. If you're running low on meter you can cancel the 2C into 214B or 236236A/B. It cuts the damage in half, but lets you save more meter.
2AABC 641236A/B/C IC 5B j.B j.2CC 5B j.B j.2CCC standard corner loop, you can do this from farther away from corner depending on which version of super you use.
2AABC 641236A/B/C IC 5B 2Bwhiff 5BB j.B 66 j.B j.2C 5B j.B j.2CC advanced corner loop, timing the 5BB is a bit strange, and your input for the j.B 66 j.B j.C needs to be quick or you will drop the combo. add 5B j.B j.2CCC 5B j.B jc j.B if you used a full BIC, input needs to be put in incredibly quick. also allows for airtech-punish if you are fast enough.
2AABC 641236A <2-hits> IC 66B 66B j.B > cornerloop lands from anywhere and pushes all the way to corner. might be able to make it IC 66B j.B 66 j.B 66B under weird circumstances.
412C 9 j.BC 66 j.B 66B 66B j.B j.2C RF anti-air combo. you need to jump after first bullet hit or bounce will not hit, brings opponent toward you for followup and then bullet will hit again. leads into dash-attack juggle and cornerloop.
2AABC 623B IC j.B 5B > cornerloop non-super cornerloop.
2AABC 412A 5B 5B > cornerloop non-meter cornerloop.
6B 214214A/B/C overhead super
2C <hit with edge of hitbox> 236A > 6623A/B crossup input the 623 along with the dash or you won't input fast enough and push out of trap.
2C <hit with edge of hitbox> 214B > 866/96 bullet crossup not sure if this is the right one, there are many ways to crossup with bullet and this one is off memory.
corner knockdown 214B <optional 5B to buffer for smoke> 4412B > best high/low or tickthrow game the bullet keeps the opponent from jump freely. this is generally your safest corner game, but may have gaps if you don't execute quick enough.
2B is a good overhead, but IAD allows for more options, such as not air-attacking and punishing high-guard with low, or staggering your air-hits to throw off timing on the low. if smoke trap hits an airborne opponent airtech-punish with an airthrow!
236A 66 6C snake trap tick throw, if trap and throw lands in a corner, immediately 5B j.B to catch the opponent for a 1-cycle cornerloop off of the trap!
j.AB 66 j.B 66B 66B j.B j.2C > cornerloop if you time the 66Bs correctly or if you use a BIC to extend, this can go from corner to corner.
alot of the damage comes from her traps and meta-game, and not her combos; compound damage from multiple overhead hits, crossup damage, trap damage, very small things. use her traps often and the result will pay out over time. don't fish for a 2C hit-confirm for your supers! make them happen rather than push for a 2A hit or something.
- never use higher than level 1 641236 super for corner loops as you will have to cut them off short for proper juggling, with very small meter:damage payout. the difference between each level and damage is around 500. so save the meter for super orb trap or another combo.
- IC 6B VERY EARLY, and always followup up 5B. don't follow up with any other move until the 5B hits, or you'll just drop and waste your RF. if you don't IC early enough you'll drop anyway.
The Insecticide Trap
When your opponent is down in the corner, use a 214B trap to keep them in the corner for your fiendish mixup purposes. Wait until they start blocking the smoke before attacking, or else you might be on the receiving end of whatever powerful wakeup move they might use.
when they are down mid-screen use 214A and chase them into the corner.
C version is pretty situational, use it the same as A for block-string into corner, absolutely punish any airborne attempts.
- use a meaty attack to buffer the timer.
Snake Traps
A version is used off of edge-of-hitbox 2C hit-confirms. leads into crossups or tick-throw, as you can dash in quick enough that the trap does not explode first.
B version is used off of 5CCC pushback, to keep momentum during guardstrings and lack of C-knockdown.
C version does both, times 3. it puts 3 traps at both distances (it's not a random pattern), meaning use RF for both situations. in case of A-scenario, pushing them into B range is viable but not what your aiming for with this. go for as much cross up as you can, and build meter! remember off of each knockdown do some sort of cross up; 6623A/B flip-crossup, airdash crossup, throw some bullets or smoke down!.
Magic bullet
A version is for mid-screen crossup and cornerloop.
B version is for mid-screen crossup and corner oki.
C version is for pressure, AA-combo.
Win Quotes
| Japanese
|
English
|
|
蜂の巣ねー
あははー
|
[TRANSLATION NEEDED]
|
|
なによぅ
先に手を出したの
はそっちだから
せーとーぼーえー
ってやつよ!!
|
[TRANSLATION NEEDED]
|
|
あうーっ!
折角の肉まんが
冷めちゃったじゃ
ないのようっ!
|
[TRANSLATION NEEDED]
|
|
記憶だろうが
命だろうが
アイツを
ぶん殴るためなら
安いモンよっ!
|
[TRANSLATION NEEDED]
|
|
あうーっ!
パンチが
届かなくったって
できることは
有るわよっ!
|
[TRANSLATION NEEDED]
|
|
(To Mio)
な、なによ!
何で真琴に
ついてくんのよ!!
キャァァ!
|
(To Mio)
[TRANSLATION NEEDED]
|
|
(To Ayu)
鼻には自信
有るんだけど
アンタ一体
何者よぅ…
|
(To Ayu)
[TRANSLATION NEEDED]
|
|
(To Makoto)
どっちが偽者か
これで文句
無いわよね?
|
(To Makoto)
[TRANSLATION NEEDED]
|
Colors

In-game References
External References
- Makoto's "Legend of Monomi Hill" move is based on Terry Bogard's "Burning Knuckle" move, from the Fatal Fury series.
- The twin guns used in Makoto's "Ground Strafing" move is a reference to Dante's guns, "Ebony & Ivory", from the Devil May Cry series. Ebony and Ivory are able to keep Dante suspended in midair as long as he's firing, just like Makoto's version. It is also based on Jin Saotome's "Blodia Vulcan" move, from the Marvel vs Capcom series.
- The shop on the right side of the background is named "CLANNAD", which is a reference to CLANNAD, another visual novel produced by Key in 2004.
Kanon References
- The shopping district in the background is where Makoto first meets Yuiichi in the game, and where they meet several times during the game.
- The fireworks that Makoto uses in her "Rat Fireworks" move is a reference to a prank she tried to pull on Yuuichi during the game.
- The name of Makoto's "Legend of Monomi Hill" move is derived from "Monomi/Scenic Hill", an important location for her in the game.
- The meat bun Makoto eats during her "Meat Bun" move is one of her favourite foods in the game.
| General
|
|
| Characters
|
|
| Mechanics
|
|
| Guides
|
|
| Wiki
|
|

