Samurai Shodown/Yashamaru Kurama: Difference between revisions
BerylBenji (talk | contribs) |
BerylBenji (talk | contribs) |
||
| Line 40: | Line 40: | ||
Because of his double jump, Yashamaru's neutral falls outside of the norm. He has an unorthodox method of attaining damage and screen control but it is most certainly a great one. Because of his aerial options, he adopts the philosophy of "air footsies" as a means for whiff punishing the opponent. This means that anything from air-to-air attempts to DPs can be exploited. | Because of his double jump, Yashamaru's neutral falls outside of the norm. He has an unorthodox method of attaining damage and screen control but it is most certainly a great one. Because of his aerial options, he adopts the philosophy of "air footsies" as a means for whiff punishing the opponent. This means that anything from air-to-air attempts to DPs can be exploited. | ||
On the ground, it's easy to imagine that his far medium slash (otherwise known as 5B) is his greatest poke. It has a long amount of range when compared to most characters and it serves well as a means of whiff punishment and interrupting forward movement. Other than this, however, he doesn't really have any other grounded pokes he can mix it up with. This means that his ground control alone is quite linear and can be easily adapted to and shut down with a deflect (qcf+A/B).This opens up his stronger and more effective air game. Because of his double jump, he can dodge and weave his way throughout the space with ease, dictating the pace of the match. His air buttons have a gargantuan amount of range. | On the ground, it's easy to imagine that his far medium slash (otherwise known as 5B) is his greatest poke. It has a long amount of range when compared to most characters and it serves well as a means of whiff punishment and interrupting forward movement. Other than this, however, he doesn't really have any other grounded pokes he can mix it up with. This means that his ground control alone is quite linear and can be easily adapted to and shut down with a deflect (qcf+A/B). It's always best to keep yourself at the mid-range to intercept their approach with 5B instead of going in yourself. | ||
His running Heavy Slash (66C) is a full screen overhead which knocks the opponent away on hit, granting a good grip of damage while giving the opportunity to either run in or back away safely. He is also airborne during the animation which means it can travel over a number of low attacks and fireballs. Examples include Kyoshiro's fireball, Haohmaru's fireball, Jubei's fireball and Wu Ruixang's floor trap. Introducing this method of punishing projectiles will make the opponent second guess their options for zoning. If blocked, it is dangerously punishable, so it holds a lot of risk. | |||
If you find yourself up close with the opponent, he doesn't have tremendous options. The two most common tools used in this situation are 2D (crouching kick) and Surprise Attack (universal overhead, B+C). 2D is his safest and quickest attack option but it barely offers any reward. It is mostly used to check the opponent's movement and blocking habits to condition them to guard low. After conditioning them with 2D, Surprise Attack will have a higher chance of hitting. If it connects, you have the advantage (+3) which means you can continue to attack safely. It is punishable when blocked, but correctly spacing it slightly further away from the opponent will render it a lot harder to punish with anything meaningful. Mixing these options up with a Guard Break (throw, C+D) is all he really has offensively at close range. | |||
His ground control doesn't bare a lot of nuance. This opens up his stronger and more effective air game. Because of his double jump, he can dodge and weave his way throughout the space with ease, dictating the pace of the match. His air buttons have a gargantuan amount of range. | |||
Jumping Light Slash (jump A) is an incredibly fast and reliable air-to-air. Yashamaru has no real normal/special anti-airs so jump back A is a great way of sniping them while keeping your distance. Its downward hitbox makes it a menace in real match situations. Jumping Kick (jump D) is also a quick vertical attack but with a lot less range. It is actually a lot harder for the opponent to anti air with a button than his other jumping attacks so it does have its niche uses. Jumping Medium Slash (jump B) is almost used in the exact same way as jump A but in a more horizontal capacity. It is slightly slower than jump A but also deals more damage, so you will more commonly use them in conjunction with one another to be as risk free as possible. He has two versions of jumping Heavy Slash (jump C), a neutral jump one and a forward/back jump one. Neutral jump C is a huge button that come crashing down vertically yet also covers a large amount of space in front of him. Forward/back jump C is a monstrous button that sweeps almost all around him. These are the heavy hitters which will cause your opponent to think twice before confronting him in the air again. There is a catch, however. They may do damage and cover a great amount of space, but they are among the slowest air buttons in the game. This means that an unnecessary reliance or abuse of jump heavies will usually result in taking the opponent's faster air-to-air. Yashamaru thrives in being as annoying and risk free as possible, so be wary. Never forget to use every single one of his air buttons in tandem with each other. | |||
===Okizeme=== | ===Okizeme=== | ||
His EX Arctic Tempest (623+S) is an effective crossup tool which can put them in the exact same knockdown situation if landed successfully. The trajectory can be altered depending on which version of the attack you use, so placing it correctly on top of the opponent's head can be next to impossible for them to block because they just don't know which side it's hitting them on. If this is blocked then prepare to eat a heavy punish. | His EX Arctic Tempest (623+S) is an effective crossup tool which can put them in the exact same knockdown situation if landed successfully. The trajectory can be altered depending on which version of the attack you use, so placing it correctly on top of the opponent's head can be next to impossible for them to block because they just don't know which side it's hitting them on. If this is blocked then prepare to eat a heavy punish. | ||
Revision as of 13:29, 24 September 2019
Introduction
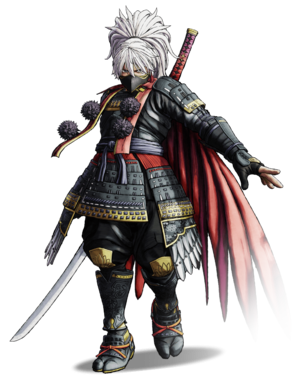
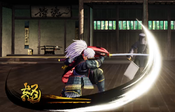
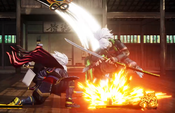
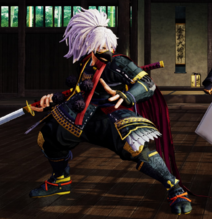
Yashamaru is a relatively straightforward character focused on fundamentals and aerial mobility. He is the only character in the game with access to a double-jump, which allows him to play his neutral game from the air as well as from the ground. His long-reaching, damaging strikes lend themselves naturally to a keepout playstyle, although he also has a basic, yet functional mixup between his 66C overhead and 66D low slide.
Another thing that makes Yashamaru unique is how much he benefits from Rage: EX Arctic Tempest can cross up, depending on range, and his raged 5C and EX Wintry Gust both grant a followup on hit. It is not uncommon for Yashamaru to deal 40% damage or more when enraged. However, with just 3 Special moves at his disposal, Yashamarus kit feels somewhat limited compared to the rest of the cast. His offense is also extremely unsafe, meaning he has to commit to hard reads from time to time.
| Strengths | Weaknesses |
|---|---|
|
|
Data
- Damage Taken: 100%
- Rage Factor: 0.32
- Rage Duration: 14 seconds
- Jump: 46 frames (Average. Has a Double Jump)
- Forward Walk Speed: 0.3 (Average)
- Back Walk Speed: 0.23 (Average)
- Dash Speed: 1.25 (Average)
- Back Dash: 27 frames
- Weapon Pickup / Drop: 40 / 80 frames
Gameplan
Yashamaru is primarily a defensive character who relies on whittling the opponent down with single button pokes, air to airs, baits and punishes. Along with Haohmaru, he is the main face of the game, meaning that his restrictive nature and low execution barrier teaches the player how to be patient and use the system mechanics effectively, making him great for beginners and the old-school crowd alike. To put it simply, he isn't good because he has strong tools, he is good because he is efficient at dealing with other character's strong tools.
This is all thanks to the one tool that sets him apart from every other character in the game; the double jump. It's a simple yet robust movement option that opens up a whole world of depth for Yashamaru. The very act of jumping itself is already a good option in this game, but chuck a second jump in the mix and suddenly it can seem hopeless to land any kind of meaningful damage on him. You will be and should be double jumping a lot. It forces your opponent to make decisions such as committing to a DP or going in for an air-to-air. This is where you bait and punish the opponent for overextending. Jump forward to elicit the DP, then jump back and punish it hard with a heavy slash or Super Special Move (SSM). This is how and where you'll be scoring most of your damage.
Running with the life lead is key and Yashamaru has more than enough options to do so. However, if the opponent threads the needle correctly and knocks you down, or if they steal the life lead, that's when Yashamaru's true weaknesses are exploited. Unlike a lot of other characters, he can't just dictate neutral with a fireball and a DP. He has no invincible reversals, reliable grounded anti airs or escape options. Almost everything other than aerial buttons and pokes are very punishable. Once they take back the lead, the match starts to become this pitiful cat and mouse chase where Yashamaru is forced to make hard reads to get in and steal it back.
He is drastically changed in rage more so than others, so Just Defending whenever you can is the meaningful optimization that separates the intermediate players and the high level ones. Not only does his damage output increase tenfold but his Arctic Tempest (DP / 623+S) turns into an imperative cross up tool used to catch your opponent off guard in the hopes of taking the life lead back whenever you're at a deficit.
Be smart and be crafty with your double jump. Always put the ball in their court and force them to approach you. Sit on that life lead and play lame. That is Yashamaru's true strength and that is his gameplan.
Neutral
Because of his double jump, Yashamaru's neutral falls outside of the norm. He has an unorthodox method of attaining damage and screen control but it is most certainly a great one. Because of his aerial options, he adopts the philosophy of "air footsies" as a means for whiff punishing the opponent. This means that anything from air-to-air attempts to DPs can be exploited.
On the ground, it's easy to imagine that his far medium slash (otherwise known as 5B) is his greatest poke. It has a long amount of range when compared to most characters and it serves well as a means of whiff punishment and interrupting forward movement. Other than this, however, he doesn't really have any other grounded pokes he can mix it up with. This means that his ground control alone is quite linear and can be easily adapted to and shut down with a deflect (qcf+A/B). It's always best to keep yourself at the mid-range to intercept their approach with 5B instead of going in yourself.
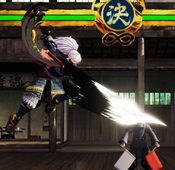
His running Heavy Slash (66C) is a full screen overhead which knocks the opponent away on hit, granting a good grip of damage while giving the opportunity to either run in or back away safely. He is also airborne during the animation which means it can travel over a number of low attacks and fireballs. Examples include Kyoshiro's fireball, Haohmaru's fireball, Jubei's fireball and Wu Ruixang's floor trap. Introducing this method of punishing projectiles will make the opponent second guess their options for zoning. If blocked, it is dangerously punishable, so it holds a lot of risk.
If you find yourself up close with the opponent, he doesn't have tremendous options. The two most common tools used in this situation are 2D (crouching kick) and Surprise Attack (universal overhead, B+C). 2D is his safest and quickest attack option but it barely offers any reward. It is mostly used to check the opponent's movement and blocking habits to condition them to guard low. After conditioning them with 2D, Surprise Attack will have a higher chance of hitting. If it connects, you have the advantage (+3) which means you can continue to attack safely. It is punishable when blocked, but correctly spacing it slightly further away from the opponent will render it a lot harder to punish with anything meaningful. Mixing these options up with a Guard Break (throw, C+D) is all he really has offensively at close range.
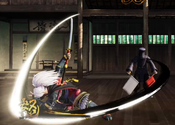
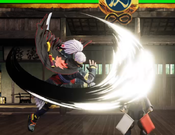
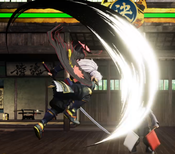
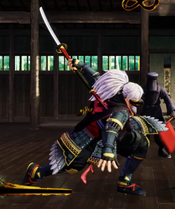
His ground control doesn't bare a lot of nuance. This opens up his stronger and more effective air game. Because of his double jump, he can dodge and weave his way throughout the space with ease, dictating the pace of the match. His air buttons have a gargantuan amount of range. Jumping Light Slash (jump A) is an incredibly fast and reliable air-to-air. Yashamaru has no real normal/special anti-airs so jump back A is a great way of sniping them while keeping your distance. Its downward hitbox makes it a menace in real match situations. Jumping Kick (jump D) is also a quick vertical attack but with a lot less range. It is actually a lot harder for the opponent to anti air with a button than his other jumping attacks so it does have its niche uses. Jumping Medium Slash (jump B) is almost used in the exact same way as jump A but in a more horizontal capacity. It is slightly slower than jump A but also deals more damage, so you will more commonly use them in conjunction with one another to be as risk free as possible. He has two versions of jumping Heavy Slash (jump C), a neutral jump one and a forward/back jump one. Neutral jump C is a huge button that come crashing down vertically yet also covers a large amount of space in front of him. Forward/back jump C is a monstrous button that sweeps almost all around him. These are the heavy hitters which will cause your opponent to think twice before confronting him in the air again. There is a catch, however. They may do damage and cover a great amount of space, but they are among the slowest air buttons in the game. This means that an unnecessary reliance or abuse of jump heavies will usually result in taking the opponent's faster air-to-air. Yashamaru thrives in being as annoying and risk free as possible, so be wary. Never forget to use every single one of his air buttons in tandem with each other.
Okizeme
His EX Arctic Tempest (623+S) is an effective crossup tool which can put them in the exact same knockdown situation if landed successfully. The trajectory can be altered depending on which version of the attack you use, so placing it correctly on top of the opponent's head can be next to impossible for them to block because they just don't know which side it's hitting them on. If this is blocked then prepare to eat a heavy punish.
EX Azure Gale (236+S) passes through the opponent on contact. This means that, when timed correctly with their wakeup, it can actually cross them up. The timing is incredibly tricky and it can be hard to pull off considering rolls. This is also punishable if blocked.
His WFT can be used as a meaty attack which can score you a lot of free chip damage. If used from the correct range, the opponent will have no choice but to wake up and block the oncoming barrage of tengu feathers while being completely safe. It isn't uncommon to win matches through chip damage this way. This move is very unsafe if performed too close to an opponent who is rolling towards you.
Most invincible reversals in this game have a lot of startup. This means that a well timed meaty Close 2A (crouching light slash) can be used to intercept jumps, back dashes and other attacks on their wakeup while still being safe against a wakeup DP. When used correctly, the meaty Close 2A will recover before the active frames of their reversal come out, so you will be able to block in time for a hefty punish. This works against Charlotte, Genjuro (WITHOUT rage), Shiki and Yoshitora to name a few.
Normal Moves
Far Slashes
5A
5A
|
|---|
5B
5B
|
|---|
5C
5C
|
|---|
2A
2A
|
|---|
2B
2B
|
|---|
2C
2C
|
|---|
Near Slashes
n.5A
n.5A
|
|---|
n.5B
n.5B
|
|---|
n.5C
n.5C
|
|---|
n.2A
n.2A
|
|---|
n.2B
n.2B
|
|---|
n.2C
n.2C
|
|---|
Kicks
5D
5D
|
|---|
6D
6D
|
|---|
2D
2D
|
|---|
3D
3D
|
|---|
Dash Normals
66A
66A
|
|---|
66B
66B
|
|---|
66C
66C
|
|---|
66D
66D
|
|---|
Air Normals
j.A
j.A
|
|---|
j.B
j.B
|
|---|
j.C
j.C
|
|---|
j.7/9C
j.7/9C
|
|---|
j.D
j.D
|
|---|
Unarmed Normals
u.5S
u.5S
|
|---|
u.2S
u.2S
|
|---|
ju.S
ju.S
|
|---|
u.66S
u.66S
|
|---|
Universal Mechanics
Guard Break
Guard Break (Throw) 4/5/6C+D Forward throw Forward throw Back Throw Back Throw
|
|---|
Surprise Attack
Surprise Attack (Overhead)
5B+C |
|---|
Dodge
Dodge
5A+B |
|---|
Counter / Blade Catch
Counter / Blade Catch 236A+B Counter Counter Blade Catch Blade Catch
|
|---|
Rage Explosion
Rage Explosion
5A+B+C |
|---|
Lightning Blade
Lightning Blade (Issen)
5A+B+C during Rage Explosion |
|---|
Command Moves
Double Jump
Double Jump j.7 or j.8 or j.9 Double Jump Double Jump
|
|---|
Special Moves
Wintry Gust
Wintry Gust j.214S Wintry Gust Wintry Gust
|
|---|
Azure Gale
Azure Gale 236S(air okay) Azure Gale Azure Gale
|
|---|
Artic Tempest
Artic Tempest 623S Artic Tempest Artic Tempest
|
|---|
Supers
Weapon Flipping Technique
Ebony Tengu Feathers
236B+C |
|---|
Super Special Move
Skand's Divine Squall
641236C+D |
|---|
Combos
List combos, use numpad notation.
Midscreen
Corner
Videos
Link to Yashamaru videos and specify year it was produced or patch version in brackets.
Example: Yashamaru combo video by "name of content creator" (2019).
Colors
External Links
